Booking functionality has become an inevitable part of the modern-day business. We use booking forms when we provide not just products, but more complex services, that are determined by date and time (e.g., dance classes, hospital appointments, etc.).
JetEngine plugin comes in handy when you build a website with custom post types, and want to create custom posts for, e.g., your services, and add custom taxonomies (say, dental care, massage, or any other category). It enables us to use Elementor to create templates with dynamic content, so half of the work is done already. But how to enable customers to book the services when the services are already there?
Now, the good news is that JetEngne has just recently got Booking Forms functionality, that will certainly be of help in such cases.
Let’s take a closer look at what we can do using the booking forms, and how we can use JetEngine Booking Forms functionality to finally establish the firm connection between our customers and the services we provide.
It’s All About Field Types
Let’s imagine we’ve got a SPA salon where we provide massage services to our clients. What information would be necessary to know when the client books such a service?

Looking more precisely at the task, we might want to know such things, as:
- our client’s full name;
- client’s email and phone number (to get in touch with him whenever needed);
- the name of the service that our client has booked;
- the date and time the client has picked for the service;
- the duration of the service (e.g., the massage duration);
- the price of the service (depending on the service’s type and duration);
- some additional services for the client to pick can be represented in the booking form as well.
Now, how we should approach this task better? Let’s start from preparing the meta field from which we would need to pull some of the content into the booking form.
Preparation
So, we go to JetEngine > Meta Boxes (or Post types > Edit in case we want to add the meta fields to the post type directly), and here create the meta field of the Text type for the service’s price (e.g., hour-value for the price of the massage services per 1 hour).

As the price for different kinds of massage should be different, this value should be dynamic.

Now we’re ready to create a booking form. First of all, make sure the Booking Forms functionality is active in JetEngine > Modules Manager.

Then, proceed to JetEngine > Booking Forms in the Dashboard and let all the fun begin. Add a title for your brand new shiny booking form and click Add Field button in the Field Settings block to create some new fields.

Step 1. Add some plain text fields
To let the client input his name and personal information, such as e-mail address and phone number, we should create the text fields for this purposes.
To do it, add the Text field type, then specify the type of content for it (text, email, URL, tel).

I’ve created 2 Text fields for First and Last Name and one field was added for email content type. All these fields were set as required.

Step 2. All Important Things Stay Hidden
One of the most fascinating features of the booking form fields is that you can actually hide the fields with the content you don’t want to show to the client right immediately in the form, but that might be needed in the confirmation email, or for the formulas to calculate the price of the service.

For one, the post’s title (the name of the service – in my case, it’s “Classic massage” massage type) will be important and worth mentioning in the confirmation email sent to the client, but when one books the service, he doesn’t necessarily have to see the name of the service repeatedly in the form itself. Also, the hourly price of the service can be shown on the custom post’s single page, however, the value is important for the formula to calculate the full price of the service.
Let’s create these hidden field types:
- to create a hidden field with the dynamic service’s title, specify the Hidden type of the field in the Type dropdown, set the field’s name, make the field required and choose Current Post Title in the Field Value dropdown;

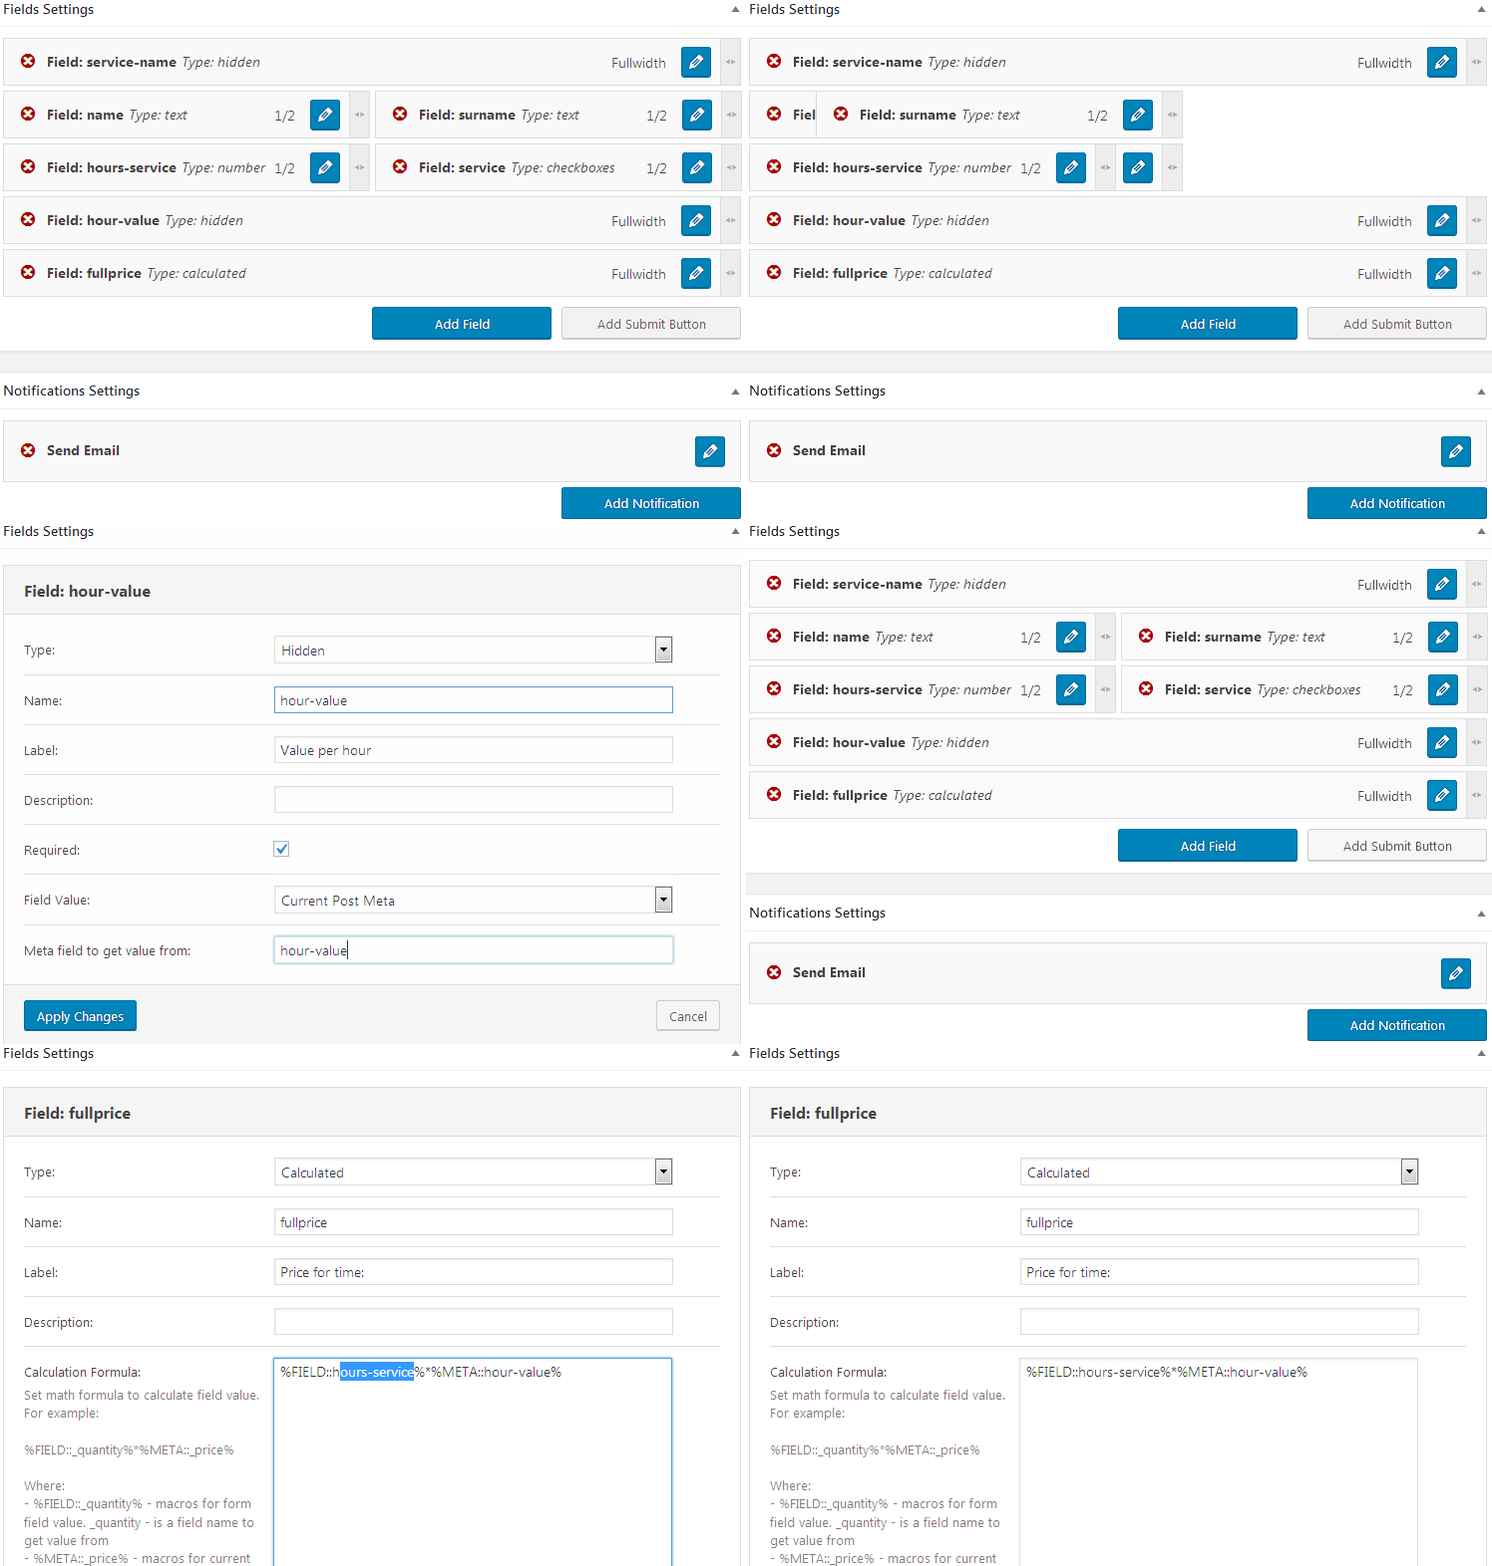
- to create a hidden field that pulls the value of the service per hour create another field with the Hidden type and set the name for it. In the Field Value dropdown set Current Post Meta, and input the meta field ID in the Meta field to get value from field (this will connect the meta field to the booking form’s field).

Step 3. Extra Services as Checkboxes
Let’s create some checkboxes to enable the client to check the extra services to get along with the main one. Create one more new field and specify its Type as Checkboxes. Fill in its name and label.

Select Manual Input in the Fill Options From dropdown.
Let’s add more options to showcase in the checkboxes. Click Add Option button and specify the values and labels for the options available to select additionally for this service (e.g., we’ve got “aroma candles” and “exotic oils” additional services to choose when one selects “Classic Massage” service).
Please, note, that Radio and Select field types are similar in creating to Checkboxes, so you can use any of them pretty the same way.
Click Apply Changes button to save all the changes.
Step 4. Calculate the Full Price
The Calculated field type allows using formulas to consequently display the calculated value of the service, based on both the values input by client or set in the meta fields of the service’s post type, and hidden in the form.
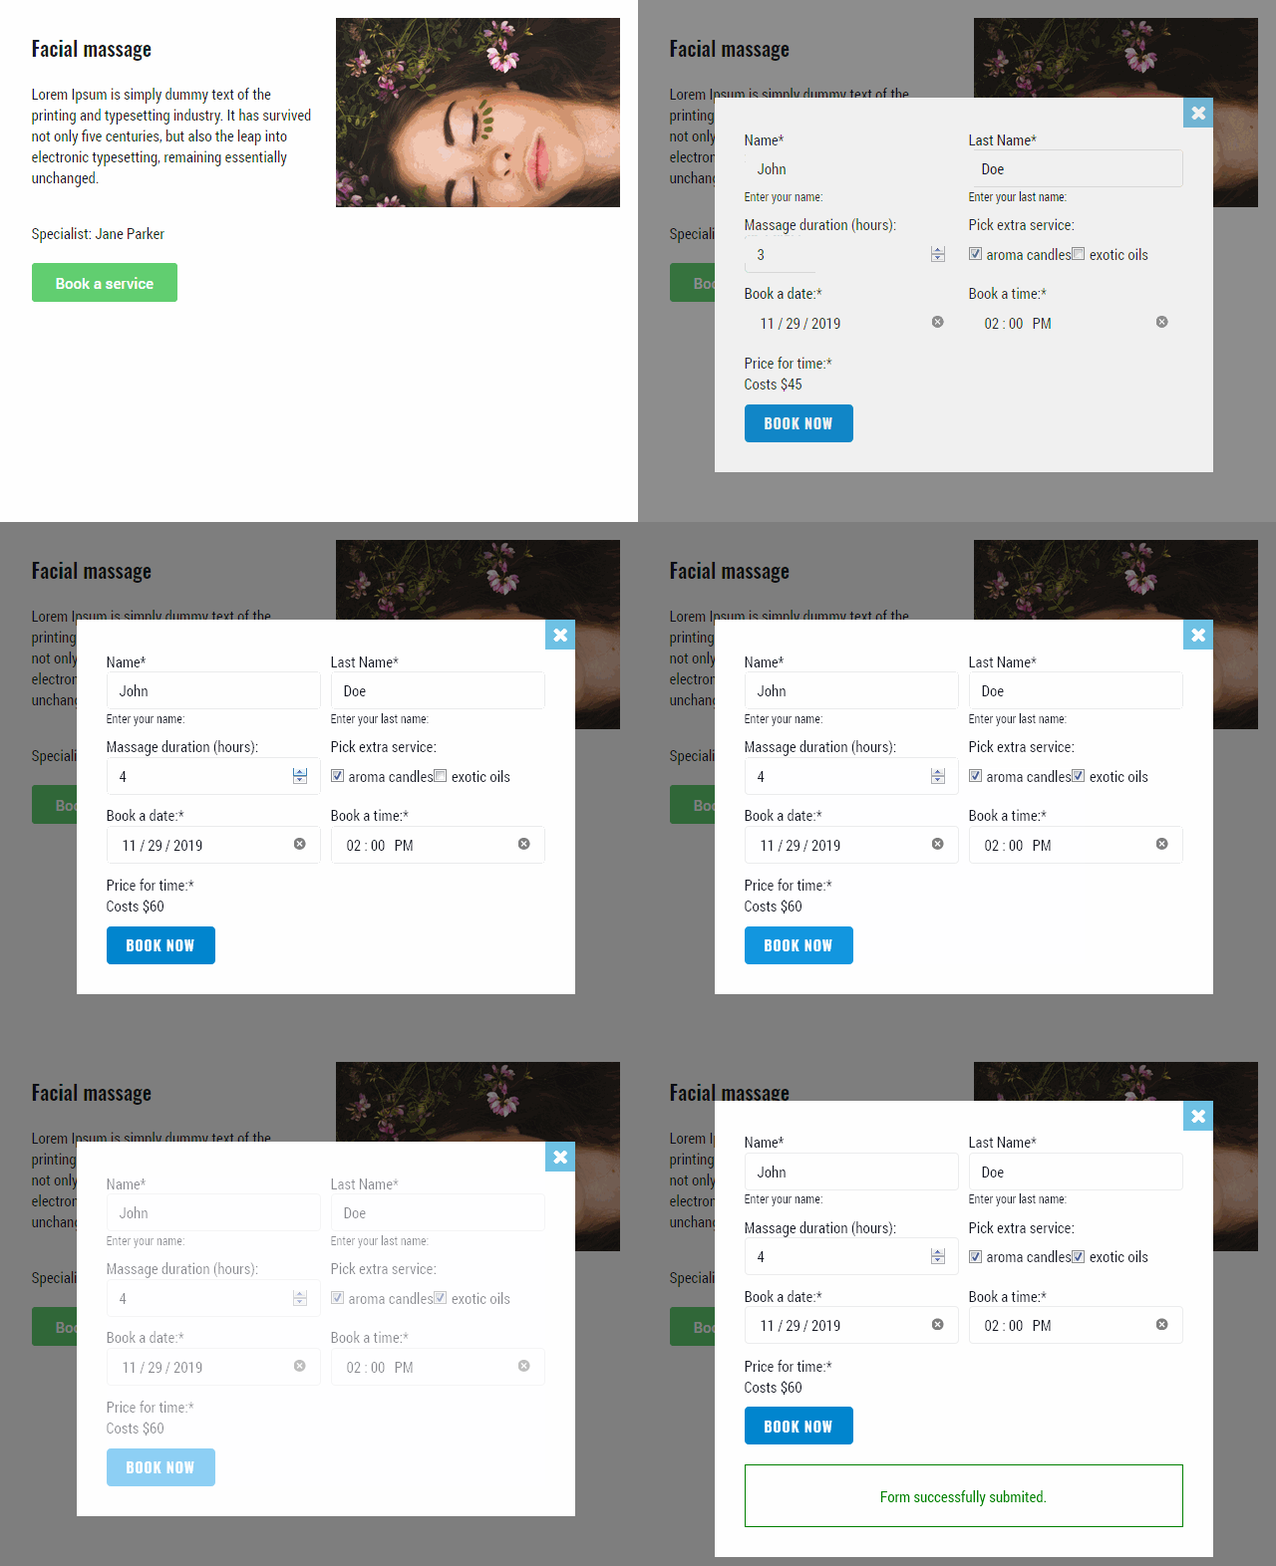
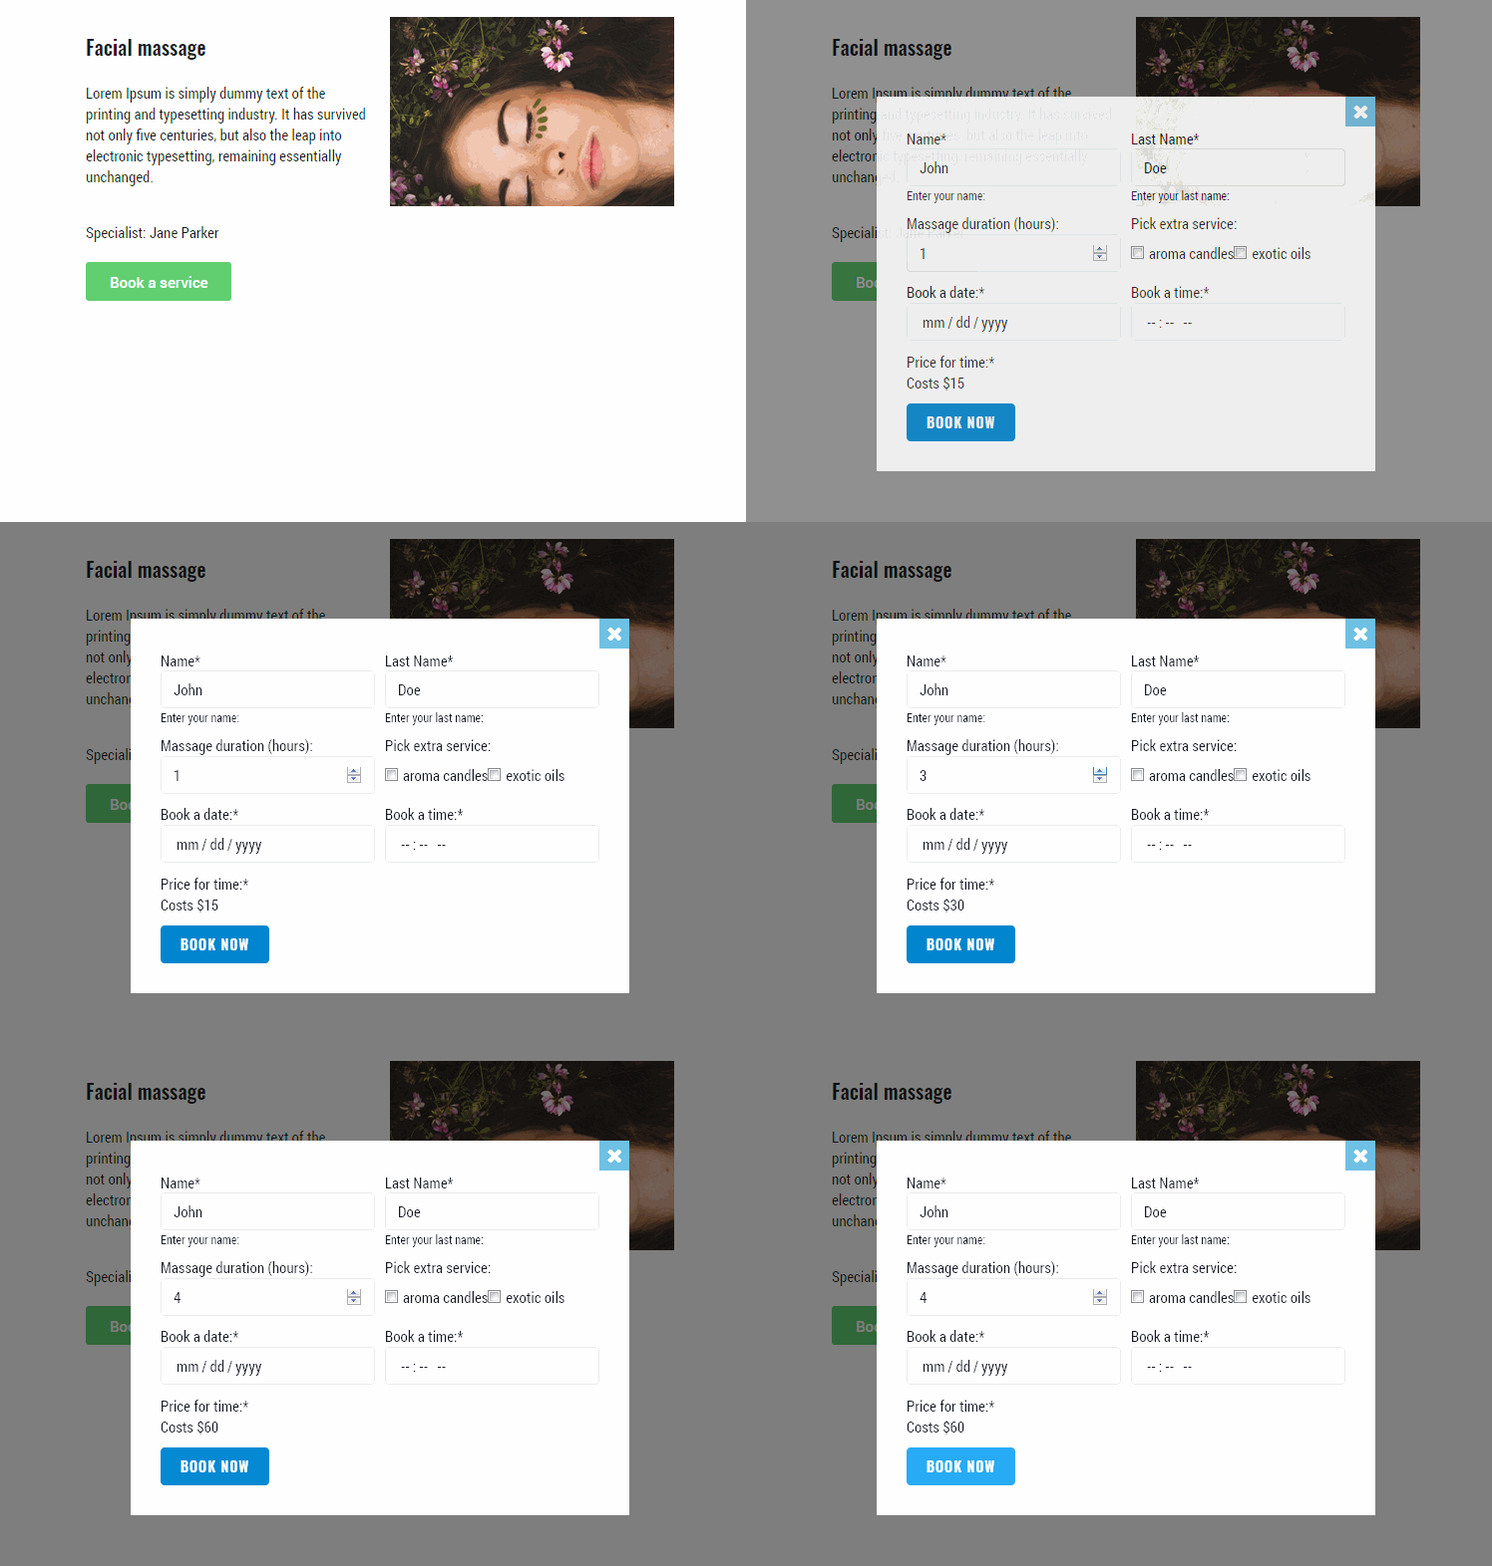
For one, we want the client to see the full price for the massage with the duration the client has set himself, based on the value of the specific massage’s type per hour.
We already have a hidden field with the value from the meta field (it’s “hour-value” field that pulls the value from the post itself).
We also have a field with the Number type called “hours-service” that allows the customer to pick the duration of the massage (it’s required).

Now create a new field, select Calculated field type, set the name for it (“fullprice”, set the label (e.g., “Price for time”).
We’re ready to set a formula. Check the macroses available on the left of the Calculation Formula block. Here you’ll see:
- %FIELD::***% macros, that stands for the values from the actual booking form;
- %META:***%, this macros stands for the value from the meta field in the post dedicated to the service.
In our example, we’ll use the following formula:
- %FIELD::hours-service%*%META::hour-value%

It will count the full price of the massage based on its duration (see %FIELD::hours-service% macros) and value per hour (see %META::hour-value%).
Step 5. The all-important timing

Finally, let’s add the date and time field types. You can do it by specifying the Date and Time type from the dropdown. then input the name of the field (e.g., date-booked) and set the label to show it to the client.
Check the field as required.

Now we’re good to go, click Apply changes to save everything. The date and time picker elements are added.
Step 6. Submit Button
The last step is to add a Submit Button. Click Add Submit Button to add one, and fill in the text label for it.

If you want to add some custom code to the form, here you’re able to do it as well using the Custom CSS class, but it’s not necessary.
Step 7. Confirmation Emails
After the form is submitted you might want to send an e-mail to your client to let him know the form was accepted. Also, you can enable automatic emails to be sent to you or website’s admin letting you know about new clients who want to use your services.
How we should do it?
Click Add Notification button in the Notification Settings block below. Then, choose Send Email notification type and specify to whom you want to send email in the Mail to dropdown (Admin email or Email from submitted form can be used as well as custom email).

Fill in the Subject of the email, From field, From Address and From name (these are pretty similar to Contact Form 7).
In the Content block, you can use the macros you’ve got from the booking form. This will help remind the client of the date, time to which the appointment is set, and tell him about the value, the name of the service, etc.
Please, check the email with the macros from the booking form on the screenshot below to learn how these values can be added dynamically to your email.

Click Apply changes button to save all the changes.
Step 8. Working with the Booking Form widget
As soon as we have the booking form ready, we can publish it (click Publish button to save it). After that, we’ll be able to pick our newly created form within the Booking Form widget that’s available in Elementor widgets list.
You can be creative when adding it, as the form can be added into popup attached to the specific button to appear on button click (e.g., you’ve got a Book Now button on your custom post type template, and the popup is attached to this button).
Also, you can add the booking form widget directly to the service page’s template where you what the visitor to be able to book it.
Once you’ve added a Booking Form widget in place, select the booking form you’ve created in the Select form dropdown, and specify the fields layout (column or row).

If you’re using the numeric fields that allow the client to set the numbers then used in the formulas, and want the formula to count the value automatically, set the AJAX submit type.
In the Style block, you’ll be able to style the form up to your liking. As for the layout, you can still change it in the Dashboard when editing the actual booking form by dragging and dropping the fields, and toggling them to change their size.
When everything is ready, click Publish (or Update) button, and that’s actually all for now! Your booking form is our in the world now!
The nuts and bolts
So, to sum everything up, the Booking Forms functionality from JetEngine is very robust and diverse.

Using the forms, you certainly can:
- provide a way for a visitor to book a room, a table at a restaurant, or an appointment with a doctor;
- provide diverse select and checkbox fields to let the client select the needed options, let the client pick the date and time for an appointment, etc.;
- automatically calculate the value of the appointment or service booked using the formulas in the specific field type;
- gather feedbacks and testimonials through the booking forms and then showcase them on front-end using the meta fields;
- send notifications to both client and admin about the successfully booked service.
And this is only the beginning! The booking forms will evolve with time, and there are so many ways to use them, that it is really difficult to at least count all the tasks one can handle with JetEngine Booking functionality.
Give the Booking Forms a try and watch how your business benefits from them!


