Сhanging the Form’s Media Button Text
Find out how to change the text or label built by the JetFormBulder Media Button.
Before you start, check the tutorial requirements:
- Elementor (Free version), or Block editor (Gutenberg), or Bricks
- Simple Custom CSS and JS plugin installed and activated
- JetFormBuilder plugin installed and activated with a configured form with the Media Field block added.
To change the text on the button, you need to add the following JavaScript code that modifies the form created using both the JetEngine (legacy) and JetFormBuilder forms. To style the corresponding button, customize the theme settings.
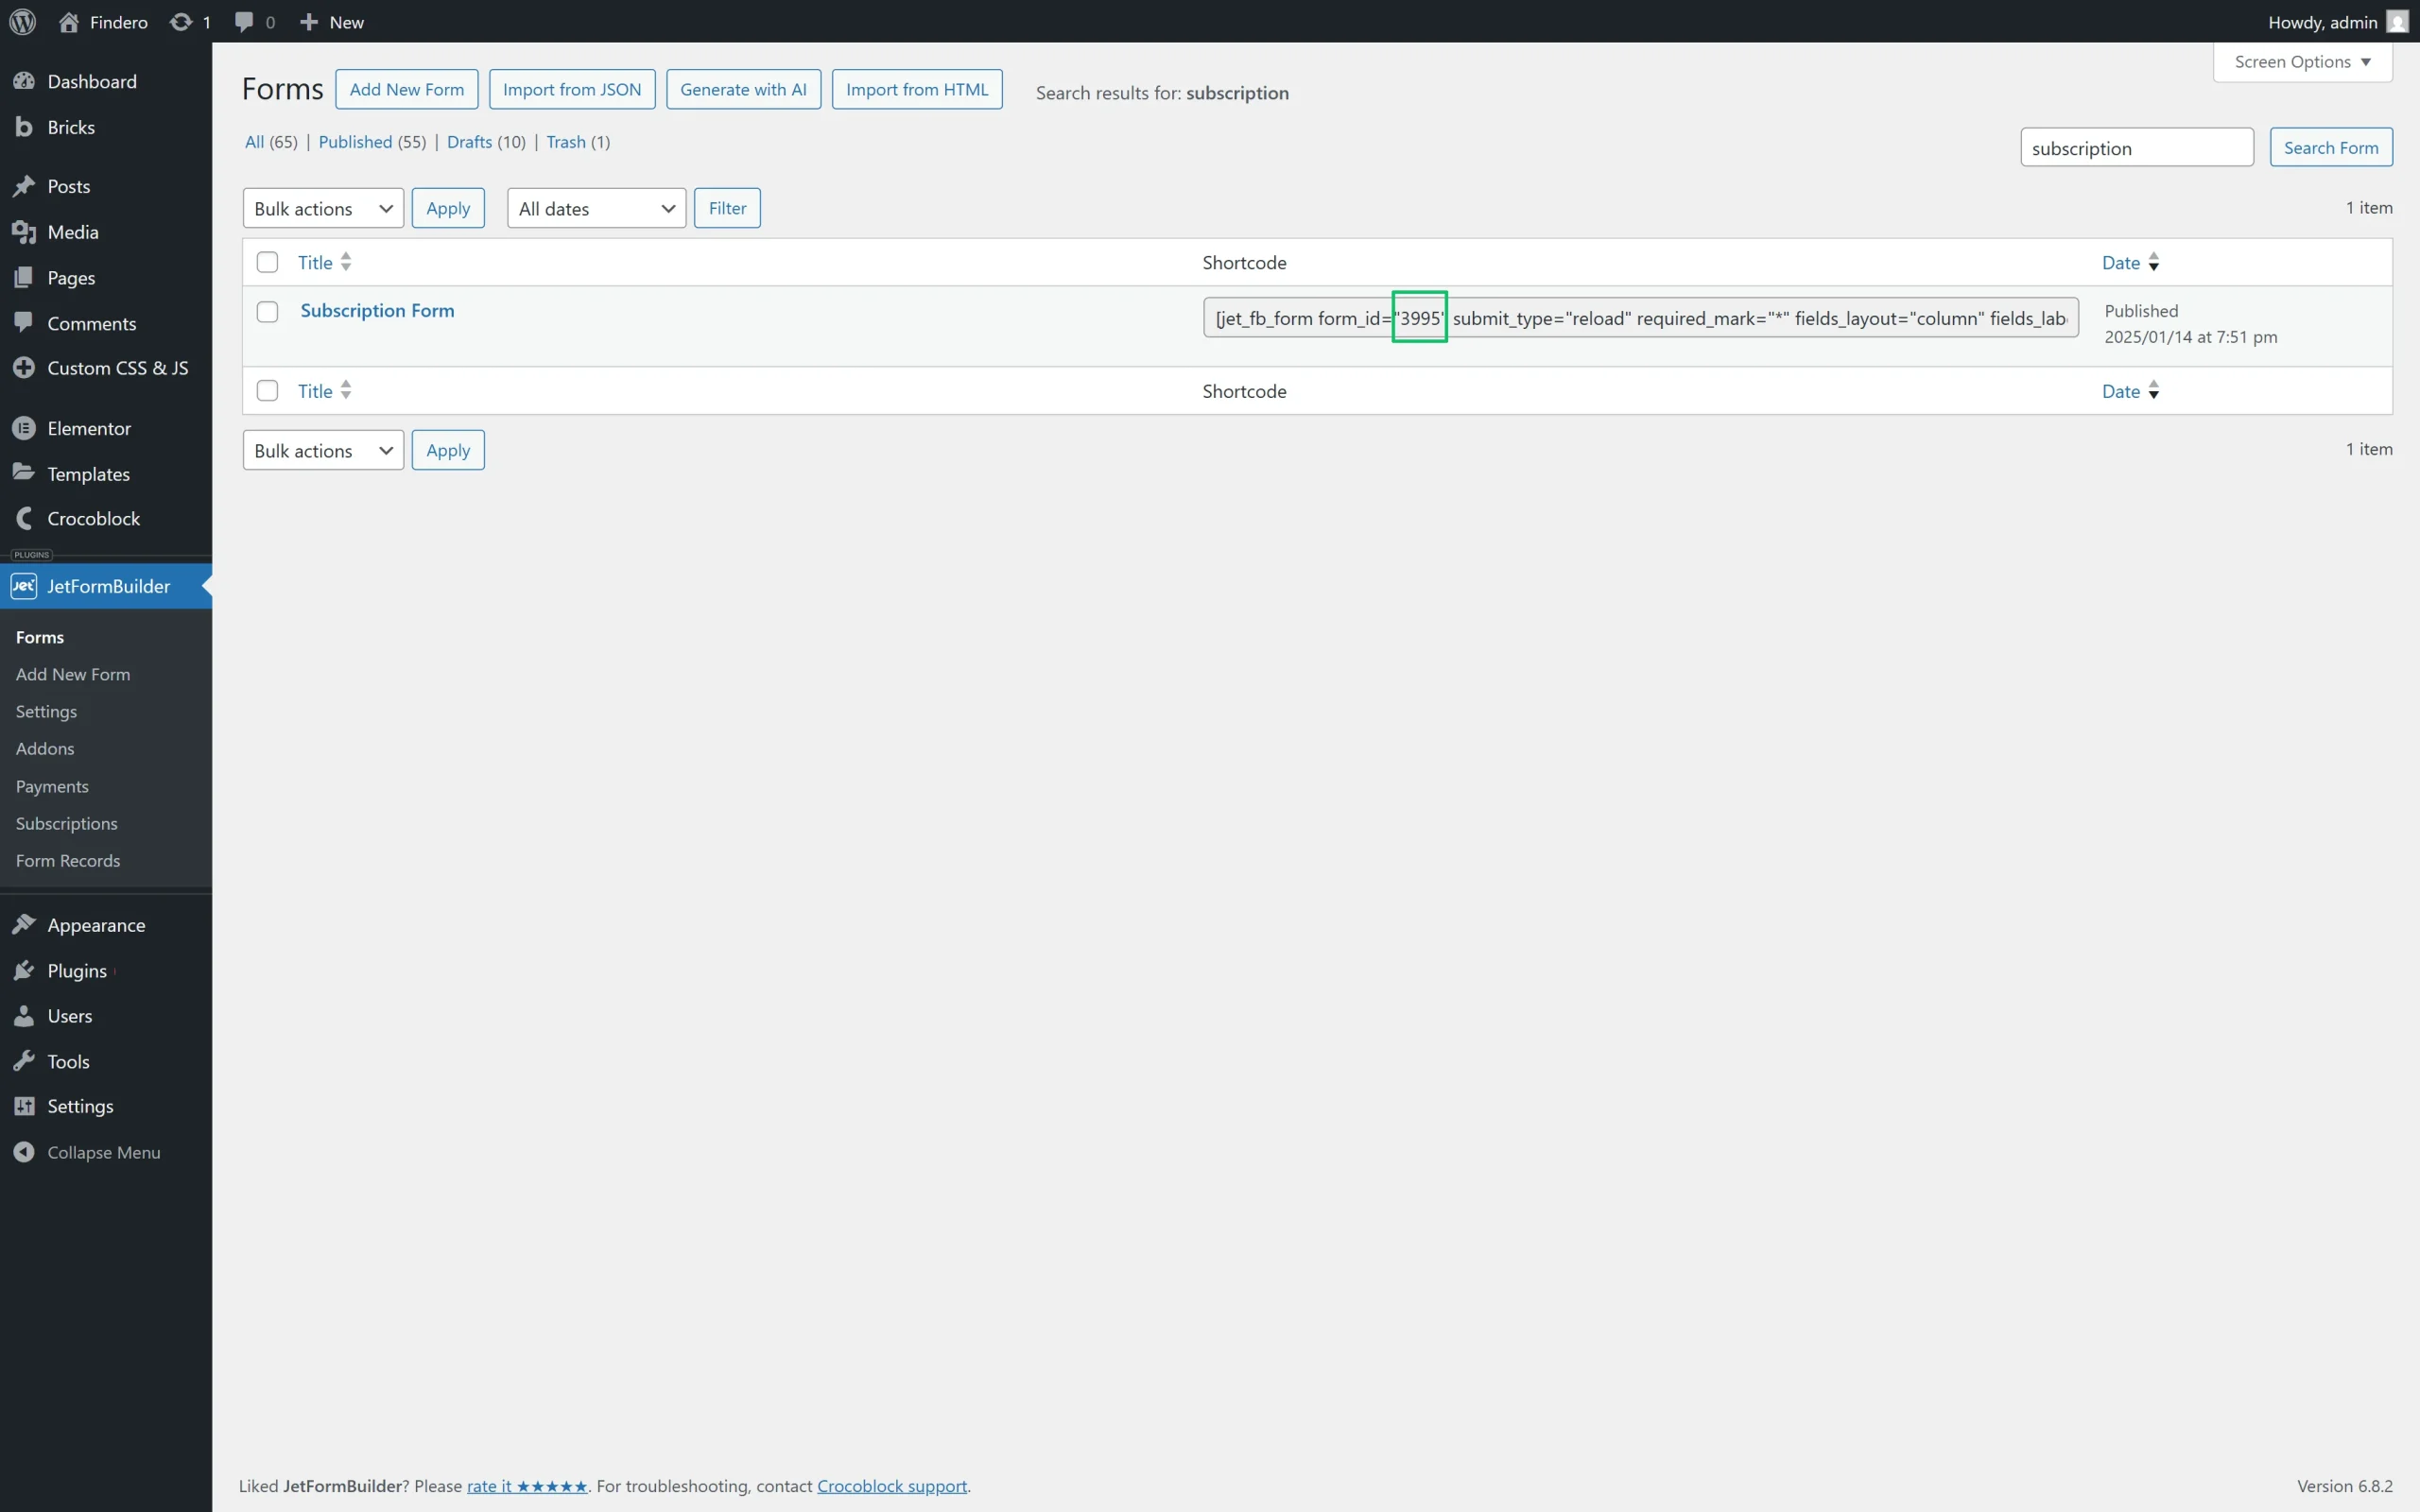
Copy the Form’s ID
Since the form’s ID will be used to apply the code for the specific form, we move to the WordPress Dashboard > JetFormBuilder > Forms tab and find the needed form.
Here, find the form’s ID in the shortcode column and copy the ID (the “3995” text, in this case).
Add the Code
Navigate to the WordPress Dashboard > Custom CSS and JS > Add Custom JS tab. This tab will be added to the WordPress dashboard after the plugin is installed and activated.
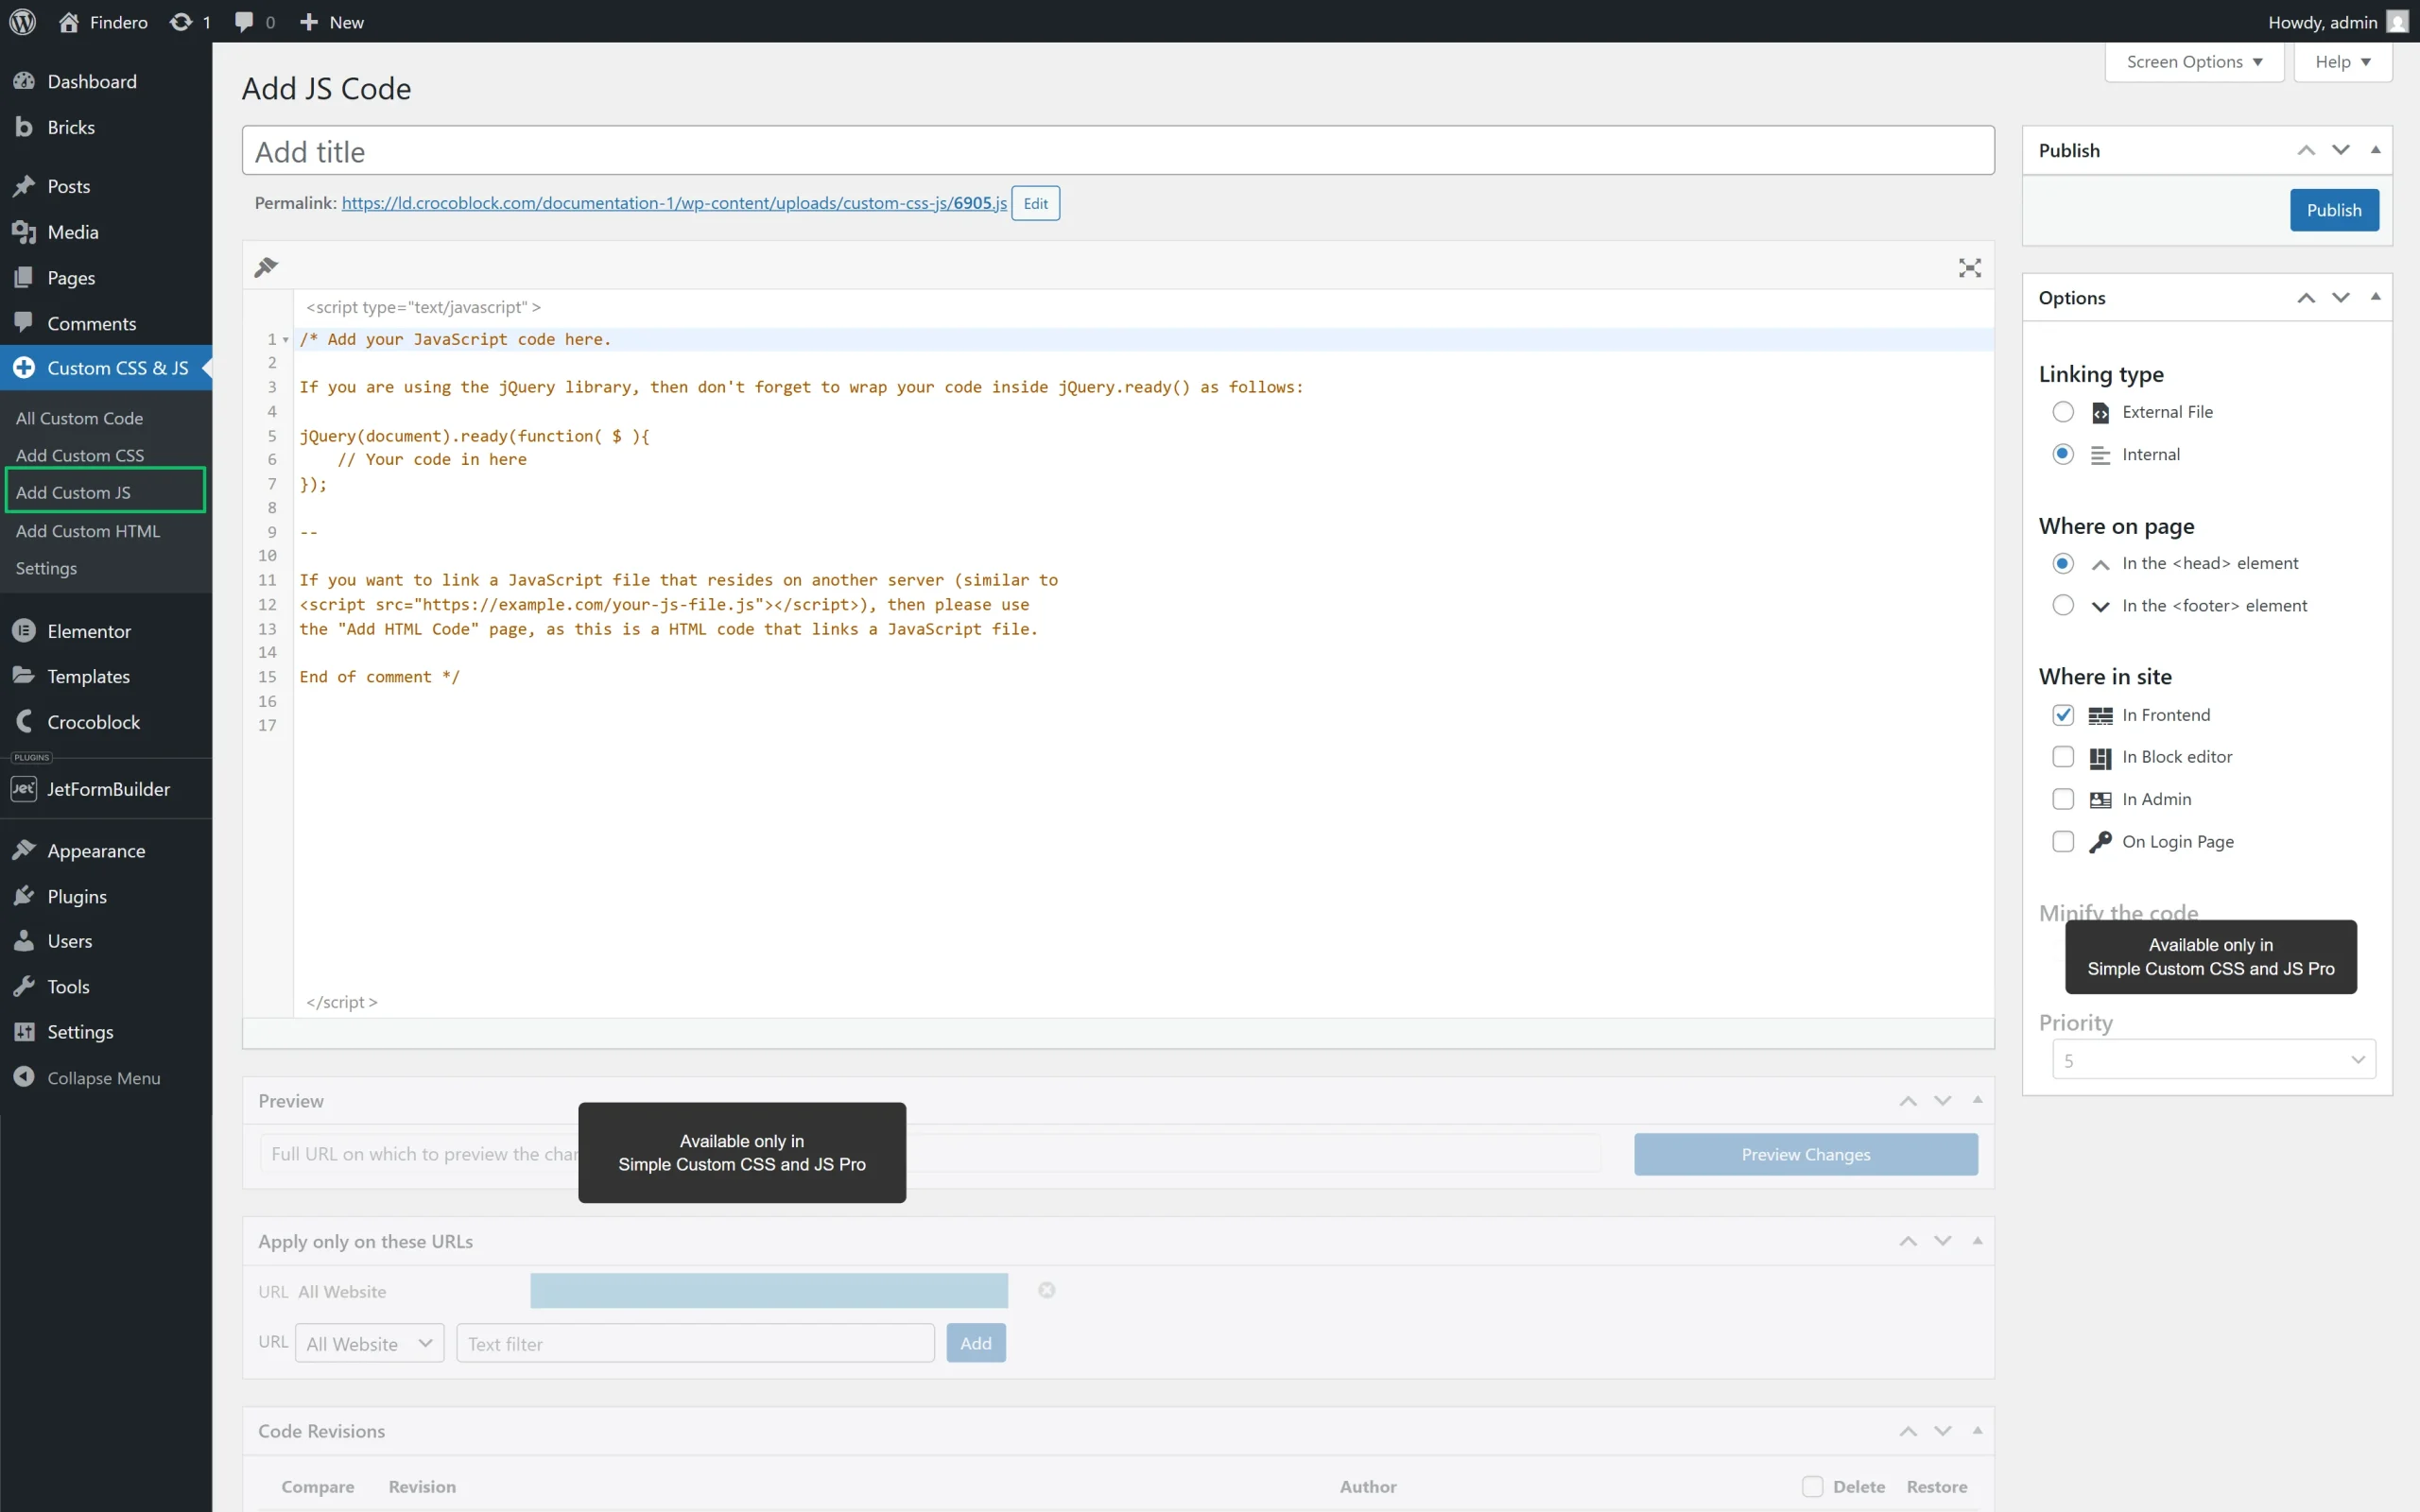
Here, insert the needed code’s title into a text field instead of the “Add title” placeholder text (for example, we use the “JetFormbuilder media field text after upload” text).
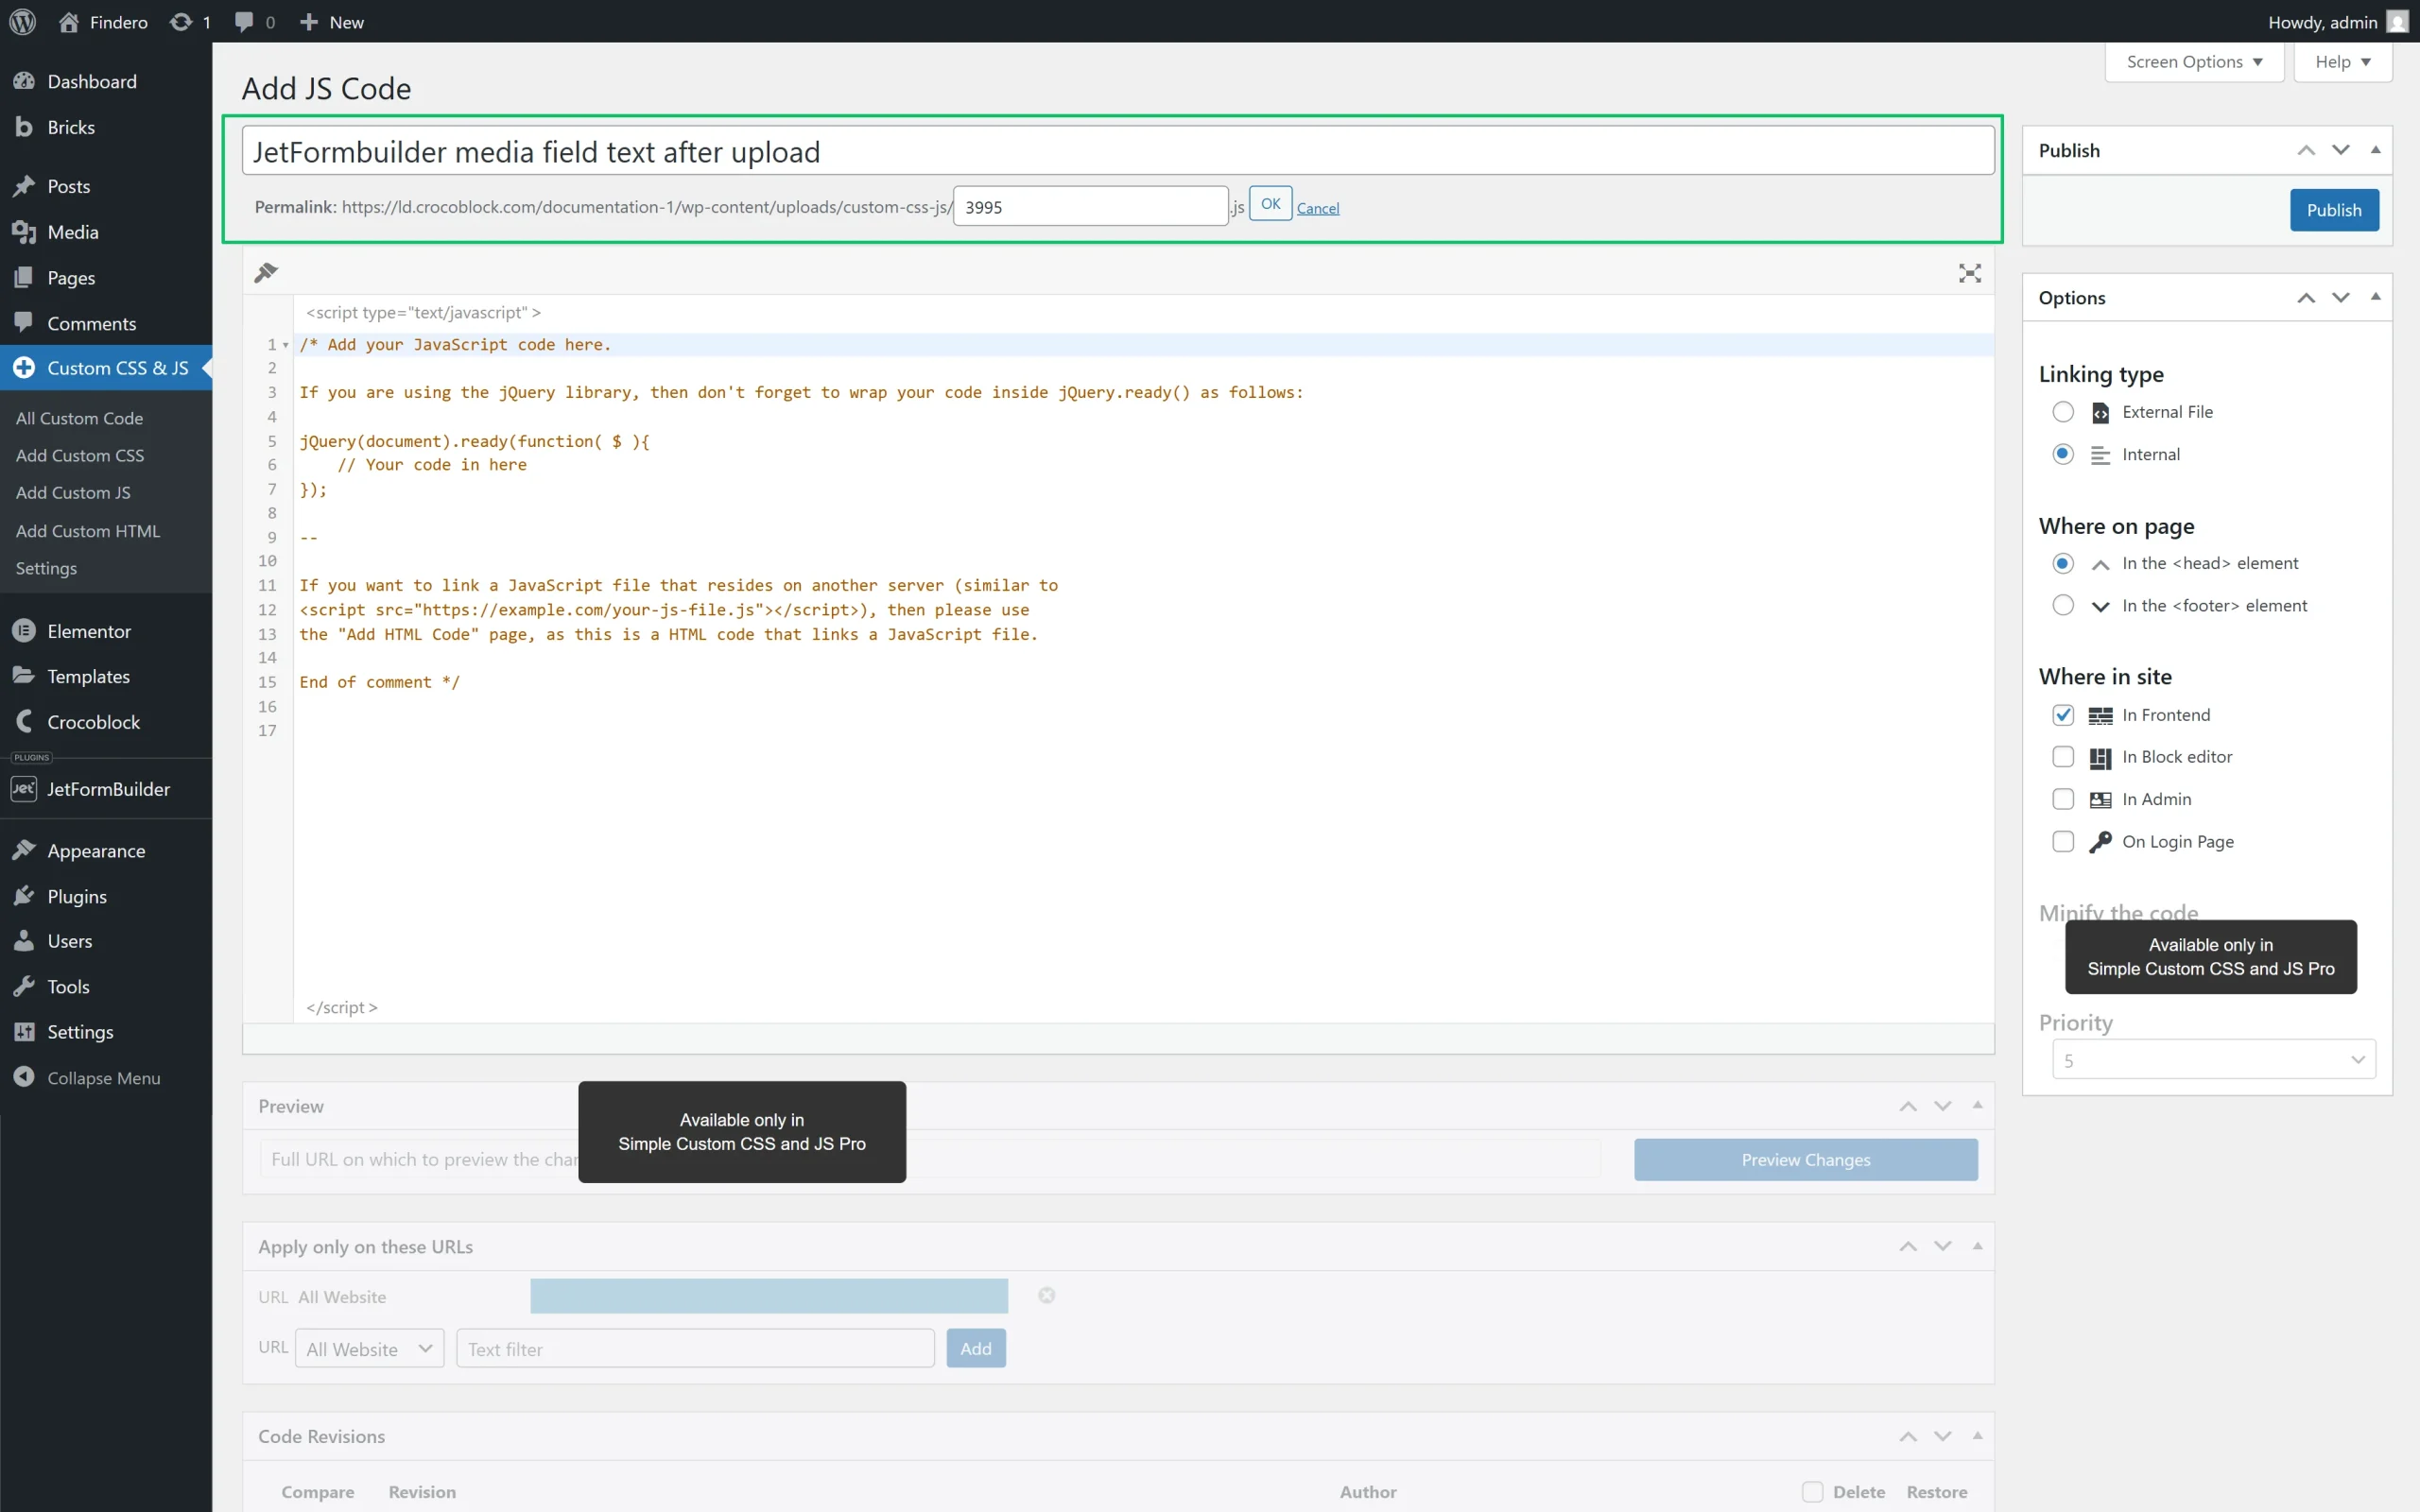
After that, navigate to the Permalink link below the text field with the default “Add title” text in it. Then, press the “Edit” button to enter the ID of the form you want to change (in this case, we add the copied ID “3995”) and press the “OK” button to save.
Then, copy the following code by clicking the link.
In the next step, paste the copied text into the text field.
Finally, move to the Options section of the tab and tick the following options: “External File” Linking Type menu, “In the <footer> element” Where on page menu, and “Frontend” Where in site menu.

Press the “Publish” button to save the code.
Customize the Code
If needed, you can add the custom code to be displayed on the corresponding button.
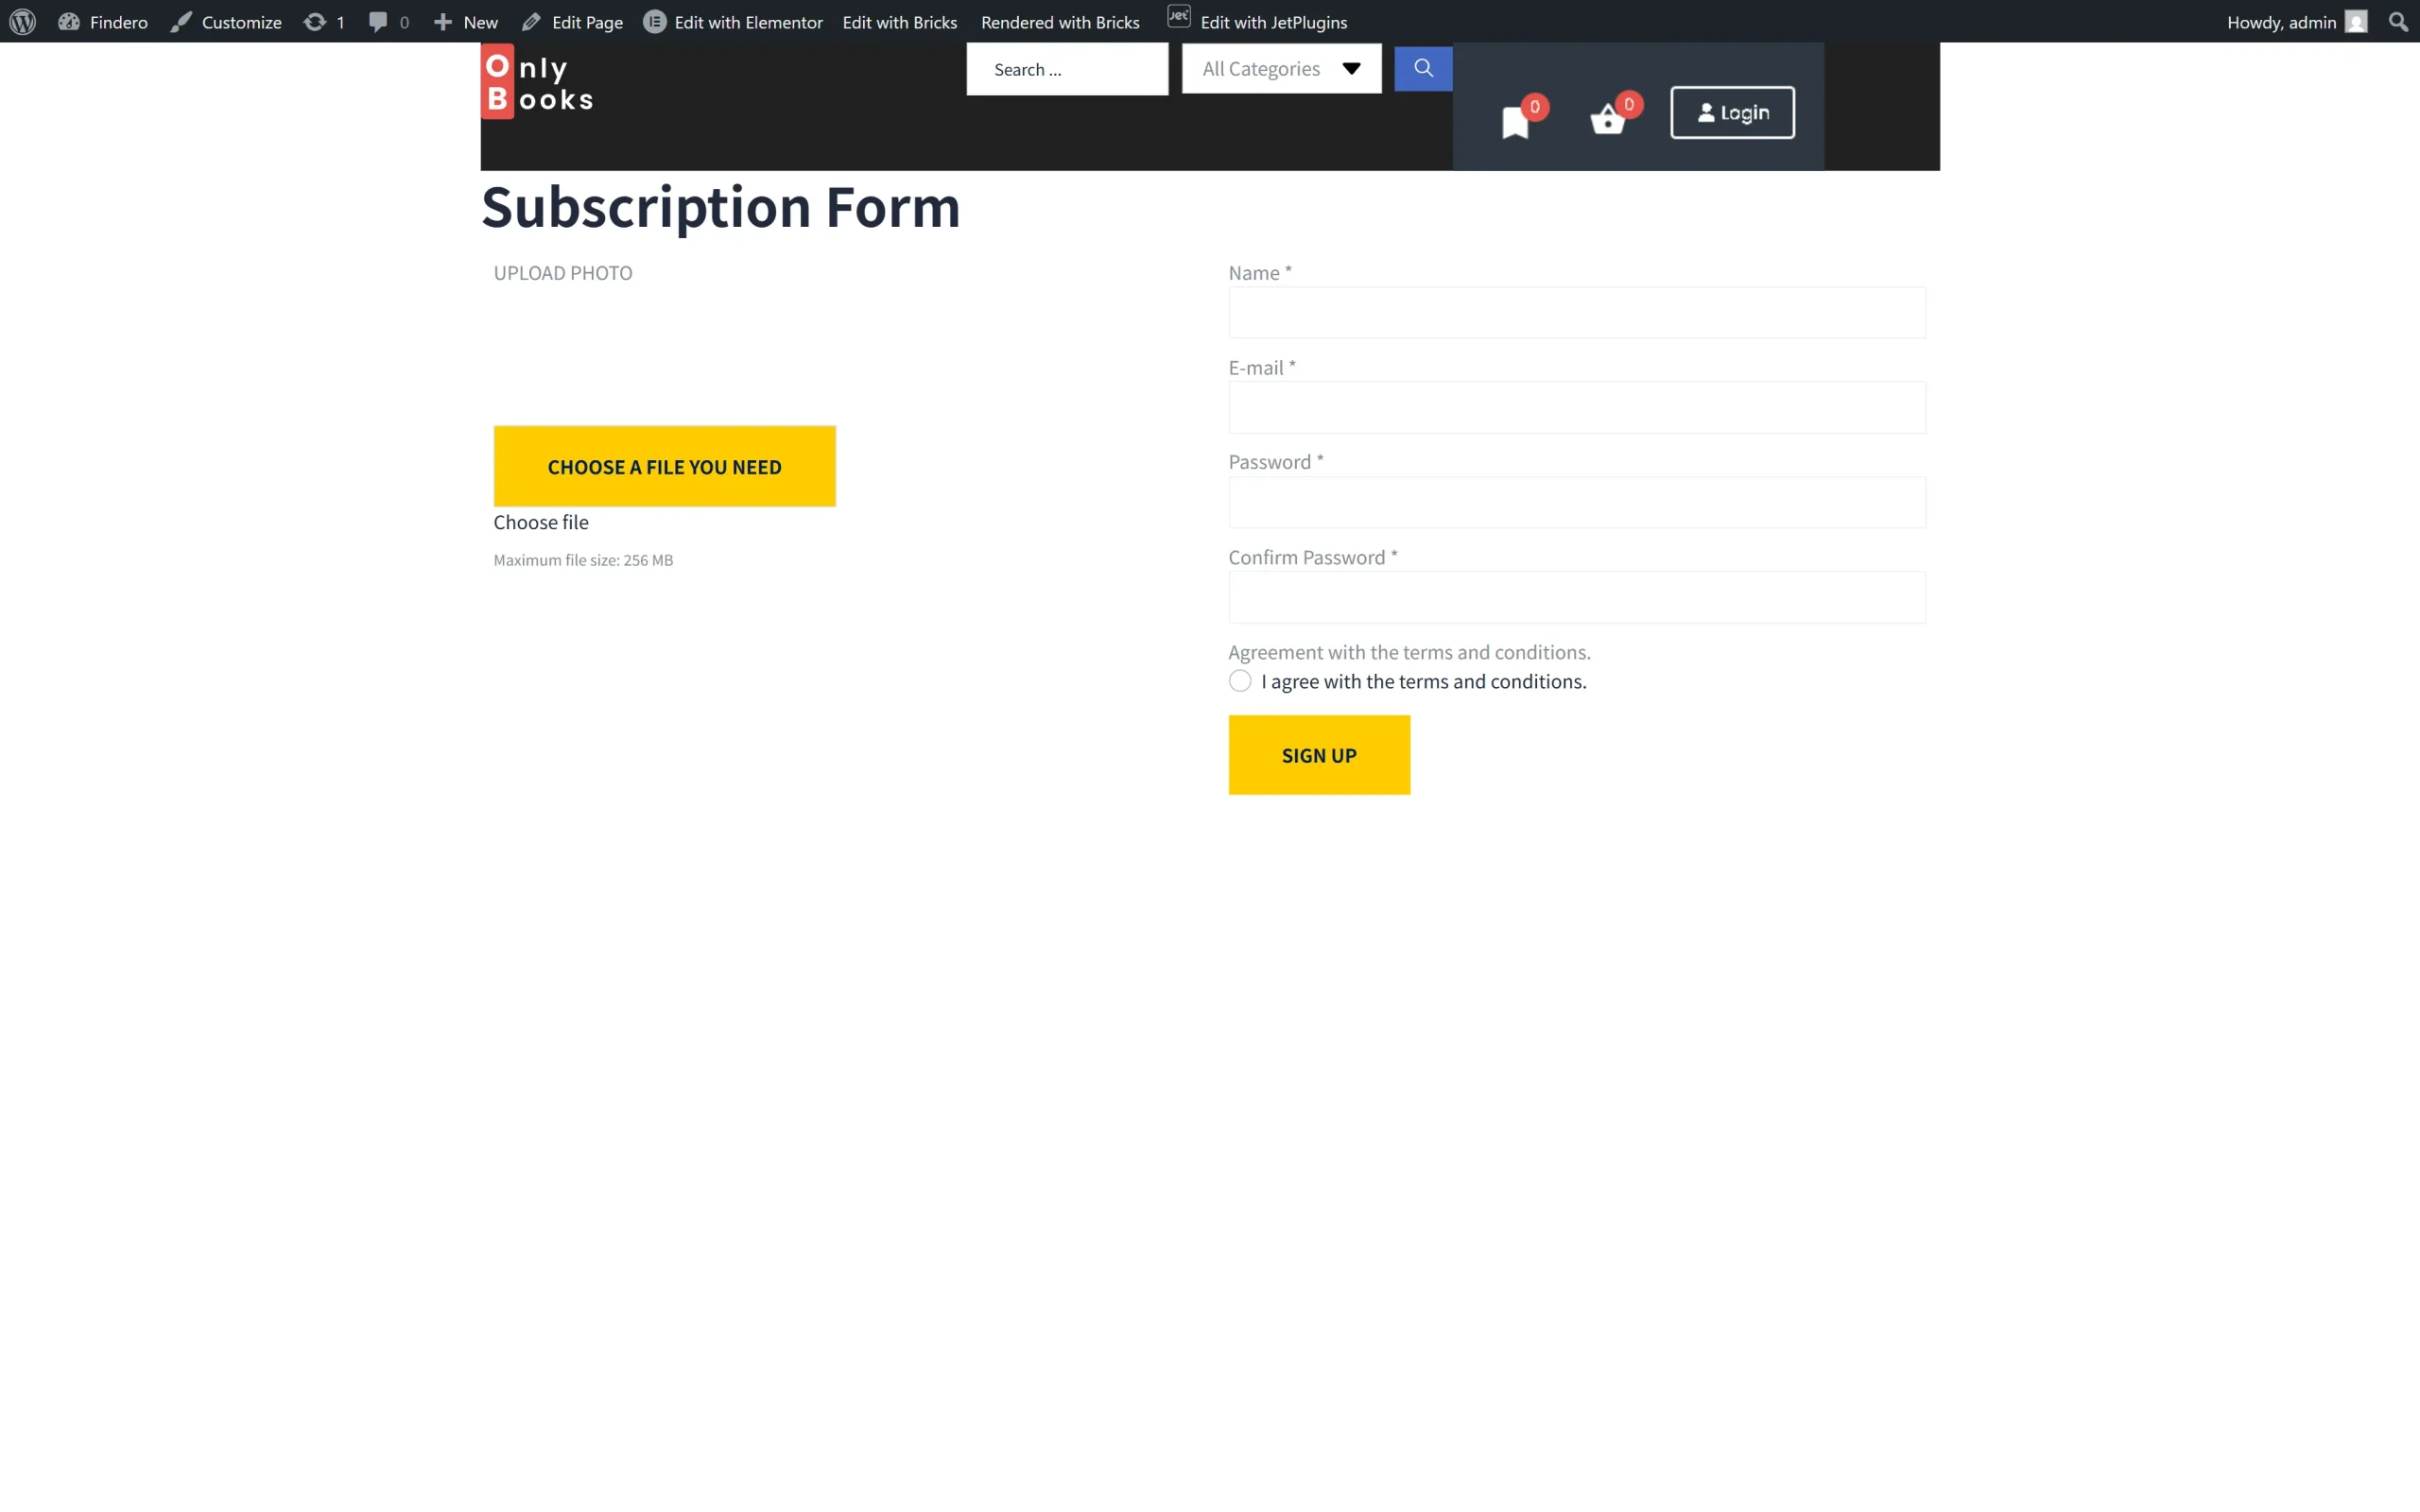
To do this, navigate to the code text and replace the default text with the required one. In this case, we move to the fourth row and type the “Choose a File You Need” text instead of the default “Choose File” text to be displayed on the corresponding button.
To customize the text displayed under the button, insert it in the fifth row.
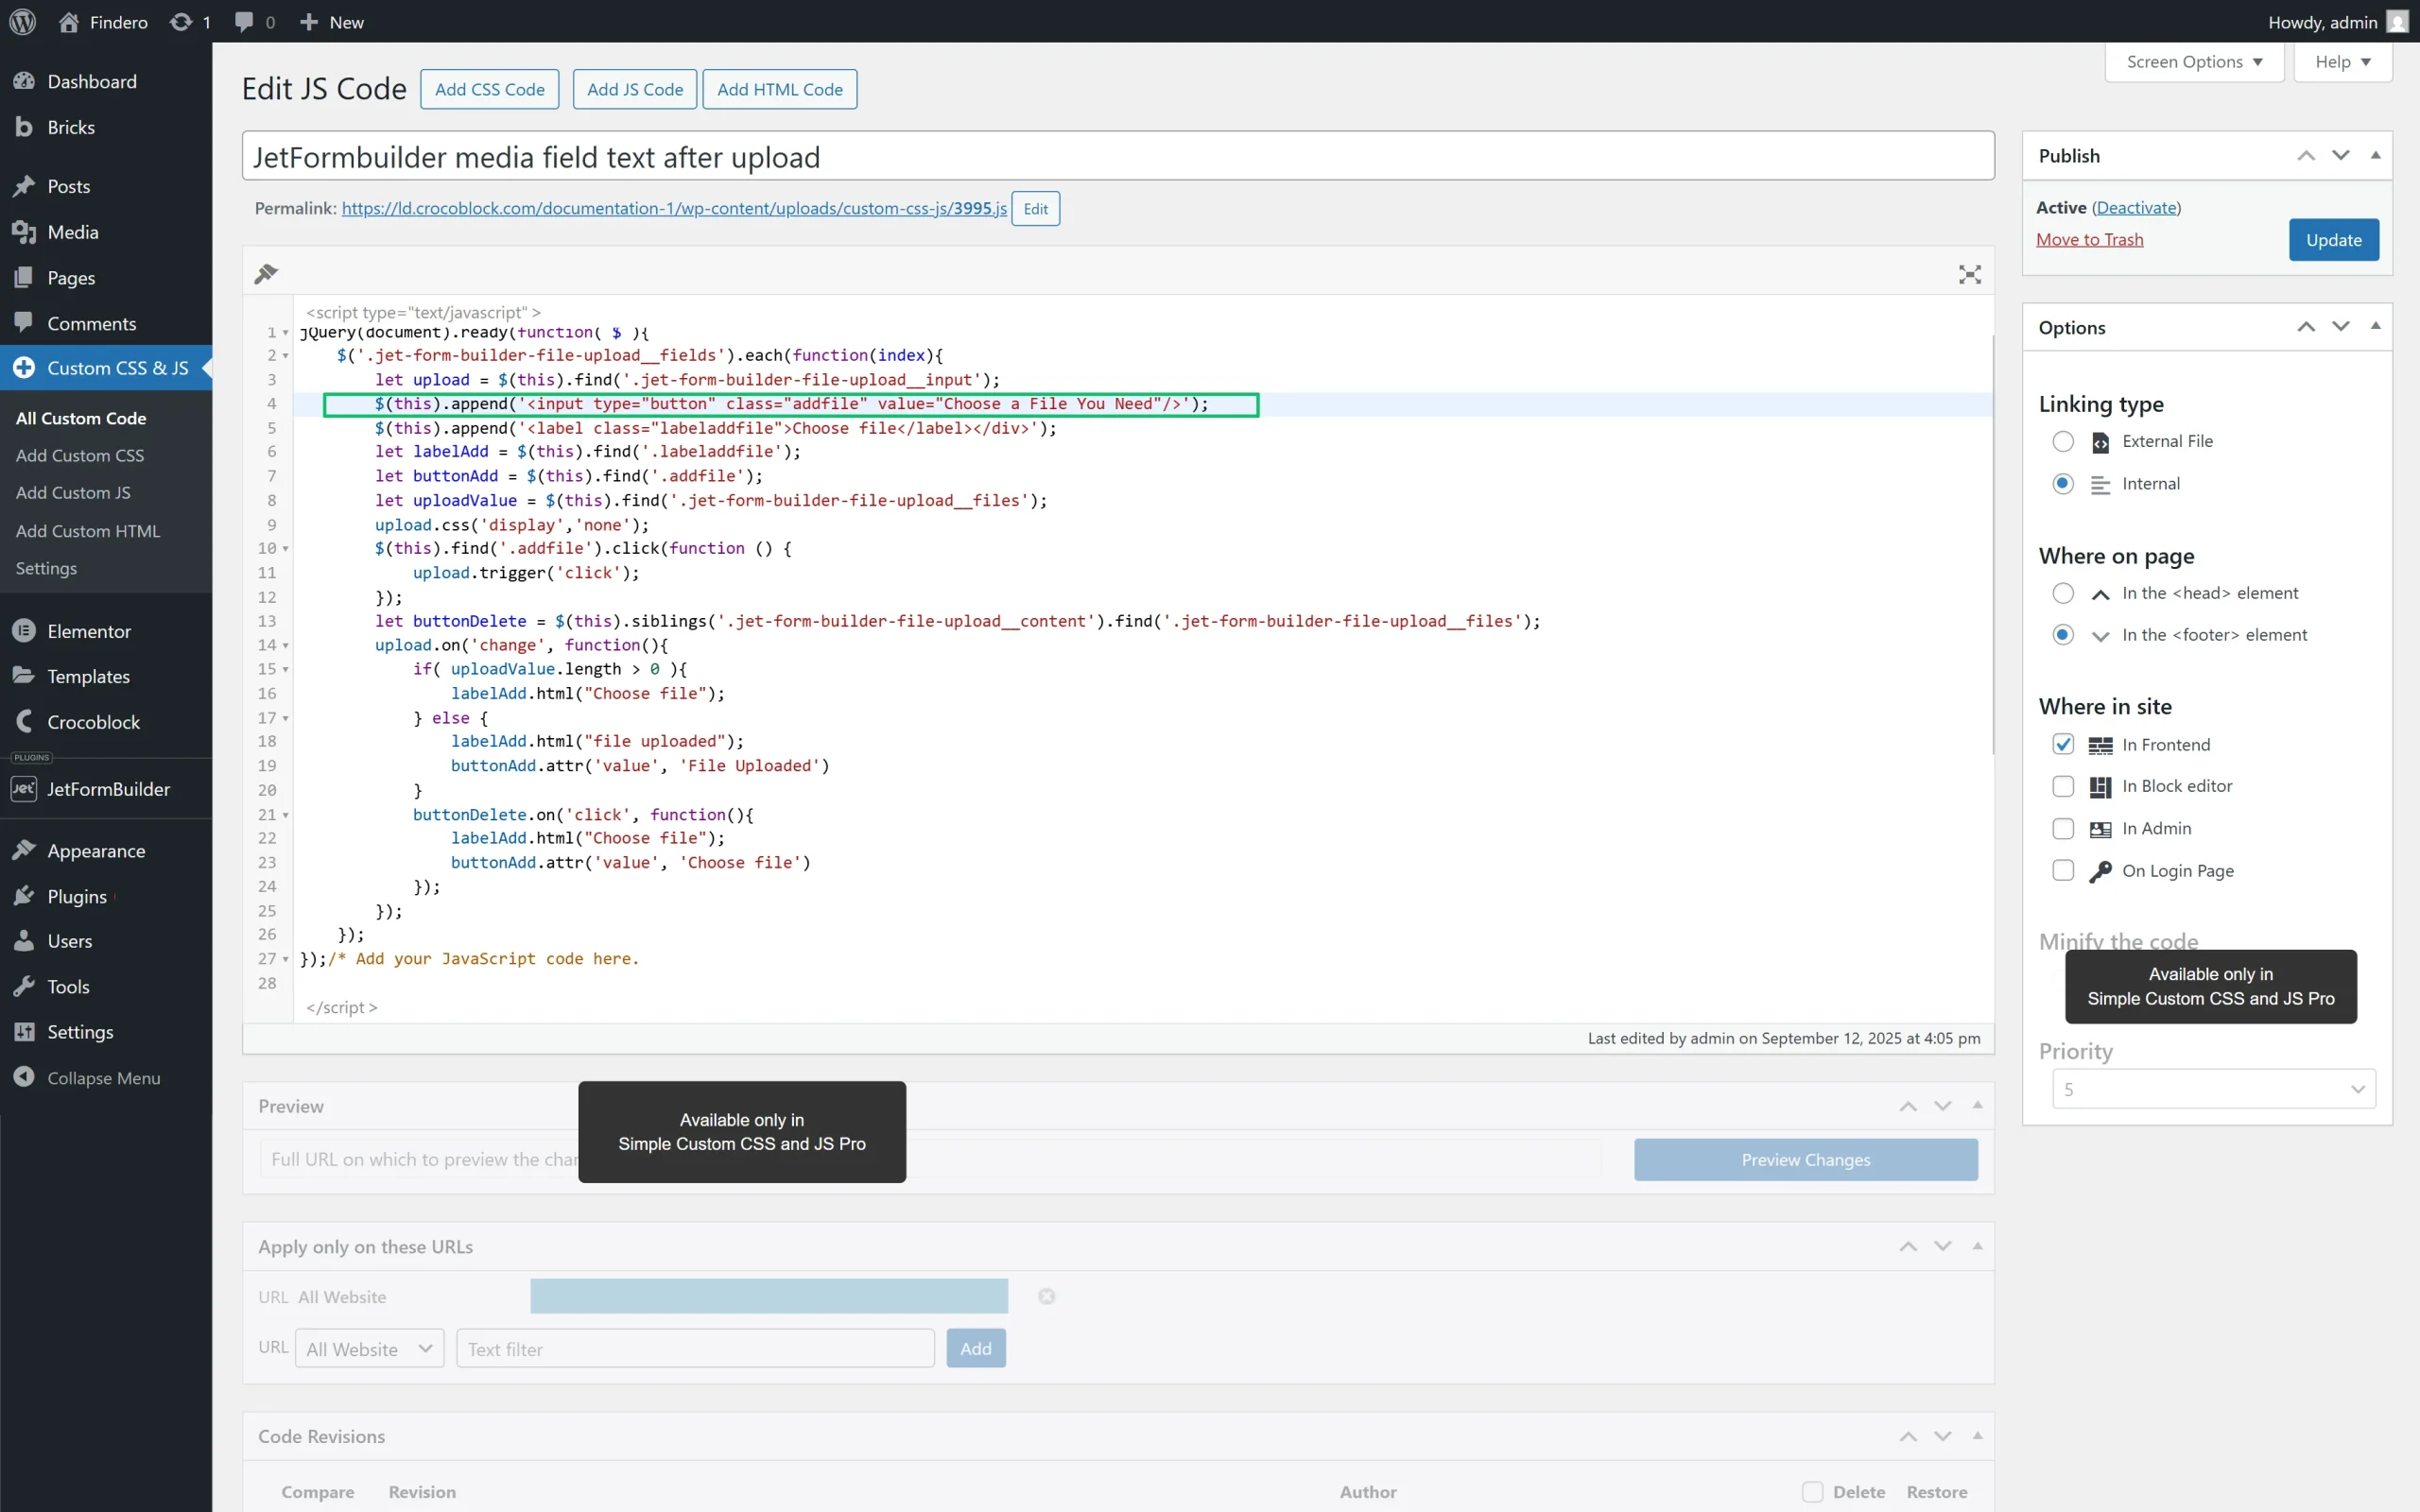
Once completed, press the “Update” button.
Test the Flow
Add the form to a page in the editor you prefer, using the JetForm widget/block/element.
Read the How to Display a Form on the Front End tutorial to know how to configure the required settings of the corresponding widget/block/element.
Then, move to the front end and observe the changes.
That’s it. Now you know how to customize the texts to be displayed on the form’s Media Field button and in corresponding headings while uploading files using a code applied for the JetFormBuilder or JetEngine plugins for WordPress.