How to Use Filters with the Calendar Widget
Learn how to apply filters to the Calendar widget with the JetSmartFilters and JetEngine plugins on your WordPress website.
From this tutorial, you will learn how to create a listing and calendar from the JetEngine plugin and how to use Filter widgets with the Calendar widget.
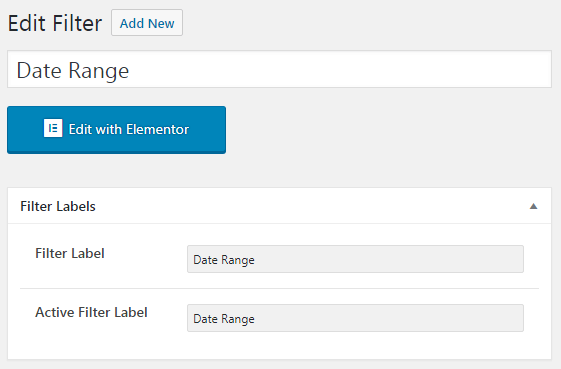
Firstly, let’s create a different filter for the Calendar widget. Navigate to Smart Filters > Add New, and type in the Name, Filter Label, and Active Filter Label.
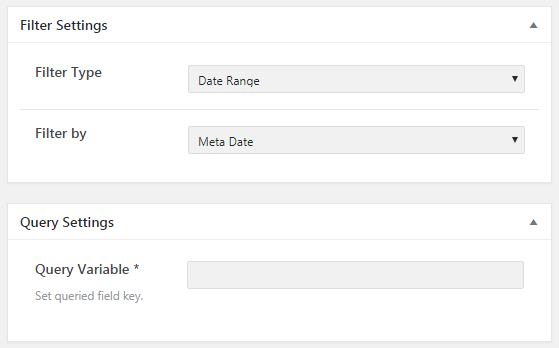
In Filter Type, select Date Range and choose Filter by Meta Date. If you’ll choose the Post Date, then it will be simply the publication date.
I choose the Meta Date, and in the Query Variable field, I need to paste the filed key from the Custom Field.
To do that, go to the Custom Post type that you’ve created before, for me it’s “Events”.
You can find out more about Custom Post Type and how to create it from this tutorial.
So, in the Events, I’ve got the number of posts, and each of these posts got the custom field with the Date. When I open the post called “Product Presentation” and scroll down to the Settings, I’ll find the field name Date, where the date of the event is set.
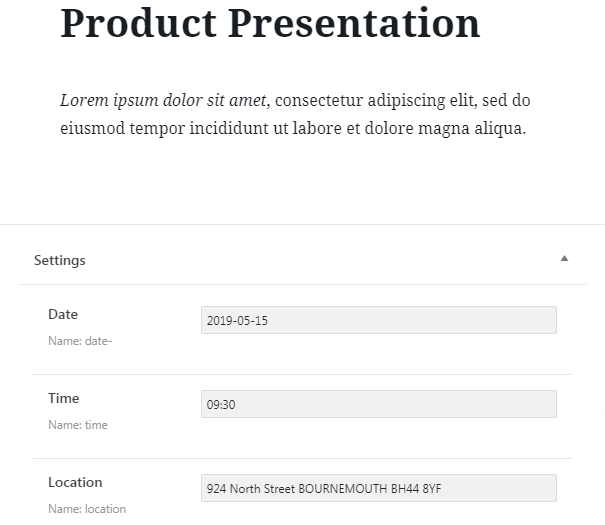
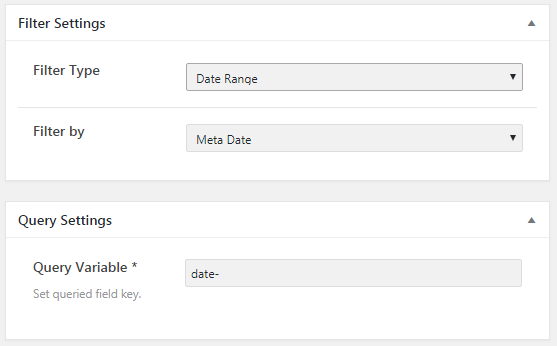
You need to copy the Name of this date that is called “date-” and insert it in the Query Variable filed in the filter you’ve been creating. Then, click on the Publish button.
After that, open the needed page and drag-n-drop the Calendar widget to the section where you want to place it.
In the Listing, select the listing you’ve created for your events.
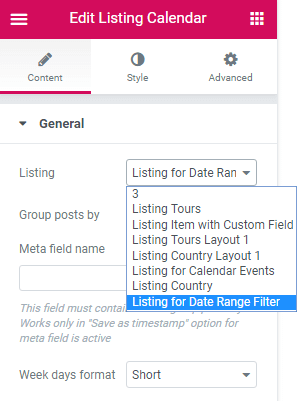
Then, you need to choose by which criteria you want to Group posts. If you choose Posts publication date, it will display this post on the day when it was created. Post modification date will do the same, but it’s going to display posts on the day when you have last changed this post. And the Date from the custom field will display posts on the dates that are set in the custom field.
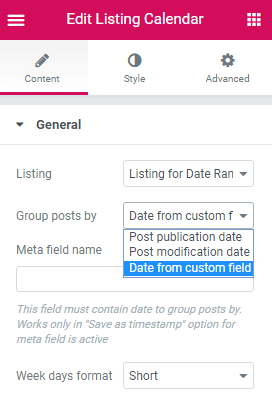
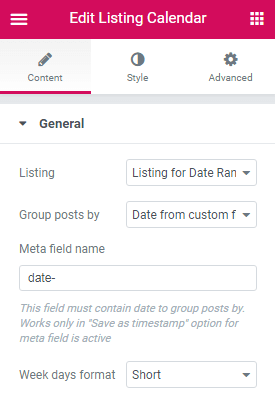
I choose the Date from the custom field and in the Meta field name paste the name of the meta field “date-”.
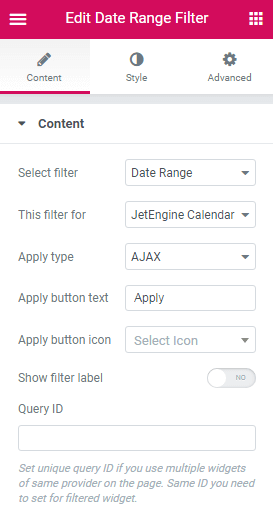
Afterward, drag the Date Range Filter to the section. In the General settings, choose your filter, for me, it’s Date Range. Then choose JetEngine Calendar from the This filter for dropdown.
The last step is to click on the Publish button and check out how the filter works.
Now you know how to use the JetSmartFilters widgets with the Listing Grid and Calendar widgets. Hope this tutorial was useful and you will enjoy the result.