How to Generate a Shortcode for Product Table
From this tutorial, you will learn how to generate a shortcode for a product table built with the JetProductTables plugin.
Before you start, check the tutorial requirements:
- WooCommerce plugin installed and activated with created products
- JetProductTables plugin installed and activated
In this tutorial, we will generate two shortcodes: one for the product table and the other for the product variations table.
Generate a Shortcode
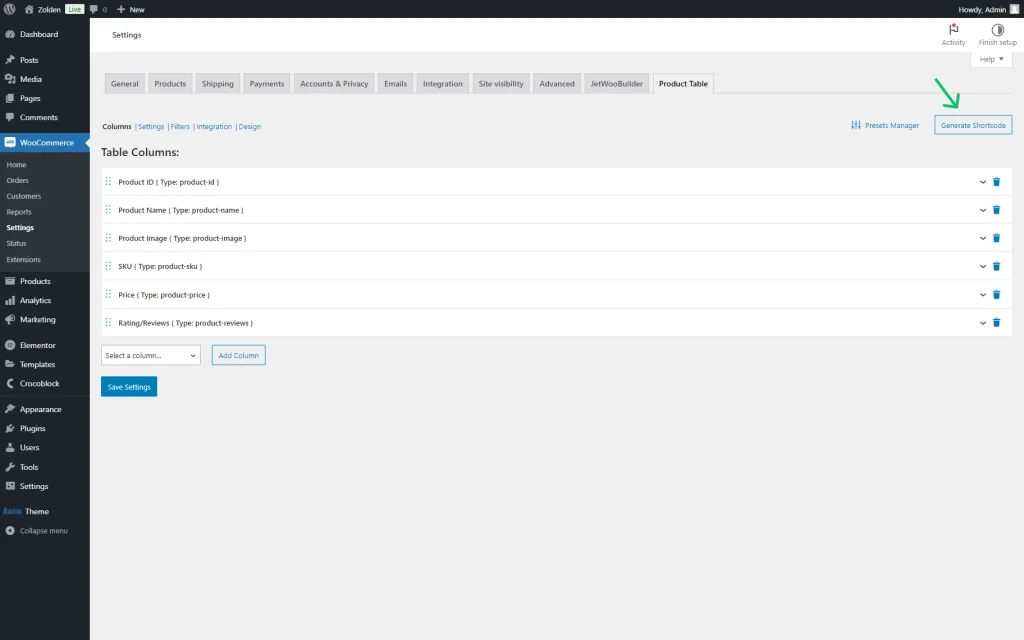
Proceed to the WordPress Dashboard > WooCommerce > Settings > Product Table directory.
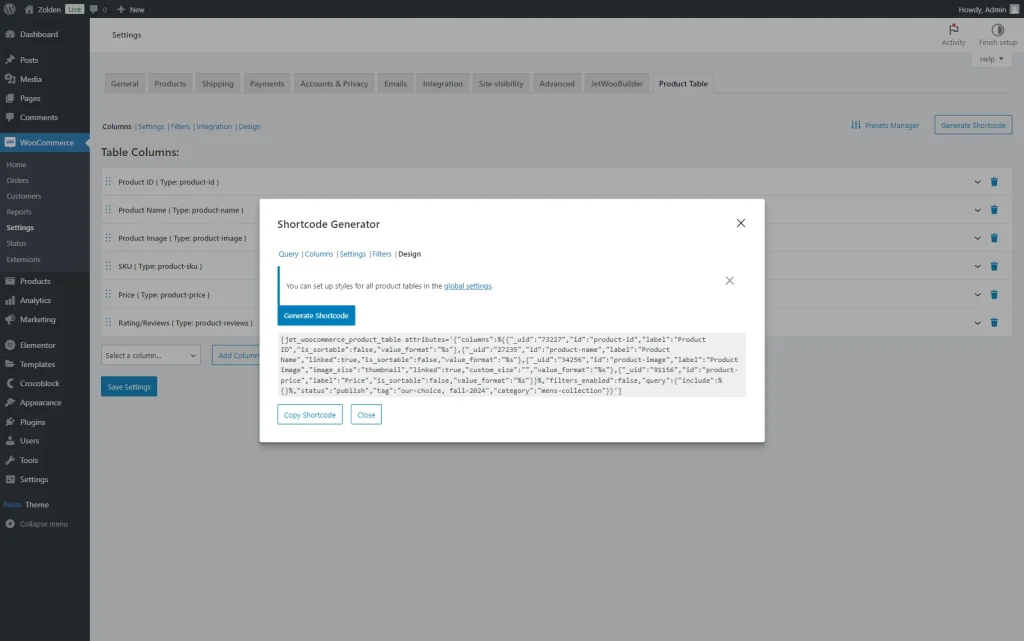
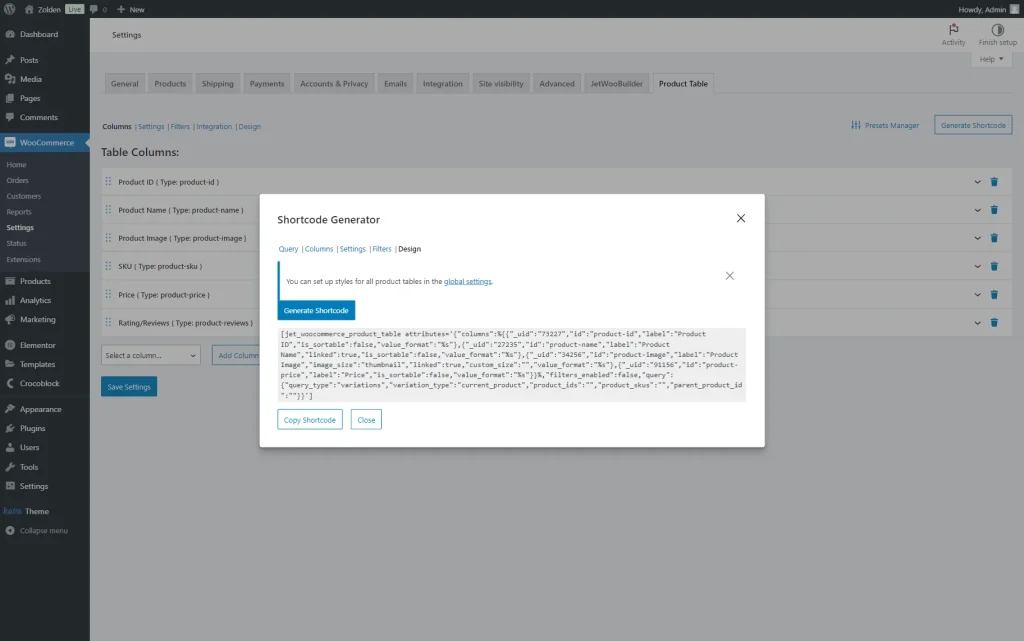
Here, press the “Generate Shortcode” button to open the Shortcode Generator pop-up.
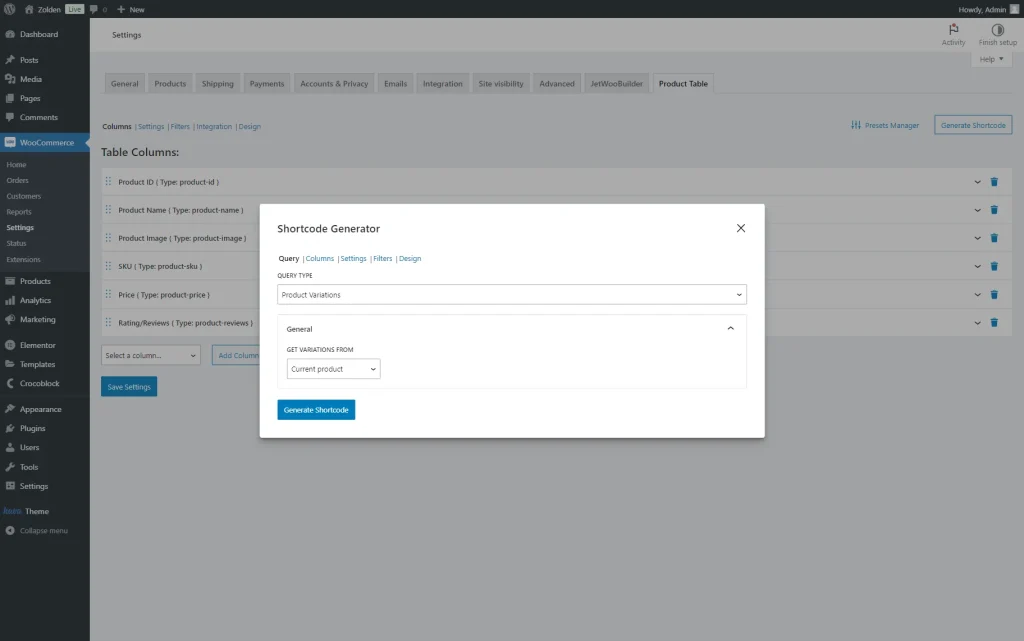
In the opened pop-up, select one of the options in the QUERY TYPE field: “Products” or “Product Variations.”
We will show two cases for both query types.
Products table
We leave the default “Products” QUERY TYPE and proceed to the following tabs.
In this tab, you can adjust settings as you wish.
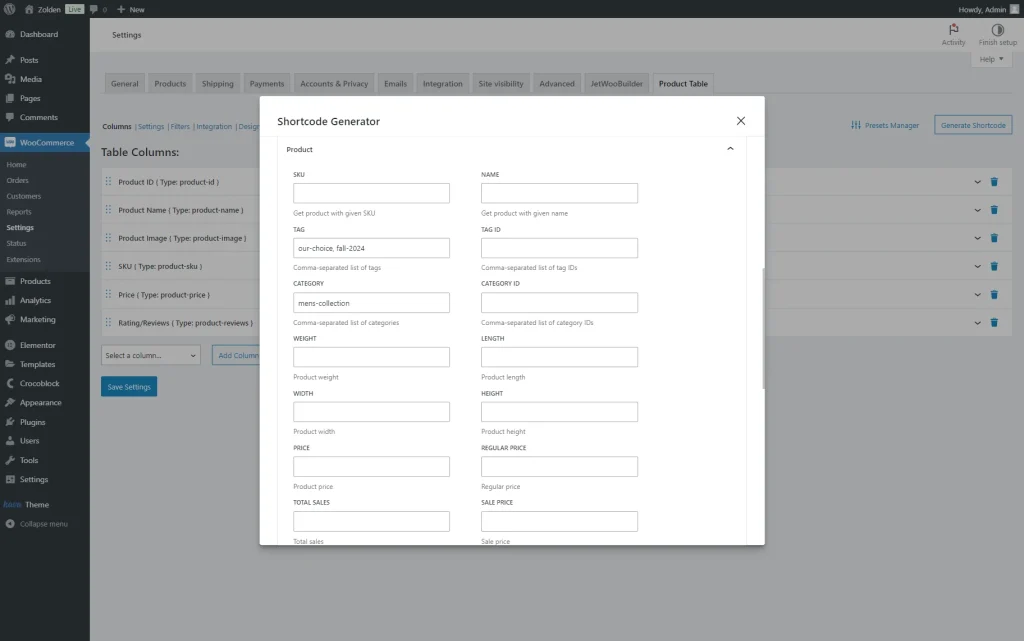
For example, we want to display only clothes that have the “Our Choice” and “Fall 2024” tags and are attached to the “Men’s Collection” category.
So, we proceed to the Product tab and complete the TAG field with “our-choice, fall-2024”, where two slugs of the tags are presented, “our-choice” and “fall-2024.” These are separated by a comma.
Next, right in this tab, we specify the CATEGORY by putting its slug (“mens-collection”) in the corresponding field.
More about the Shortcode Generator settings can be found in the JetProductTables Overview.
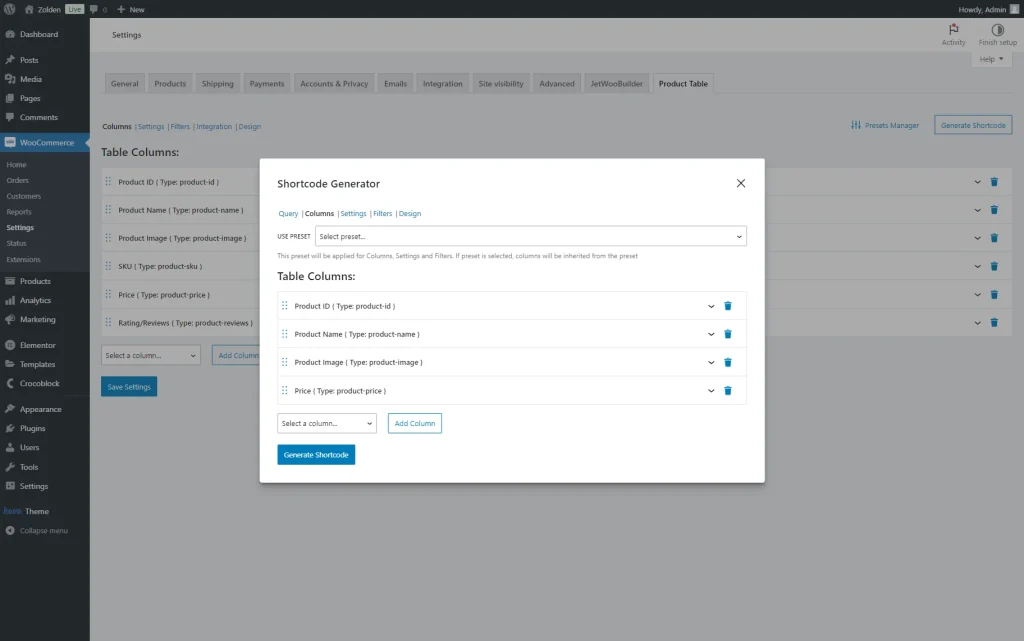
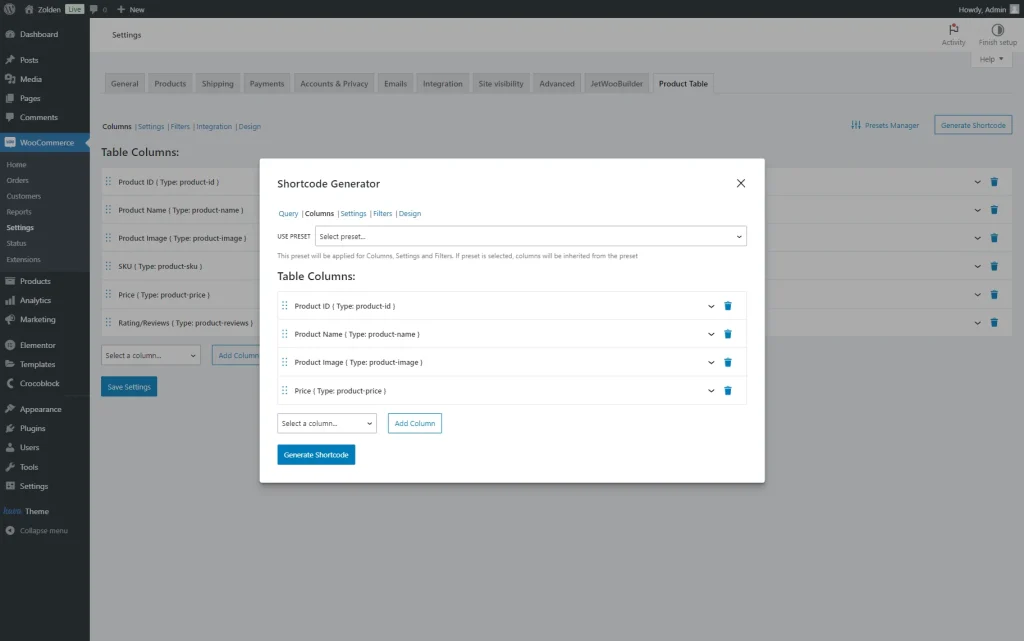
Once the first Query tab is adjusted, proceed to the Columns tab.
Here, you can add or delete columns that will be added to the table. For instance, we delete the “SKU” and “Rating/Reviews” columns.
Proceed to the following tabs if needed.
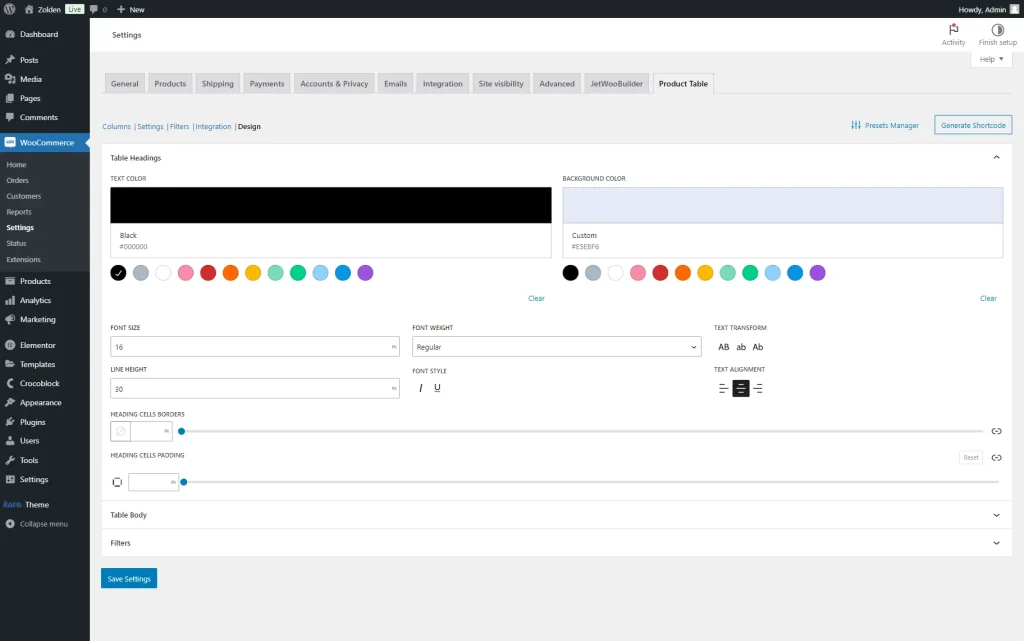
For now, close the pop-up and proceed to the global Design tab.
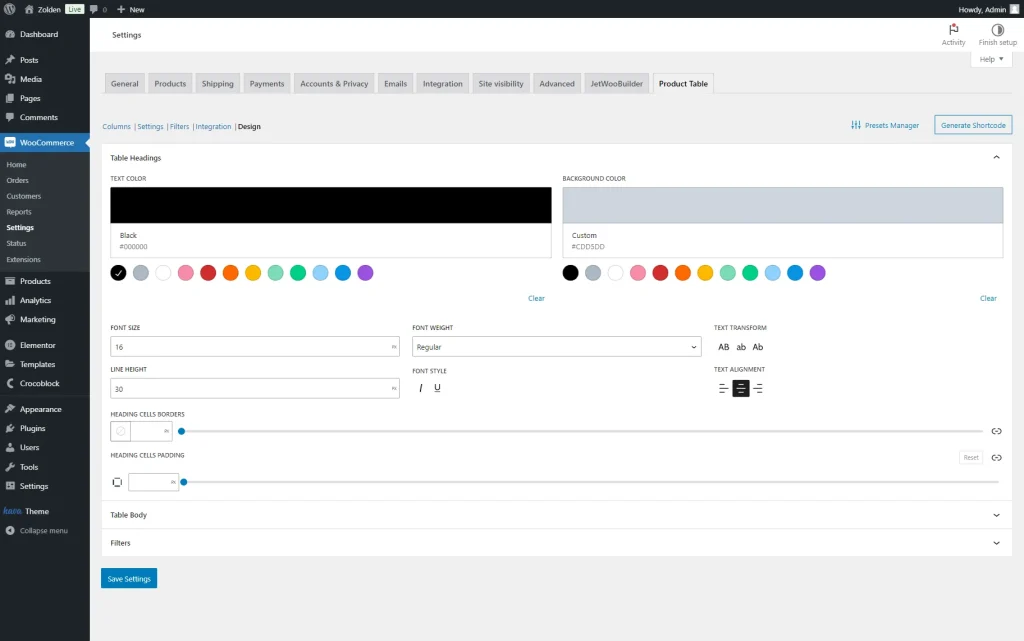
In the Table Headings tab, we set the TEXT COLOR and BACKGROUND COLOR.
We also add the FONT SIZE (“16”) and LINE HEIGHT (“30”).
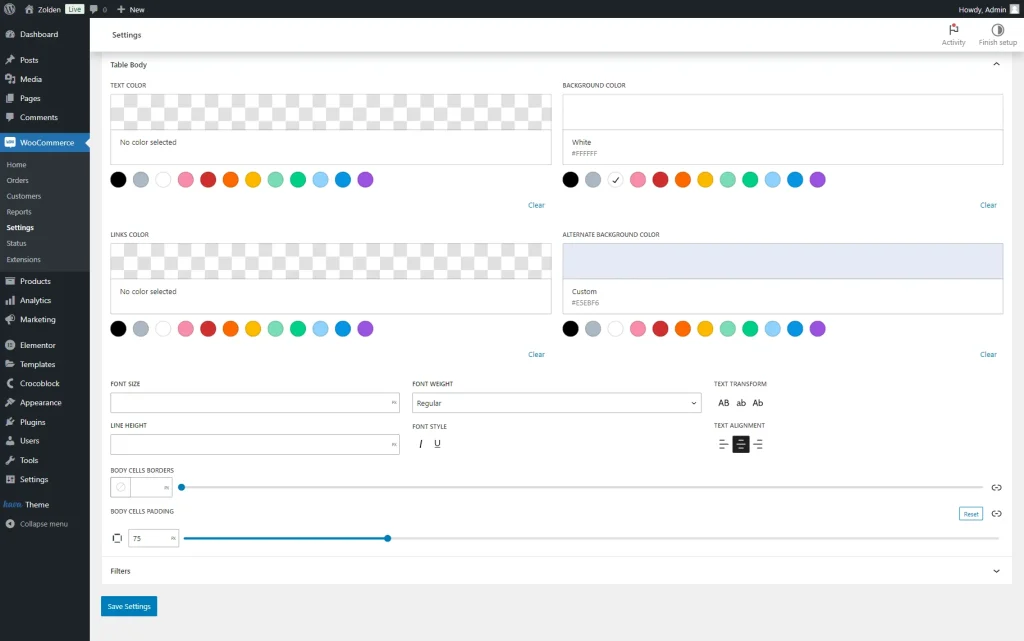
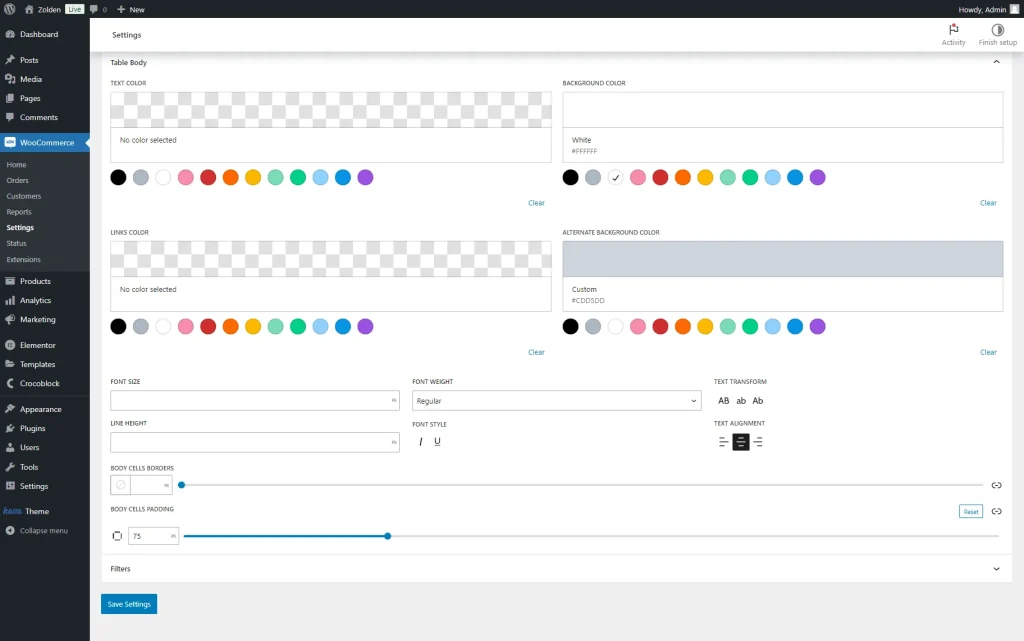
In the Table Body tab, we set the BACKGROUND COLOR and ALTERNATE BACKGROUND COLOR.
Then, we set the BODY CELLS PADDING to “75.”
Click the “Generate Shortcode” button one more time to return to the shortcode table generator.
In the opened pop-up, press the “Generate Shortcode” button.
Copy the shortcode and close the pop-up with the corresponding buttons.
After adjusting the needed settings, press the “Save Settings” button.
Then, head to the page/template where you want to add the shortcode table. For instance, we want to place the table on a static page, so we go to WordPress Dashboard > Pages > Add New Page and create a page in the Elementor editor.
However, you are free to use the shortcode in any preferred editor.
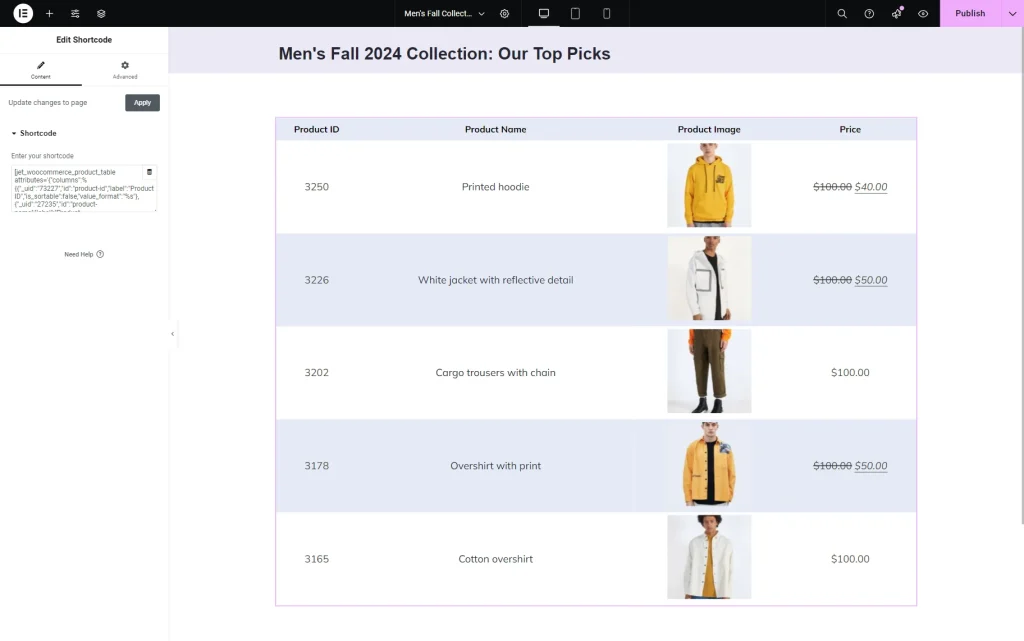
In the opened editor, we add a “Men’s Fall 2024: Our Top Picks” Heading and a Shortcode widget.
In the Enter your shortcode textarea, paste the copied shortcode.
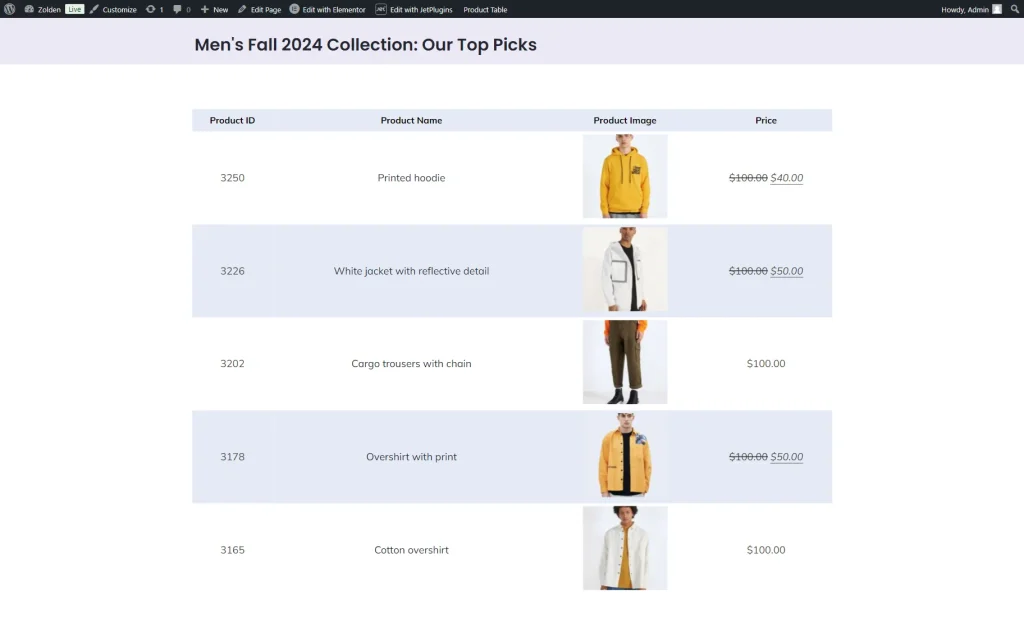
Once you complete the page editing, press the “Publish” button and proceed to the front-end page.
The product shortcode table is now presented here.
Product variations table
Let’s create one more shortcode table; this time, it will display product variations.
Return to WordPress Dashboard > WooCommerce > Settings and open the Product Table tab.
Then, click the “Generate Shortcode” button.
Select the “Product Variations” QUERY TYPE and pick the preferred option in the GET VARIATIONS FROM selector.
For instance, we leave the default “Current product” option to pull the variations of the current product.
Move to the following tabs. For instance, we go to the Columns tab and delete the “SKU” and “Rating/Reviews” columns.
Then, open the Design tab.
In the Table Headings tab, we set the TEXT COLOR and BACKGROUND COLOR.
After that, we add the FONT SIZE (“16”) and LINE HEIGHT (“30”).
In the Table Body tab, we set the BACKGROUND COLOR and ALTERNATE BACKGROUND COLOR.
Then, we set the BODY CELLS PADDING to “75.”
Press the “Generate Shortcode” button to re-open the generator pop-up.
Here, generate and copy the shortcode. Then, close the pop-up.
Press the “Save Settings” button.
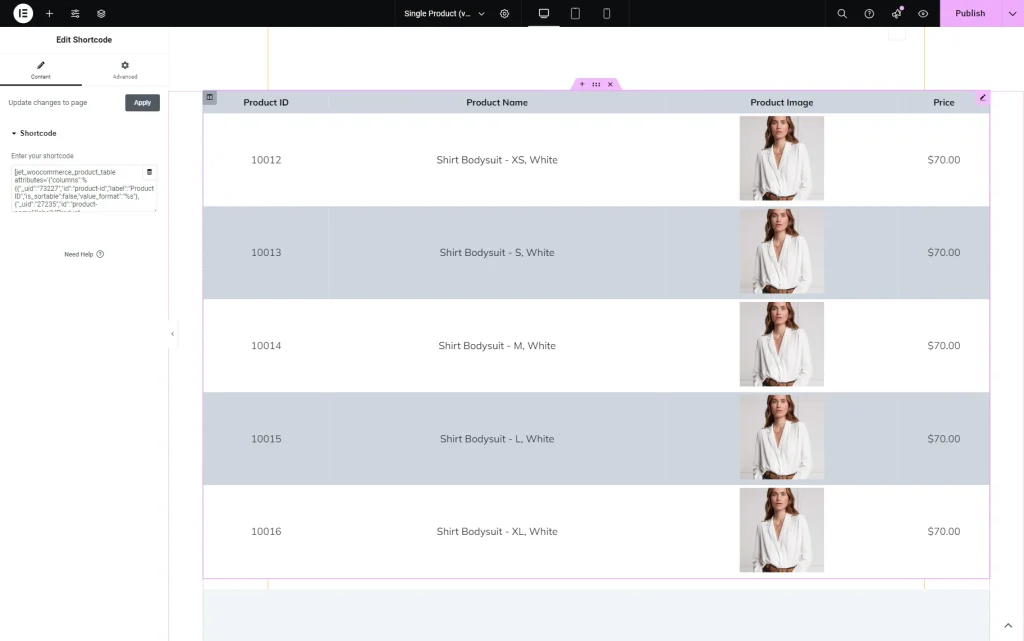
The next step is adding a shortcode table to the page/template. This time, we want to add a product variations table to the Single Product Template built with JetWooBuilder.
So, we proceed to WordPress Dashboard > Crocoblock > Woo Page Builder and open the previously built Single Product Template in Elementor.
Here, we add a Shortcode widget and enter the copied shortcode in the corresponding textarea field.
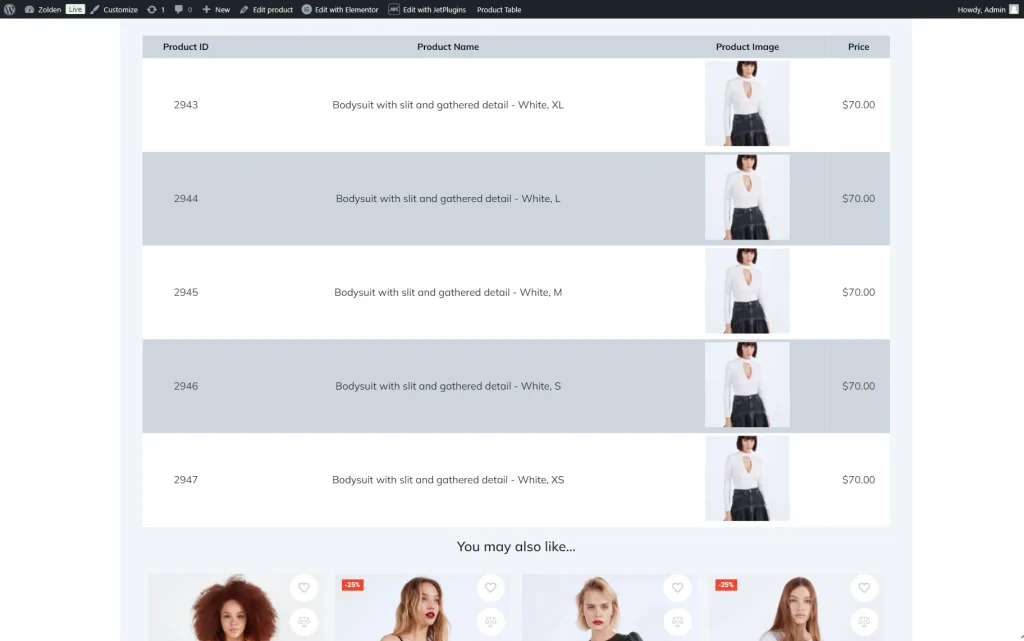
Once the page is ready, press the “Publish” button and proceed to one of the product pages on the front end.
The product variations table is now displayed here.
Also, watch our JetProductTables WordPress Plugin Overview video to learn more about the Shortcode Generator.
That’s all; now you know how to generate a shortcode for a product table made with the JetProductTables plugin.
