How to Manage Access Capability of Appointments
Discover how to manage the users’ access capability of appointments with the JetAppointments plugin for WordPress.
Before you start, check the tutorial requirements:
- JetEngine plugin installed and activated
- JetAppointment plugin installed and activated
Initially, open the functions.php file of your child theme. Optionally, you can use a plugin for code snippets to paste filter codes there. For example, in this guide, we use the Code Snippets plugin.
So, we navigate to WordPress Dashboard > Snippets > Add New. Now, we want to add a filter that will change the needed access capability name to access the appointments list page.
If you also use Code Snippets, give a name to the snippet and paste the following code in the corresponding code area:
add_filter( 'jet-apb/page/jet-apb-appointments/capability', function() {
	return 'edit_posts';
} );
where:
- jet-apb/page/$page_slug/capability — a hook name;
- jet-apb-appointments — a list of the appointments in the WordPress Dashboard > Appointments > Appointments directory;
- edit_posts — is a capability name. It can be changed depending on the capability you need. For more information, check the Roles and Capabilities guide.
The current snippet will activate the Appointments directory for the “Editor” use role.
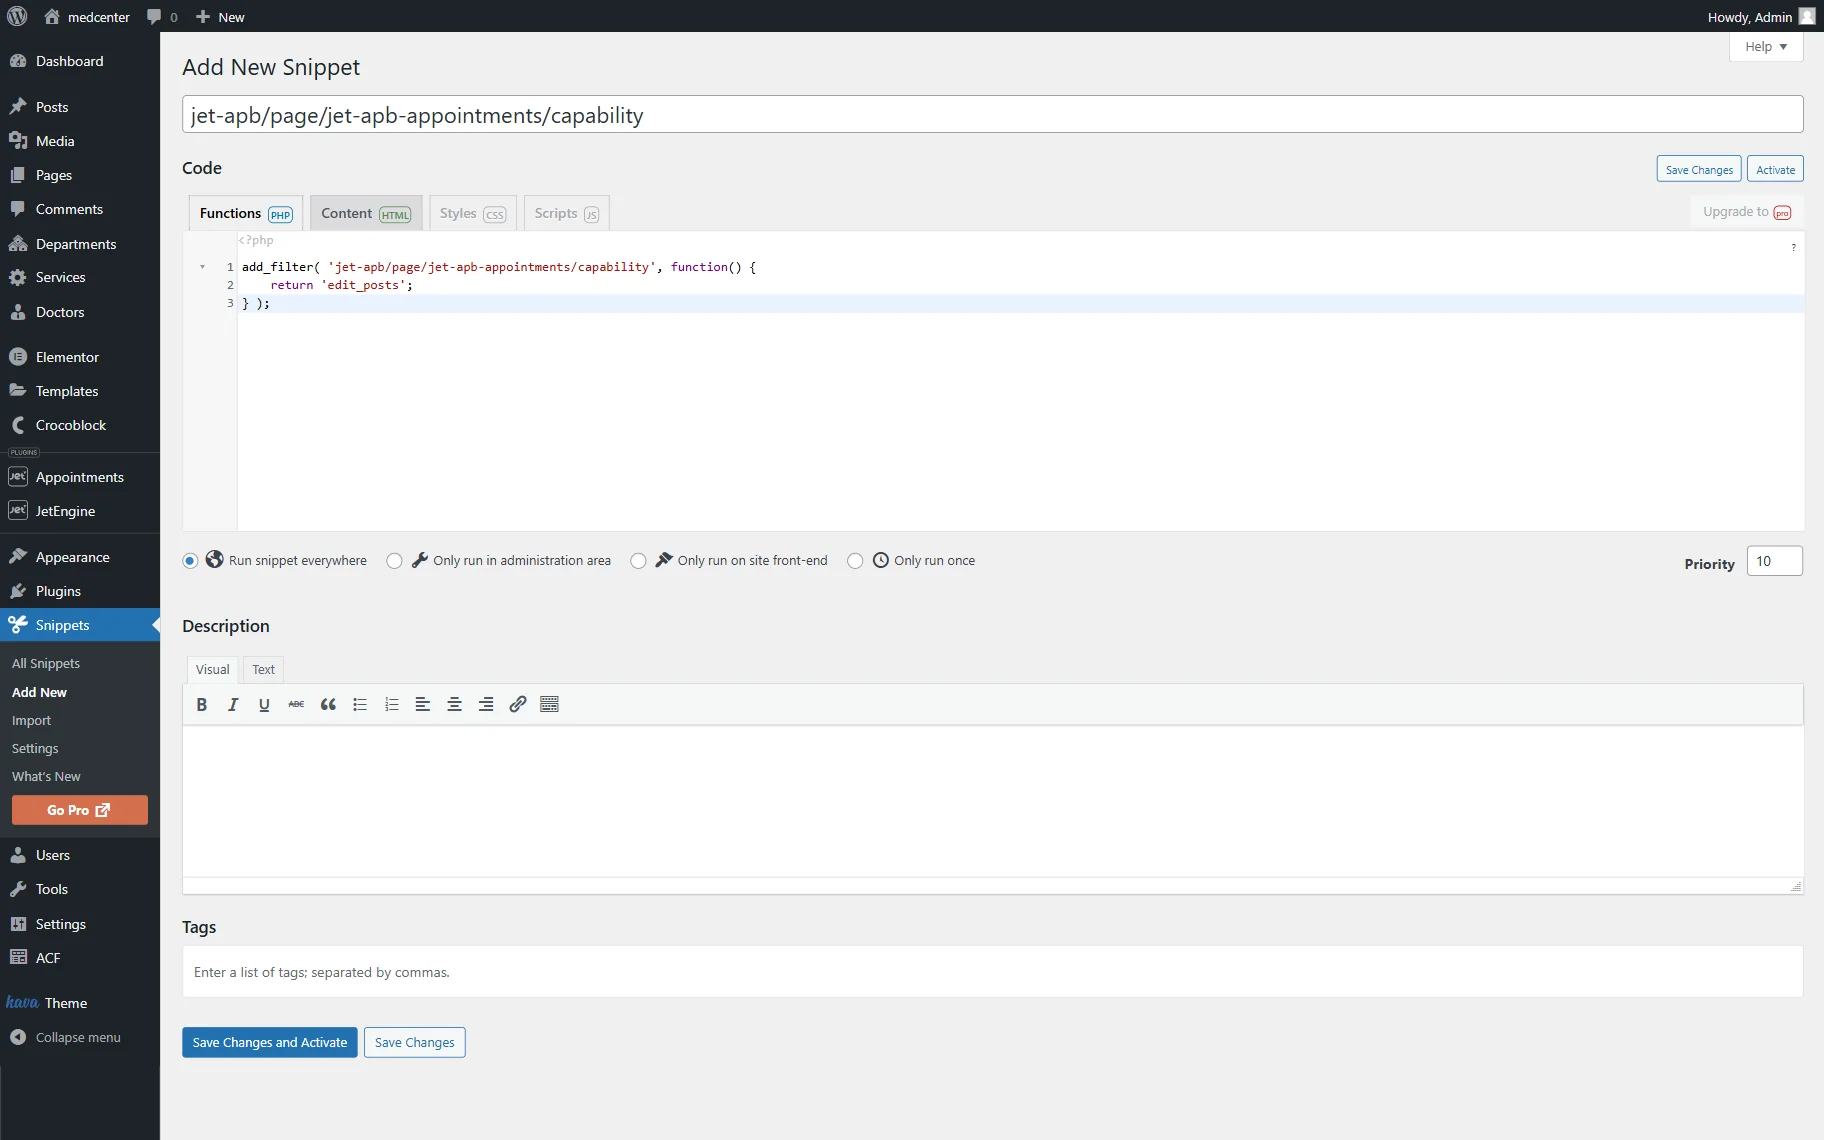
Press the “Save Changes and Activate” button.
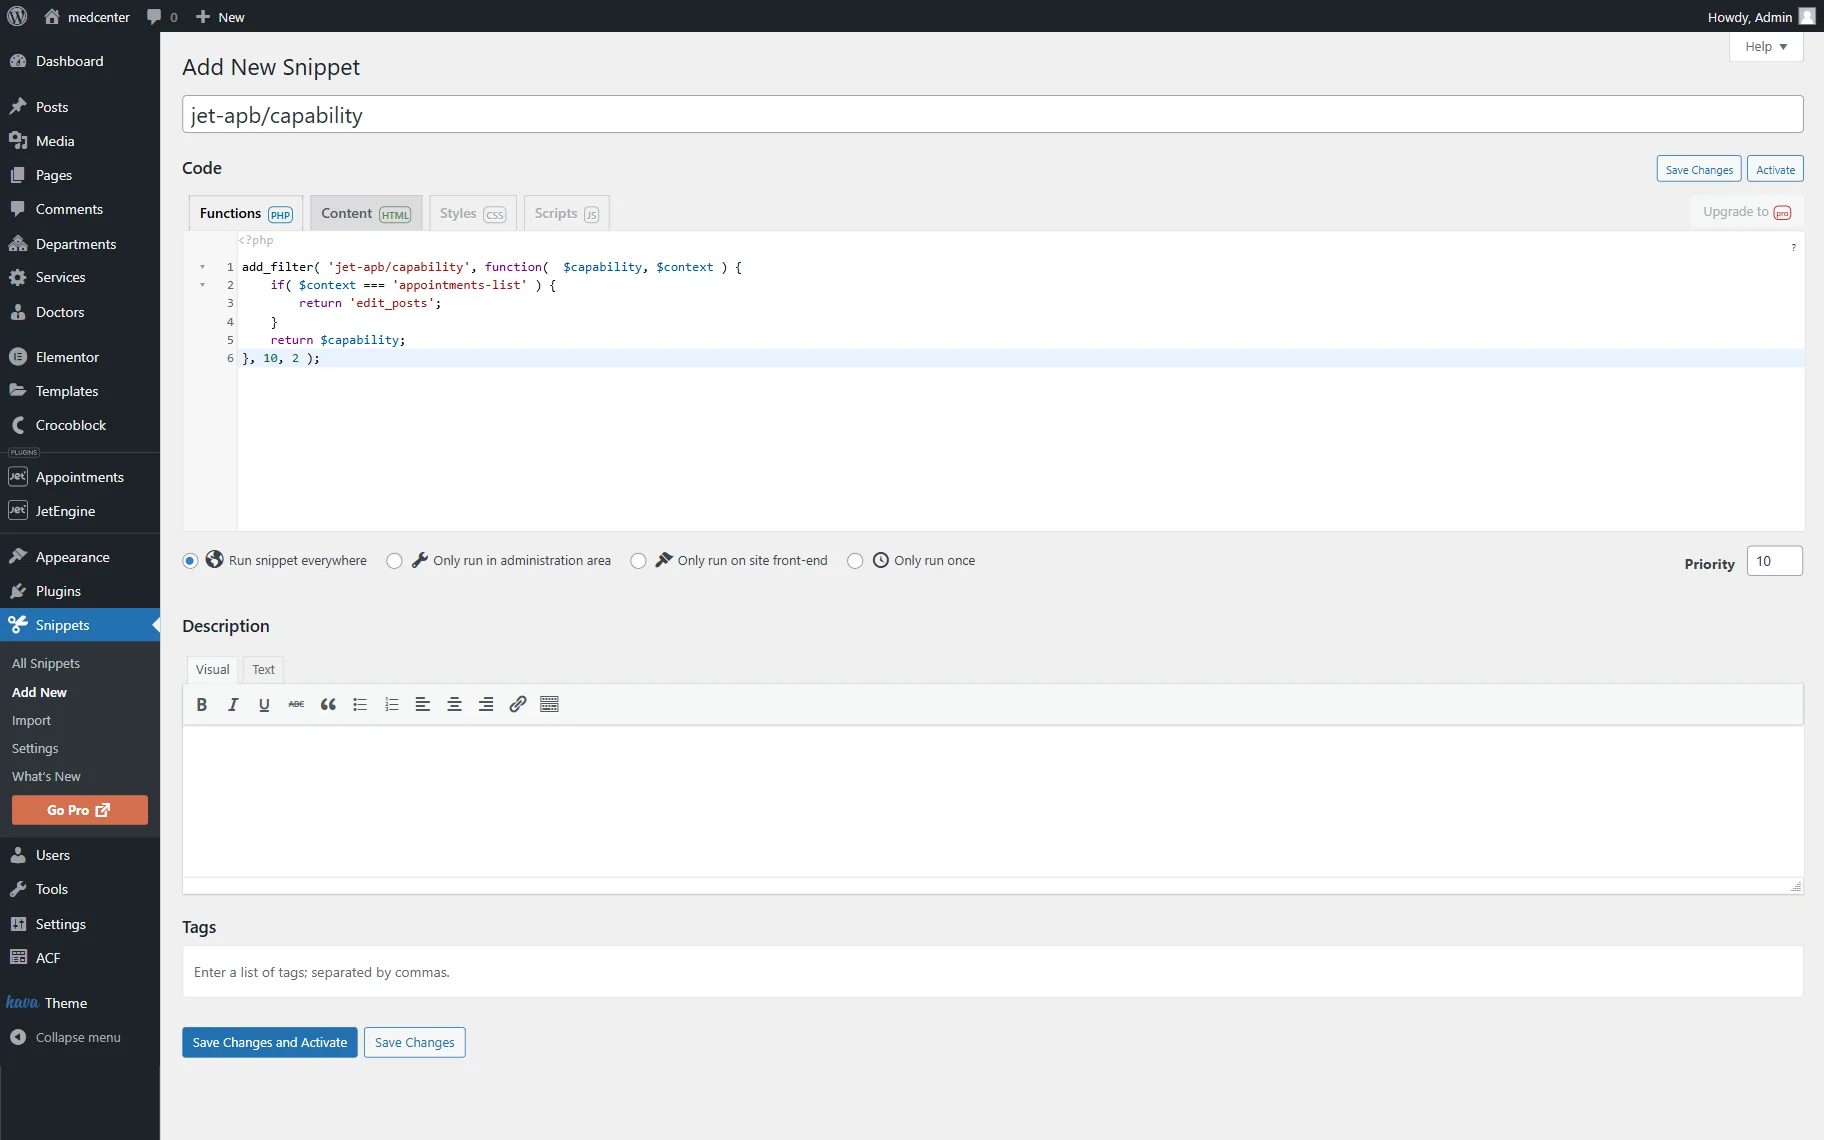
The first option you can add is the filter that changes the access capability name with the help of endpoints.
To add it, return to WordPress Dashboard > Snippets > Add New and name the snippet.
Paste the following snippet to the code snippet area:
add_filter( 'jet-apb/capability', function(  $capability, $context ) {
	if( $context === 'appointments-list' ) {
		return 'edit_posts';
	}
	return $capability;
}, 10, 2 );
where:
- jet-apb/capability — a hook name;
- appointments-list — an endpoint that is used as a context. This exact endpoint allows seeing the appointments list;
- edit_posts — is a capability name. It can be changed depending on the capability you need. For more information, check the Roles and Capabilities guide.
You can use the following endpoints in the code:
- appointment-add-appointment — to be able to add appointments from the admin dashboard;
- appointment-meta — to be able to see metadata from the admin dashboard;
- appointments-list — to get the appointments list;
- delete-appointment — to be able to delete appointments;
- appointment-zoom-token — to get access to the appointment zoom token;
- get-appointment — to get information about appointments by ID;
- update-appointment — to be able to update appointments;
- update-appointment-integrations — to be able to update appointment integrations;
- update-appointment-workflows — to be able to update appointment workflows.
If several allowed contexts are needed to be added, it can be done with the code like this:
add_filter( 'jet-apb/capability', function( $capability, $context ) {
    $allowed_contexts = [
        'appointment-add-appointment',
        'appointments-list',
    ];

    if ( in_array( $context, $allowed_contexts, true ) ) {
        return 'edit_posts';
    }

    return $capability;
}, 10, 2 );
The second filter that you can add works based on the user ID. It completely rewrites the validation and not only changes the access capability name.
Open the WordPress Dashboard > Snippets > Add New directory again.
Paste the code snippet:
add_filter( 'jet-apb/current-user-can', function( $option, $context ) {
	if( ( $context === 'appointment-add-appointment' ) && get_current_user_id() === 3 ) {
		return true;
	}
	return $option;
}, 10, 2 );
where:
- jet-apb/current-user-can — a hook name;
- appointment-add-appointment — an endpoint, the allowed context;
- 3 — a user ID;
- true — a value that indicates if the user role gets permission. It can be set to “true” or “false”.
For this filter, you can also add several contexts if needed.
Now, the user with the corresponding role can log in to the account and check the Appointments dashboard. Here, we log in to the account with the “Editor” role.
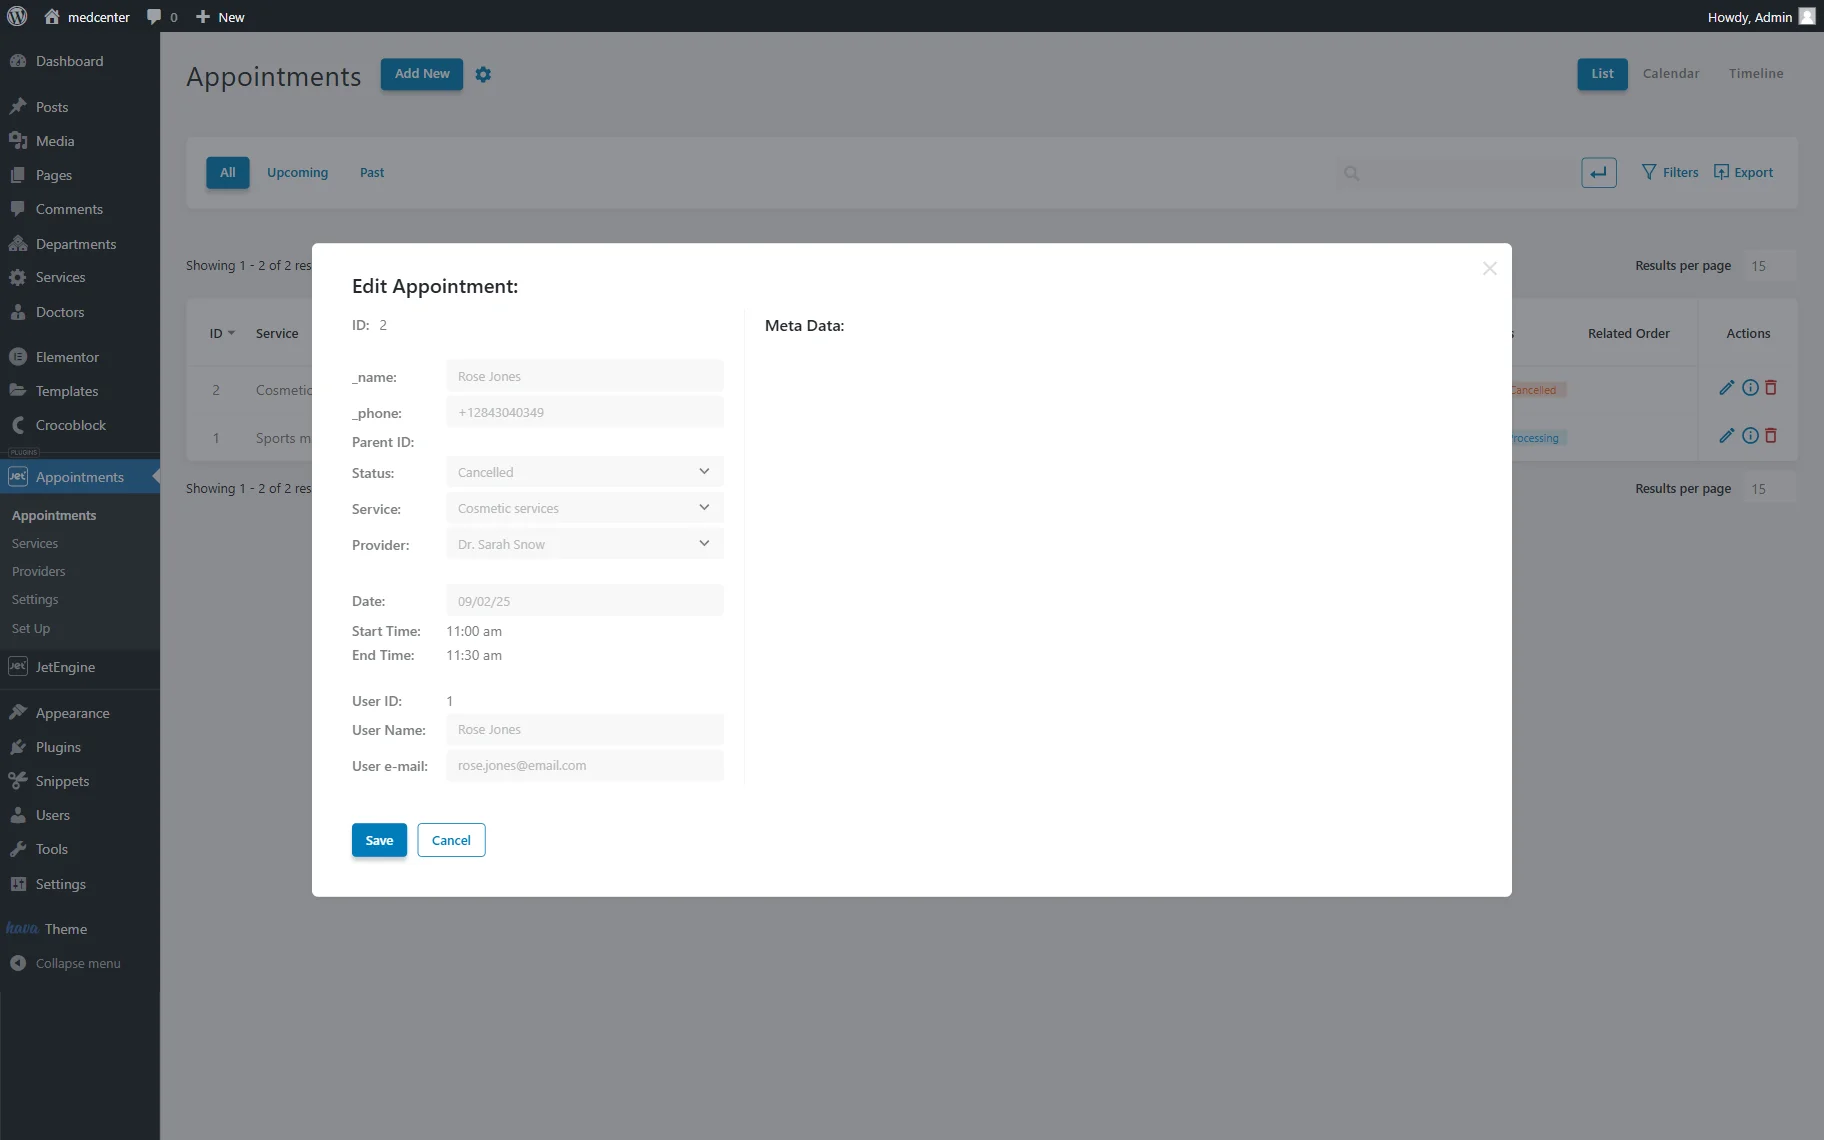
As you can already observe, the WordPress Dashboard > Appointments > Appointments dashboard becomes available to the user.
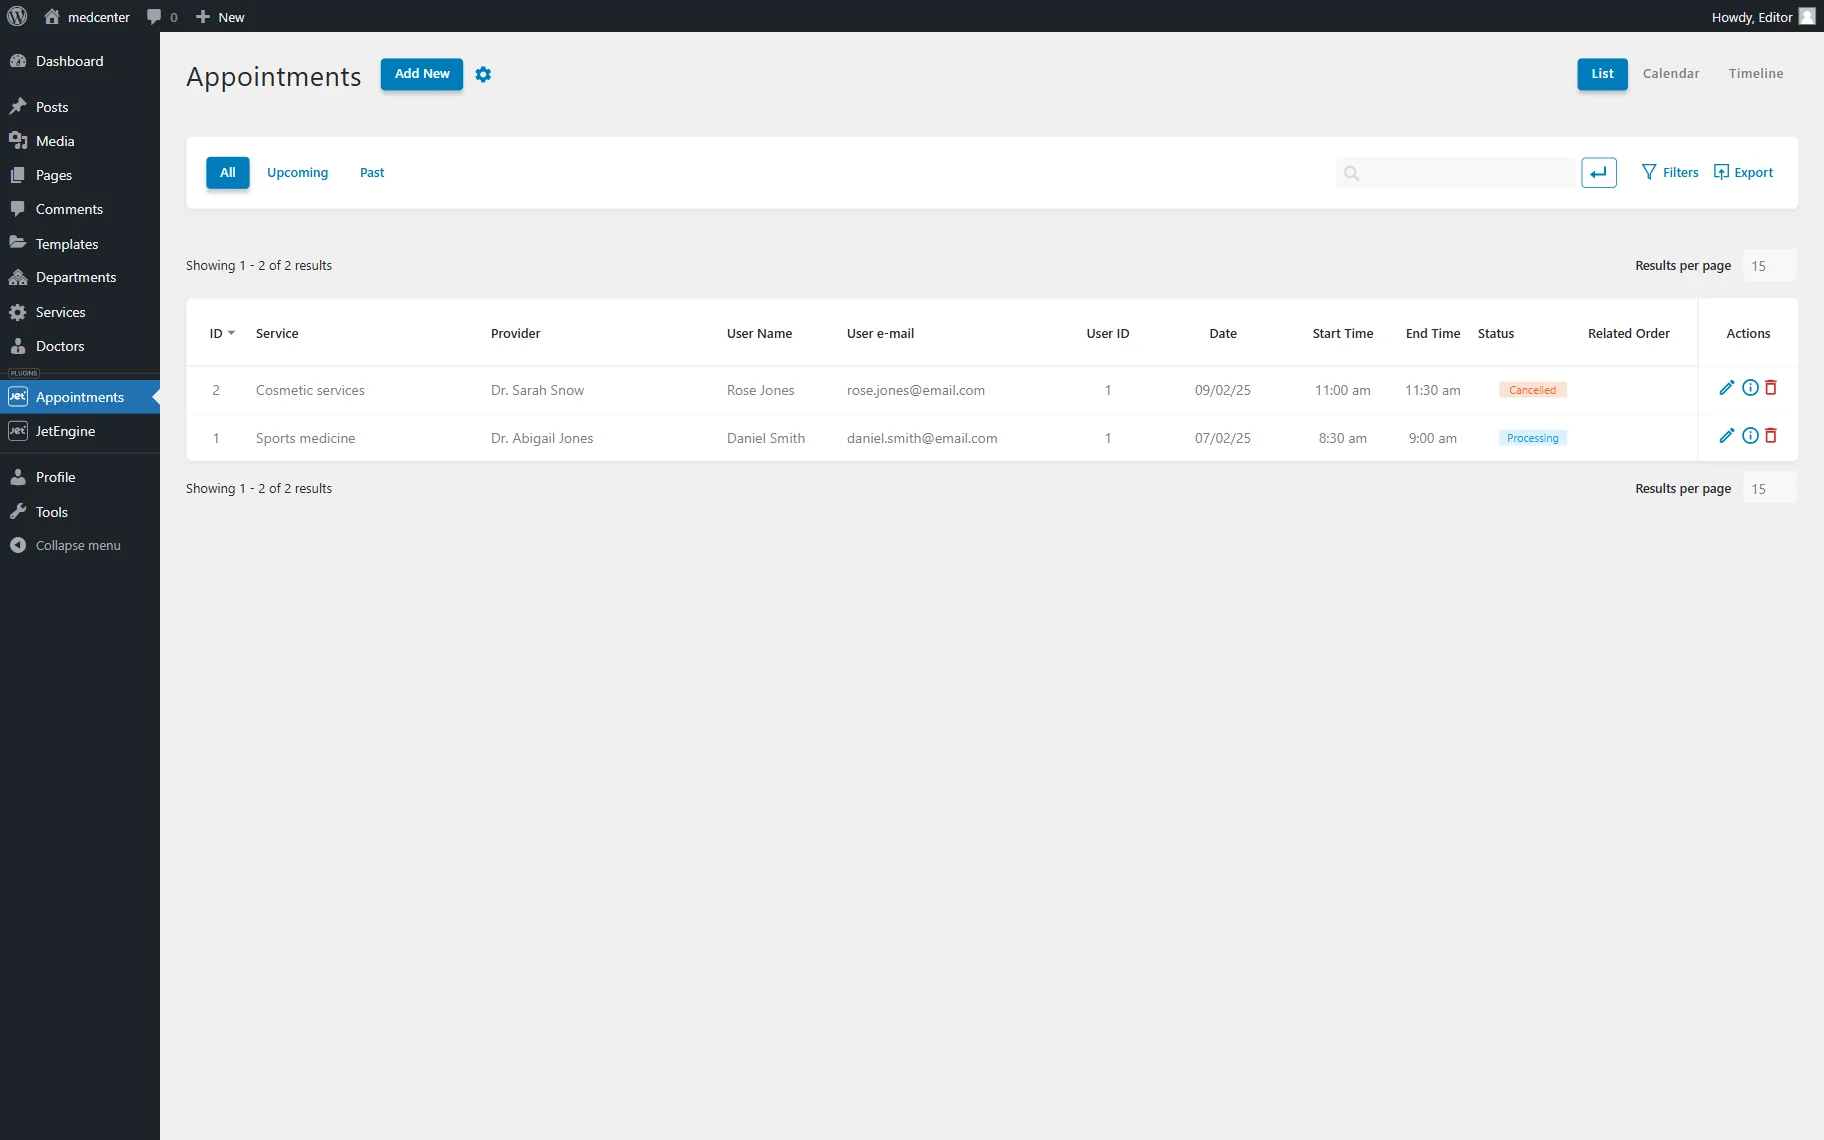
Next, depending on the given capabilities, the user can manage the appointments.
That’s all; now you know how to manage appointments with the JetAppointments plugin for WordPress websites.