Appointment Confirmations Overview
Discover JetAppointment’s feature to turn appointment confirmations into just a basic workflow on your WordPress website.
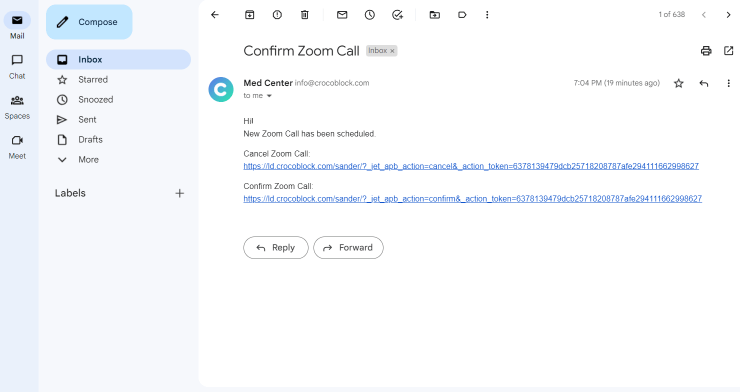
Fundamentally, appointment confirmation with JetAppointment allows you to send an email to the service provider where they can approve or cancel the appointment by following one of the presented links.
Now let’s find out how to adjust this process to work like clockwork.
Primarily, go to WordPress Dashboard > Appointments > Settings and open the Advanced tab.
Pay attention to the Generate Confirmation URLs toggle. It is an essential feature to be enabled if you want to set up everything correctly.
By activating it, you allow creating and storing a unique token for each appointment. Further, this token can be added to the URL to change the desired appointment without being tied to the user on the website.
Therefore, once the user creates an appointment, a token and URLs for confirming and canceling will be recorded in the appointment metadata.
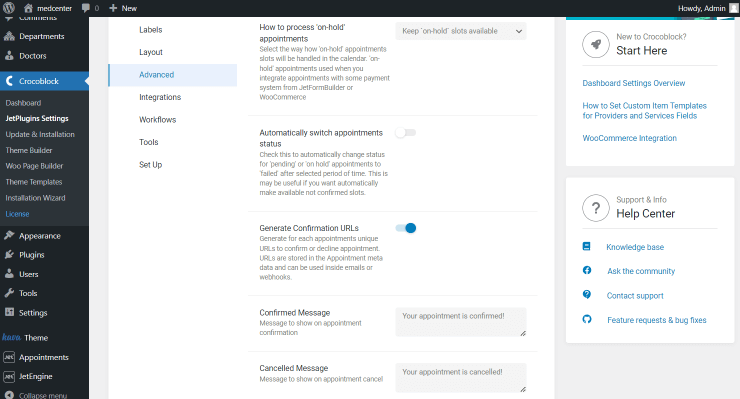
- Generate Confirmation URLs — activate this toggle to generate URLs for appointment confirmations and cancellations. They can be used later for emails and webhooks;
- Confirmed Message — fill in the message displayed once the appointment has been approved;
- Canceled Message — complete the message shown after the appointment cancellation.
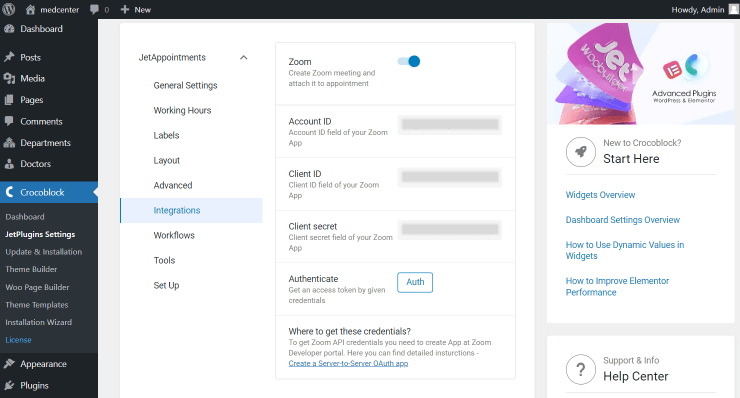
Paste the credentials you can get once you create the Zoom Server-to-Server OAuth app.
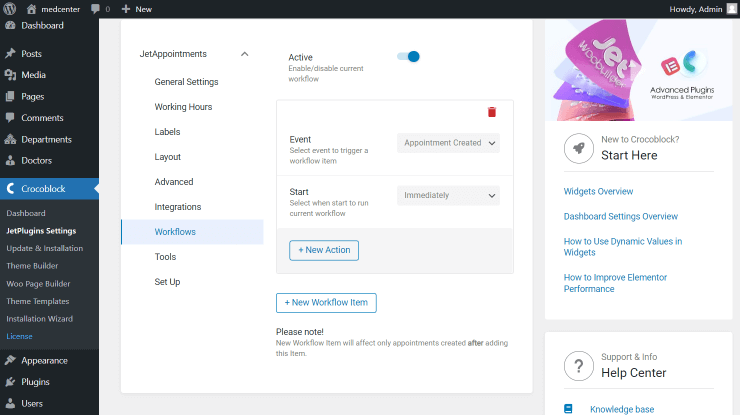
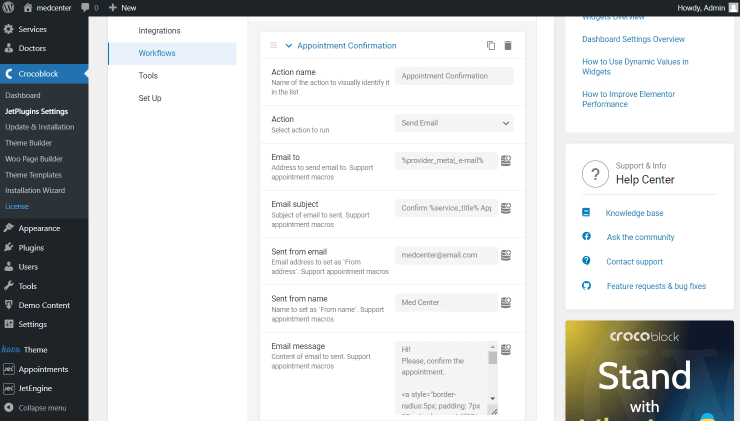
Find out more about the Appointments Workflows and Workflows tab to check how we can set up the email with a confirmation email.
Create a new workflow by pressing the “Add New Workflow” button. Complete the fields according to your needs.
Add a new action by pressing the samely named button.
Adjust the “Send Email” Action. You can set it up similarly to the shown example to integrate the Zoom appointment confirmation.
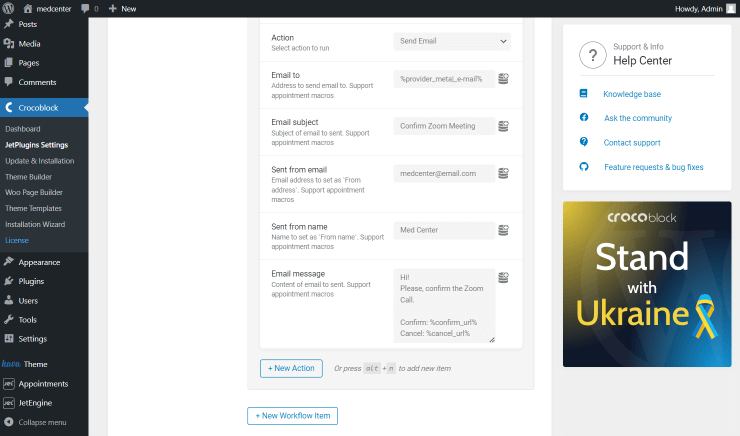
Or, make these macros a part of the confirming usual appointment via the link process. You don’t need to activate the Zoom integration in the Integrations tab this time. Just complete the fields accordingly.
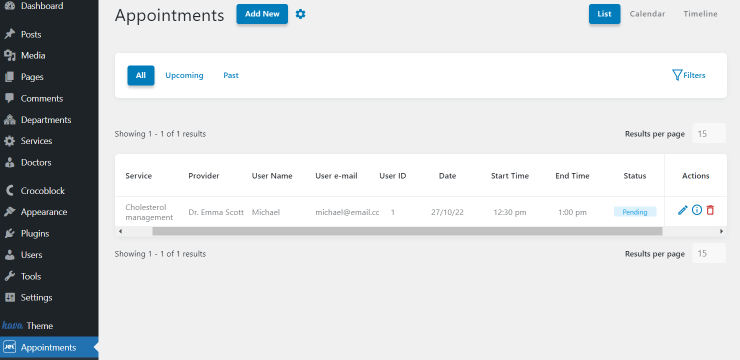
That’s how appointments look in the WordPress Dashboard > Appointments directory. Check the complete Appointments Dashboard Overview.
Now the appointment’s status is “Pending.”
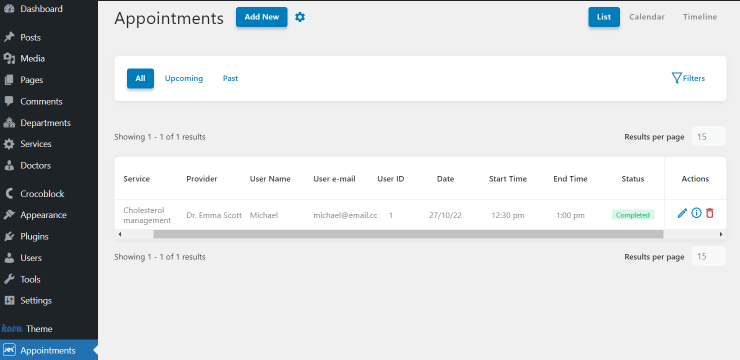
After the appointment confirmation, the status is changed automatically to “Completed.”
 >
>
Though if the appointment is canceled, the user can’t approve it by following the confirmation link. It is since the token is being deleted on this step to avoid confusion if somebody books an appointment simultaneously.
Let’s look at the email the service provider will get.
That’s it for the appointment confirmation settings. Now you know how to adjust the settings to get the well-established system of sending messages for appointment confirmation.