How to Use CartFlows Variations Swatches Inside JetEngine’s Listing
In this guide, you will find out how to display the CartFlows product variation swatches in the JetEngine’s Listing Grid using the Woo Data functionality for WordPress websites.
Before you start, check the tutorial requirements:
- Elementor (Free version), Block editor (Gutenberg), or Bricks
- WooCommerce plugin installed and activated
- CartFlows Variations Swatches plugin installed and activated
- JetEngine + CartFlows Variations Swatches addon installed and activated
- JetEngine plugin installed and activated
Build a WooCommerce Query
First, we should add a query that will be later used as a source for the listing template, where the Woo Data will be displayed.
So, we navigate to WordPress Dashboard > JetEngine > Query Builder and press the “Add New” button.
On the opened page, specify the Name of the query in the General Settings section (here, “WC Query”) and select the “WC Product Query” Query Type.
Next, we move to the WC Product Query and select the “Published (publish)” Product Status and “variable” Product Type.
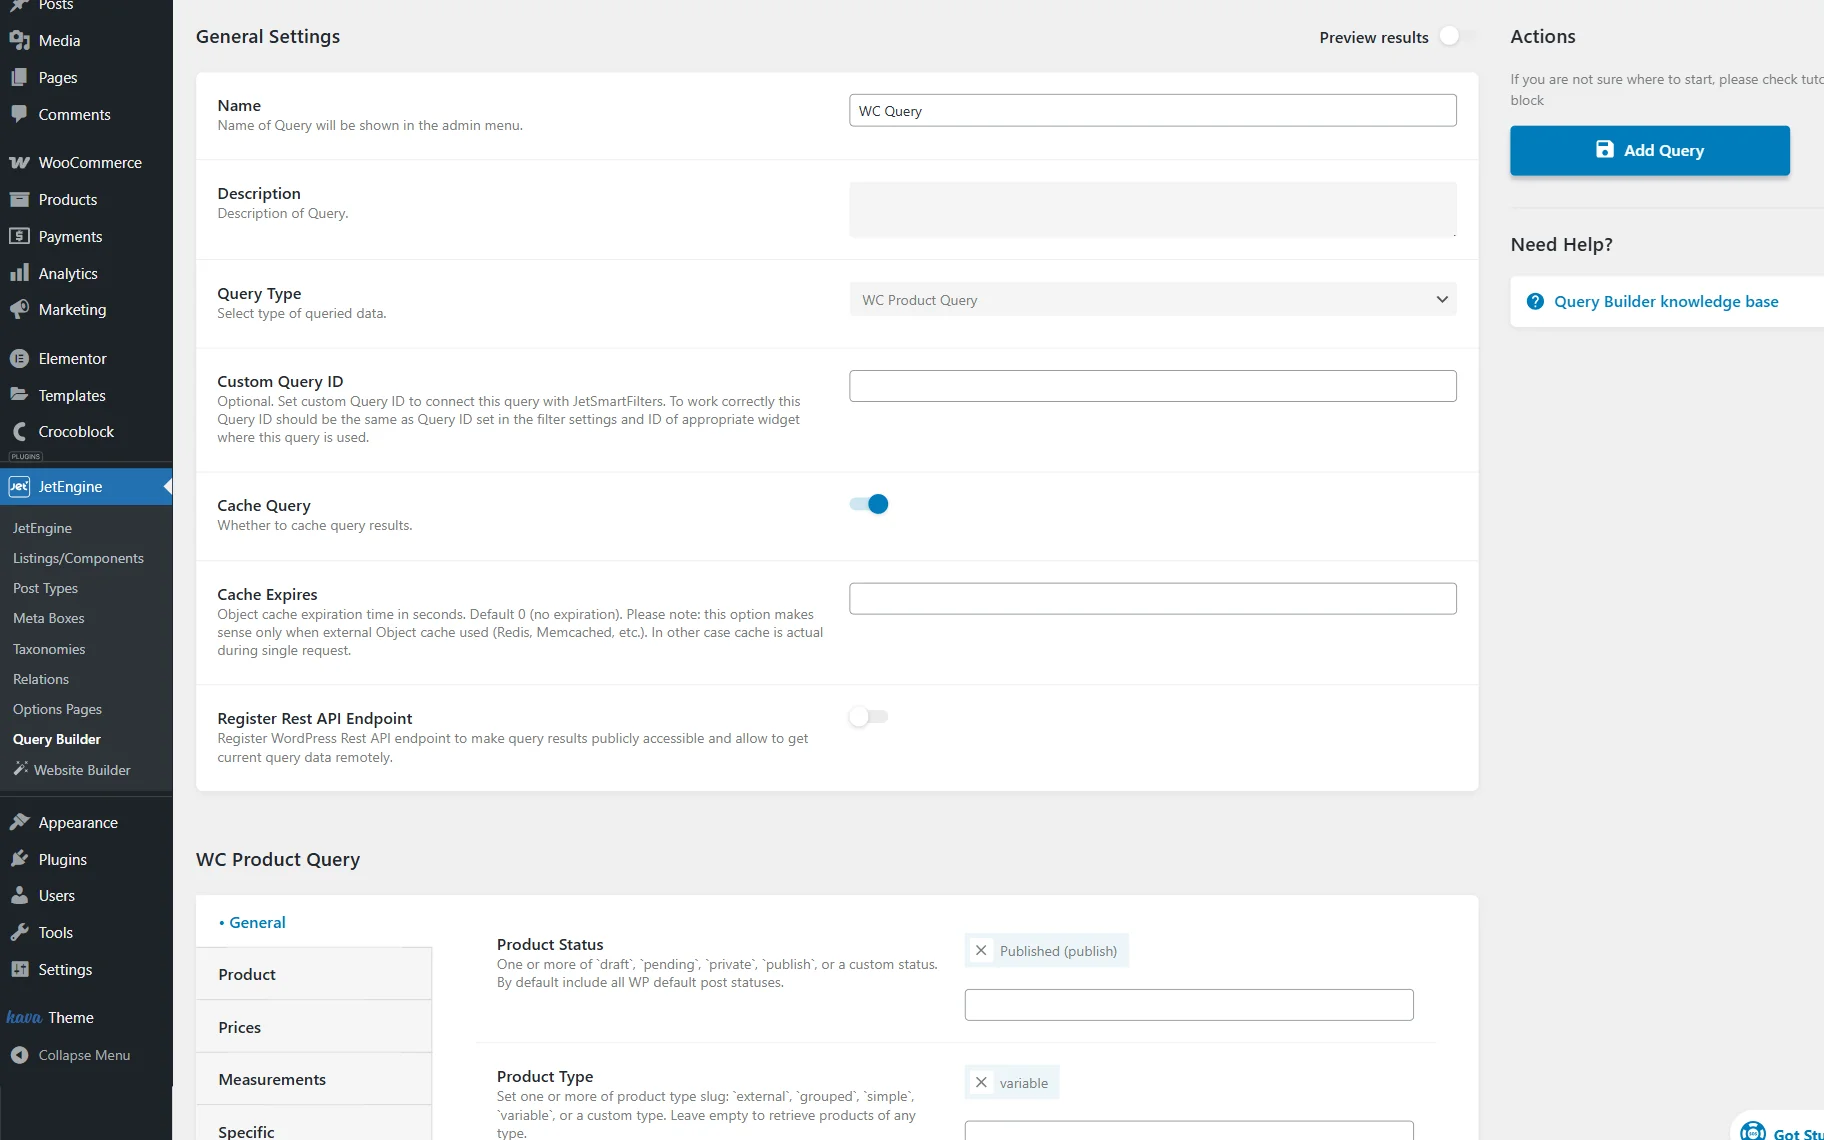
Adjust other settings in the query if needed, and press the “Add Query” button when ready.
Create a Listing
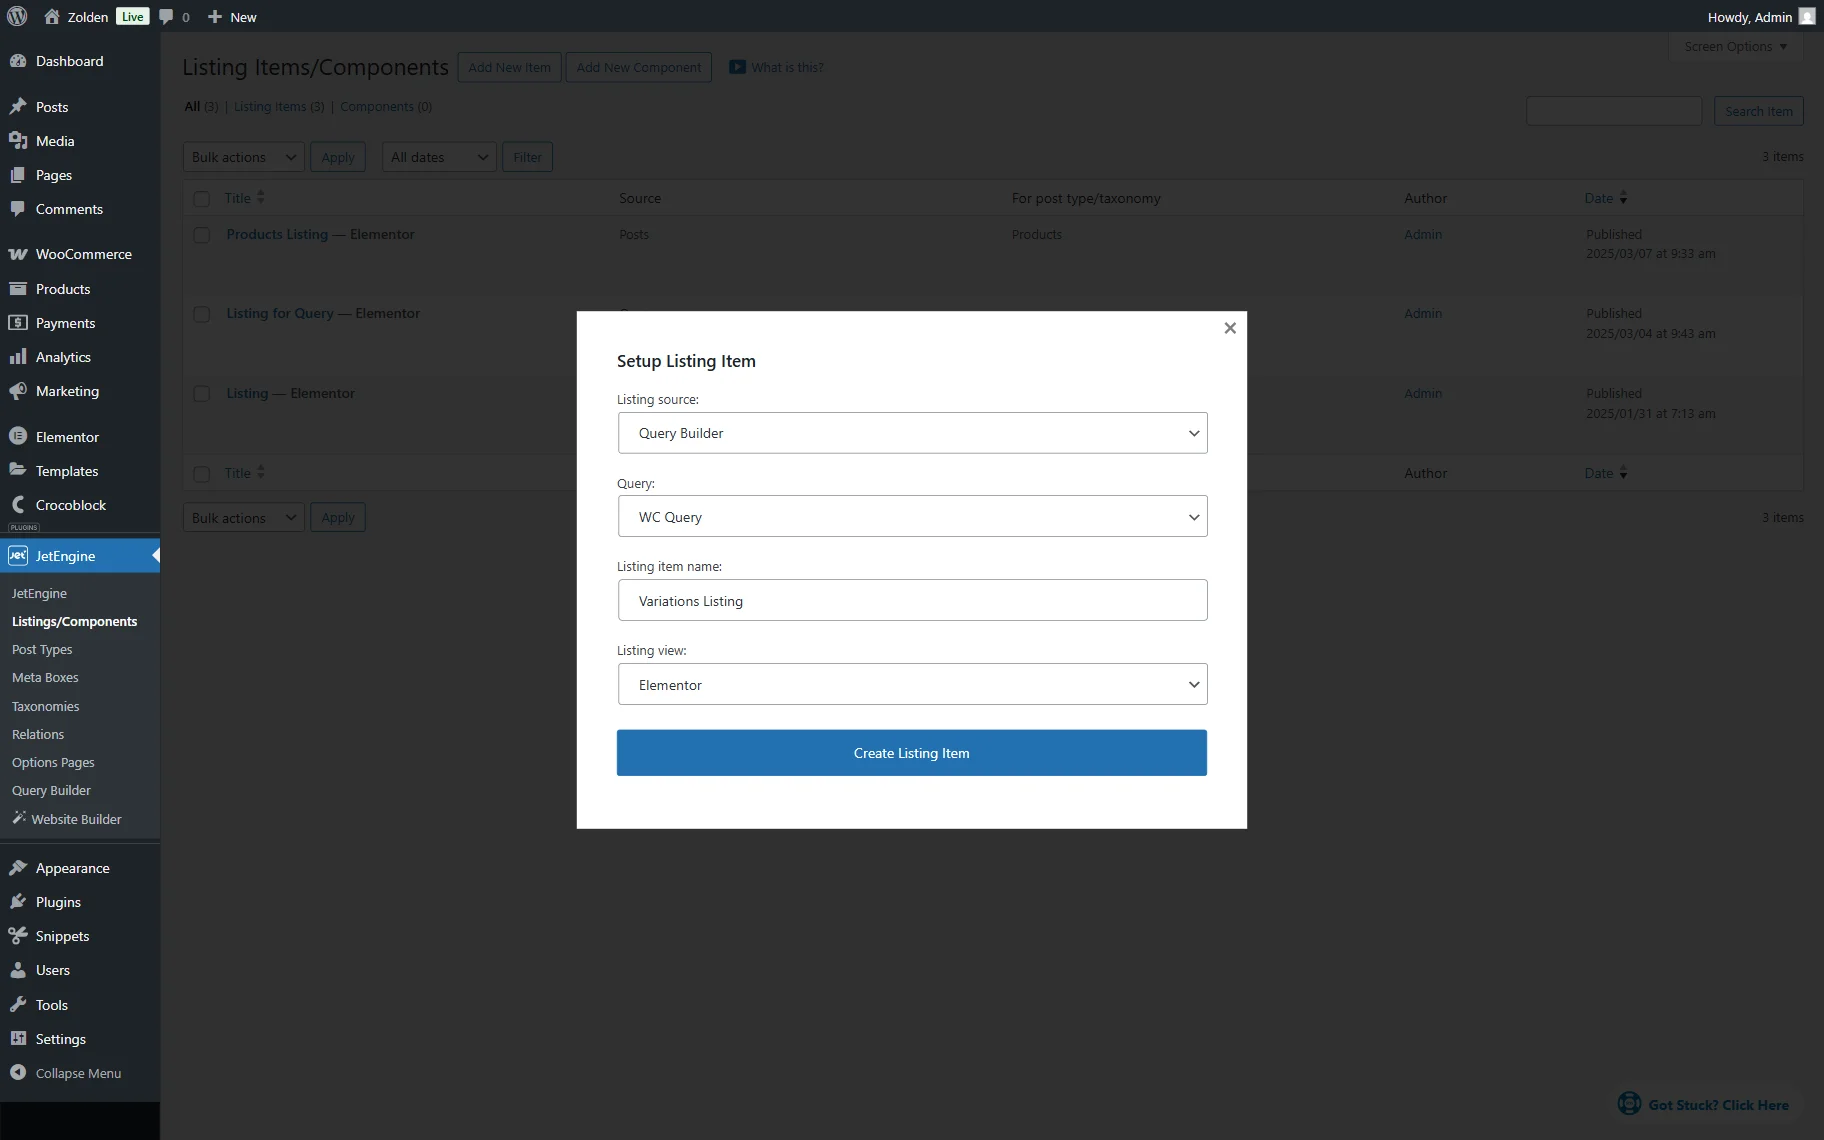
It’s time to build a listing template. Move to the WordPress Dashboard > JetEngine > Listing/Components directory and hit the “Add New Item” button to open the pre-editing pop-up.
In the pop-up, select “Query Builder” Listing source, your query’s name in the Query dropdown, set the Listing item name, and select the preferred editor in the Listing view dropdown. Among the options where the Woo Data will be available are “Elementor,” “Blocks (Gutenberg),” and “Bricks.” For example, we select the Elementor builder.
Press the “Create Listing Item” to proceed to the editor.
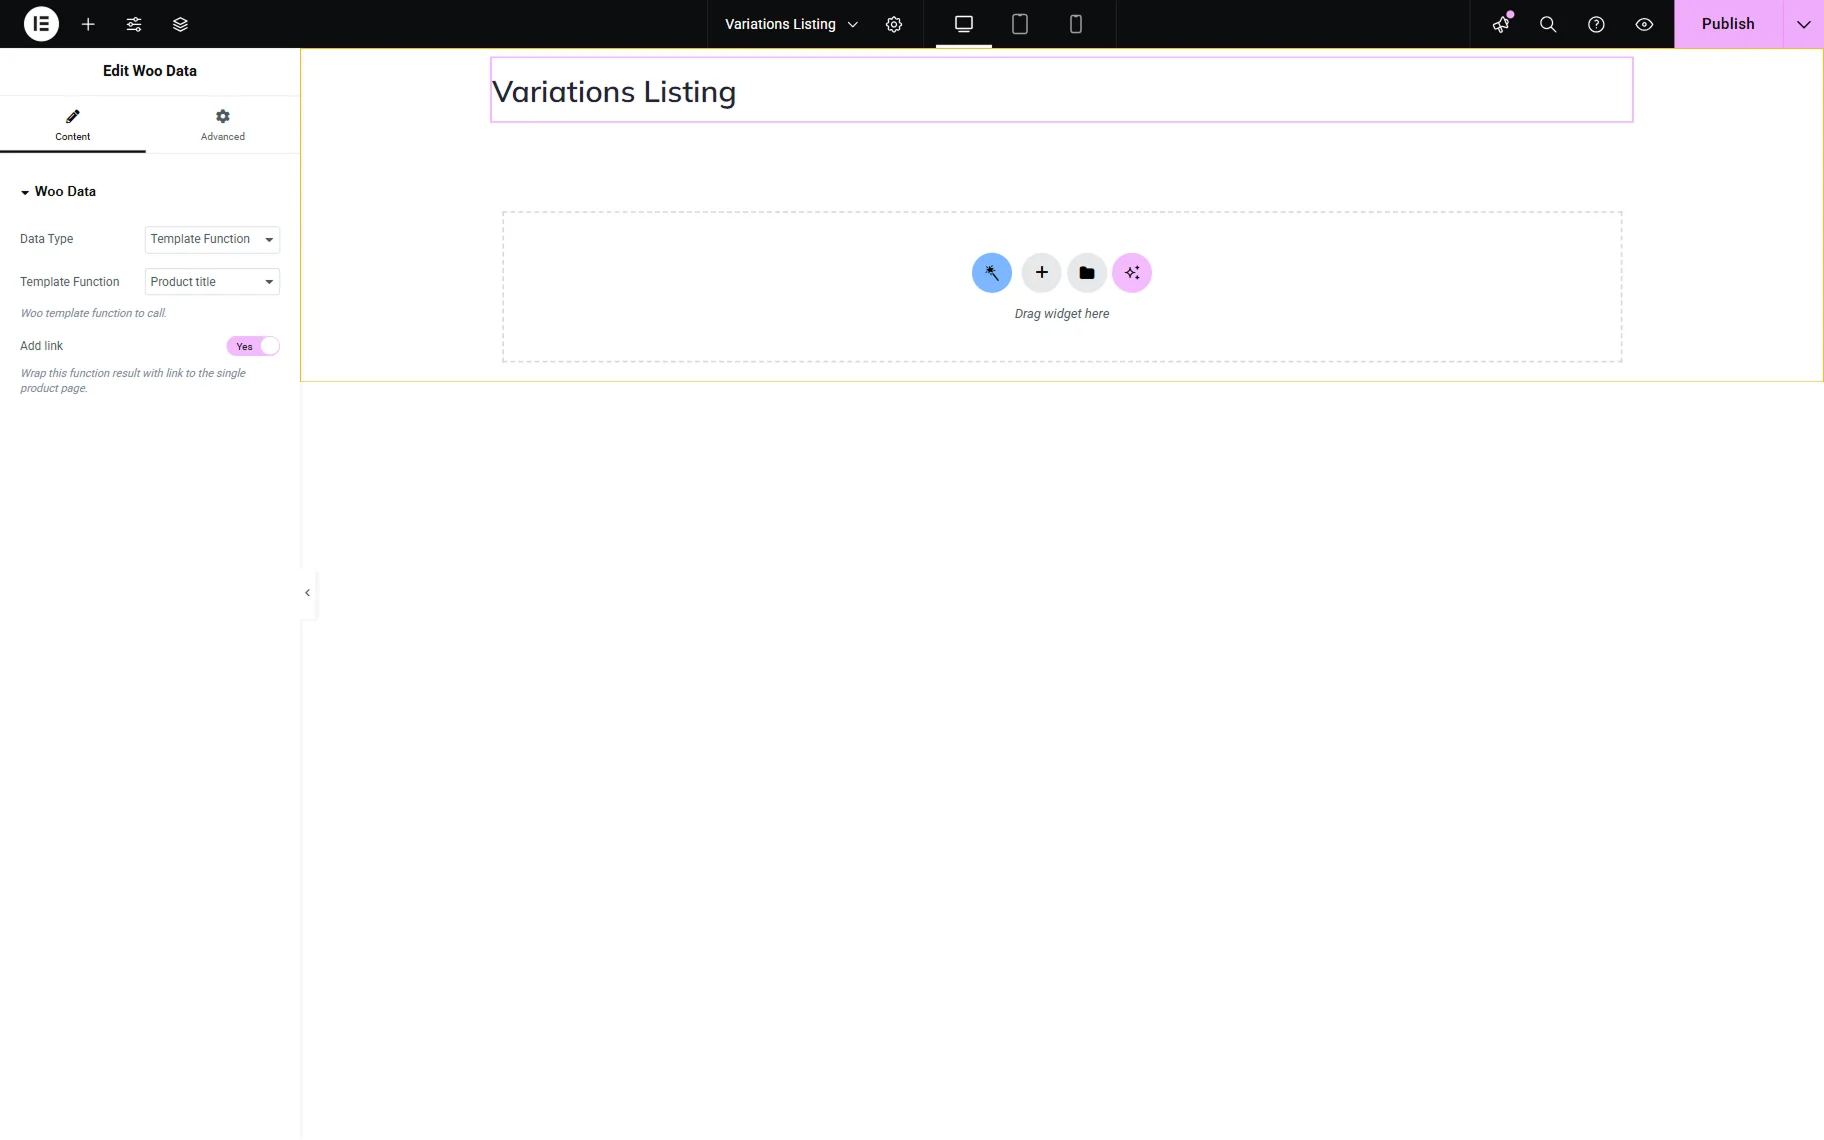
When the editor is opened, find and add a Woo Data block/widget/element to the page.
For example, first we want to add a product title, so we select the “Template Function” Data Type and specify the Template Function itself, “Product title.”
We also activate the Add link toggle so the title will lead to the single product page when clicked.
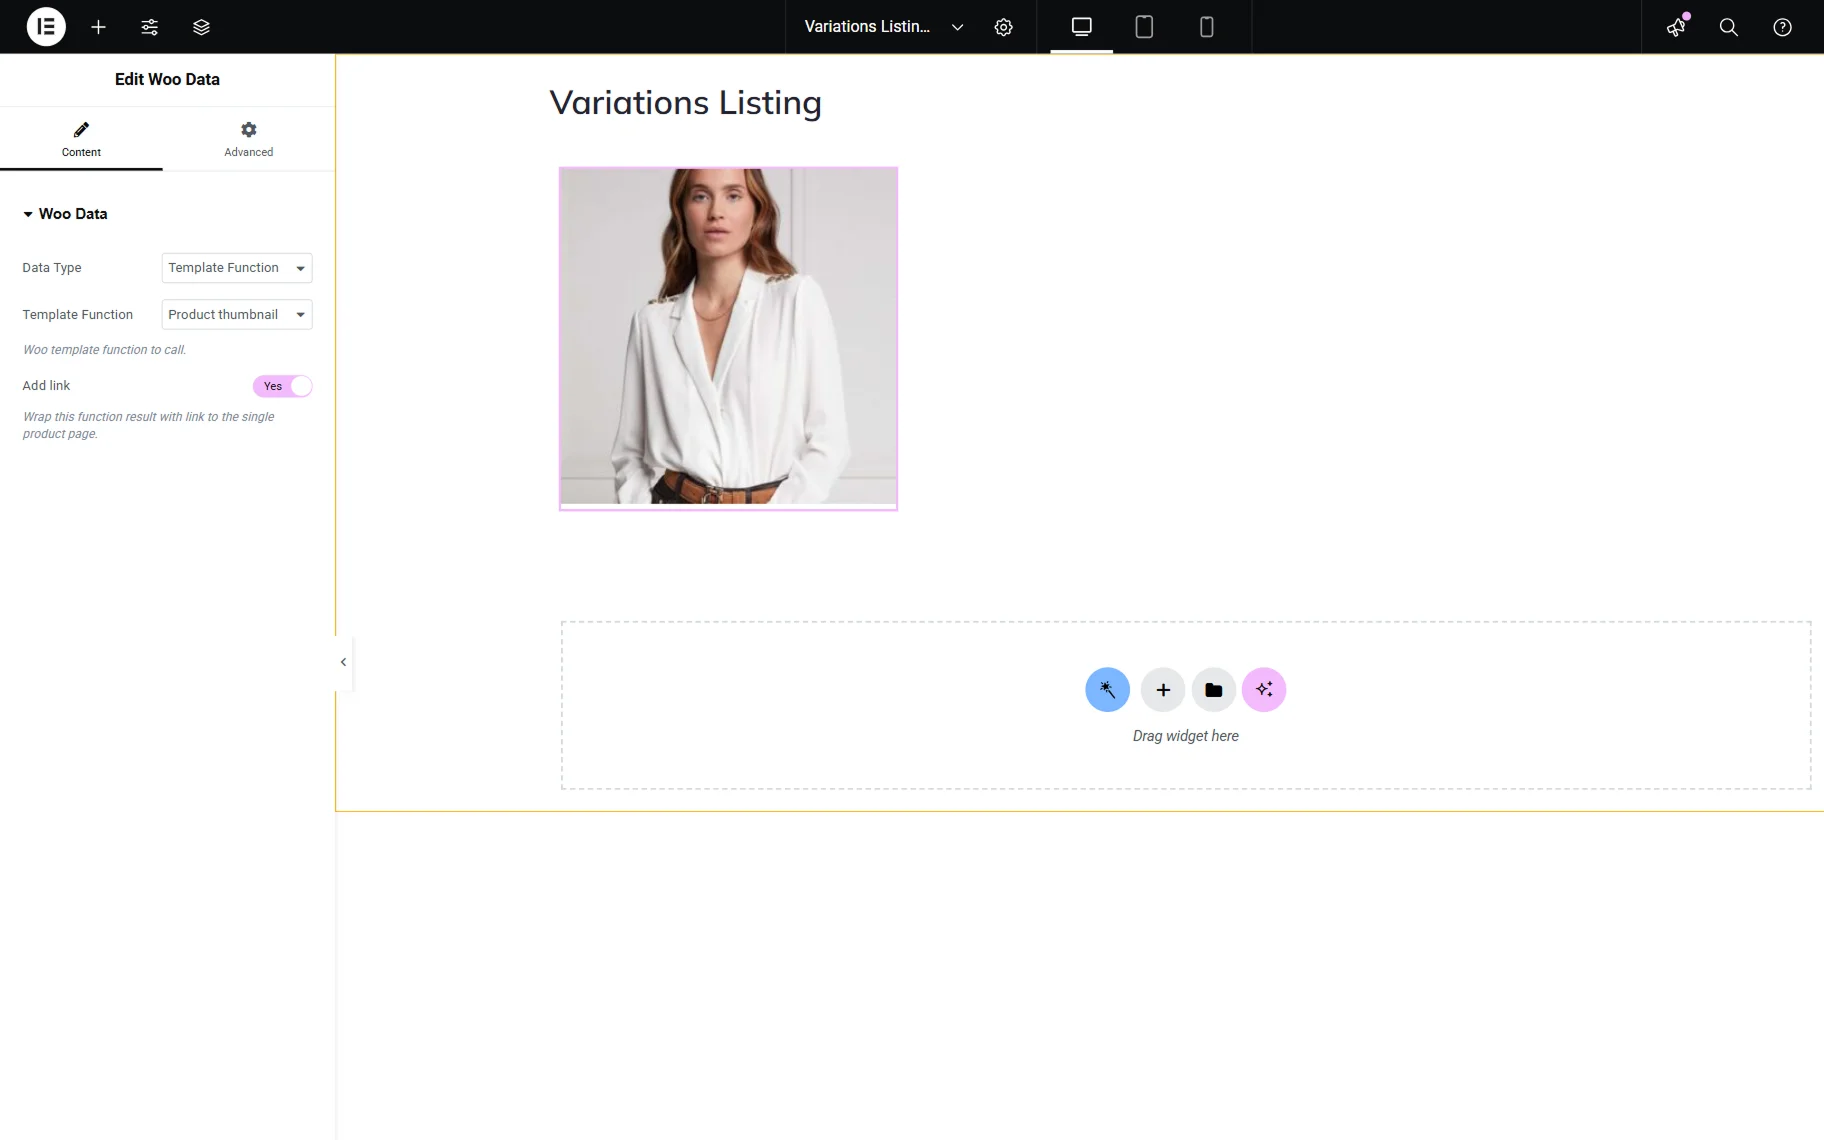
Next, we add one more Woo Data widget, also with the “Template Function” Data Type, but this time with the “Post thumbnail” Template Function.
Here, the Add link toggle is also activated, so when the image is clicked, it will redirect to the single product page.
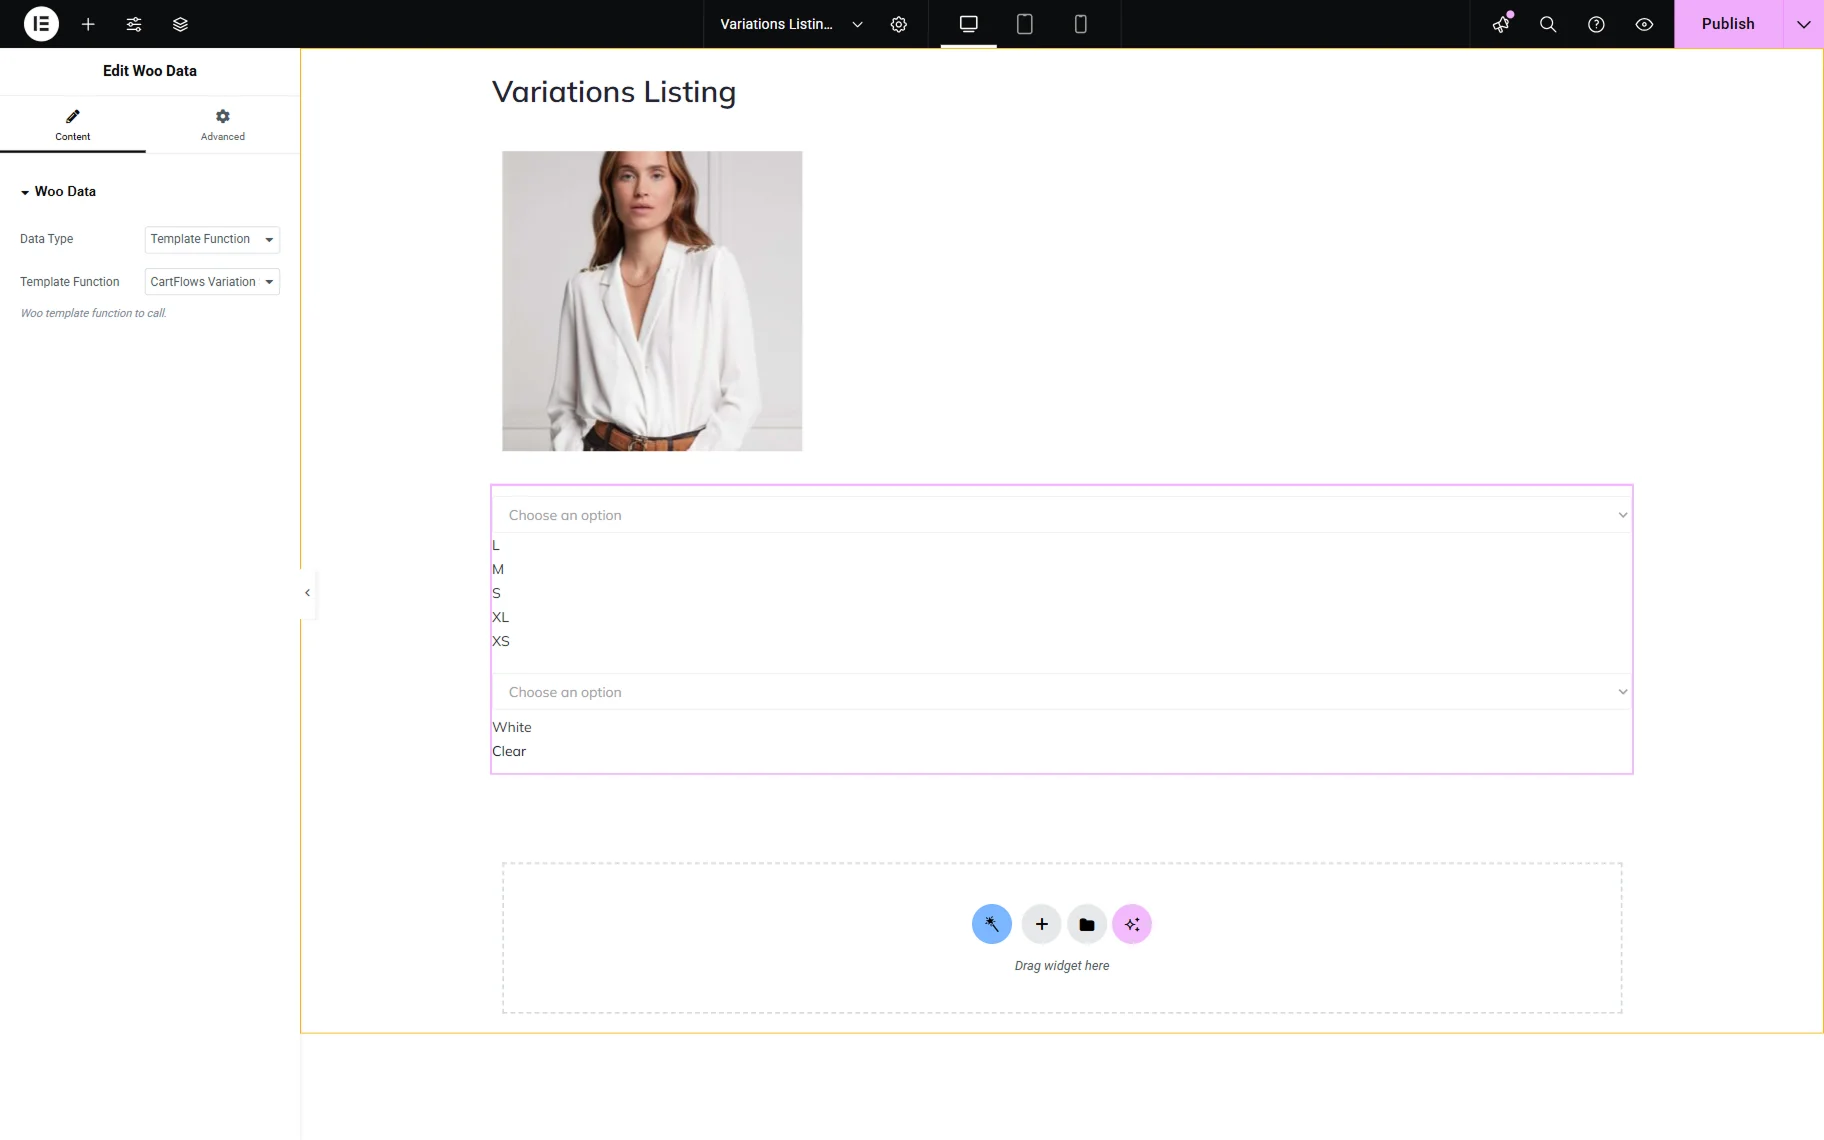
Add the next Woo Data widget and set it to “Template Function” Data Type, too. This time, select the “CartFlows Variation” option.
This option will display the variation swatches. Mind that they will look proper later on the front end.
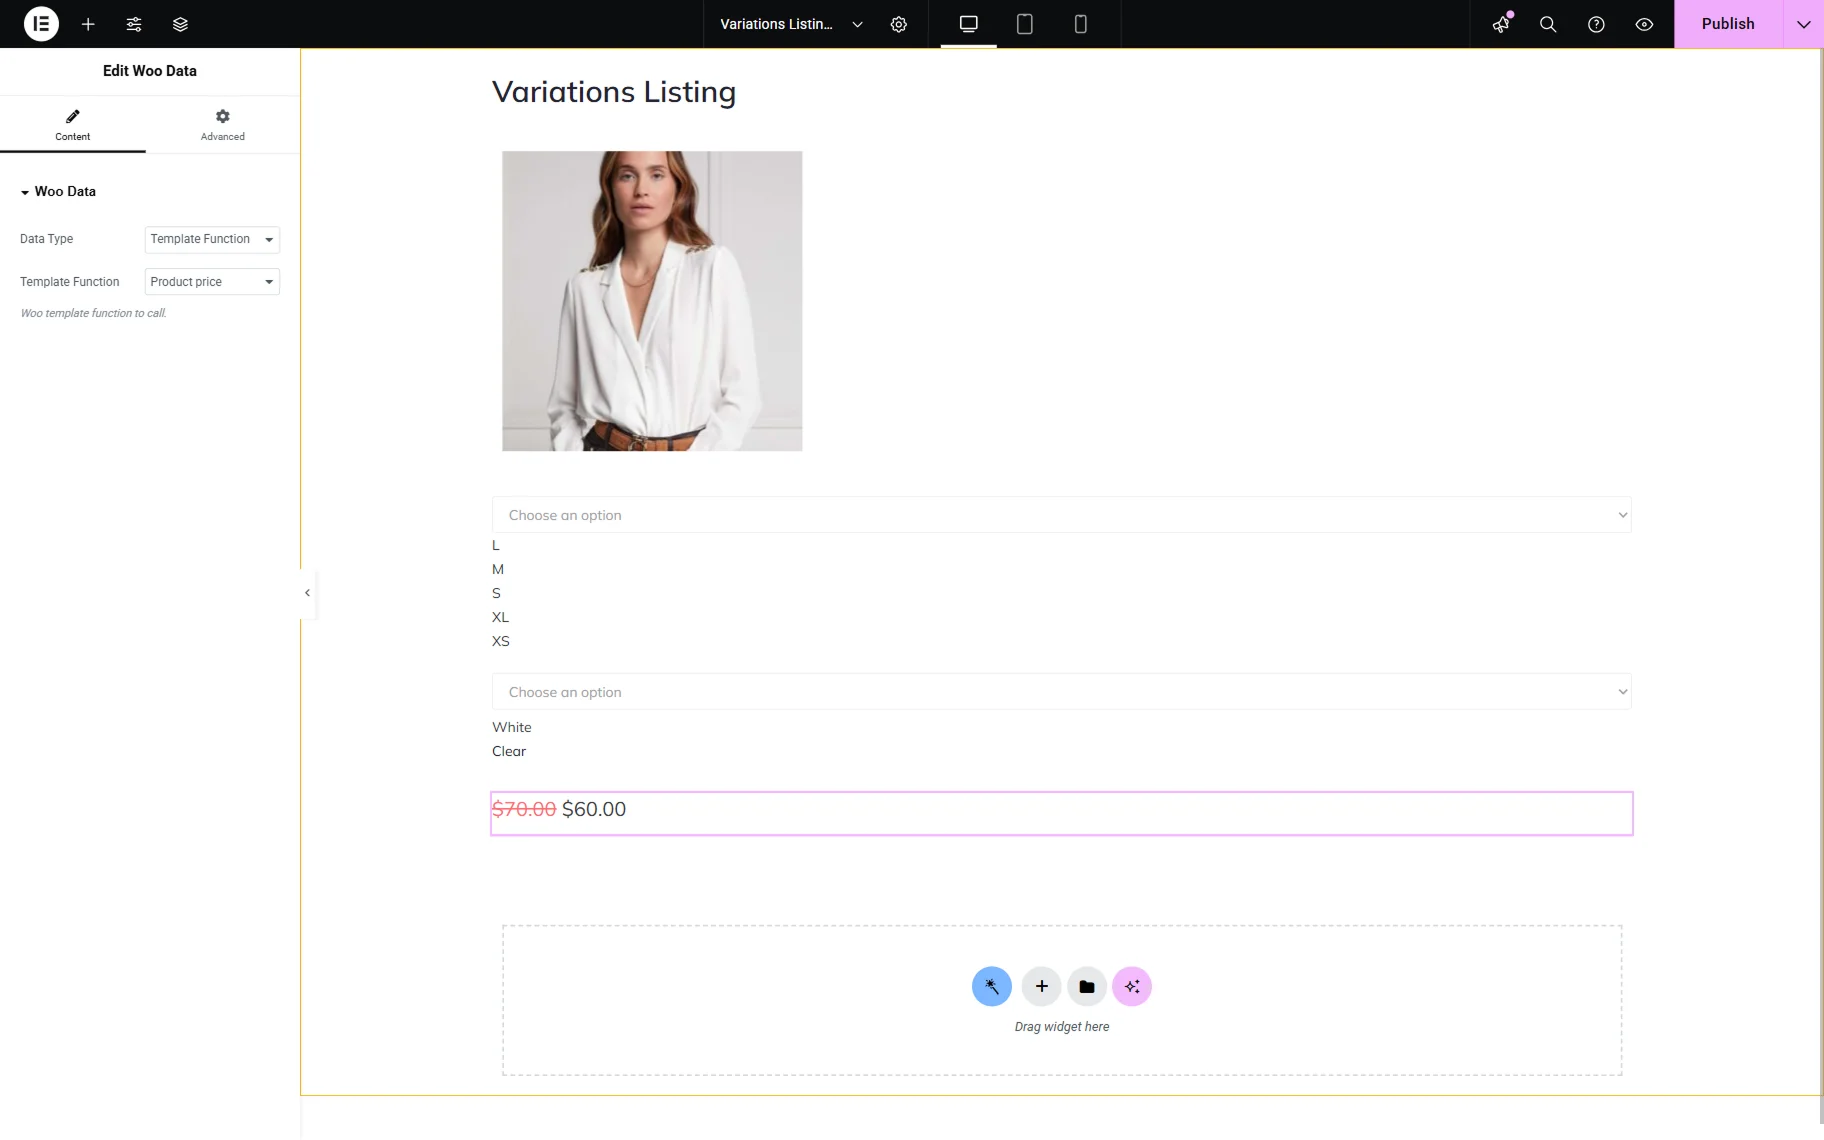
Next, we also add one more Woo Data widget with the “Template Function” Data Type and a “Product price” Template Function to display the product’s price accordingly.
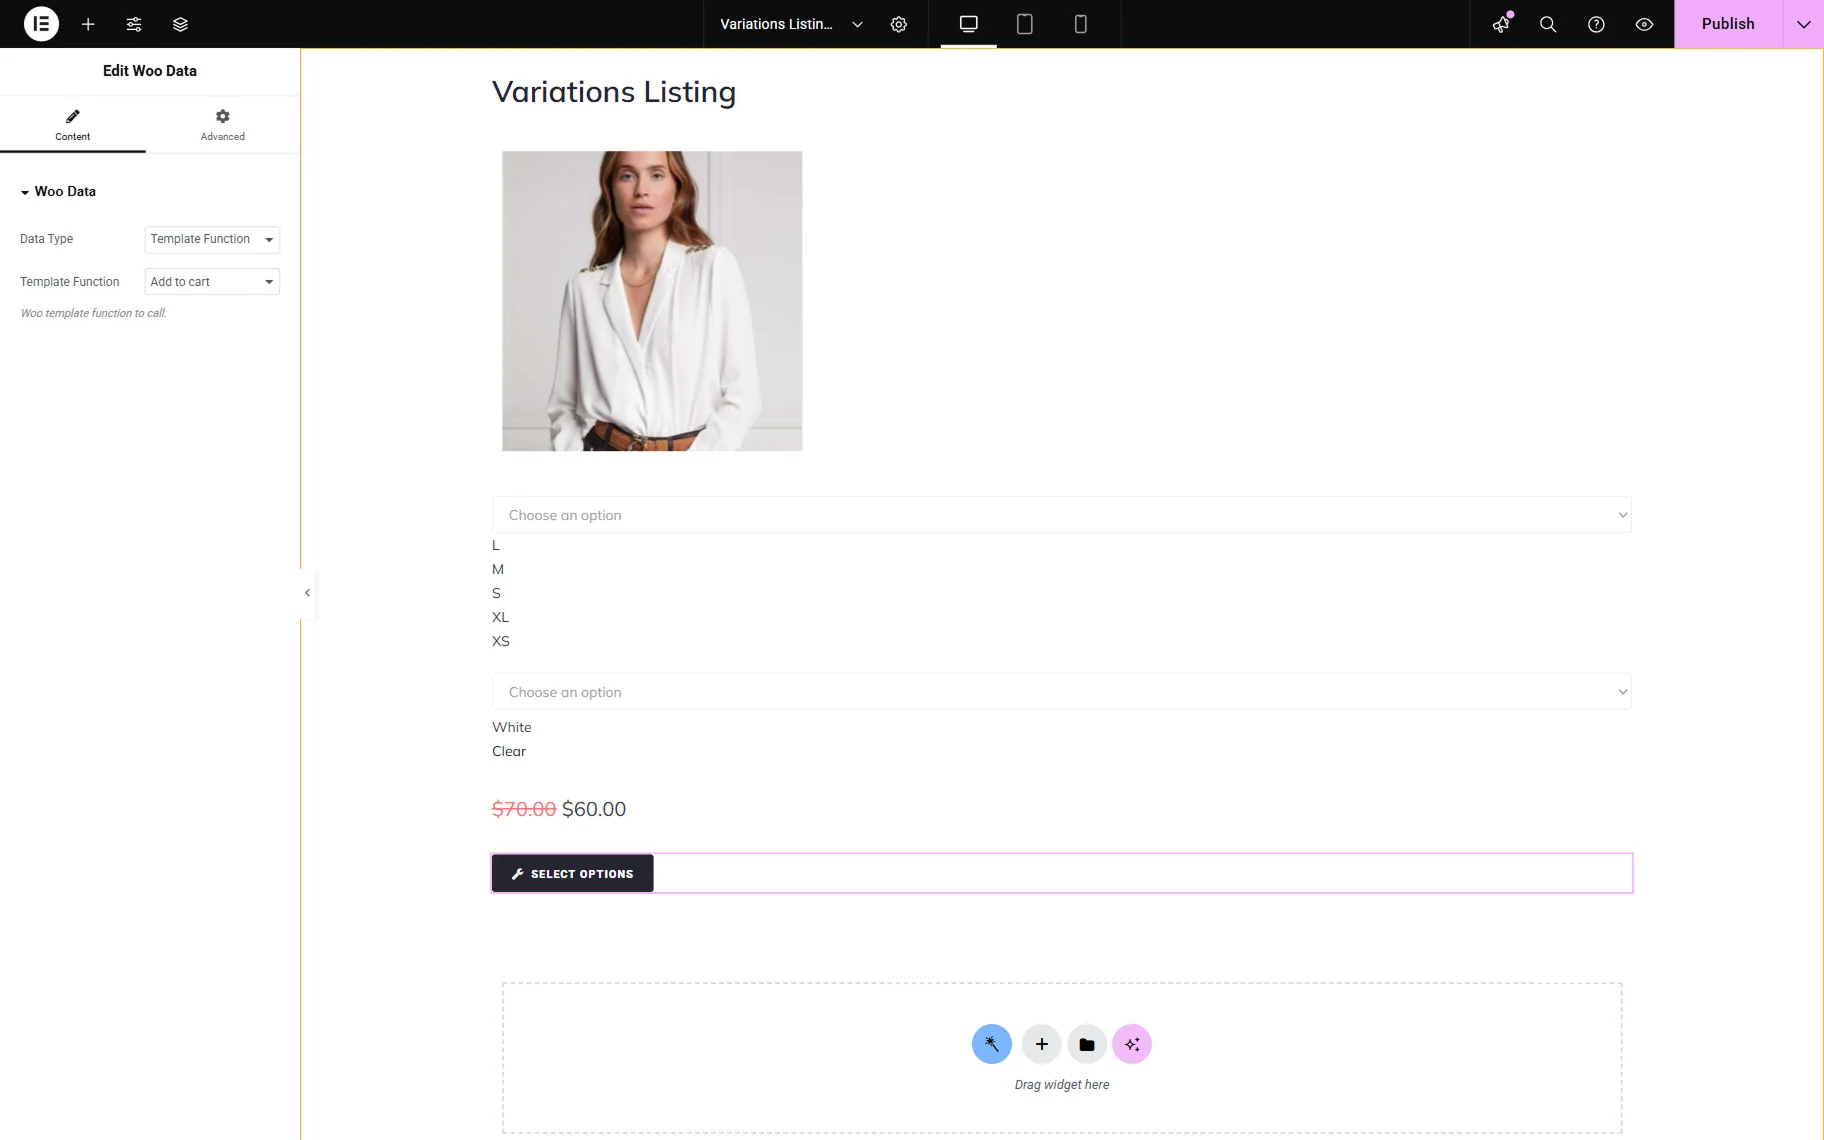
Finally, add another Woo Data widget. This one also has the “Template Function” Data Type set and the “Add to cart” Template Function selected in order to display the “Select Options/Add to Cart” button.
Once the template is ready, press the “Publish” button to save the page.
Add a Listing Grid to the Page/Template
Go to the page/template where you want to place the listing. In our case, it’s an Elementor-built page called “Products Page”. Use other builders if preferred.
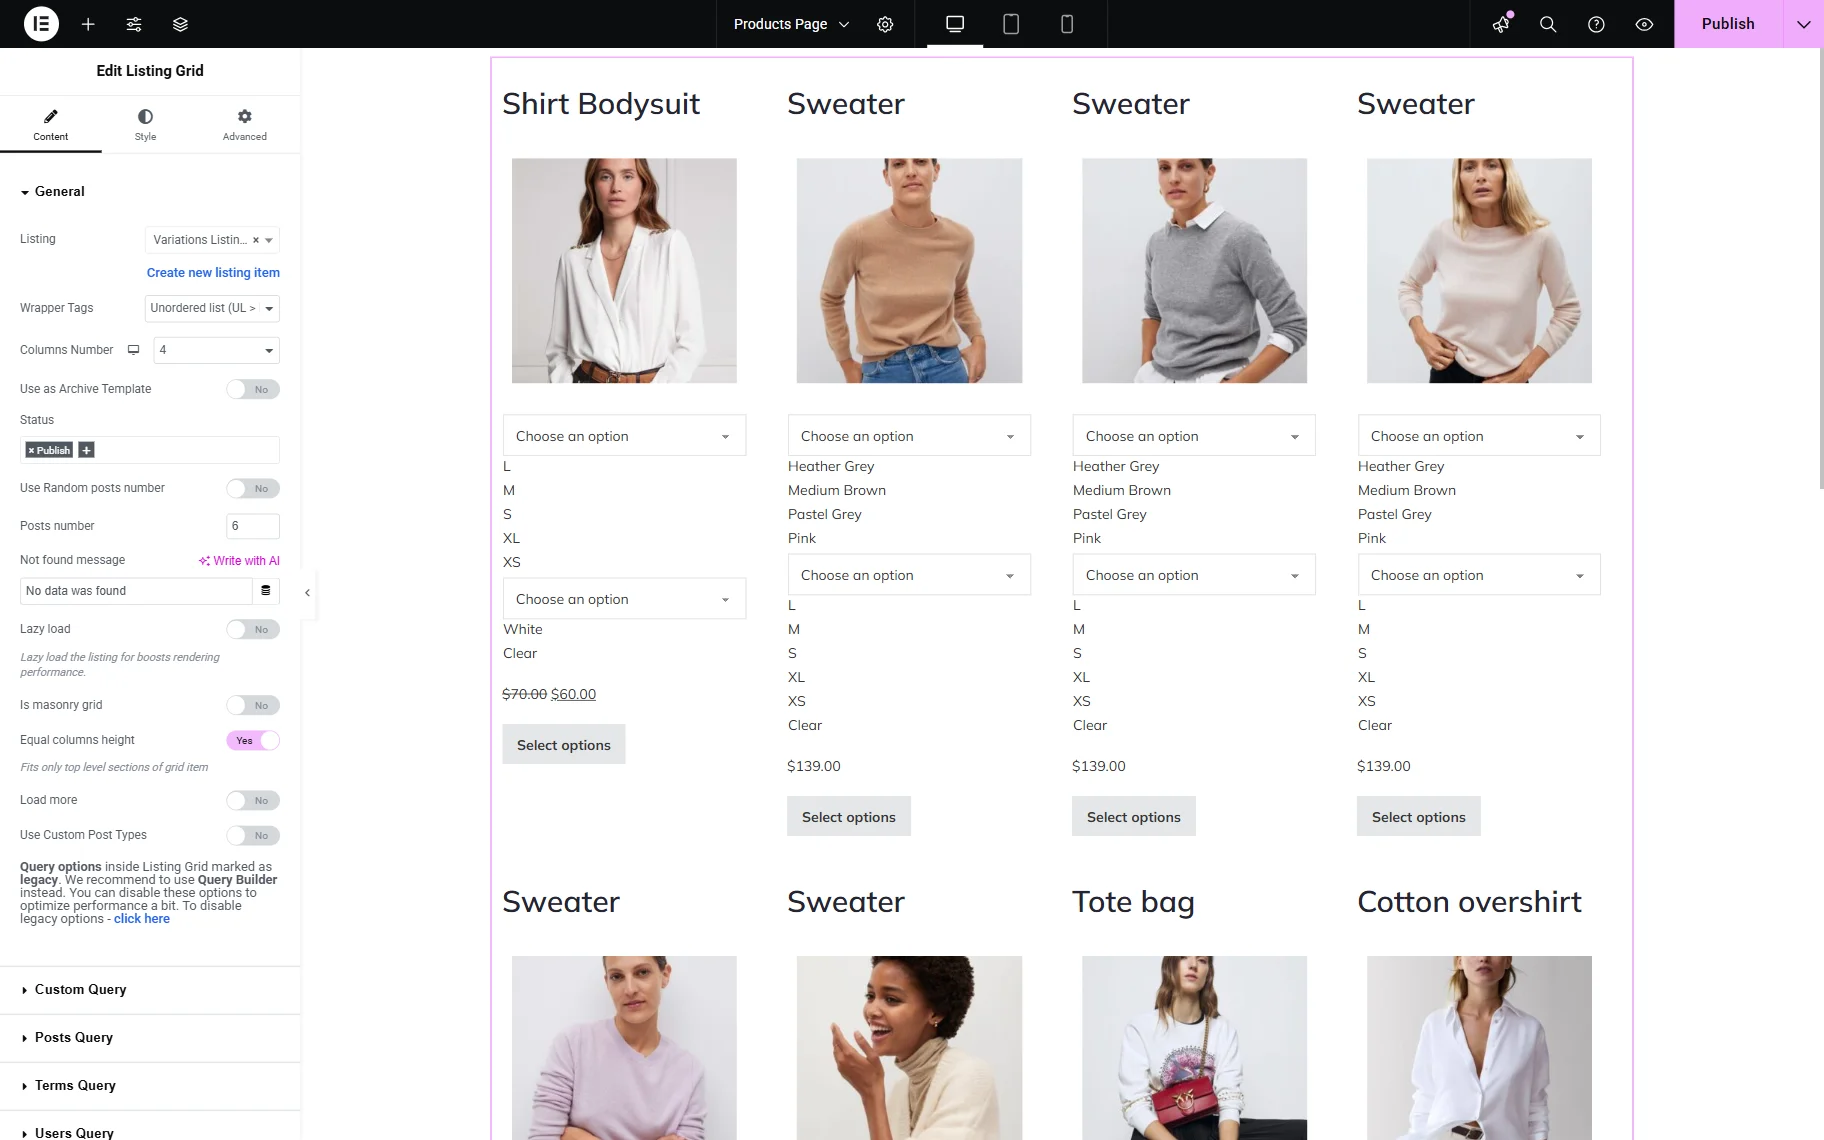
Add a Listing Grid to the page and select the just-built widget in the Listing dropdown.
Mind selecting the “Unordered list (UL > LI)” option in the Wrapper Tags field so the listing layout displays correctly later on the front end.
Adjust other settings if needed and move to the Advanced settings tab.
In the Layout section of the Advanced tab, find a CSS Classes field and paste the “listing-ul” value in there.
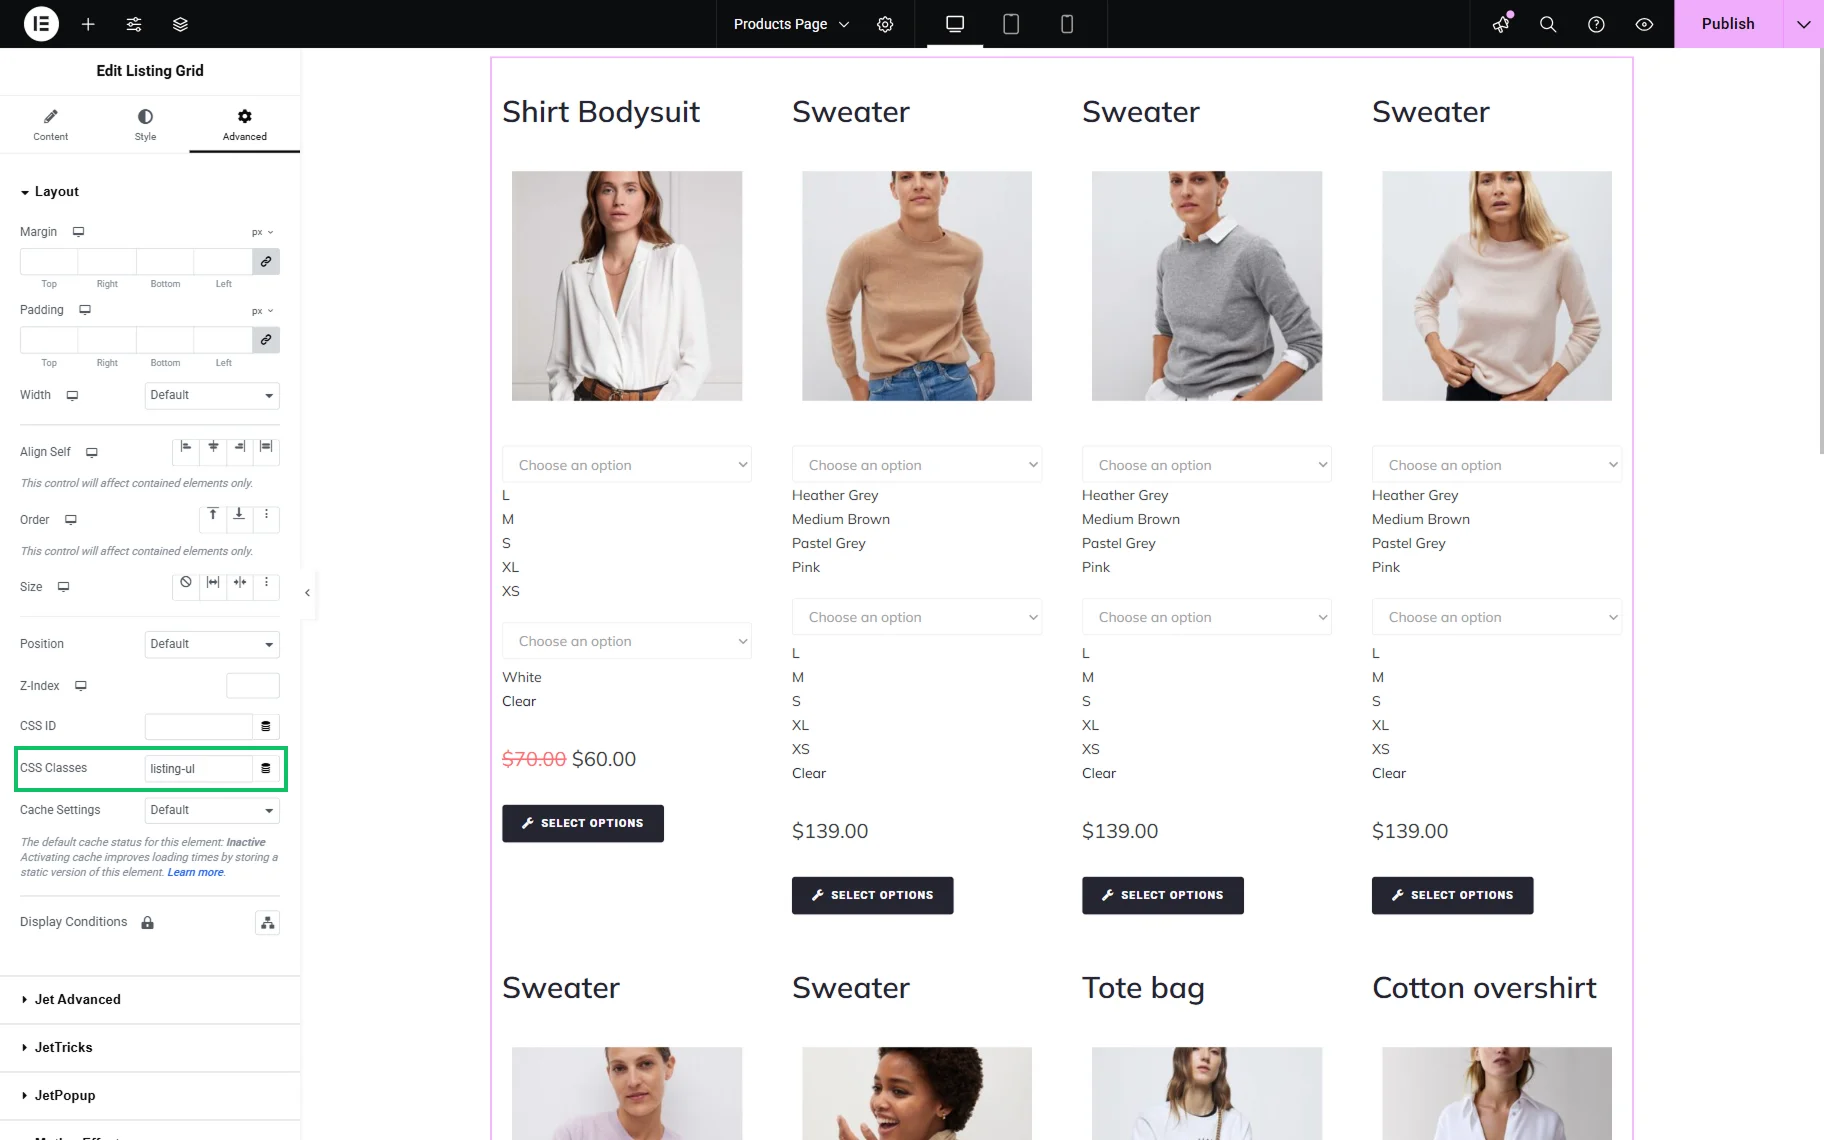
When all the changes have been made to the page, save the result.
Check the Result
Now, let’s check the result on the front end.
Once you open the page, you see the Listing Grid with the CartFlows variations displayed.

That’s all about using the CartFlows Variation Swatches inside the JetEngine’s listing template on your WordPress website.