How to Use JetEngine Condition Shortcode in Bricks
Learn how to generate, use, and customize shortcodes that allow displaying CPT posts that meet the specific conditions and redirection to another page using the JetEngine plugin for WordPress and the Bricks theme.
Before you start, check the tutorial requirements:
- Bricks theme installed and activated
- JetEngine plugin installed and activated with the Dynamic Visibility module enabled and a Custom Post Type (CPT) created
In this tutorial, we explore how to generate and customize a shortcode that displays meta fields based on specific conditions. The shortcode is also modified to include a link and accompanying text to redirect users to a different page.
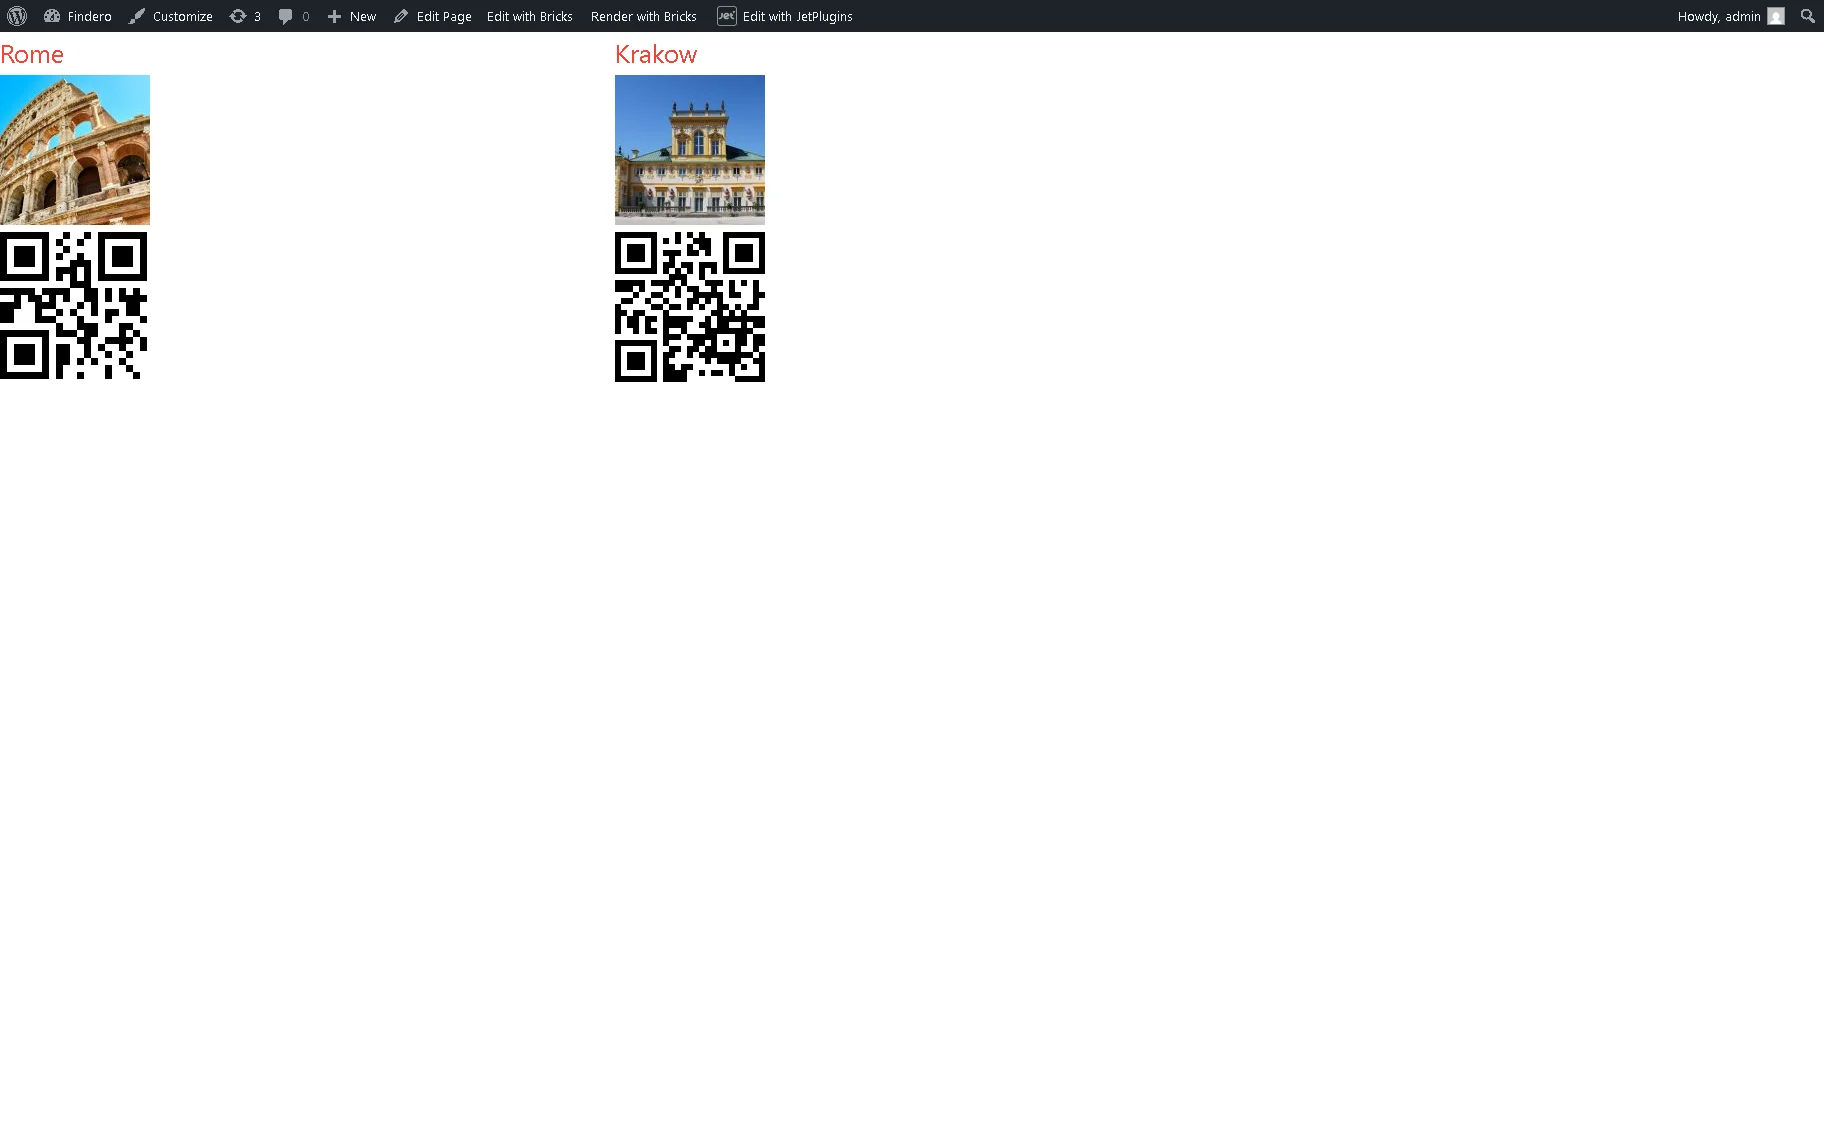
In detail, we first create “City Tours” CPT posts with the “Days” Number and “Coupon” Text meta fields. In turn, these fields contain the tour durations in days and possible discounts, respectively. If a tour lasts for more than three days, the clients will get a discount, which is stored in the “Coupon” meta field and encrypted as a QR code.
In the described case, users can select the desired tour and press the corresponding link to be redirected to another page with more details about the discount they get.
Build a Query
Proceed to WordPress Dashboard > JetEngine > Query Builder.
Here, on the Queries List page, press the “Add New” button and build a query for the “City Tours” CPT posts.
Read the Query Builder Posts Query Type tutorial for more details.
For this query, we type its Name (the “City Tours Query” text, in this case), keep the default “Post Query” option in the Query Type drop-down list, and choose the needed CPT in the Post Type drop-down list of the newly appeared Posts Query > General tab.
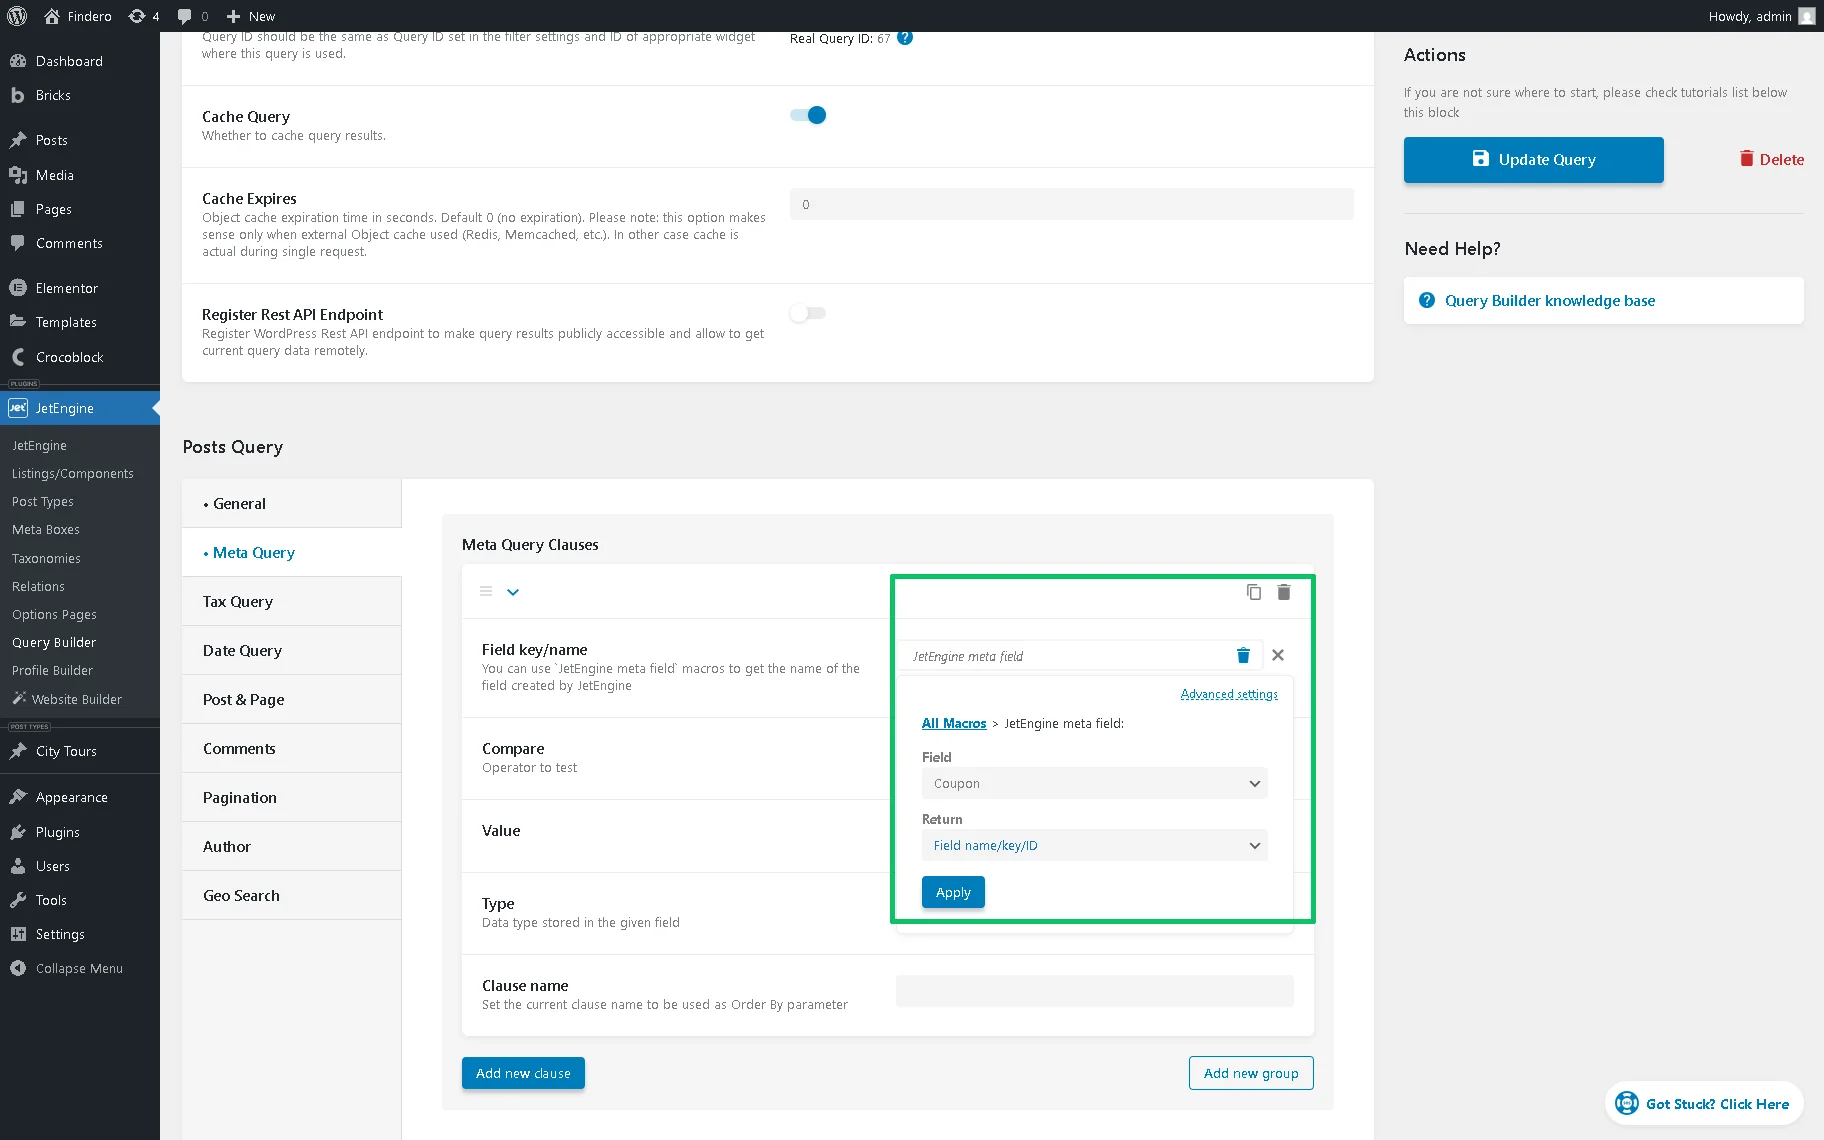
Next, unfold the Meta Query tab. In the Meta Query Clauses section, click the “Add new clause” button and the “Dynamic Tag” icon, and choose the “JetEngine meta field” option in the newly appeared Field key/name field. After that, set the needed meta field (in this case, the “Coupon” meta field) in the Field and the “Field name/key/ID” option in the Return field.
Finally, click the “Apply” button.
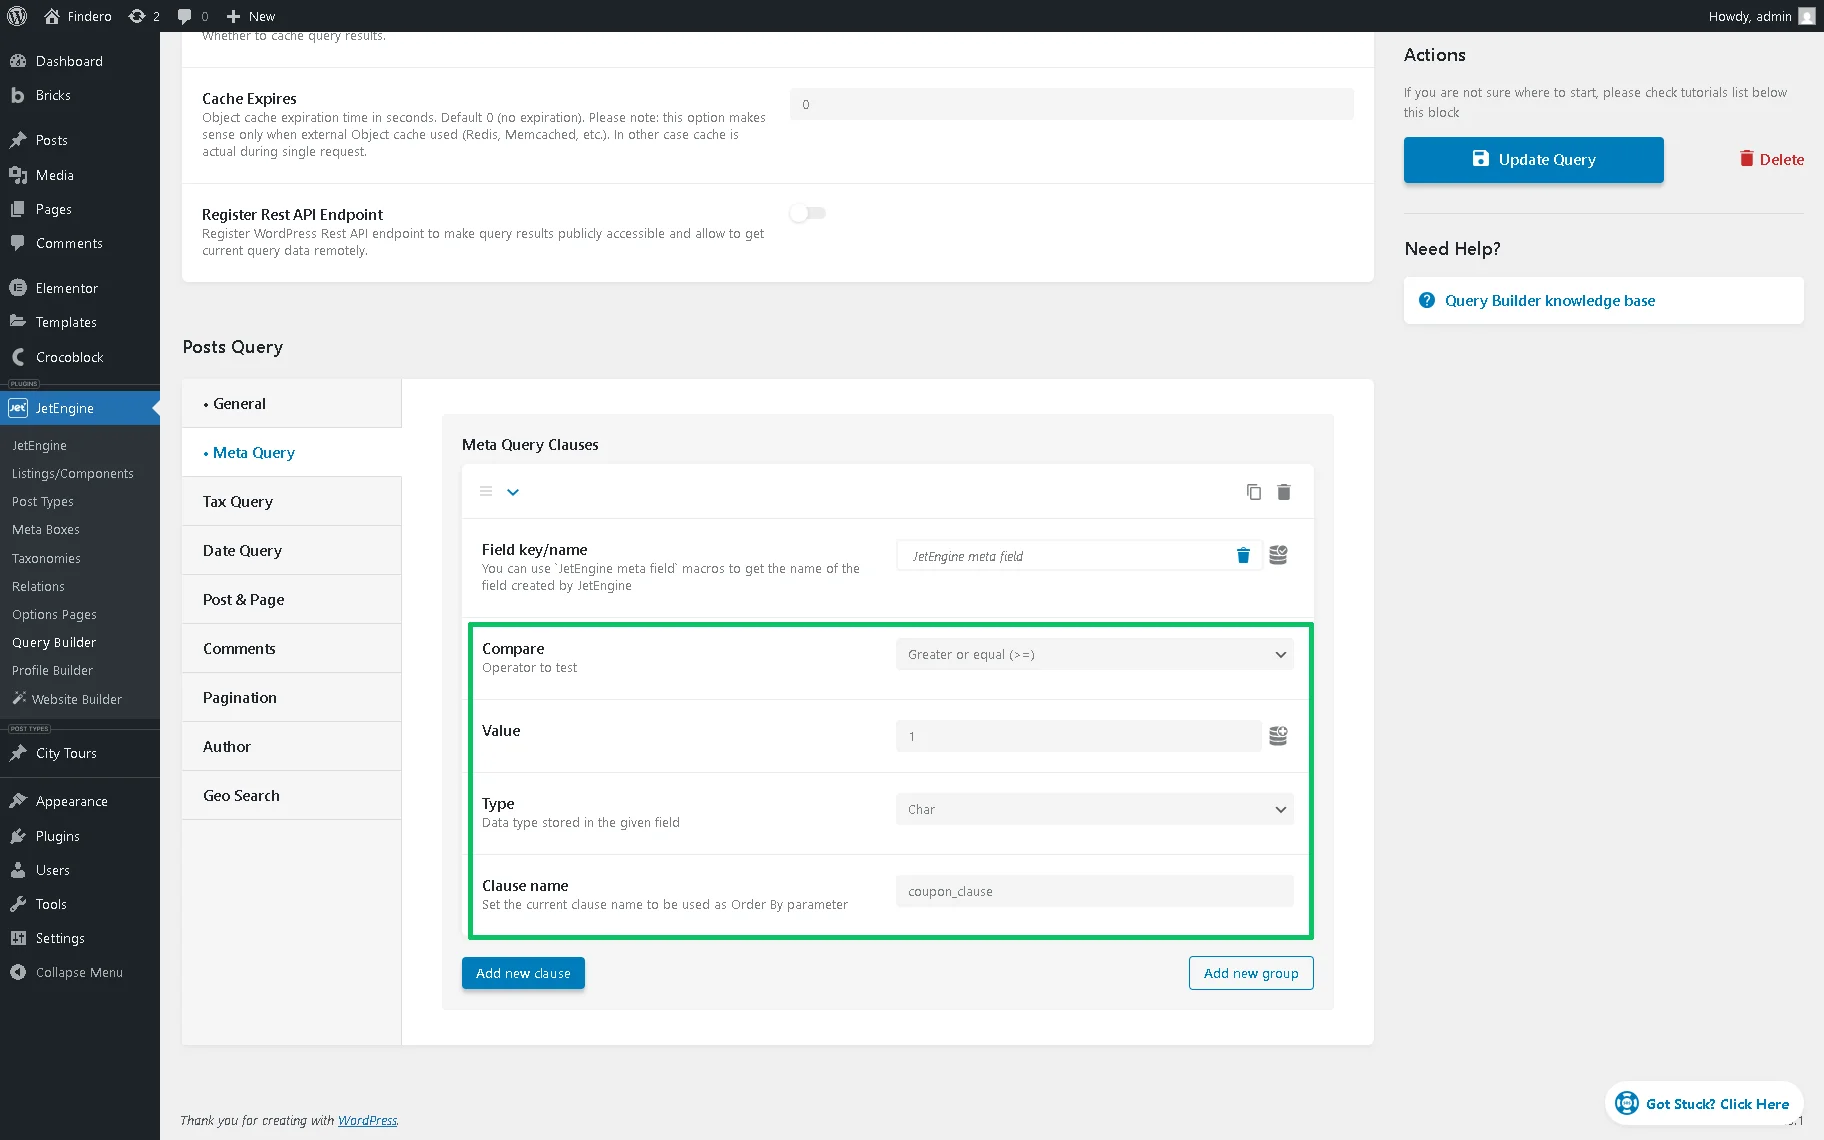
Then, set the “Greater or equal (>=)” Operator, set “1” as a Value, and select the “Char” Type. Finally, insert the Clause name and press the “Add/Update Query” button.
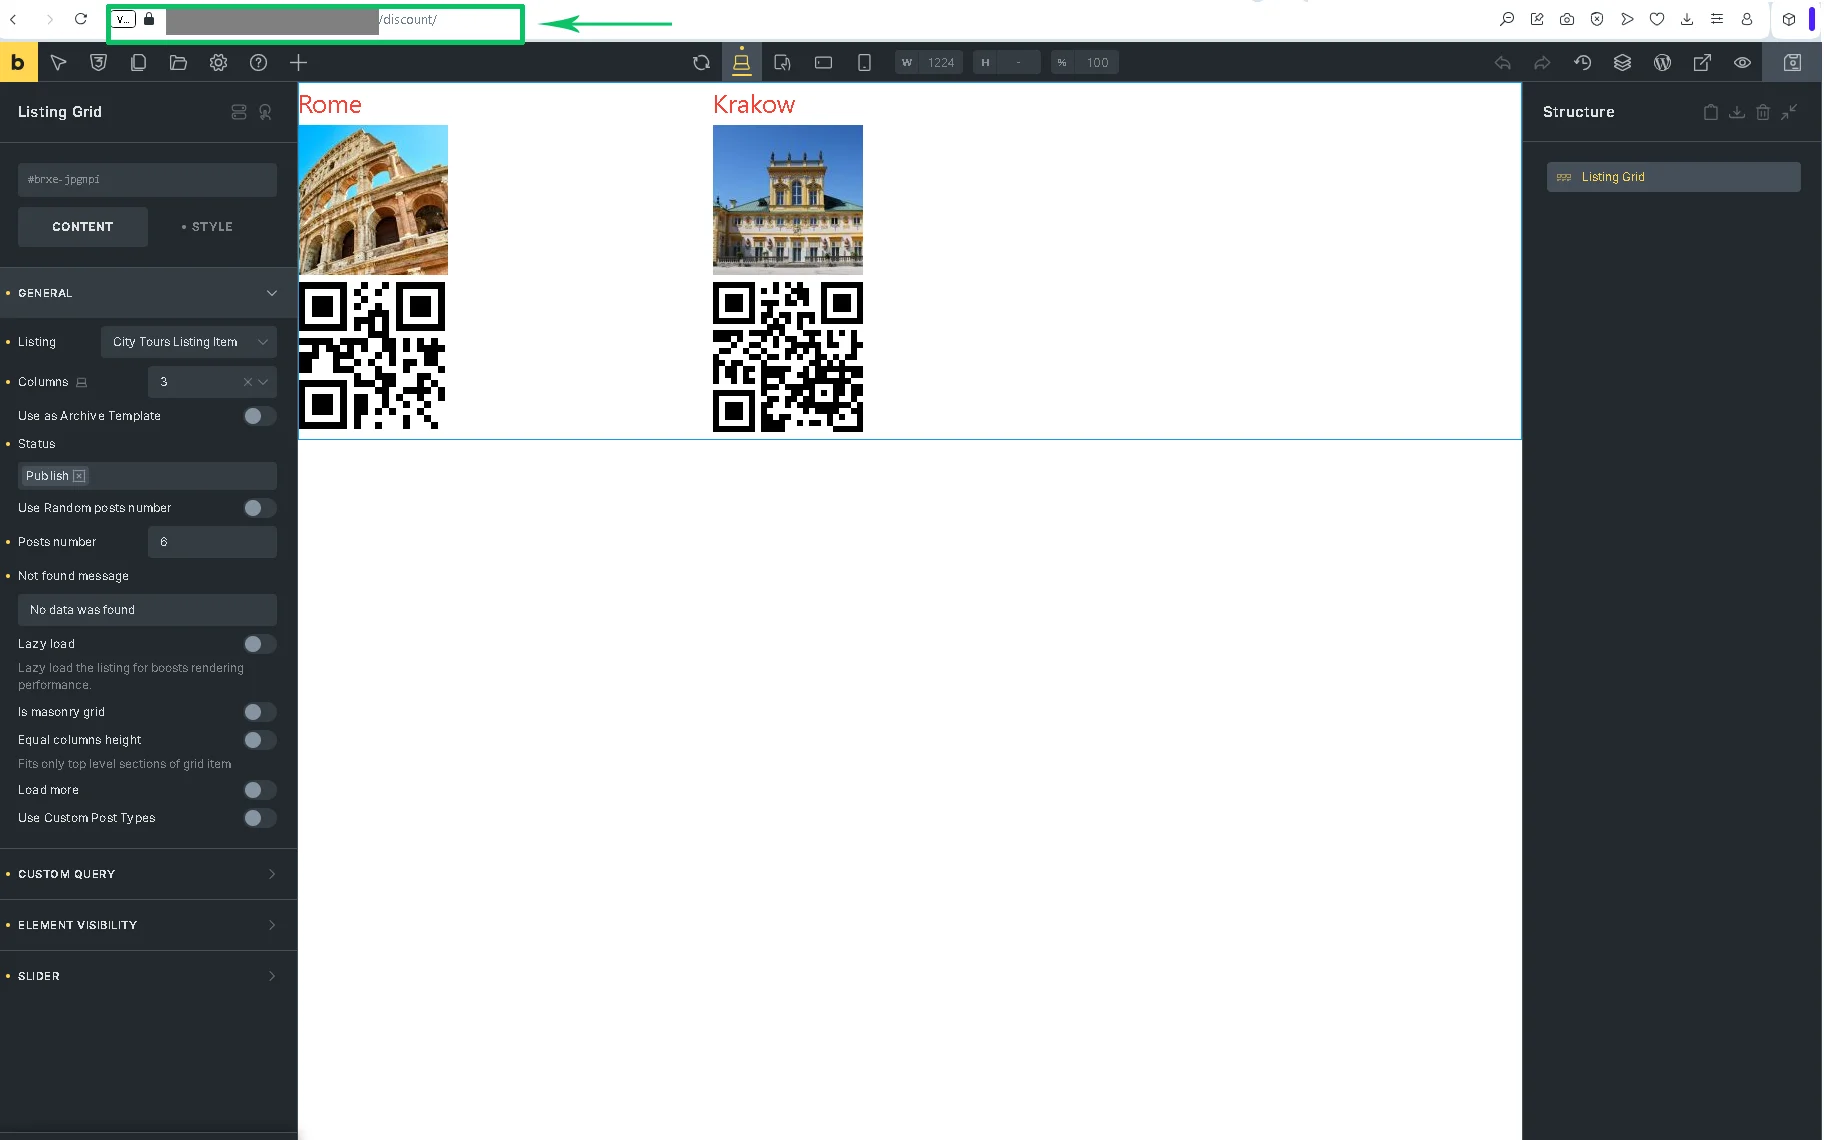
Create a Listing to Display the Meta Fields with QR Сodes
First, move to the WordPress Dashboard > JetEngine > Listings/Components tab and create a new Listing Item to show the CPT’s data in the Bricks builder. Design it as needed.
More details on configuring the Dynamic Field and Dynamic Image elements can be found in the How to Create Listing Item in WordPress with Bricks Builder video.
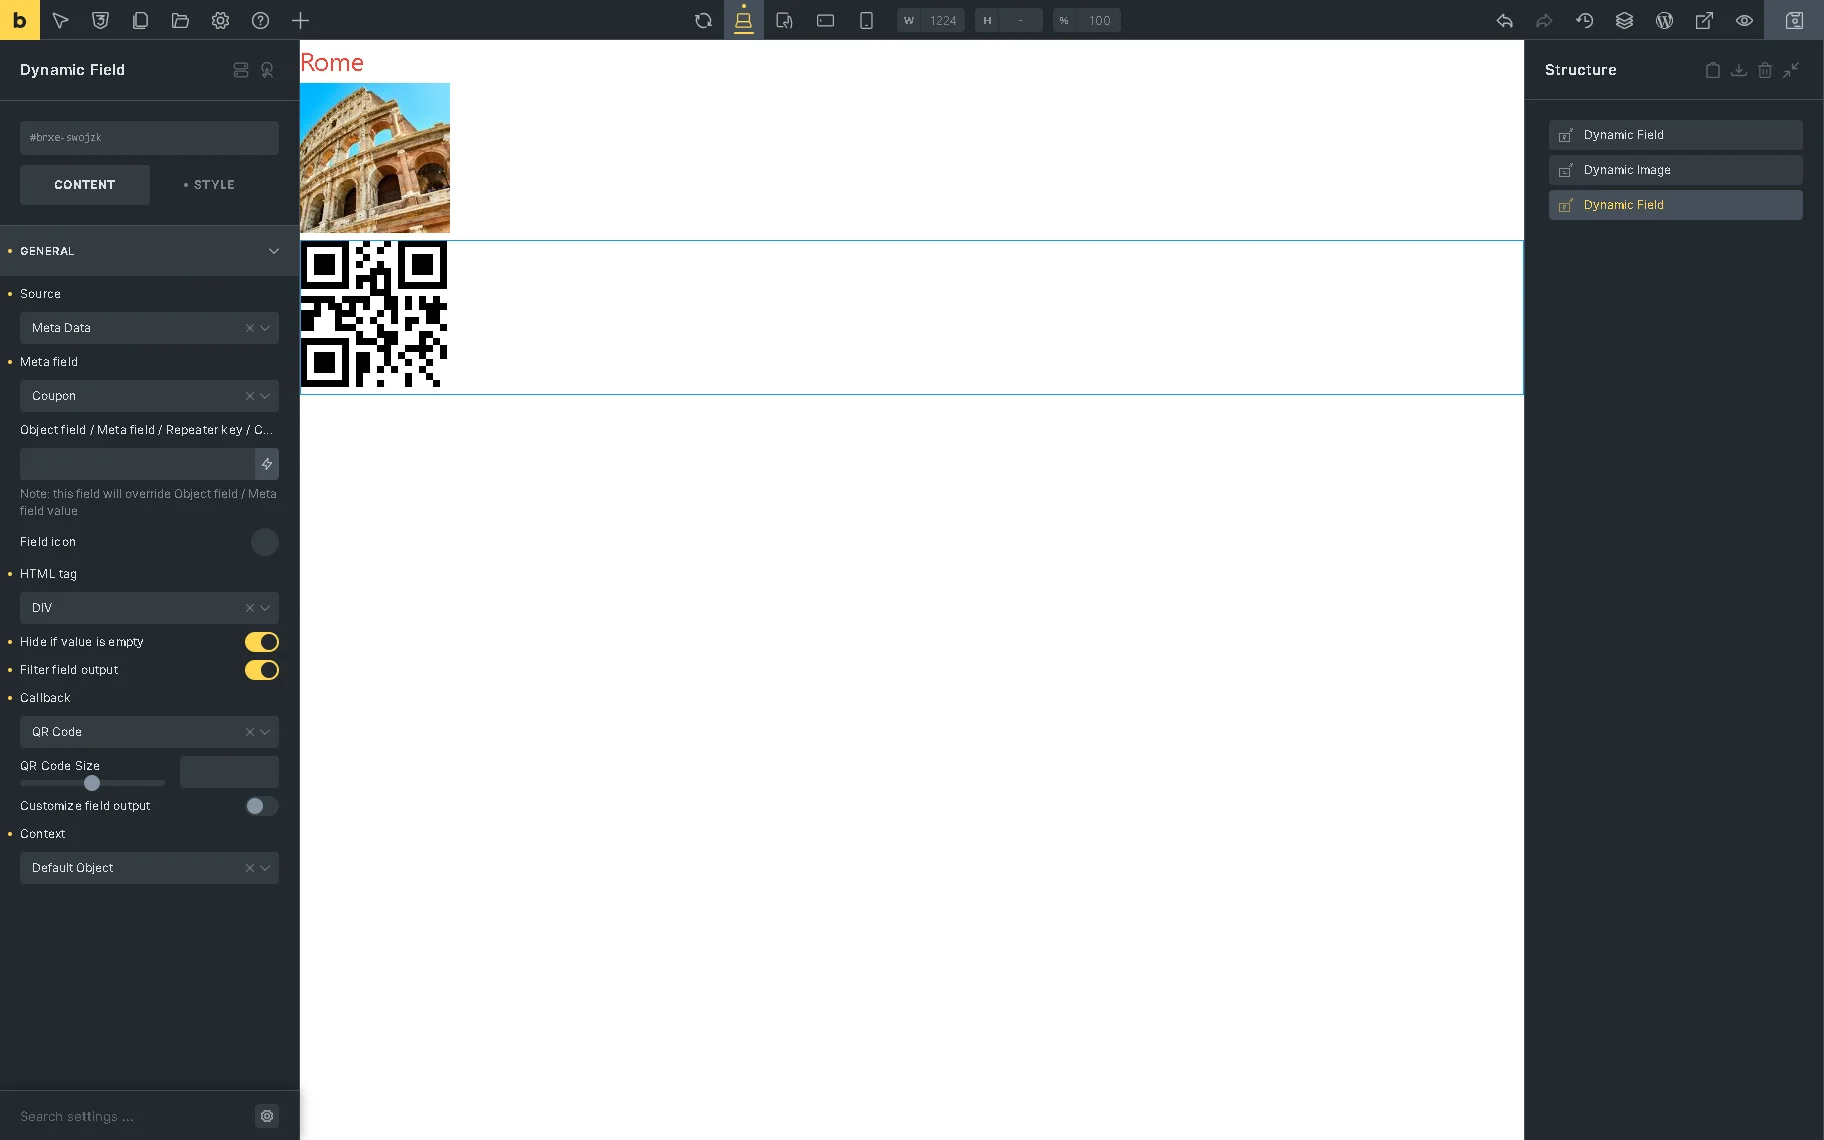
To display the “Coupon” Text meta field, we insert the Dynamic Field element and select the “Media Data” Source, then choose the needed meta field in the Meta field drop-down list (“Coupon,” in this tutorial). Then, enable the Filter field output toggle and choose the “QR Code” option in the Callback drop-down list.
When you finish, hit the “Save“ button in the upper right corner.
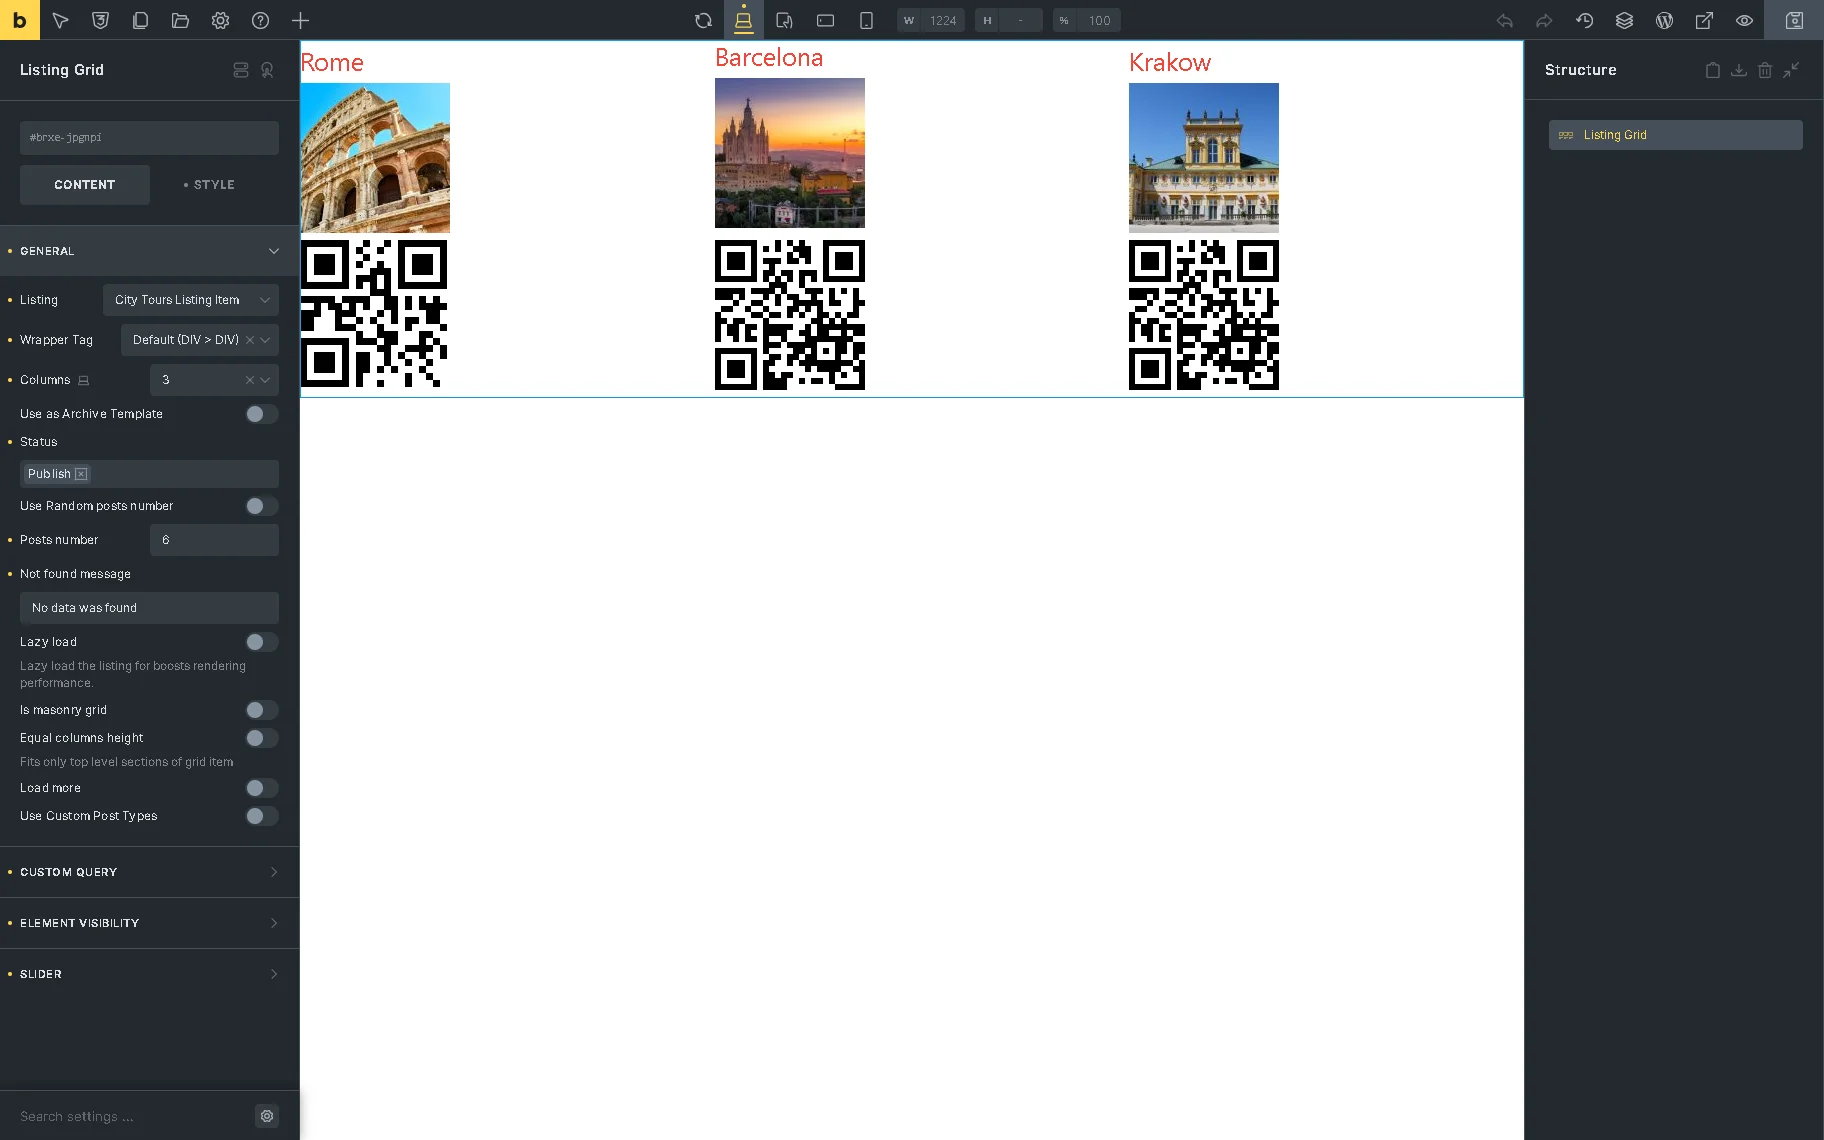
Second, create a new page or open an existing one (“Discounts”, in this case) to display the query listing item and show the needed CPT posts (the “City Tours” CPT, in this case) using the Listing Grid element.
Save the page.
Generate a Shortcode
Proceed to WordPress Dashboard > JetEngine > JetEngine and unroll the Shortcode Generator tab of the JetEngine dashboard.
Here, set the “JetEngine Condition” option in the Shortcode drop-down list. After that, select the “Enclosing (e.g. [shortcode attrs]content… [/shortcode])” Tag Enclosing Type.
After that, in the Condition drop-down list, choose the “Show element if condition met” option and set the corresponding Condition (the “Greater than” option, in this case).
Since we intend to offer discounts for tours lasting more than three days, we set this condition to create a shortcode.
Type the required meta field’s Name/ID in the Field (here, the “days”) in the newly appeared drop-down list and insert the Value to compare (we type the “3” text).
We leave the Context field unchanged but set the “Numeric” Data Type.
After that, the shortcode will appear in the text field below the Data Type field.
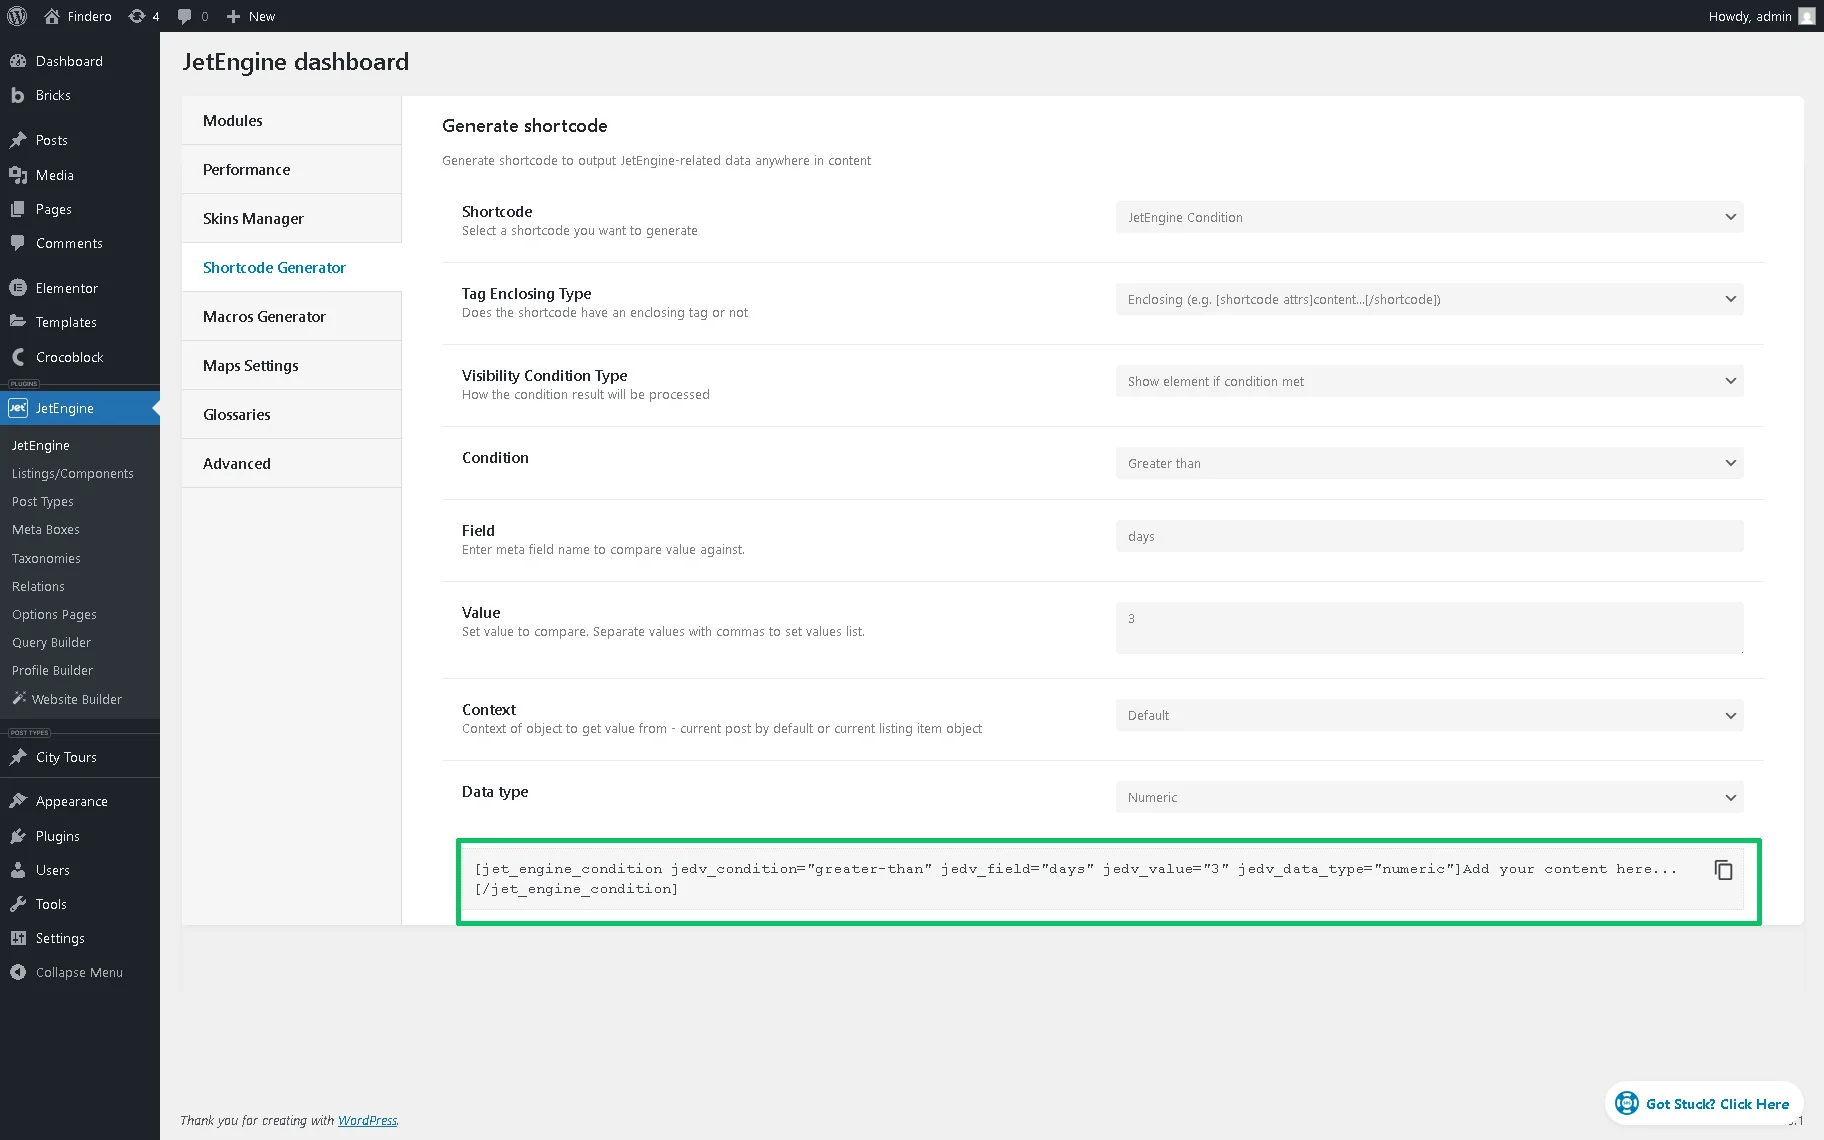
[jet_engine_condition jedv_condition="greater-than" jedv_field="days" jedv_value="3" jedv_data_type="numeric"]Add your content here...[/jet_engine_condition]Copy this generated shortcode.
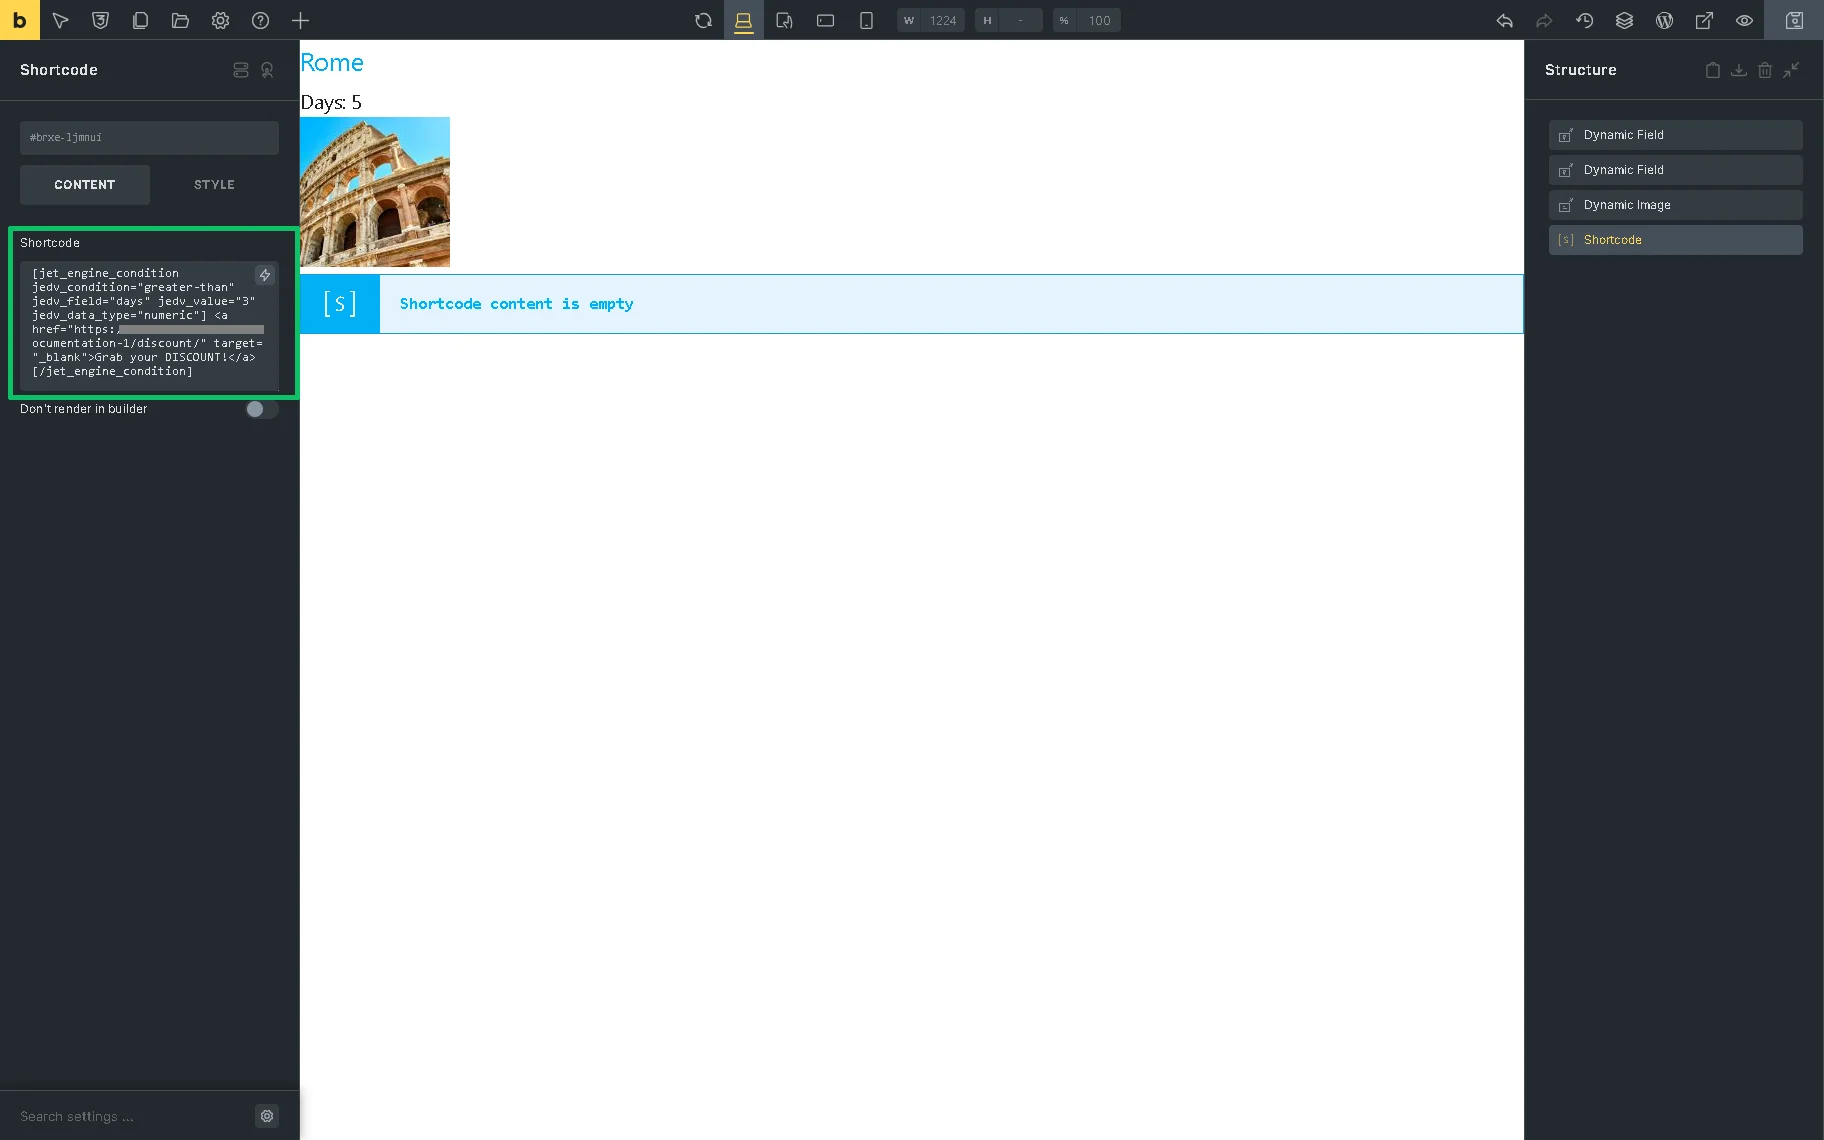
Create a Listing Item with the Shortcode
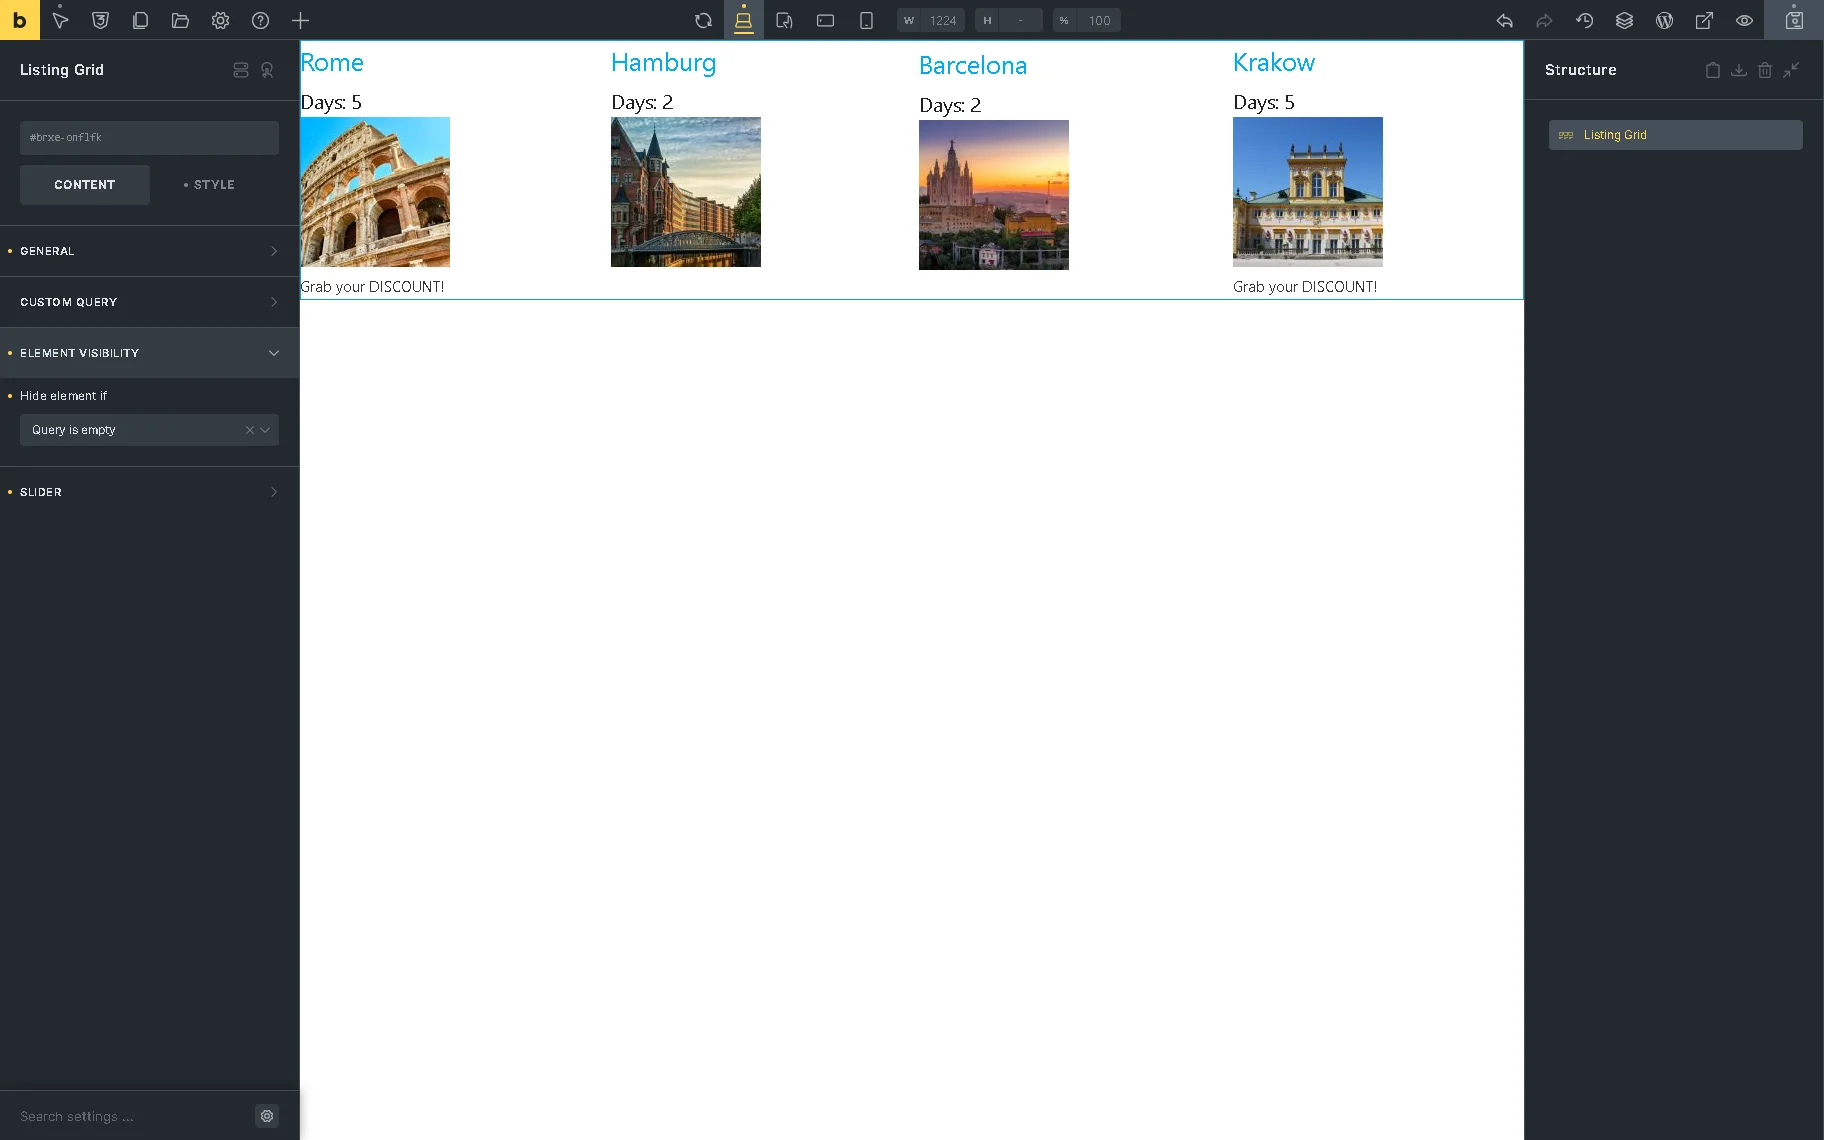
Create another Listing Item in the Bricks builder and design it according to your preferences.
In the next step, insert the Shortcode element. Here, add the copied shortcode into the corresponding text field (below the “Shortcode” text).
Now, move to the page that includes the listing with the QR-Codes (“Discount”, in this case) and copy the page’s URL.
Return to the Listing Item, move to the Shortcode element, and paste the copied URL as HTML code instead of the “Add your content here..” text in the Shortcode text field. After that, add the text (e.g., “Grab your DISCOUNT!”) that you’d like to be displayed via the element.
In this case, the text we finally entered into the Shortcode field of the Shortcode element looks as follows:
[jet_engine_condition jedv_condition="greater-than" jedv_field="days" jedv_value="3" jedv_data_type="numeric"] <a href="https:************ocumentation-1/discount/" target= the page’s"_blank">Grab your DISCOUNT!</a> [/jet_engine_condition]Here we insert the:
<a href="https:************ocumentation-1/discount/" target= "_blank"> Grab your DISCOUNT!</a>code instead of the “Add your content here…” default one.
Once completed, save the Listing Item.
Next, create or open another page (we name it the “Shortcode page”) and insert the Listing Grid element to show the Listing Items with shortcodes.
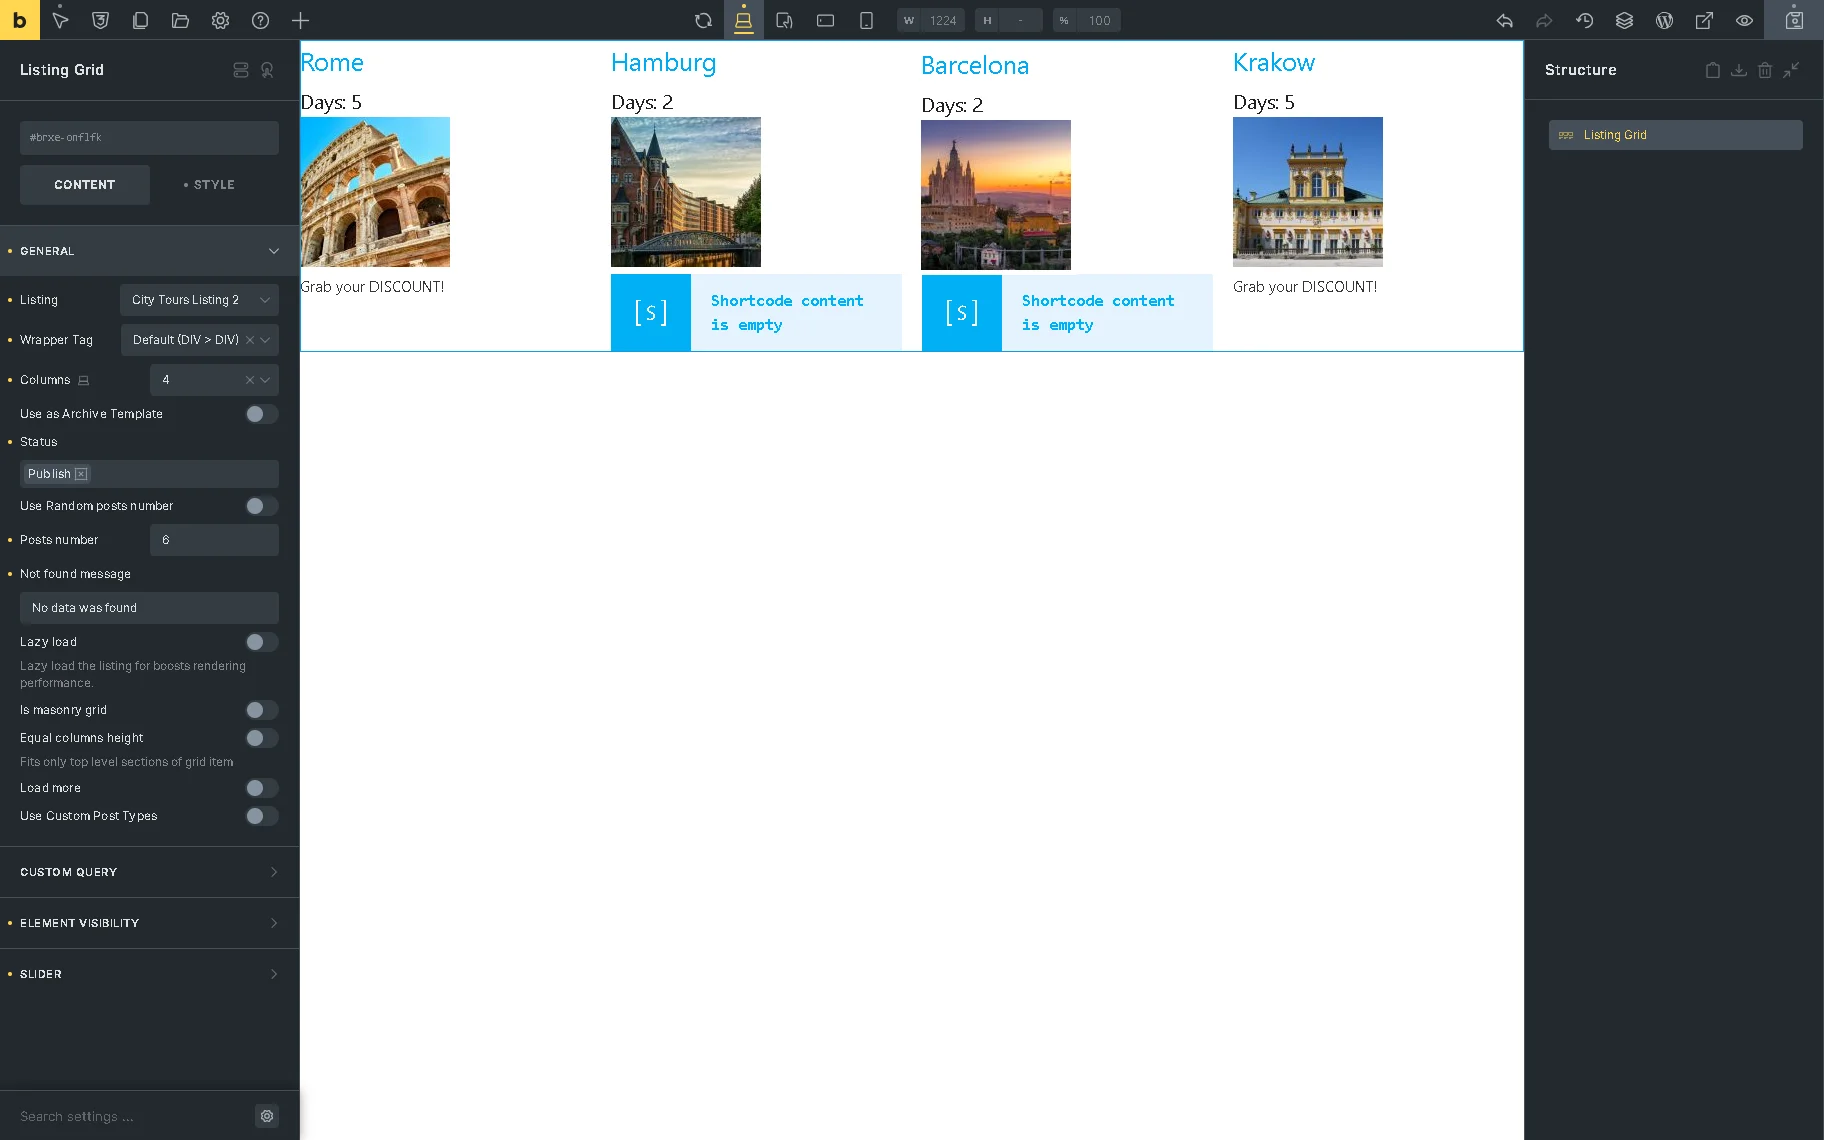
Since we left empty the “Discount” meta field for tours whose duration is three days or less, the Shortcode element does not display the text. To hide the empty elements, unfold the ELEMENT VISIBILITY settings and select the “Query is empty” option in the Hide element if field.
Finally, save the page and navigate to the front end.
Test the Flow
On the front end, the page displays the Shortcode elements as links (the “Grab your DISCOUNT!” text, in this case).
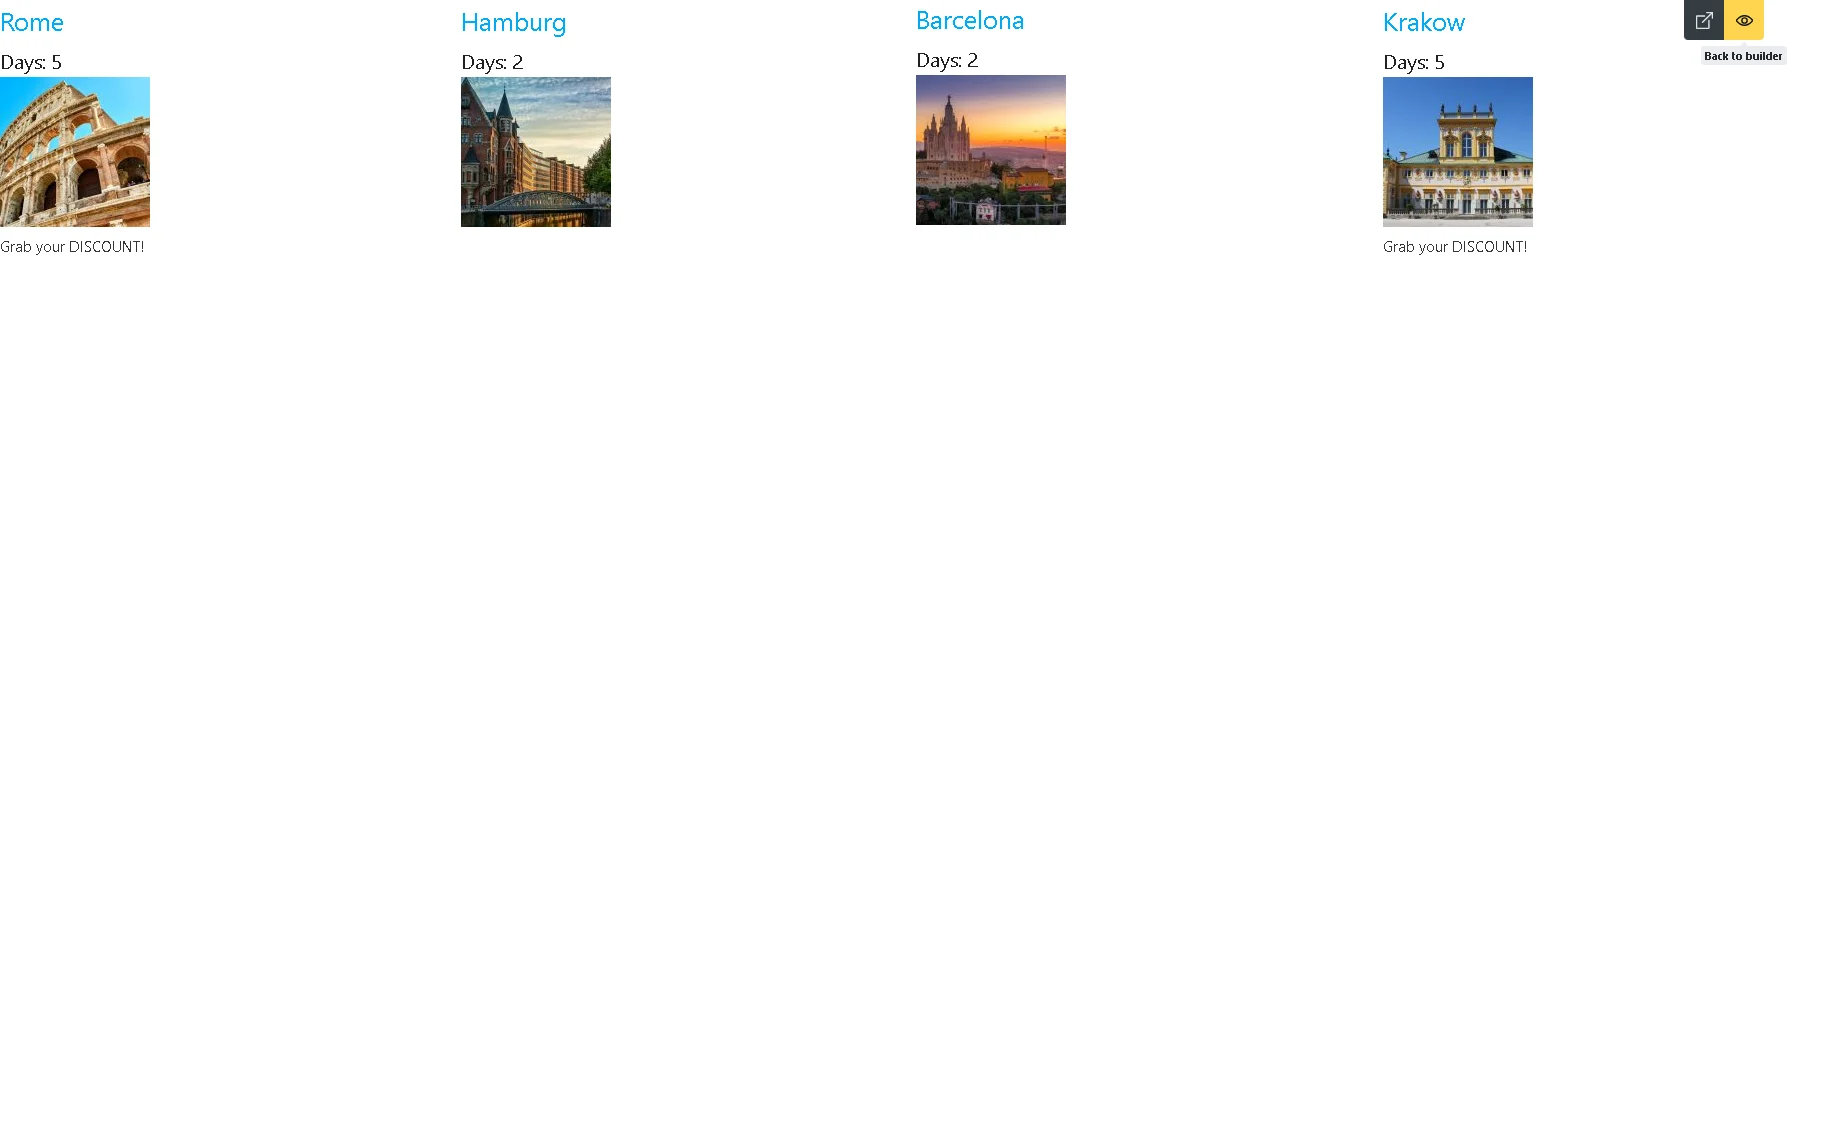
After pressing any link, you will be redirected to a page that displays CPT posts that meet the needed conditions.
That’s it. Now you know how to generate and use the pre-generated and customized shortcodes that allow displaying CPT posts that meet the specific conditions and redirection to another page using the JetEngine plugin for WordPress and the Bricks theme.