Custom Field Types Overview
The tutorial overviews custom meta field types made with the JetEngine plugin, details the meta field’s features, explains how to manage its settings via the WordPress Dashboard, and exemplifies the meta fields on the front end and back end.
Meta Fields by the JetEngine plugin are available for post types (custom and default), Custom Content Types, taxonomies, relations, users (in meta boxes), and options pages. The Meta Fields are intended to store data of a specific type via Custom Post Type posts.
Adding the Meta Fields
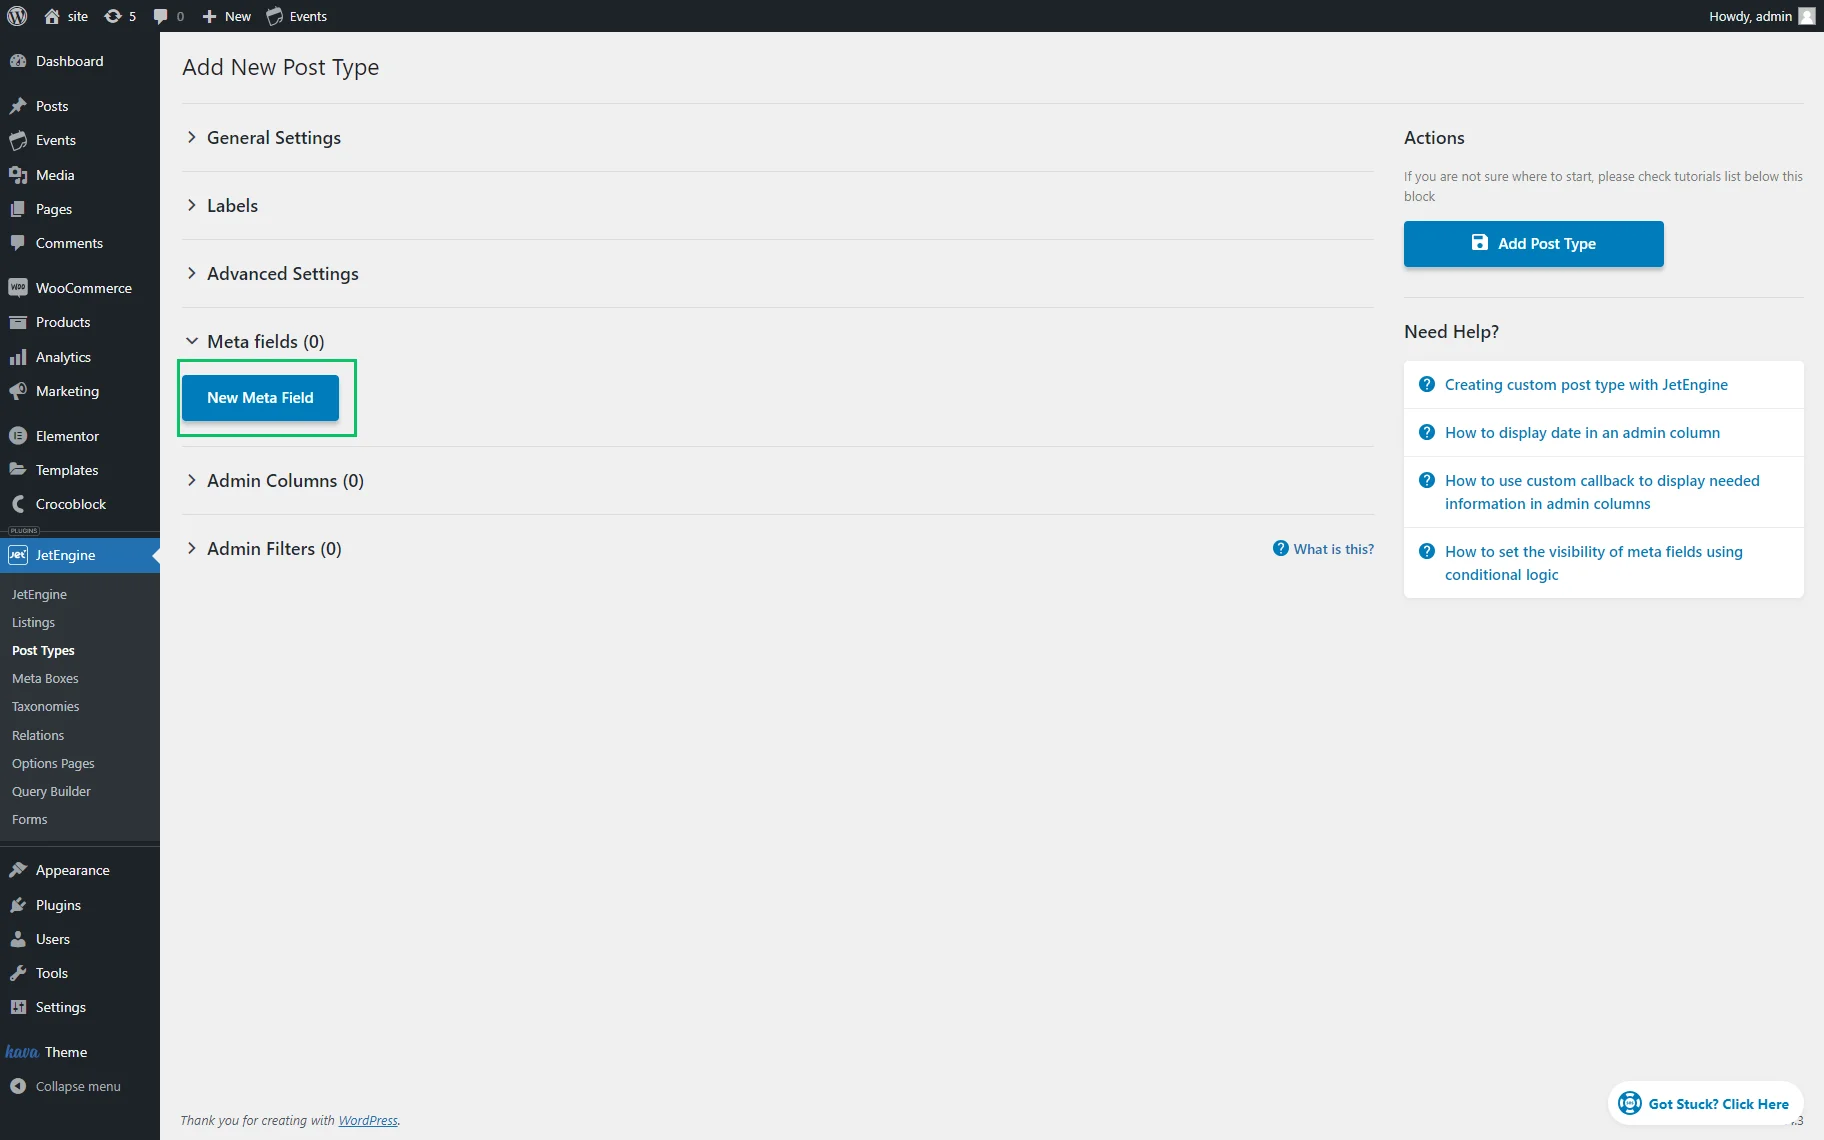
To add the meta field(s), one should navigate to WordPress Dashboard > JetEngine and click the appropriate tab: Post Types, Meta Boxes, Taxonomies, Relations, or Options Pages.
Then, the “Add New” button should be pressed.
The Meta fields (or similarly named) settings tab is available for each listed feature editor. By default, the new meta field of the “Text” Field type appears after clicking the “New Meta Field” button.
Standard Settings of the Meta Fields
After pressing the “New Meta Field” button, the default meta field settings are unrolled. The following fields of the meta field settings are standard for all meta field types:
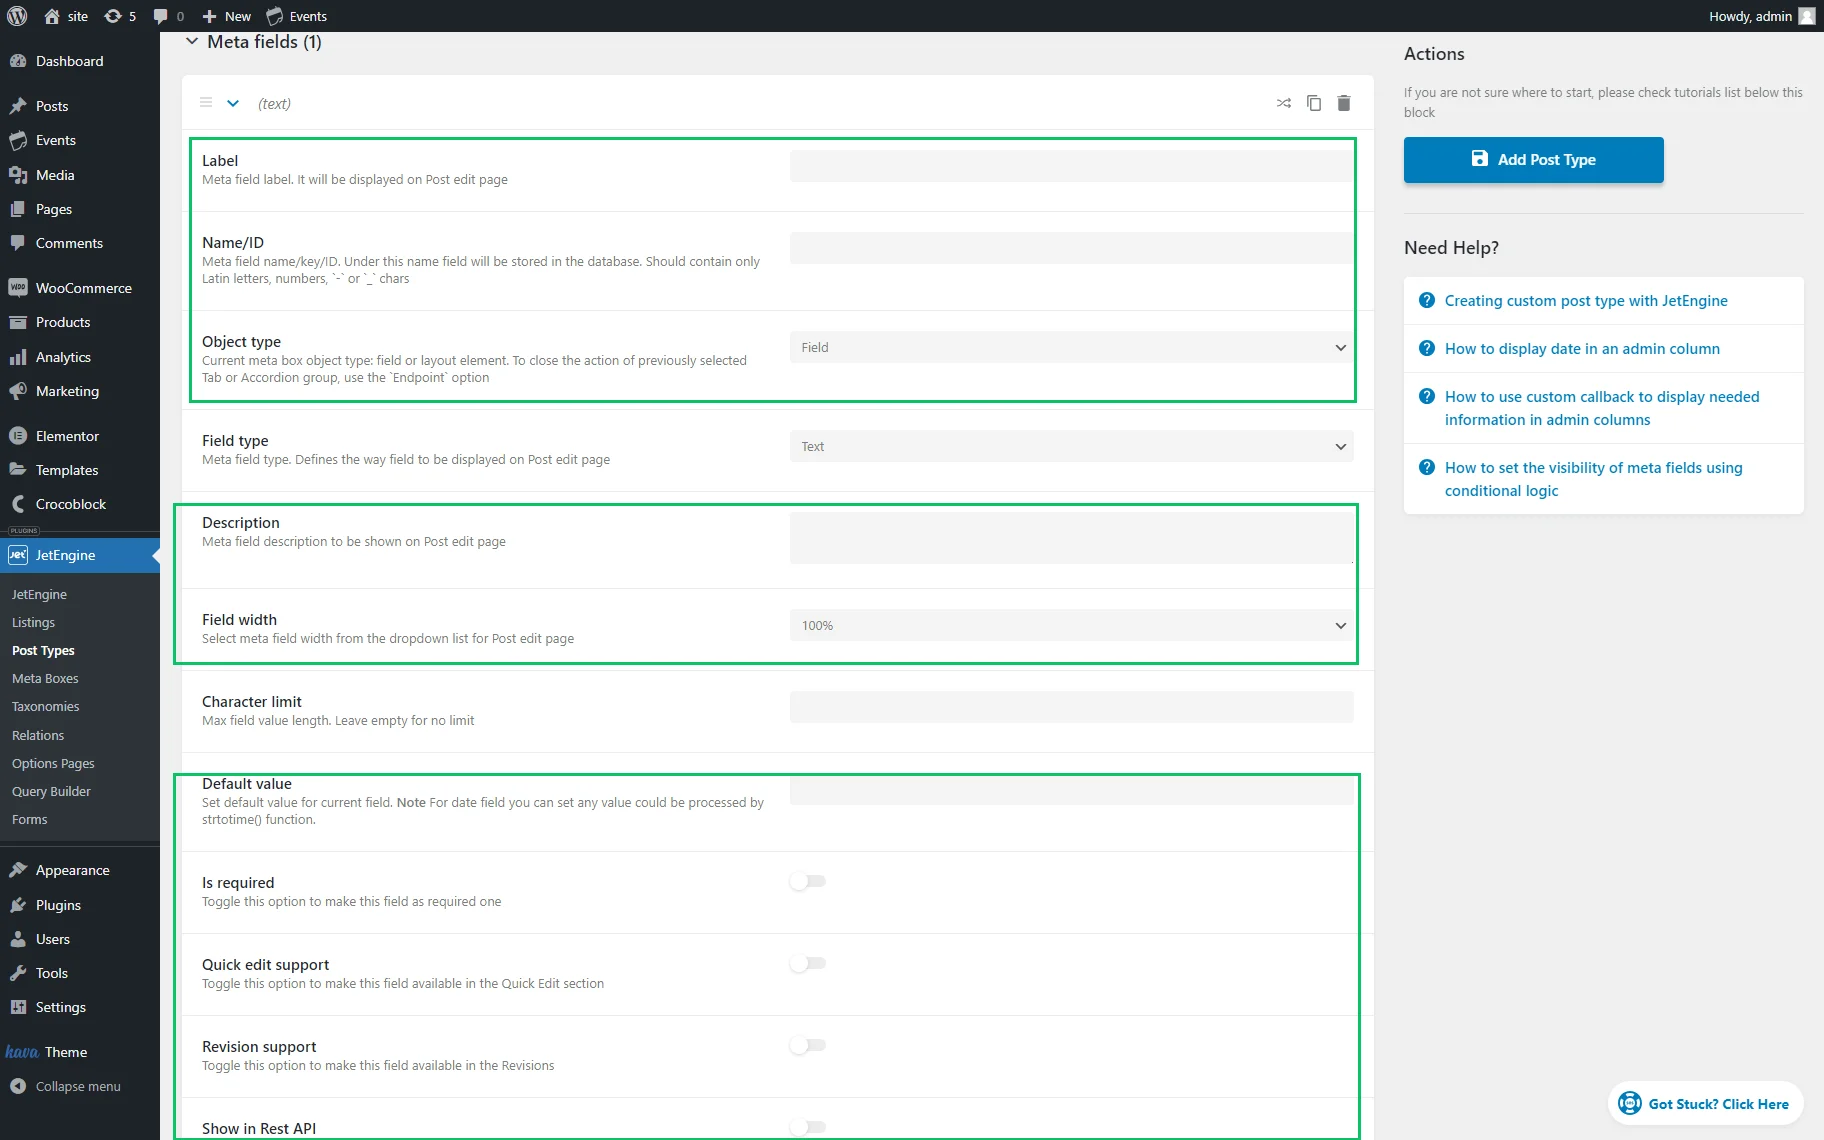
- Label — a title of the field that will be shown to users;
- Name/ID — a value that is generated automatically, according to the text put into the Label bar. The ID must contain no spaces and consist of only Latin letters and numbers. The auto-fill feature will add a random number to the name if it is not unique. The fields with identical IDs could be confusing and cause issues if used elsewhere. If the Label bar includes Cyrillic letters, the auto-fill will transliterate them to English;
- Object type — a dropdown list that allows users to select the type of the meta field. The “Field” option allows adding values there. Meanwhile, the “Tab,” “Accordion,” and “Endpoint” options will create a specific layout;
- Description — an additional field to type information about the meta field purpose;
- Field width — a dropdown list with the field width options that can be changed to make the meta field layout more compact. The “100%” option is set by default;
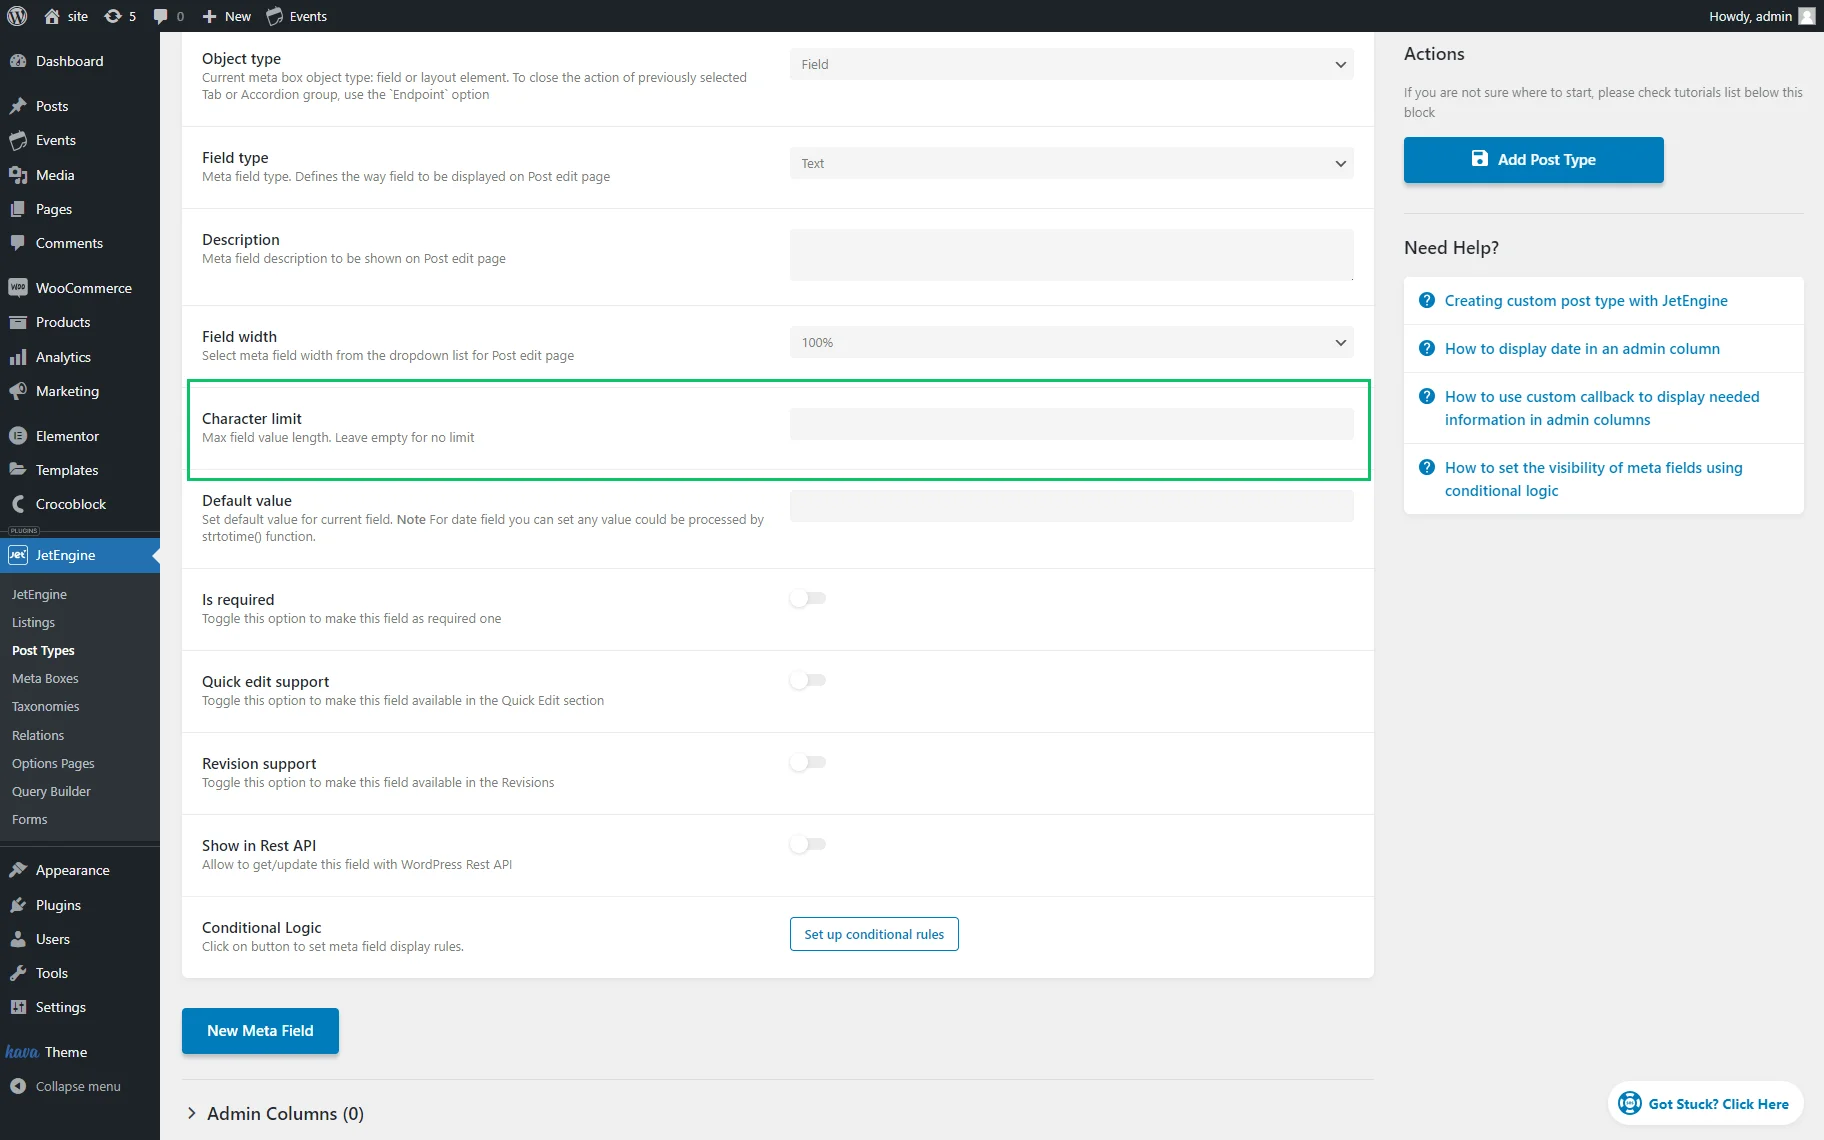
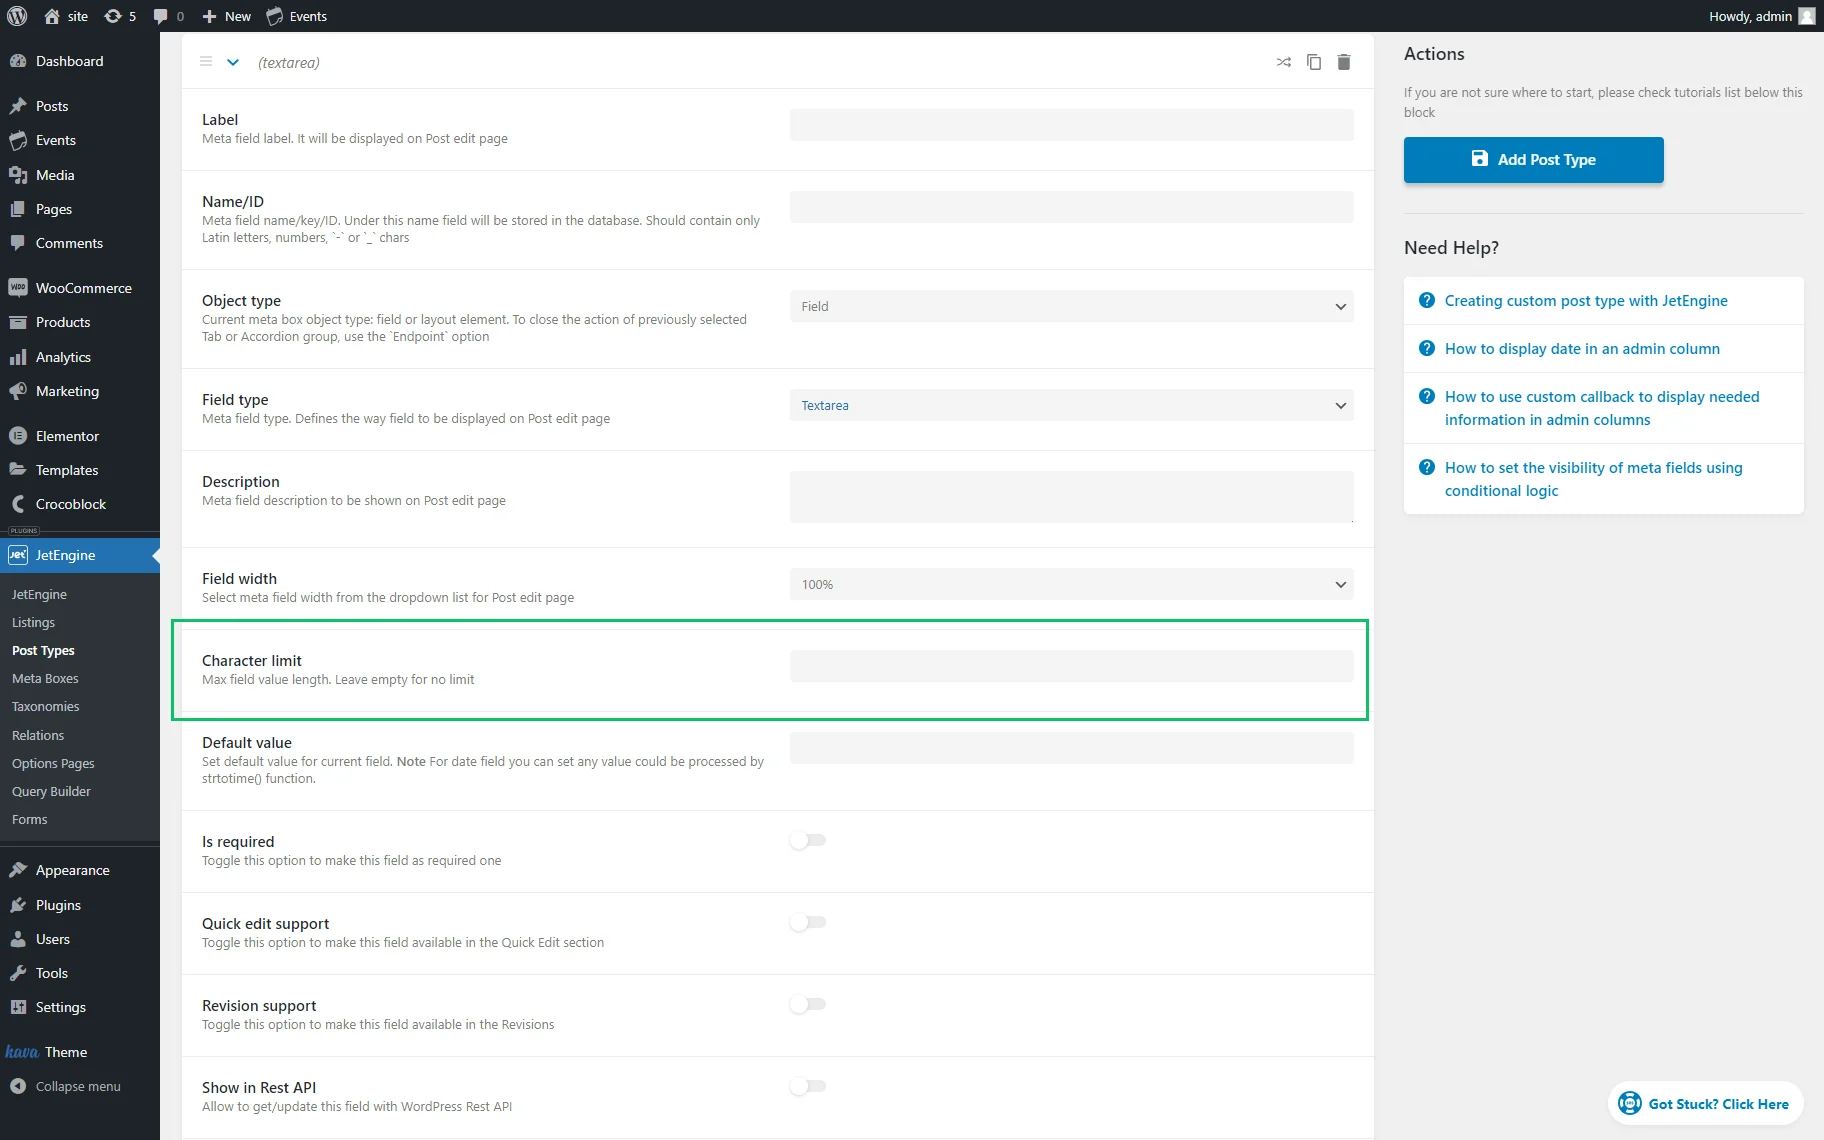
- Character limit — a field responsible for the meta field input limitation;
- Default value — a default input for the meta field that can be changed if desired;
- Is required — if enabled, this toggle makes the field required;
- Quick edit support — an option that allows displaying some meta fields from JetEngine in the default area for fast editing. It will enable quick change of the values of some meta fields without opening posts.
- Revision support — if activated, this toggle displays changes made to the field in the post’s Revisions section. By default, meta fields are not shown in this section, even if the “Revisions” option is selected in the Supports field of the Post Type settings. This switcher appears only when default or CPT posts are the places where the meta fields will be used;
- Show in Rest API — a switcher that enables displaying the current meta field in the REST API;
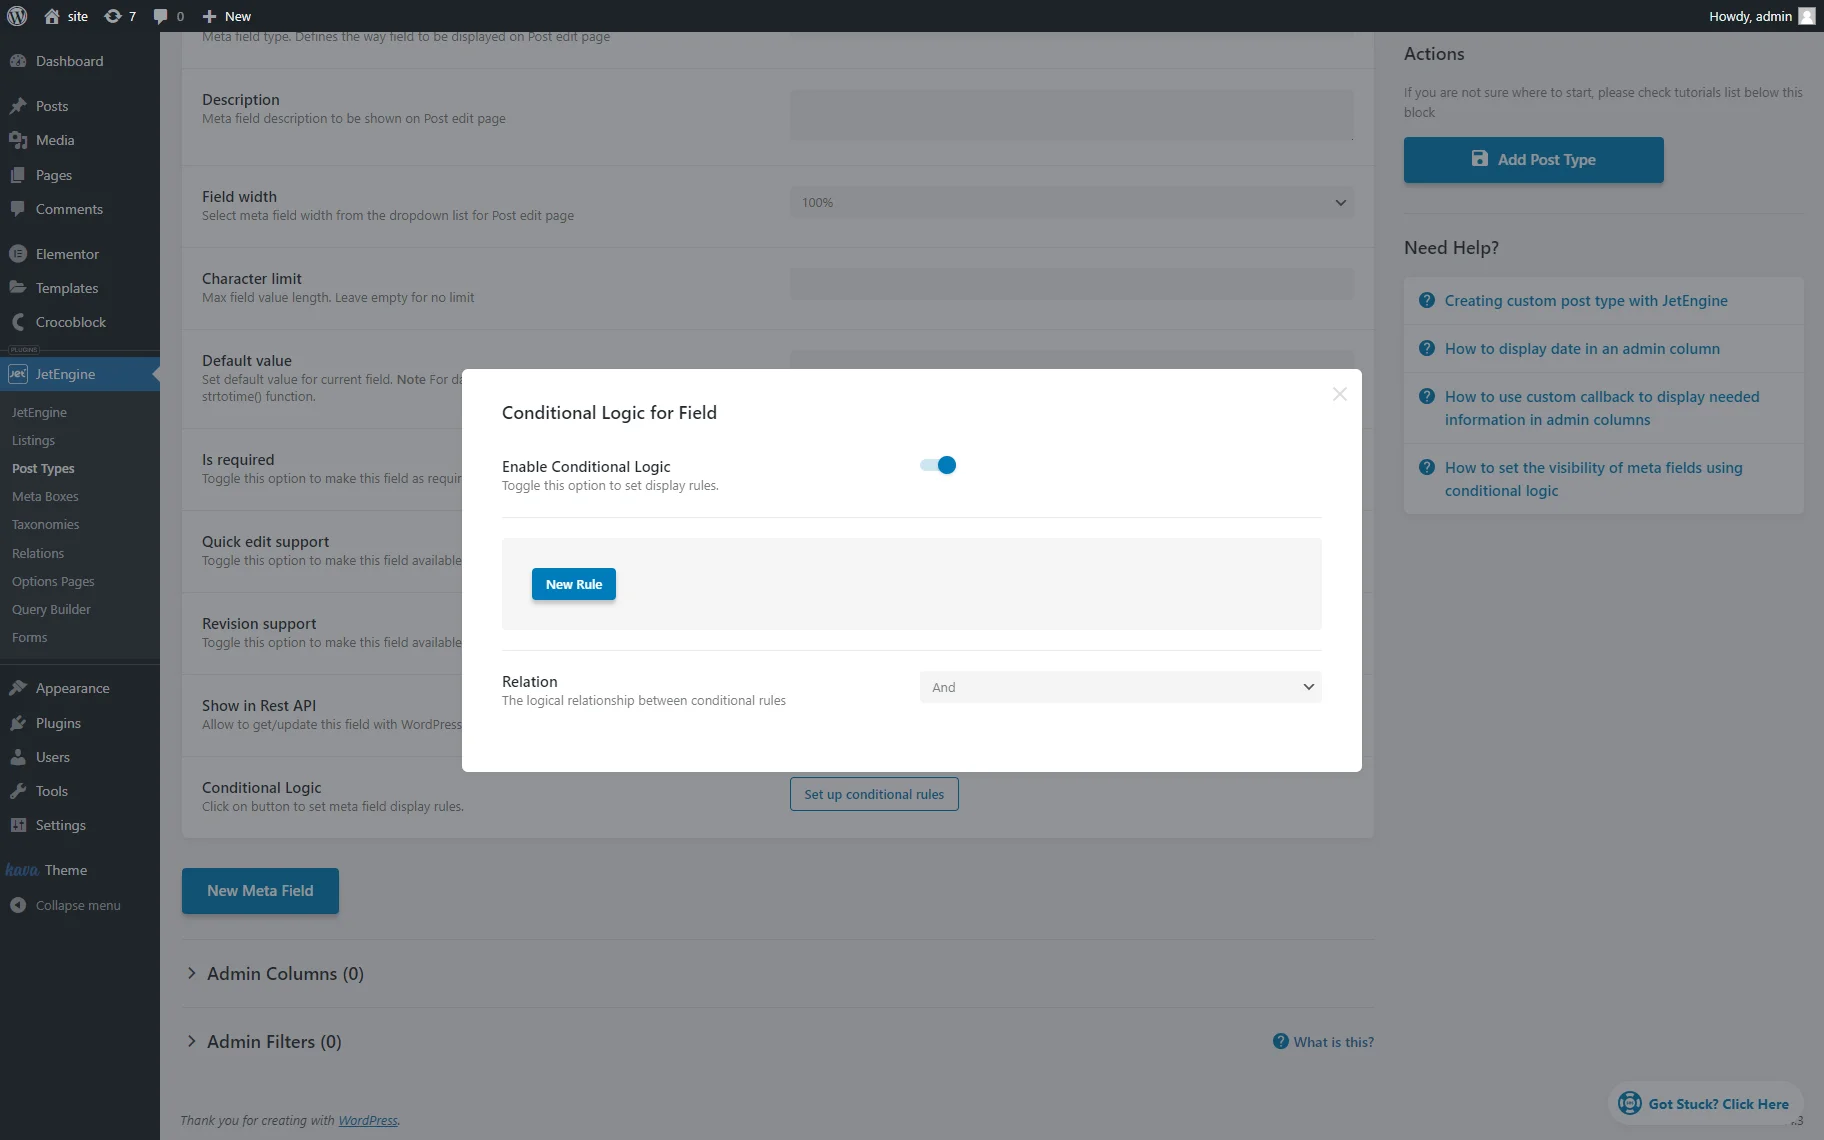
- Conditional Logic — a toggle that makes a meta field visible under the set conditions. If enabled, this toggle opens the Conditional Logic for Field pop-up, where a conditional logic rule and a relation can be set.
Meta Field Types and Their Features
The following Meta Field types are available in the Field type dropdown menu: “Text,” “Date,” “Time,” “Datetime,” “Textarea,” “WYSIWYG,” “Switcher,” “Checkbox,” “Iconpicker,” “Media,” “Gallery,” “Radio,” “Repeater,” “Select,” “Number,” “Colorpicker,” “Posts,” “HTML,” “Advanced Date,” and “Map.”
Texts and numbers
This group of meta fields includes the “Text,” “Textarea,” “WYSIWYG,” and “Number” meta fields. Except for the “WYSIWYG” meta fields and the aforementioned meta fields, these are frequently used meta fields. The text fields from this group, except for their direct purposes, collect and display data on numbers, texts, ranges of numbers, emails, URLs, links, and passwords.
Text
This type is for adding a custom text field to the post type to provide supplemental information about posts.
The “Text” meta field allows setting the maximum field value length in the Character limit field; leaving this field empty sets no limitation in the character value. The following characters are allowable: uppercase and lowercase Latin and Cyrillic letters; digits from 0 to 9; special characters and spaces. The field stores data as single-string values.
Textarea
This field type can be used to add a textual area to posts and arrange the text line by line. The Character limit field specifies the maximum field value length; leaving it empty sets no limitation on the character value.
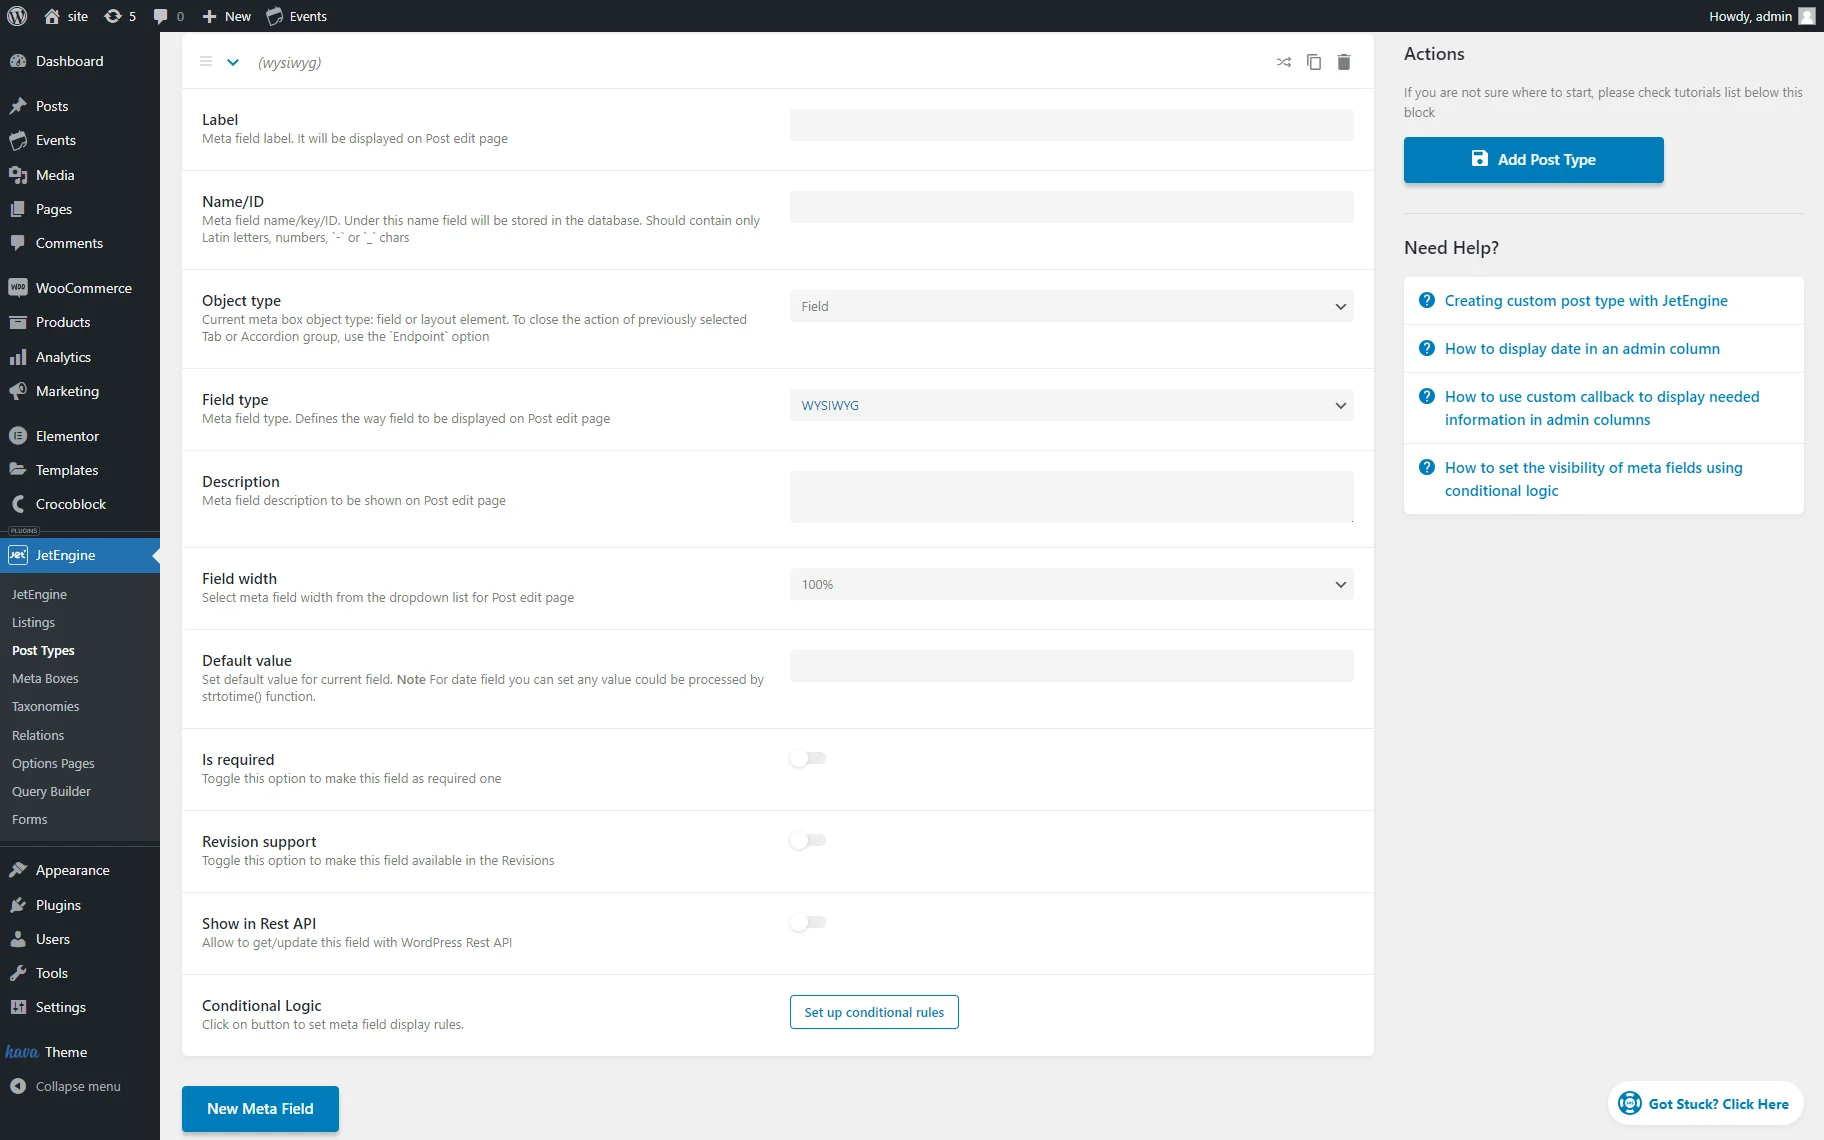
WYSIWYG
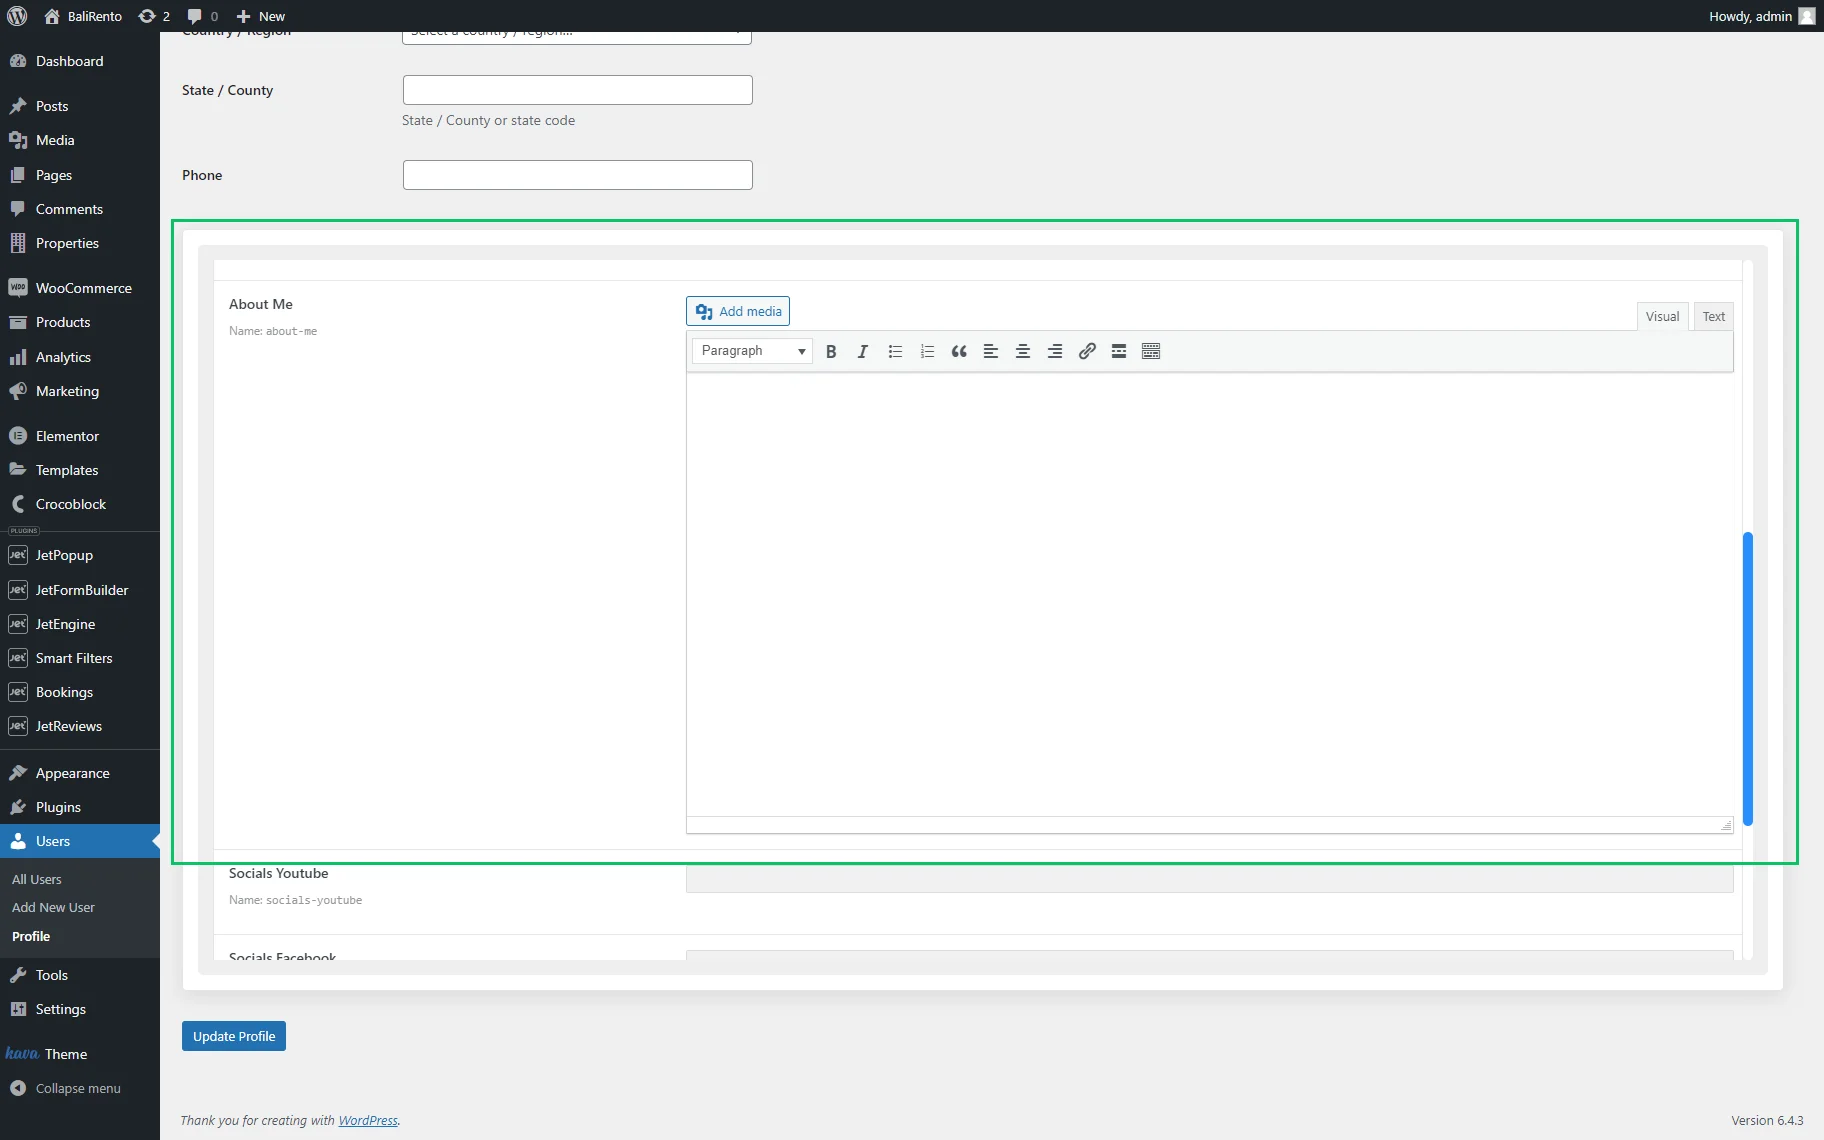
Once this type is selected, a basic editor in the custom field will be displayed. It allows adding content field settings to a particular layout and customizing its appearance directly in the WordPress Dashboard.
Number
This meta field can contain numbers only. The data is saved in the string format.
The meta field has the following specific settings:
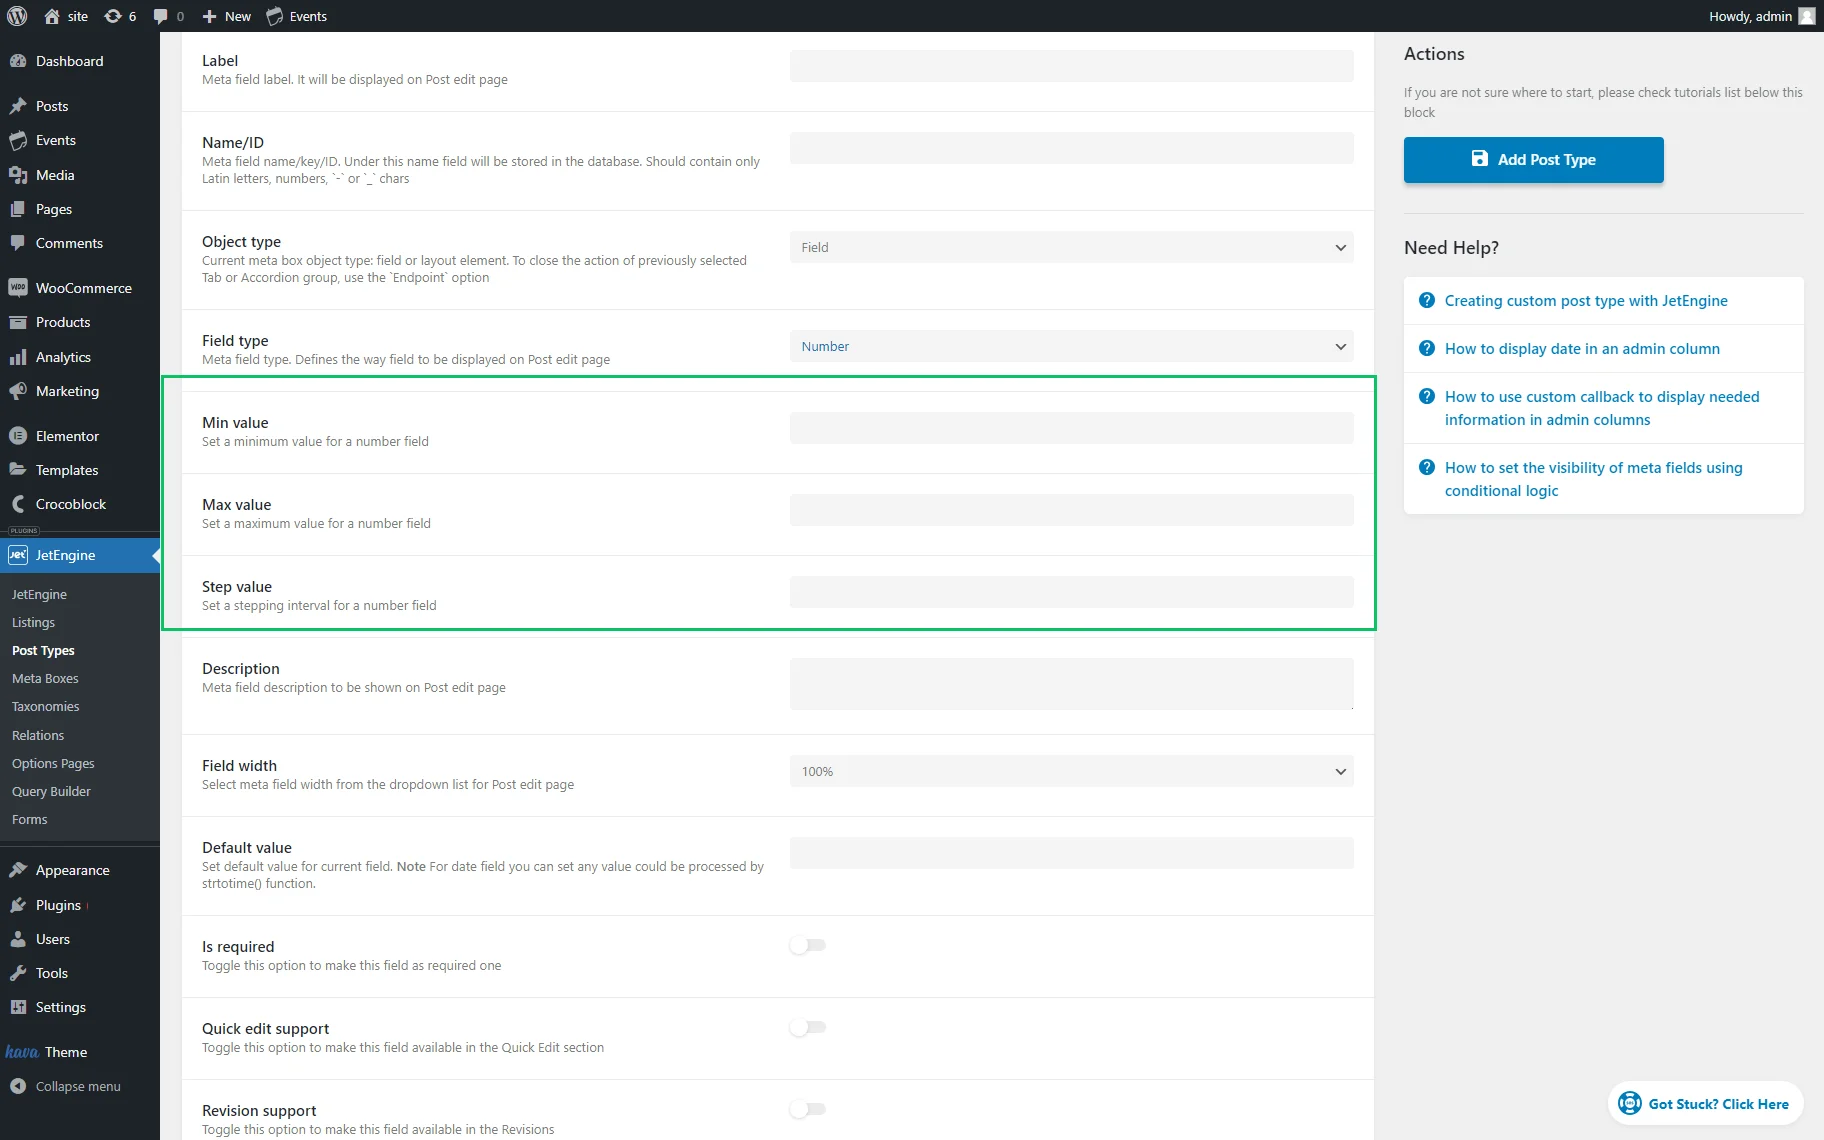
- Min value — the minimal value required to complete the meta field;
- Max value — the maximum value that can be chosen;
- Step value — the field that represents the intervals between the selectable values. For instance, if users select the “2” value and there are no minimal and maximal values set, the “1,” “3,” “5,” etc., values can be chosen for completing the meta field.
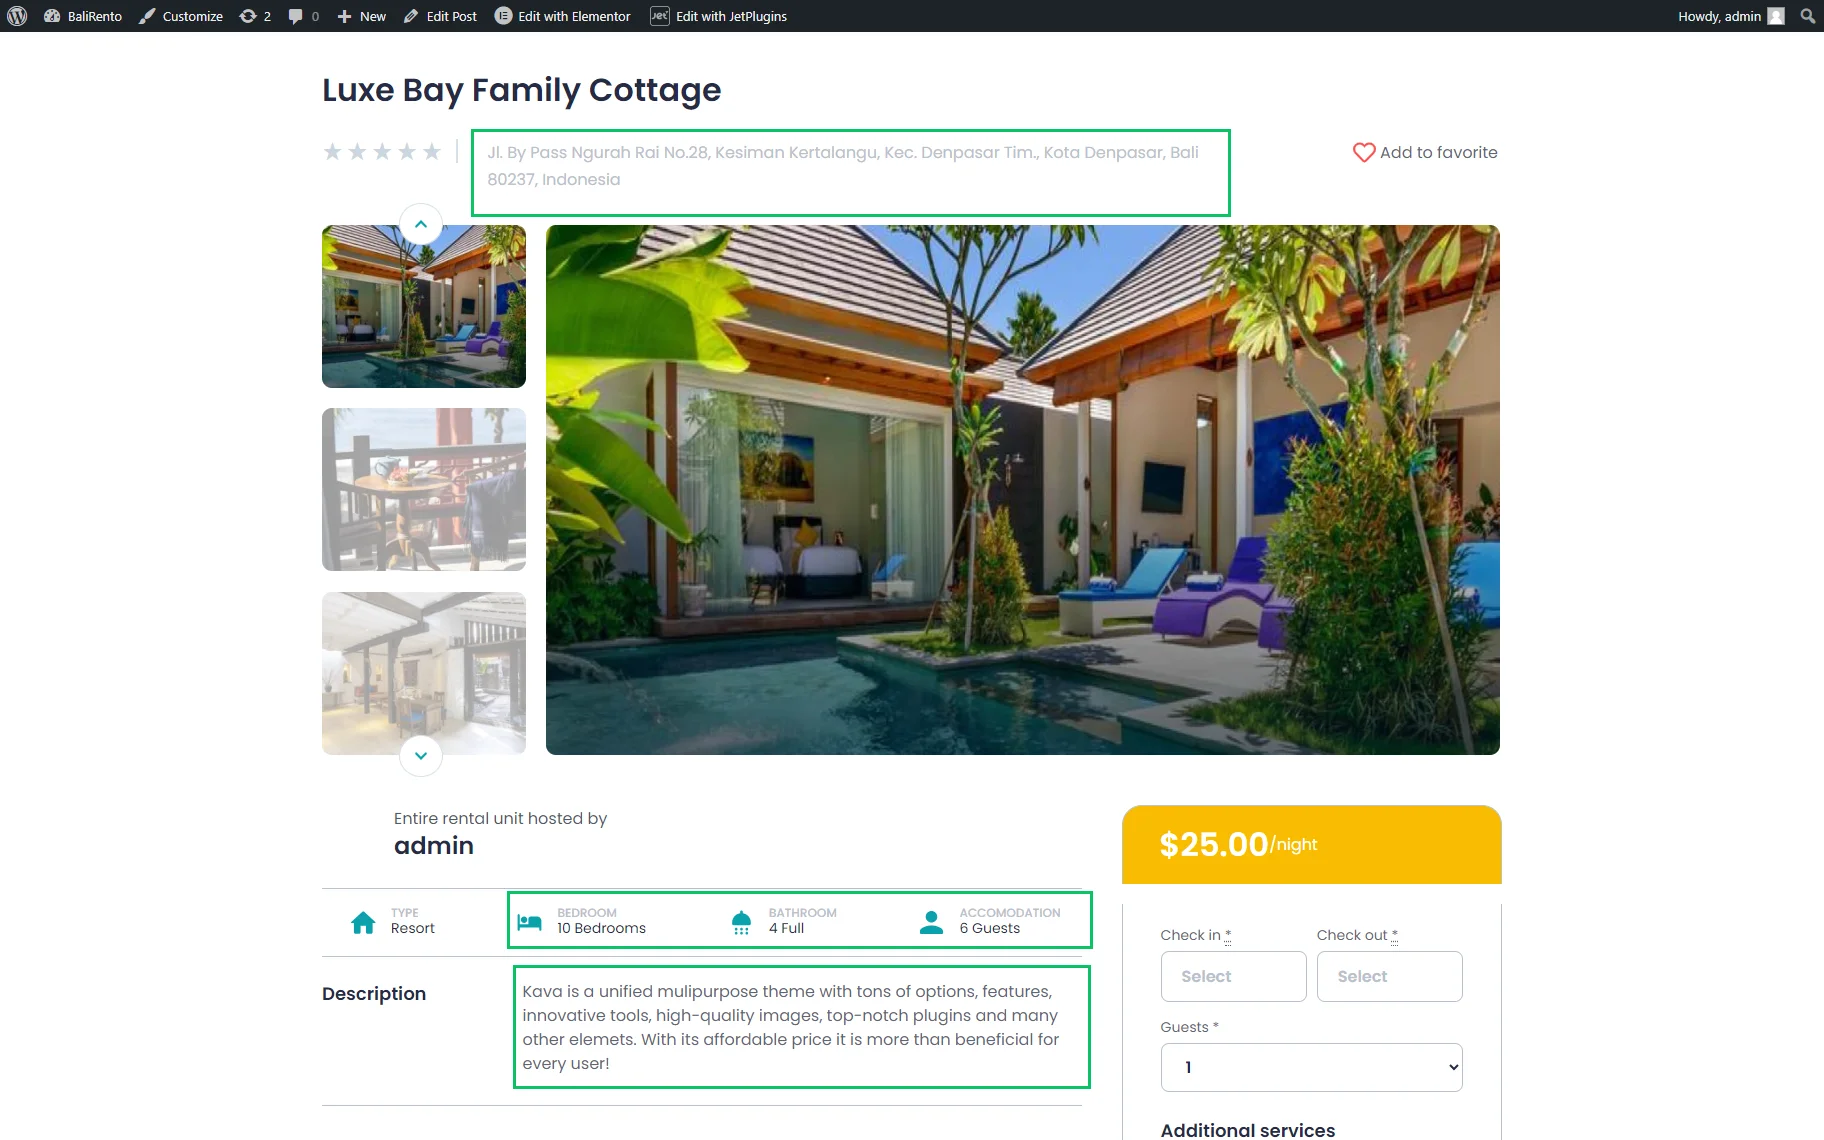
Text fields on the front end
In the given case, we display the “Text” (here, the “Address” meta field), “Textarea” (here, the “Description”), and “Number (here, the “Number of bedrooms,” “Number of bathrooms,” and “Guests”) on the front end.
The “WYSIWYG” meta field is often used for content field settings, for example, for users’ profiles.
Images
The “Media” and “Gallery” meta fields are used to display images. The images are stored as the image array, image URL (string), or image ID (integer).
Media
This type adds media files to the posts.
The meta field has a specific field Value format, which is the media format stored in the database. The available options include “Media ID,” “Media URL,” and “Array with media ID and URL” to display media using both IDs and URLs. The graphical file formats are available, e.g., PNG, JPG, and WebP.
Another unique field is available for the “Media” Field type:

- Restrict MIME Types — a toggle that is deactivated by default. When activated, the Allowed MIME Types field appears, which lets selecting the allowed MIME types of the uploaded media files.
Gallery
This meta field adds multiple images to the posts and products as a gallery. The graphical file formats are available, e.g., PNG, JPG, and WebP.
The Value format dropdown list allows the selection of the images stored in the database. The available options include “Media ID,” “Media URL,” and “Array with media ID and URL” to display media using both IDs and URLs.
Also, one can restrict the MIME types of the uploaded media using the corresponding field.

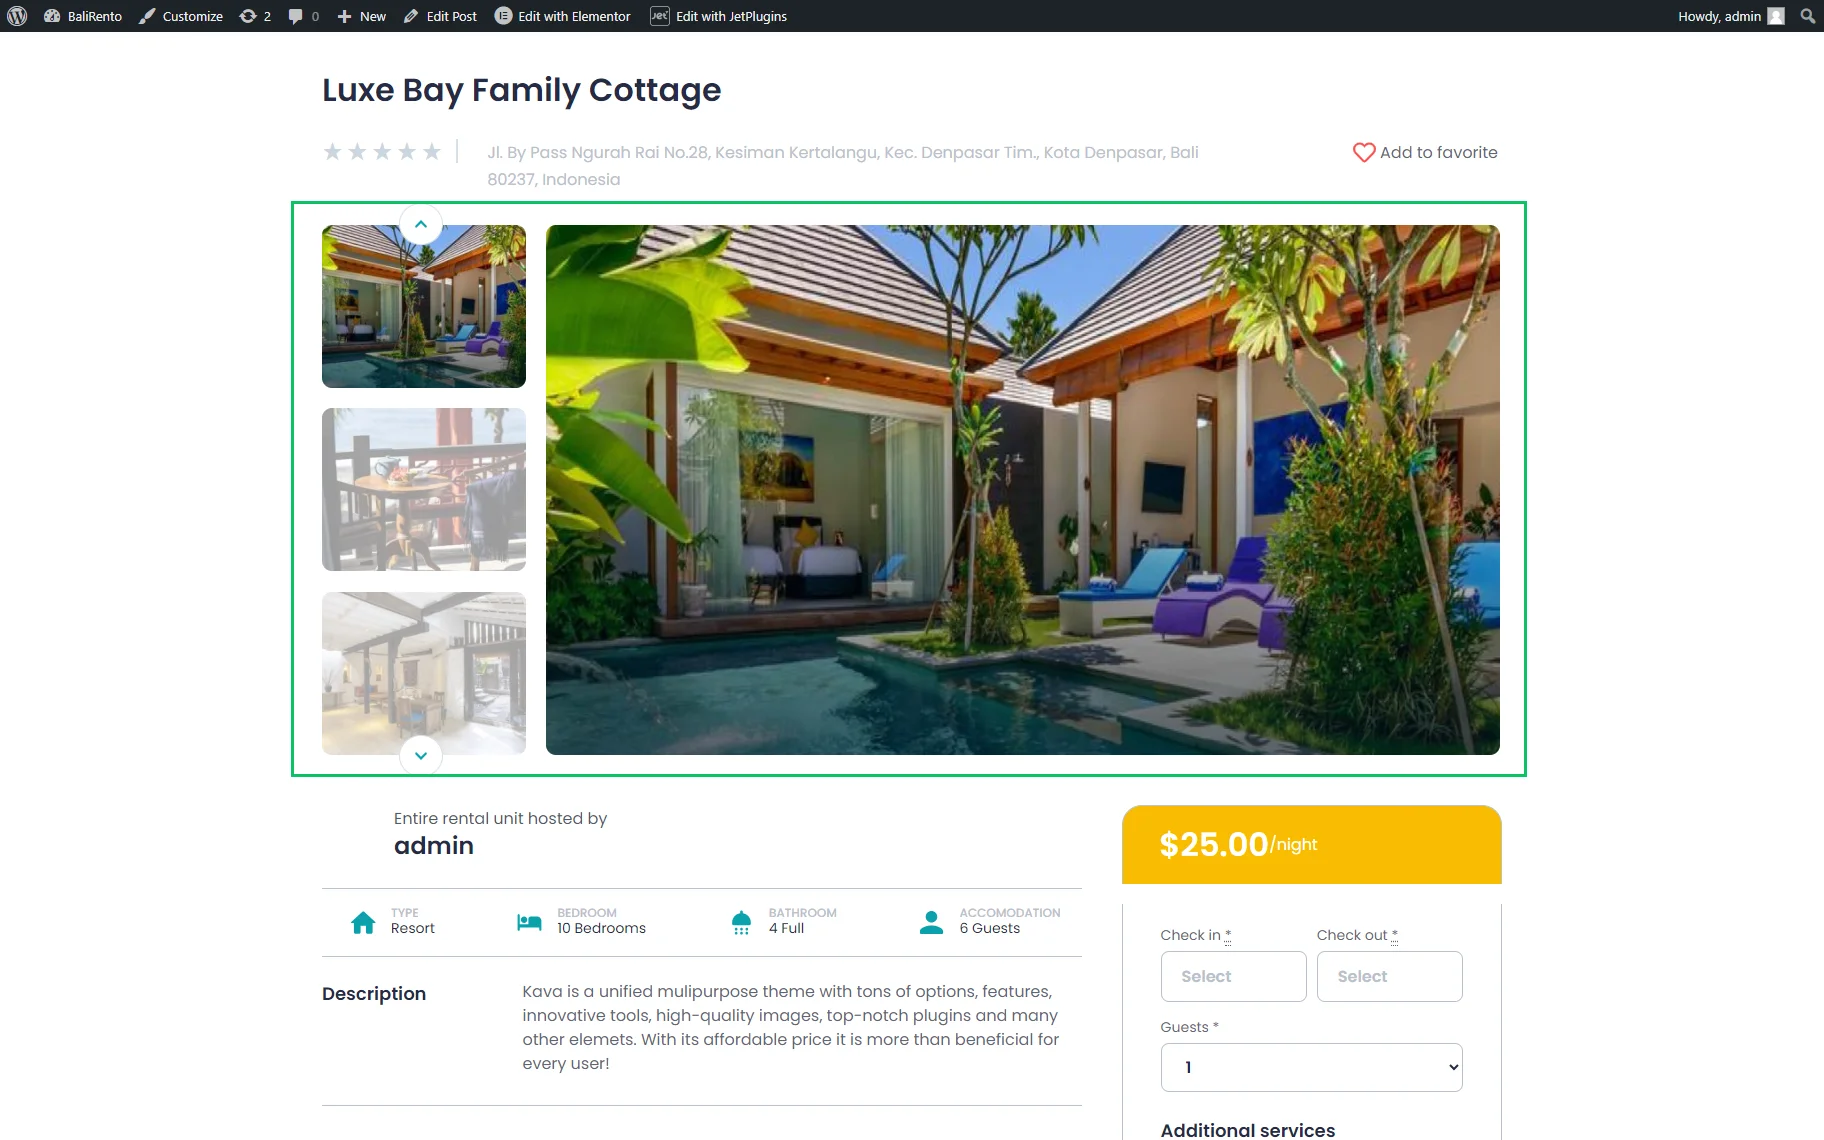
Image fields on the front end
In the given case, we placed the “Gallery” field with images on the front end.
Dates and times
The “Date,” “Time,“ “Datetime,” and “Advanced Date” meta fields are intended to select the date and/or time and display them on the front end in the needed format.
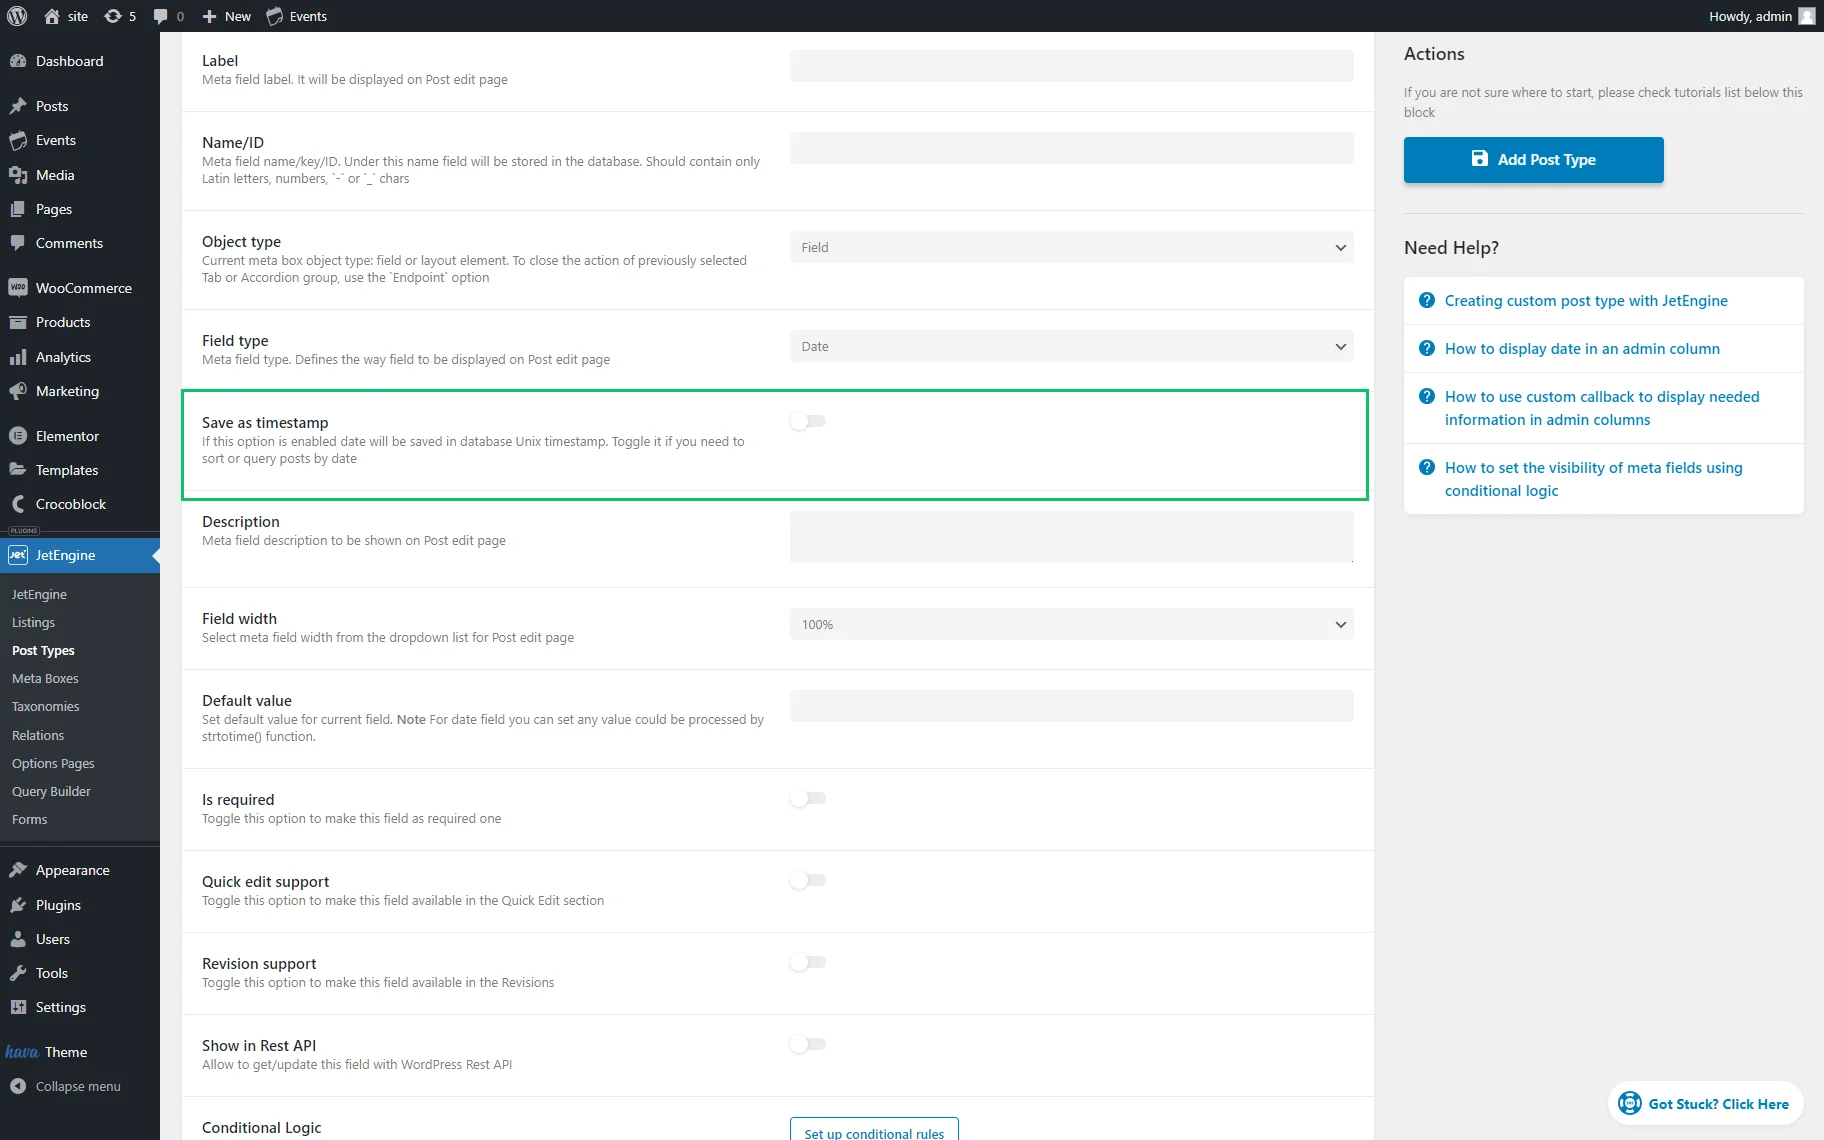
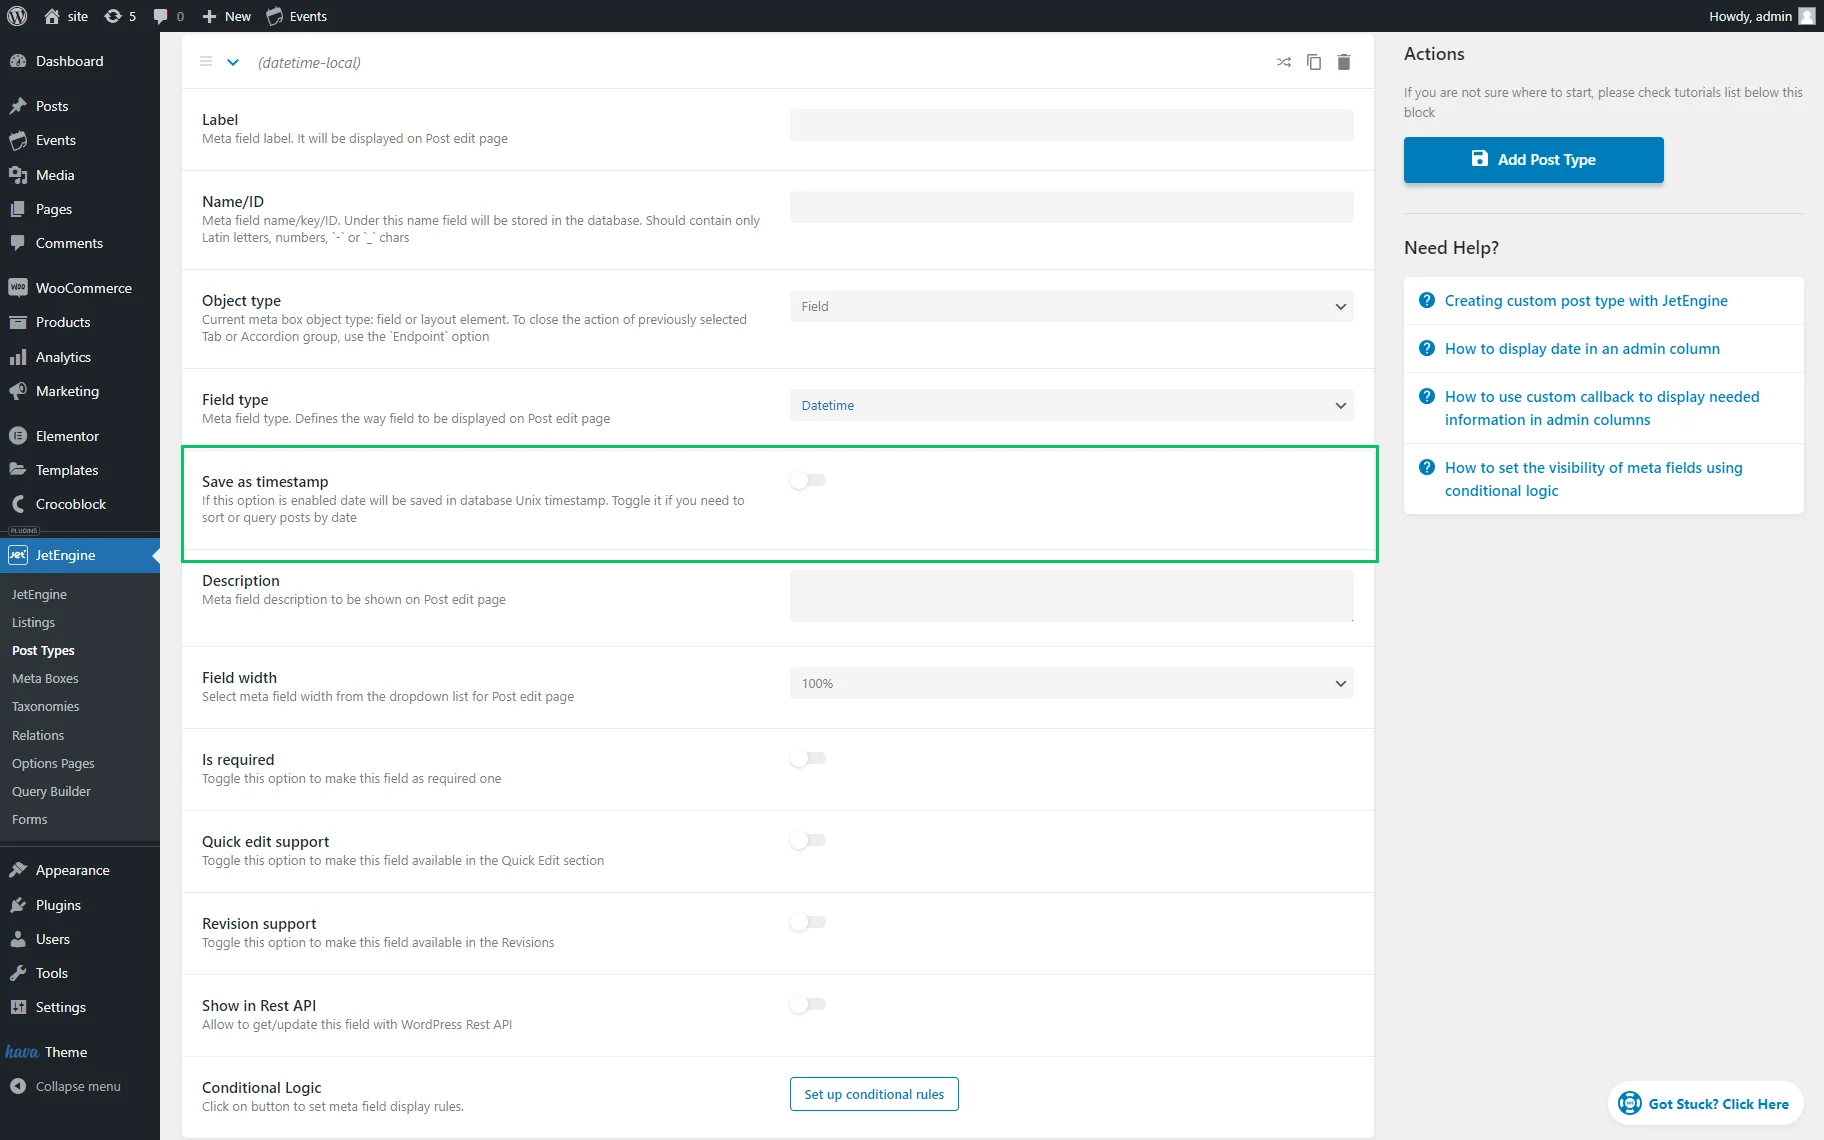
Date
This meta field provides information about the dates of events, meetings, or conferences. The “Date” meta field settings include the Save as timestamp toggle. It allows users to query the posts by date, display the date on the front end using the Dynamic Field widget, and set the needed format via callback. The dates are stored in the site’s database in the YYYY-MM-DD format.
When setting the query, users can use the date with macros to return the date as a timestamp.
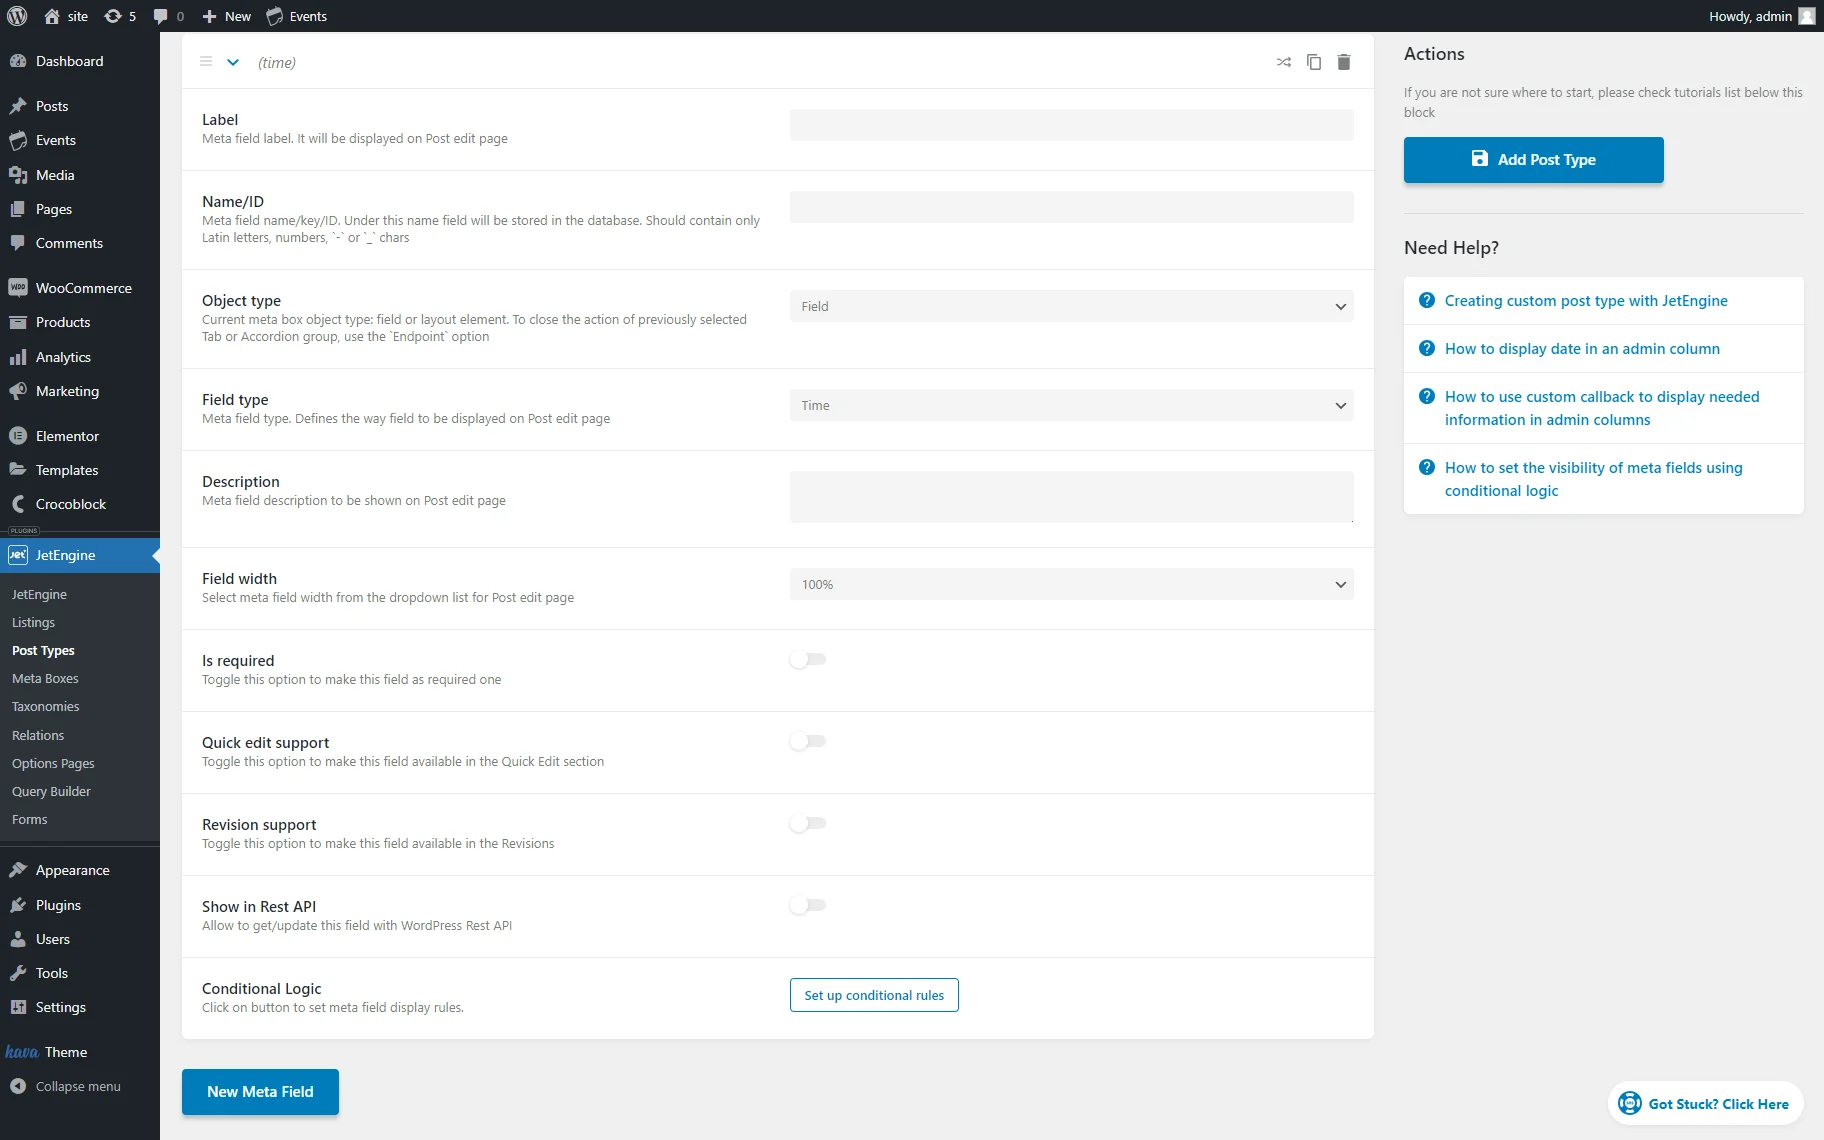
Time
This type is suitable for adding a time marker for posts and adding the time for different events. The time data is stored in the site’s database in the HH:MI format.
Datetime
This custom meta field allows picking the date and time in the same place. The “Datetime” meta field settings allow data to be saved as timestamps.
If enabled, the Save as timestamp toggle allows users to query the posts by date or time, display the date or time on the front end using the Dynamic Field widget, and set the needed format via callback. The dates and times are stored in the site’s database in the YYYY-MM-DD HH:MI format.
When setting the query, the date or time with macros can be used to return the date or time as the timestamp.
Advanced Date
The “Advanced Date” meta field allows displaying the date range with the necessary recurrence of the events to CPT. The dates and times are stored in the site’s database in the YYYY-MM-DD HH:MI format.
The specific settings are:
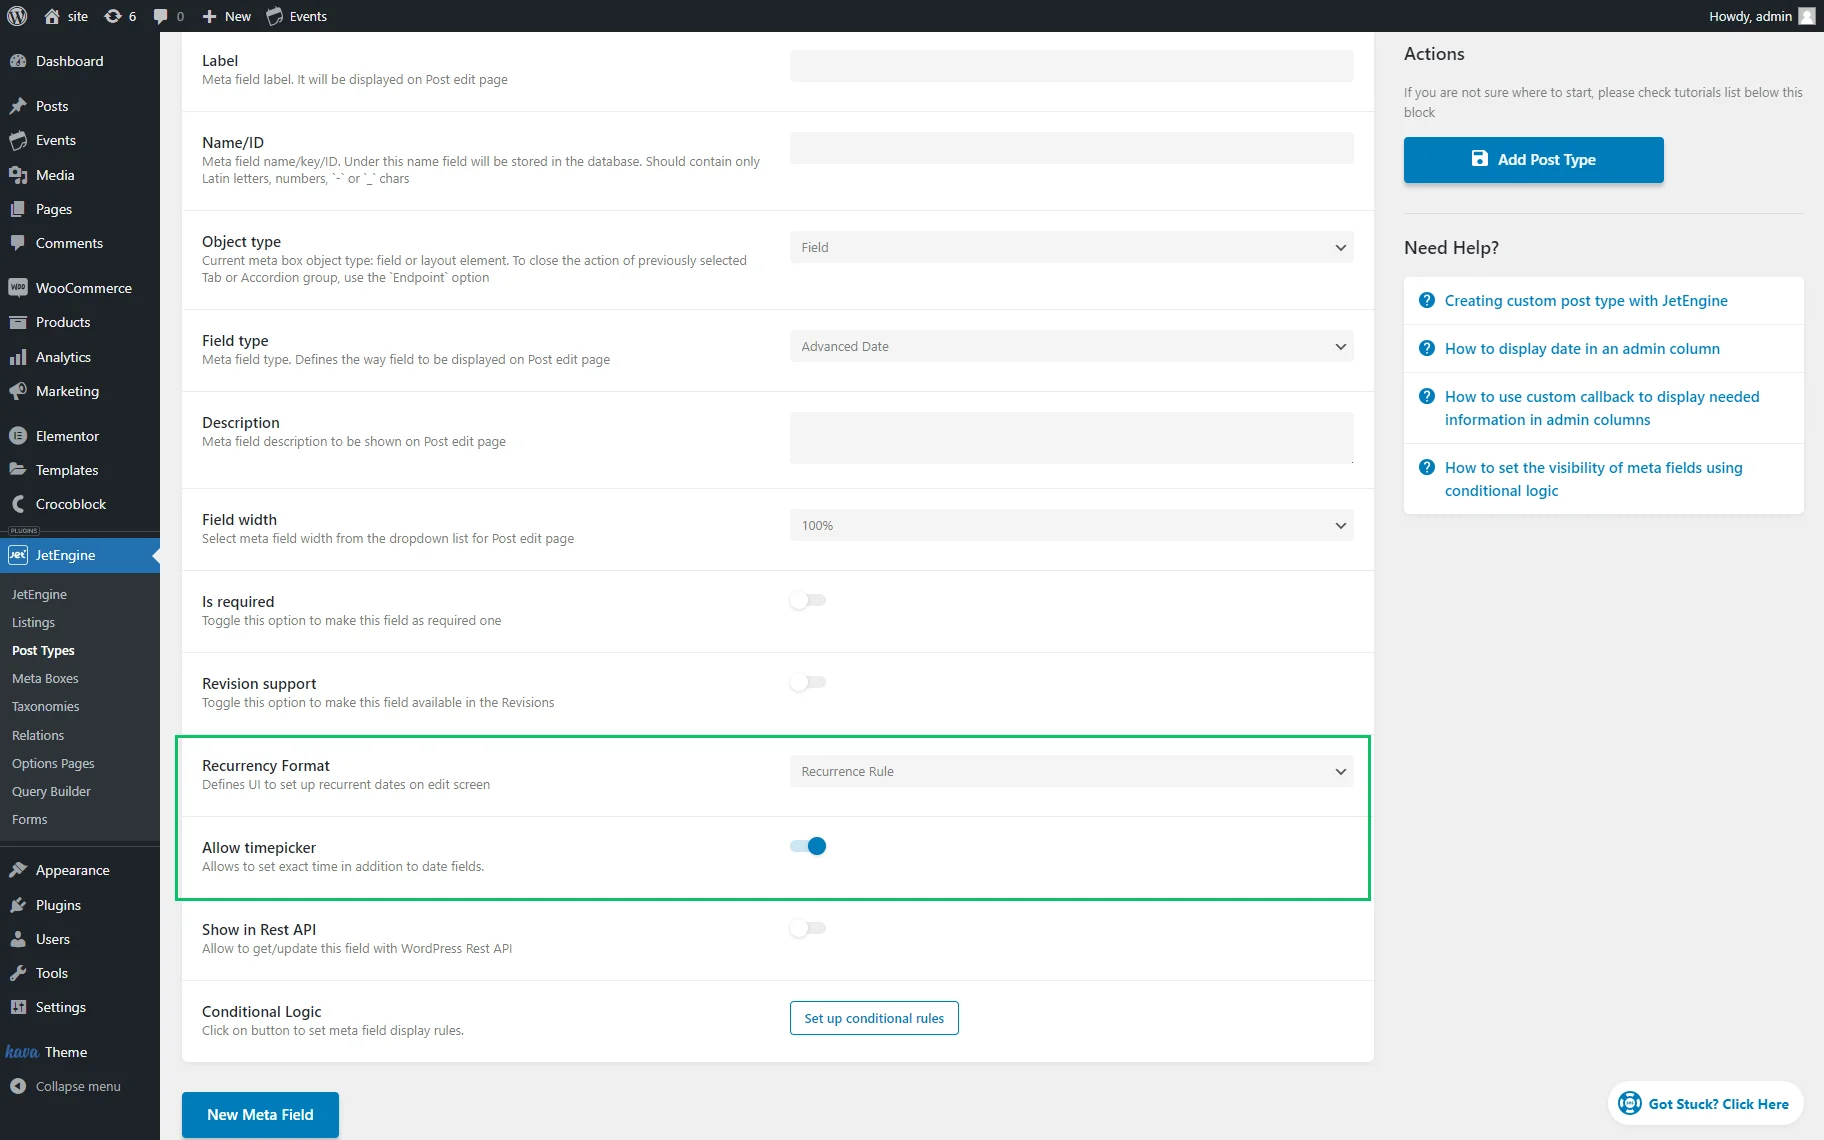
- Recurrency Format — a drop-down list that allows setting the “Recurrent Rule” or “Manually” options to display dates according to a rule or add custom dates, respectively. For example, the “Recurrent Rule” option displays the daily, monthly, yearly, etc., event if enabled, and the “Manually” display means adding needed custom dates manually;
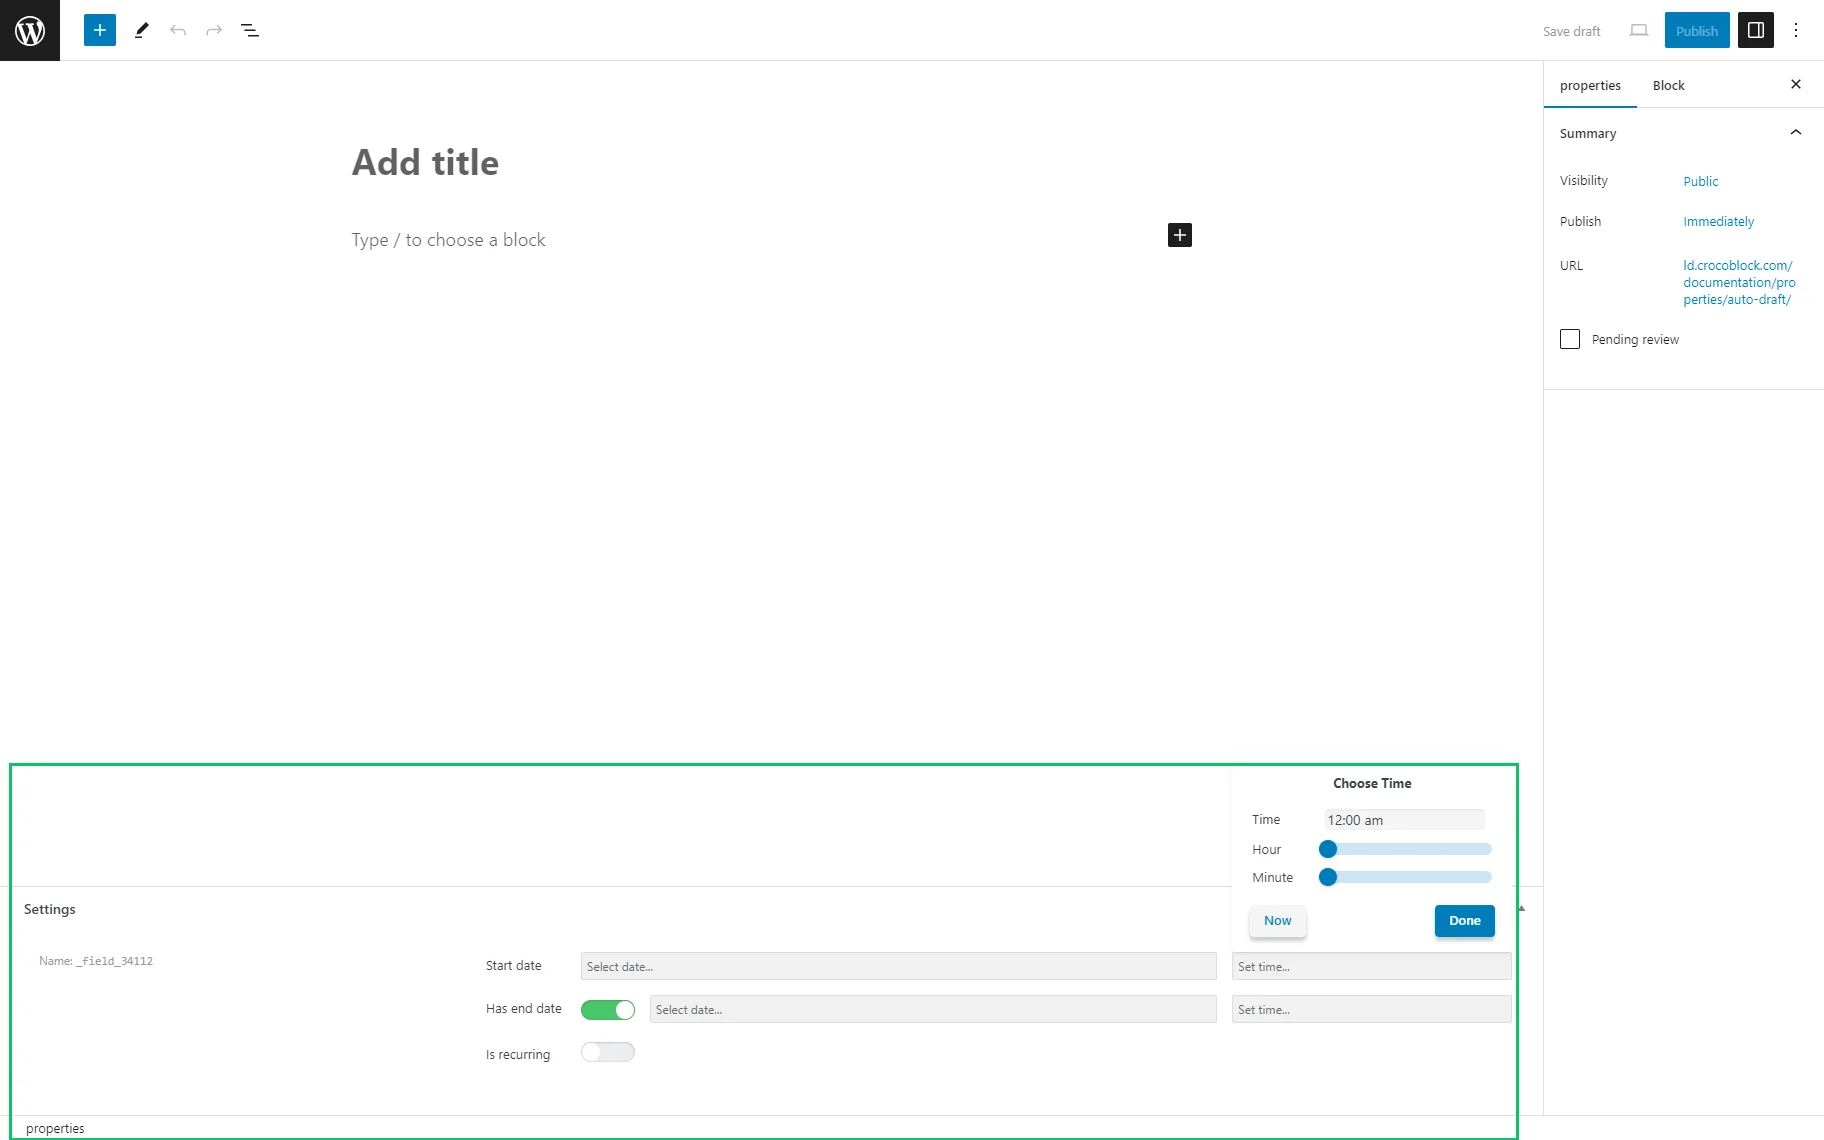
- Allow timepicker — if enabled, this toggle adds additional fields to select times for displaying the events. Learn more from the Timepicker in the Advanced Date field settings chapter of the video tutorial.
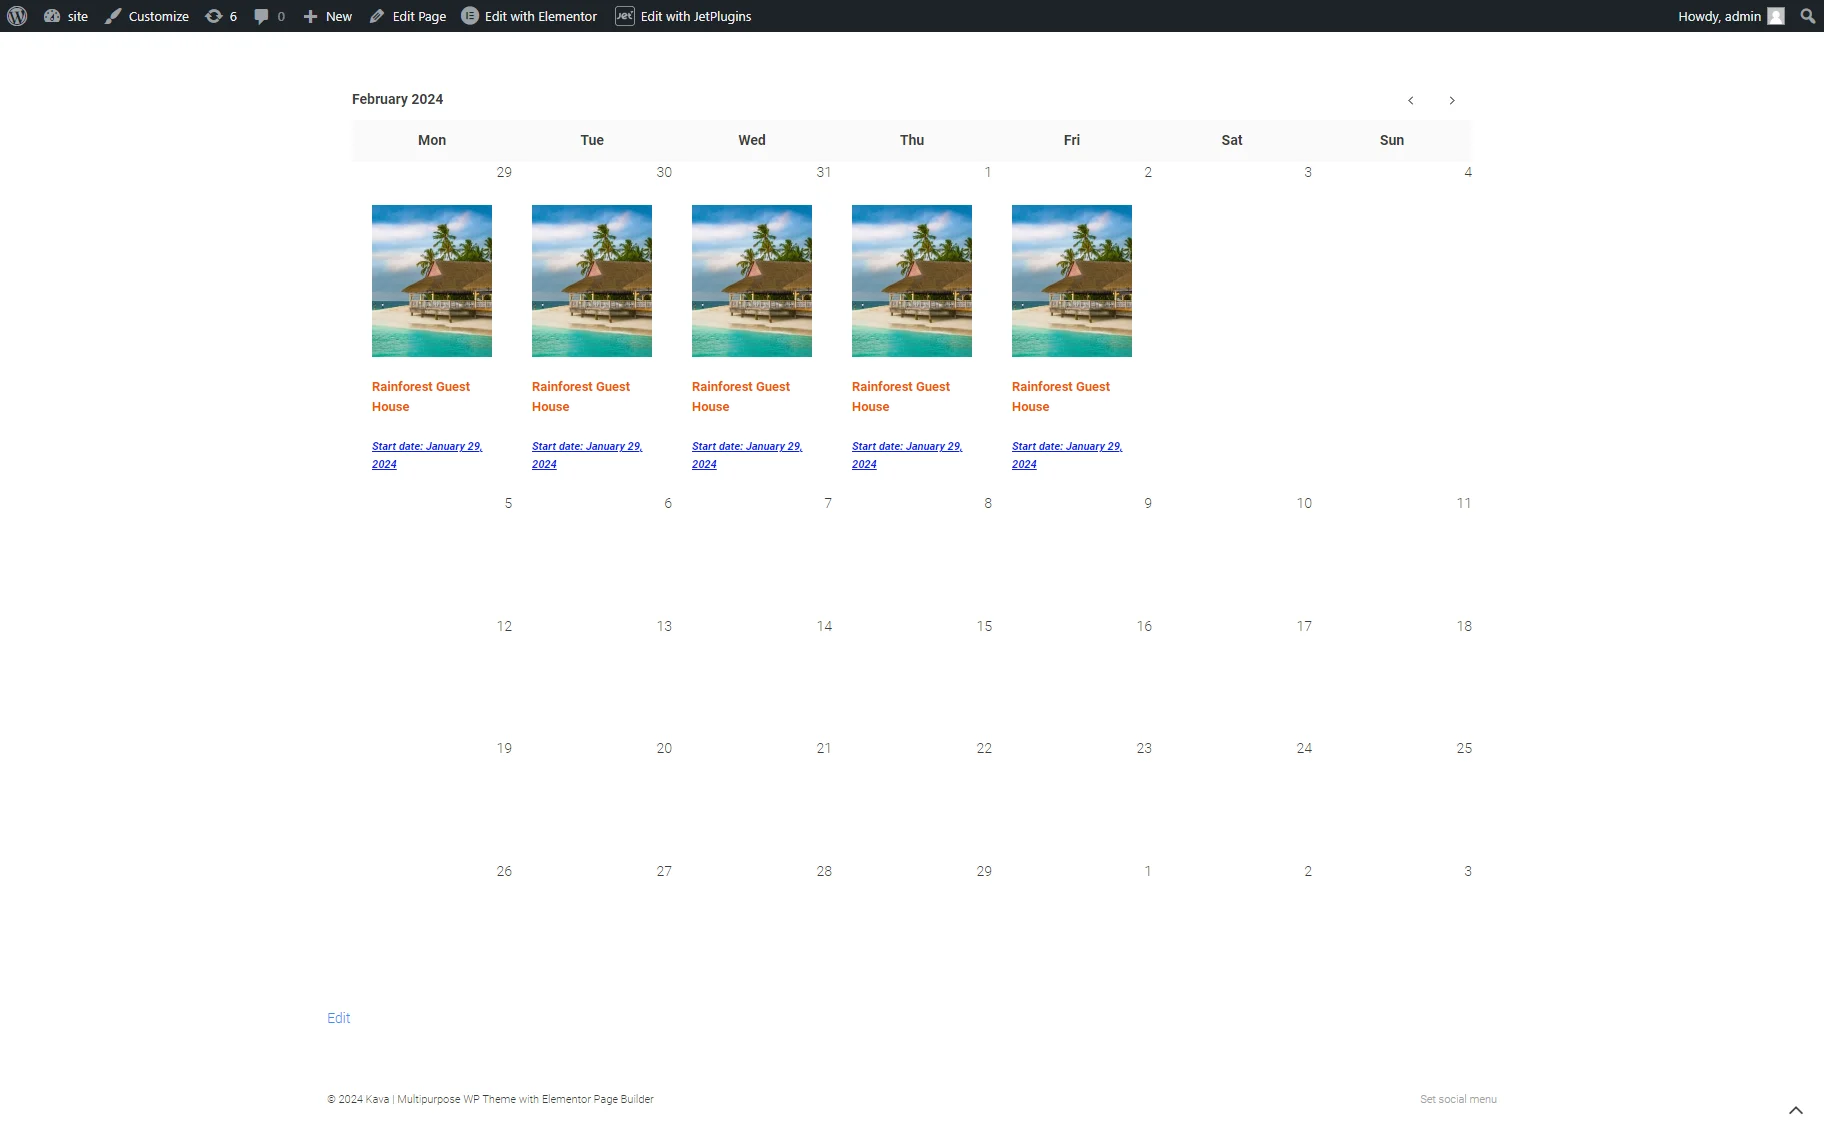
Date and time fields on the front end
The “Date” meta field can now be placed on the front end.
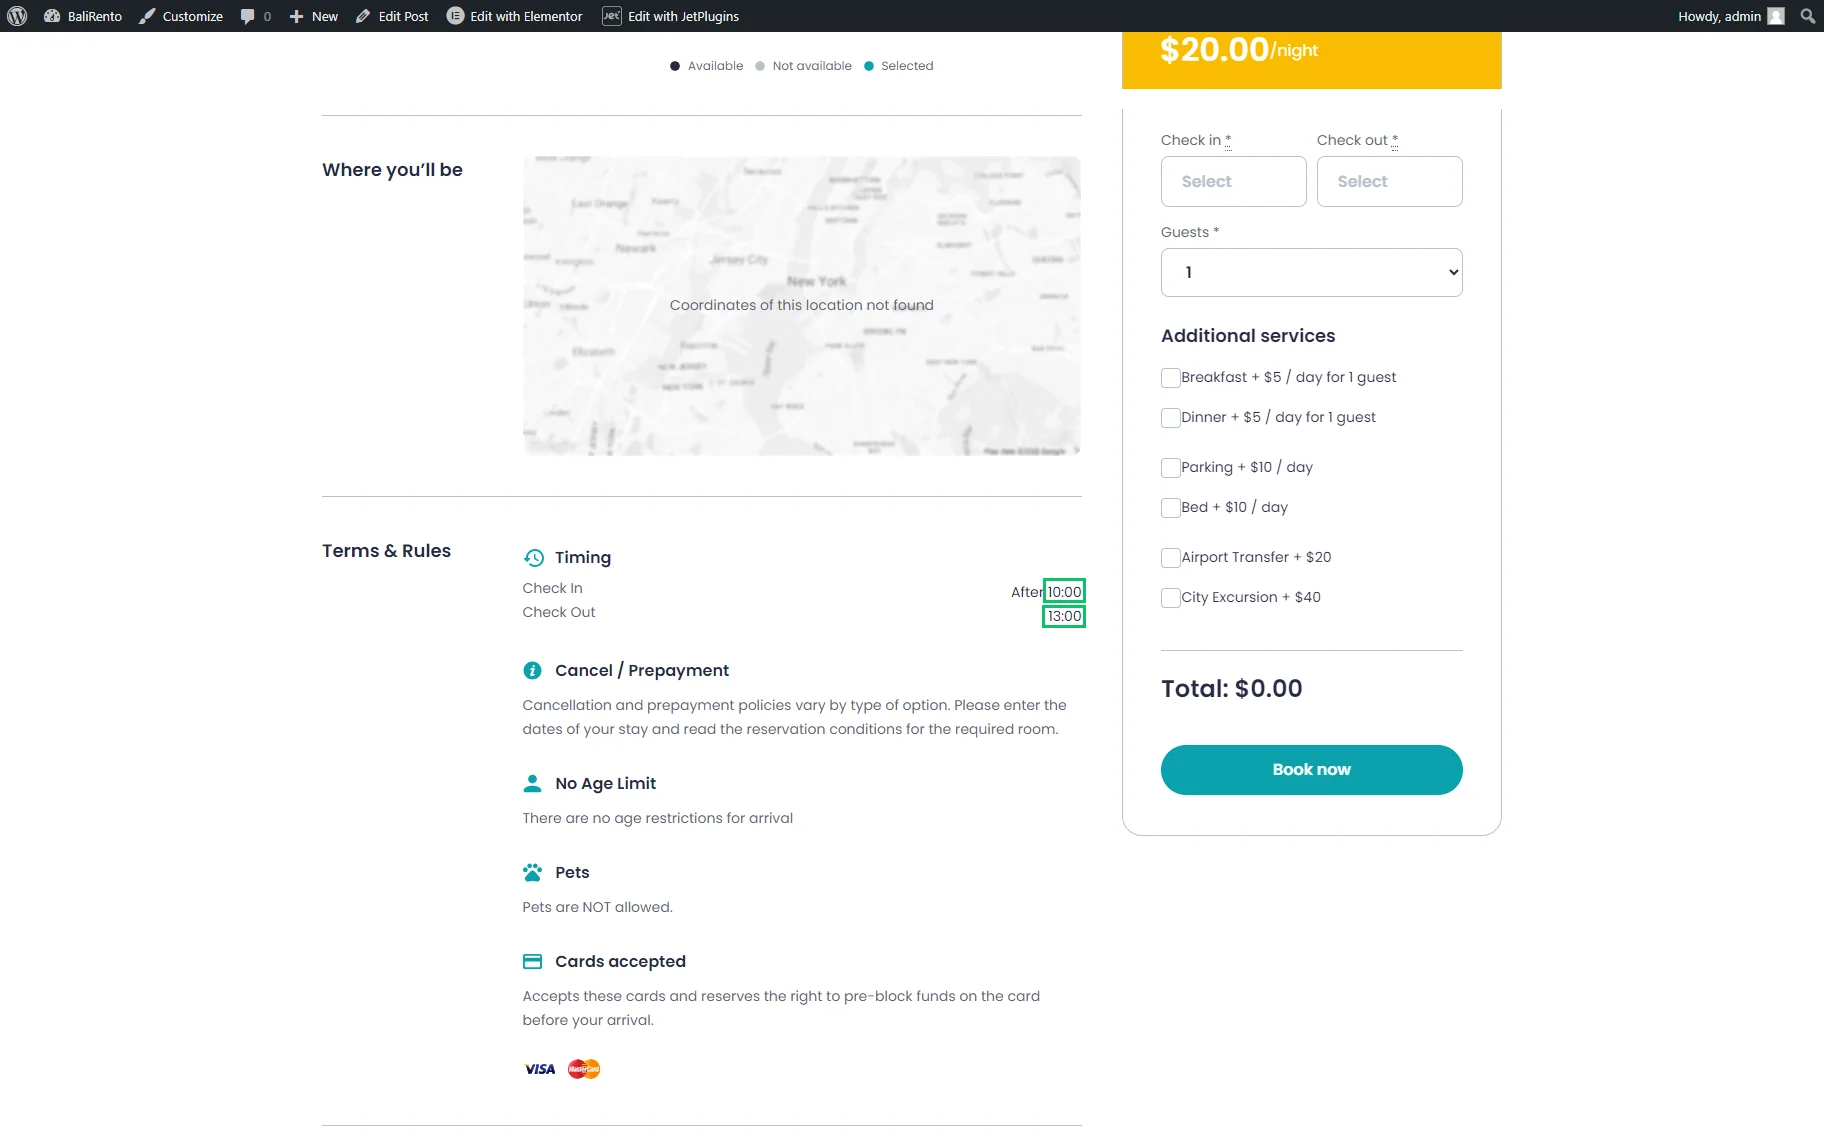
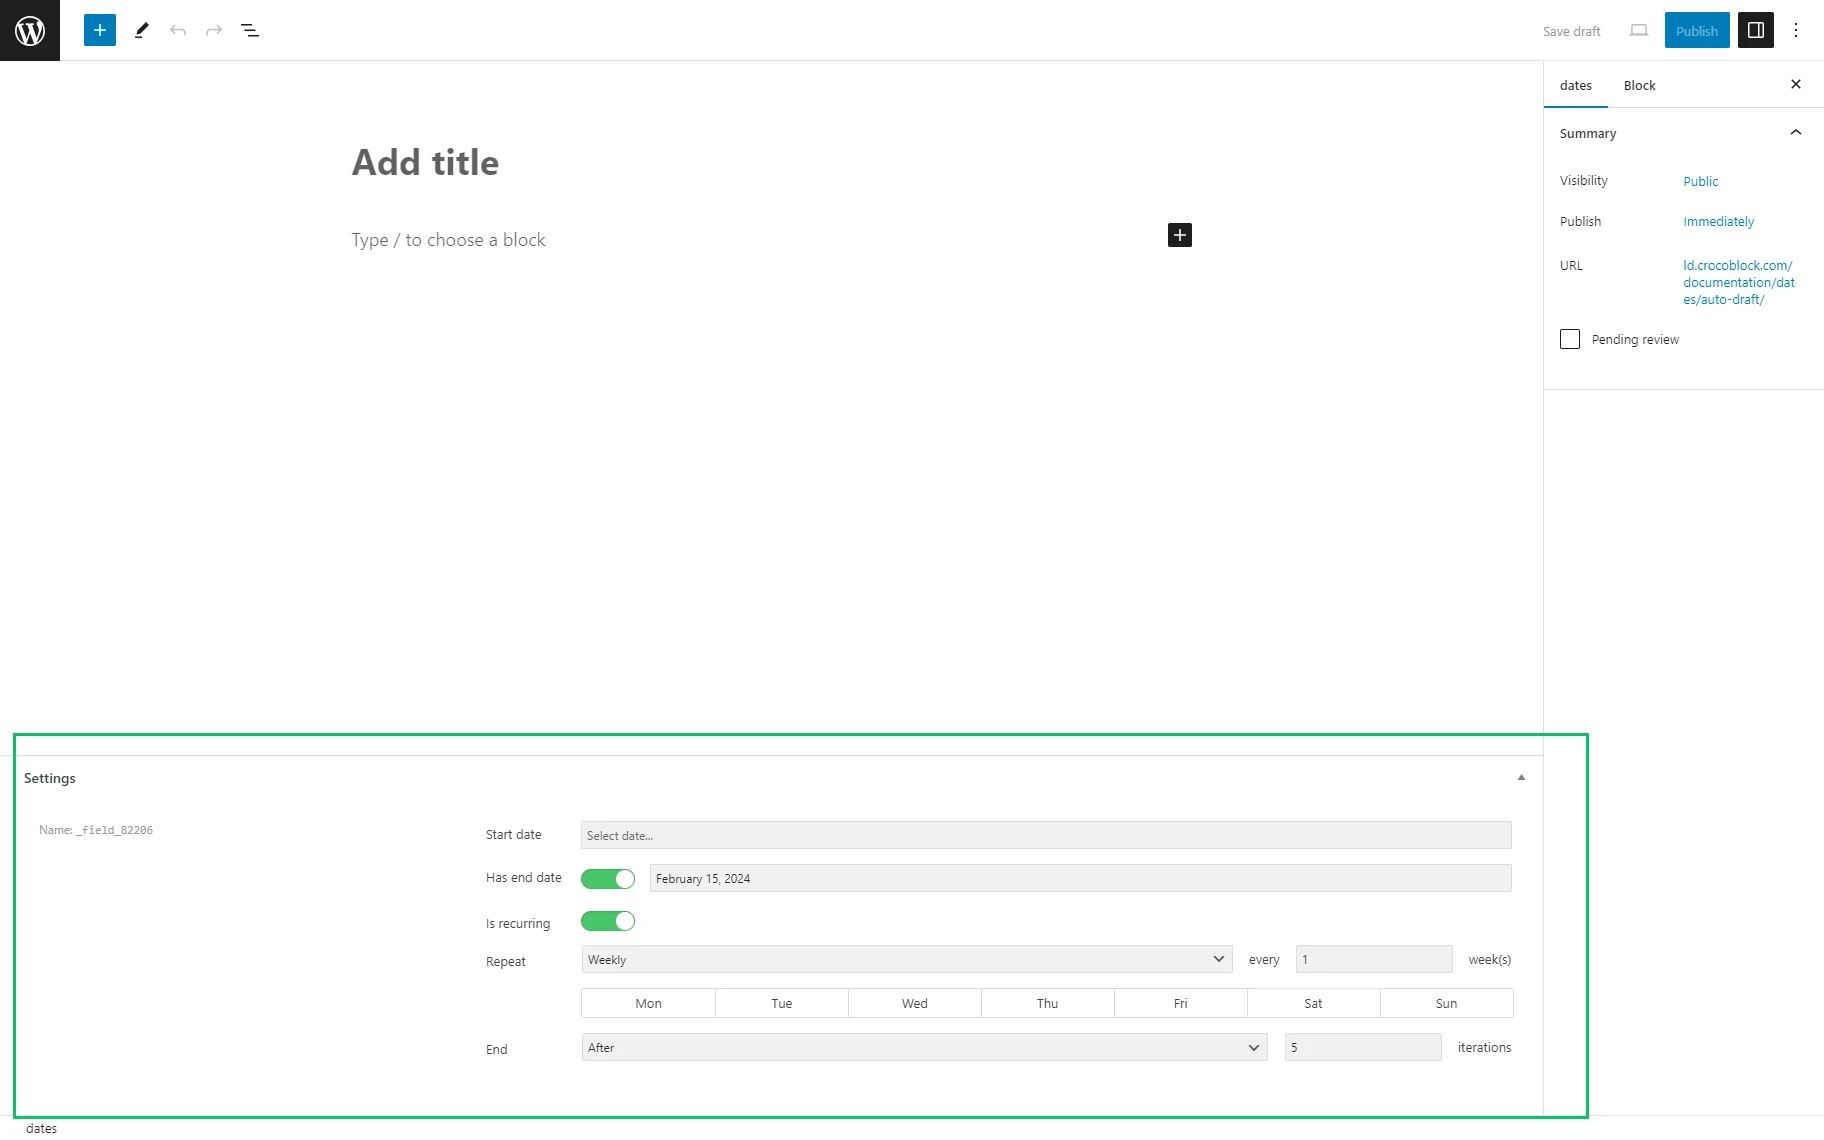
In contrast to the “Date” meta field, the “Advanced Date” is a specific JetEngine meta field, which includes the start date, end date, and event recurring dates. One can display a listing with recurring events based on the “Advanced date” meta field.
Selection
This group of meta fields, including “Radio,” “Checkbox,” and “Switcher,” allows selecting the necessary items on the back end and displays only the selected ones on the front end.
The JetEngine plugin saves the “Radio,” “Checkbox,” and “Switcher” meta field values in the WordPress database in the “wp_postmeta” table. The storage format depends on the field type and its settings.
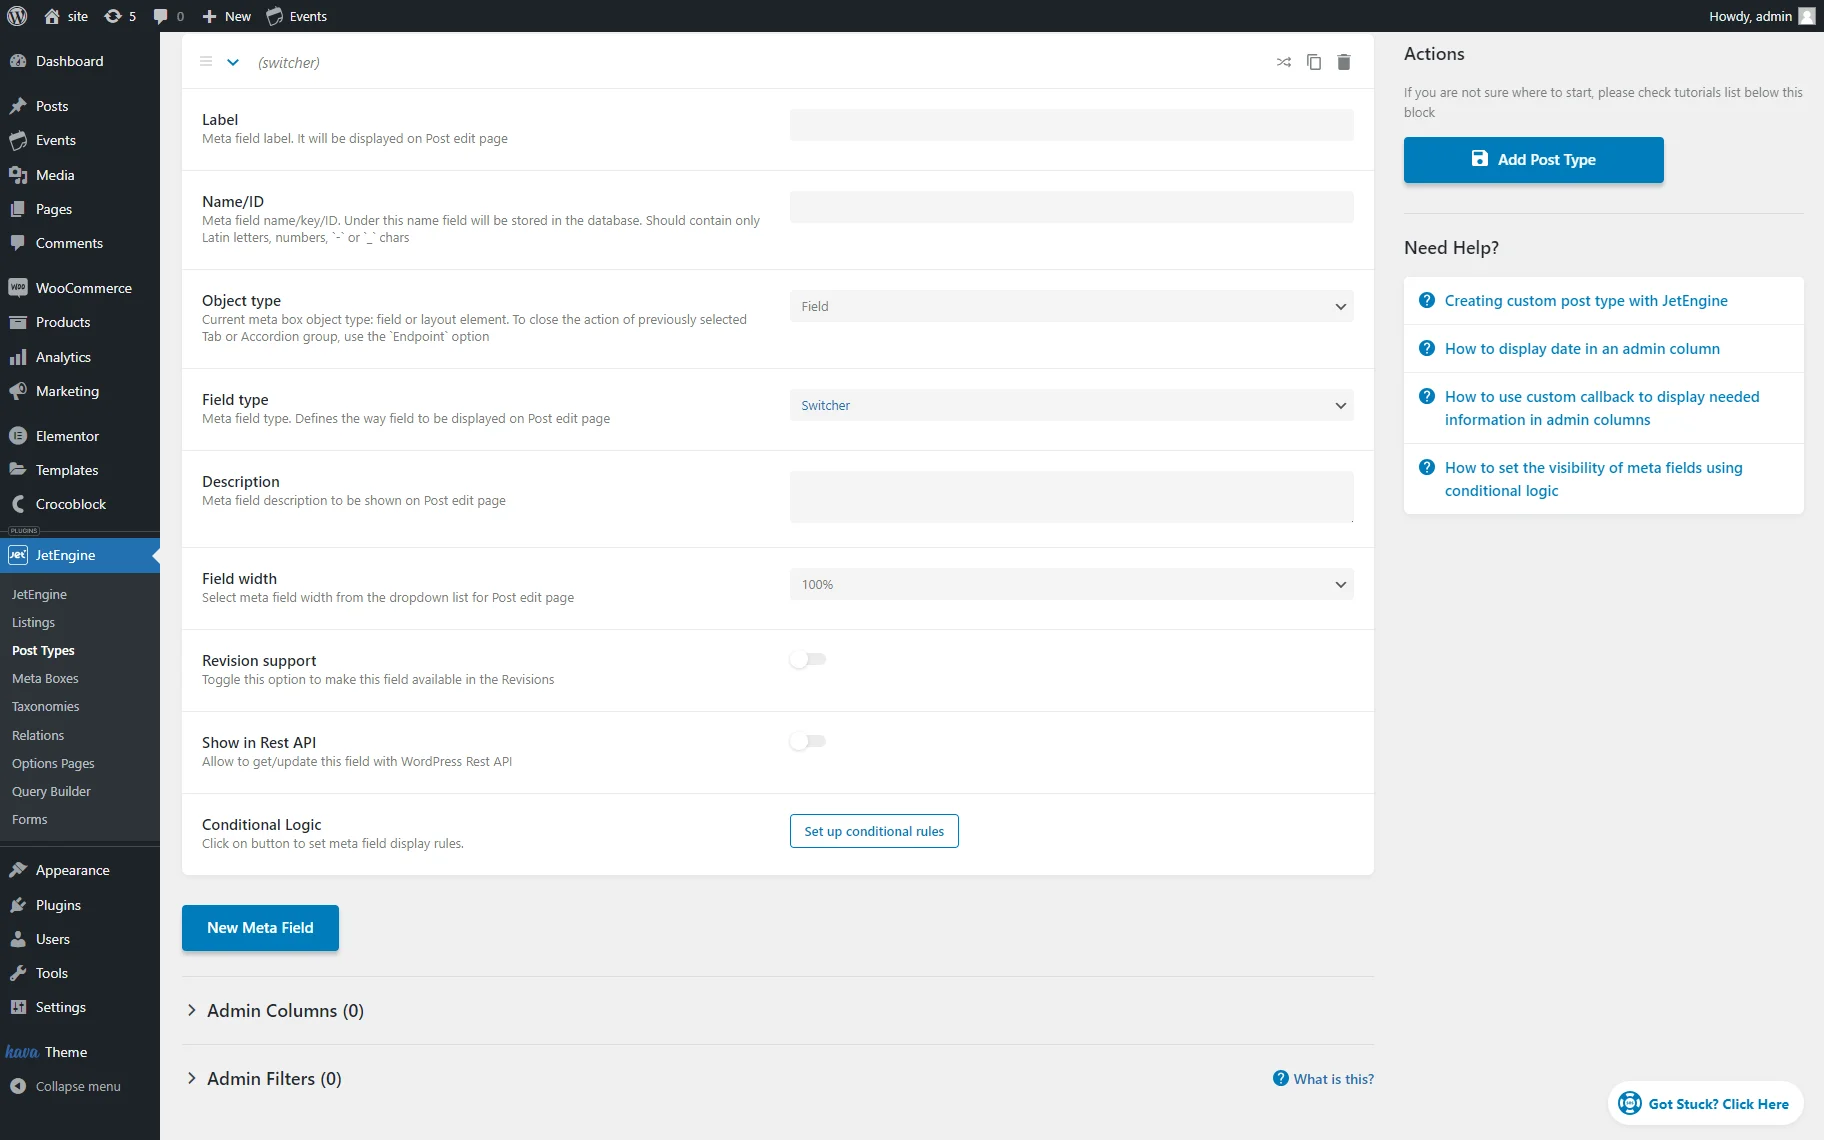
Switcher
The “Switcher” option adds a toggle as a custom field to posts, products, events, etc., which allows one to turn on/off the appropriate option in the meta field block. The data is saved in the “true/false” format in the WordPress database.
Checkbox
This type adds checkboxes to default and custom posts with different options.
Values in the database are saved referring to the type of the “Checkbox” field: value of a single-choice “Checkbox” field is stored as a string (usually “1” or “on” when the checkbox is checked and absent or “0” when it is unchecked); and the multiple-choice “Checkbox” field values are stored as serialized arrays (e.g., a:2:{i:0;s:6: “value1”;i:1;s:6: “value2” ;).
The meta field has the following specific fields:
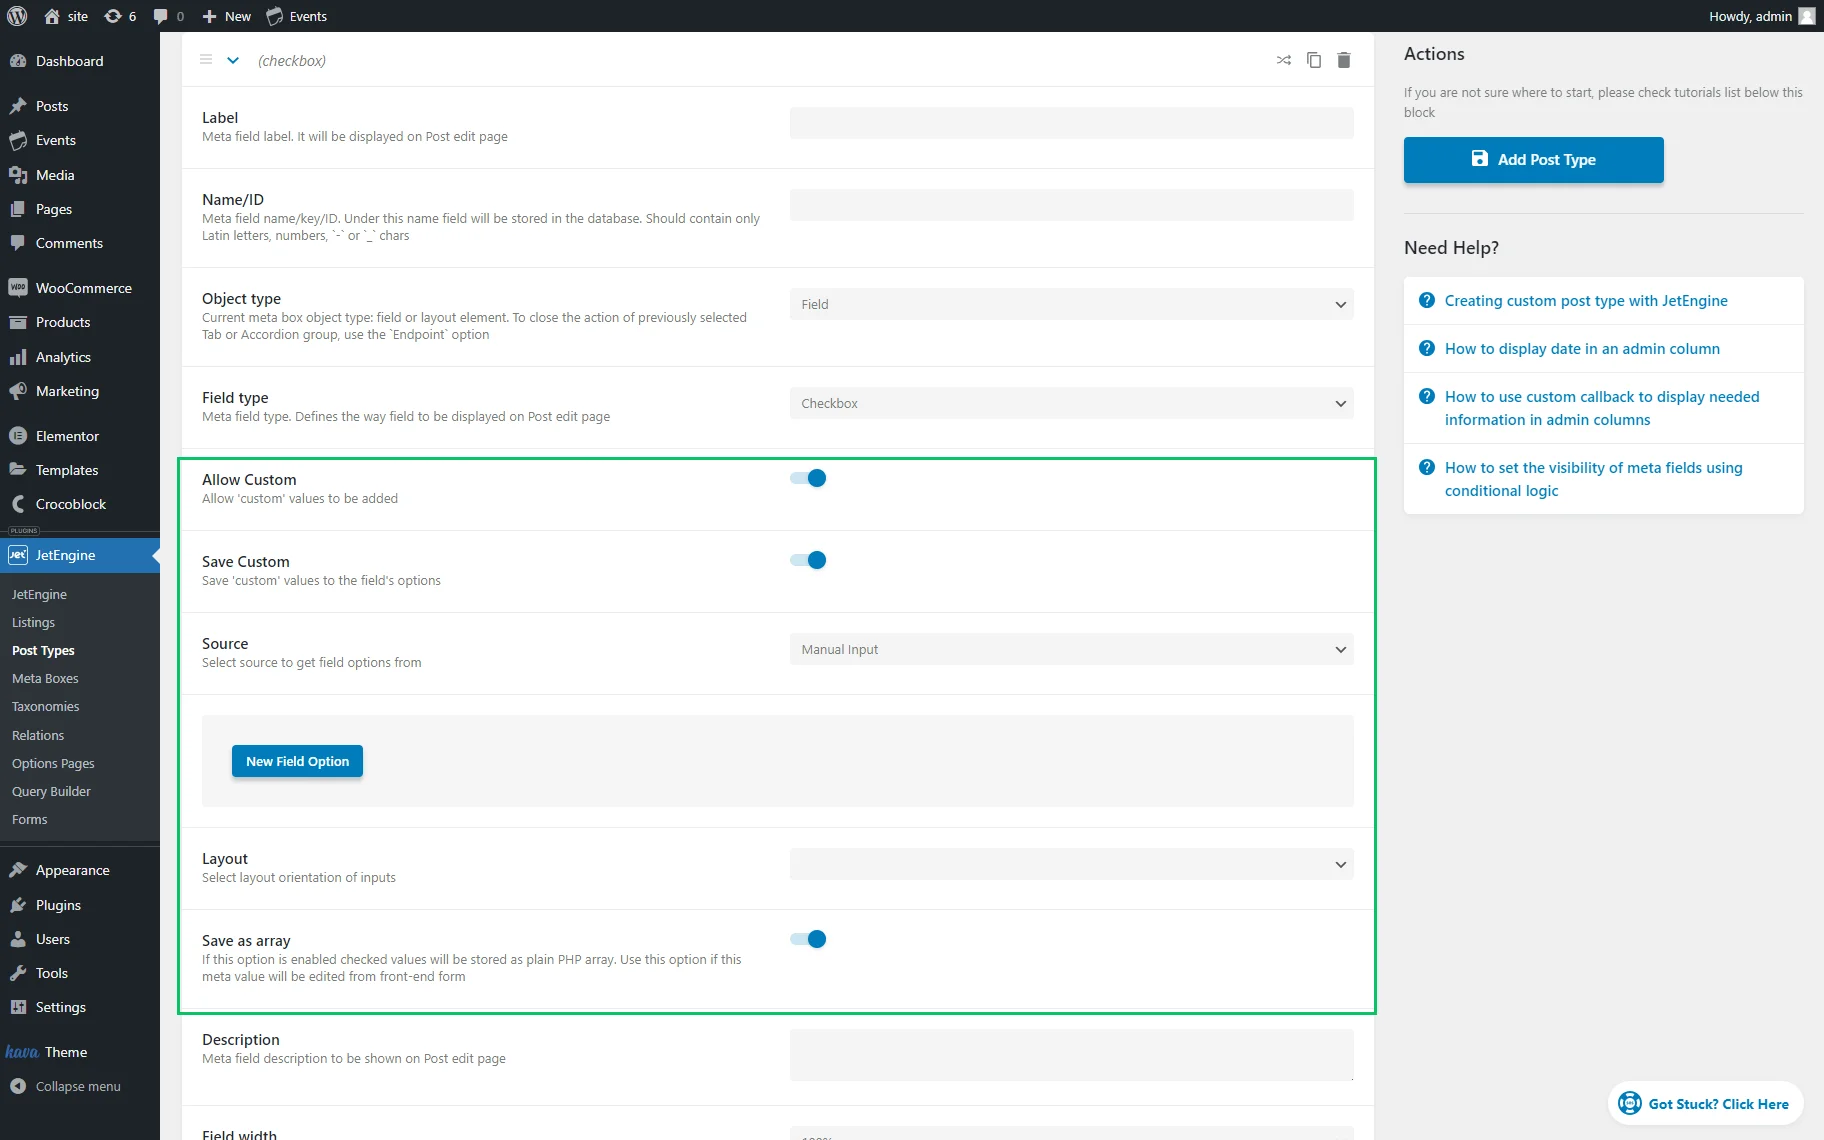
- Allow Custom — a toggle that allows adding custom values to the fields, saving them to the database of the current post without saving them to the default values list. If enabled, the switcher turns on the Save Custom — a toggle that can be enabled to save the custom field options added to the field while editing the post. Therefore, all the posts will contain the new values of the “Checkbox” field.
- Source — a drop-down list that includes options that determine the source of the content:
- Manual Input — a source that speaks for itself: all the options should be built manually by pressing the “New Field Option” button and completing the requested values;
- Bulk Manual Input — a way to set options through one text field, where each option is added on a new line. Allowed formats for Bulk Options:
- value — value and label will be the same;
- value::label — separate value and label;
- value::label::checked — separate value and label, checked by default.
- Glossary — a glossary can also be a source for a meta field. It should be selected in the corresponding field;
- Query Builder — an option that allows showing options that are derived from the specified Query results.
- Layout — a layout for the options. It can be either “Vertical” or “Horizontal”;
- Save as array — a feature for editing this field in the front-end form. The checked values will be stored as a plain PHP array when this option is enabled. If the Save as array option isn’t activated, the field won’t be pre-filled in the form;
- Quick edit support — an option that works only if the Save as array toggle is switched on. This option makes it possible to display some meta fields from JetEngine in the default area for quick editing.
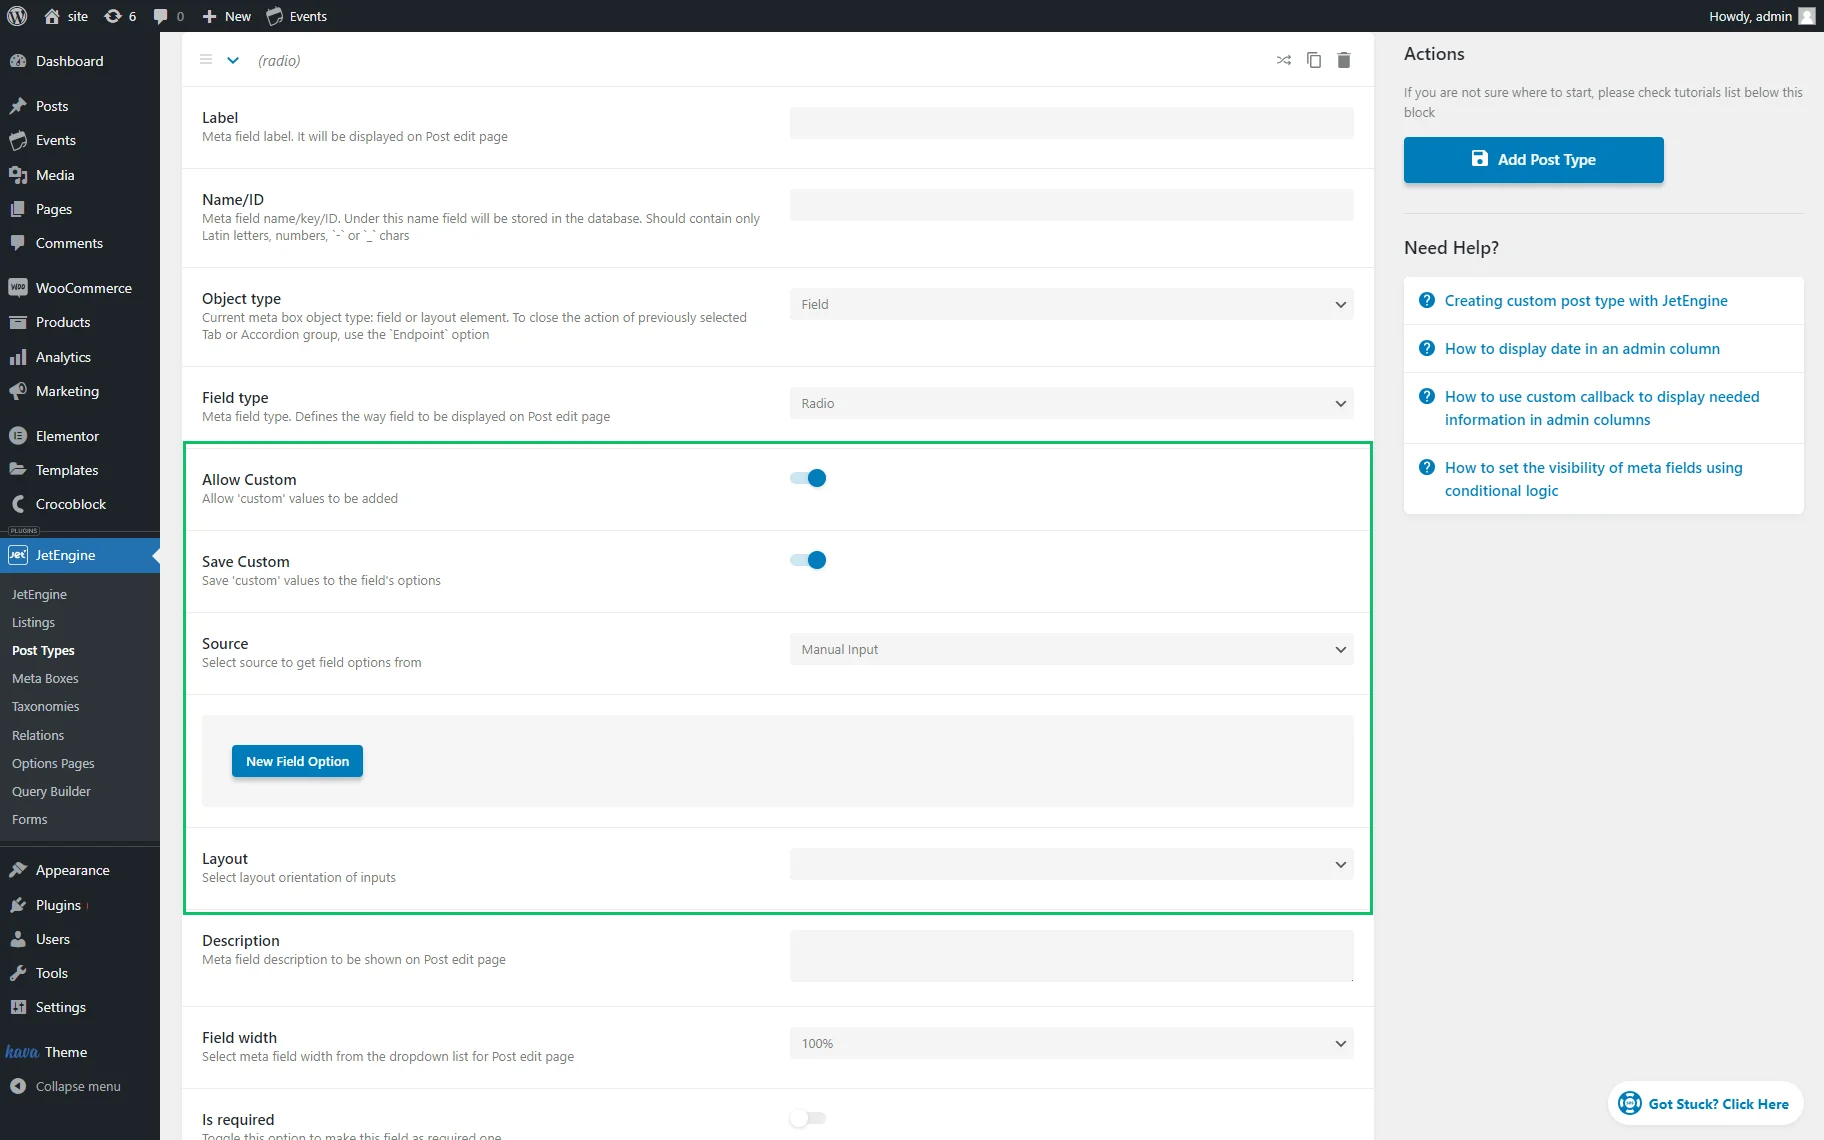
Radio
The “Radio” type can be used for adding radio buttons to choose one option from multiple options. The field values in the database are saved referring to the type of the “Radio” field: the value of a single-choice field is stored as a string (for example: “selected_value”), and the multiple-choice “Radio” field values are stored as a serialized array.
The meta field has specific settings analogous to the “Checkbox” type described above: the Allow Custom and Save Custom toggles, the Source, and the Layout fields.
Select
This field type can be used to add a dropdown selector to the post.
The meta field has the following settings: Source (a list similar to the “Checkbox” and “Radio” types), Placeholder, and Multiple.
The specific settings are:
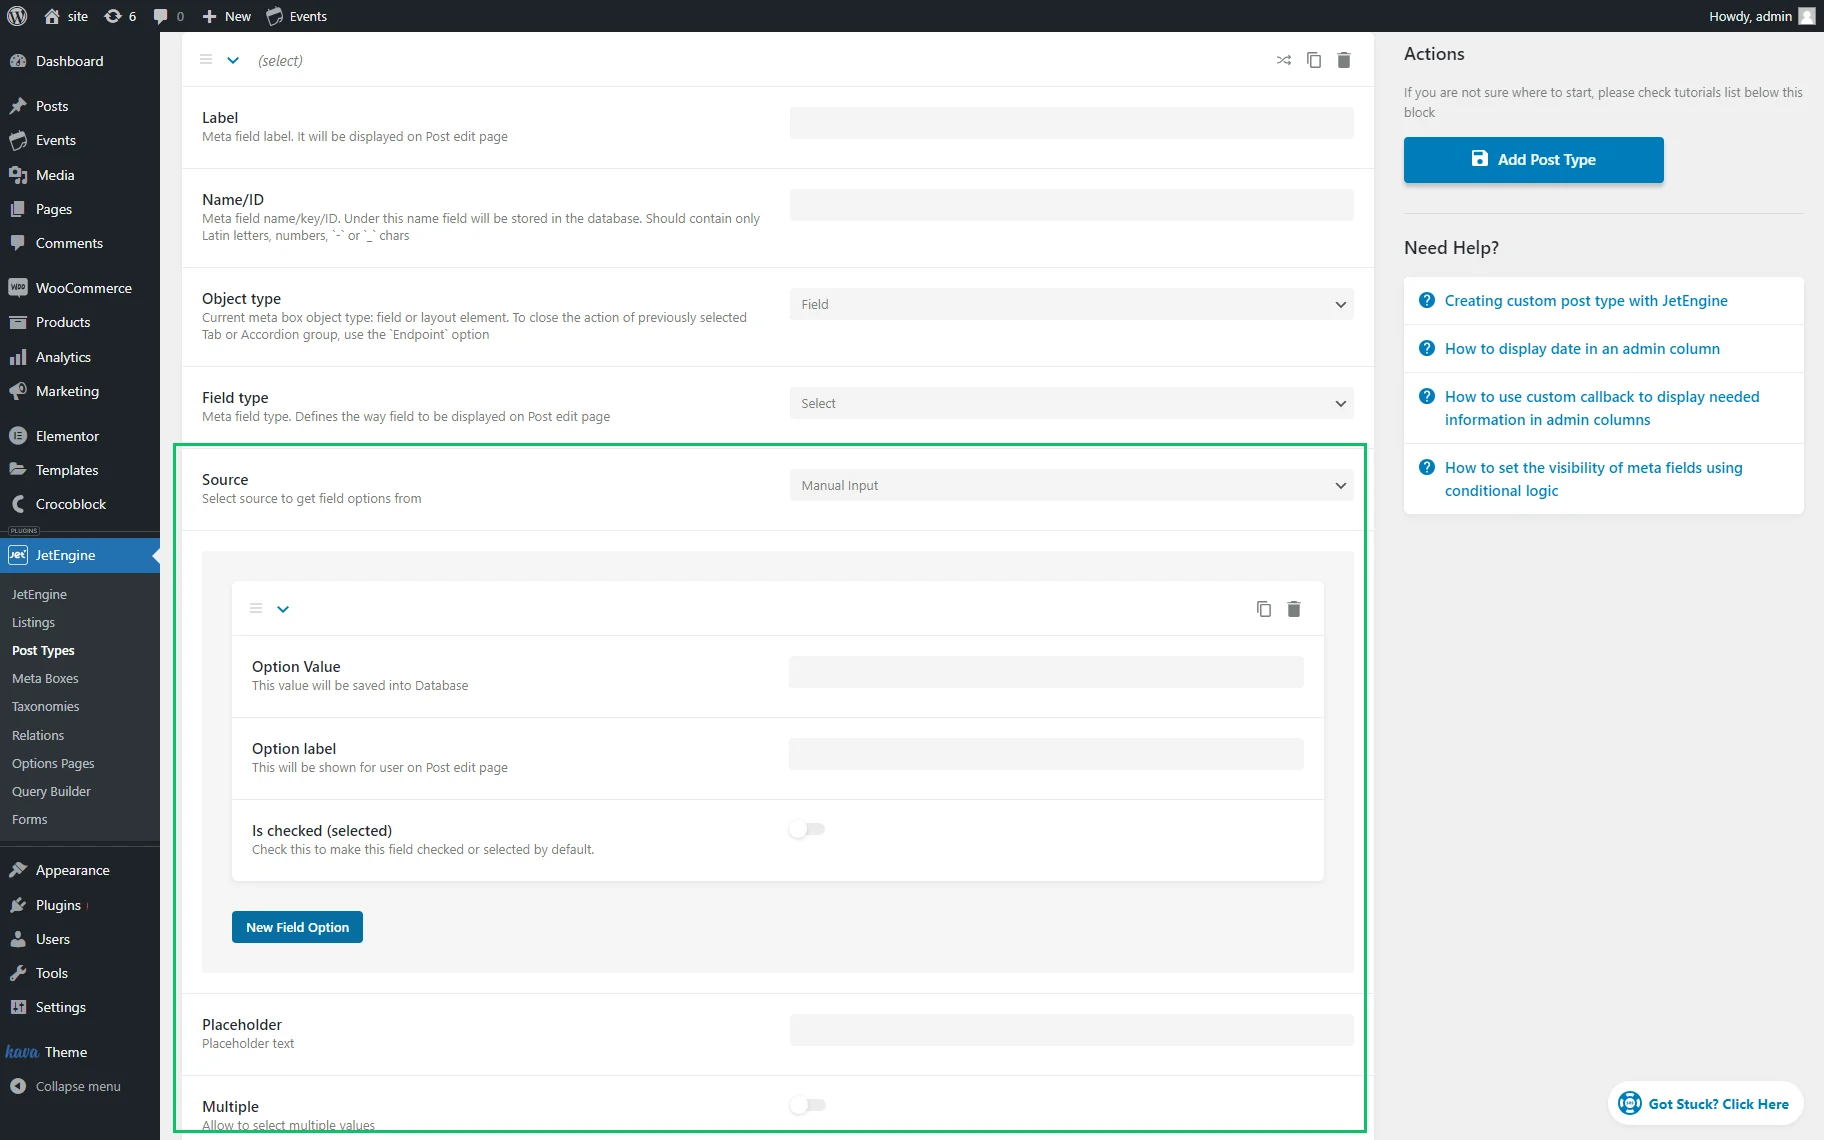
- Placeholder — a text displayed as the placeholder in the “Select” field;
- Multiple — a toggle that allows setting several values in the “Select” field at once. This value can also be shown using the proper callback for the Dynamic Field.
Pressing the “New Field Option” button turns on the following settings:
- Option Value — a field to type the value of the meta field, which will be saved in the database;
- Option label — a field to type the text to be shown to users on the post edit page;
- If checked (selected) — a toggle that makes the field checked or selected by default if enabled.
Select fields on the front end
In the given case, we added the “Checkbox” meta field to the CPT and selected some items.
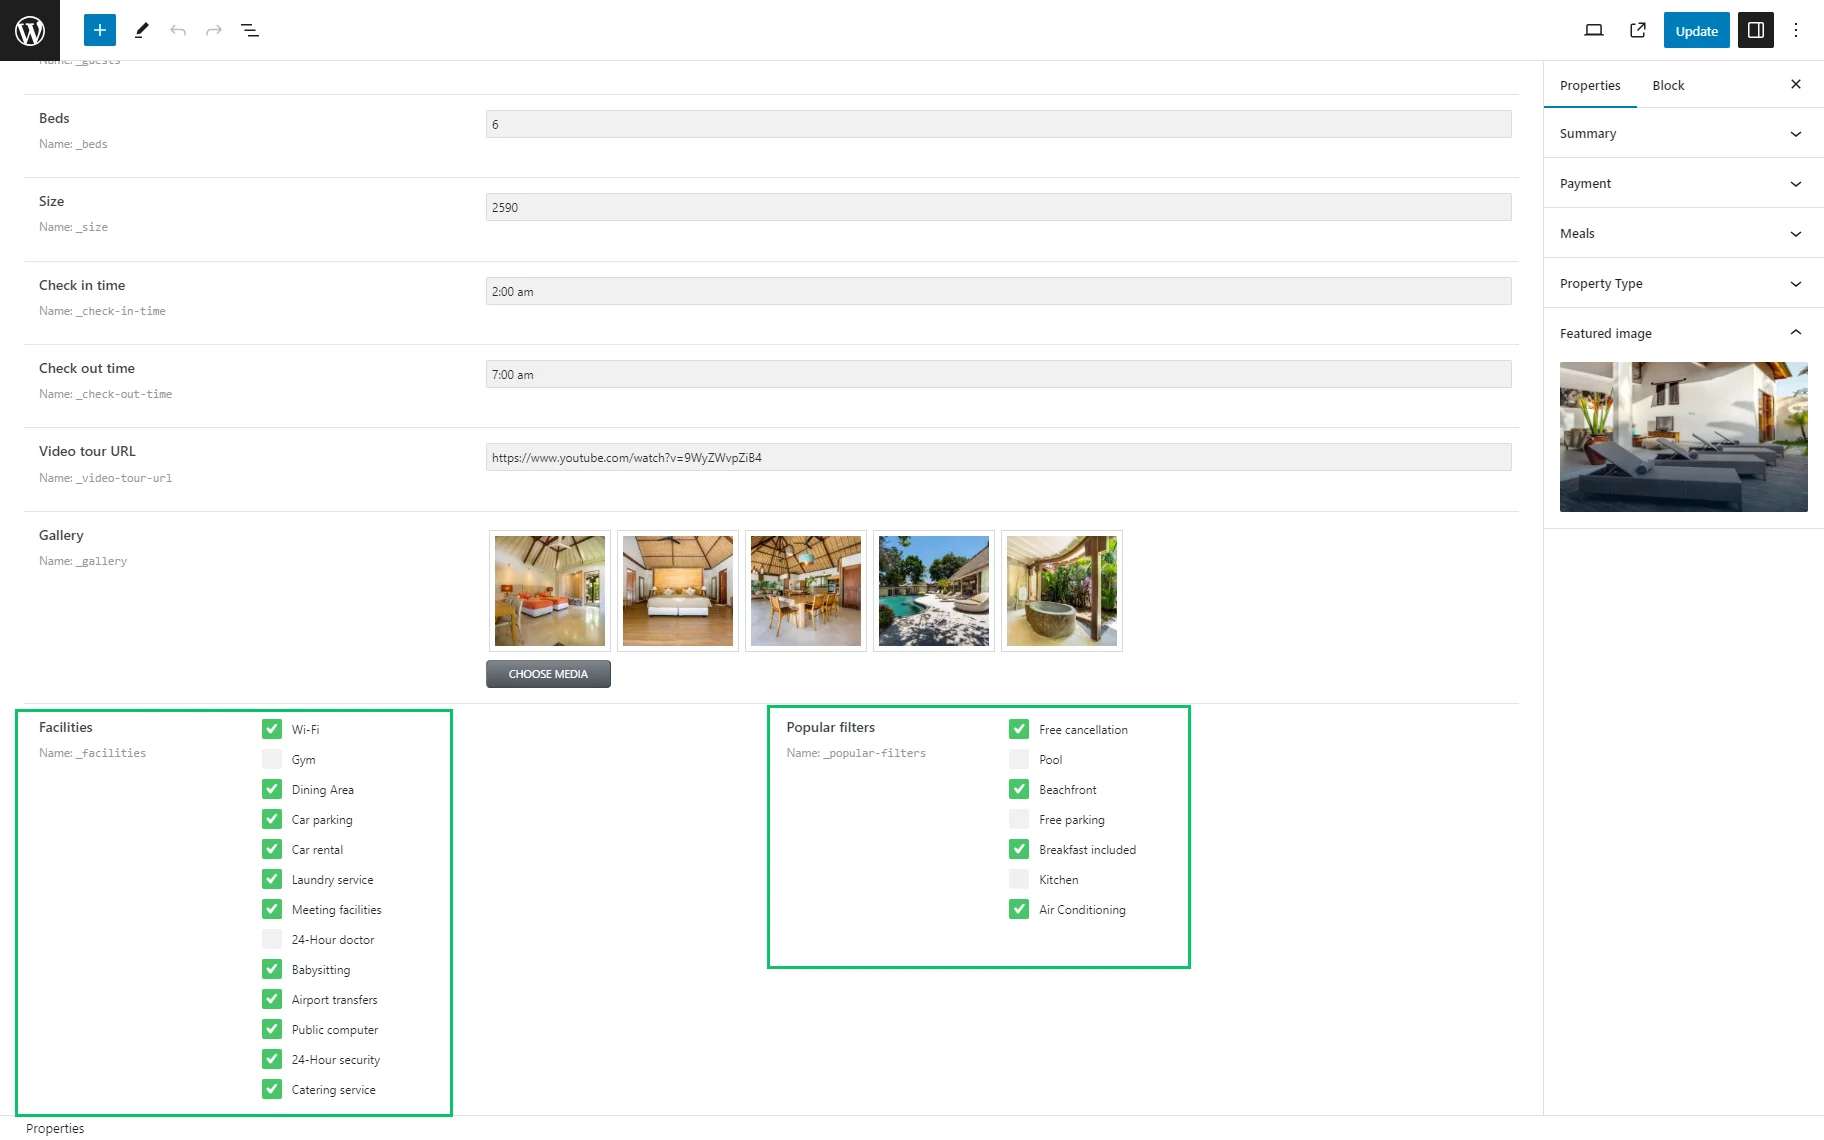
alt text: the checkbox meta field added to the cpt
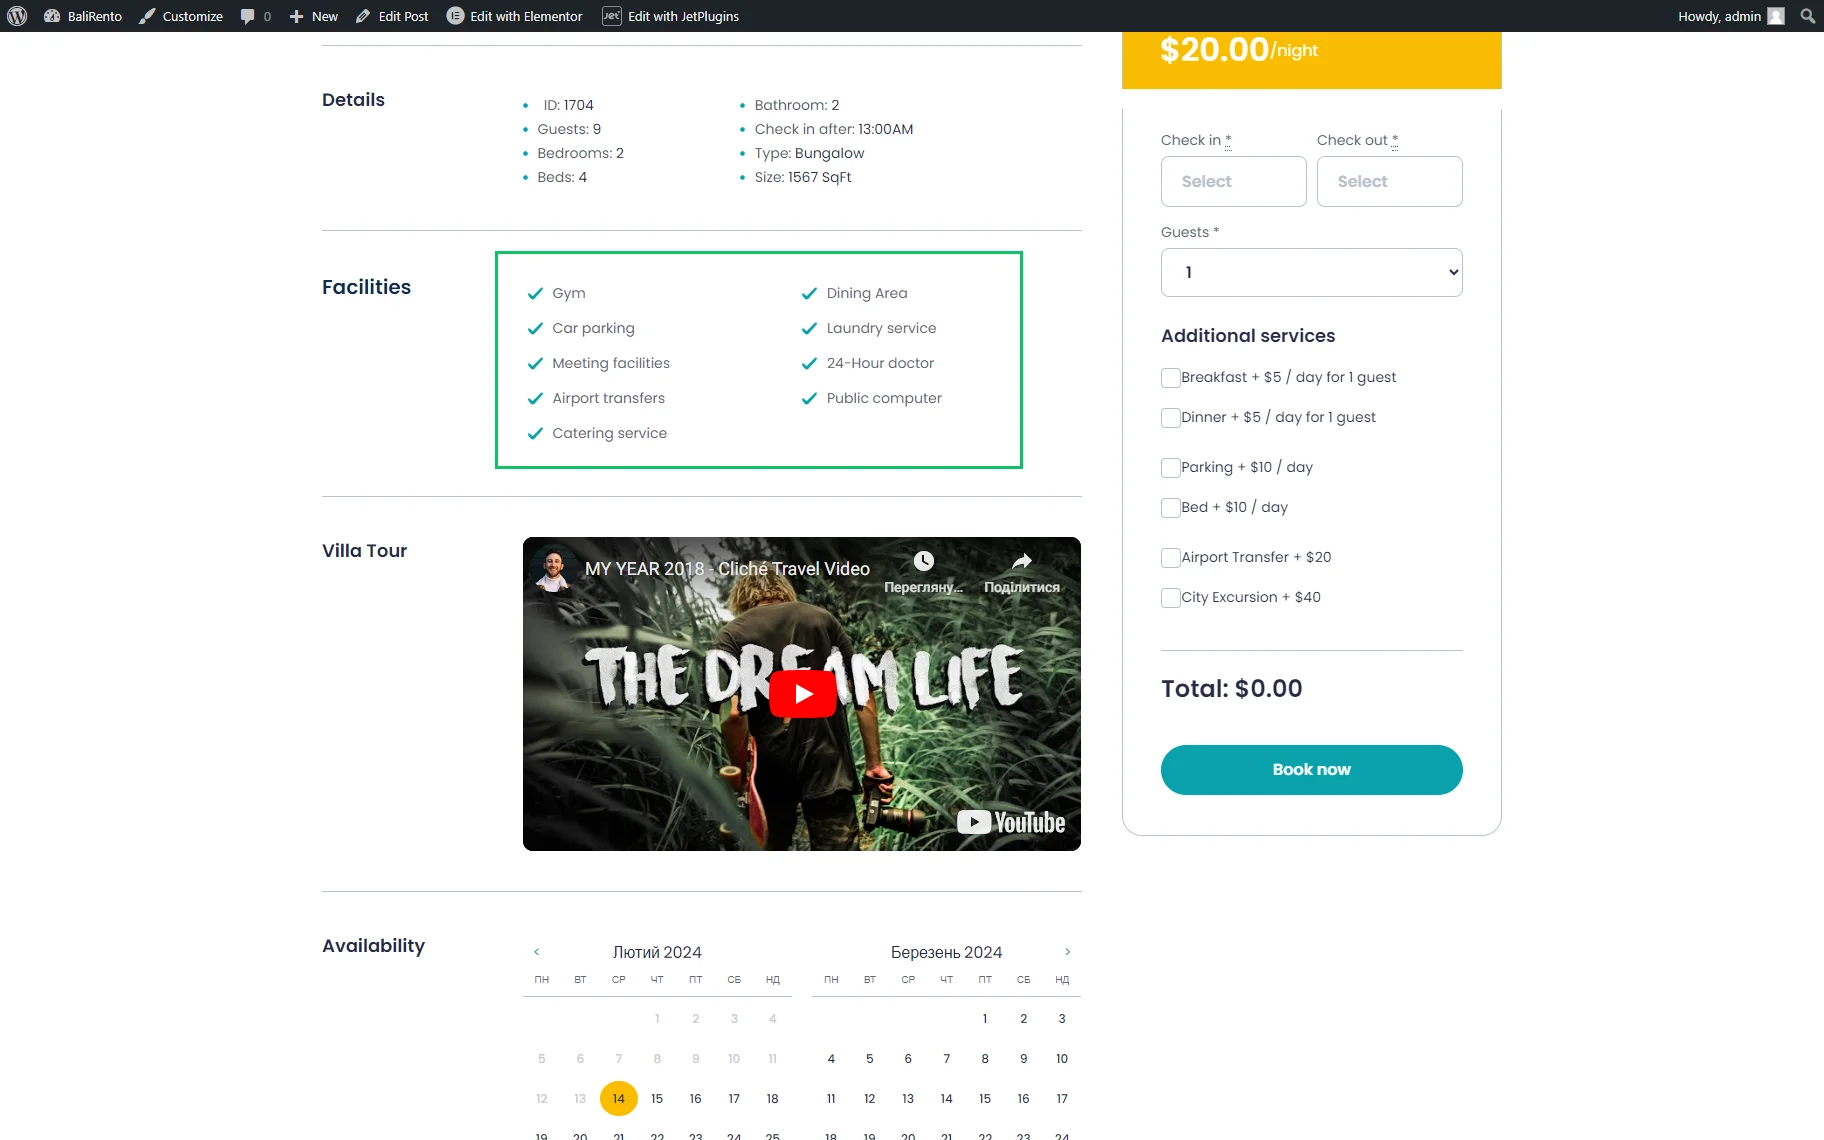
Only selected items will be displayed on the front end.
Colors and icons
The “Iconpicker” and “Colorpicker” meta fields allow highlighting specific items or groups of items.
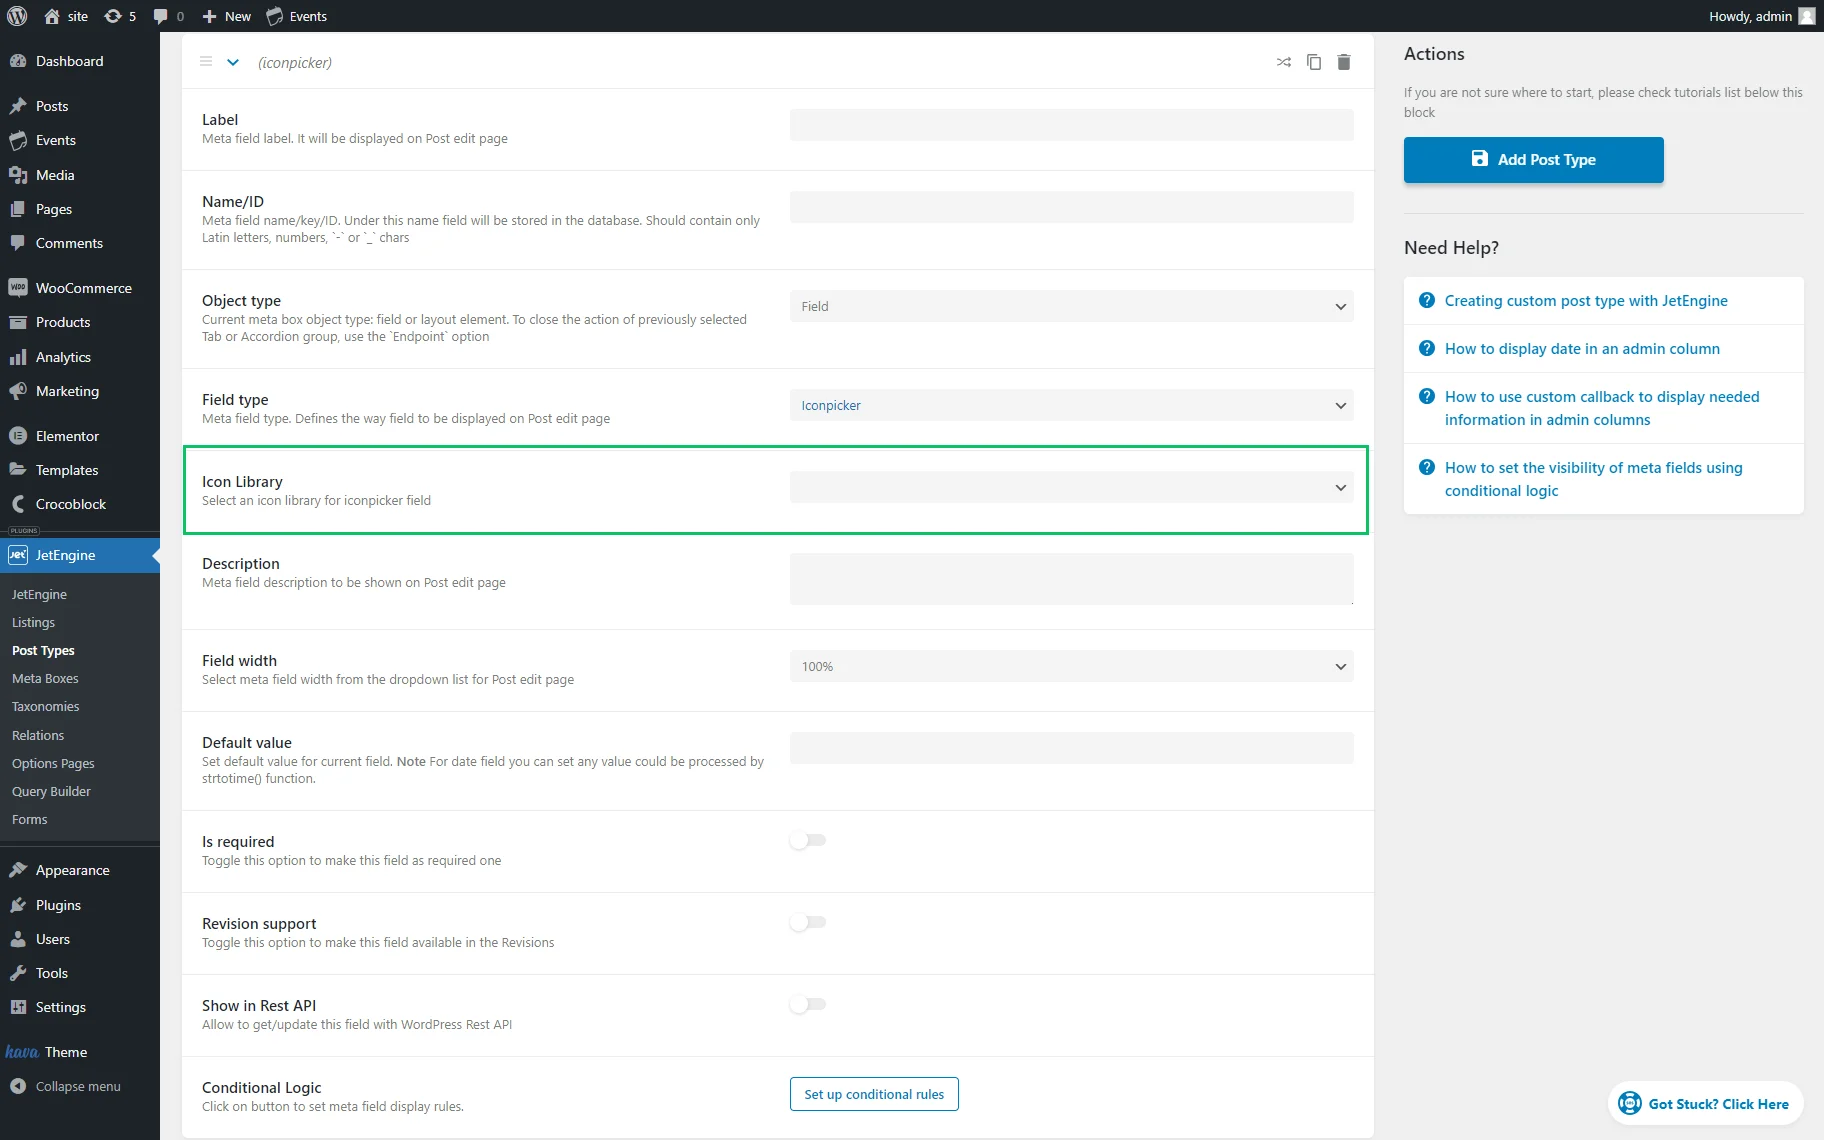
Iconpicker
The “Iconpicker” meta field allows users to choose an appropriate icon for the posts by selecting an icon from the library (except the default “Font Awesome 4,” and “Dashicons”) or by adding libraries via the Icon Library field.
The icon pickers are usually used via custom meta fields created by specific plugins.
Selecting the icon libraries and adding other ones depends on their implementation in the providing plugin (e.g., some plugins maintain additional libraries, while others work with only predefined sets of icons).
The value of the “Iconpicker” field is saved as a string of the specific class (for example, of the “dashicon-admin-site” class for the “Dashicons” library or the “fa fa-star” class for the “Font Awesome 4” library). However, not all “Iconpicker” meta fields allow for the choice of libraries (it depends on the plugin), and not all meta fields save values in the “Dashicons” format (it can be another class).
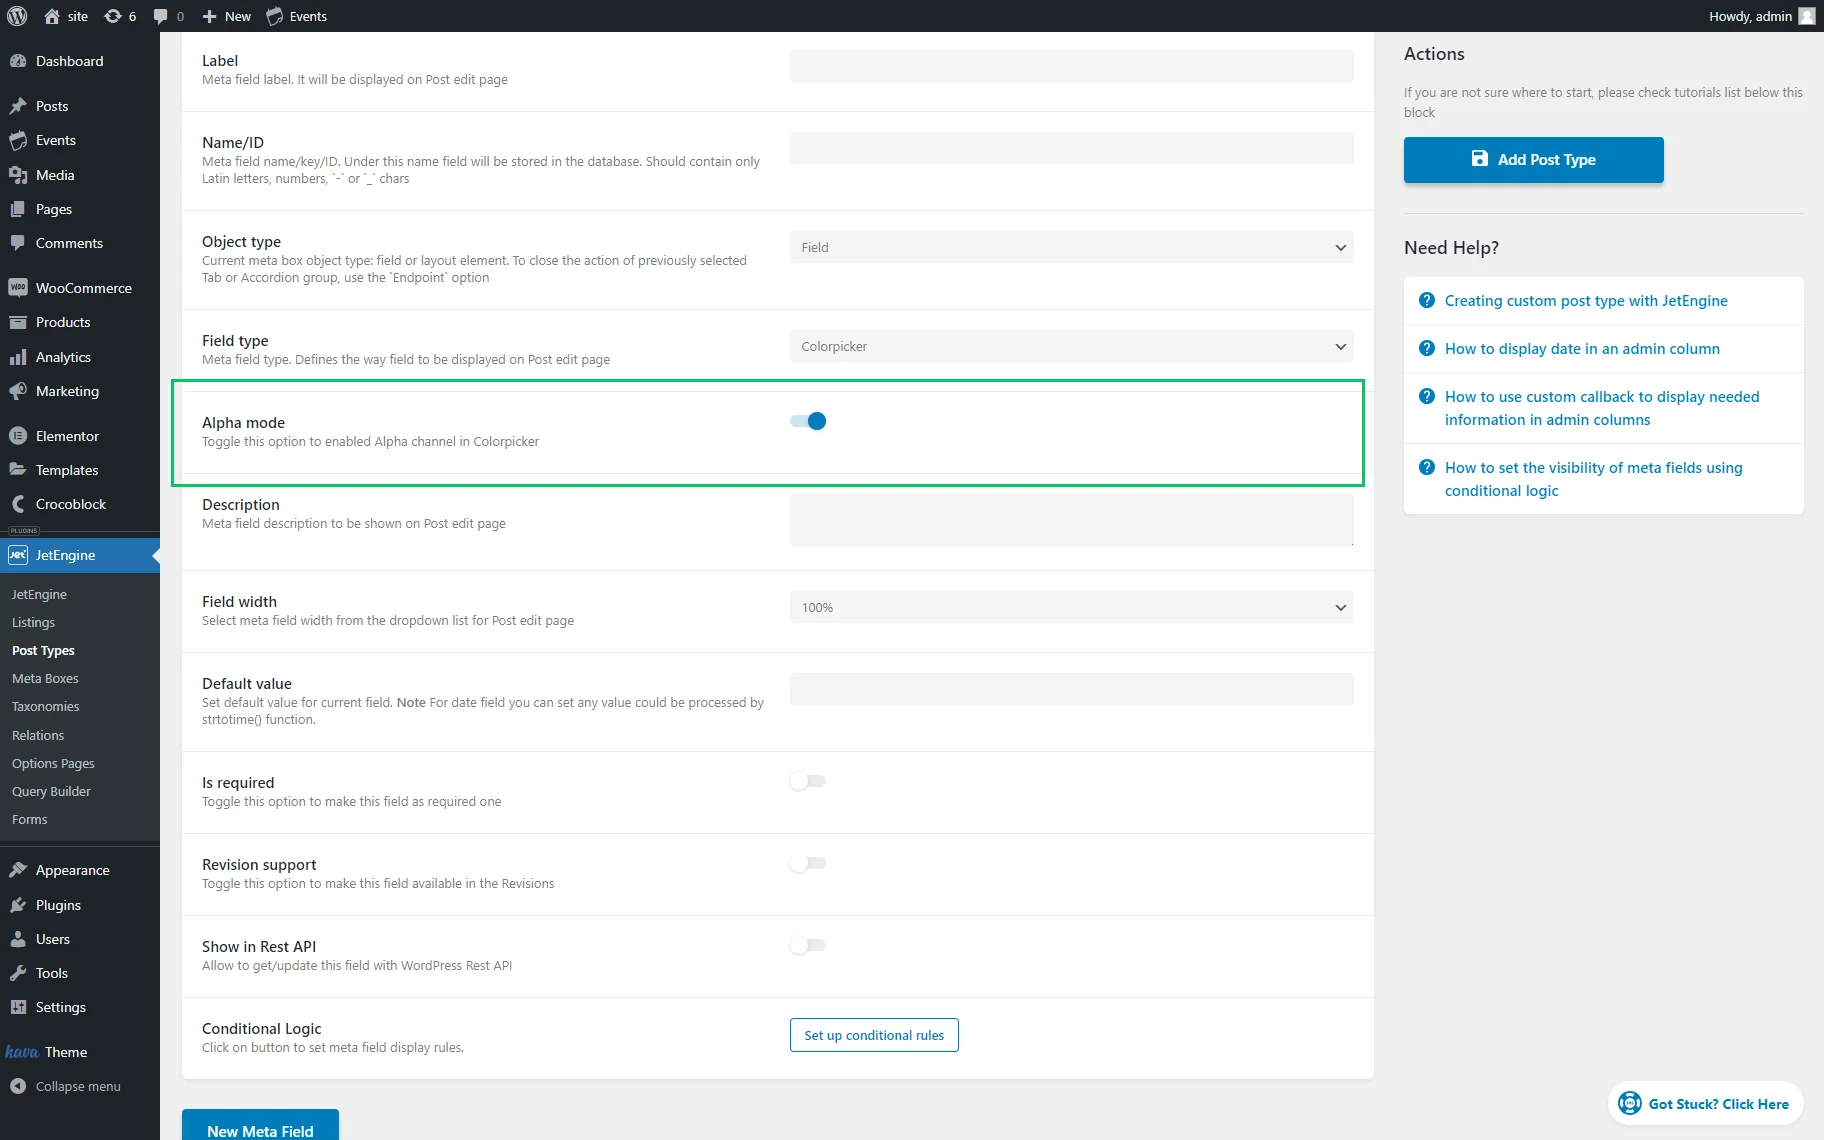
Colorpicker
This filter type will add a color picker tool to the posts. . The field stores a string with the HEX color value.
Users can add the alpha channel in the color picker by enabling the Alpha mode toggle.
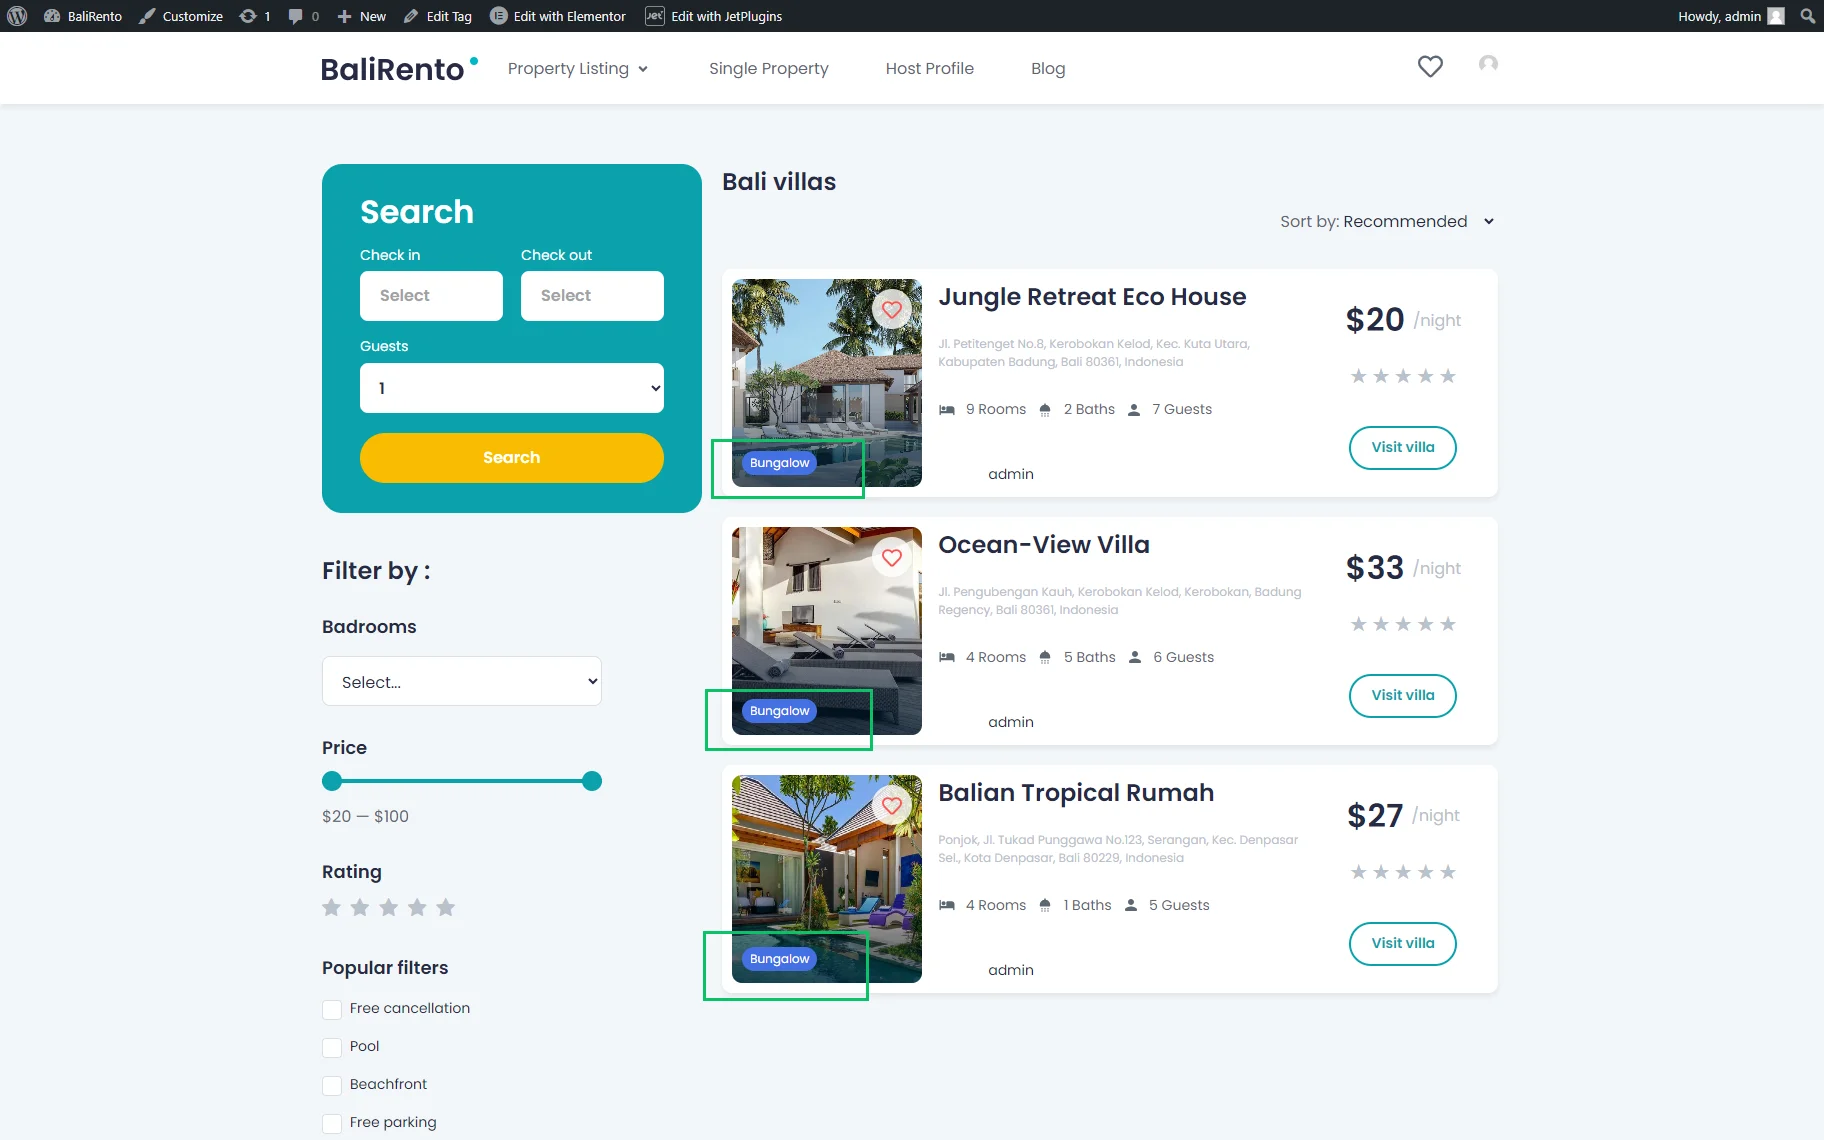
Picker fields on the front end
In the given case, we used the “Colorpicker” meta field for taxonomy.
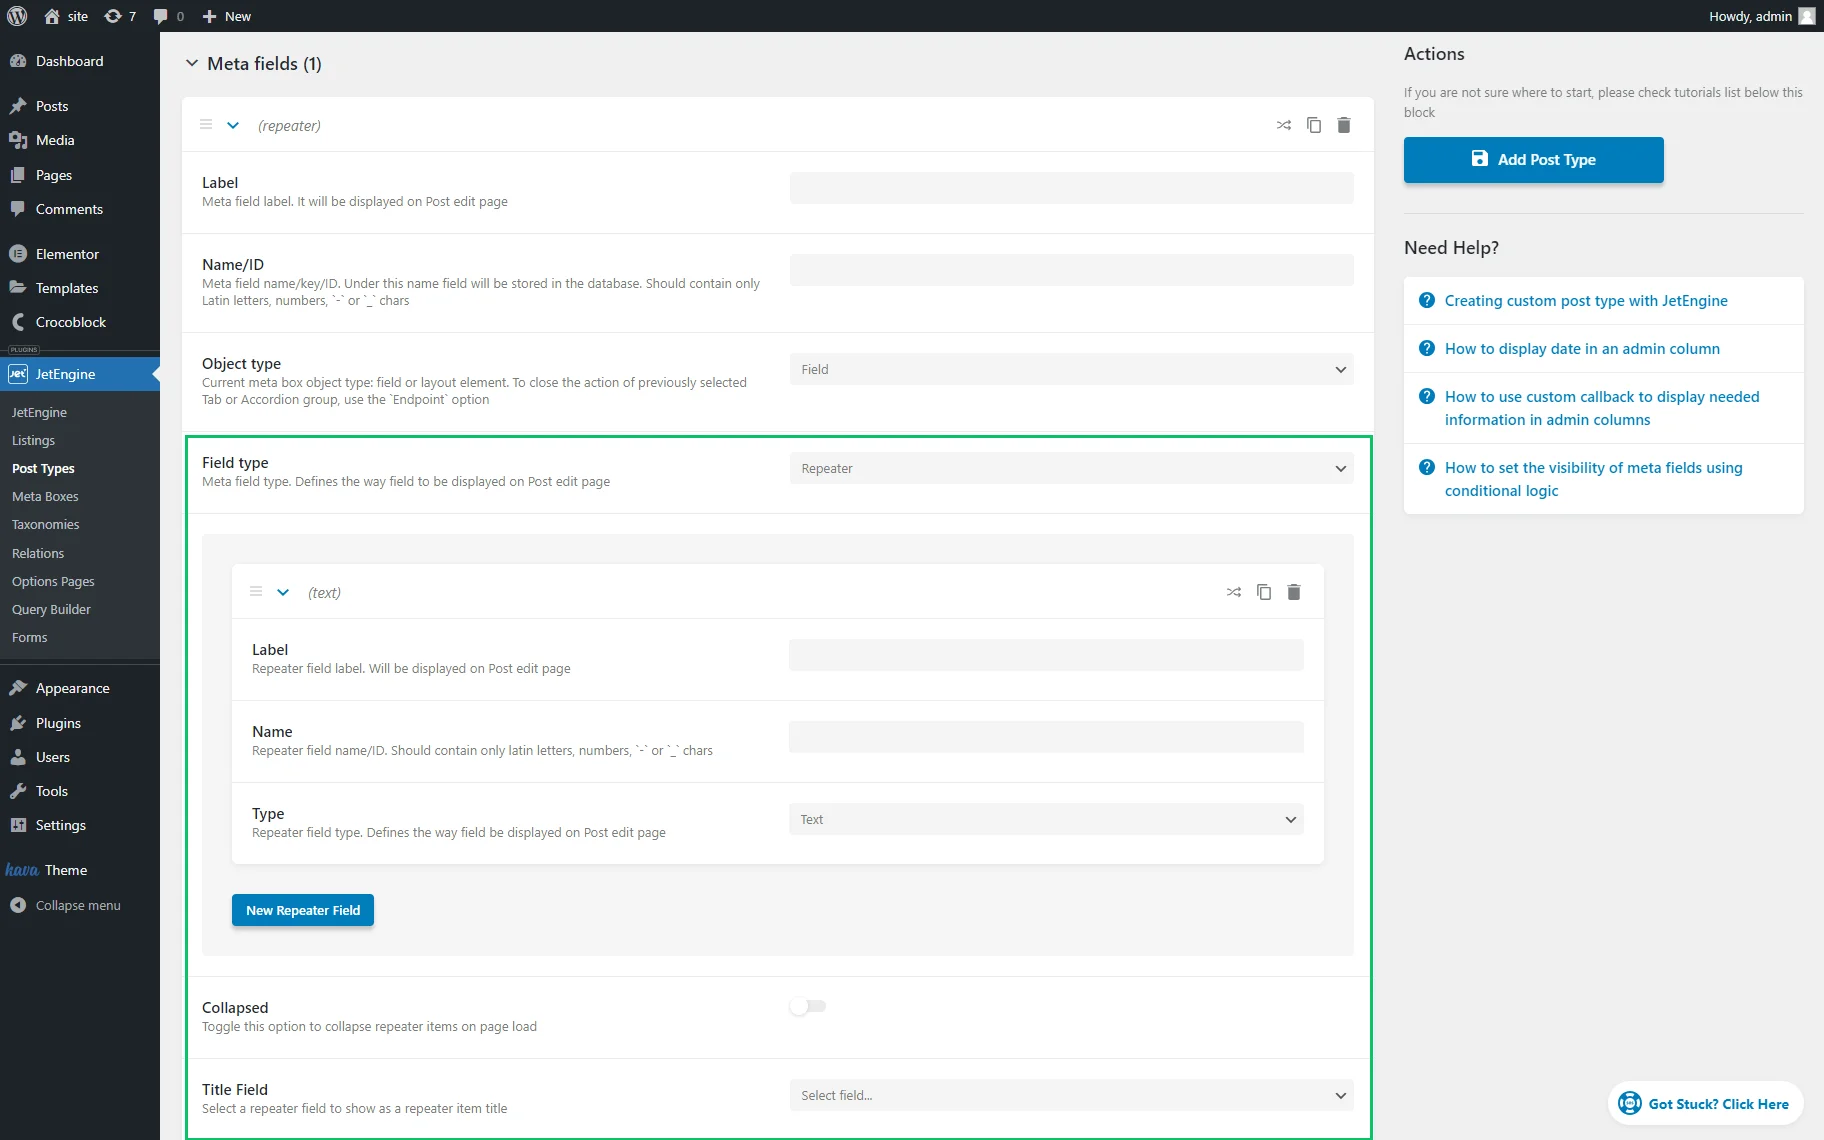
Repeater
The “Repeater” type meta field is intended for adding recurrent nested meta fields. This type will add the repeating content block for every post, product, event, etc., which can be later filled with value in the WordPress Dashboard.
The data is saved in the JSON string format.
The “Repeater” meta field allows adding nested meta fields of any type.
Pressing the “New Repeater Field” button adds meta fields to the repeater block and unrolls the settings:
- Label — a label displayed while editing the post;
- Name — a repeater field name that will be used as the value to display meta field information filled in the post on different pages;
- Type — repeater field type that will define how the meta field will look while editing the post.
The Collapsed toggle and Title Field dropdown list settings refer to the “Repeater” meta field. If enabled, the Collapsed toggle allows collapsing the repeater items on page load. The Title Field dropdown list allows selecting the repeater field as a repeater item title.
Maps, HTML, and Posts fields
Now we will look through other meta field types settings: the “Maps,” “HTML,” and “Posts” ones.
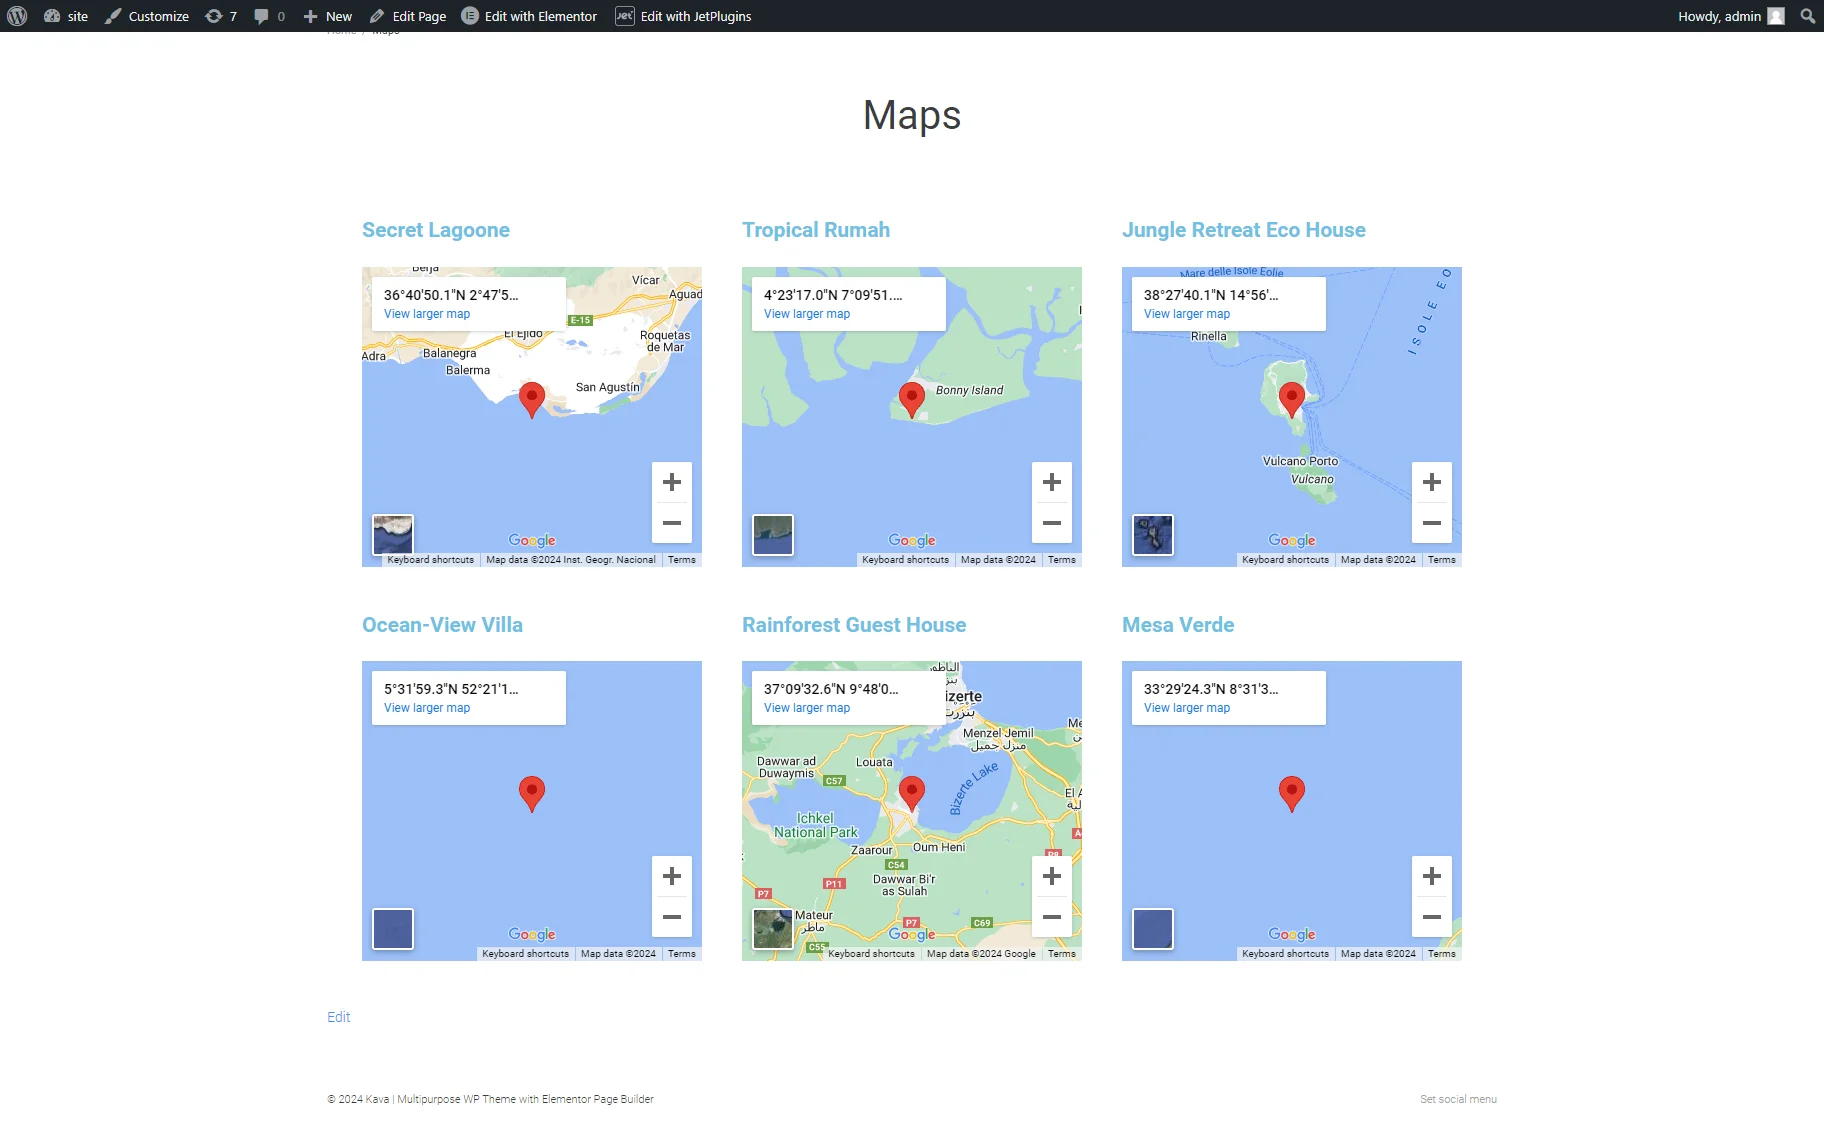
Maps
This meta field displays different types of maps and presents them as listings.
The meta field stores values as arrays of data for the selected location, referring to the option set in the Value format dropdown list, e.g., the “String with location Lat and Lng separated by coma,” “Array with location Lat and Lng,” “Location Address.”
Posts
This type allows setting and displaying related posts from the WordPress Dashboard. To do that, one should use the “Related posts list” callback in the Dynamic Field widget added to a listing.
Therefore, the following settings are available:
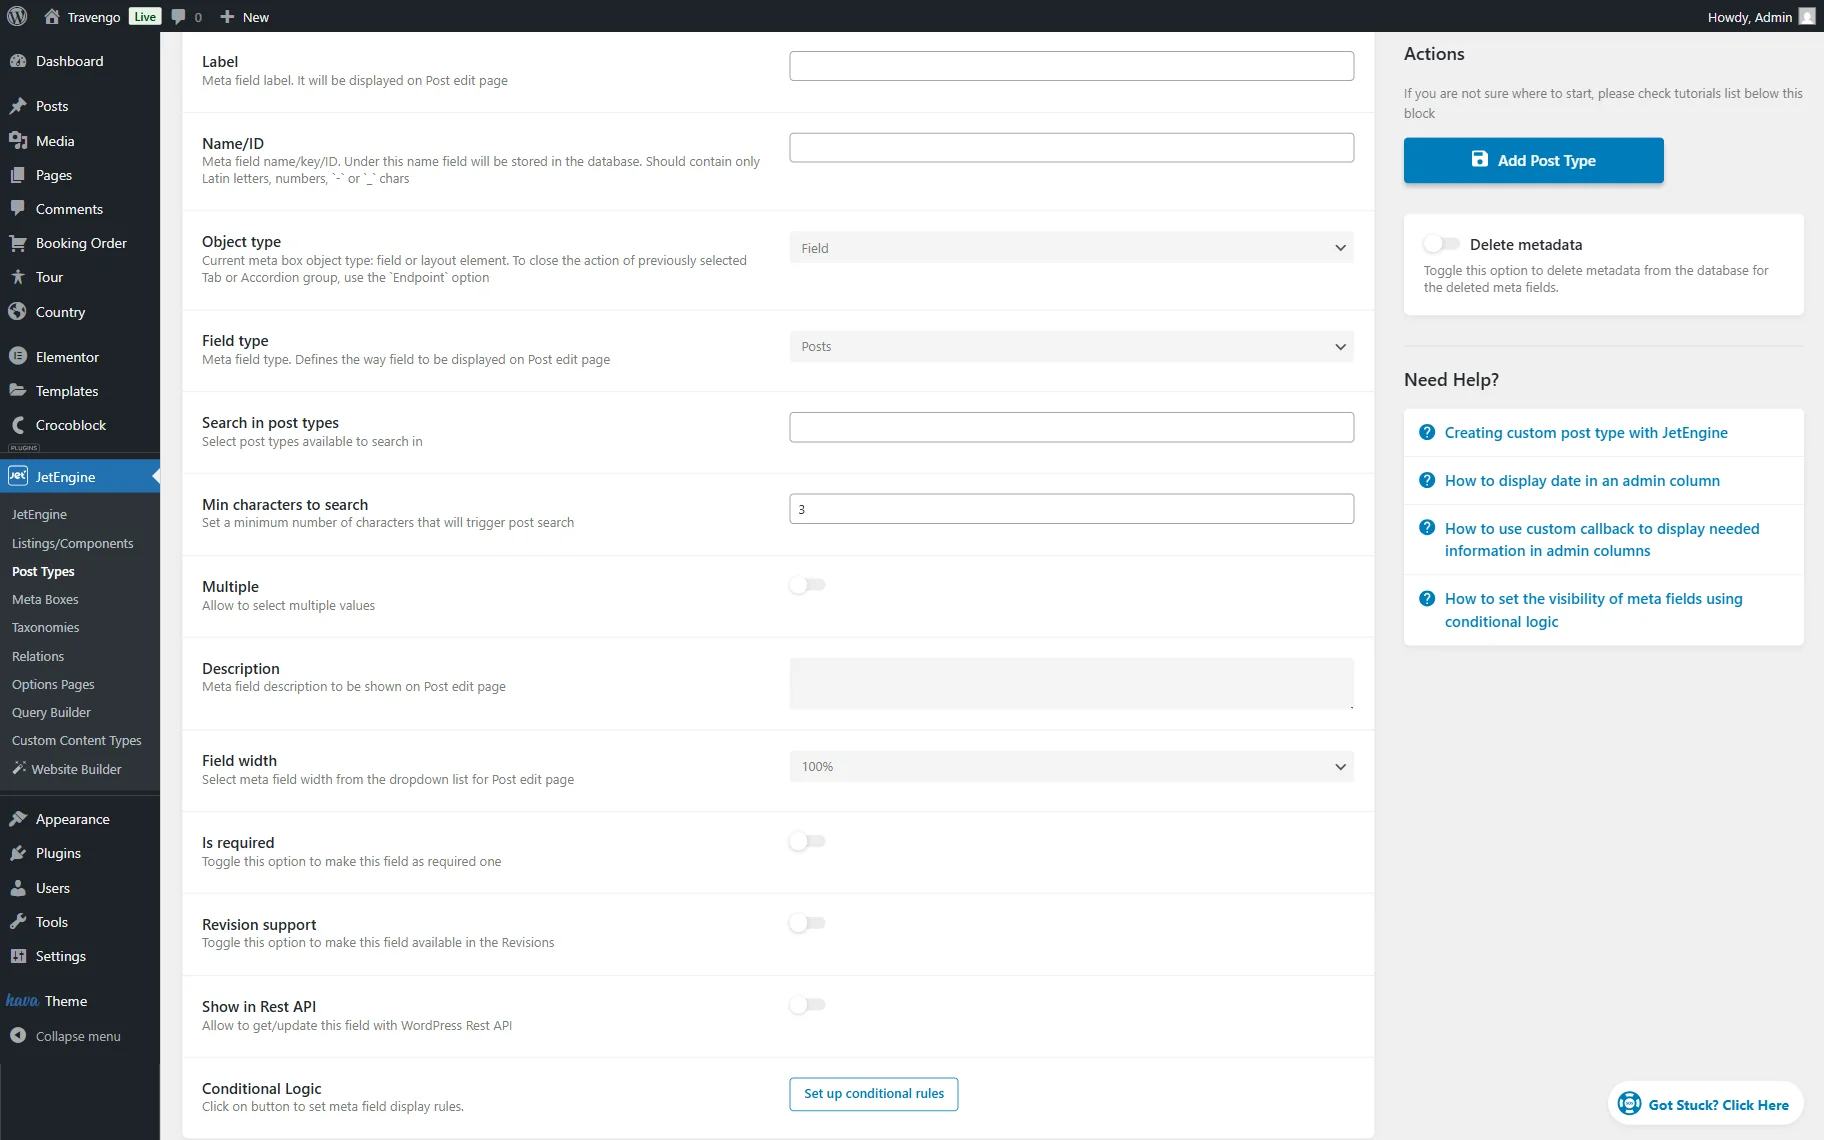
- Search in post types — a dropdown list to choose the post type as the searching source;
- Min characters to search — a field where the minimum number of symbols typed in the field to search the needed post is specified. By default, it is set to “3,” which means one should type at least three symbols into the bar so the recommended posts for selection are shown;
- Multiple — if enabled, this toggle allows the selection of multiple values.
One can add the related posts to the CPT, listings, etc.

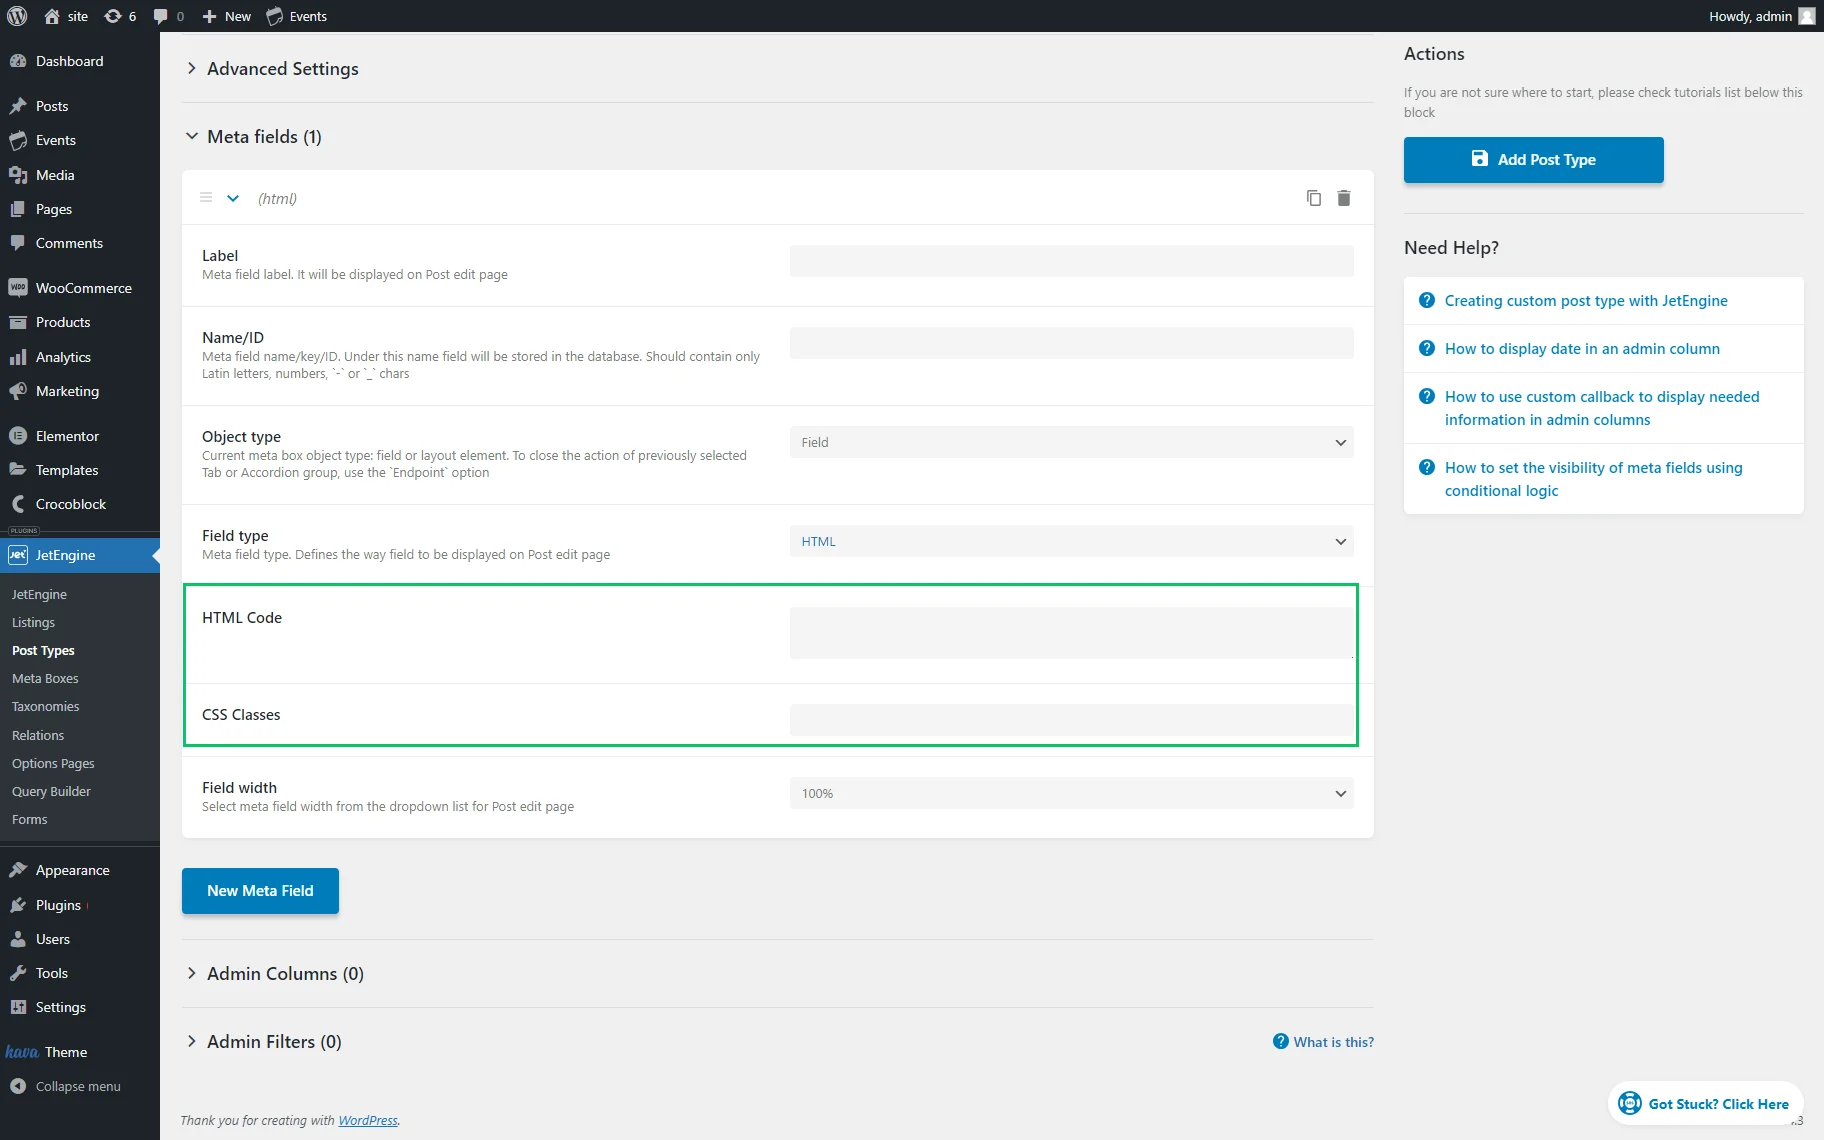
HTML
The “HTML” meta field allows adding custom code to the editing page.
This meta field displays statistical information in the back end. It is obligatory to add an HTML markup for the data to be shown.
The HTML Code field adds the needed HTML code, and the CSS Classes field adds the desired styles.
The “HTML” meta field value is not saved in the database and is not available on the front end, but it works via the WordPress Dashboard.
That’s all about the JetEngine’s custom meta fields. The content added into the custom meta fields can be displayed in the listings and single post templates using Elementor, Gutenberg, or Bricks.