Settings Schedule Widget Overview
Discover how to add and set up the Settings Schedule widget from the WordPress JetBooking plugin.
The Settings Schedule widget in the JetBooking WordPress plugin pulls data from Booking Settings > Schedule and displays it on the editing page in Elementor, Gutenberg, or Bricks. Similarly, settings applied on the frontend are transferred to the backend setup. This solution can be useful when one needs to allow providers to control their schedules without providing them with full admin rights.
Settings Schedule Widget Adjust
When added to the editing page, the Settings Schedule widget has three settings sections presented:
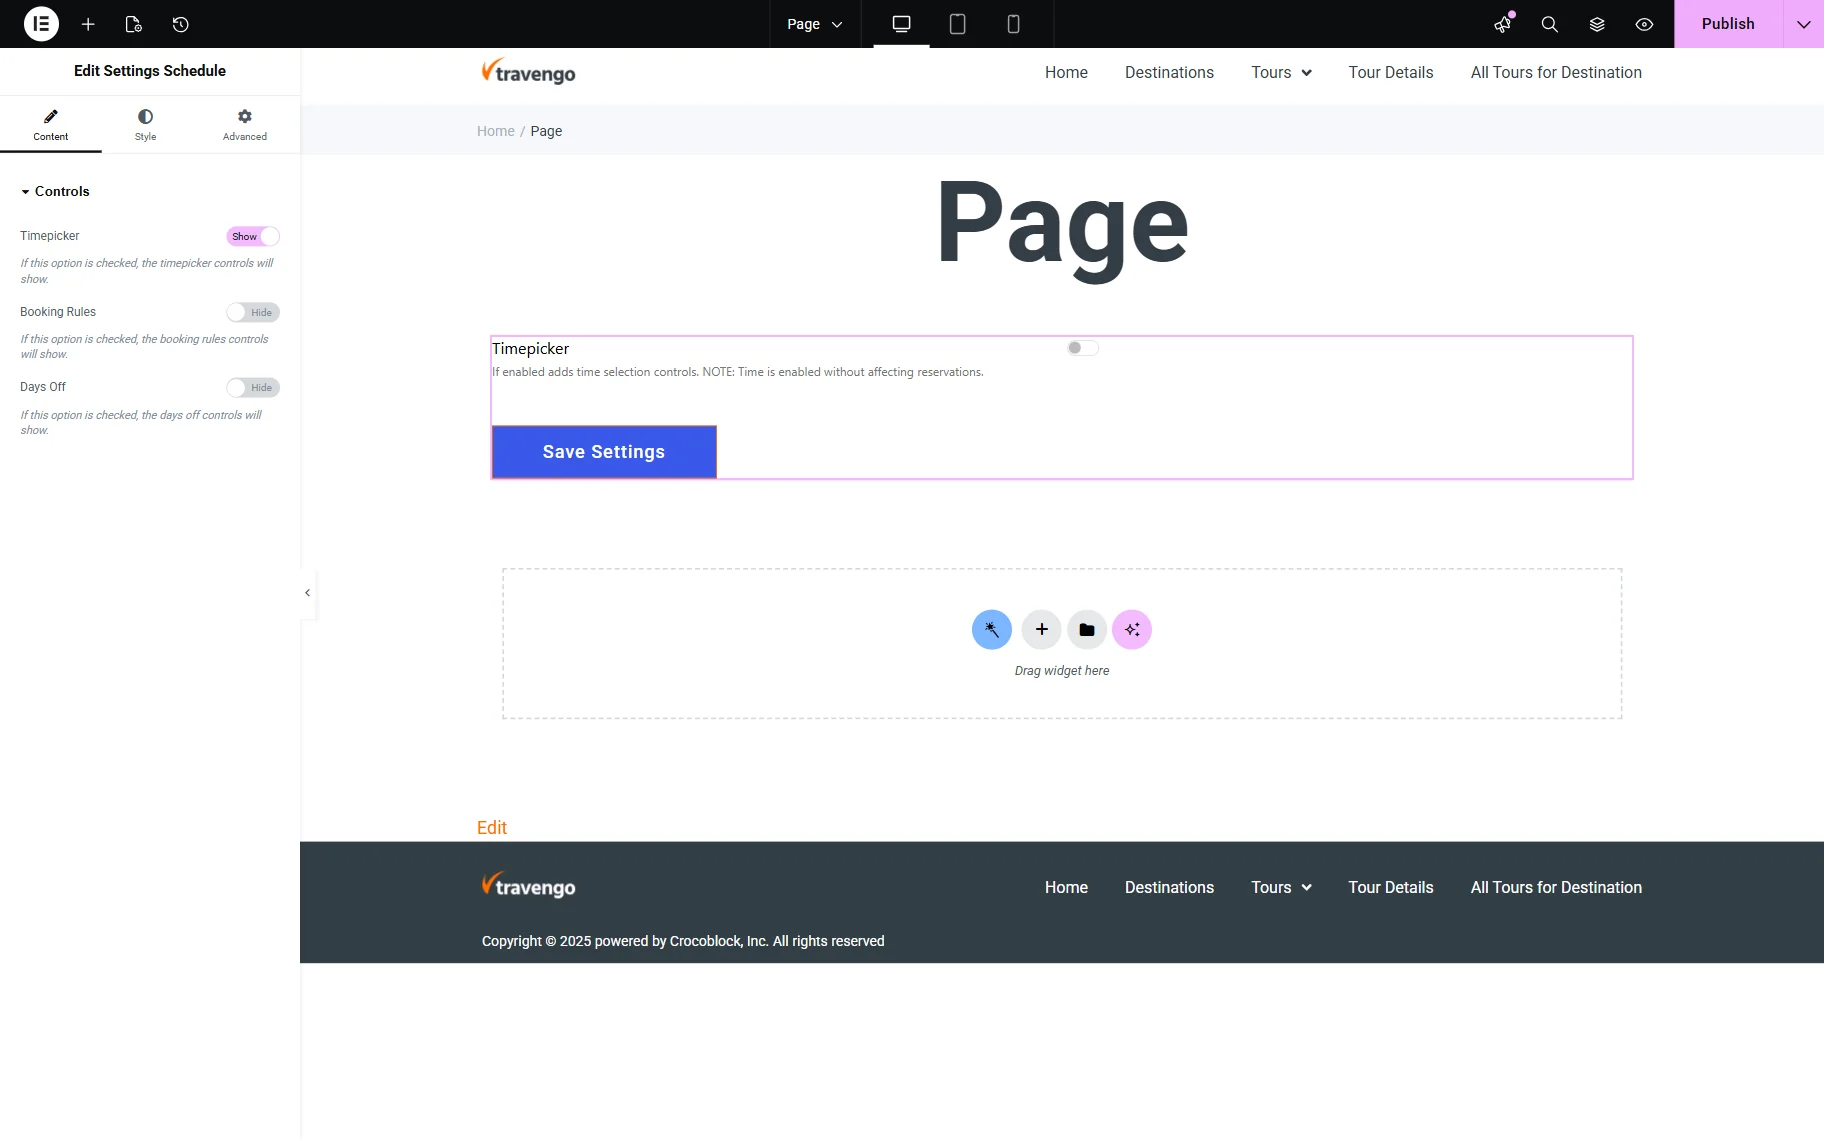
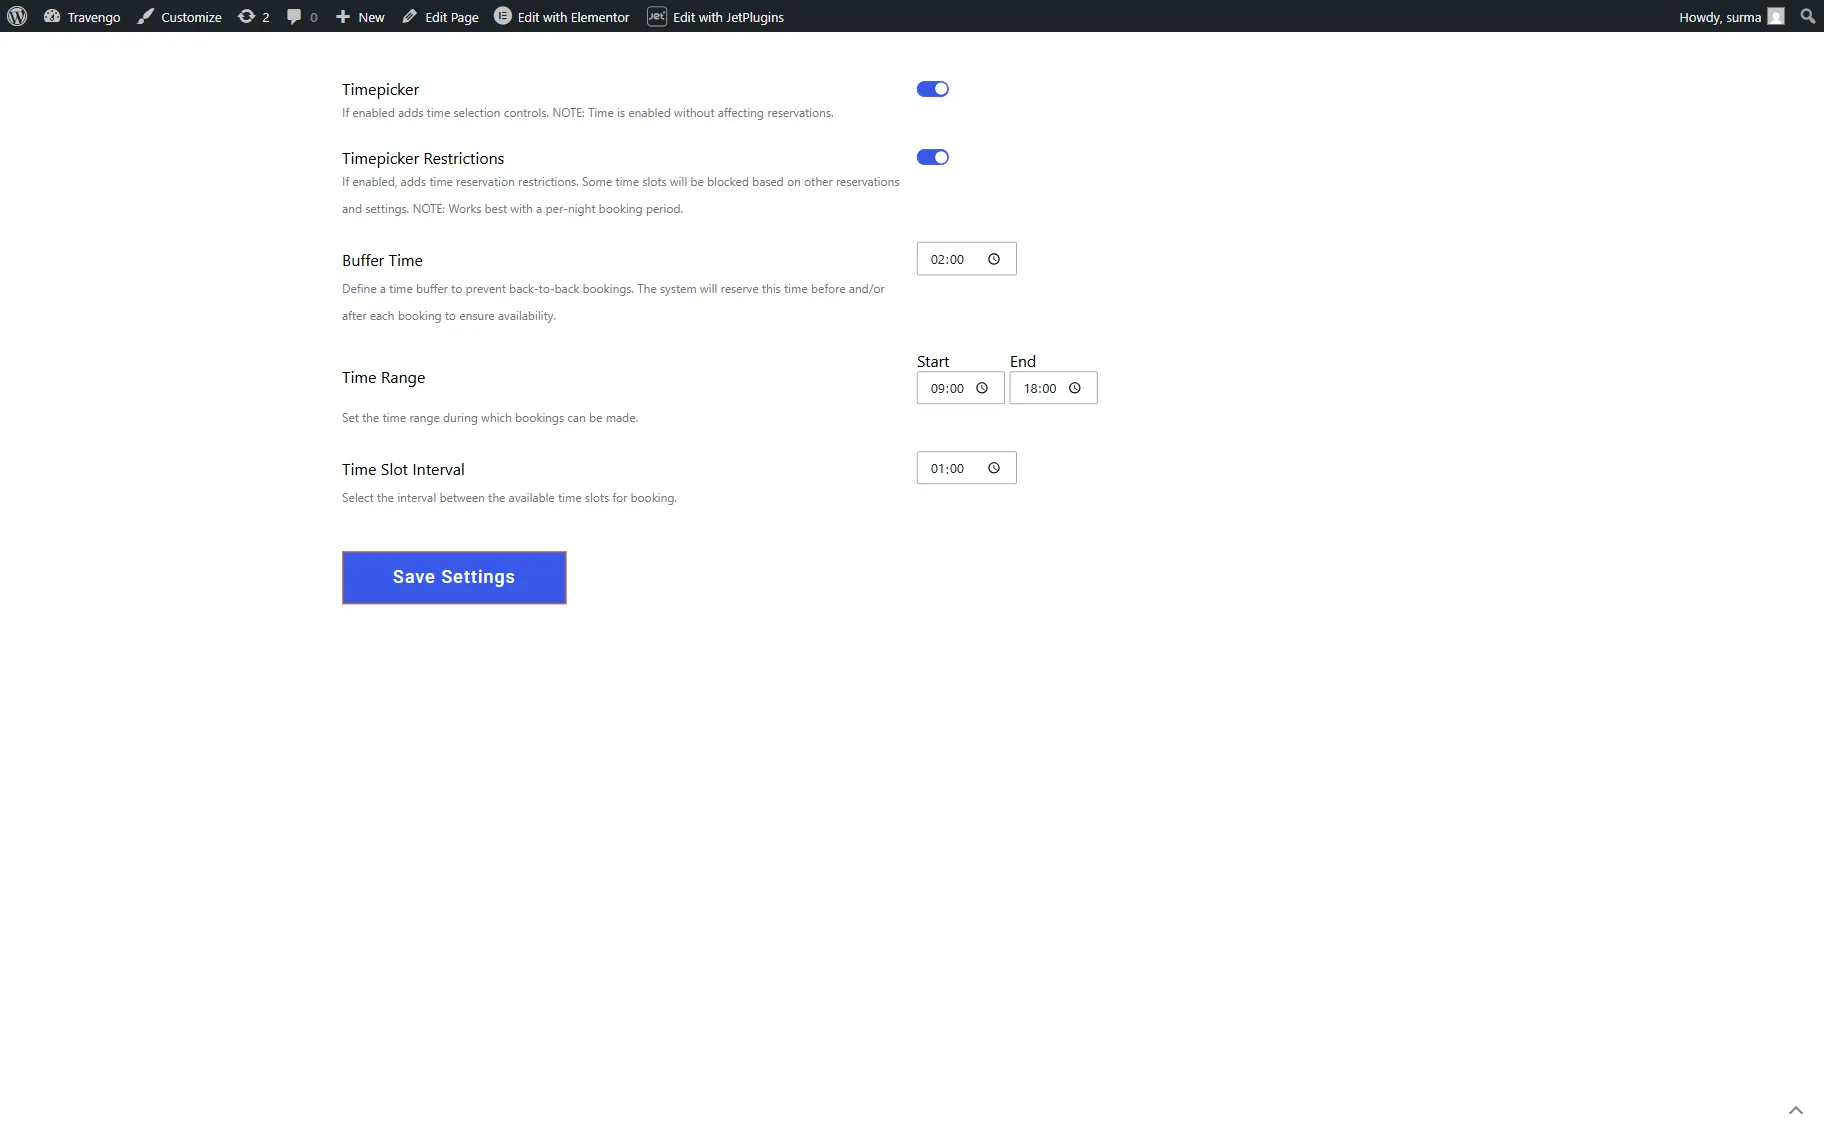
- Timepicker — when this toggle is checked, the timepicker controls will be shown. If the Timepicker is enabled on the front page, the following settings will appear:
- Timepicker Restrictions — if enabled, this feature applies time-based reservation restrictions that automatically block certain time slots based on existing bookings and configured settings. It works best with a per-night booking period to ensure accurate availability management. It activates the Buffer Time option;
- Buffer Time — sets a time gap between bookings to prevent back-to-back reservations, specified in hours and minutes (e.g., “2:00” means a two-hour gap). The system will automatically block the specified time before and/or after each booking to ensure proper availability;
- Time Range — time slots that define the available time frame for making bookings (e.g., between 9 a.m. and 6 p.m.);
- Time Slot Interval — sets the spacing between available booking time slots, specified in hours and minutes (e.g., “1:00” means a one-hour interval).
More details are available in the How to Manage Timepicker for Check-In/Check-Out in JetBooking and How to Manage Timepicker for Check-In/Check-Out in WooCommerce-Based Mode tutorials.
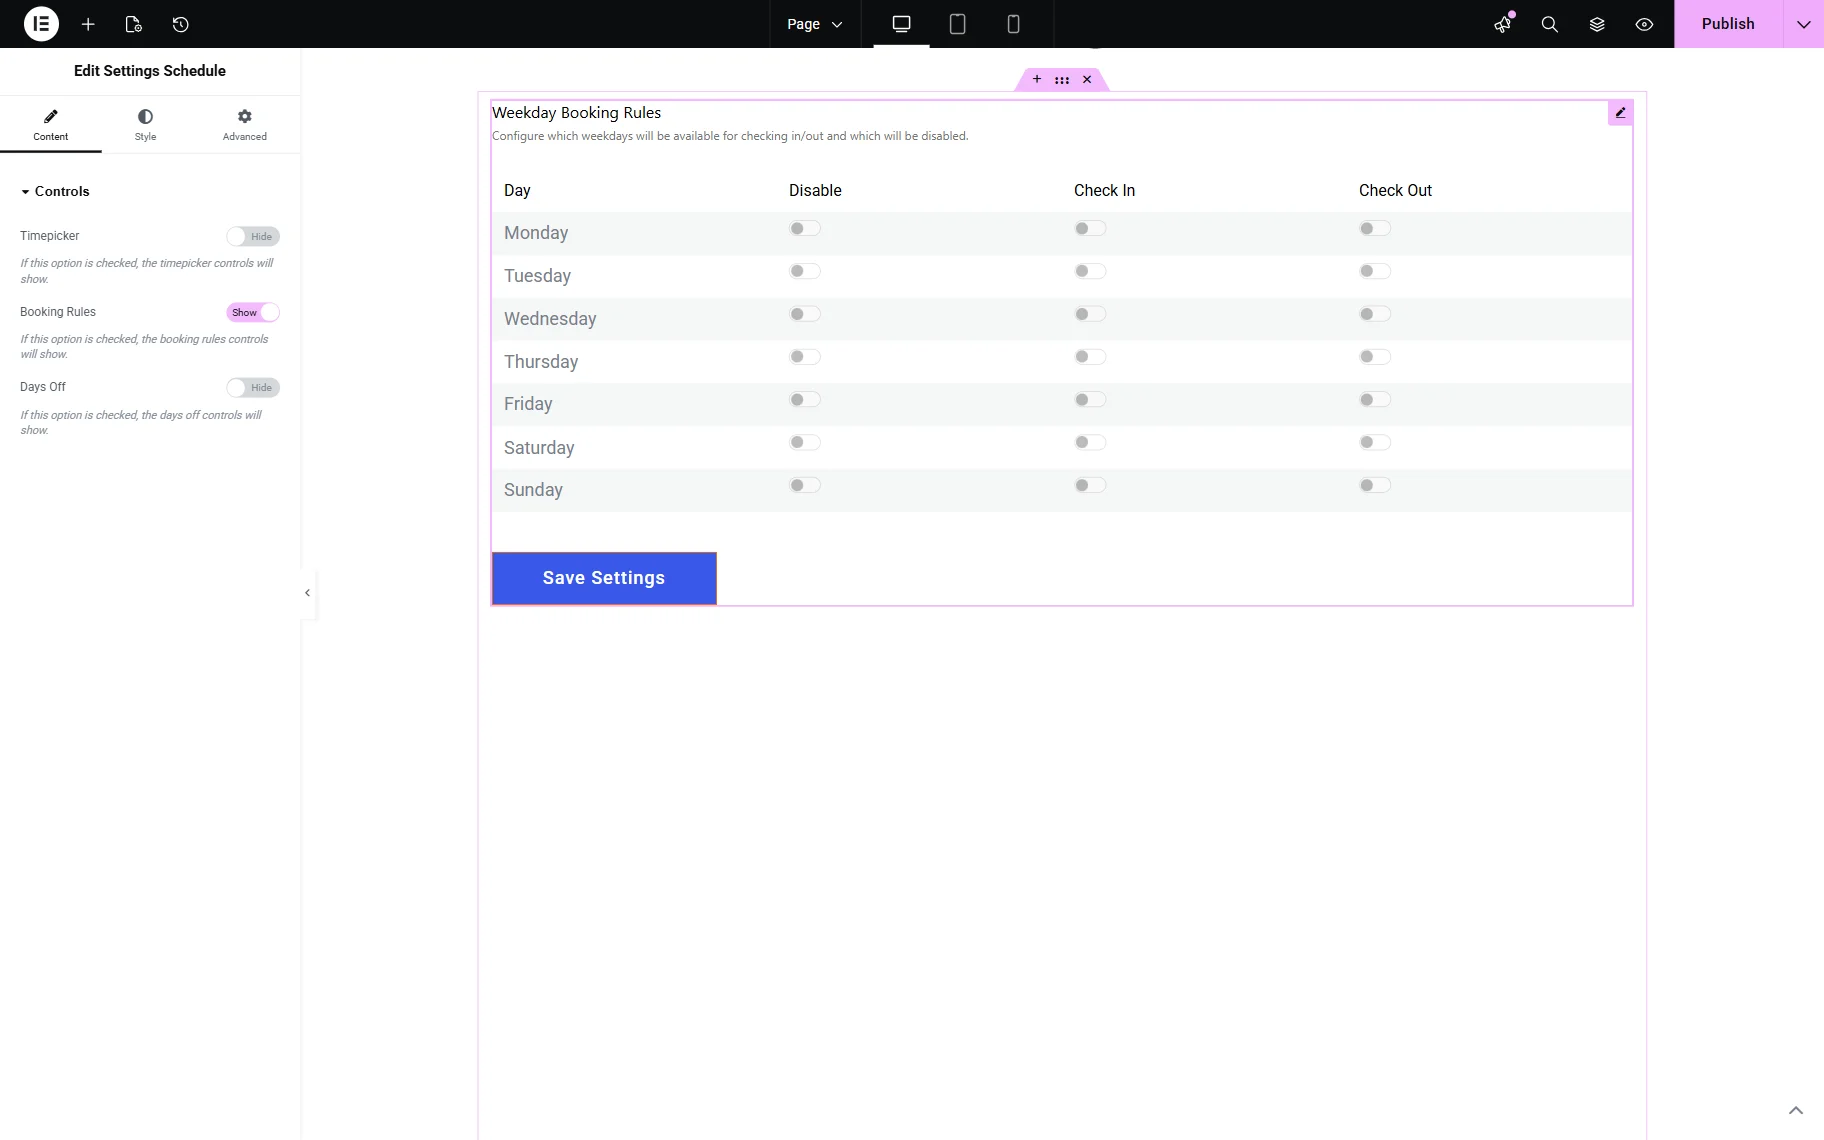
- Booking Rules — when this toggle is enabled, the booking rules controls appear, allowing one to choose which weekdays are unavailable for booking. Additionally, the weekdays available for check-in and check-out can be specified by enabling the toggles in the Check In and Check Out columns. Consequently, specific days can be enabled for checkouts, while others are unavailable. If all toggles are on or all options are disabled, the results will be the same: all days will be open for booking, check-in, and check-out.
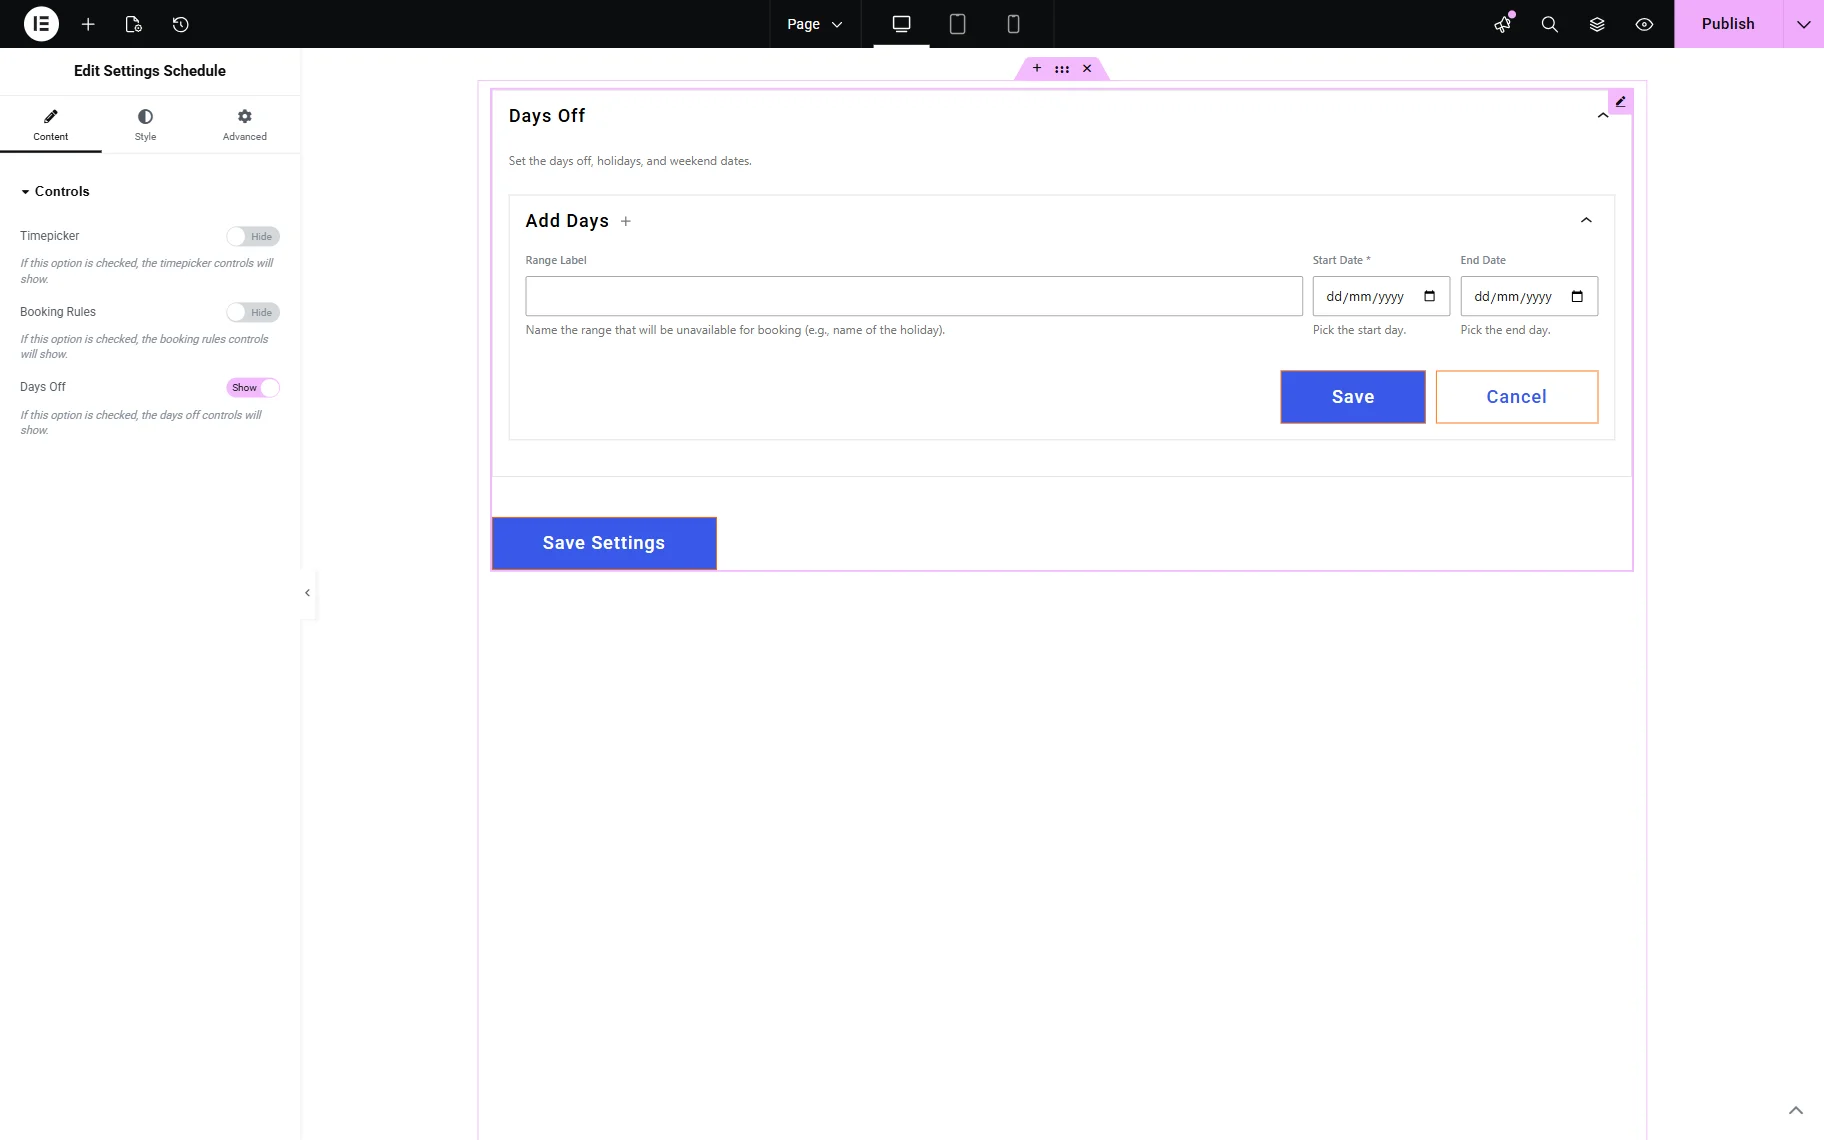
- Days Off — allows adding days (e.g., national holidays) that will be out of reach for customers. To set the days off, one should fill in the following fields:
- Range Label — sets the name of the holiday day or period (e.g., “Christmas 2025);
- Start Day — sets the holiday period’s first day. If a holiday includes only one day, only this field should be set;
- End Day — sets the last day of the holiday period.
More information is provided in the How to Manage Days and Weekends in Booking tutorial.
Once the adjustments are made on the frontend, the “Save Settings” button should be clicked.

Any settings applied on the frontend are reflected in the backend’s arrangement for the vendor who made the changes. For the admin, the changes made by vendors will not be visible.

That’s it. Now you know how to set up and use the Settings Schedule widget available as a part of the JetBooking WordPress plugin.