How to Filter the Posts Using Custom Fields Values
Learn how to filter posts by custom field values using the JetBlog plugin for WordPress.
Before you start, check the tutorial requirements:
- Elementor (Free version);
- JetBlog plugin installed and activated.
Configure the Posts Settings
Currently, the Custom Fields can be added to a post via the Post Options or the site’s database.
Add the Custom Fields via the Post Options
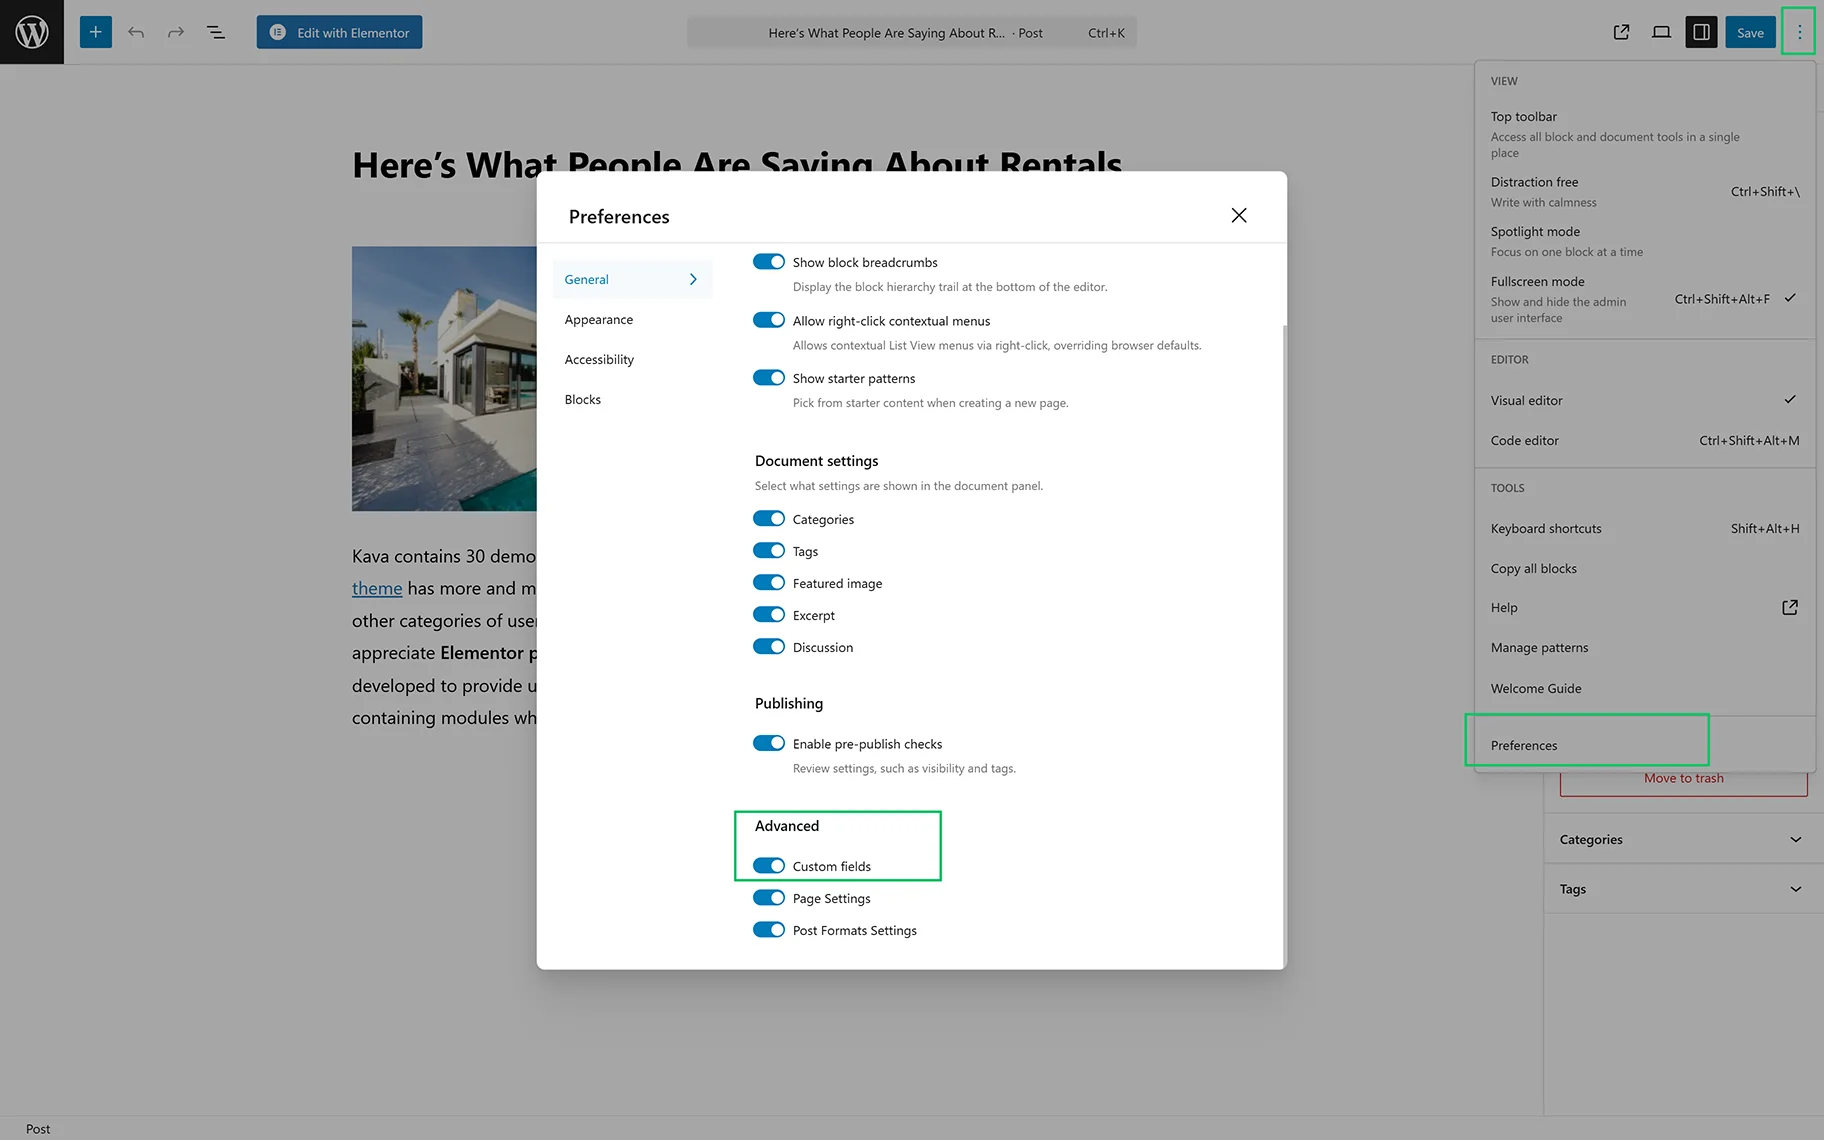
Open the needed post in the WordPress Dashboard > Posts > All Posts tab and click the “three dots” button in the upper-right corner. Here, move to the bottom of the settings window and press the Preferences tab.
Next, move to the bottom of the newly appeared Preferences pop-up and enable the Custom Fields toggle in the Advanced section.
After that, the pop-up will disappear, and a list of custom fields will appear below the post’s fields. Scroll the page until you reach the Custom Field block.
Below, you will see the block named “Add New Custom Field“. In the drop-down, select the Name and enter the post’s Value to be shown.
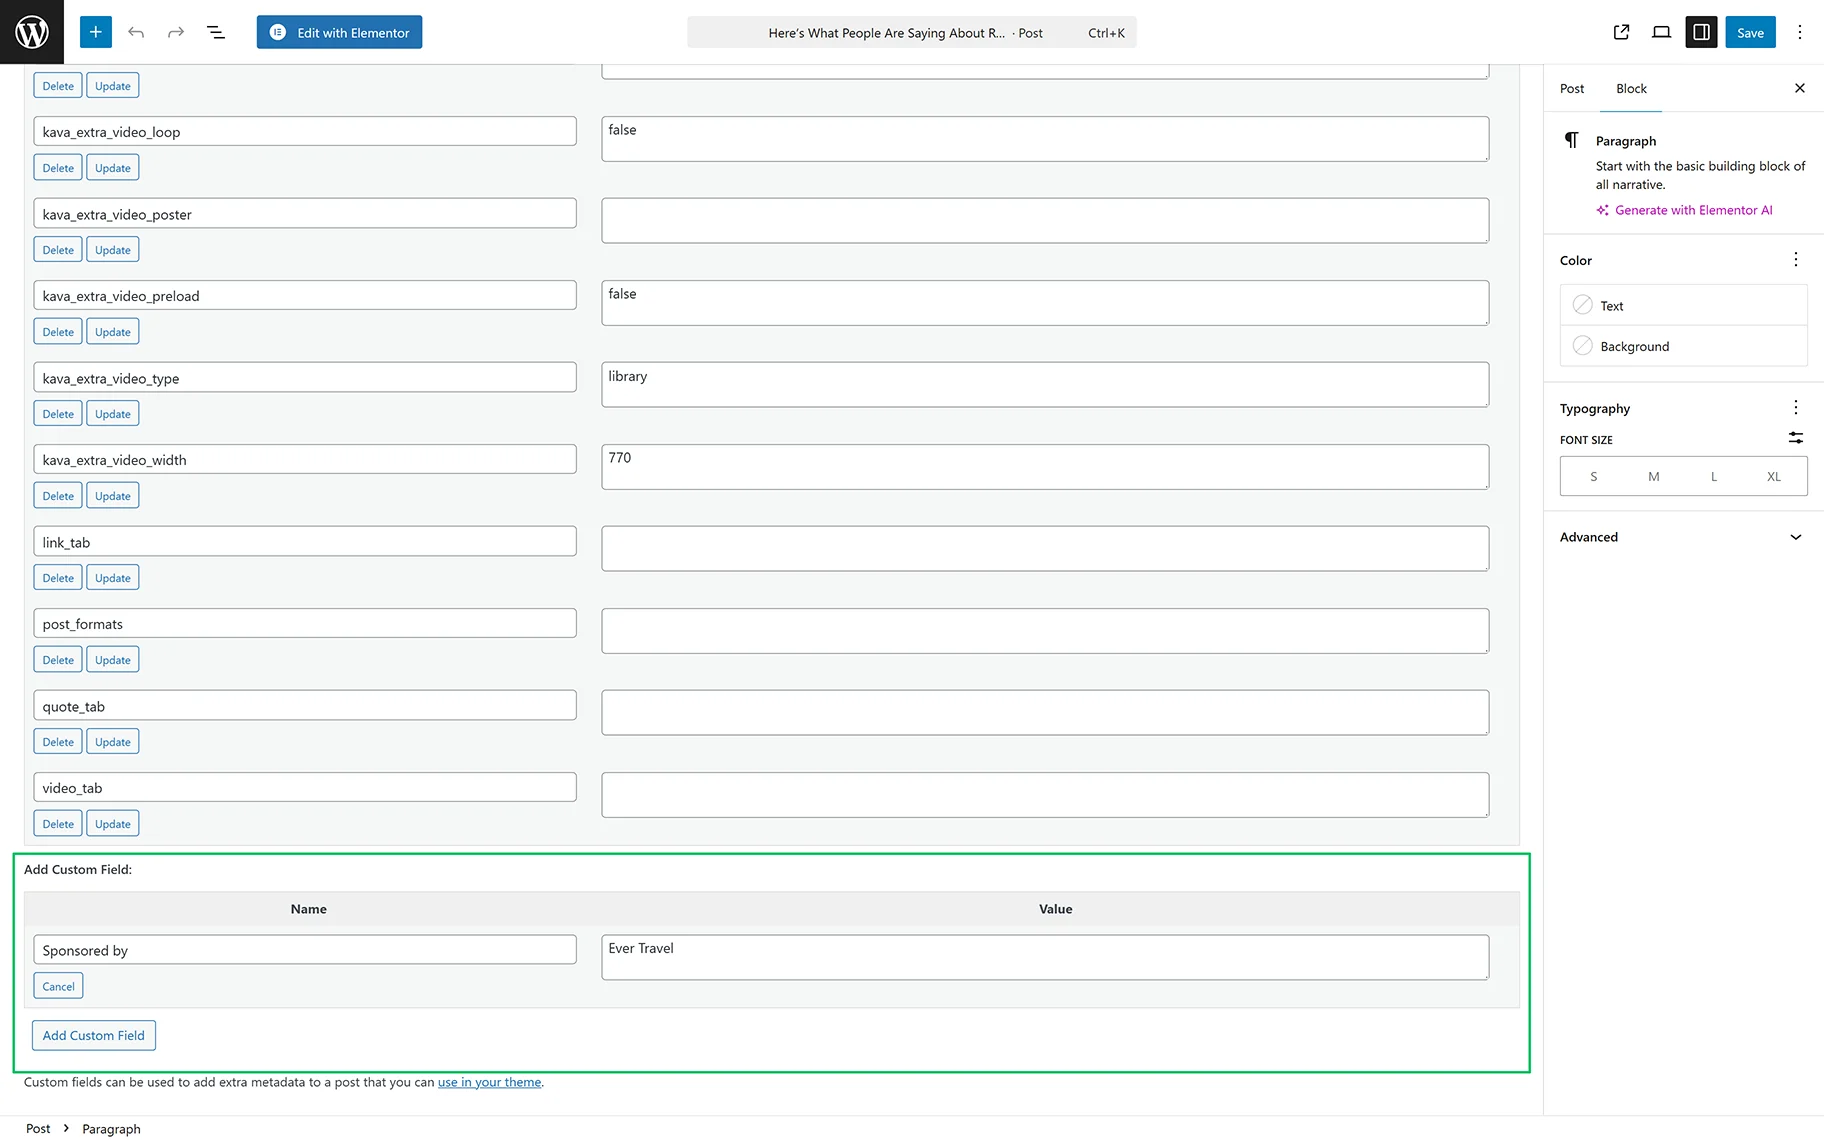
Finally, save the post by pressing the “Save” button at the top of the page.
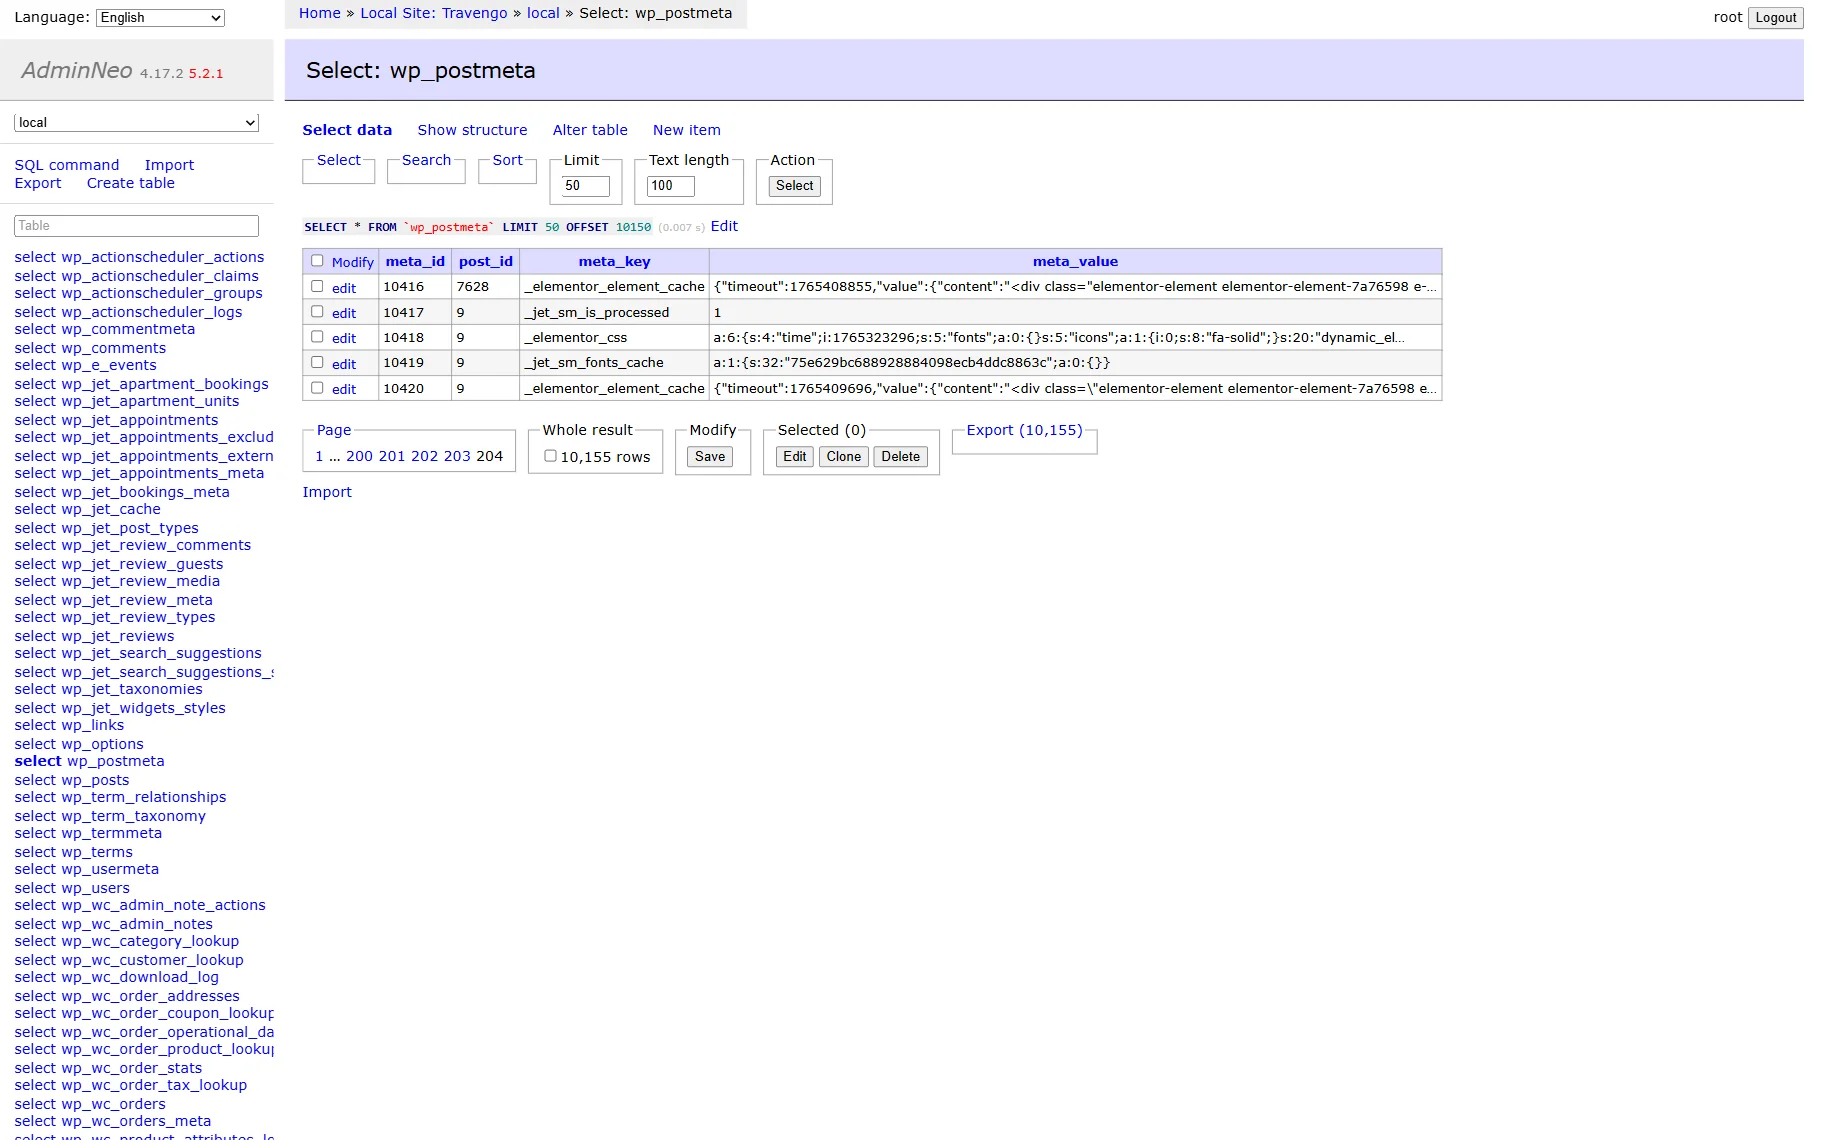
Add the Custom Field via the site database
To add value, you need to access the site’s database using the appropriate tools (e.g., phpMyAdmin). Then select the wp_postmeta table and look for the meta_key field to choose the appropriate key.
Configure the Filter Settings
Enable the JetBlog widgets
Move to the WordPress Dashboard > Crocoblock > JetPlugins Settings tab. Here, the JetBlog settings are displayed. Unroll the Available Widgets tab and enable the Smart Posts List or Smart Tiles List widgets.
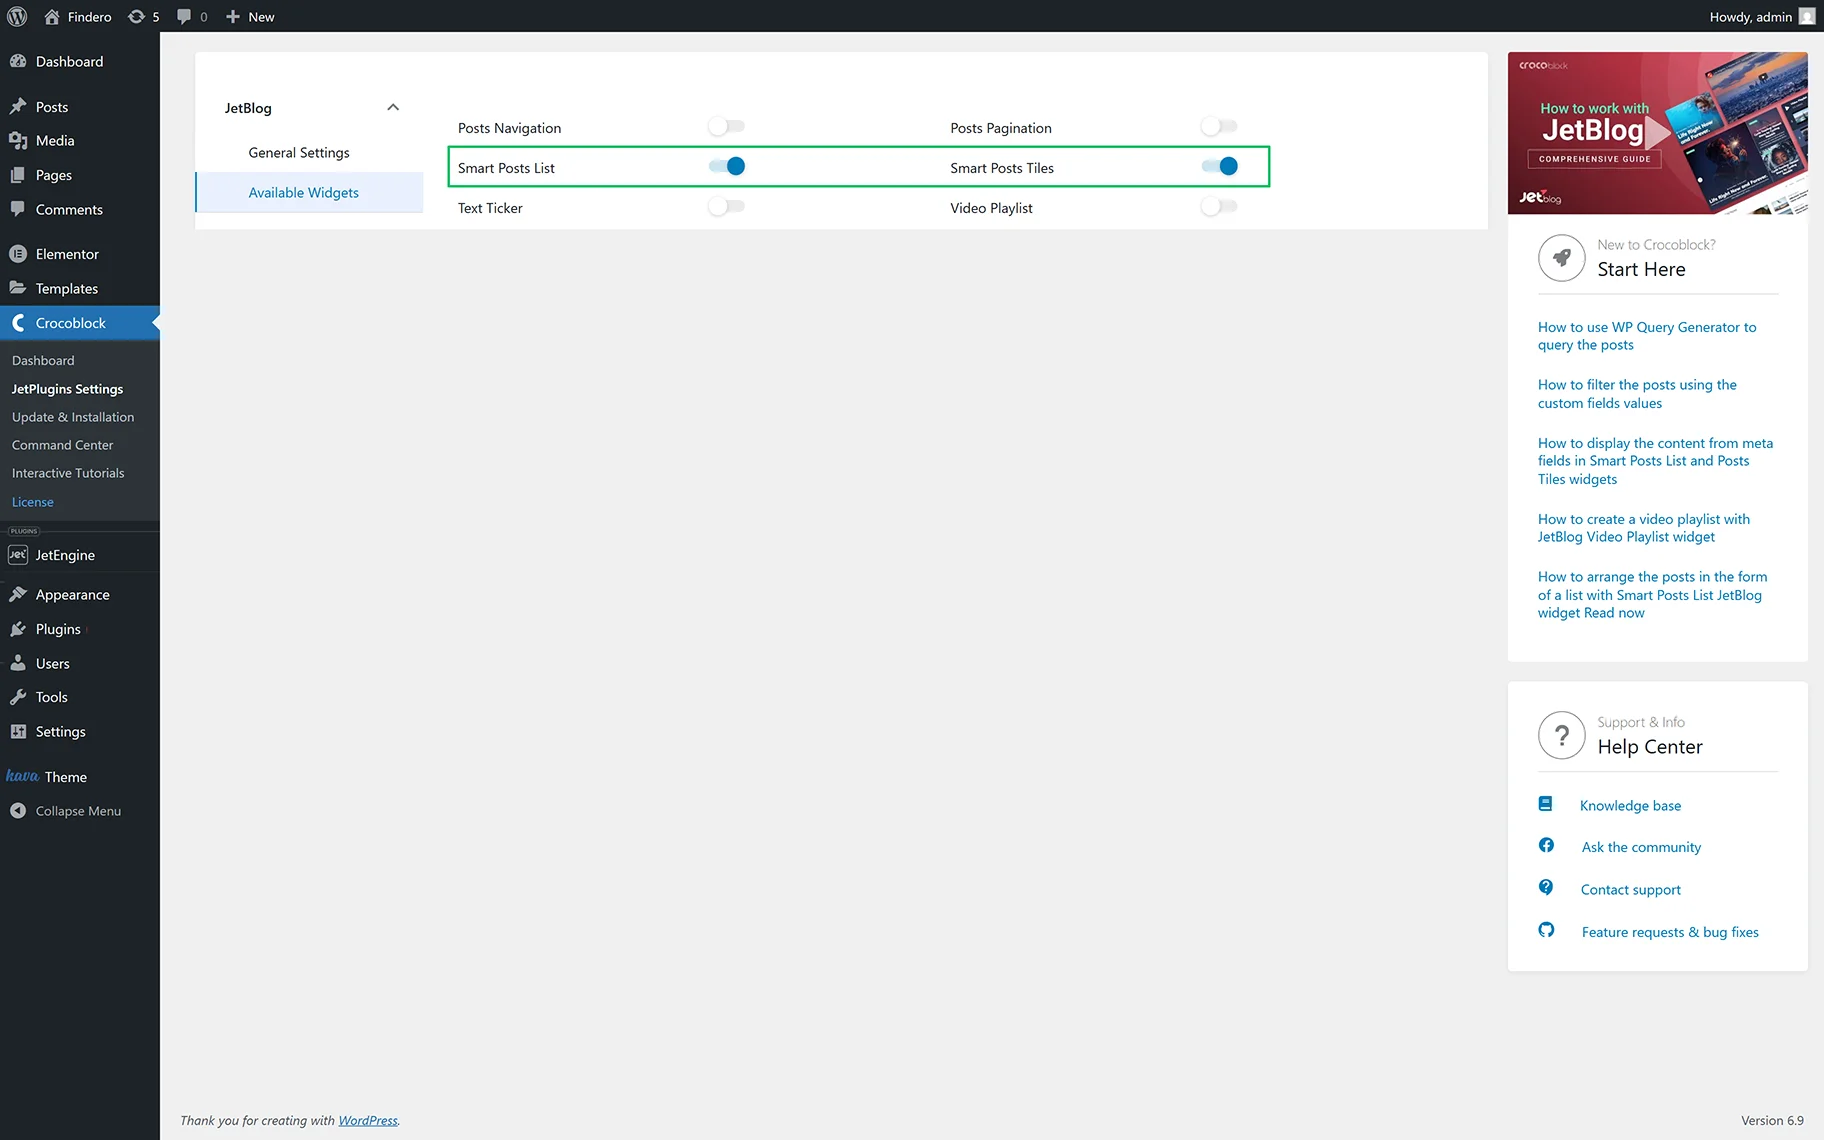
Once enabled, the changes will be saved automatically.
Add the widgets to a page
Open a page and insert the Smart Posts List or Smart Tiles List widget on the page. Here, the posts will be displayed and arranged by default.

After that, choose the needed section and proceed to the Content > Query & Control tab.
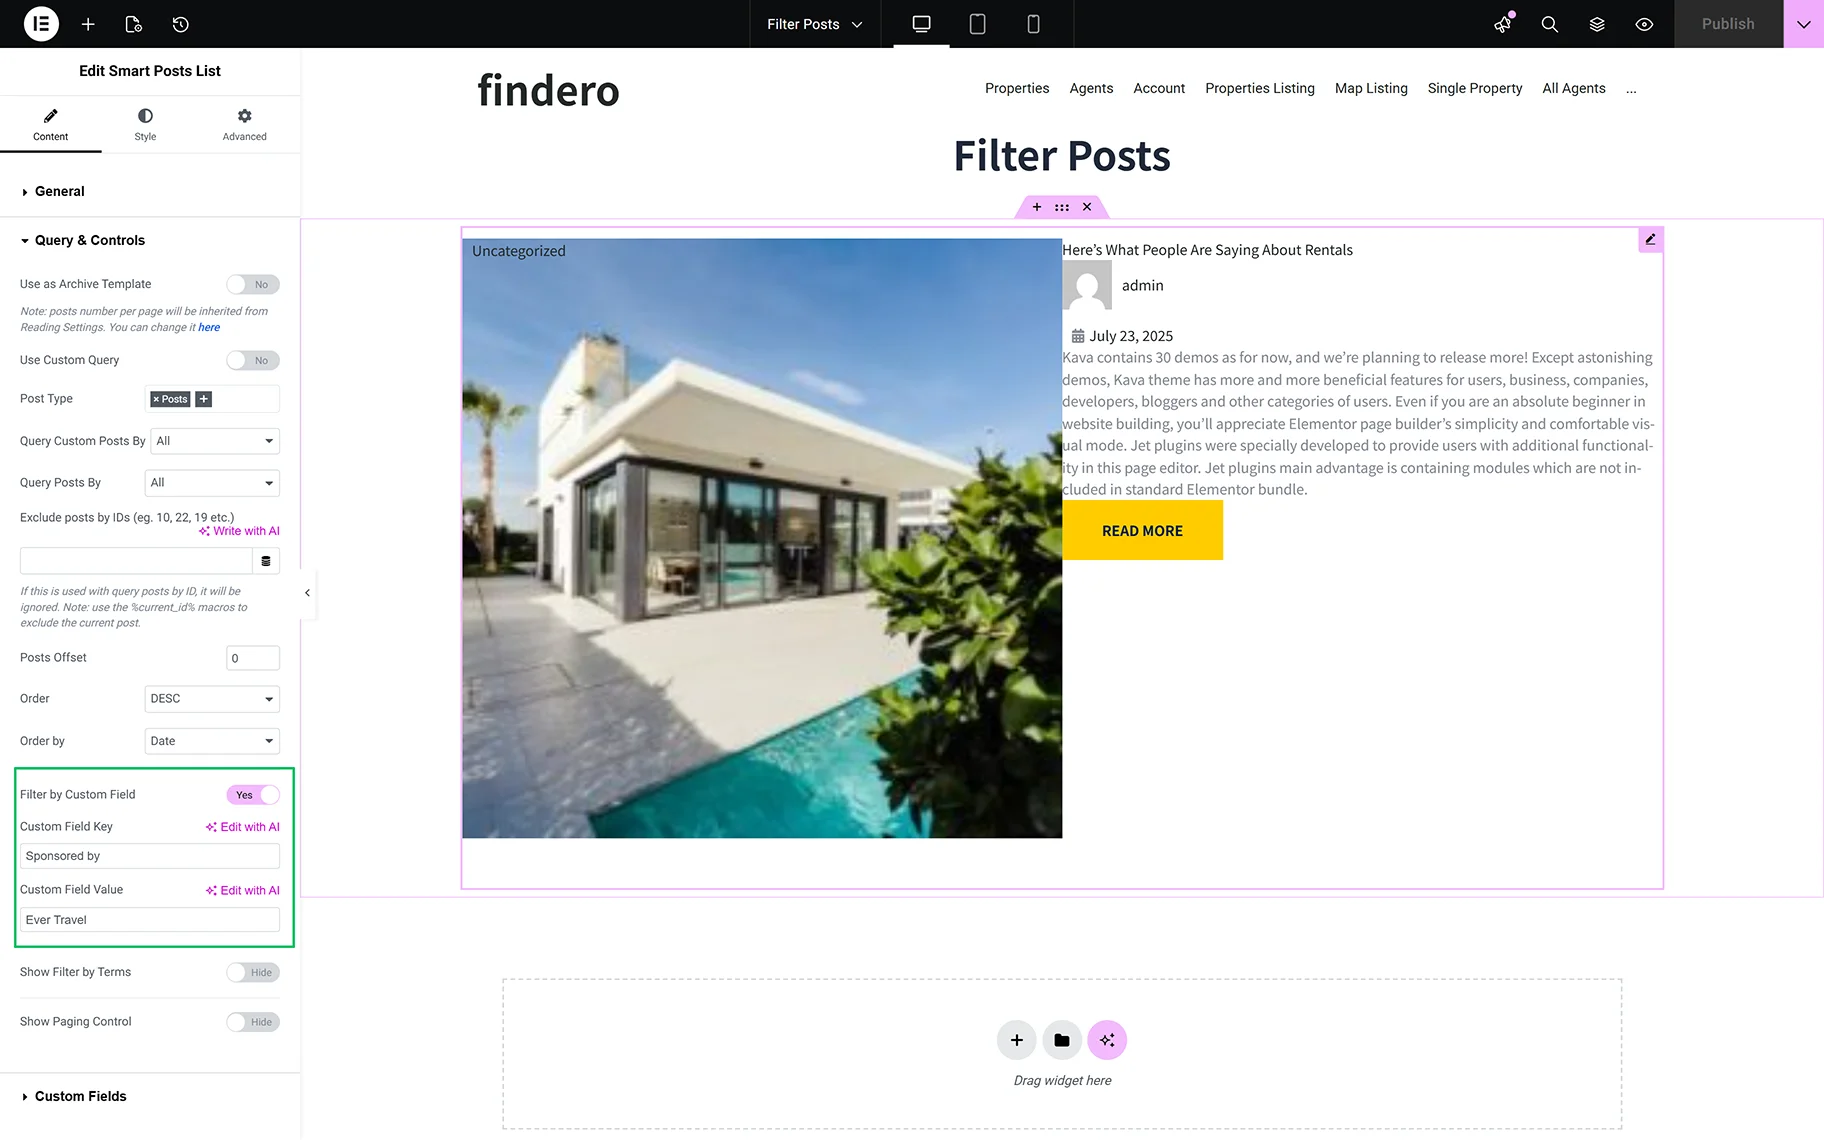
Toggle on the Filter by Custom Fields option.
In the Custom Fields Key field, you have to add the corresponding field’s name.
The next field is Custom Fields Value, where you can query posts by the specific value of the custom field.
Below, you can turn on the filter by Terms: Categories, etc.
That’s all about filtering posts by custom field values using the JetBlog plugin for WordPress.