How to Add a MailChimp Subscription Form
This tutorial features the overview of Subscribe widget from the JetElements plugin that can be linked with the MailChimp list.
MailChimp is a plugin that helps you to manage the users’ email base. And JetElements Subscribe widget is the tool that can help you to create a subscription form integrated with it. This tutorial will show you how to link the subscription form with the MailChimp list and add it to your website’s page.
Setting up MailChimp API Key and Audience ID
If you still don’t have a MailChimp account, please, feel free to check this tutorial. It provides detailed instructions on creating an account and finding out your MailChimp API key and Audience ID. Now, let’s make sure our MailChimp account has proper integration with the JetElements Subscribe widget.
Navigate to JetPlugins > JetElements Settings > Integrations in WordPress Dashboard. In the MailChimp section, find the fields where you have to input the MailChimp API key and the MailChimp Audience ID.
Also, you can enable the Double opt-in option in case you want that the contacts will receive an opt-in confirmation email when they subscribe to your list.

JetElements Subscribe widget overview
Let’s make the process of customizing the subscription form in the Elementor builder more clear.
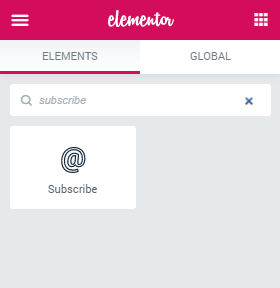
First of all, open the page where you would like to place a subscription form in the Elementor page builder. Find Subscribe widget in the left-side widget menu and drag it to your page.
By default, the form contains only two elements: a field where one can input an email and the “Subscribe” button. Take a look at the Content > Field menu tab.
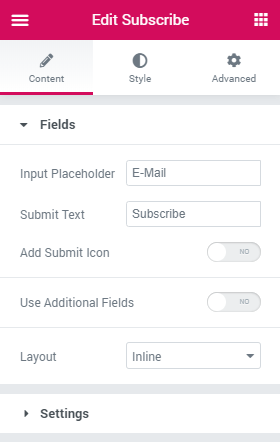
- In the Input Placeholder text area, you can input the text that the user will see in that field before inputting there something. It can give the visitor the tip on what information should be placed in the field and about the format of the information (e.g., an email).
- The Submit Text is the text that will be shown on the submission button.
- If you want to add an icon to the submission button – turn the Add Submit Icon toggle on. Afterward, you will get the opportunity to choose the icon.
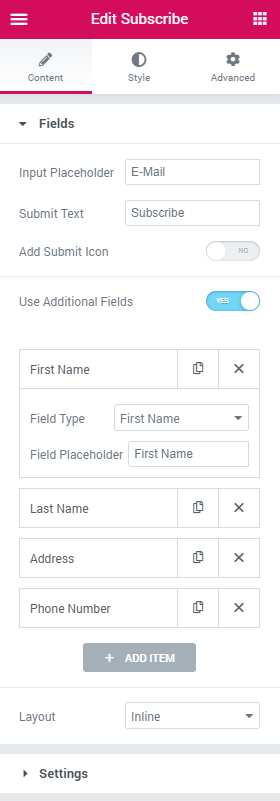
- Turn on the Use additional fields option to add more fields to the subscription form (e.g., First Name, Last Name, Phone number, etc.). You can simply delete or duplicate the items. And to add more fields to the form – click the “Add New Item” button.
- Layout drop-down menu defines whether the subscription button will be placed to the right or below the form fields.
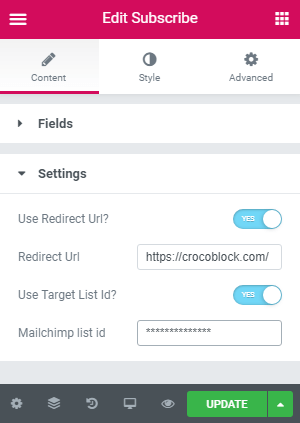
In the Settings section, you can set up the URL for redirection and enable usage of Target Audience ID of your MailChimp list.
In the Style section, you can customize the Layout, Width, Background, Color, Padding, Margin, Border Radius, Border Type, Box Shadow, Text Color, and Typography to make the design of your Subscribe form more appealing.
Don’t forget to click the “Publish” or “Update” button at the bottom of the page to save the changes.
Congrats! From now you will be able to add an effective MailChimp subscription form to Elementor using the JetElements Subscribe widget.