How to Change the Font in WordPress
Sometimes, you might want to change the default font that comes with your WordPress theme. There are several ways you can do this, and here we will look at each. If you like tinkering around with CSS code, you can do it that way. Or, if that’s not your thing, you can easily change the font using a plugin.
Tutorial requirements:
- WordPress website;
- font plugin (optional);
- font from Google fonts.
First, a Look at the Terminology
- Web fonts: these are hosted on another website. To use them, you link them to your website.
- Locally hosted fonts: these are hosted on your own website.
- Web-safe fonts: most computers come with a limited set of pre-installed fonts. These will display fine for most visitors.
How to Change the Font in WordPress: the Options Available
There are several ways you can change the font on your WordPress site. The main ways are:
- Installing a plugin that gives you access to web fonts.
- Coding a web font into your WordPress theme.
- Using a locally hosted font that you will host on your website and then add to your WordPress theme.
How to Change the Font in WordPress Using a Plugin
This option is ideal for people uncomfortable with adding code to their website. All you need to do is install a special plugin that will easily give you access to web fonts such as Google Fonts.
Google Fonts Typography is one such plugin and comes with a whole range of Google Fonts.

You can install it in the usual way from your WordPress dashboard:
- Click Plugins > Add new.
- Search for “Google Fonts”.
- Click Install Now.
- Click Activate.
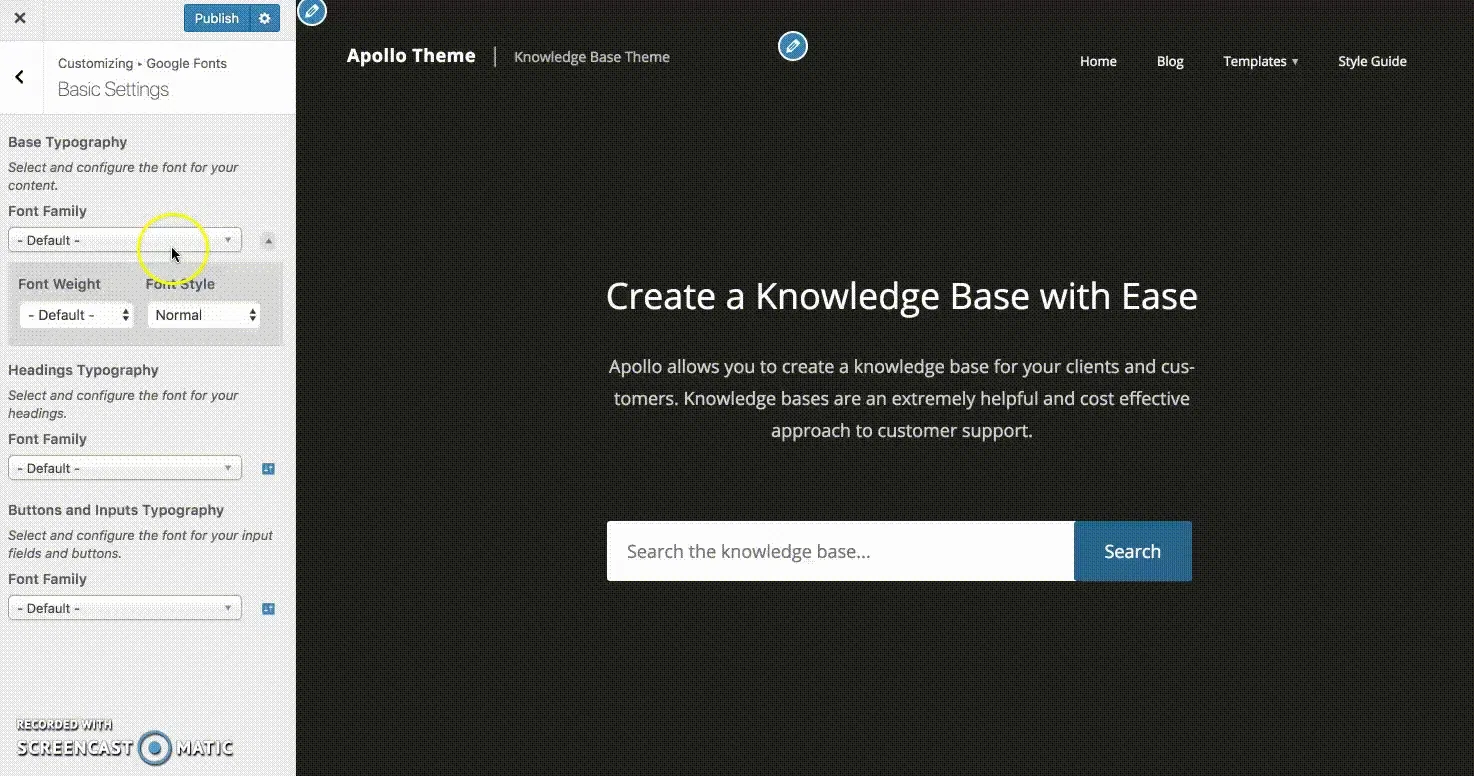
Then access the plugin from the theme customizer by going to Appearance > Customize. You should now see the settings for Google Fonts. Within this, you will see several sections:
- Basic Settings: here, you can easily set the default font for body text, headings, and buttons.
- Advanced Settings: this gives you more control over details such as branding, footer, and sidebar.
- Front Loading: you can use this to speed up your website by setting it not to load any font weights you don’t need to use.
- Debugging: if a font is not displaying correctly, you might be able to fix it here.
How to change the font color?
Unfortunately, the free version of Google Fonts Typography doesn’t allow you to change the font color. To do this, you need to buy the Pro version.
However, changing the font color is possible by adding some CSS code. On the Customizer’s home screen, click Additional CSS. You can then paste some code in there.
For example:
body {
  color: blue;
}

h1 {
  color: green;
}
This will make the body text blue and the H1 header green. If you want a more specific color, you can replace “blue” or “green” with any hex color code from this chart.
How to Change the Font in WordPress by Coding It Into Your Theme?
This option is ideal for those happy with adding code to their WordPress theme. It could be a good option if you want to limit the number of plugins installed on your site.
Before you edit your WordPress theme, you will need to create a child theme. If you are unsure how to do that, here are some instructions.
Once you have created your child theme, give it two files: style.css and functions.php.
Here, we will use Google Fonts, as it’s free and very commonly used.
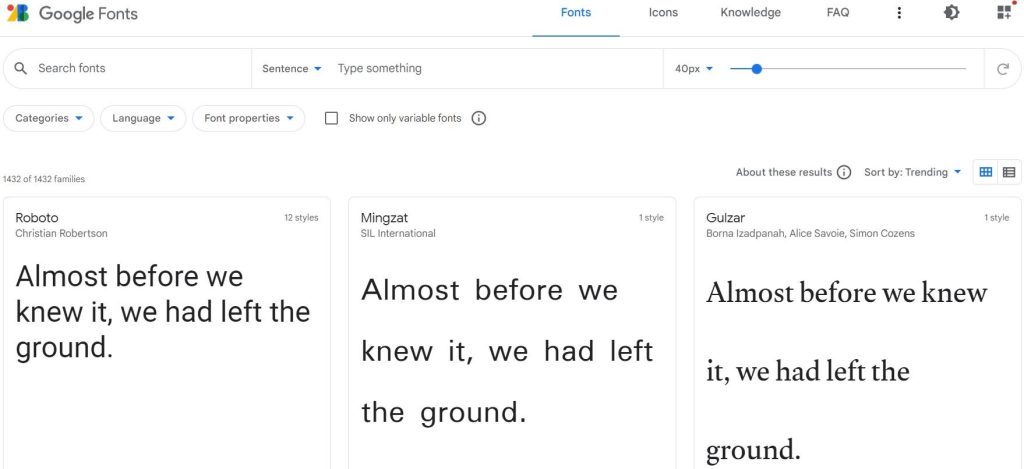
1 Step — Choose a font and get the link.
- Go to Google Fonts and select the font family you want to use
- Click Select All Styles, and some code should appear
- Don’t select the whole code. Just select the bit that looks like this: https://fonts.googleapis.com/css?family=Raleway

2 Step — Enqueue the font(s).
Open the functions.php file and past this code, replacing https://fonts.googleapis.com/css?family=Raleway with the code you got from Google Fonts:
function add_google_fonts() {
wp_enqueue_style( 'googleFonts', 'https://fonts.googleapis.com/css?family=Raleway', false);
}
add_action( 'wp_enqueue_scripts', 'add_google_fonts' );
This will enqueue the style from the servers of Google Fonts. If you ever want to add more fonts at a later date, just amend that one line of code like this:
https://fonts.googleapis.com/css?family=Raleway|Merriweather3 Step — Add the font(s) to the stylesheet.
Before using the font on your site, you must add it to the stylesheet.
To do this, open style.css, where you can add CSS code to style specific elements with your chosen font(s).
For example:
body {
 font-family: 'Raleway', sans-serif;
}

h1, h2, h3 {
 font-family: 'Merriweather 'Raleway', serif;
}
This code will make the headings use Merriweather font, but the main body text will use Raleway font.
Save the stylesheet file and view your website to ensure everything appears as it should. If the fonts are not displaying correctly, you might need to clear your web browser’s cache.
4 Step — Add a backup font.
Occasionally, a particular font won’t display for somebody viewing your site. There can be various reasons, such as viewing it on an old device or using a slow internet connection. Or sometimes, the provider of the web font might be having technical problems.
But this is why it’s good to have a backup font, just in case. And we can do that by using one of the web-ready fonts that most visitors already have on their devices. To do this, edit the CSS code in this way:
body {
 font-family: 'Raleway', Helvetica, sans-serif;
}

h1, h2, h3 {
 font-family: 'Merriweather', Georgia, serif;
}
By doing this, the website will display your chosen web fonts when possible – in this example, Raleway for the body and Merriweather for the headings. But if those cannot be displayed, visitors will see Helvetica and Georgia instead.
How to Change the Font in WordPress by Hosting the Font on Your Website
There are various reasons why you might want to host the font on your own website. For example, if you are concerned about the potential security issues of using web fonts or don’t have the budget to pay for a premium fonts plugin.
1 Step — Adding the font files to your website.
- Go to Google Fonts.
- Find the fonts family you want to use and click it.
- Click Download Family.
- Unzip the font file on your computer.
- Delete any font weights you don’t want to use.
- Go to Convertio to convert the files to .woff format and download them.
- Create a child theme of your WordPress theme.
- Access the server files for your website and to wp-content/themes/themename (where “themename” is the name of your particular WordPress theme).
- Create a subfolder called “fonts” and upload the .woff files there.
2 Step — Adding the font to the stylesheet.
In the WordPress dashboard, go to Appearance > Theme File Editor, open style.css and paste in CSS code such as this:
@font-face {
 font-family: ‘Raleway';
 src: url( “fonts/Raleway-Medium.ttf”) format(‘woff’); /* medium */
 font-weight: normal;
 font-style: normal;
}

@font-face {
 font-family: ‘Raleway';
 src: url( “fonts/Raleway-Bold.ttf”) format(‘woff’); /* medium */
 font-weight: bold;
 font-style: normal;
}

@font-face {
 font-family: ‘Merriweather';
 src: url( “fonts/Merriweather.ttf”) format(‘woff’); /* medium */
 font-weight: normal;
 font-style: normal;
}
Of course, you will want to use your own choice of font names, not the ones I have used here. You can add as many as you like in this way.
Then you can add the styling for the various elements of your text, for example:
body {
 font-family: 'Raleway', Helvetica, sans-serif;
 src: url( “/fonts/Raleway-Medium.ttf” );
}

h1, h2, h3 {
 font-family: 'Merriweather', Georgia, serif;
}
Once you’ve done that, your locally hosted fonts should work with your WordPress theme.
FAQ
Please see the section above titled How to Change the Font in WordPress by Coding It Into Your Theme.
Yes. From your WordPress admin dashboard, go to Appearence u003e Customize u003e CSS. From there, you can paste in CSS code such as:
#main-nav ul a {
font-family: u0022Timesu0022, serif;
}
You can change the font size in the Block Editor, but not the font style.
If you are using the default Twenty Twenty-Two WordPress theme, this uses the Source Serif Pro for headings and an easy-to-read sans-serif font.
So, now you know how to change the font in WordPress. We have covered several different ways of doing so. You can install a plug that gives you access to web fonts. You can add CSS code to your WordPress theme. Alternatively, you can use a locally hosted font if the other methods do not suit you.