How to Clear WordPress Cache with WP Rocket
Find out how to install WP Rocket, configure it, and clear the website's cache.
Before you start, check the tutorial requirements:
- WP Rocket installed and activated
%desc%
WP Rocket is a solution for those who want to speed up their website. This plugin has all the needed features and functionality for achieving this goal. But it should be appropriately installed and well-configured.
Install WP Rocket Plugin
Upload and install the plugin. Enter your account: https://wp-rocket.me/account/ and download the plugin by clicking the “Download WP Rocket” button.

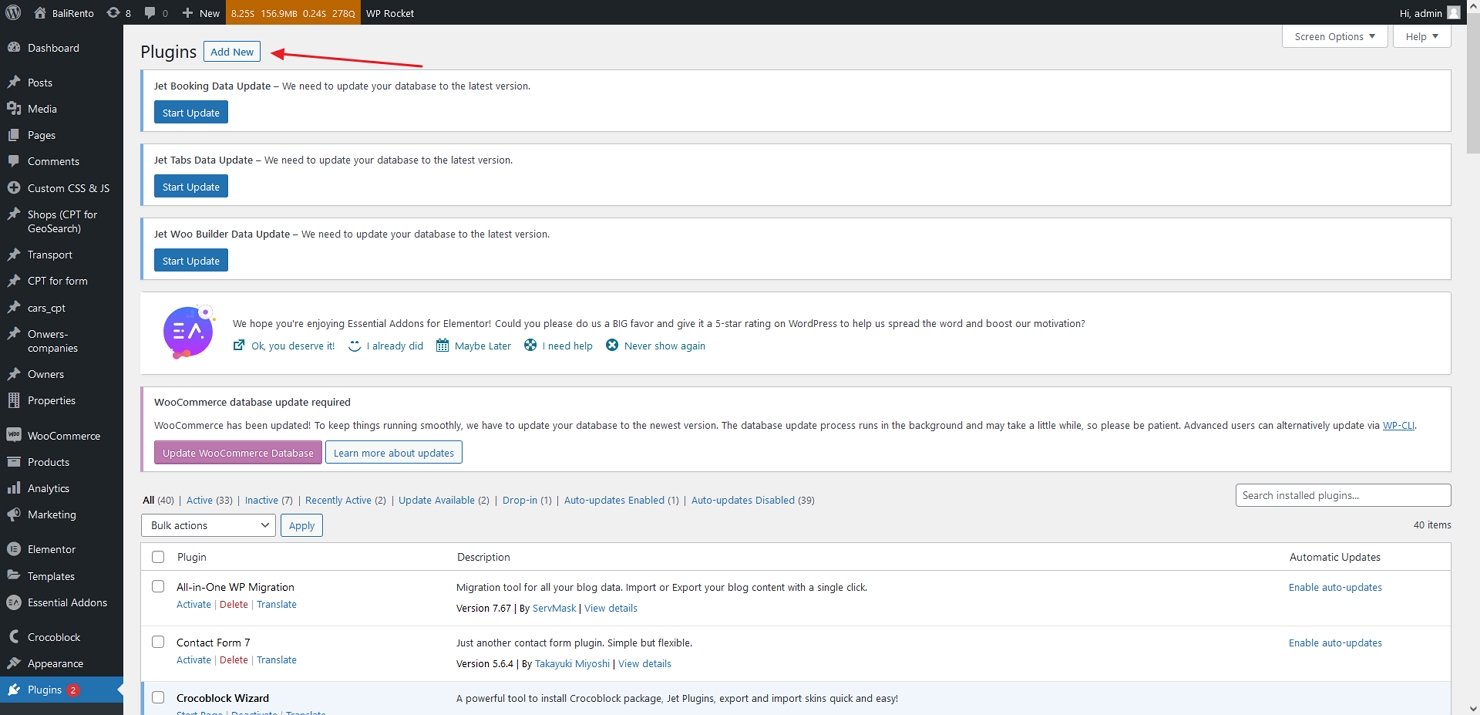
Once you have a .zip file on the PC, install and activate it via the WordPress Dashboard > Plugins directory. There, click “Add New.”

Drag and drop or choose the plugin’s .zip file and click the “Install Now” button.

Once the installation is over, click the “Activate Plugin” button.

Configure the plugin by following the official WP Rocket website tutorials.
Сlear the Website’s Cache
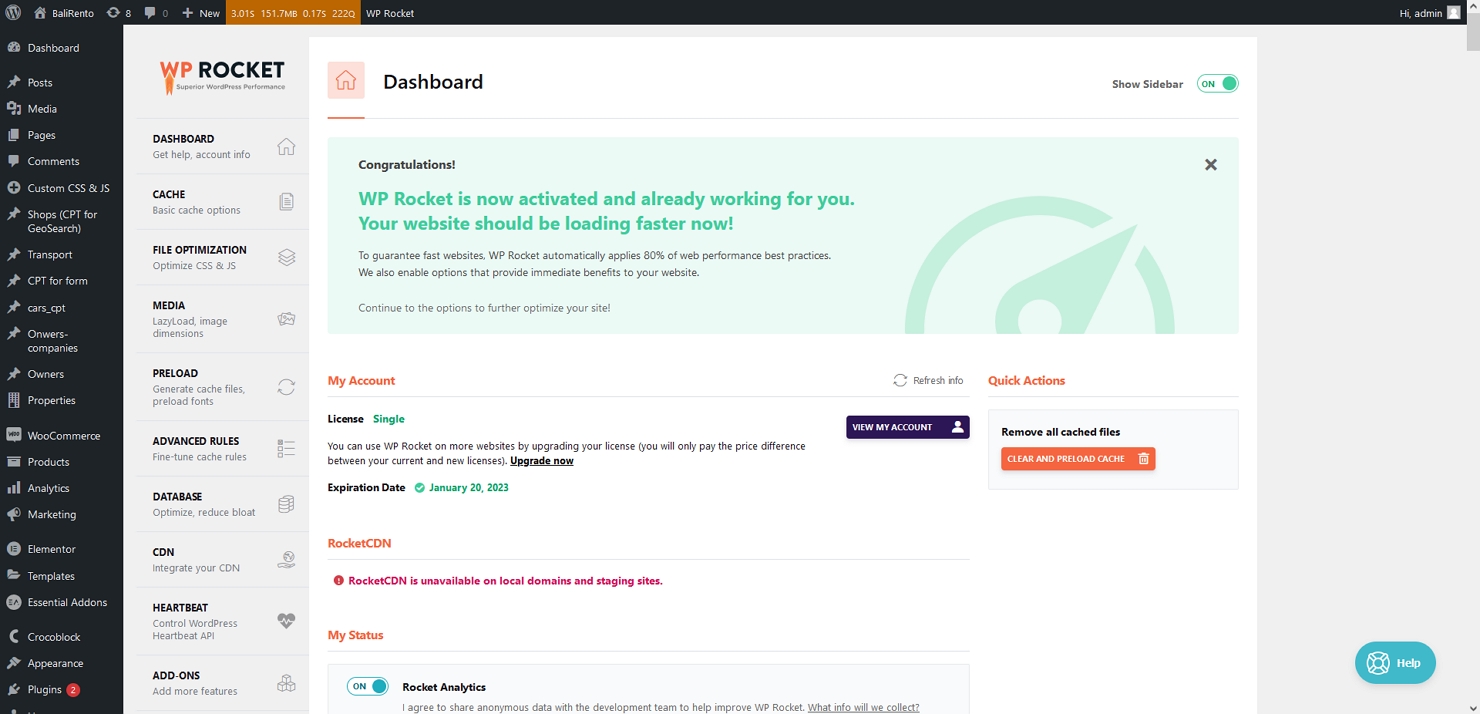
If you need to clear the cache on the whole website, you can do that from the WP Rocket dashboard (1) or the WordPress panel (2).

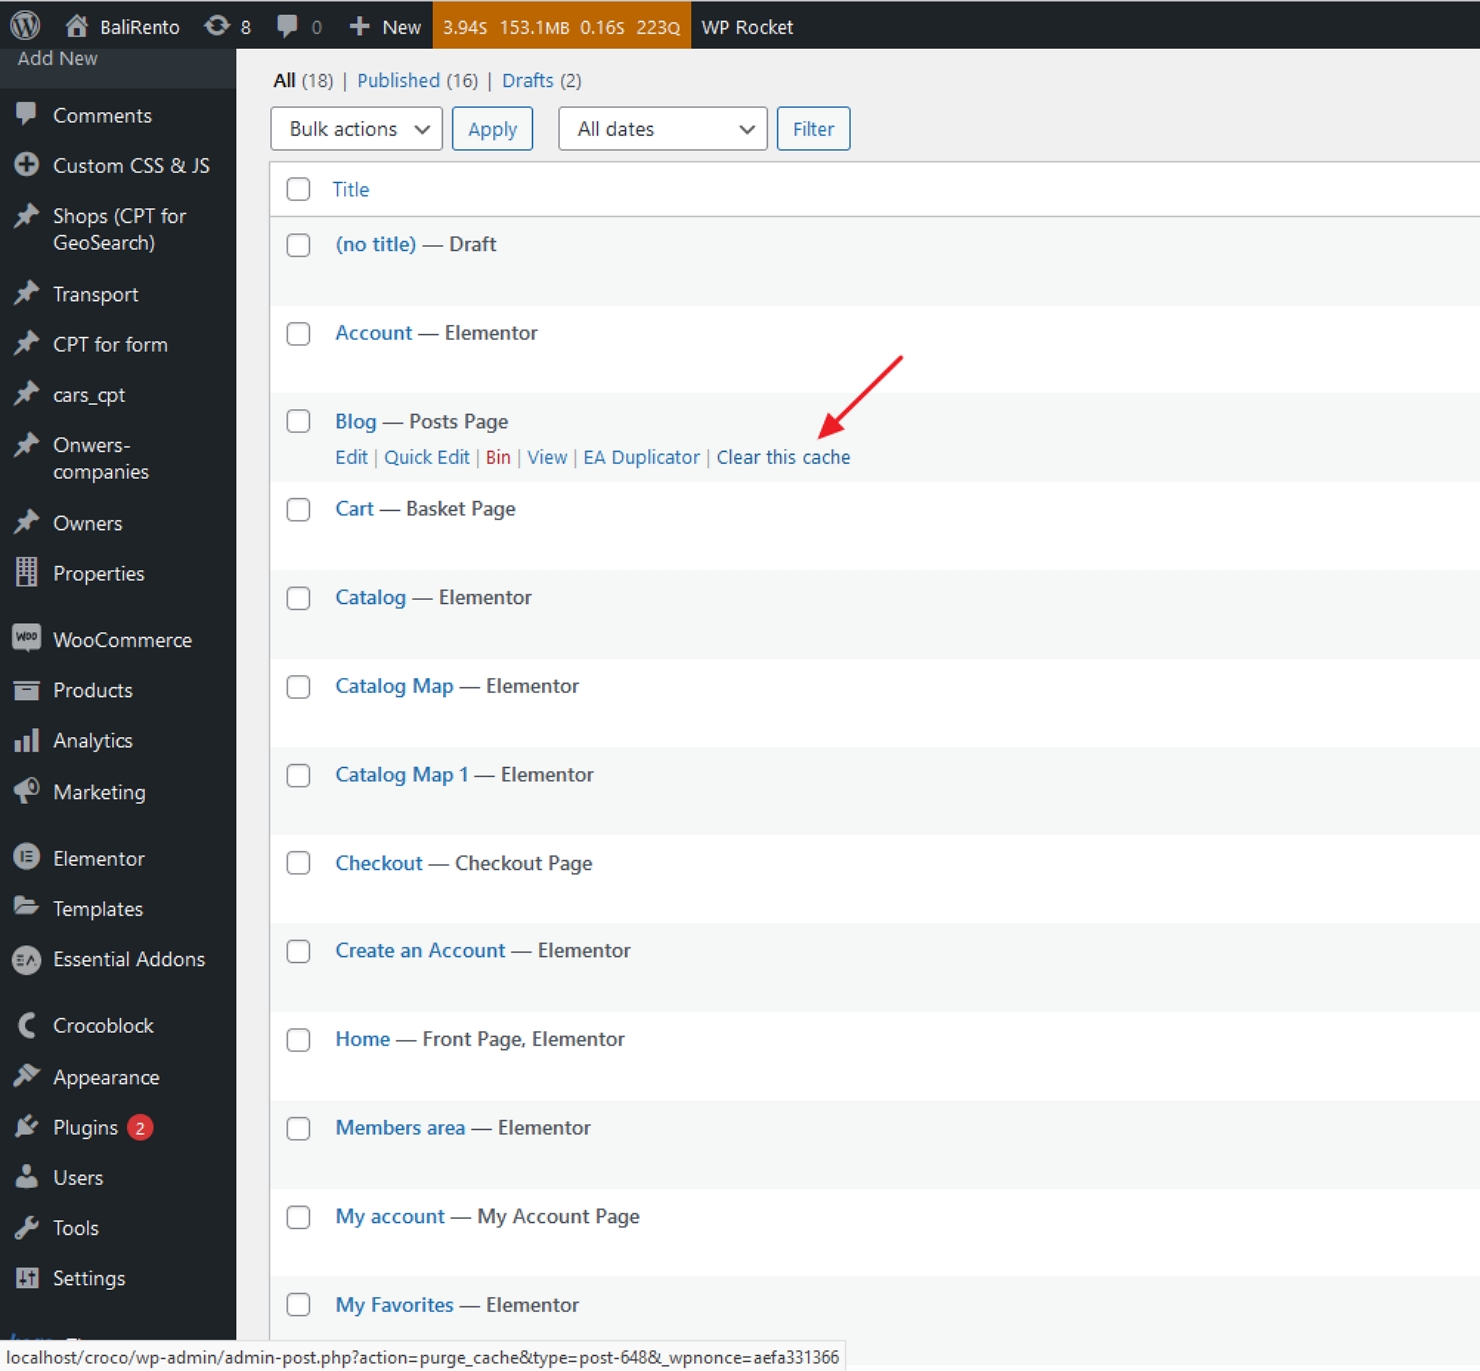
Also, sometimes you may need to clear the cache of a specific page. You can do it from the WordPress Dashboard as well.

To learn more about changing the WP Rocket settings for the Crocoblock plugins, please follow this article WP Rocket: WordPress Caching Plugin Review.
That’s all about clearing the website’s cache with the WP Rocket plugin.