How to Manage Appointments from the WordPress Dashboard
This tutorial describes all controls of the JetAppointment Booking appointments list dashboard tab.
Before you start, check the tutorial requirements:
- JetAppointment plugin installed and activated
- JetEngine plugin installed and activated
When you install the JetAppointment booking plugin, it adds an Appointment tab to the dashboard menu.
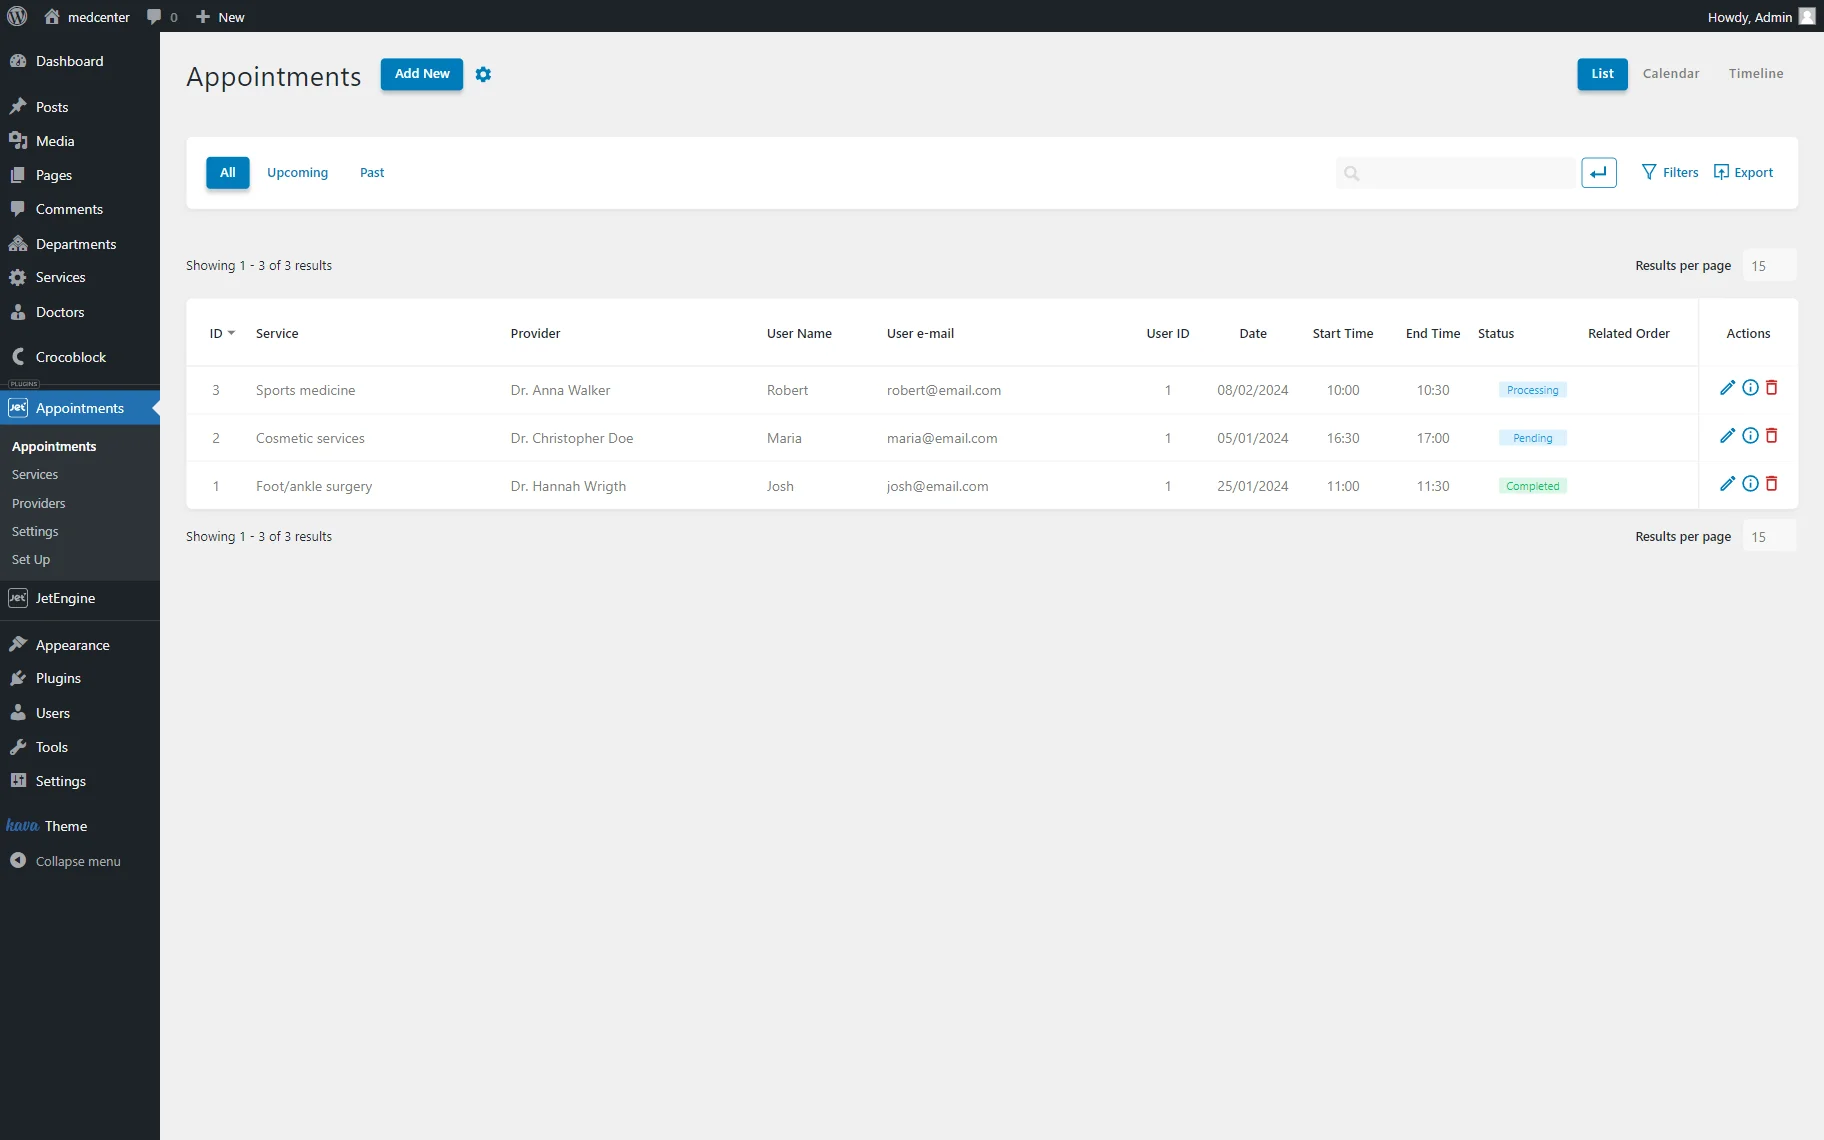
Its first submenu tab is the Appointments list window. You can add, edit, and delete appointments and do other actions here.
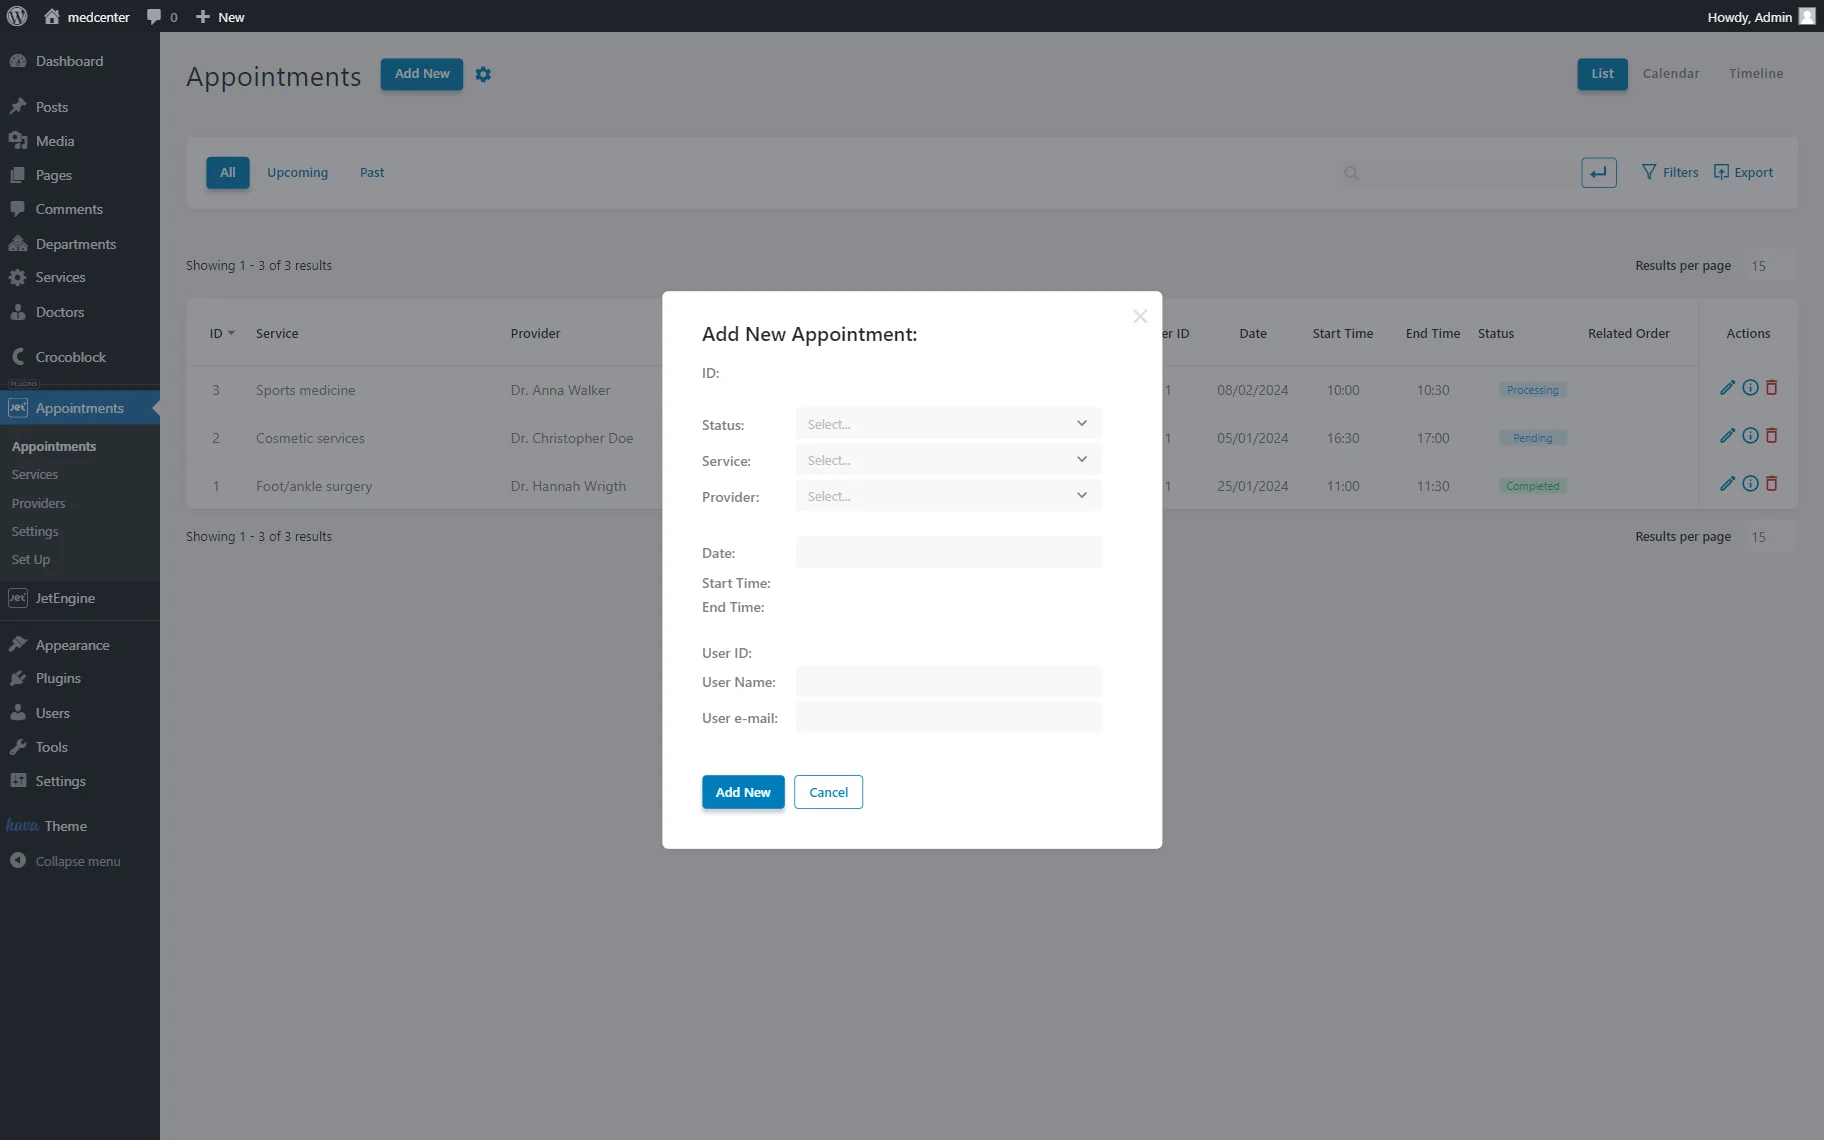
Adding New Appointment
Click on the “Add New” button at the top of the page to open an appointment pop-up window.
Here, you can set the Status of the appointment, choose the Service and Provider that you previously assigned to the JetAppointment functionality in the Settings tab, define the Date and Time of the appointment, and insert the User name and User e-mail values.
All the data you set here will be shown in the corresponding columns of the appointments table. When you fill in all the fields, press the “Add New” button at the bottom.
Appointment Statuses
JetAppointment uses several appointment statuses to show the current stage of the booking.
Let’s check the available appointment statuses that appear in JetAppointment:
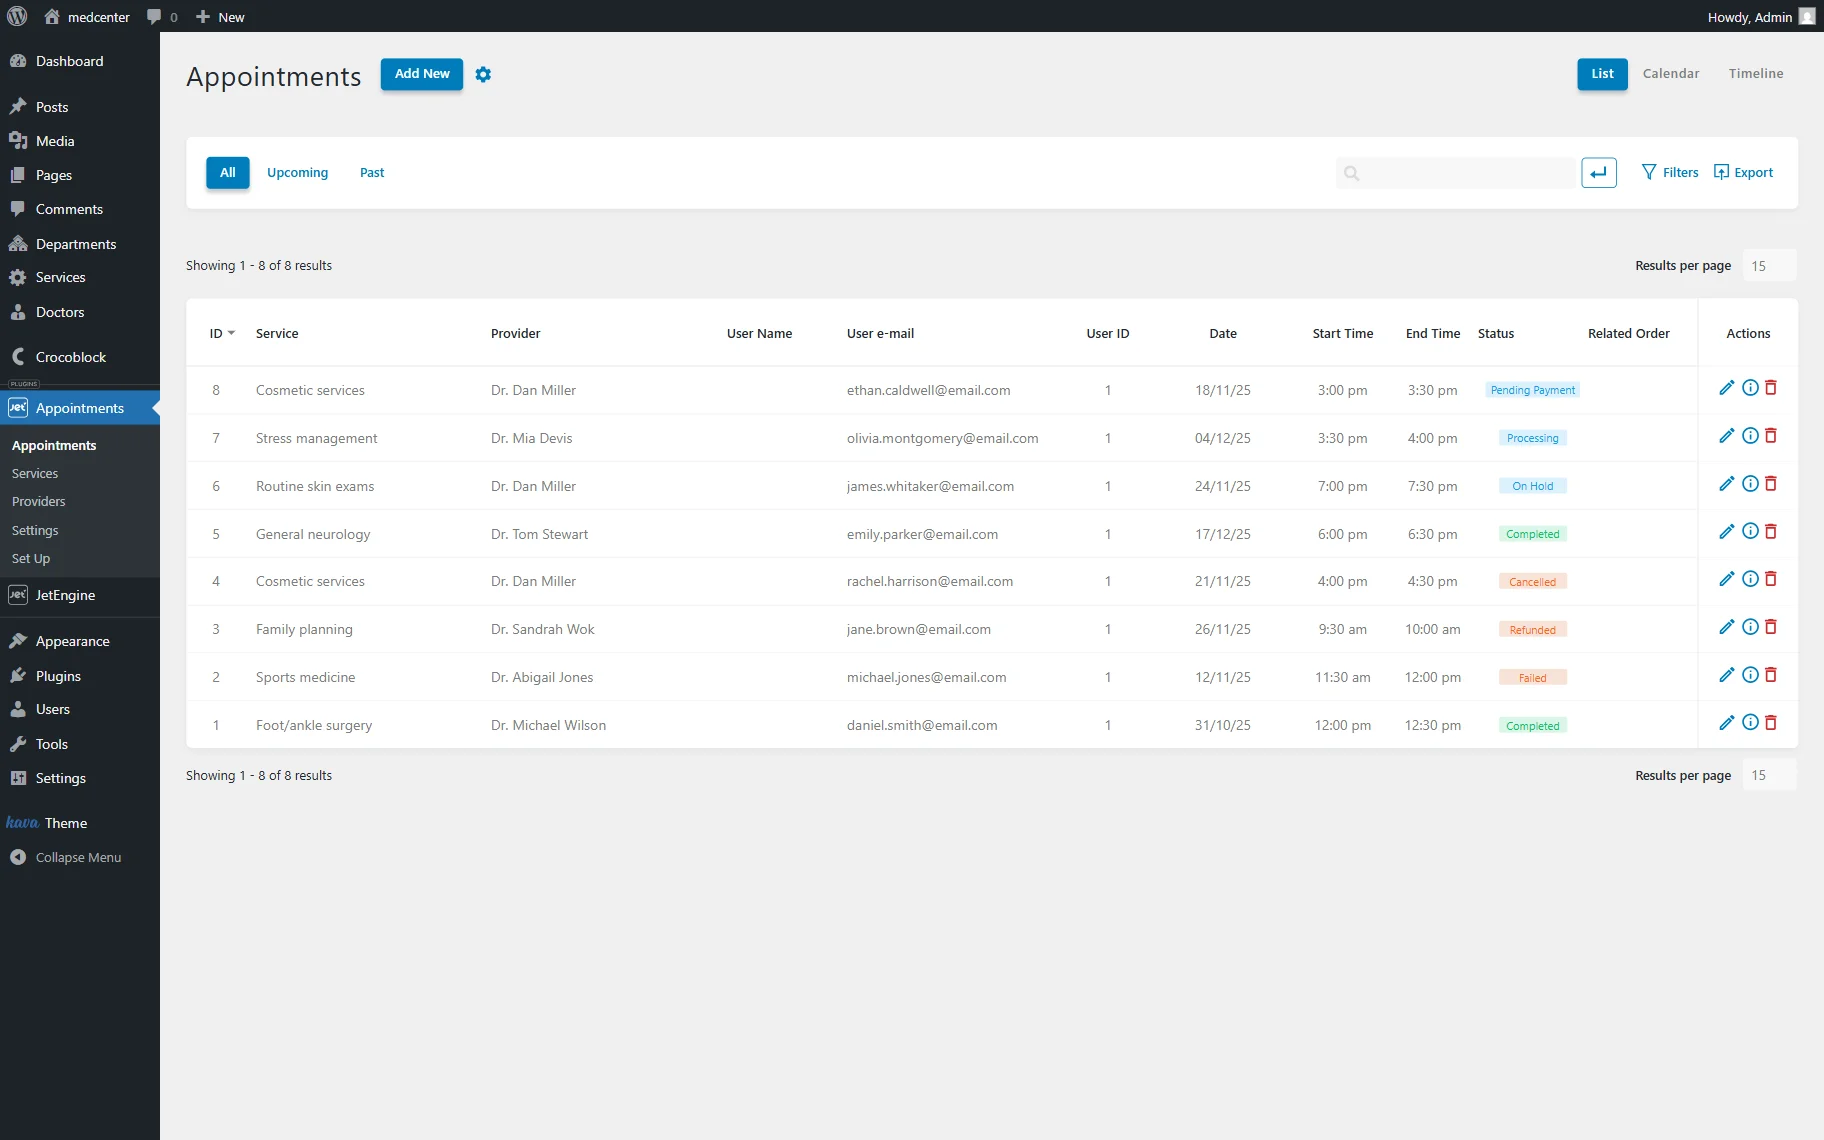
- Pending Payment — the initial status after the booking form is submitted and the booking is created, which means that the payment has not been completed yet. For example, the client leaves the payment page or does not finish the checkout process;
- Processing — the payment has been completed, and the booking is currently being processed. This status may be used for payment methods that do not require immediate online payment and is usually updated automatically by the payment integration;
- On Hold — the appointment is paused or waiting for further action, such as manual review or payment confirmation;
- Completed — the appointment and all related actions have been fully completed. This status can be set manually by the admin or updated automatically, depending on the configuration;
- Cancelled — the appointment has been cancelled;
- Refunded — the payment for the appointment has been refunded to the client;
- Failed — the booking process was not completed due to an error (for example, when payment details are invalid).
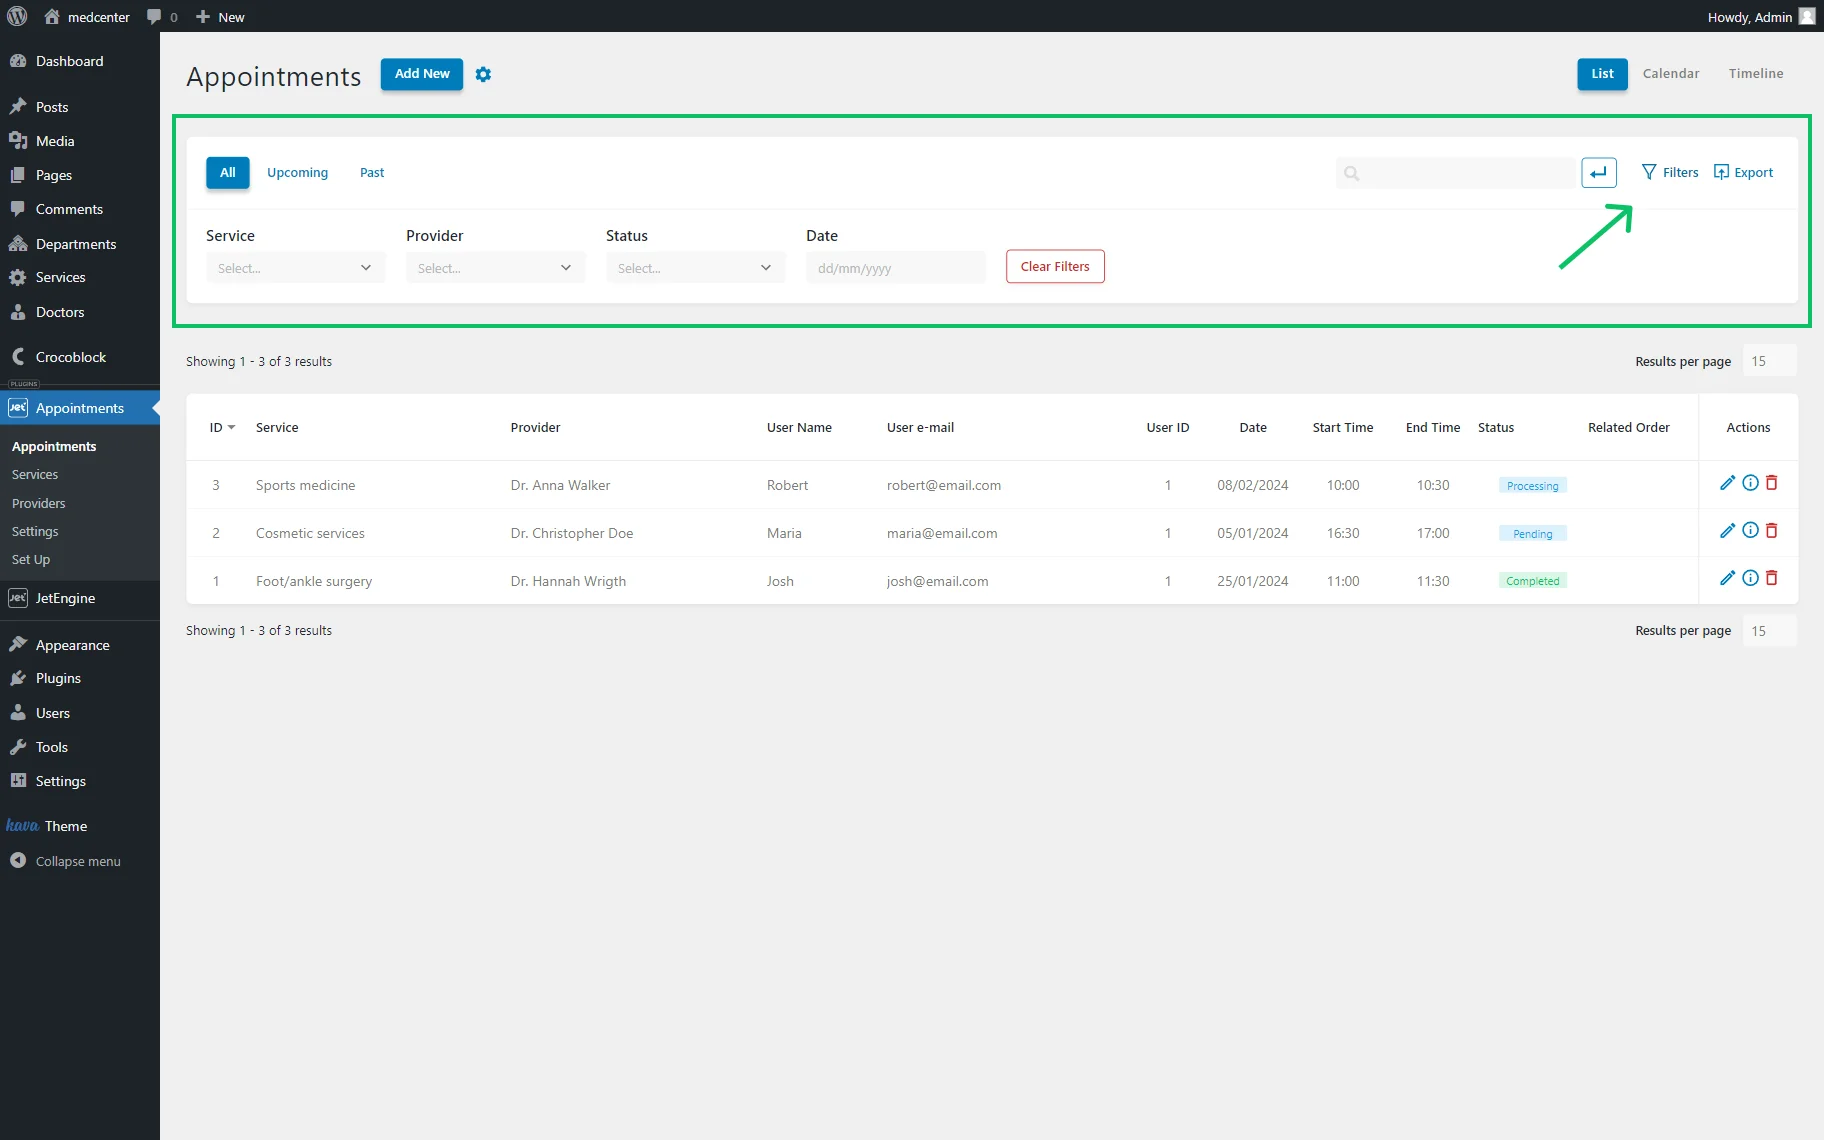
Filtering Appointments
If there are many appointments on the list and you want to find one of them quickly, it is convenient to use filters. Press the “Filters” sign to open the available filters.
They allow you to sort results according to the Service, Provider, Status, or Date values. You can also use the Search filter. Type the word or number into the bar, and the system will show only the results containing that value.
Use the tabs above the filters as well to search among the “All,” “Upcoming,” or “Past” appointments.
Managing Settings
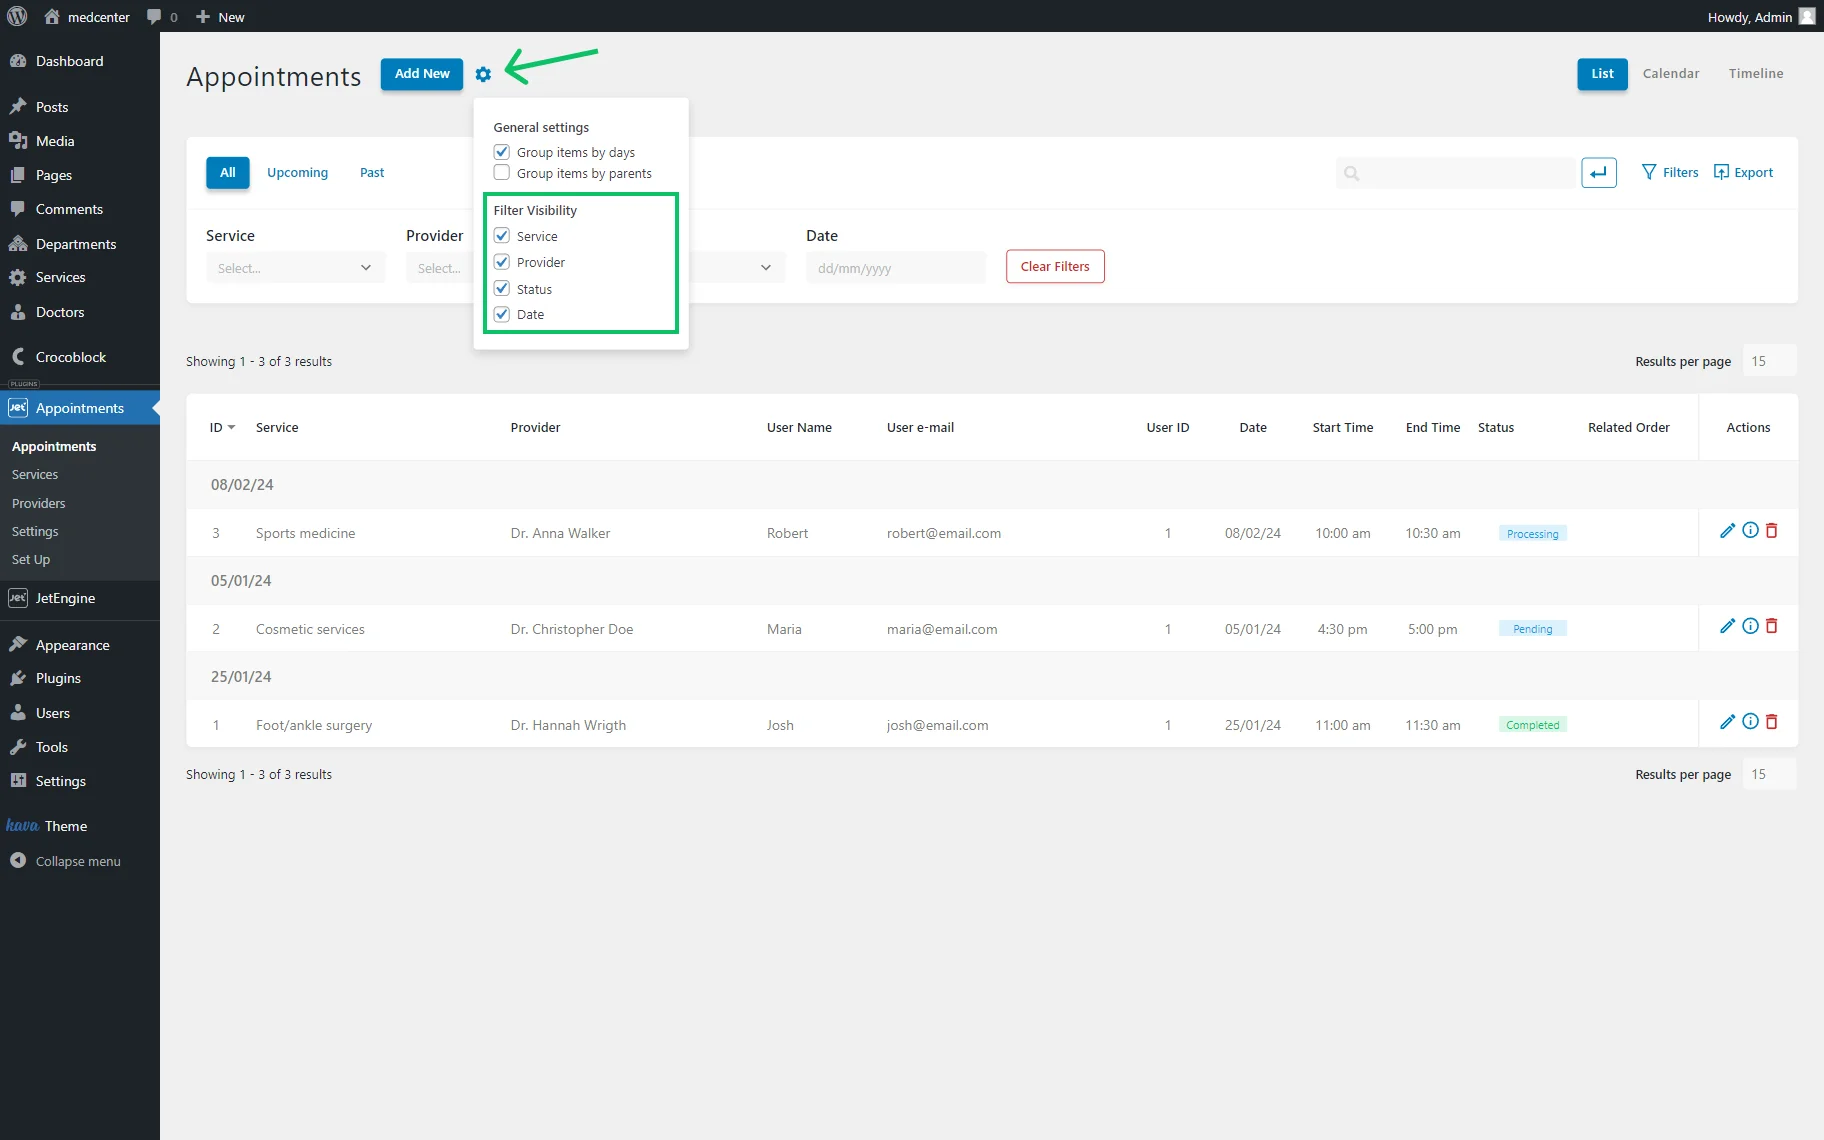
Next to the “Add New” button, there is also a gear icon that allows you to set the layout settings and adjust filtering options.
Primarily, you can adjust the General settings. These correspond to the list view: pick either “Group items by days,” “Group items by parents,” or leave the options unchecked to see the default list layout.
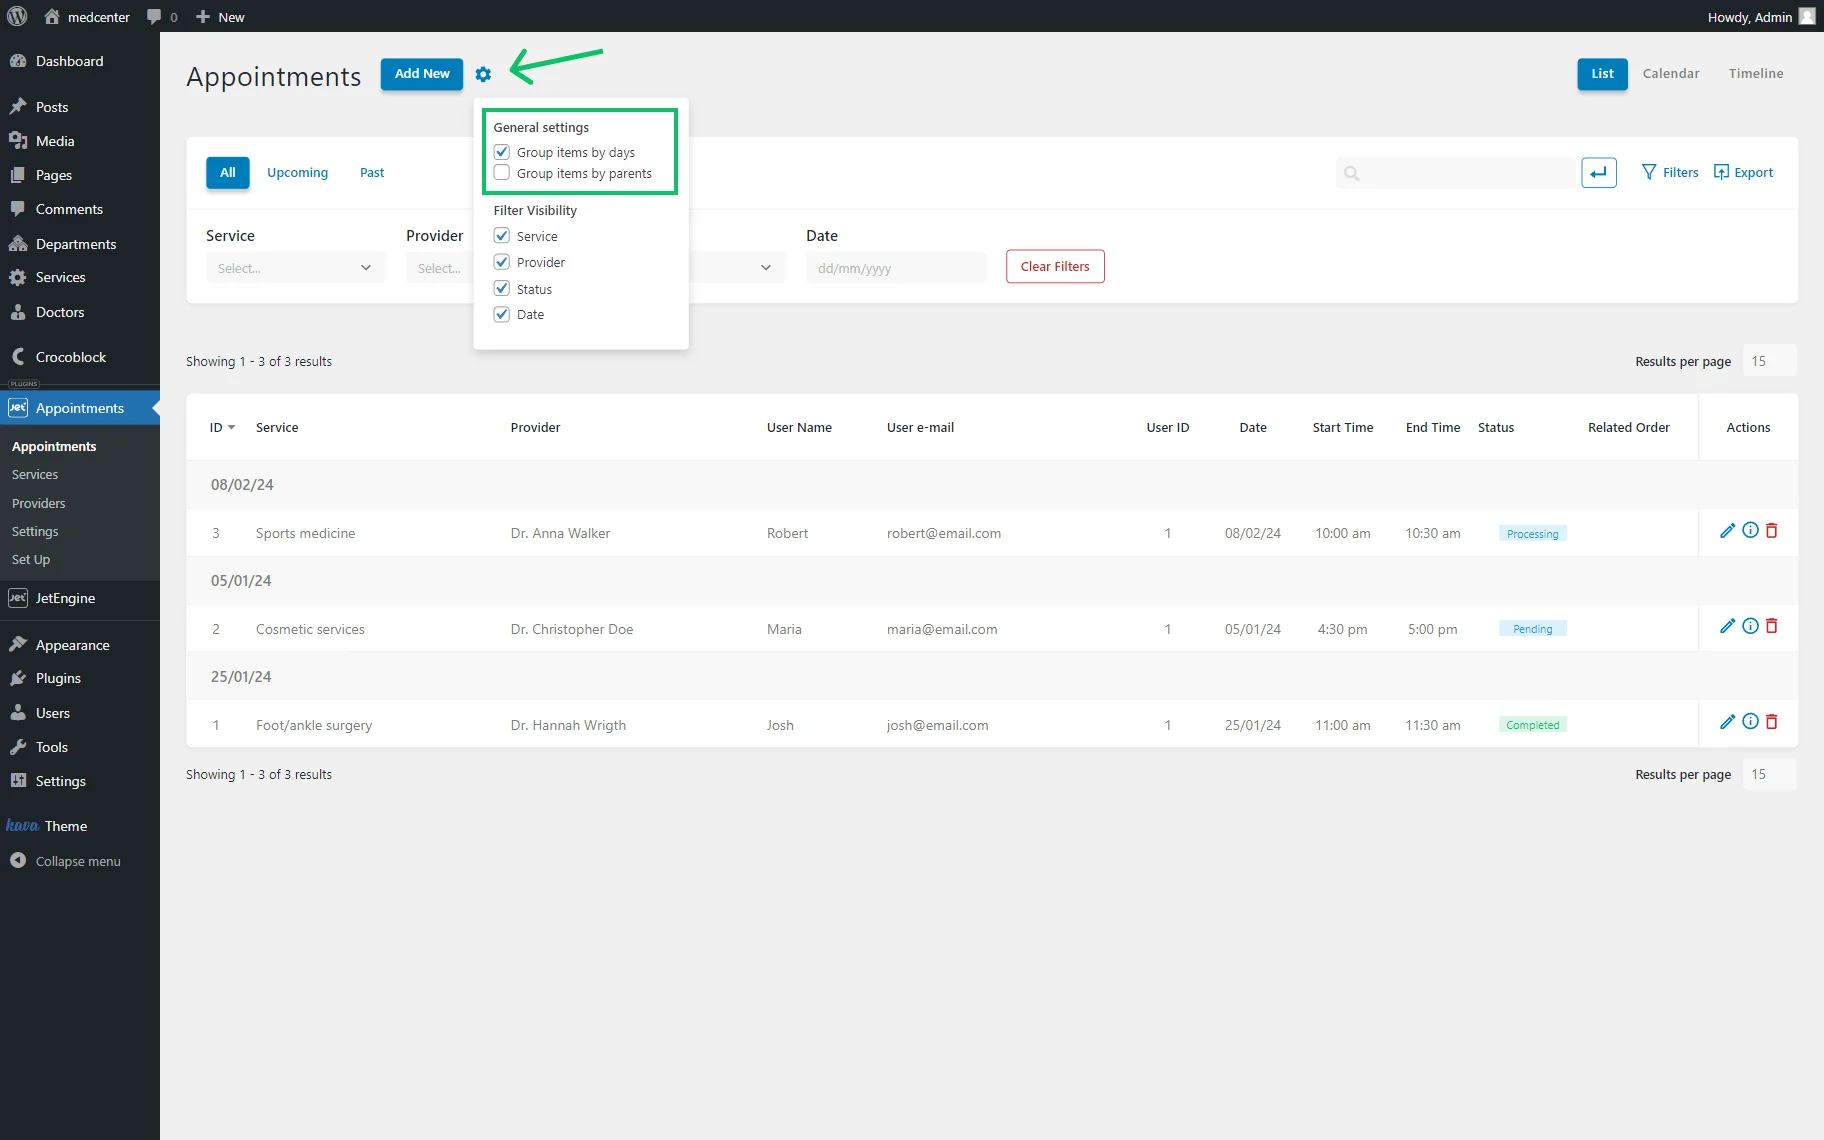
Then, you can see the filtering fields that are checked by default. If you uncheck some of them, they will no longer be displayed as filtering options.
Appointments List
All appointments you or your clients make are shown in the table. From the admin panel, you can perform various actions with these appointments.
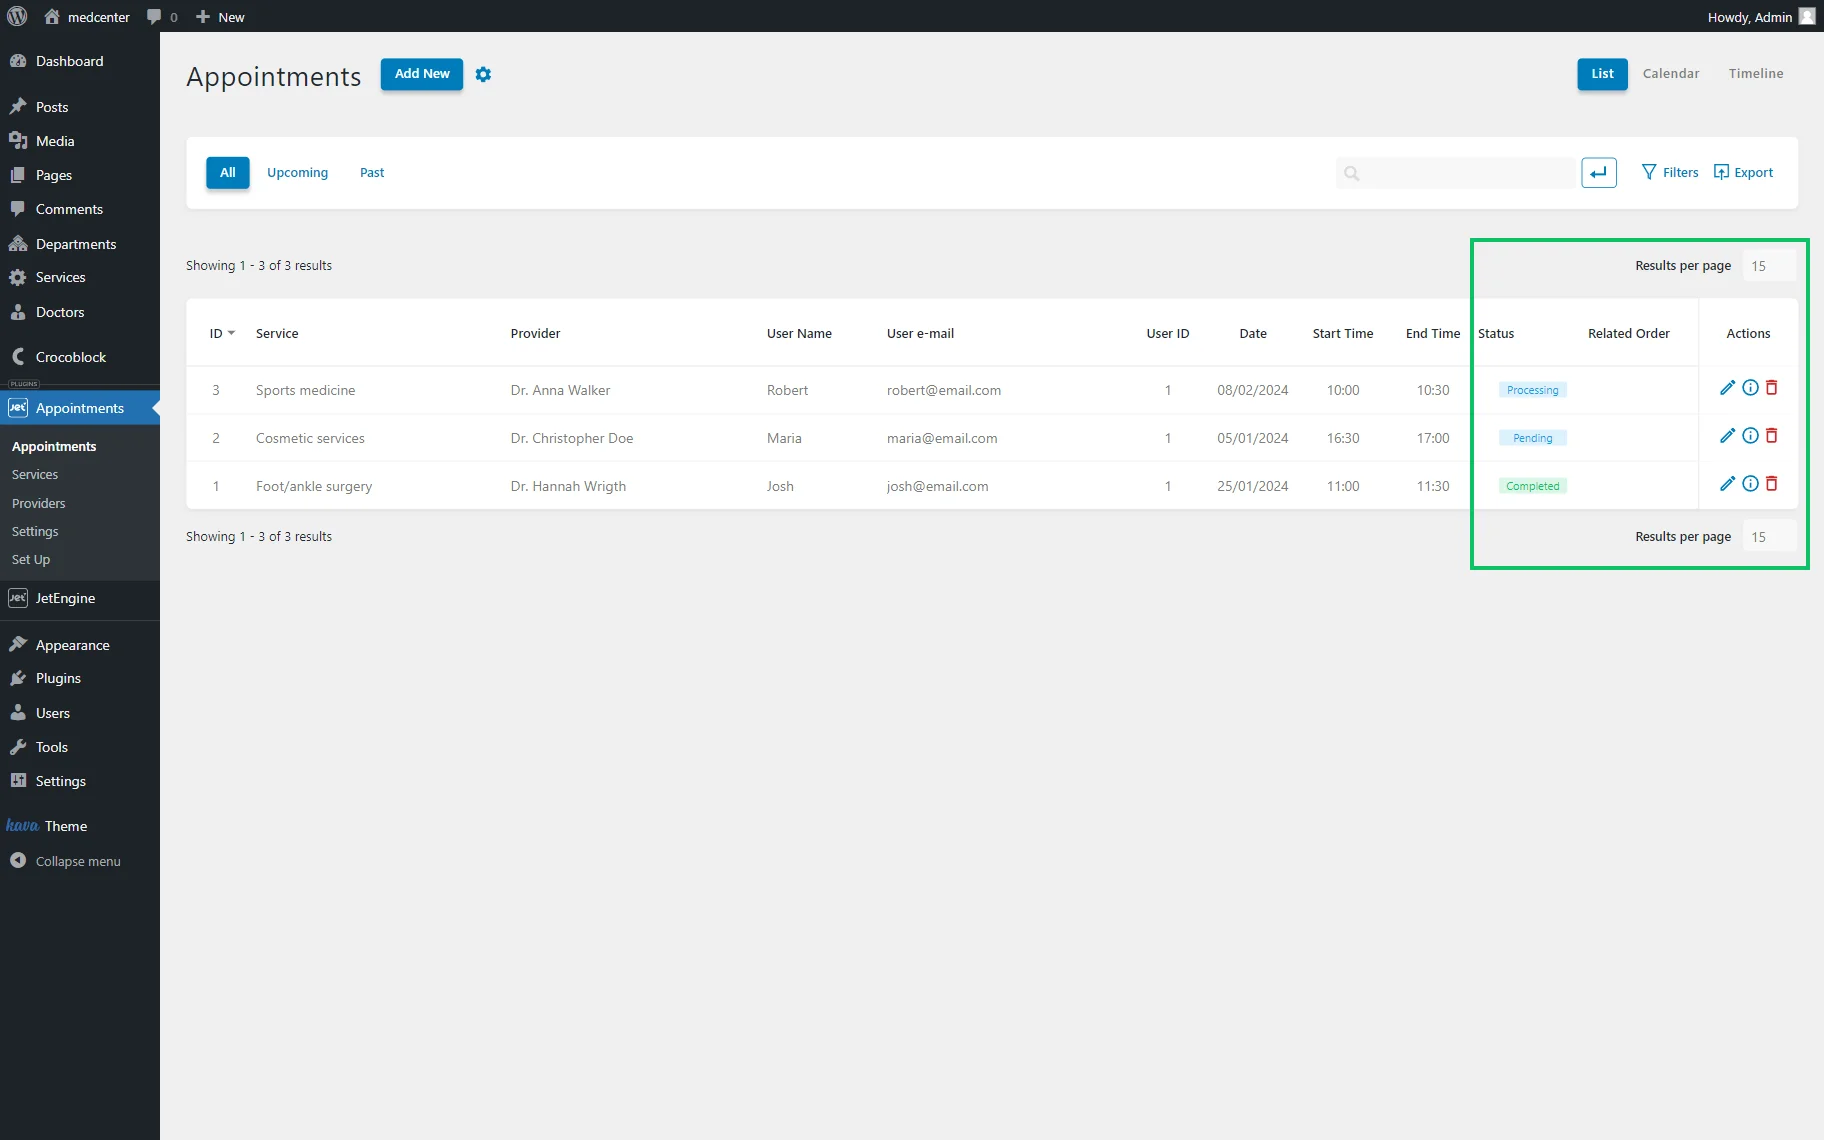
- Results per page — you can change the number of appointments that are shown on this page at the same time by clicking on the bar;
- Edit Appointment — clicking the button with the pencil-shaped icon opens the pop-up window where you can change any data of the appointment;
- Appointment Details — the button with the “i” letter in the circle opens the pop-up window with the details, including the appointment and user’s IDs;
- Delete Appointment — if you press the red recycle bin button, you will receive a notification asking if you are sure about deleting the appointment. Deleted appointments can’t be restored.
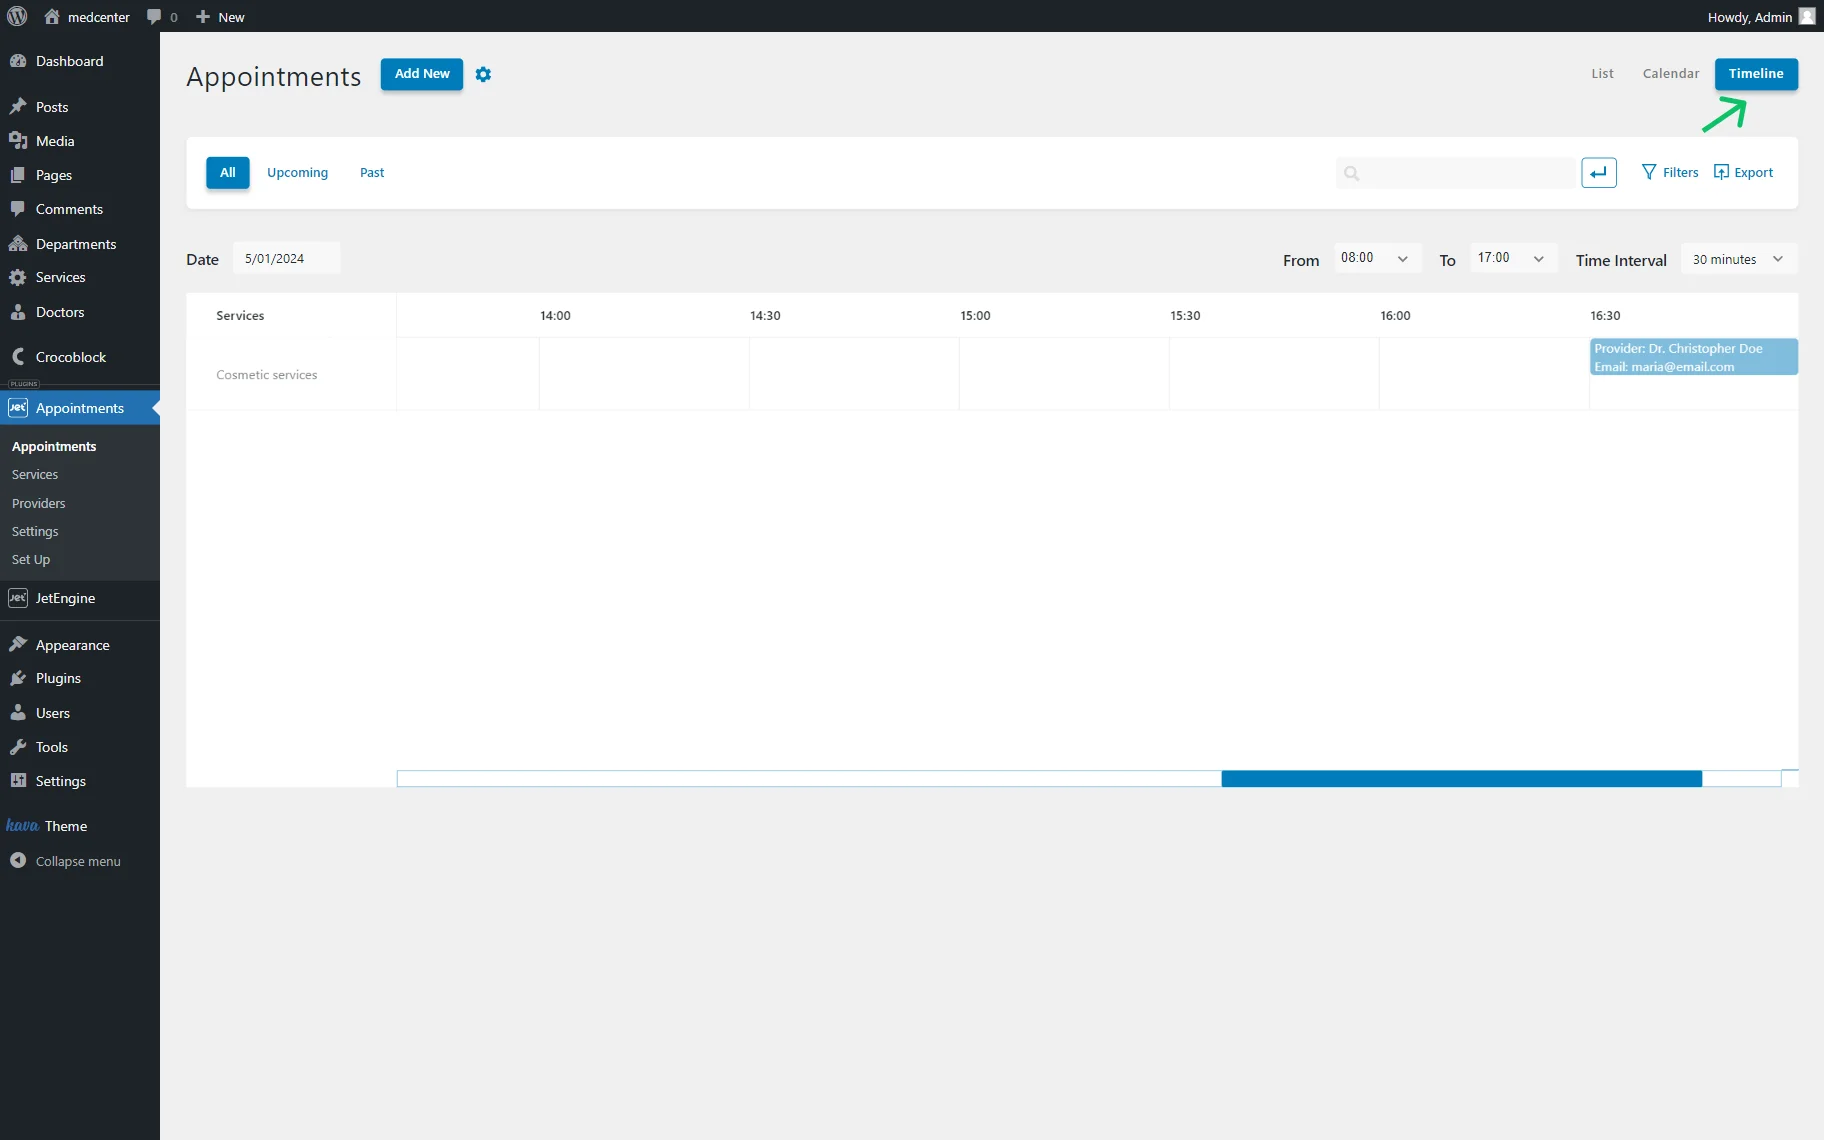
Calendar and Timeline View
The appointments list can be convenient if you need to see all the information about the status and ID of every appointment. However, you can also find it helpful to shift to the “Calendar” or “Timeline” view.
In the “Calendar” view, all the appointments are placed in the calendar cells corresponding to the appointment date. You can click on the appointment and see the details.

In the “Timeline” view, you will find the table displaying services and working hours for one day. The Date bar allows you to change the displayed day. The From and To drop-down lists allow setting what hours will be shown in the table, and Time Interval defines the number of columns in the table.
Check the Zoom Calls and JetAppointment integration guide to adjust online appointments and receive email notifications as well.
That is all about the Appointments submenu tab of the JetAppointment dashboard menu settings.