How to Create a Sticky Header
This tutorial will show how to create and adjust style settings in Elementor to make a sticky header unique with the help of the JetBlocks extension.
The header is one of the integral parts of any site. Here the core information about the company displays, such as logo, contacts, call-to-action-buttons, and of course, a site menu, which is responsible for proper visitor navigation through the website. Find it at the top of a page. With the help of the JetBlocks plugin, you have an opportunity to make it sticky and the header will be visible when scrolling down the page.
Open your Header in Elementor Editor
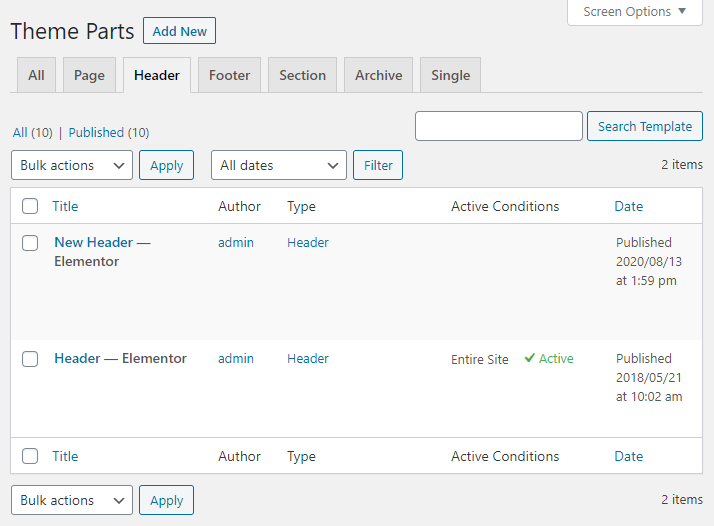
First of all, go to Crocoblock > Theme Builder > Header and open the necessary header in Elementor page builder.

Enable Sticky Section
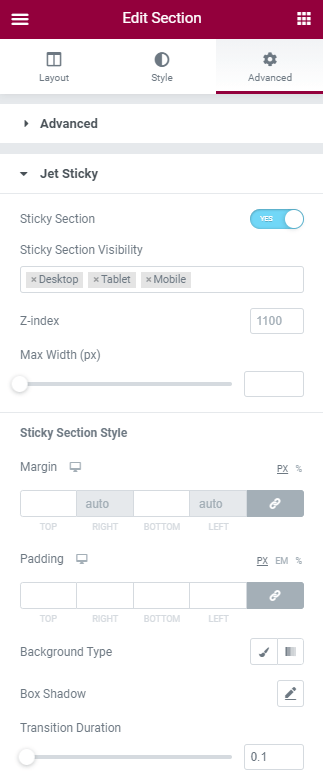
After the new window is opened, click on the section’s surface with the right button of the mouse and choose the Edit Section option. Go to the Advanced menu tab, find the JetSticky section, and enable the Sticky Section toggle.

- Sticky Header Visibility. Here you can set on what devices the sticky header will be visible;
- Z-index. This bar defines what content will overlay the other. The higher the value – the more the layer is prioritized;
- Max Width. Allows you to control the width of the section;
Style up the header with the help of the features in the Sticky Section Style. Find out some more options to make the header attractive and convenient.
Well, now all is ready to create an incredible sticky header. As you can see, the steps are very simple, activate and customize the header with a massive amount of options in a few clicks. Look at the results of the JetBlocks extension usage.
You now know how to make the header of your website sticky. Enjoy!