How to Create a Custom Header with the JetBlocks Widgets
This tutorial will show you the way to create a custom header with the help of the JetBlocks widget.
There are cases when for some specific pages you need to create a header that will be different from the one you have by default. From this tutorial, you will learn how to create such a header with the help of the JetBlocks plugin step by step.
Name the header
Open your WP Dashboard and proceed to the JetPlugins > Theme Builder. Open the Header tab. Here where you can see all the headers available for you.
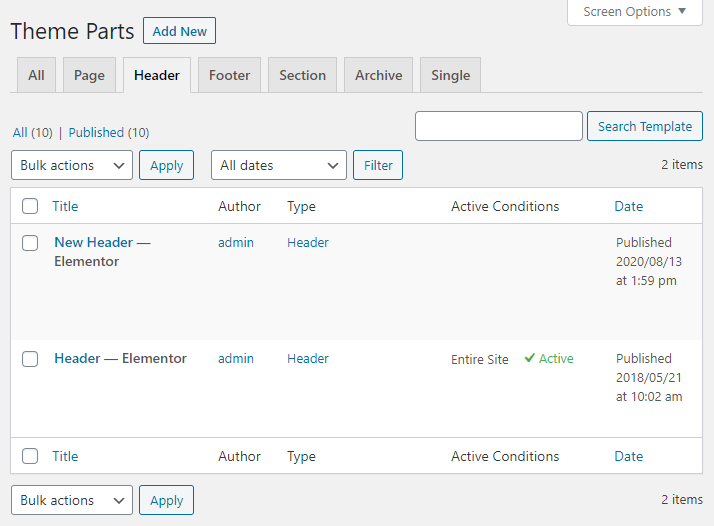
Click the “Add New” button at the top to create a custom header. In the Select Template Type popup box select the type of the template you want to create as “Header” and assign it a name. After that, hit the “Create Template” button.
https://crocoblock.com/knowledge-base/wp-content/uploads/2023/02/Screenshot_3-1.png alt=”naming the Header”>Build the header’s structure
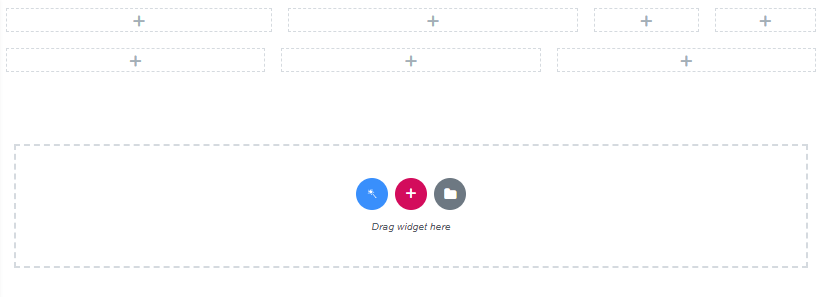
After you click the button, you will be led to the Elementor page builder. Click the “Add New Section” button in the working area (the one with the plus icon on it) and select a structure. In this case, we will be using the 4-column one.
By dragging the borders of the columns resize them as you see fit. Add the three-column section below. Now it’s time to fill the columns with the widgets.
Fill the header with widgets
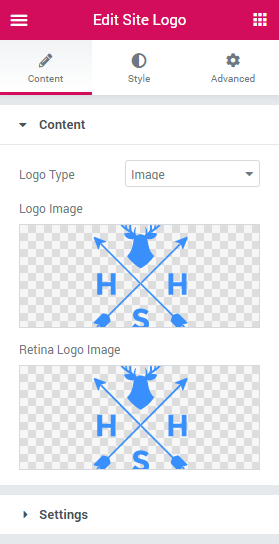
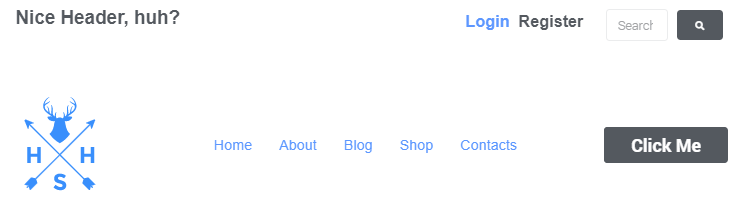
Find the Site Logo widget and drop in on the page. Open the Content accordion block, set the Logo Type to “Image” and select the image in the Logo Image field. You can also upload a Retina Logo Image for the iOS screens.
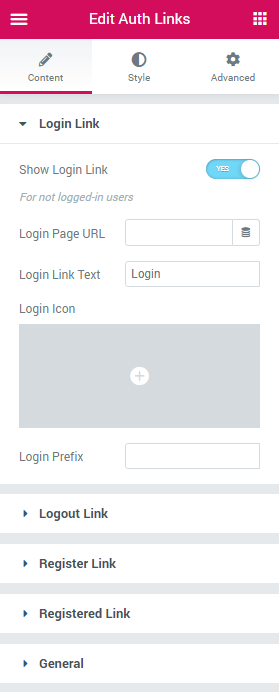
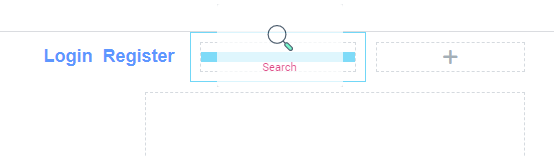
The next widget will be Auth Links with the help of which your visitors will be able to log in or create an account on your website. In the left-side menu, you can enable and customize the Login link, Logout link, Register link and Registered link.
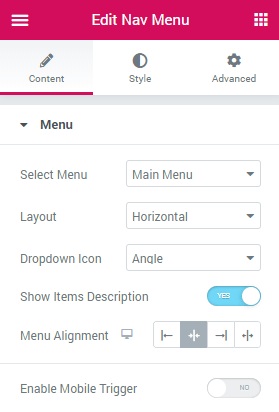
Afterward, find the Nav Menu widget and drop it to the center column of the lower section.
Open the Menu accordion block and in the Select Menu dropdown list select the menu you want to be visible on the page. Select the type of the menu which can be either vertical or horizontal in the Layout dropdown. Make all the necessary changes such as styling your menu up, turning on the Enable Mobile Trigger toggle, etc.
Look for the Search widget in the widget menu and drop it on the page. In General Settings menu you can change the icon, enable or disable the search field, etc.
Let’s also add a title using the Heading widget to the very top of the page and a button with the Button widget which will be one of the CTA elements on your page saying Click Me. Now let’s have a look at what we have already created.
If you need a more complex header, just use some of the other JetBlocks widgets, like Breadcrumbs, Hamburger Panel, or WooCommerce Shopping Cart, etc. And if you need a ready-made solution you can click the Magic Button and take a look at available headers.