Query Builder WC Product Query Type
This overview will describe all the Query Builder’s WC Query type settings as a part of the JetEngine plugin.
WC Product Query type of Query Builder from the JetEngine plugin allows you to create a customizable product list that is safe to use and will not break due to database changes in future WooCommerce versions. Building custom WP_Queries or database queries is likely to break your code in future versions of WooCommerce as data moves towards custom tables for better performance.
It is the best-practice way for plugin and theme developers to retrieve multiple products. You’ll be able to create a Listing template for it and then display it with the help of the Listing Grid widget on the needed pages of your website.
Also, check how to showcase WooCommerce Upsells and best-seller products with the help of WC Product Query type.
Let’s have a closer look at all the settings.
General
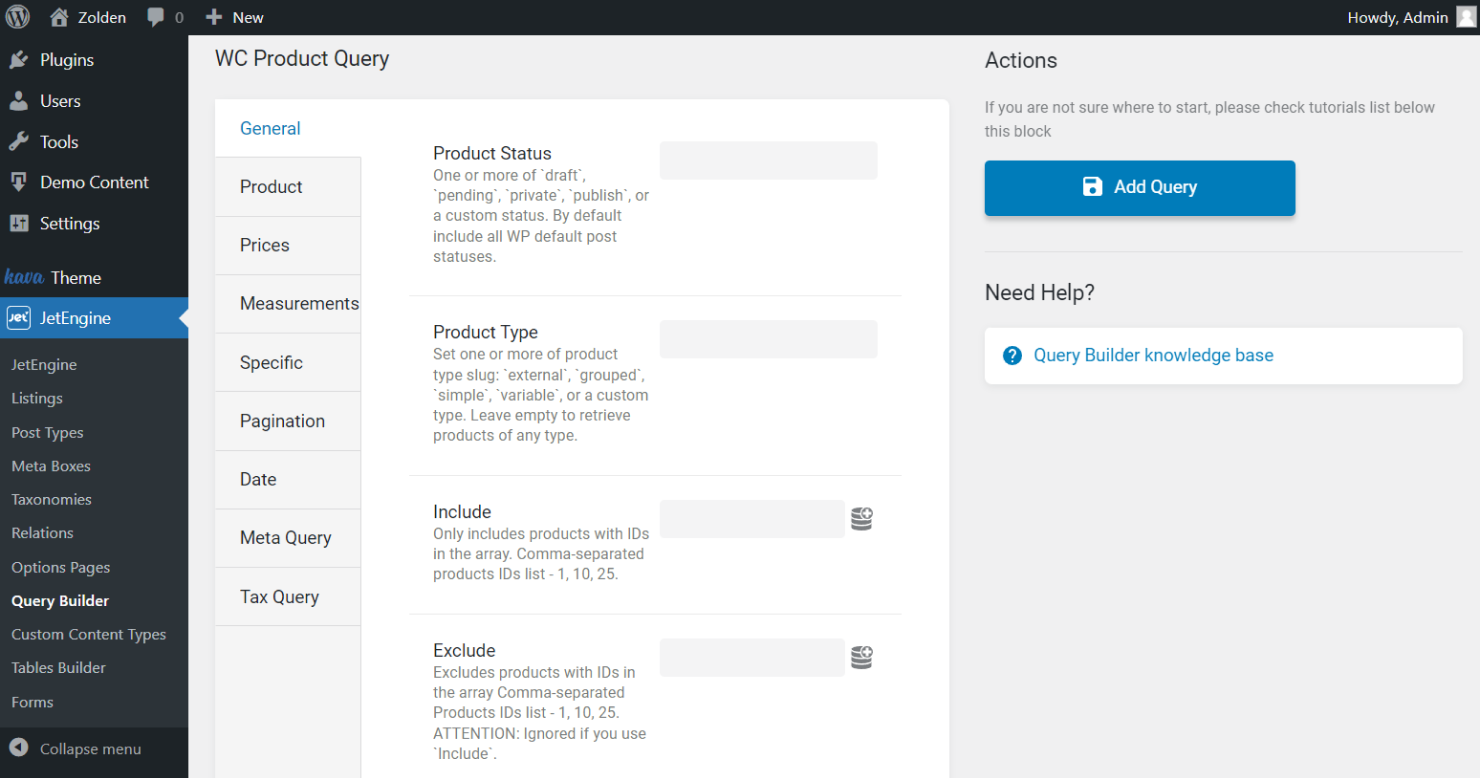
- Product Status — choose the product’s status that will be added to the list. You can select “Publish,” “Pending,” “Draft” statuses, etc.;
- Product Type — look through all the product types on your website. You can set ‘simple,’ ‘grouped,’ ‘external,’ or ‘variable’ options. Also, you can leave the field empty to retrieve products of any type;
- Include — set product IDs or get them dynamically by clicking on the dynamic icon;
- Exclude — exclude products by ID.
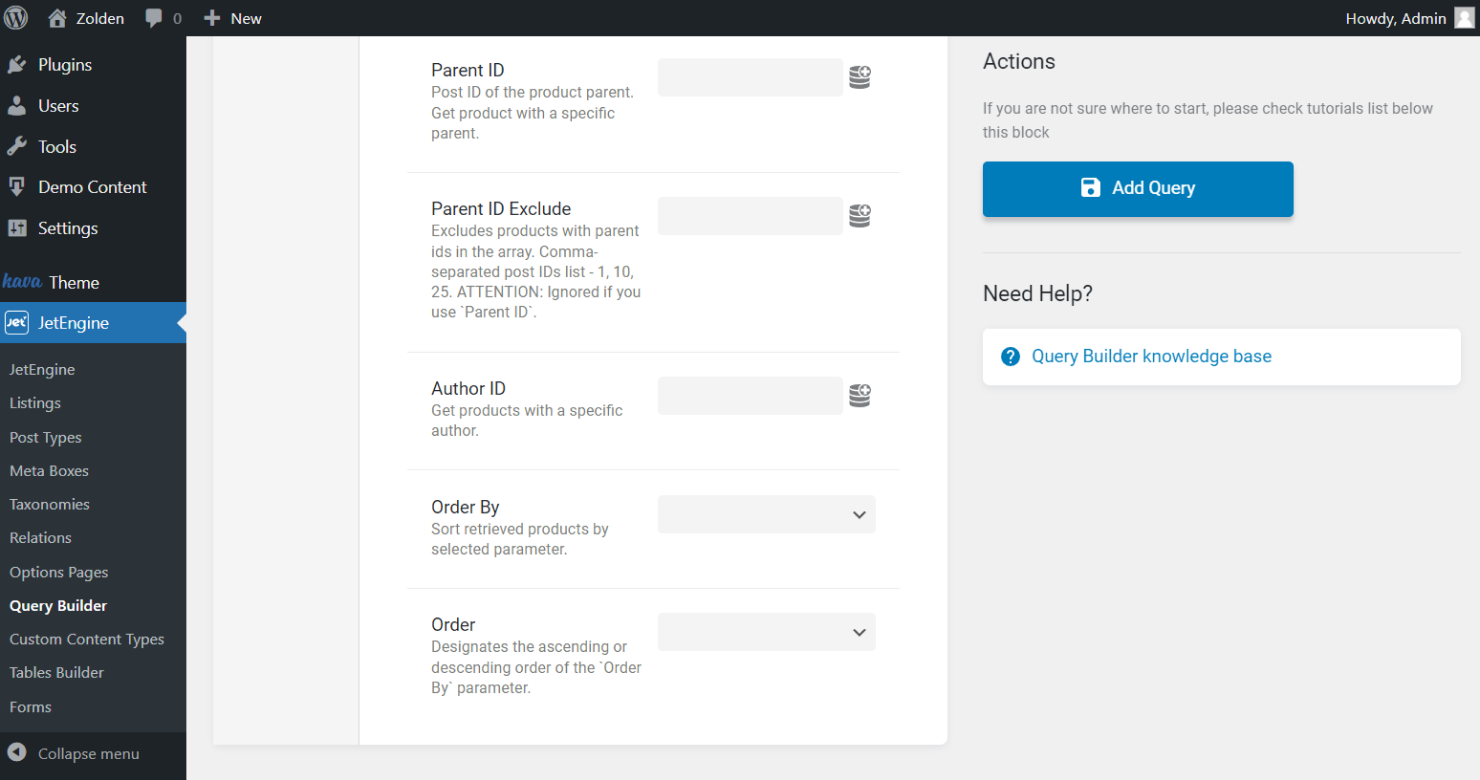
- Parent ID — add the ID of the product parent;
- Parent ID Exclude — exclude products with parent IDs;
- Order By — sort retrieved products by selected parameters. You can order by product ID, product name, date, in random order, etc.;
- Order — order products from lowest to highest values and highest to lowest.
Product
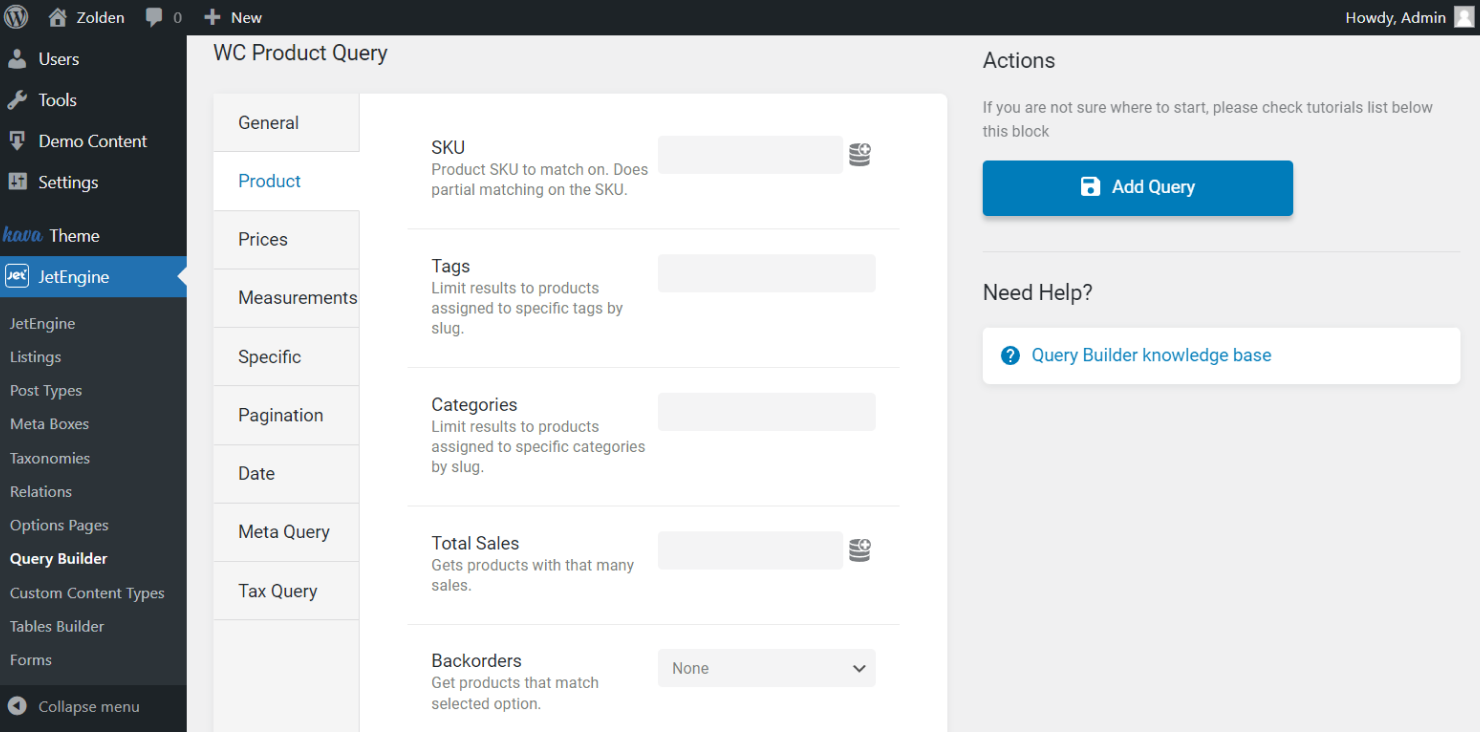
- SKU — add product SKU to match on;
- Tags — select a needed tag from the dropdown to limit results;
- Categories — choose the category to limit results to products assigned to specific categories by slug;
- Total Sales — get products with that many sales;
- Backorders — choose whether to allow to show backorders or not;
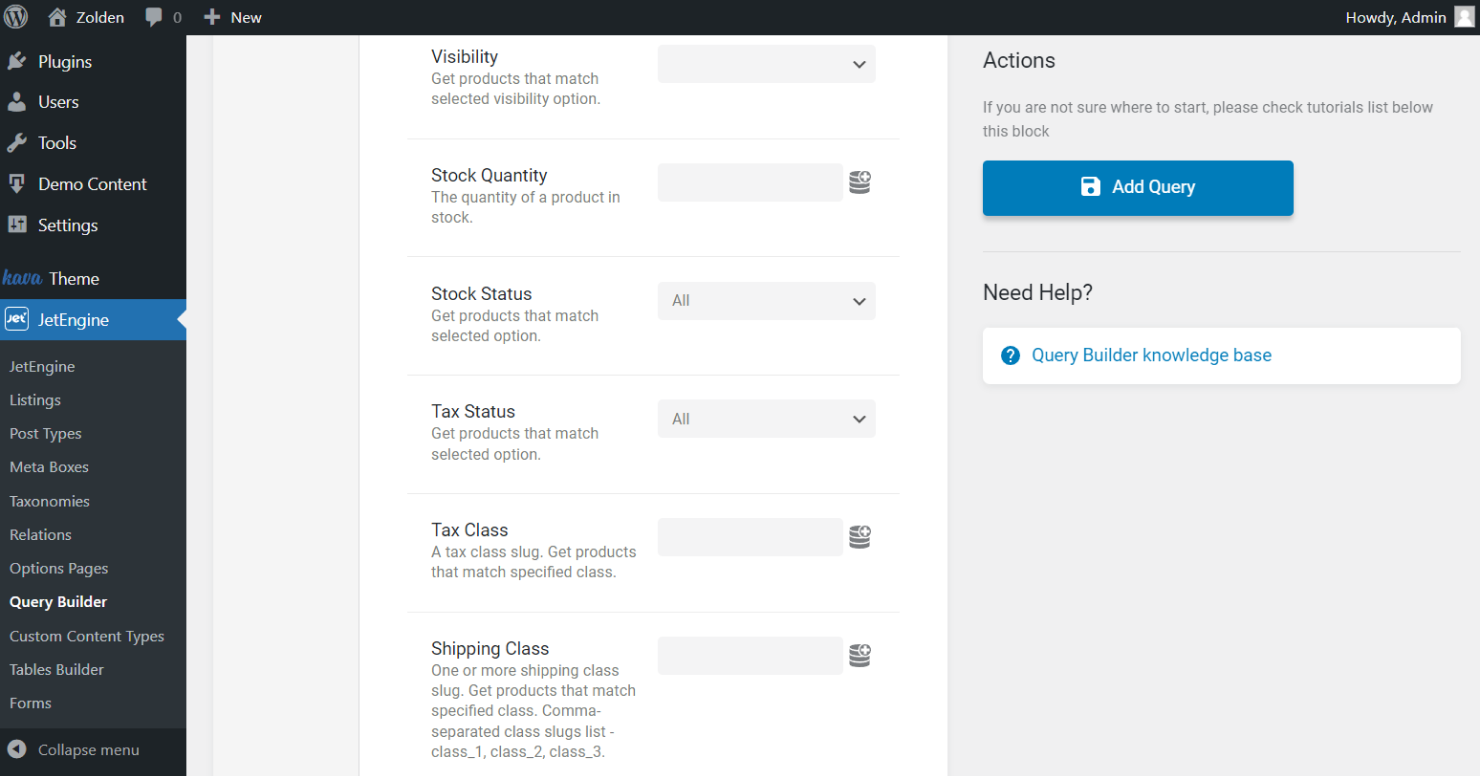
- Visibility — choose one of four visibility options to get products that match this visibility;
- Stock Quantity — set the quantity of a product in stock;
- Stock Status — define the stock status;
- Tax Status — get products that match selected options, such as “All,” “None,” “Taxable,” and “Shipping only”;
- Tax Class — get products that match the specified tax class;
- Shipping Class — add class slugs to get products that match the specified shipping class;
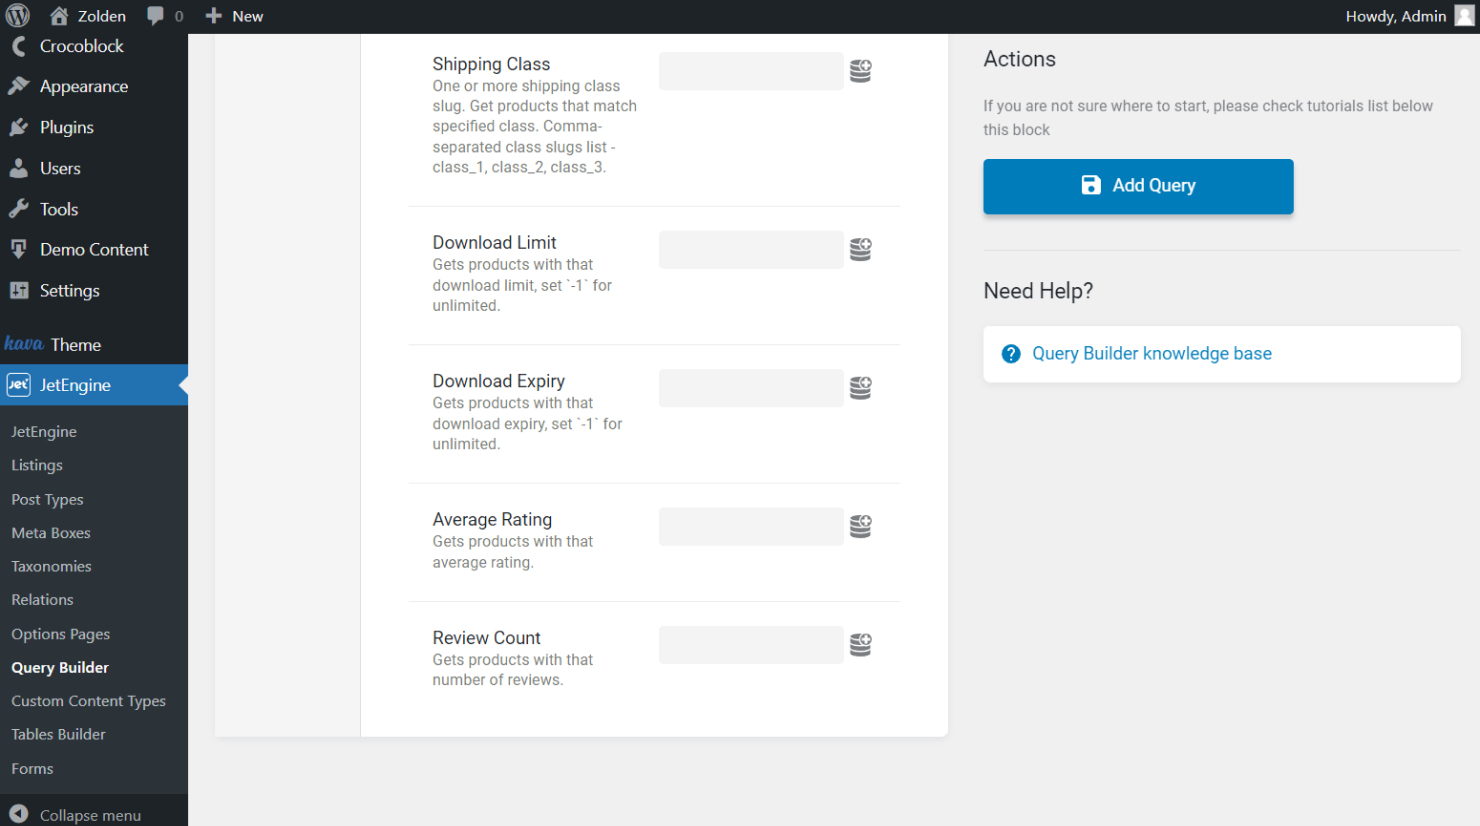
- Download Limit — fill in the field with a number to set the download limit for products;
- Download Expiry — type in the download expiry limit;
- Average Rating — add rating number to get products with this average rating;
- Review Count — get products with that number of reviews.
Prices
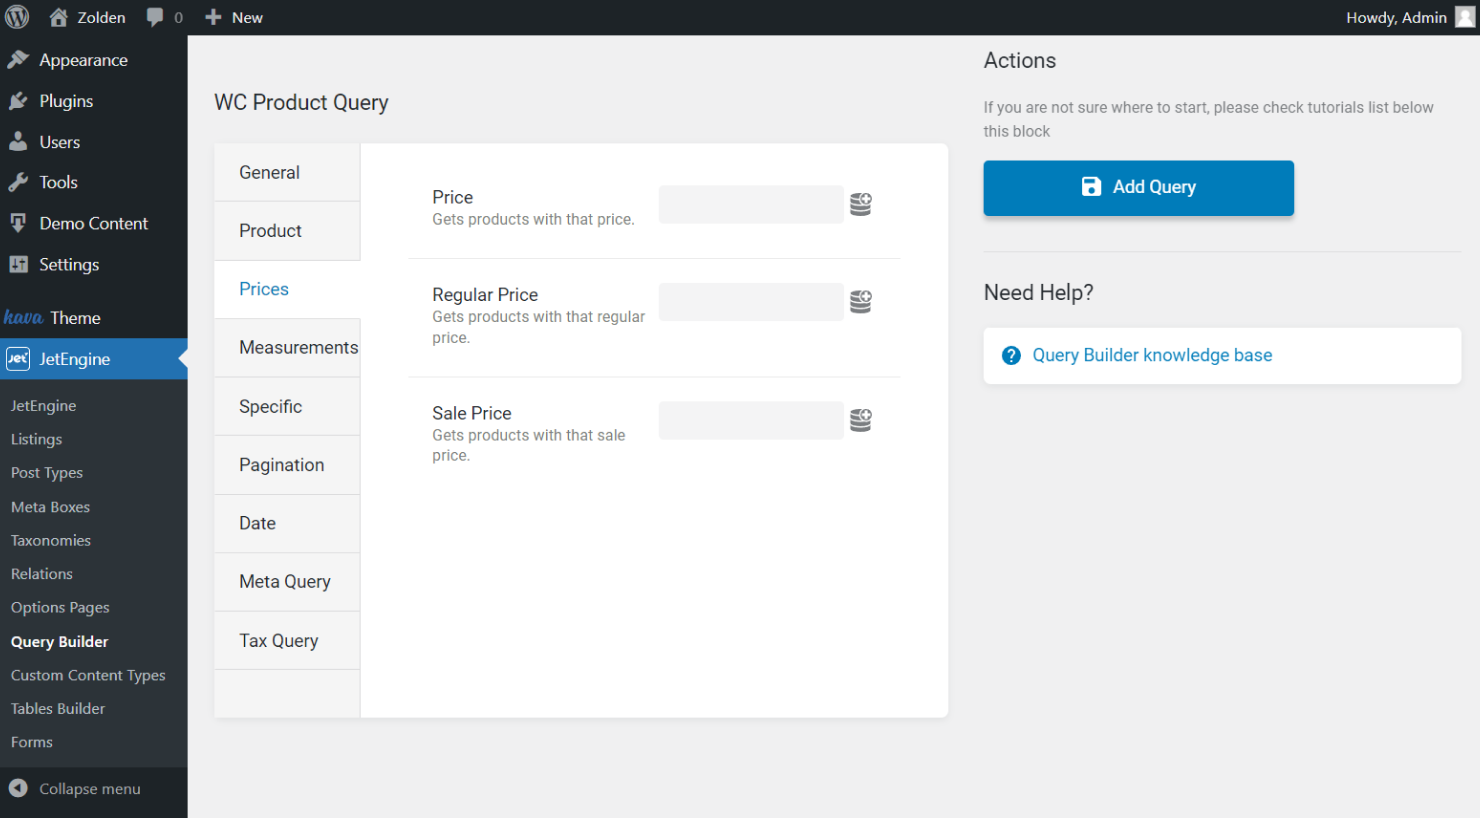
- Price — set the value to get products with that price;
- Regular Price — fill in the field with a standard price for your products;
- Sale Price — add the value for a sale price.
Measurements
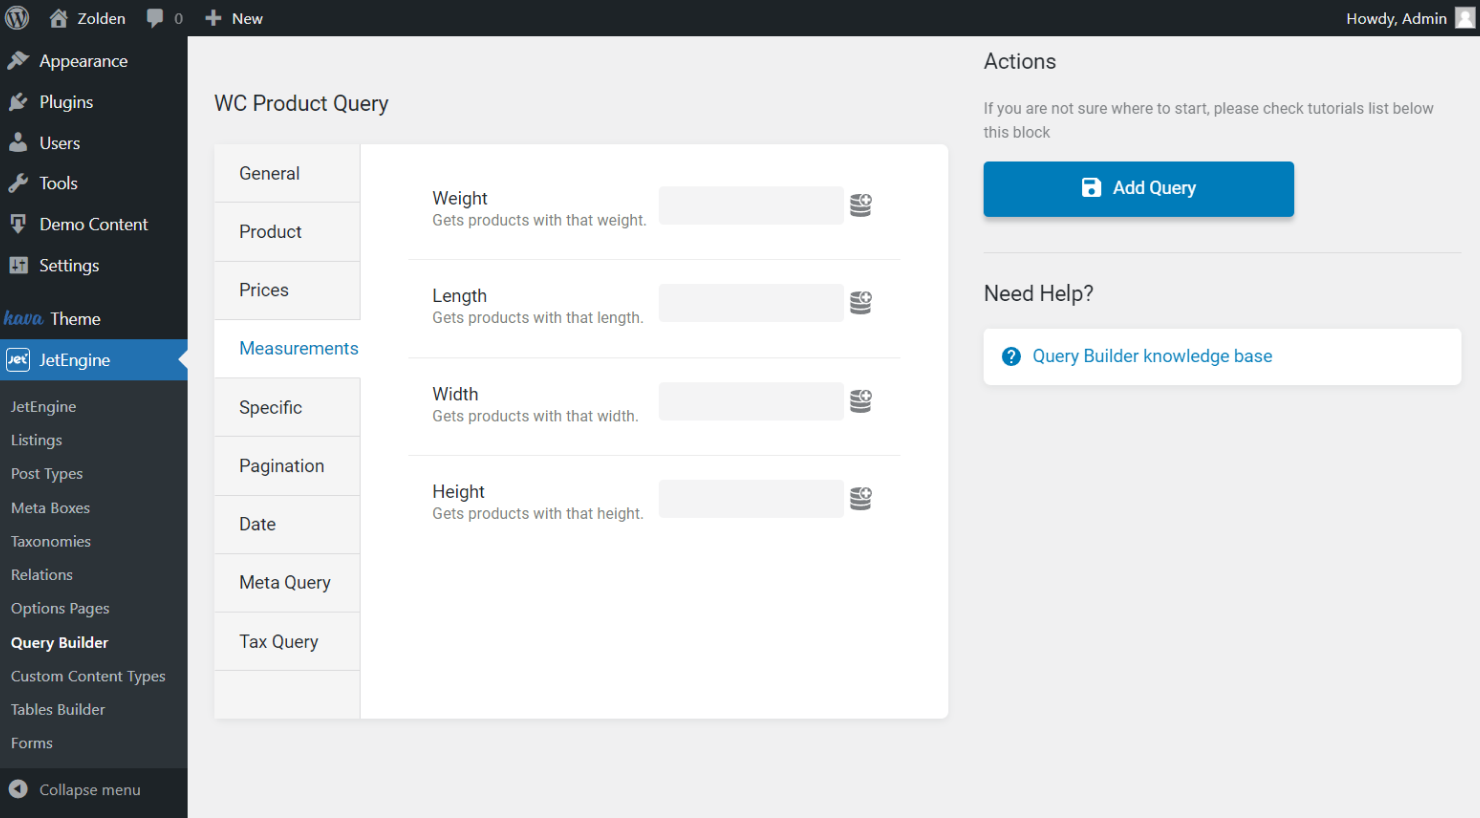
- Weight/Length/Width/Height — complete the fields with a value to specify the parameters of the product.
Specific
This tab allows you to include specific settings such as Feature and Status. Let’s have a closer look at them.
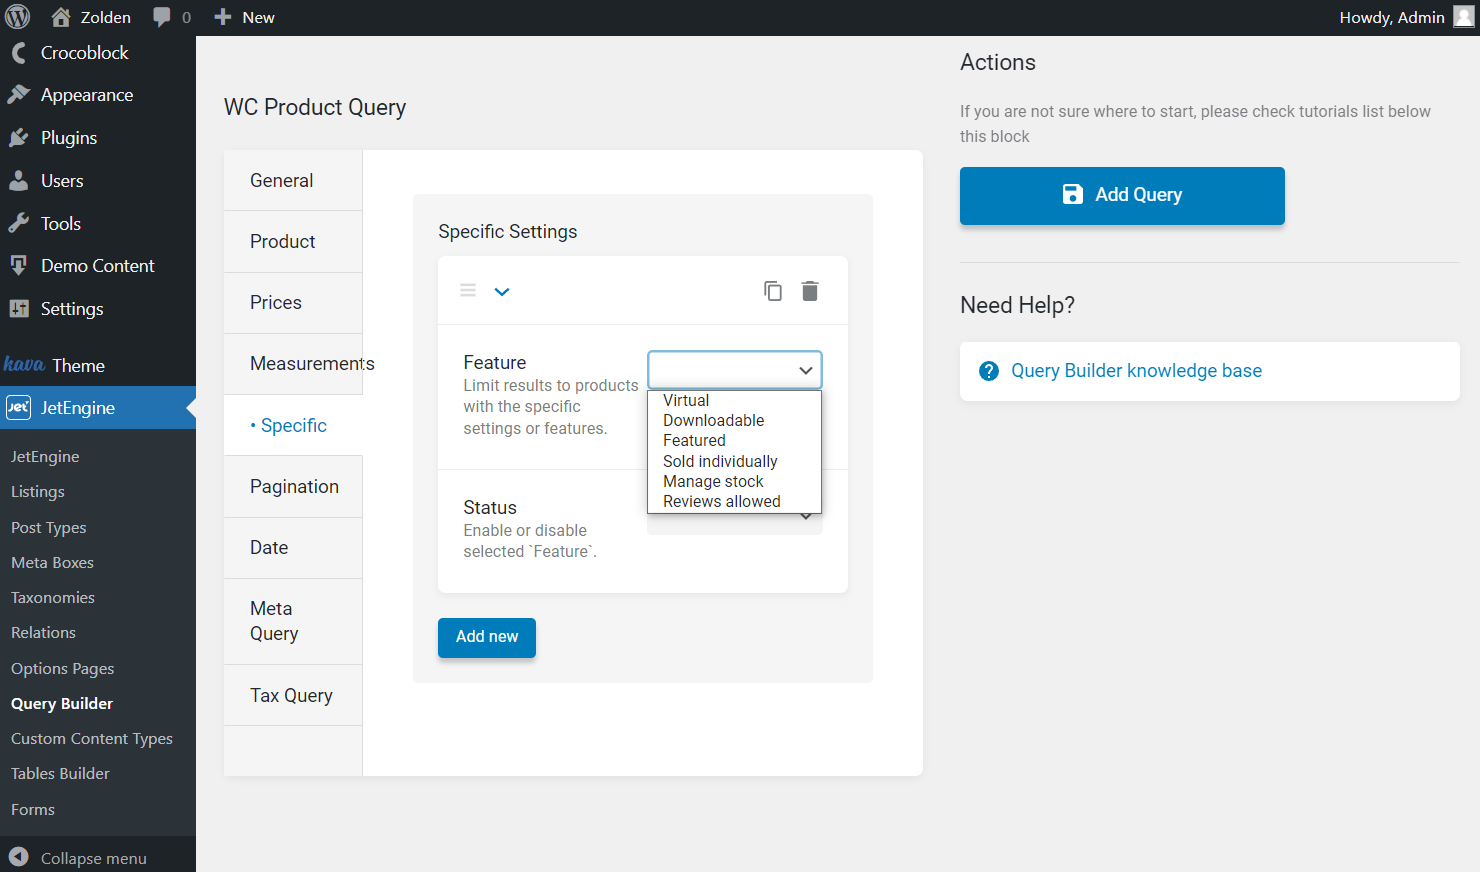
- Feature — limits results to products with specific settings or features, such as “Virtual”, “Downloadable”, “Featured”, “Sold individually”, “Manage stock”, and “Reviews allowed”;
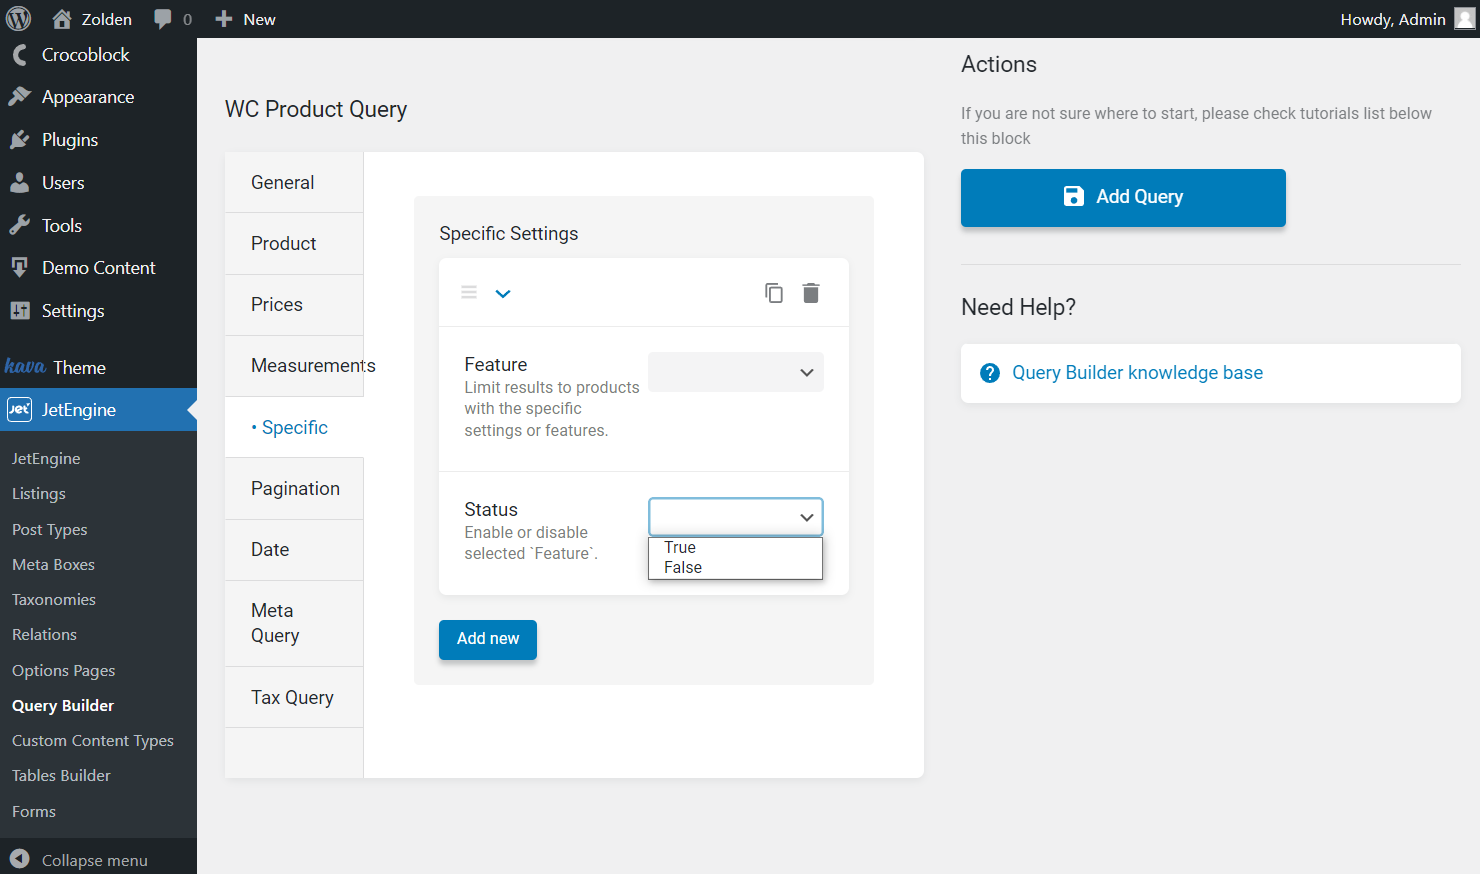
- Status — choose “True” or “False” to enable or disable the selected feature.
Pagination
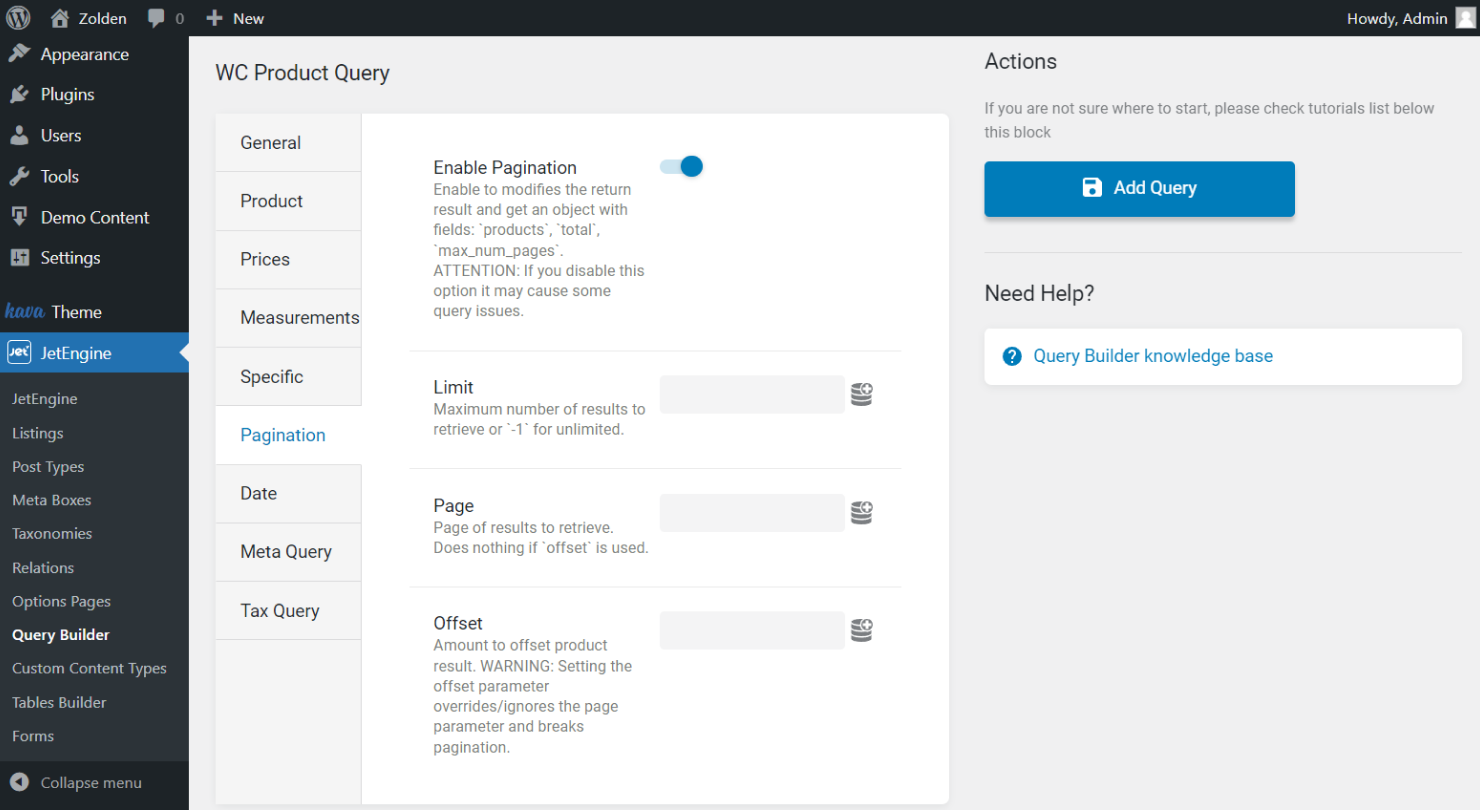
- Enable Pagination — activate this option to modify the return results and get an object with fields: ‘products,’ ‘total,’ ‘max_num_pages.’ Please note that if you disable this option, then it may cause some query issues;
- Limit — set the maximum number of results to retrieve or ‘-1’ for unlimited;
- Page — add the number of results you want to display on the page. For example, you have twelve products. If you set the limit to three, then you will have four pages and three products on each page;
- Offset — set amount to offset product result.
Date
In this tab, you can add different date query classes. Let’s discover all of them.
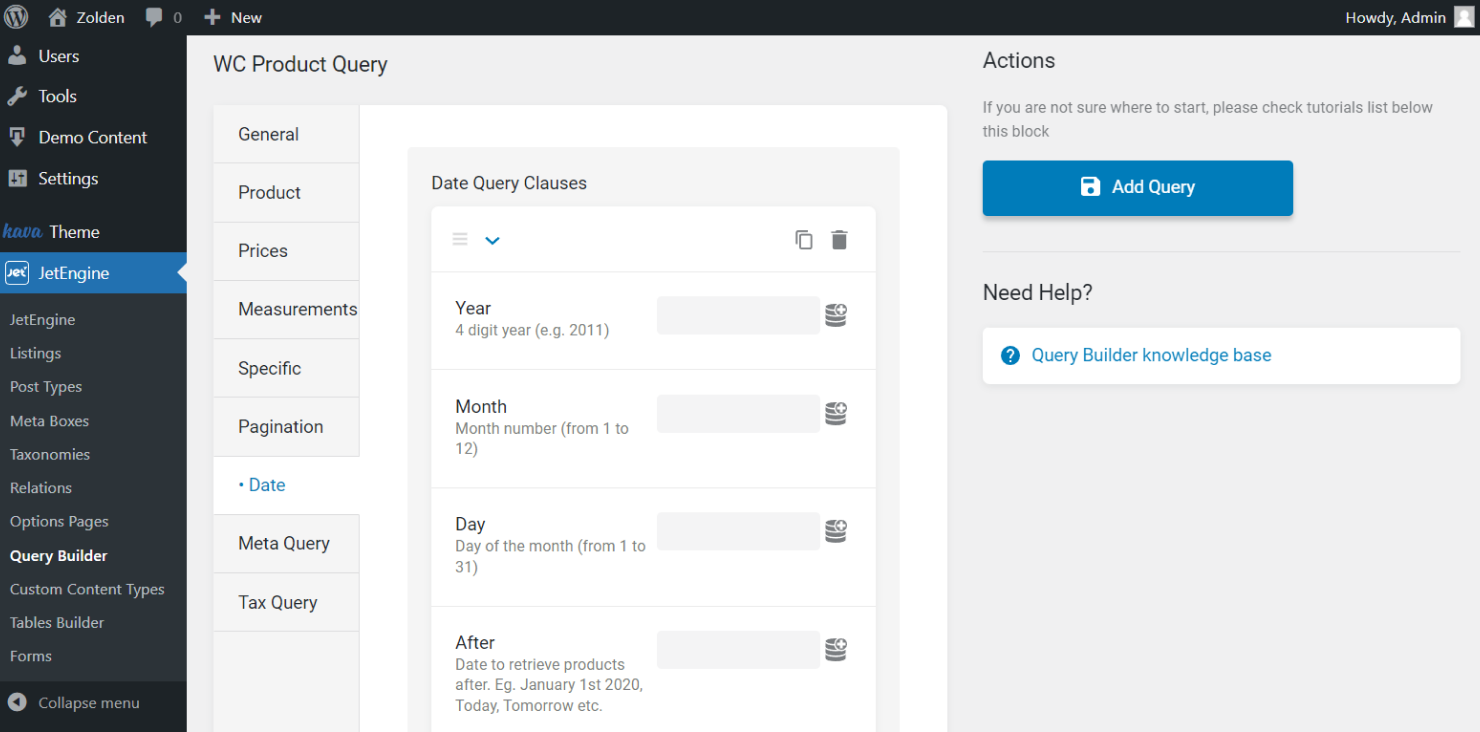
- Year — specify the needed year. Products that were created or modified this year will be added to the list;
- Month — type in a month. Products that were created or modified in the specified month will be added to the list;
- Day — complete the field with a day. Products that were created or modified on this day will be added to the list;
- After — type in the date. Products that were created or modified after the date you enter into this bar will be added to the list;
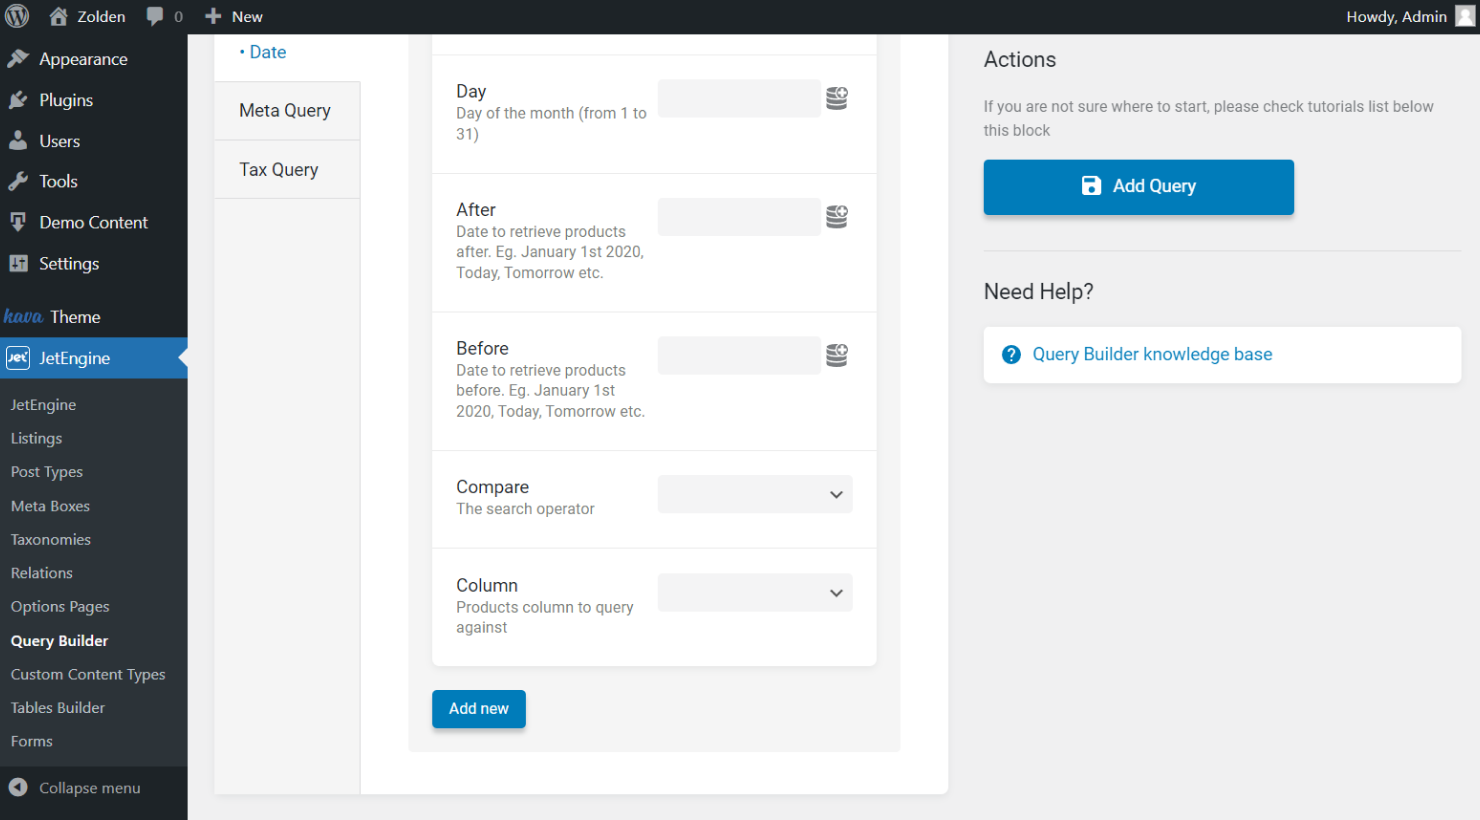
- Before — type in the date, and all posts that were created or modified before this date will be added to the list;
- Compare — choose how the date you added to Year, Month, and Day bars will be compared to the date of post creation or modification;
- Column — choose which date to take. You can select from the following items: “Date created,” “Date modified,” “Date on sale from,” and “Date on sale to.”
Meta Query
This tab allows you to add products to the list according to the values of their meta fields.
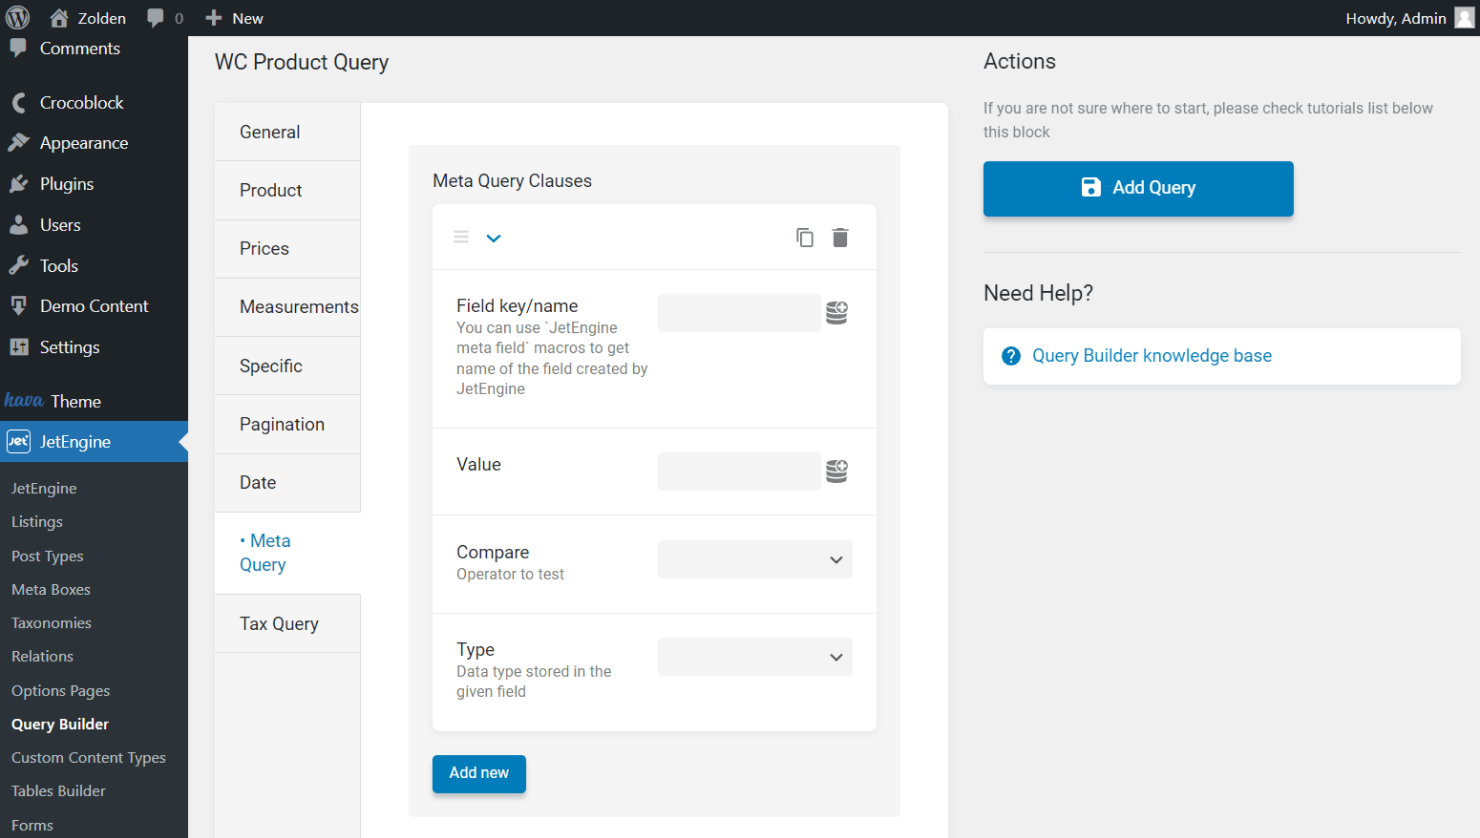
- Field key/name — use the ‘JetEngine meta field’ macro to get the name of the field created by JetEngine;
- Value — add a value that will be compared to the value of the meta field you have chosen in the Field key/name bar;
- Compare — determine how the values will be compared:
- Equal — displays products that have an equal value;
- Not Equal — shows products that don’t have an equal value;
- Greater than — displays products that have a greater value. Mind that it works with numeric values only;
- Greater or equal — shows products that have a greater or equal value. It also works only for numeric values;
- Less than — shows products that have less value. Works for numeric values only;
- Less or equal — displays products that have a less or equal numeric value;
- Like — shows products that have the value you set in the Value field;
- Not like — displays only products that don’t have the value you’ve put in the Value field;
- In the list — after you add several values to the Value field, it shows the posts that have at least one of them in their content;
- Not in the list — displays products that have any values except the ones you’ve added to the Value field;
- Between — displays products that contain the value between two, which are set in the Value field;
- Not between — shows all products except the ones that contain a value that matches the set interval;
- Exist — shows all the products that contain the Field key/name. You don’t need to set the Value in this case;
- Not exist — displays all the products that don’t contain the Field key/name. You don’t need to set the Value either.
- Type — specify what kind of data is stored in the chosen meta field:
- Char — alphabetic data that is not sensitive to case;
- Numeric — whole numbers only;
- Date — date values (be aware, there should be enabled the Save as timestamp toggle in the fields, from where you get date values);
- Datetime — date and time (be aware, there should be enabled the Save as timestamp toggle in the fields, from where you get date values);
- Decimal — fraction number data;
- Time — time values;
- Binary — data that is sensitive to the case;
- Signed — whole numbers, both positive and negative;
- Unsigned — whole numbers, only positive.
Tax Query
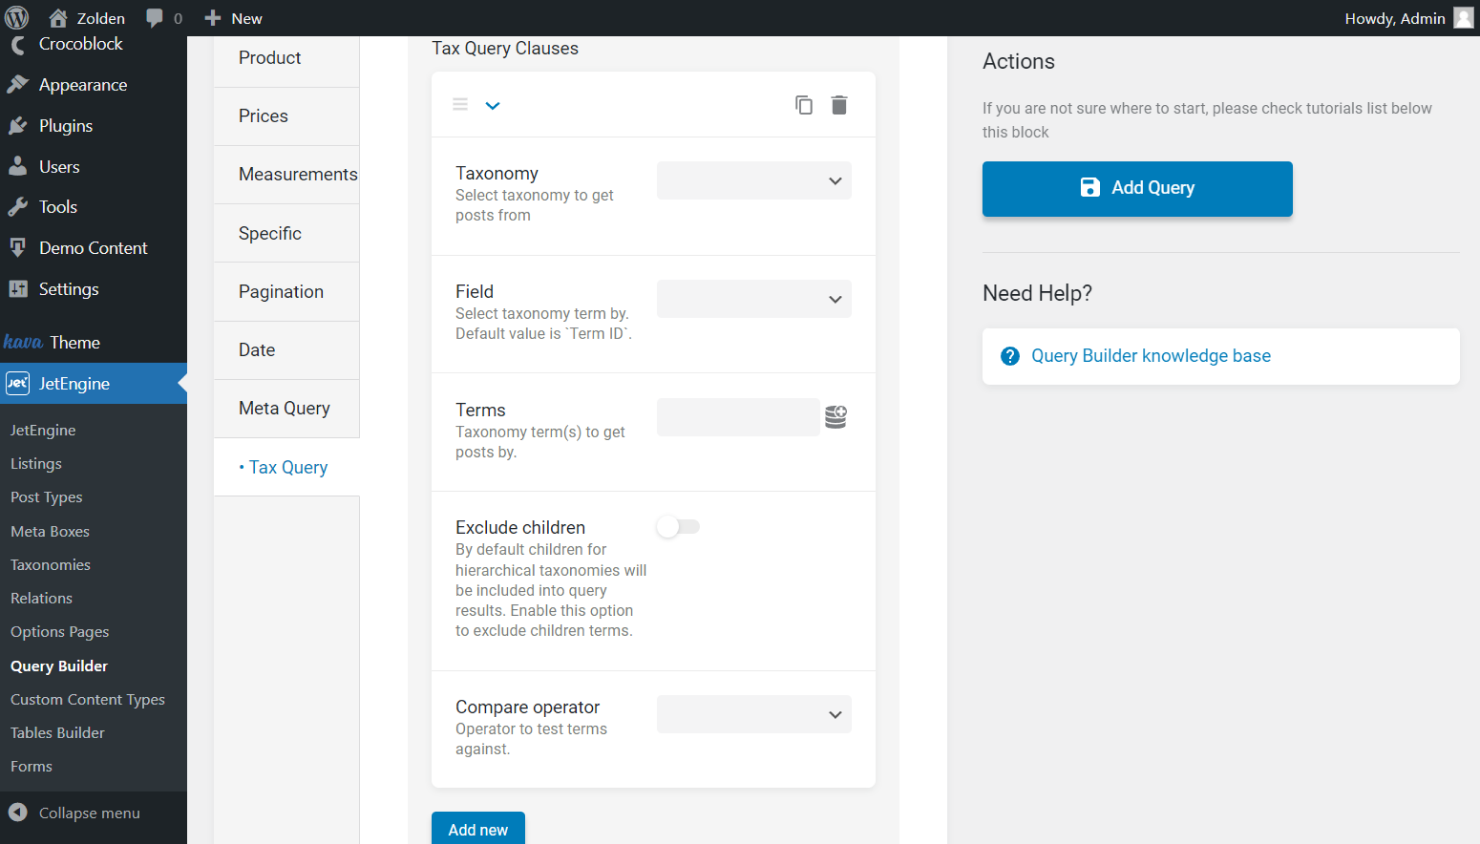
- Taxonomy — define the taxonomy you want to get the posts from;
- Field — select whether to use terms by Term ID, Slug, or Name. If you choose the “Term ID” option, fill in the following Terms field with the %current_terms% macro to showcase the posts with the same terms as the main one on the page. You can also add more terms by separating them with a comma;
- Terms — depending on the option you have picked in the Field, enter the ID, slug, or name of the needed term;
- Exclude children — activate the switcher if you have selected a hierarchical taxonomy and don’t want to add the posts with children terms;
- Compare operator — pick how terms will cooperate:
- IN displays all the taxonomy values;
- NOT IN allows to hide items from the current taxonomy;
- AND enables several conditions;
- EXIST tests the existence of any record in a subquery;
- NOT EXIST does the opposite to the previous operator.
That is all for the WC Product Query Type of the Query Builder. Now you can create a product list and display it wherever you want.