How to Create Appointment Booking Forms
Learn how to create appointment booking forms, manage their settings, and add to CPTs, posts, pages, and/or archive pages using JetPlugins.
Before you start, check the tutorial requirements:
- Elementor (Free version) or Block editor (Gutenberg)
- WooCommerce plugin (Free version) installed and activated
- JetFormBuilder plugin installed and activated
- JetAppointment plugin installed and activated
- JetThemCore plugin installed and activated
The JetFormBuilder plugin creates forms with 18+ standard field blocks and arranges them in multi-column layouts. If the JetAppointment plugin is activated, the JetFormBuilder plugin adds special appointment blocks with different post-submit actions. With the JetEngine plugin, the JetFormBuilder plugin builds various appointment systems.
The JetAppointment plugin creates two types of appointments:
- single services only (is the primary appointment system without particular block usage and managing their settings). The tutorial Creating Forms with JetFormBuilder: Overview details the form building;
- single services and their providers (for example, one doctor can provide some different services) with the application of the Appointment Provider and Appointment Provider blocks.
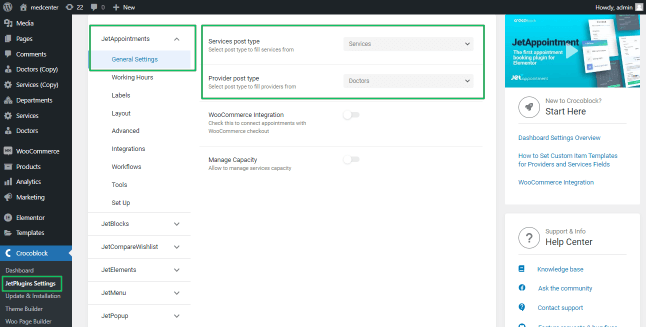
JetAppointment Settings for the Service-Provider system
Navigate to WP Dashboard > Crocoblock > JetPlugins Settings > JetAppointments > General Settings tab. Unroll the Service post type and Provider post type drop-down menus and select the appropriate CPTs (here, the Doctor CPT is the provider, and the Services CPT is the services with one-to-many relation set).
Creating Forms
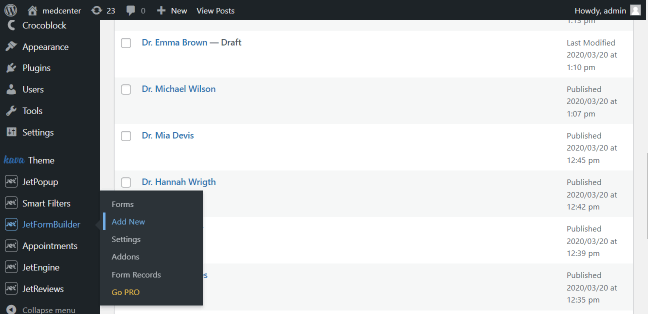
Navigate to WP Dashboard > JetFormBuilder > Add New to create a new form.
The JetFormBuilder plugin creates forms in the Gutenberg editor by default.

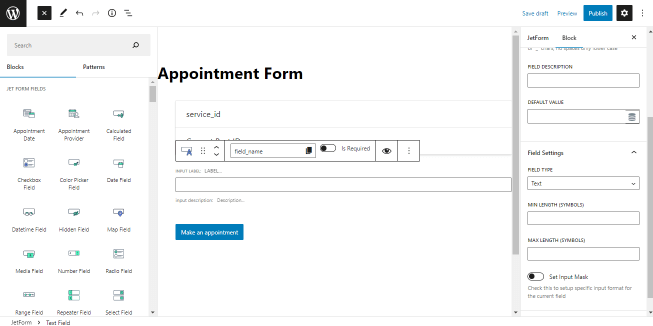
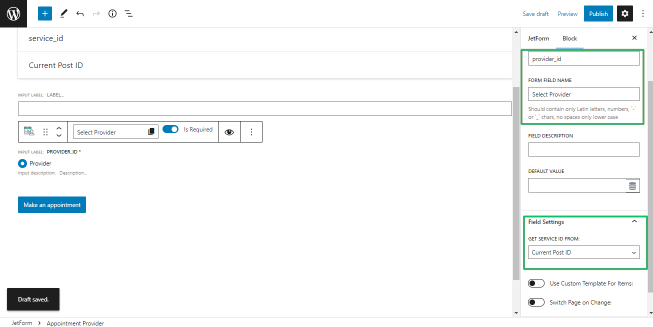
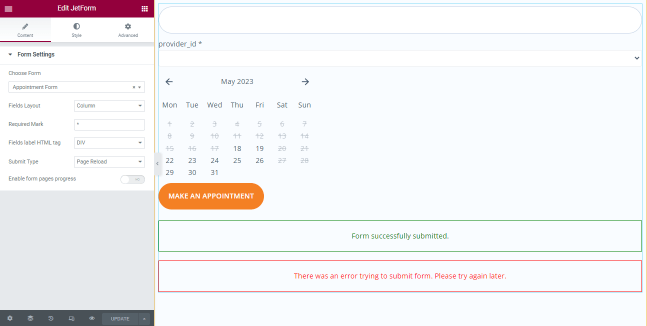
Type the form name (here, Appointment Form). The hidden field is added by default: type the field name in the Form Field Name field (here, service_id), and select the Current Post Id option from the Field value drop-down menu.
Press the “+” button, unroll the menu with blocks and patterns, and drag-n-drop the necessary fields (here, the text field block to add the user’s data).
The JetFormBuilder Plugin: Looking Through General Settings Section details the JetFormBuilder block settings and how to manage them.
To create a service-provider appointment form, find the Appointment Provider block and add it to the form.
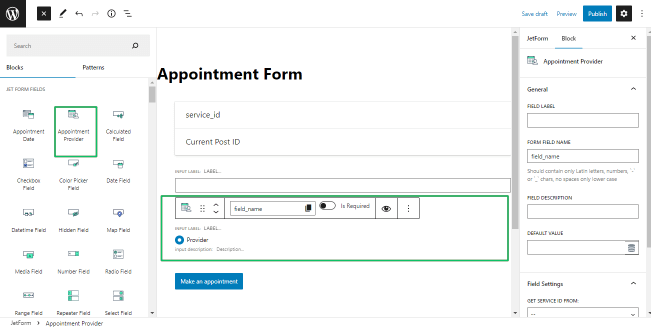
Type the form name (here, Appointment Form) and select the Current Post Id option from the Field value drop-down menu.
Find the Appointment Date block and drop it into the form.
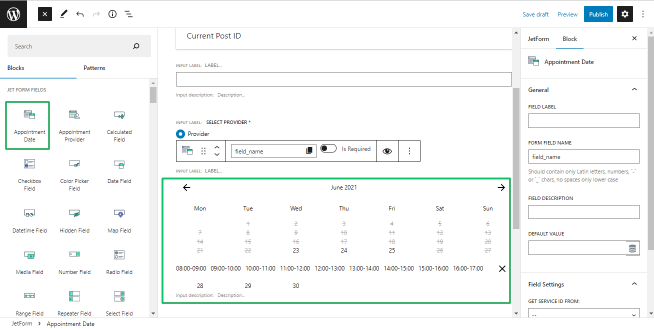
Add the following settings to this block:
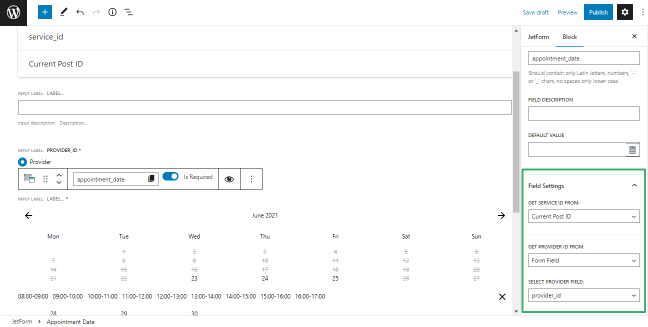
- select the Current Post ID option from the Get Service ID from the drop-down menu;
- select the Form Field option from the Get Provider ID From the drop-down menu. This option turns on the Select Provider Field drop-down menu ー select the Appointment Provider’s Field Label (here, provider_id).
Appointment Settings
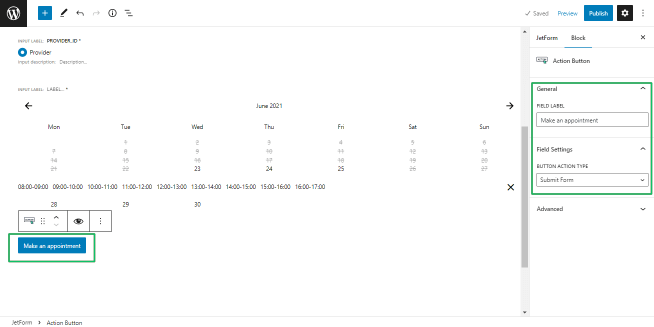
The form has the Action button added by default with the Submit default text. Navigate to the settings of the Action button block and type the necessary text (here, Make an Appointment).
Select the Submit Form option from the Field Setting drop-down menu.
WooCommerce integration
Apply the post-submit actions for the form. Select the Make an appointment option from the drop-down menu and press the pencil icon to edit this action.
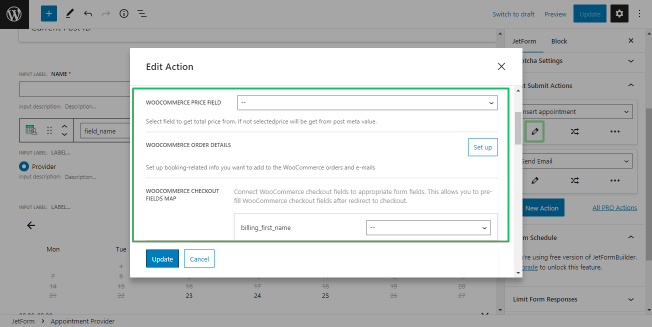
If the JetAppointment > Settings > General > WooCommerce integration toggle is enabled, the Make an Appointment option pop-up displays the settings integrated with WooCommerce.
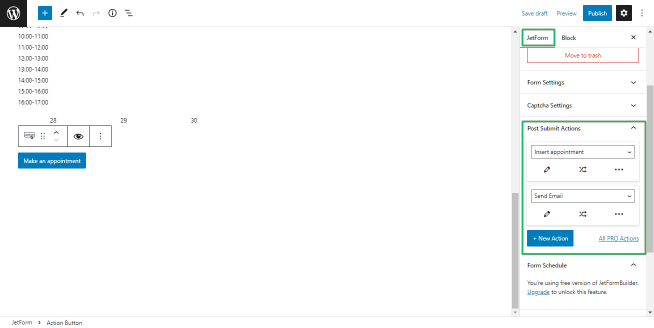
Adding Post Submit actions
Add another post-submit action if necessary by pressing the “+ New Action” button (here, Send Email to confirm the appointment).
Adding the appointment form data to CPTs
The JetAppointment plugin collects appointment data to manage appointments via its dashboard.
Users can specify CPTs to collect the submitted appointment data by selecting the Insert/Update Post option from the Post Submit Actions tab.
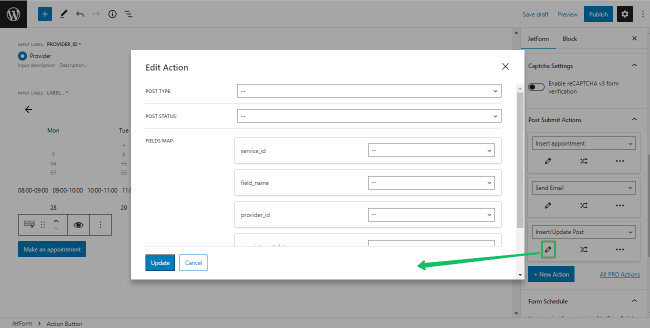
Choose the necessary CPT from the drop-down menu and other options to specify meta-fields to save the appointment data.
Press the “Update” button to save changes.
Press the “Publish” button to publish the form.
Appointment Appearance
If the JetAppointment plugin is enabled, users can set different time schedules: Slots, Time Picker, and Recurring. The JetFormBuilder plugin, in its turn, will take into account these settings and display the Appointment Date block according to the JetAppointment plugin settings.
Adding the Form to Single Pages
Users can add the built form to single pages in Elementor or Gutenberg.
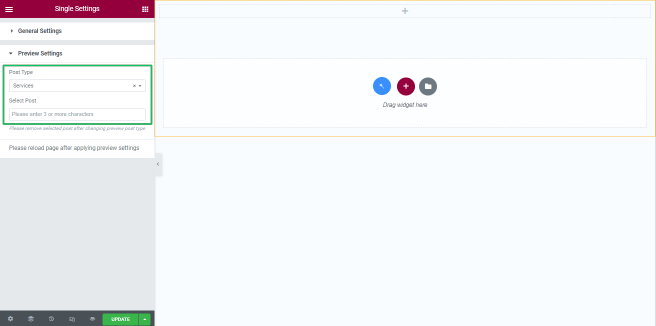
Create a single page to display the Service CPT (here, Services CPT).
Find the JetForm widget and drag-n-drop it where needed. Select the built form from the Choose Form drop-down menu. Add the built form (here, Appointment Form).
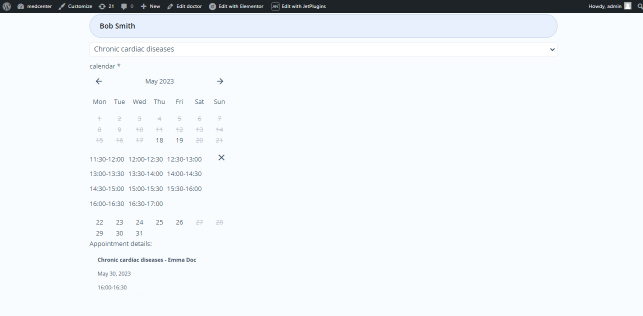
The image below shows the front-end view of the added single services-providers form.
That’s all about how to create appointment booking forms.