How to Set Appointment Booking Forms
This tutorial covers creating multiple Appointment booking forms — a Static Page Booking Form, a Single Service Booking Form, and a Single Provider Booking Form.
Before you start, check the tutorial requirements:
- Block editor (Gutenberg)
- JetAppointment plugin installed and activated
- JetFormBuilder plugin installed and activated
- JetEngine plugin installed and activated
Static Page Booking Form
The Static Booking Form can be used on any page of the website since it does not have any dynamic information (it does not have a service or provider preset), so the user can select the needed service and its provider manually (if a provider is activated in the JetAppointment settings).
Go to the WordPress Dashboard > JetFormBuilder > Add New to create a new form.
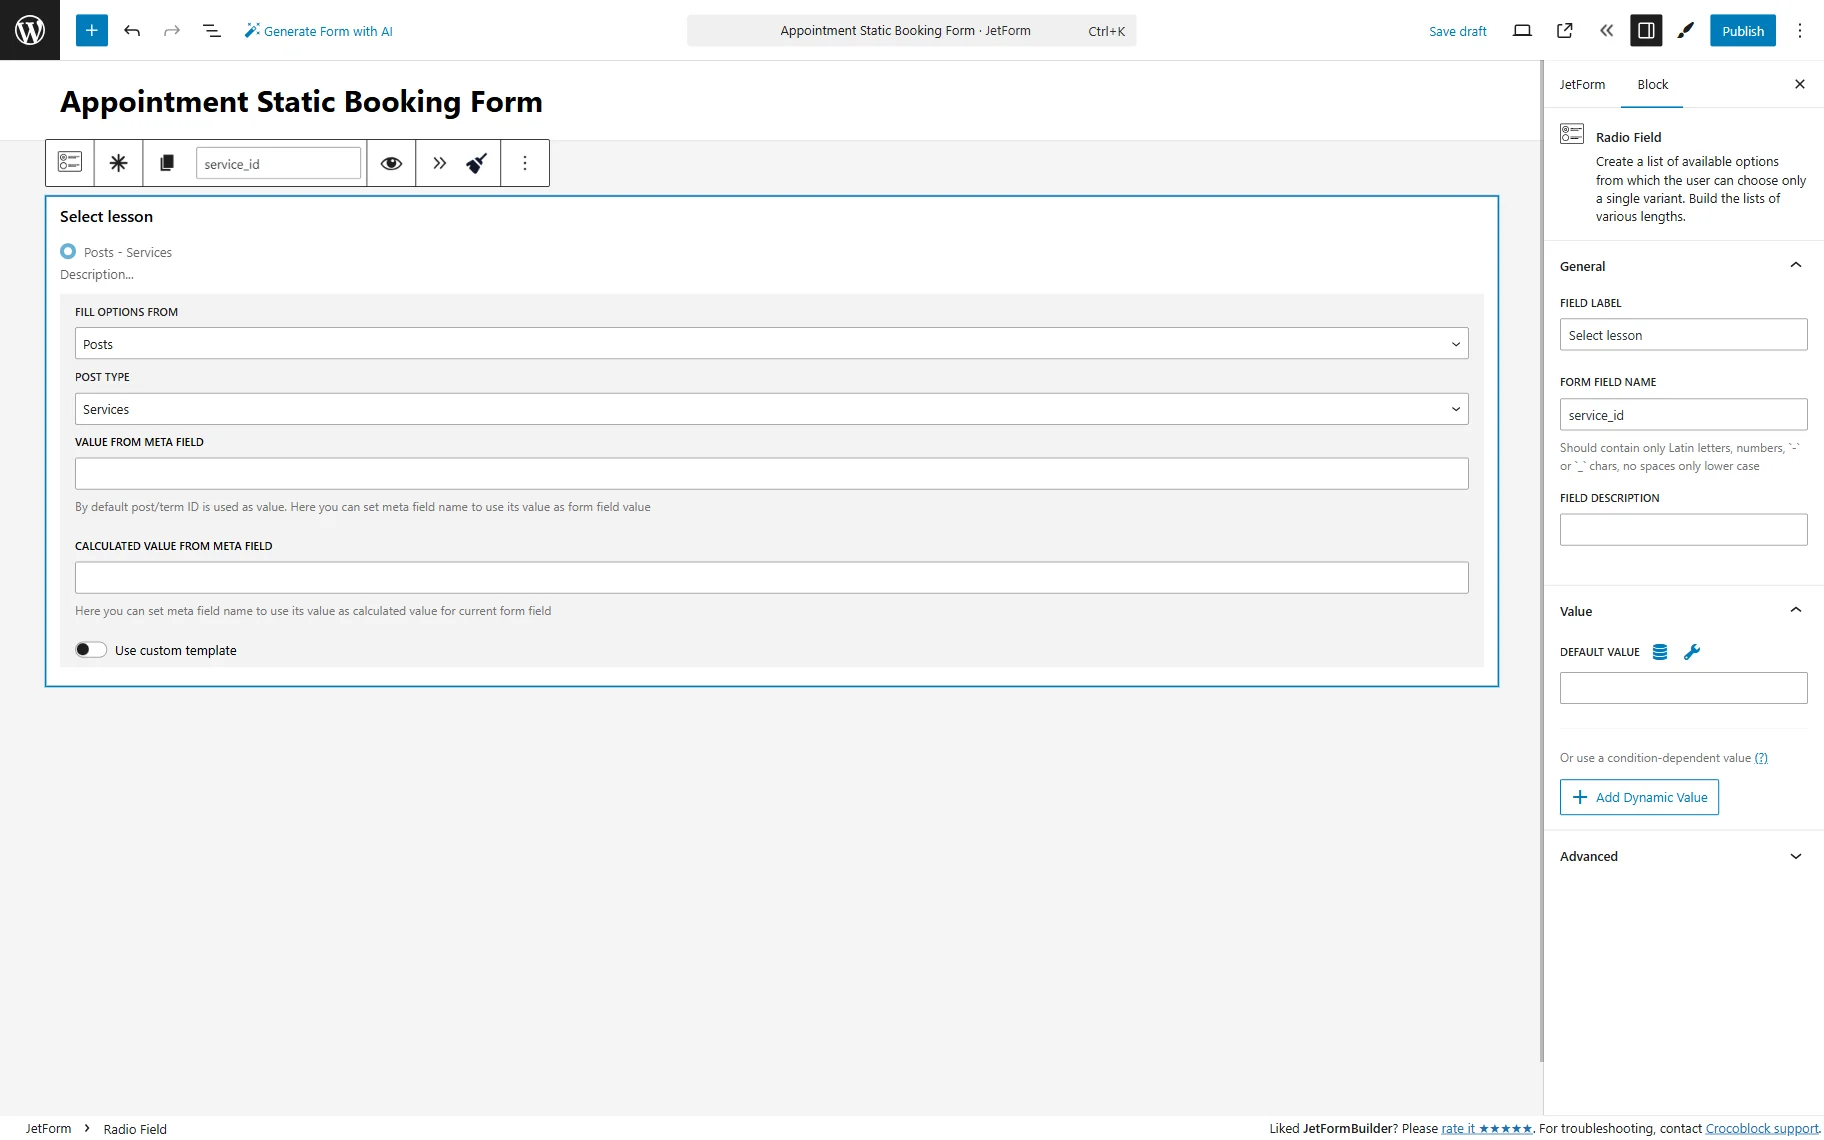
Initially, we delete default fields and add a Radio Field or Select Field to the form. In the FILL OPTIONS FROM field, we pick the “Posts” option. Then select the POST TYPE with the services. In our case, it is the “Services” post type.
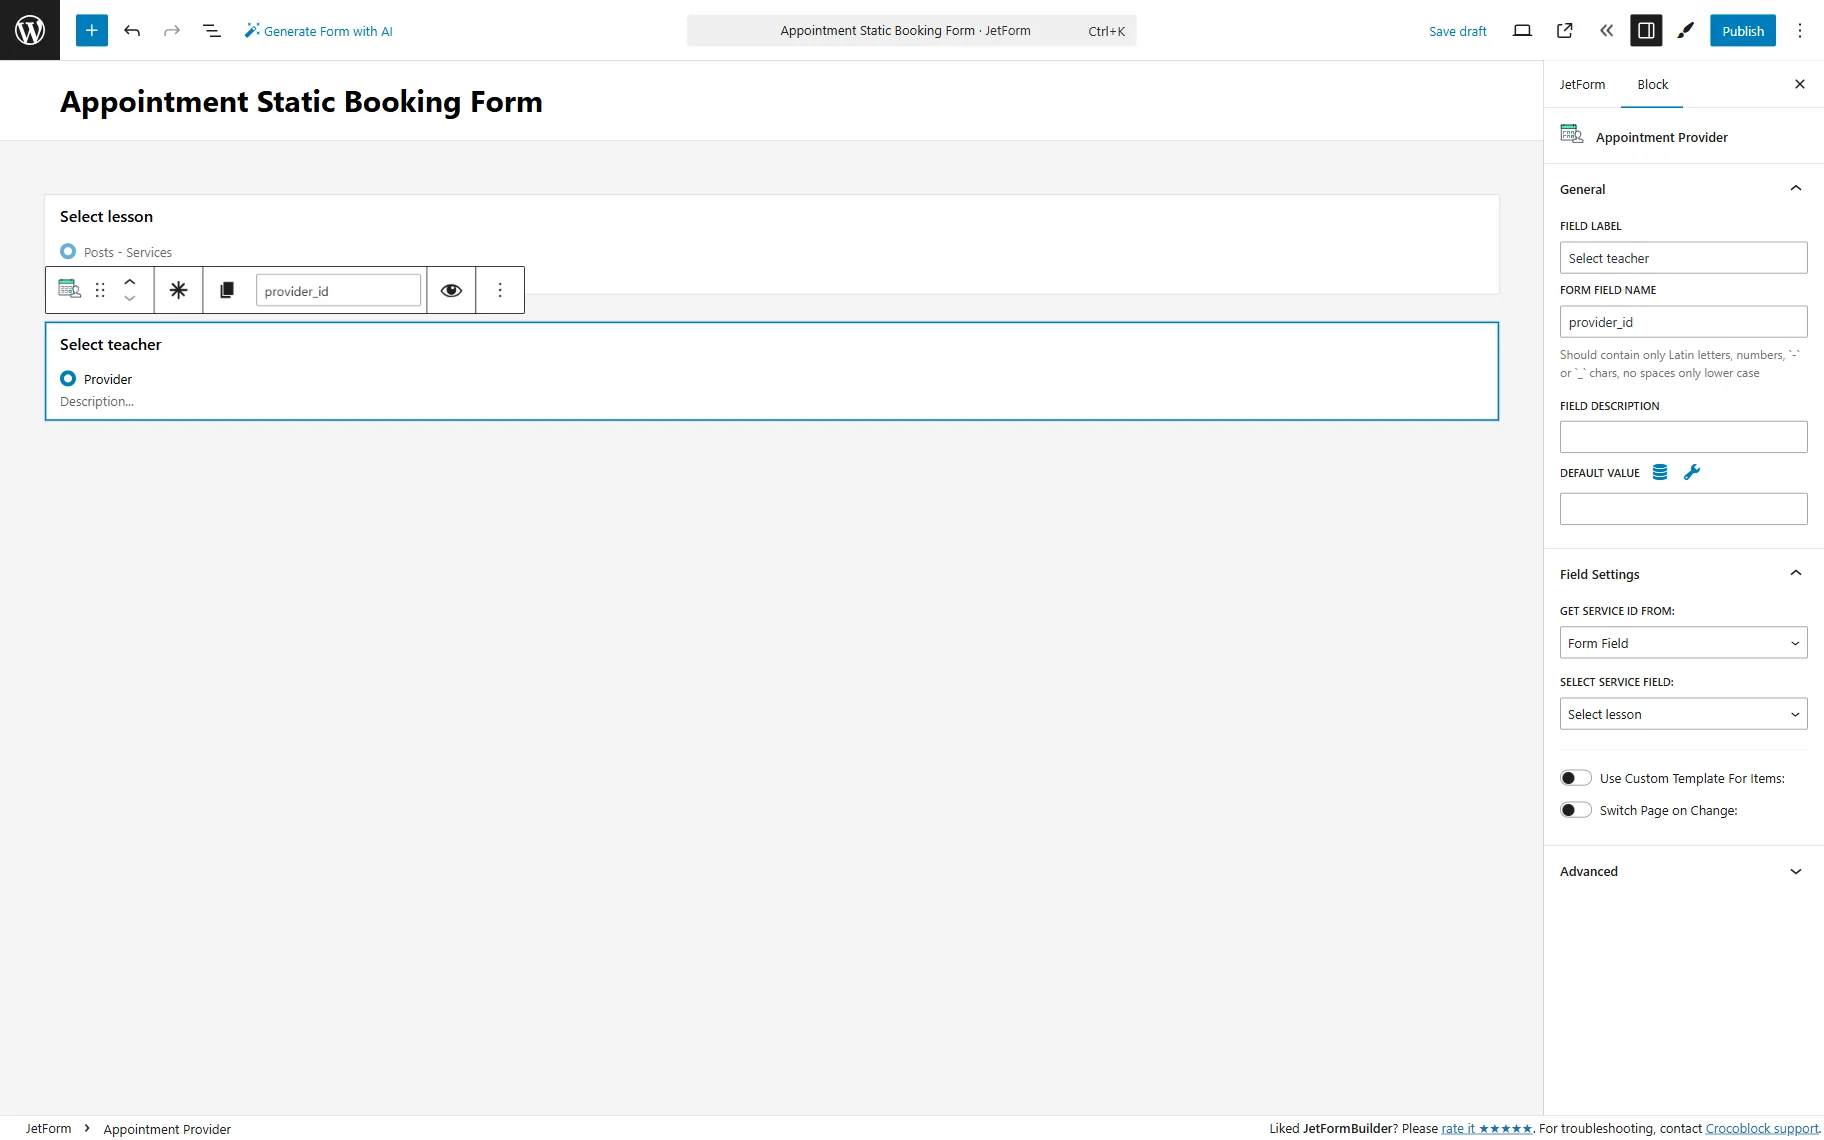
Next, we add the Appointment Provider field to the form.
In the Field Settings section, pick the “Form Field” option in the GET SERVICE ID FROM field. In the SELECT SERVICE FIELD, we opt for the field in the form where the service is selected. In the given case, it is a “Select lesson” field.
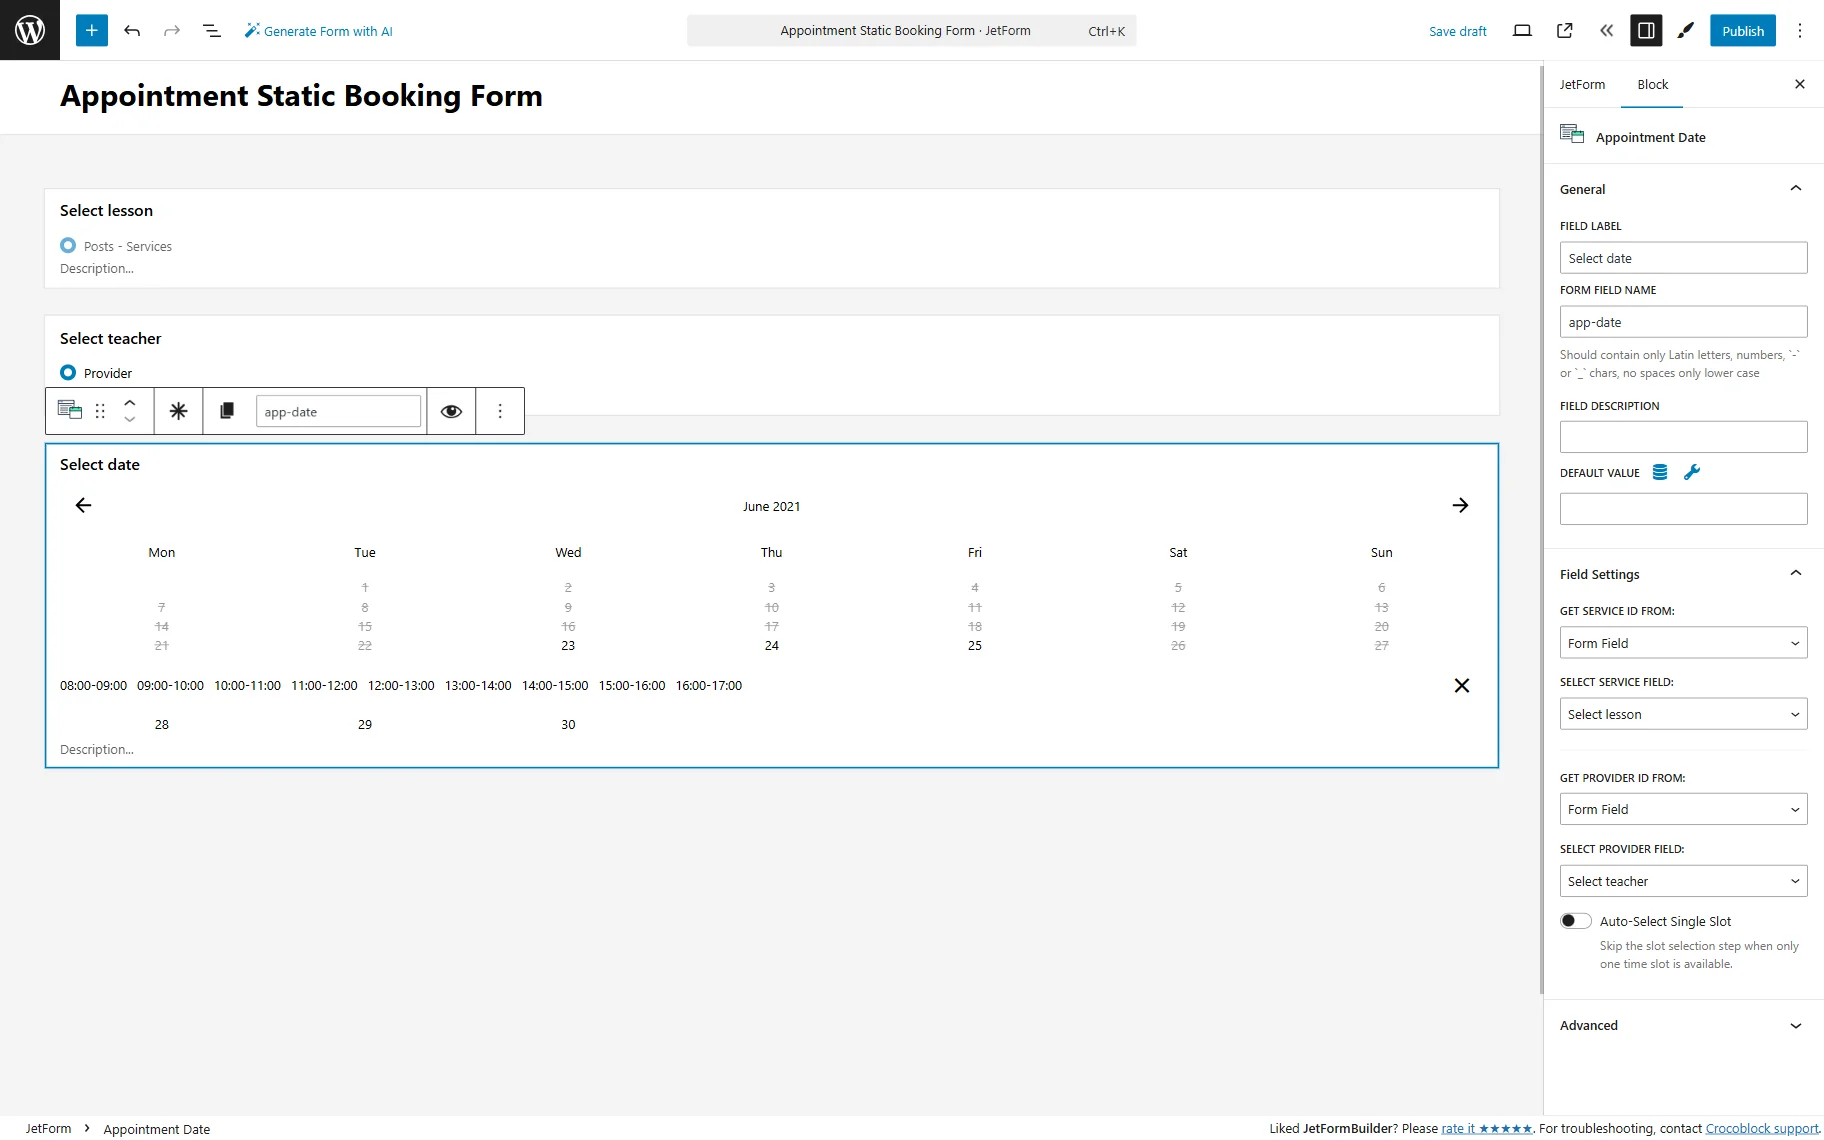
Moving on, we add the Appointment Date field. This field provides a calendar for selecting a slot on a desired date. In this field, open the Field Settings tab once again.
In the GET SERVICE ID FROM field, we pick the “Form Field.”
In the SELECT SERVICE FIELD, we also choose the “Select lesson” field.
In the GET PROVIDER ID FROM field, we pick the “Form Field” as well, and in the SELECT PROVIDER FIELD, we opt for the “Select teacher” field.
Also, you can activate the Auto-Select Single Slot toggle. When enabled, if only one time slot is available in a day, it will be automatically added to the appointment list immediately when the day in the calendar is clicked.
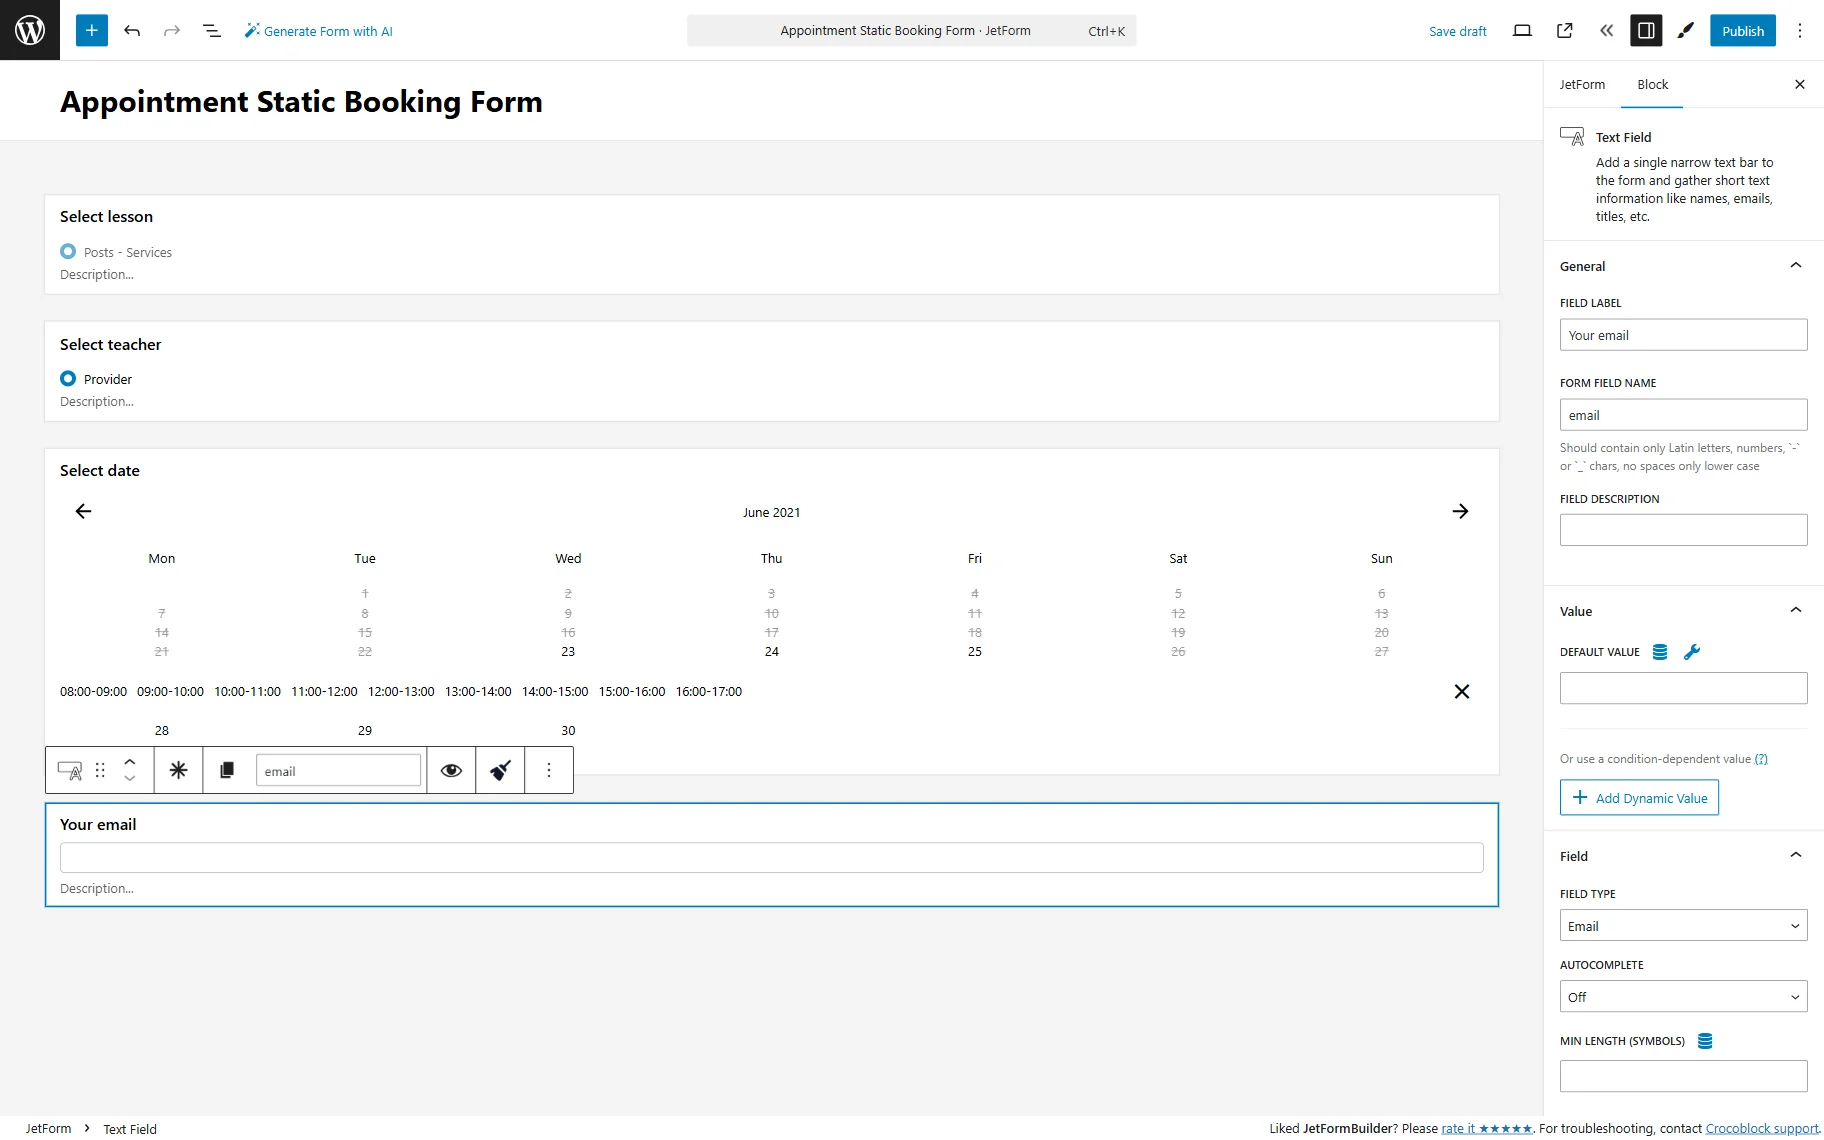
After that, we add another set of fields starting with the email Text Field. In the FIELD TYPE setting, we picked the “Email” option so that only an email address can be entered in this field.
Next, we add another Text Field of a “Tel” FIELD TYPE to accept a telephone number. This field is optional.
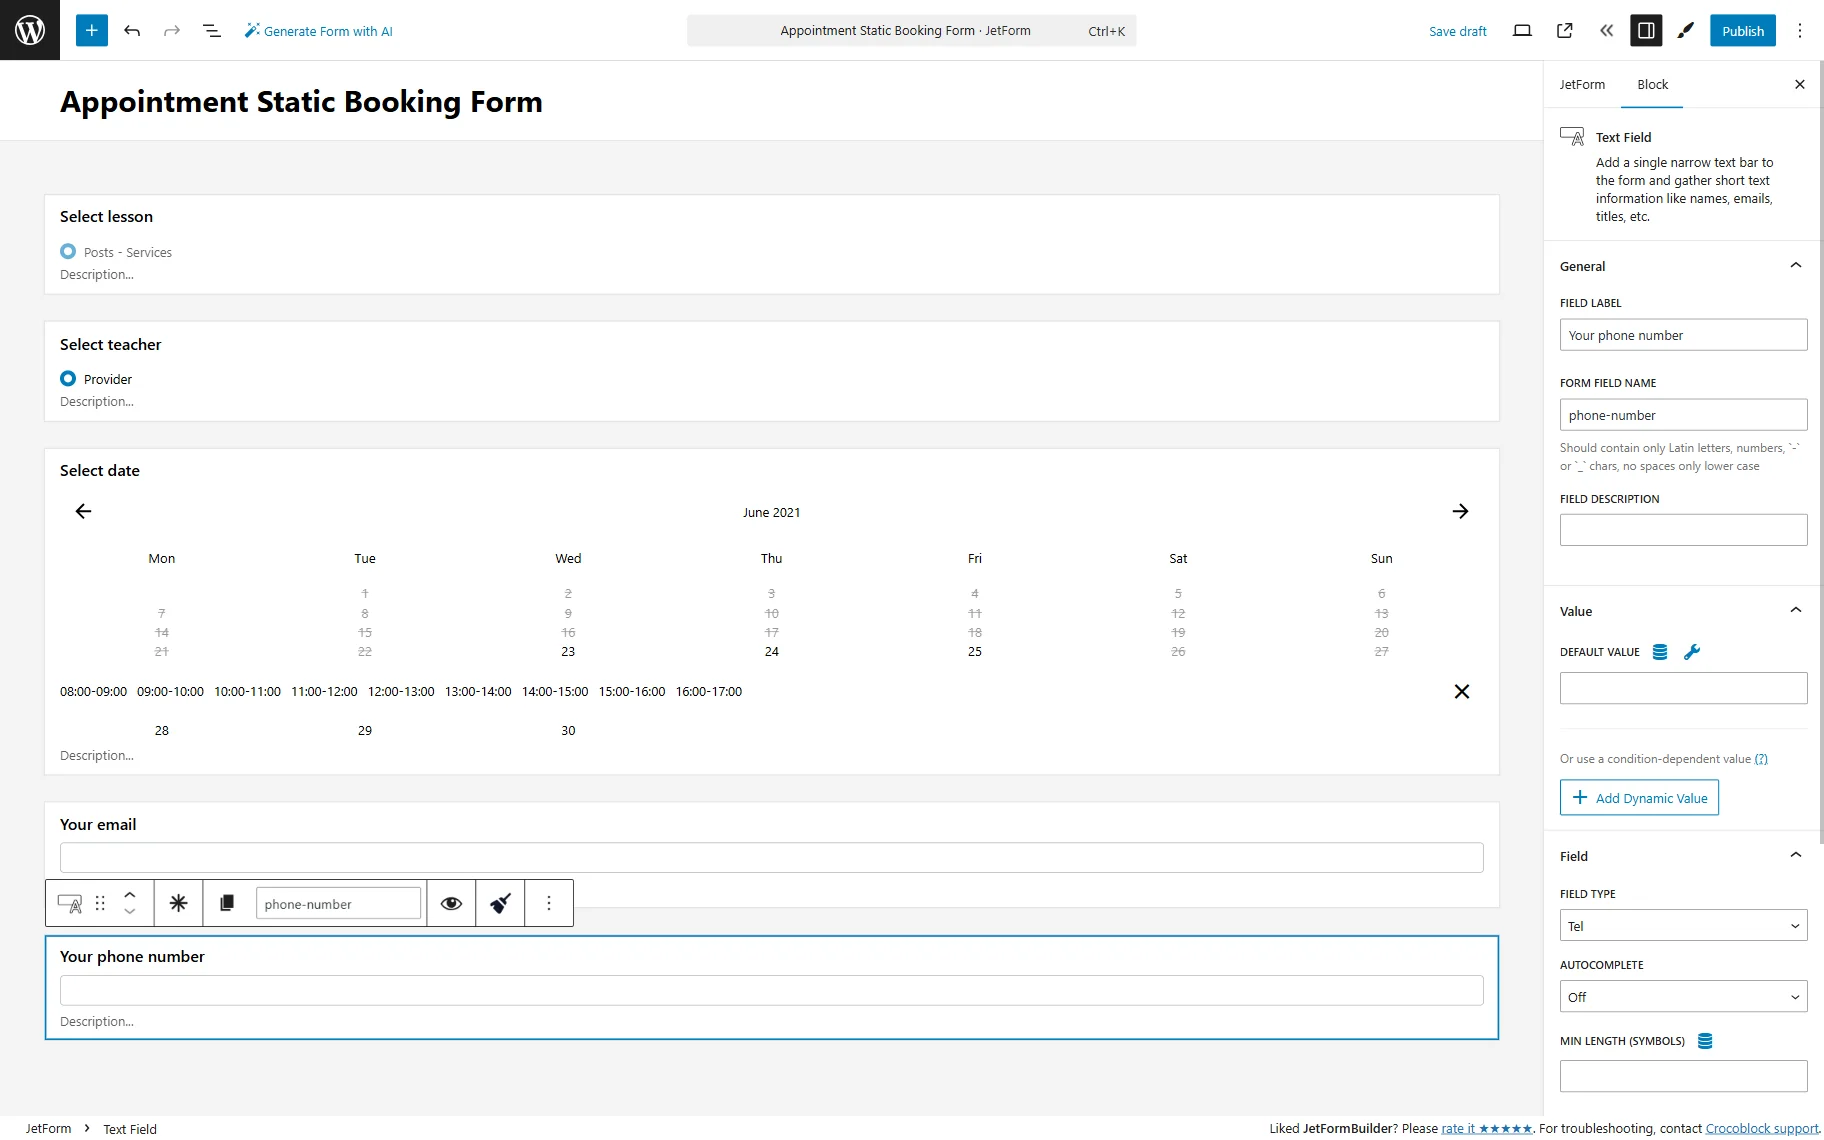
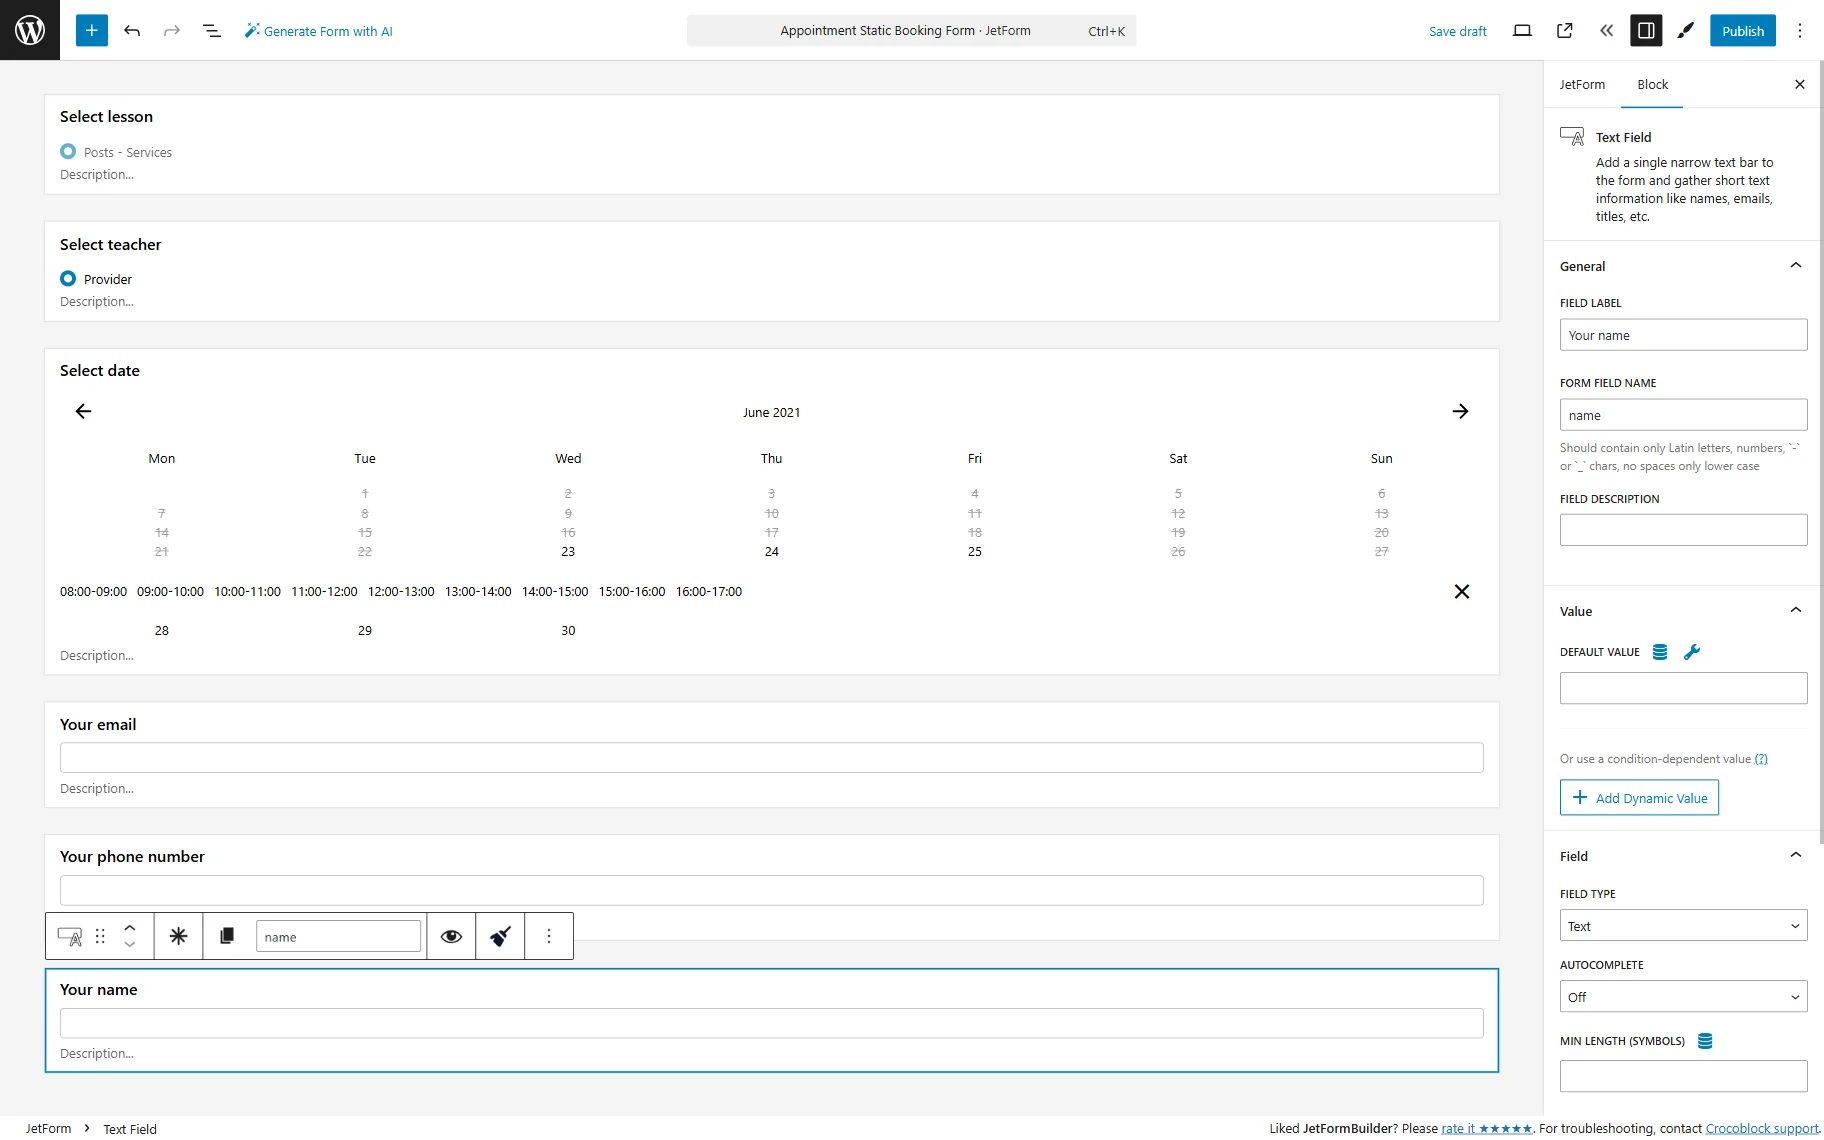
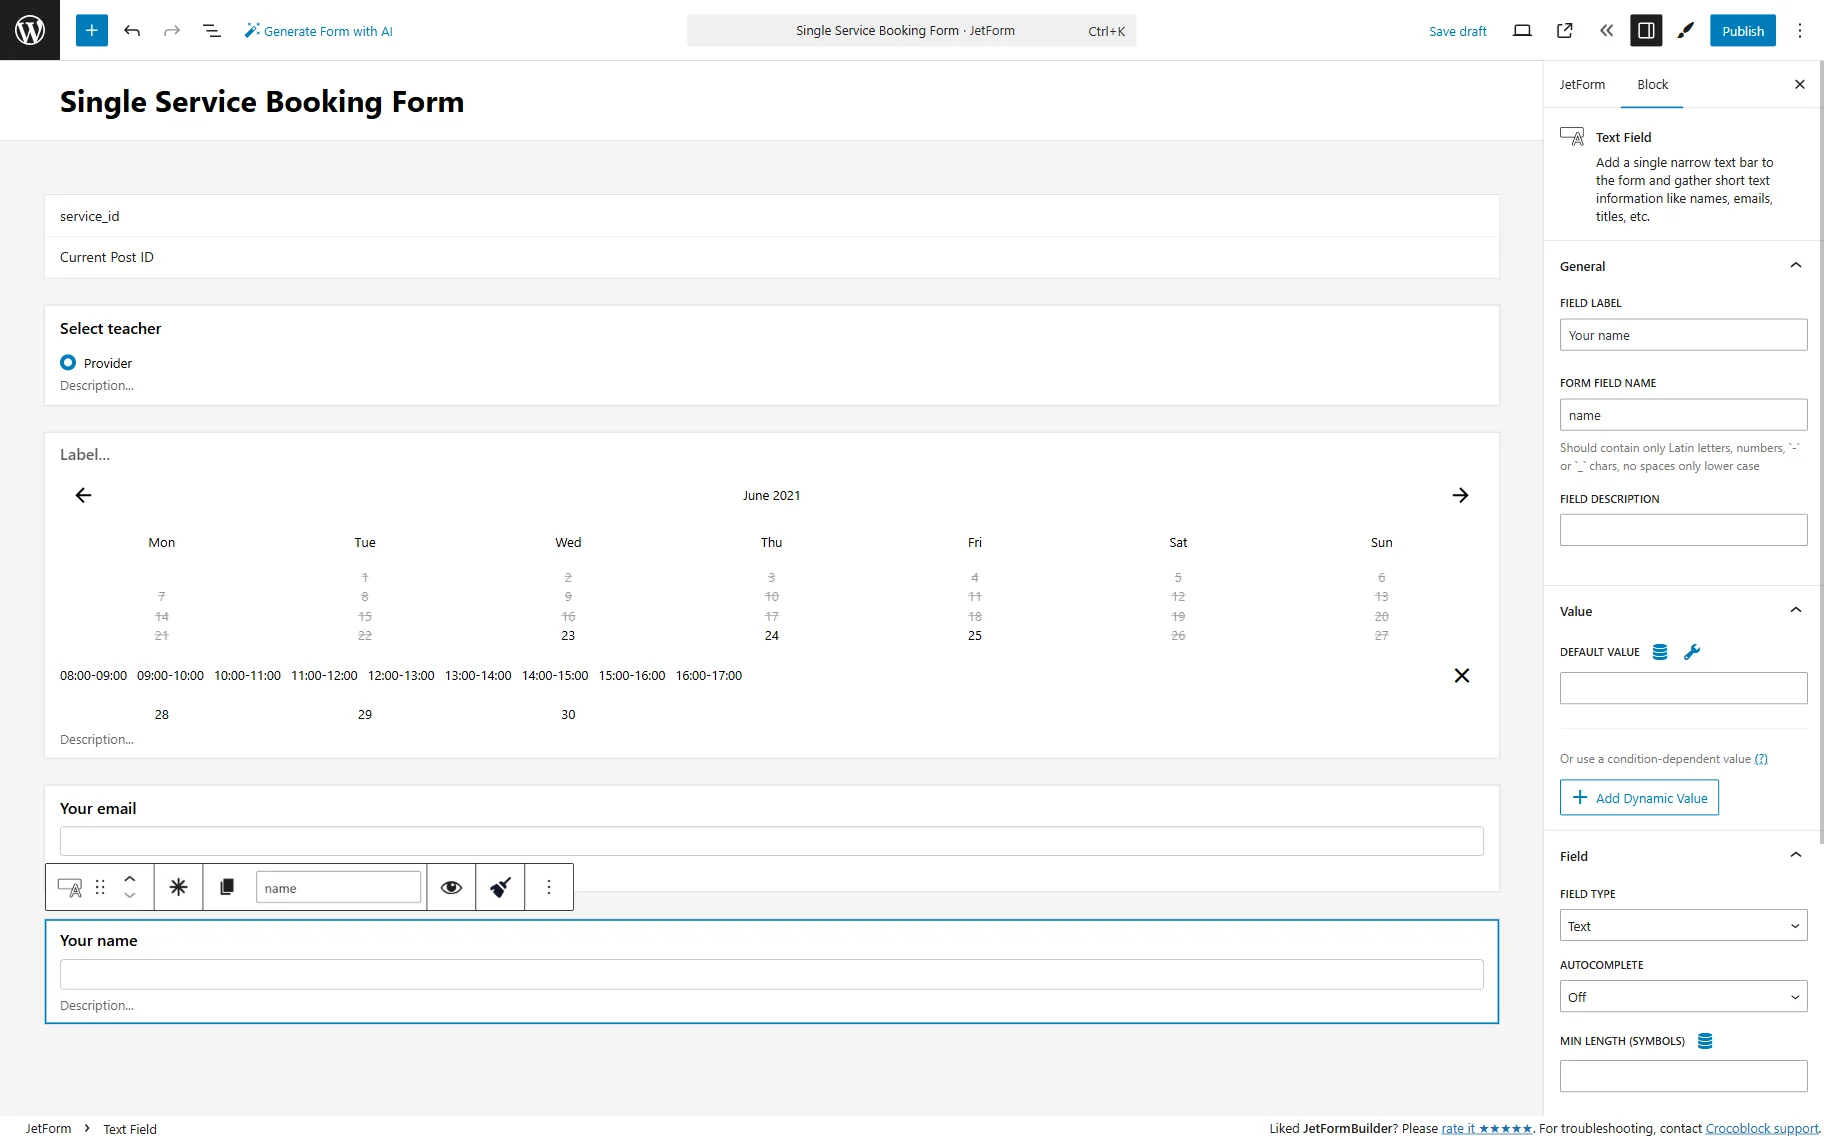
The last field in the form is another Text Field where users can enter their names.
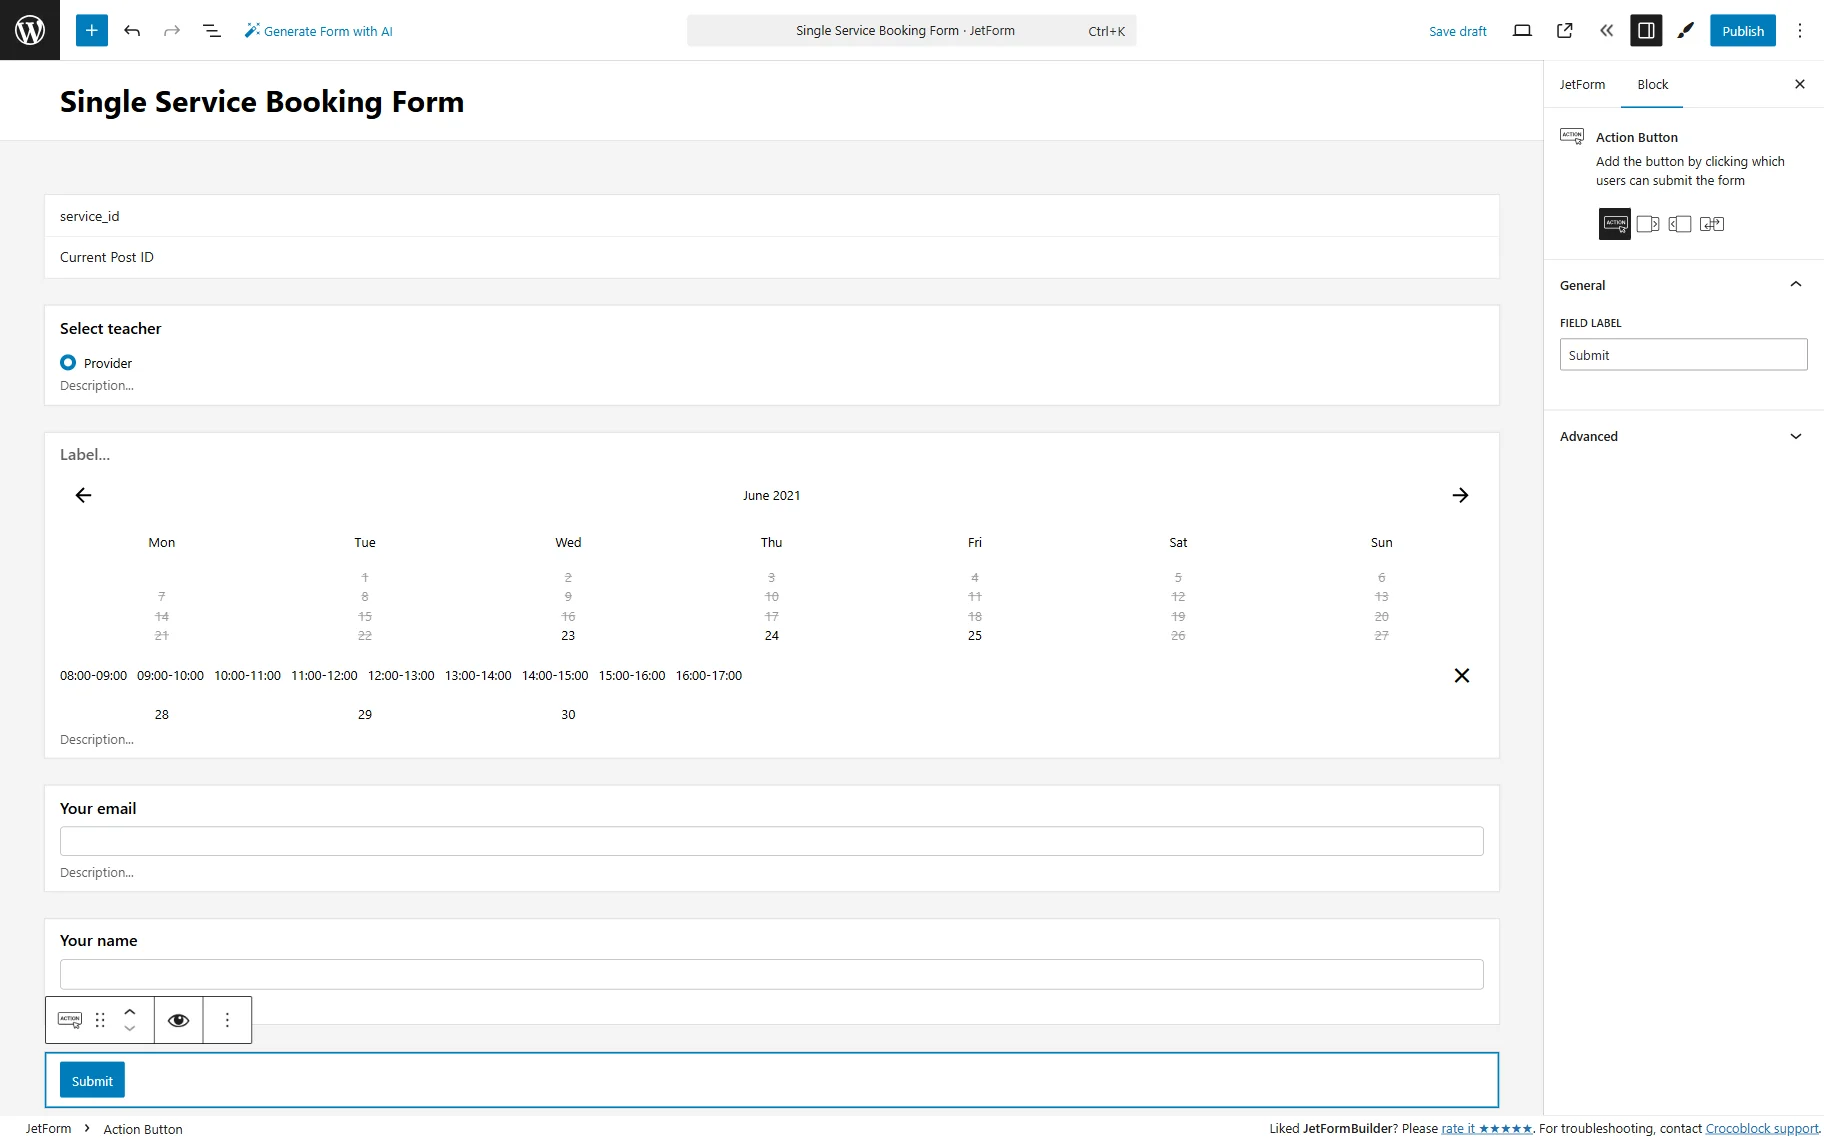
Next, we add an Action Button to finalize the form with the “Submit” button.

Note that you can add any fields to the form according to your goal.
After adding the fields, we can set the post-submit action in the form.
Open the JetForm settings tab and go to the Post Submit Actions section. Here, press the “New Action” button. In the opened pop-up, find and click the “Insert appointment” action to add it.
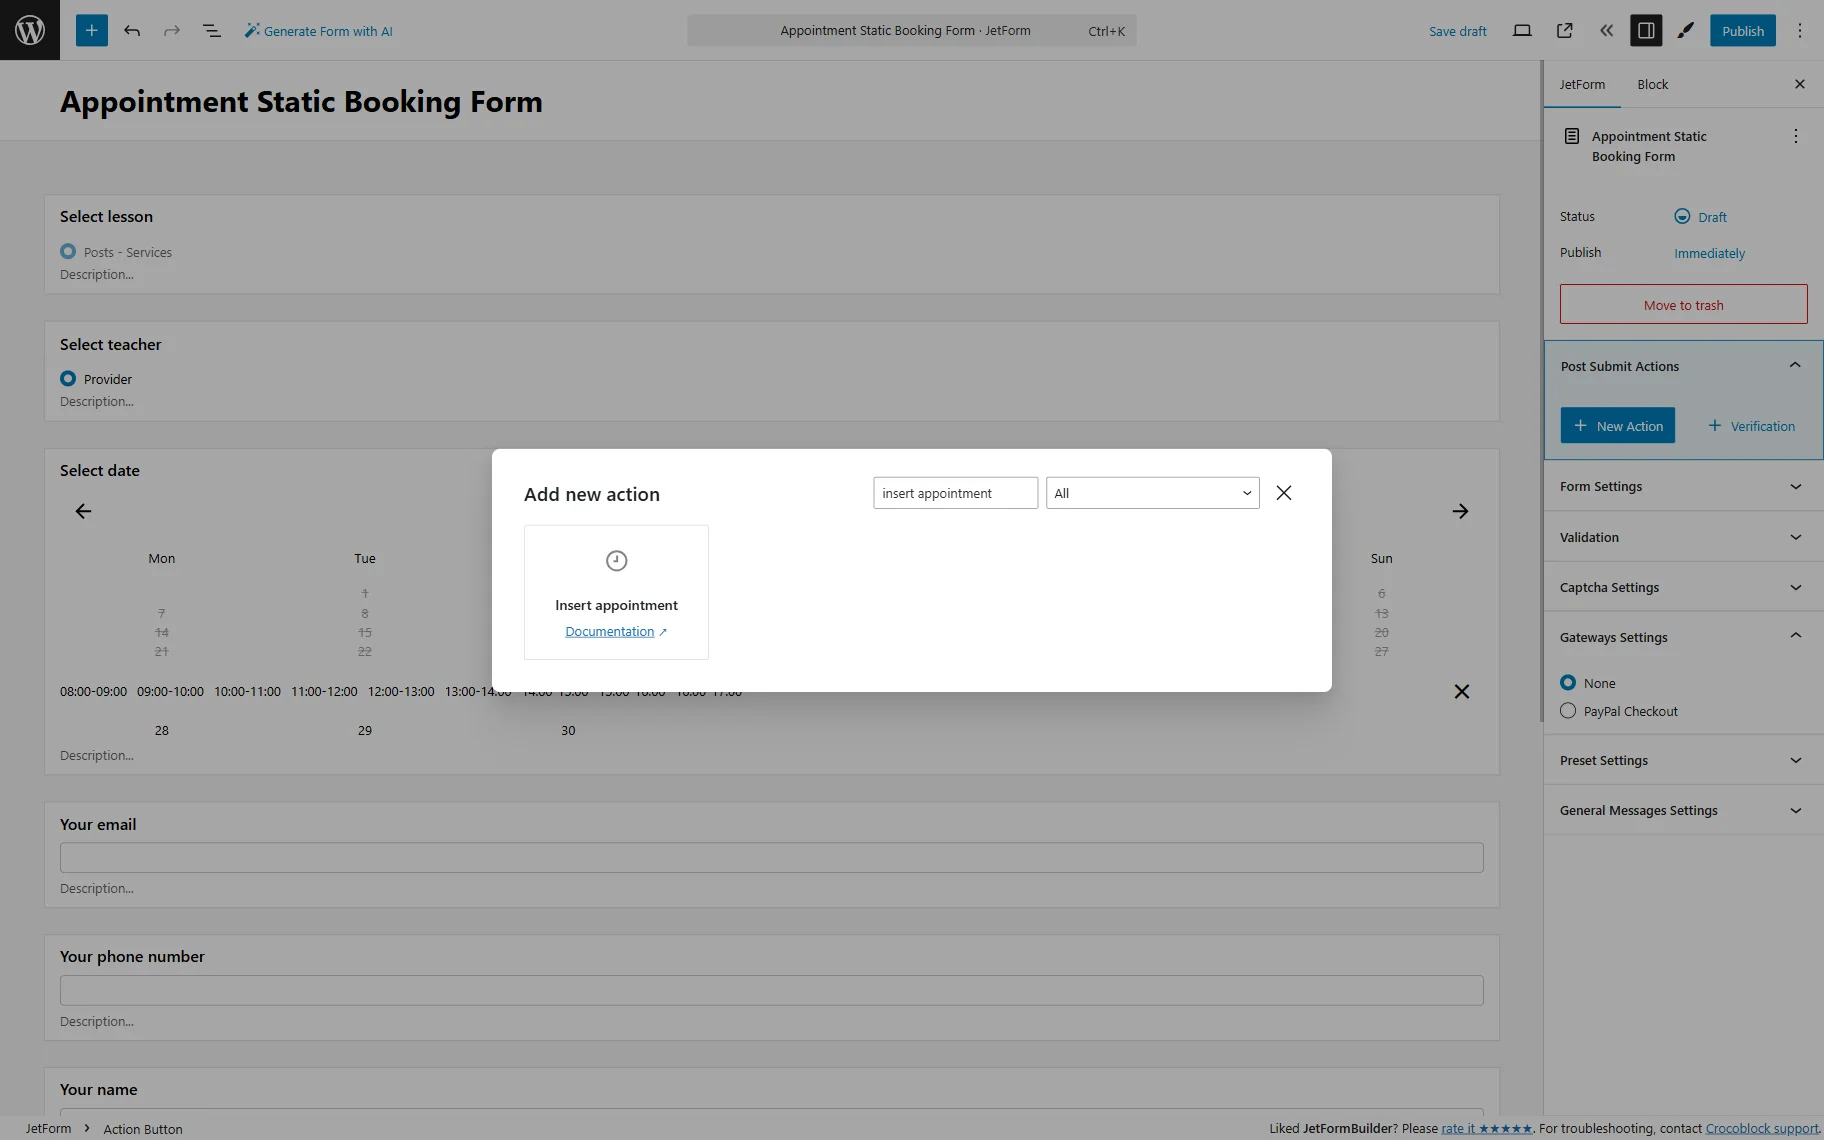
Now, you should see a pop-up that provides the settings for this action.
In the SERVICE ID FIELD, we picked the “Select lesson” Radio Field with the posts of the “Services” post type.
In the PROVIDER ID FIELD, we selected the Appointment Provider “Select teacher” form field.
In the APPOINTMENT DATE FIELD, we picked the Appointment Date field called “Select date.”
The USER E-MAIL FIELD has the “Your email” field mapped.
The USER NAME FIELD is mapped to the “Your name” field.
A custom column can be created in the JetAppointment plugin settings if you need to save additional data that can not be added to the default fields.
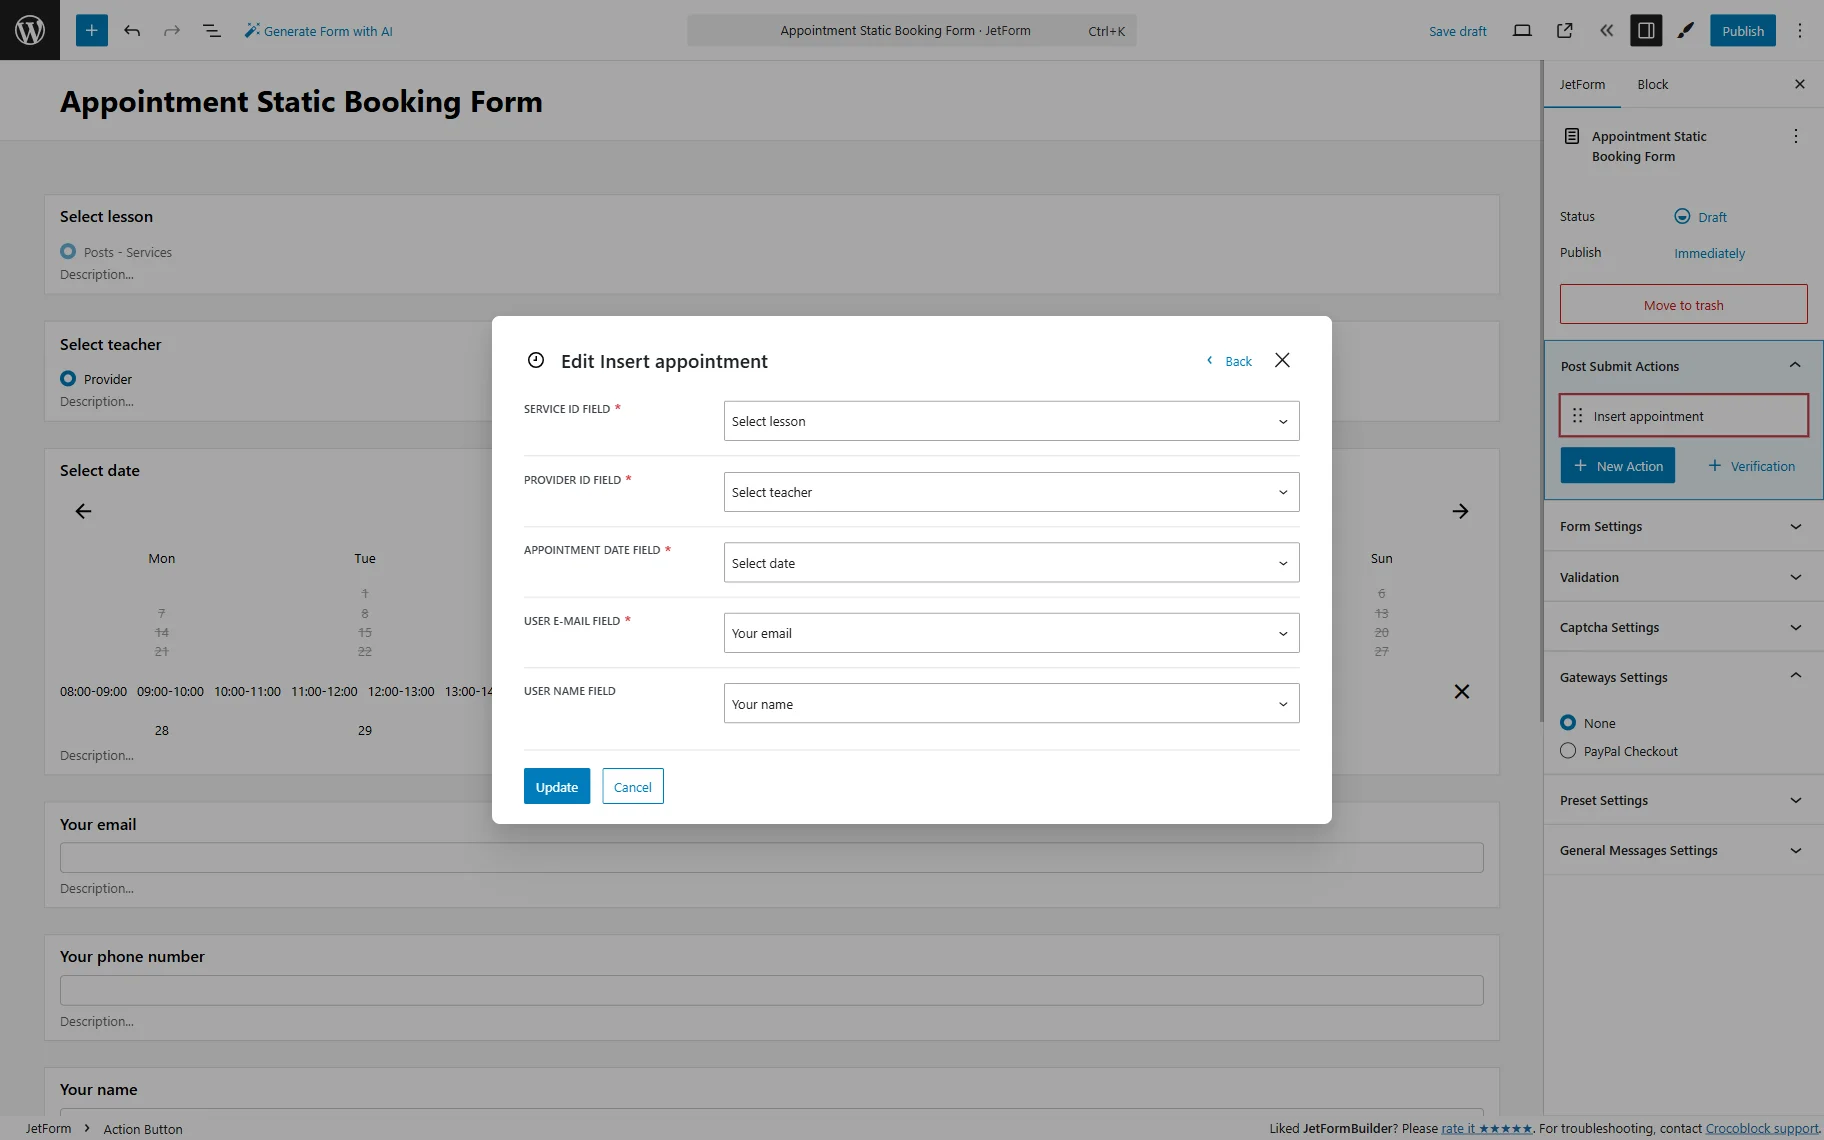
After mapping the fields, you can update the action and save the form.
Single Service Booking Form
Unlike the Static Page Booking Form, which can be placed on any website page, the Single Service Booking Form is meant to be published on the Services Single Page.
This form requires slightly different settings than the Static Page Booking Form, so let us check how the form should be set up.
Create a new form in the WordPress Dashboard > JetFormBuilder > Add New directory.
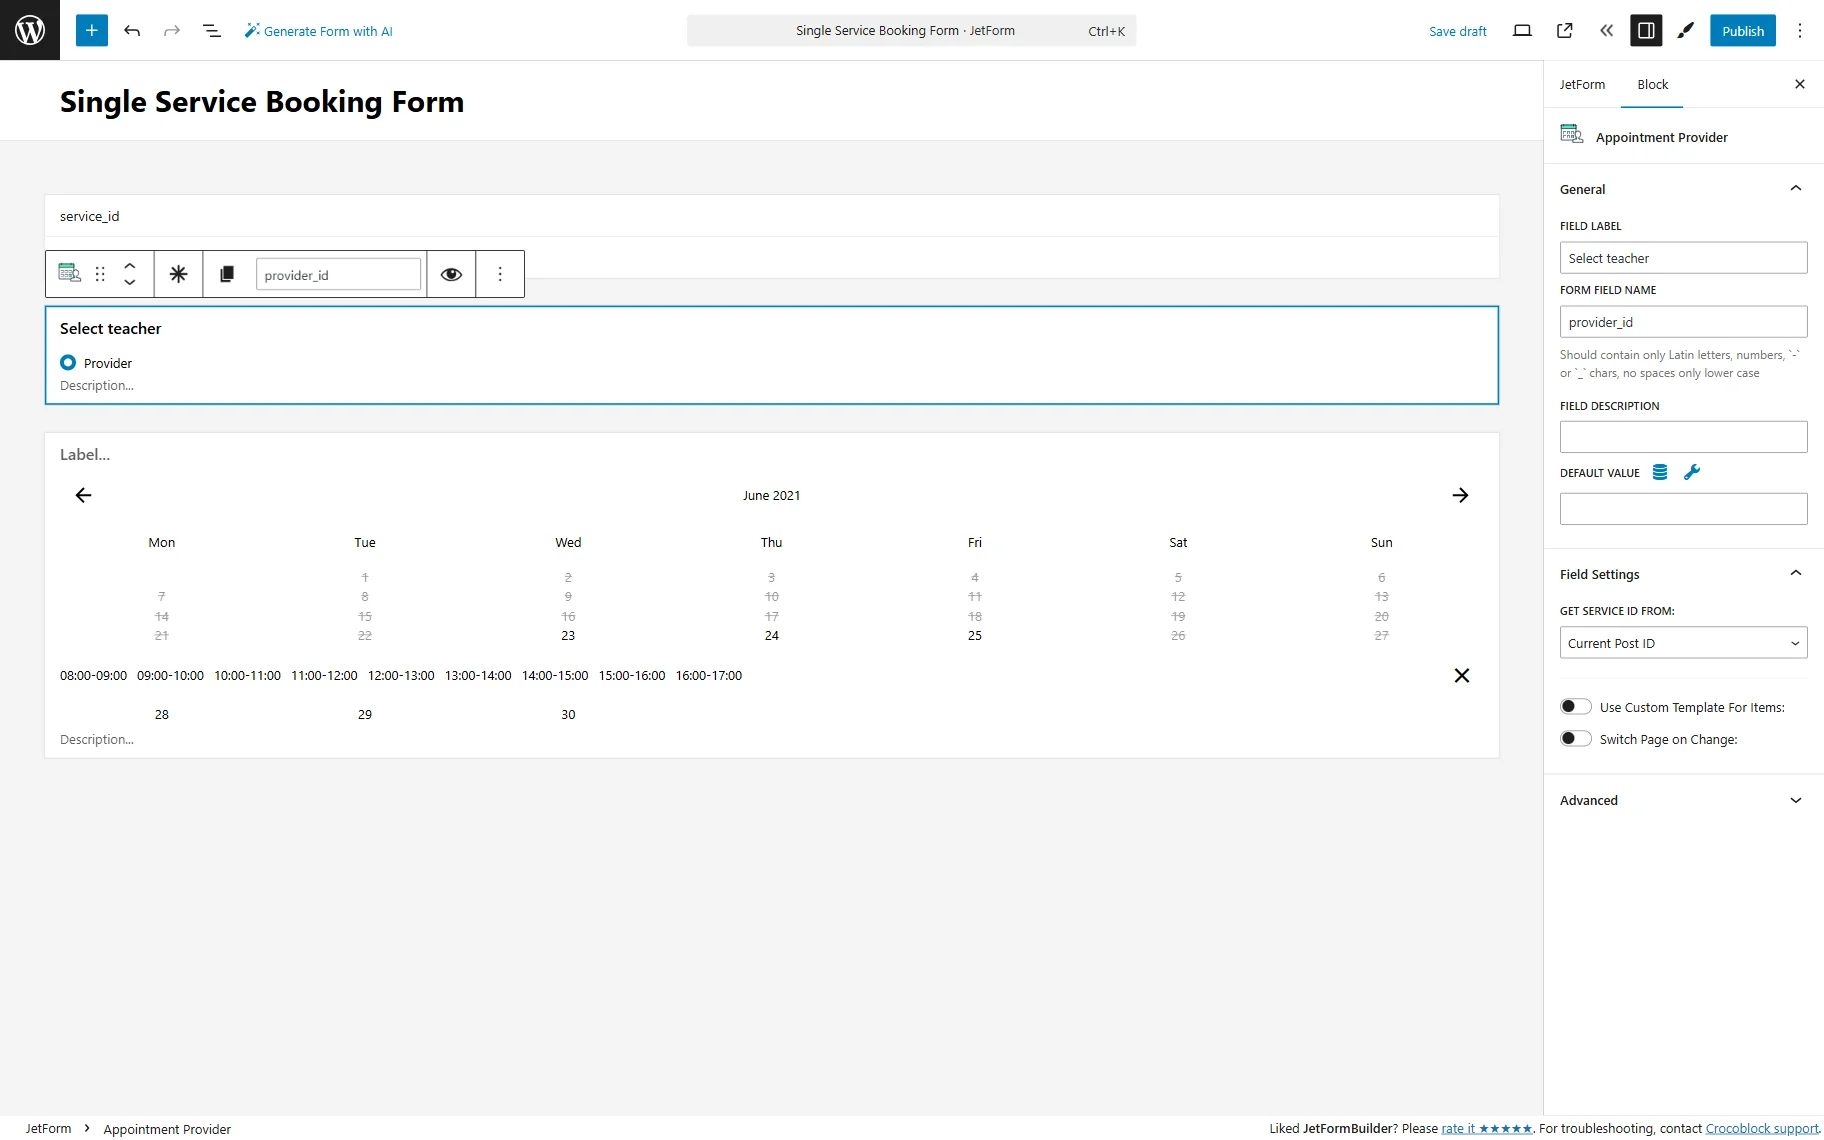
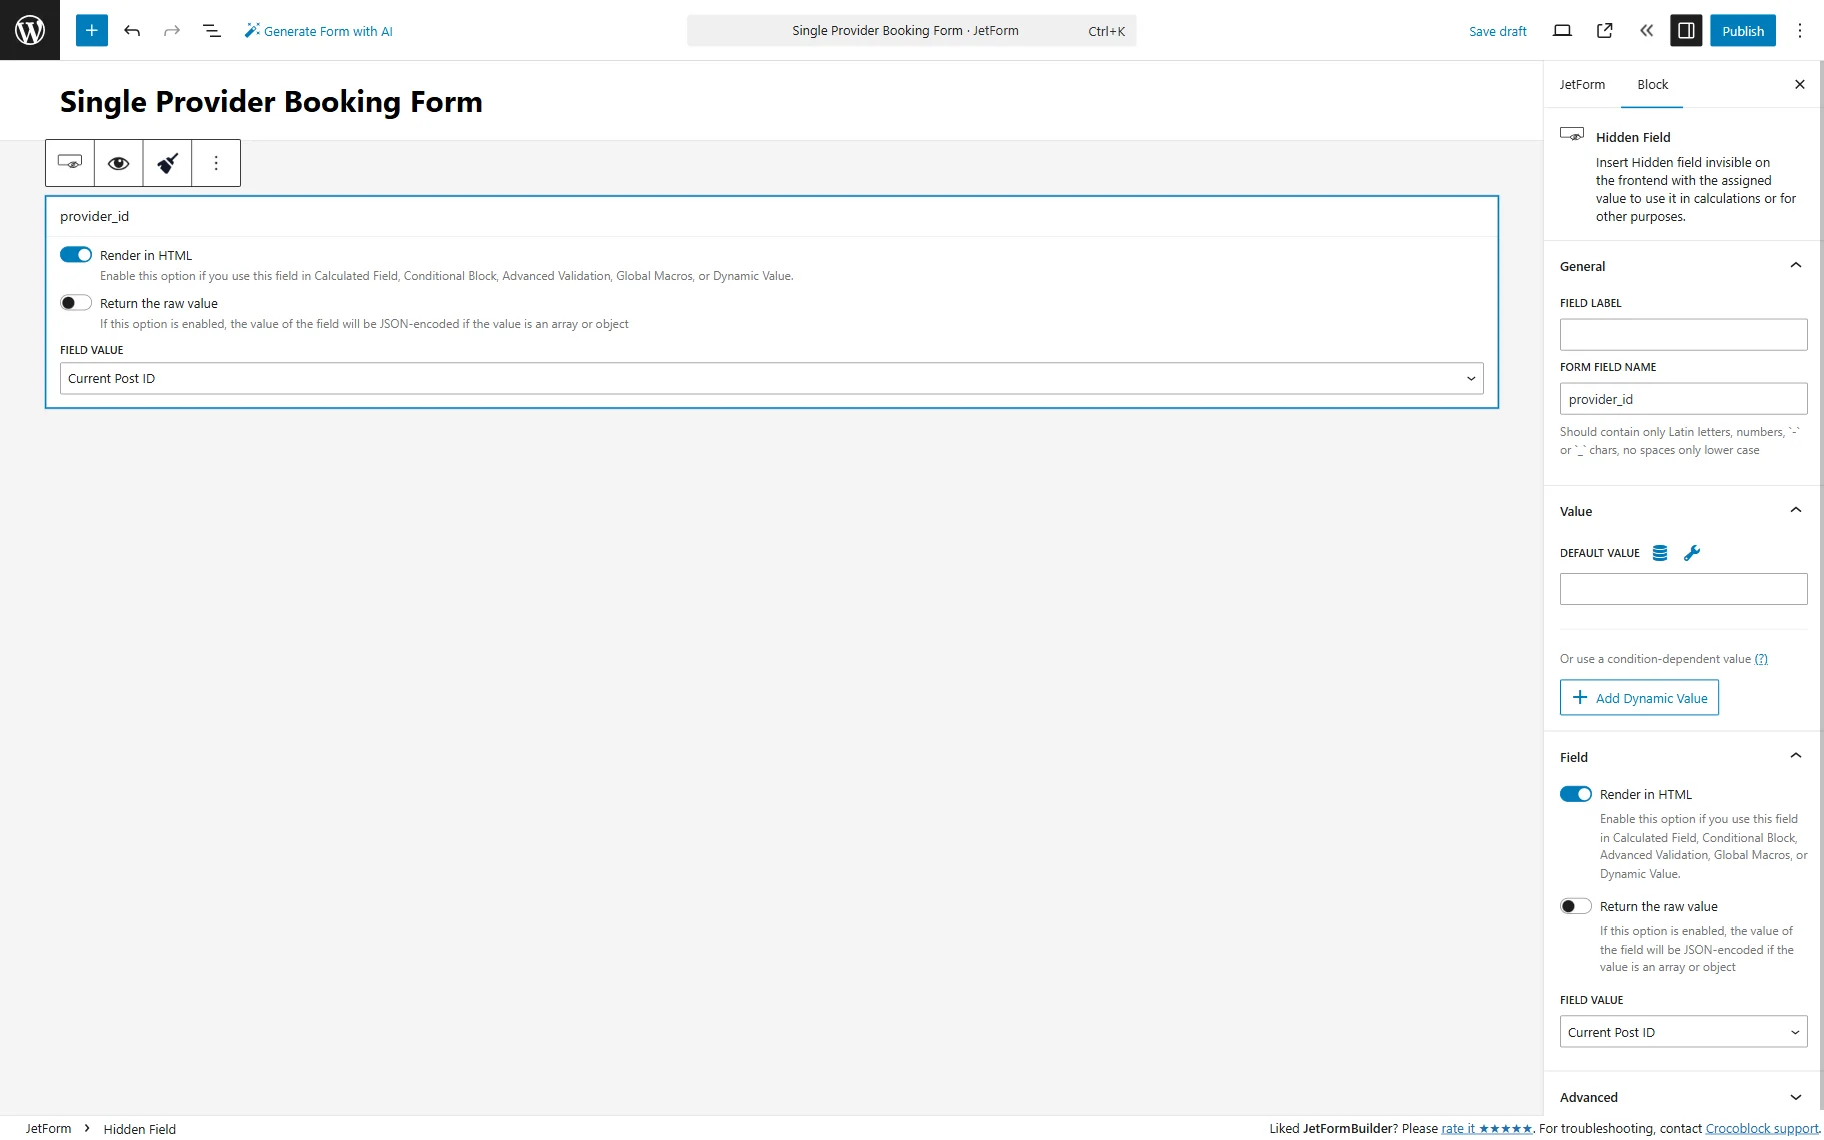
Firstly, we should add a Hidden Field with the “Current Post ID” option as a FIELD VALUE. This Hidden Field will pull the ID of the current post, which is a service. The value of this field will be used in the Appointment Provider and Appointment Date fields to pull the data of providers and available slots accordingly.

Next, we add an Appointment Provider field. In the Field Settings tab, we set the “Form Field” option in the GET SERVICE ID FROM field and the “service_id” one in the SELECT SERVICE FIELD.
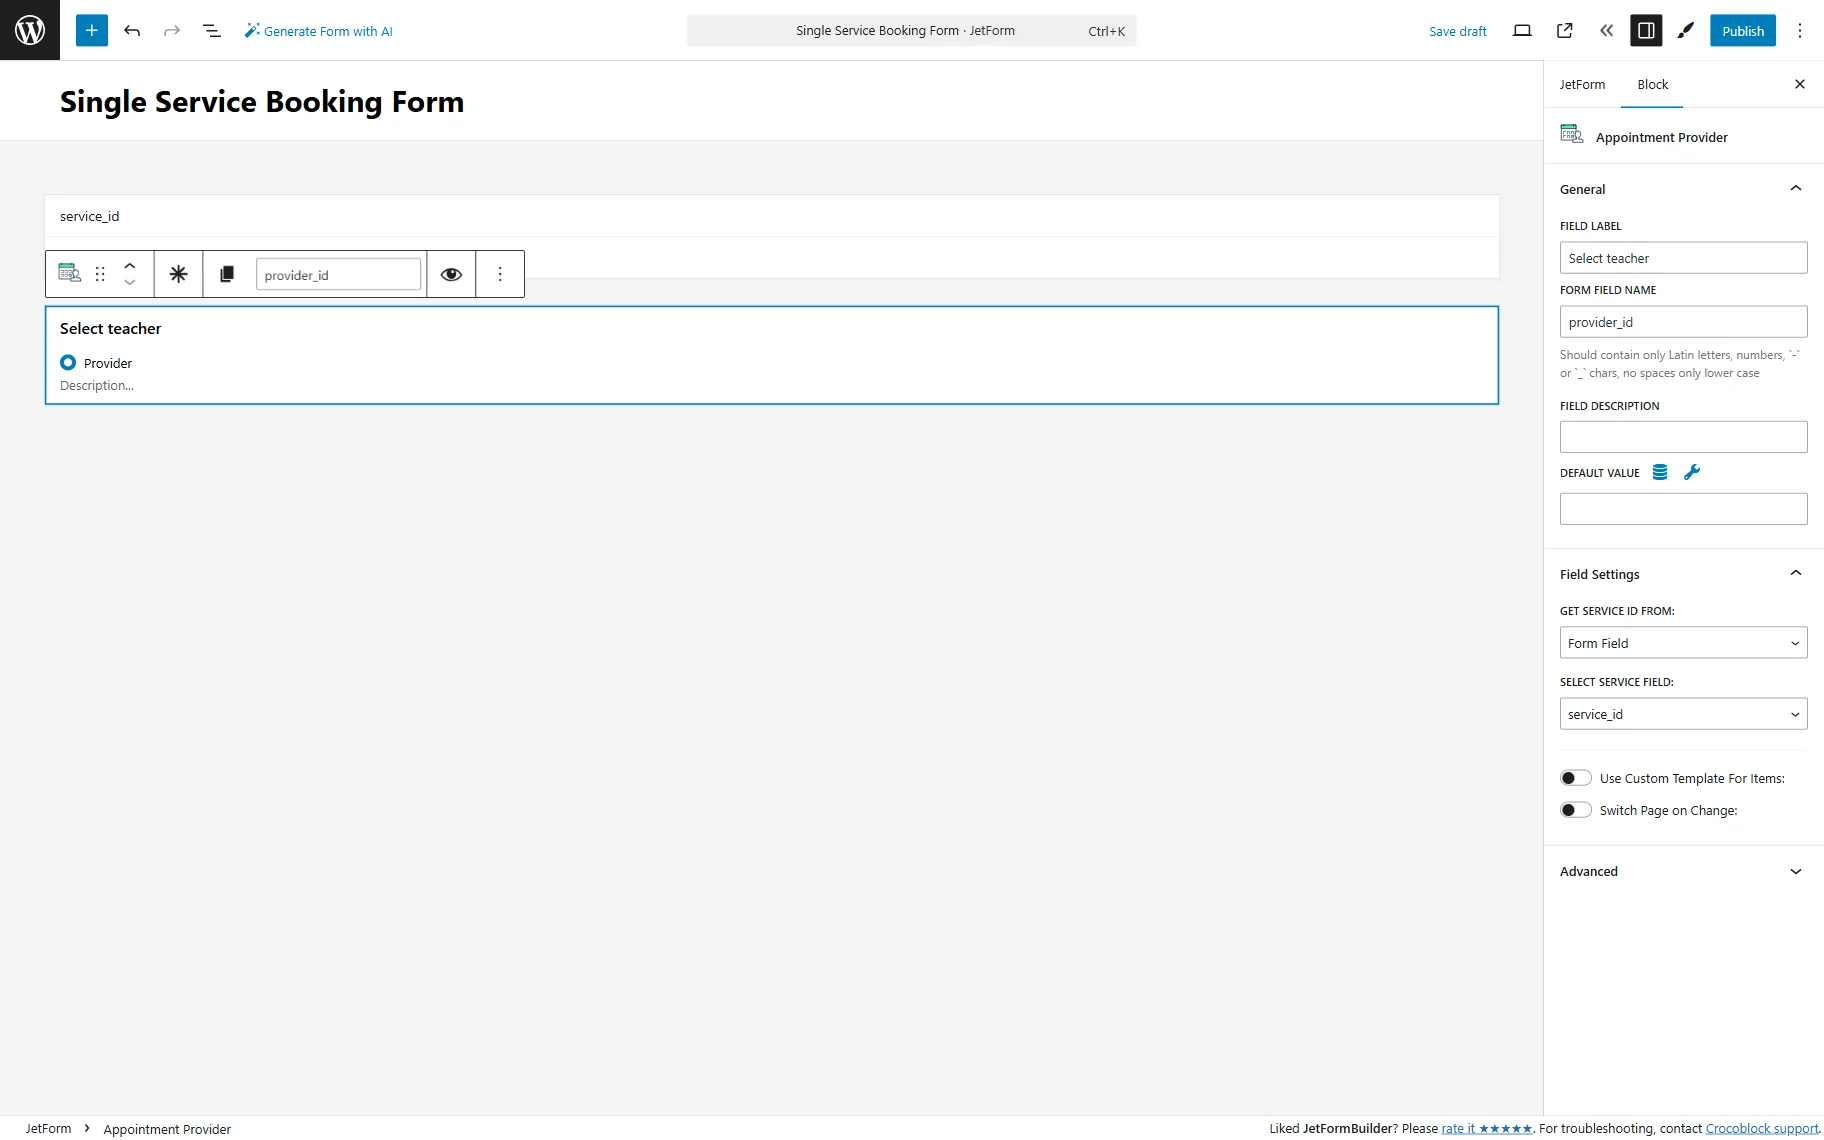
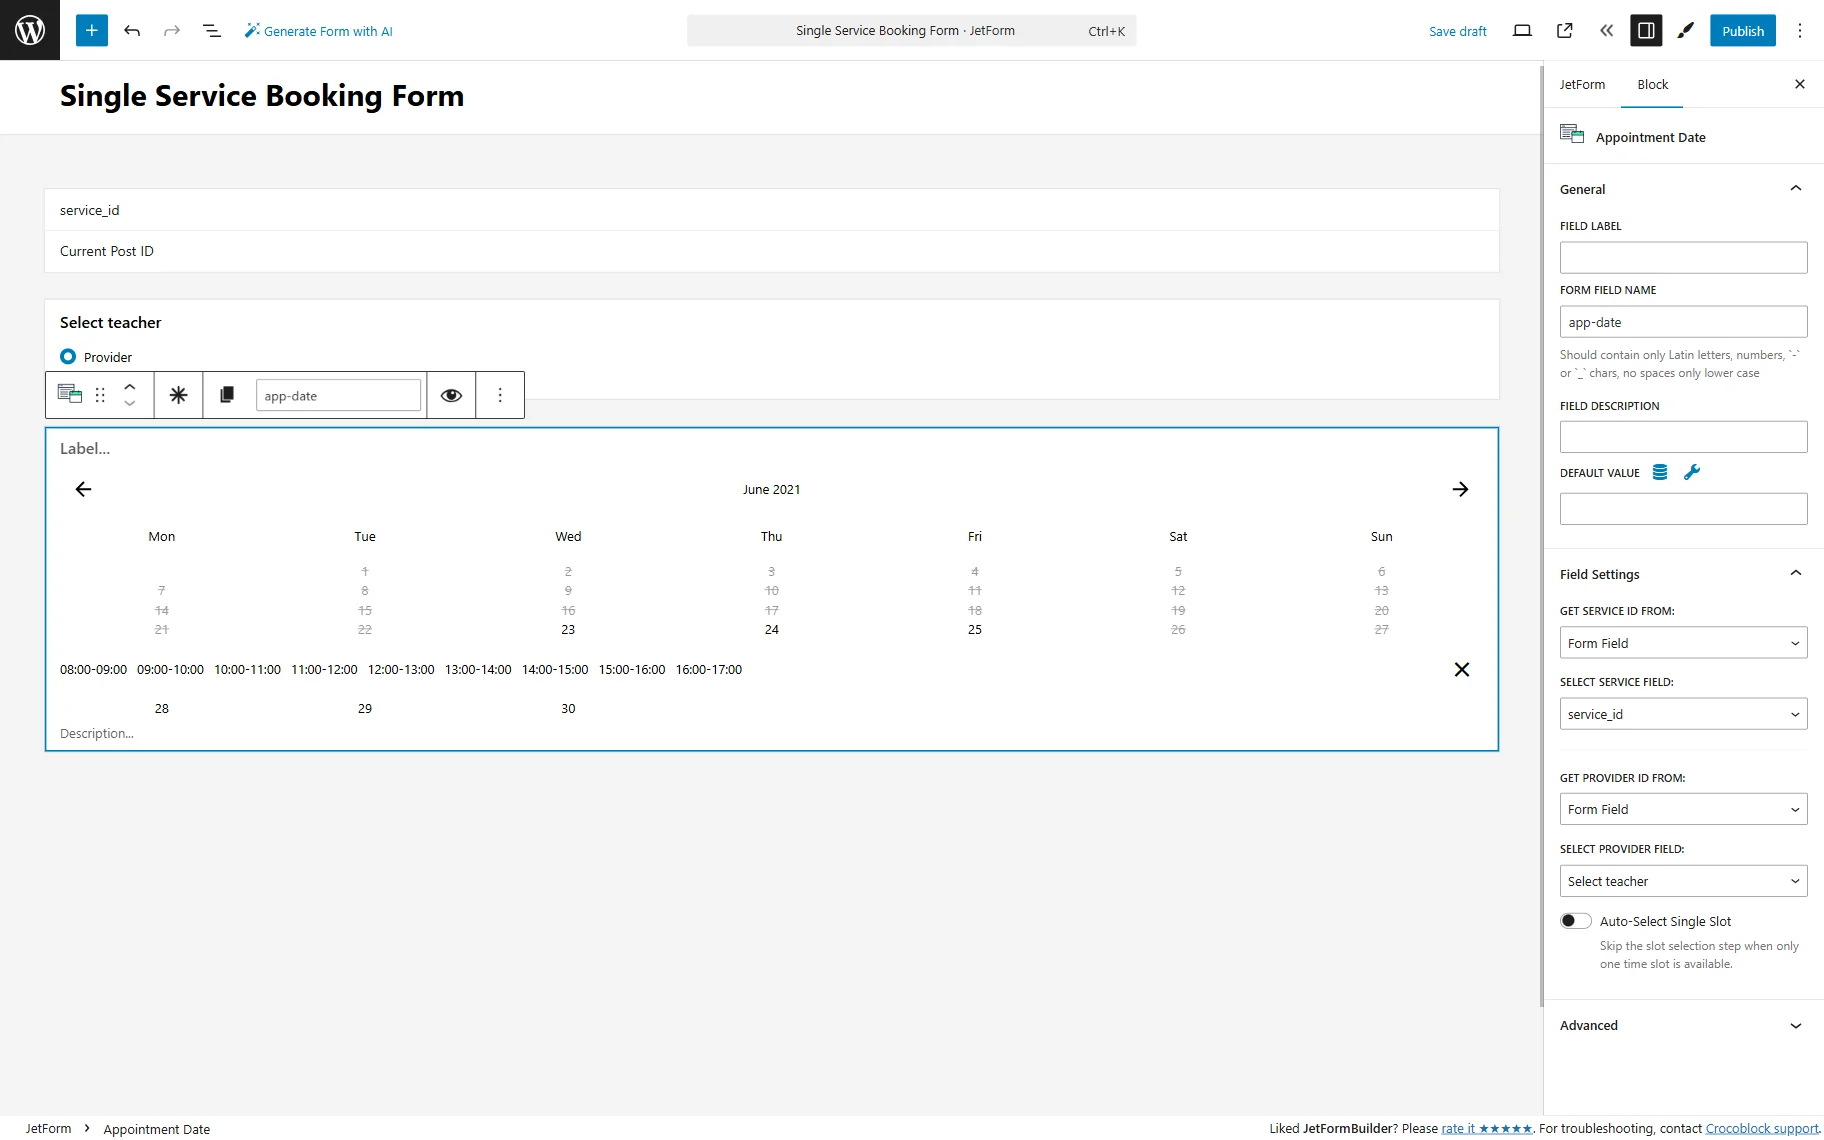
Next, we can add the Appointment Date field, which has the following settings.
In the GET SERVICE ID FROM, we pick the “Form Field.”
In the SELECT SERVICE FIELD, we also choose the “service_id” field.
In the GET PROVIDER ID FROM field, we pick the “Form Field” as well, and in the SELECT PROVIDER FIELD, we opt for the “Select teacher” field.
Next, you can activate the Auto-Select Single Slot toggle. With this feature enabled, if only one time slot is available in a day, it will be automatically added to the appointment list immediately when the day in the calendar is clicked.
Note that you could select the “Current Post ID” as a source of the service ID in the Appointment Provider and Appointment Date form fields in this Single Service Booking Form, but since we created a Hidden Field with the needed value, we kept using it as a service ID source. It may be better to add a Hidden Field to pull the “Current Post ID” value, as this field can be used in other parts of the form (in the “Send Email” action, for example).
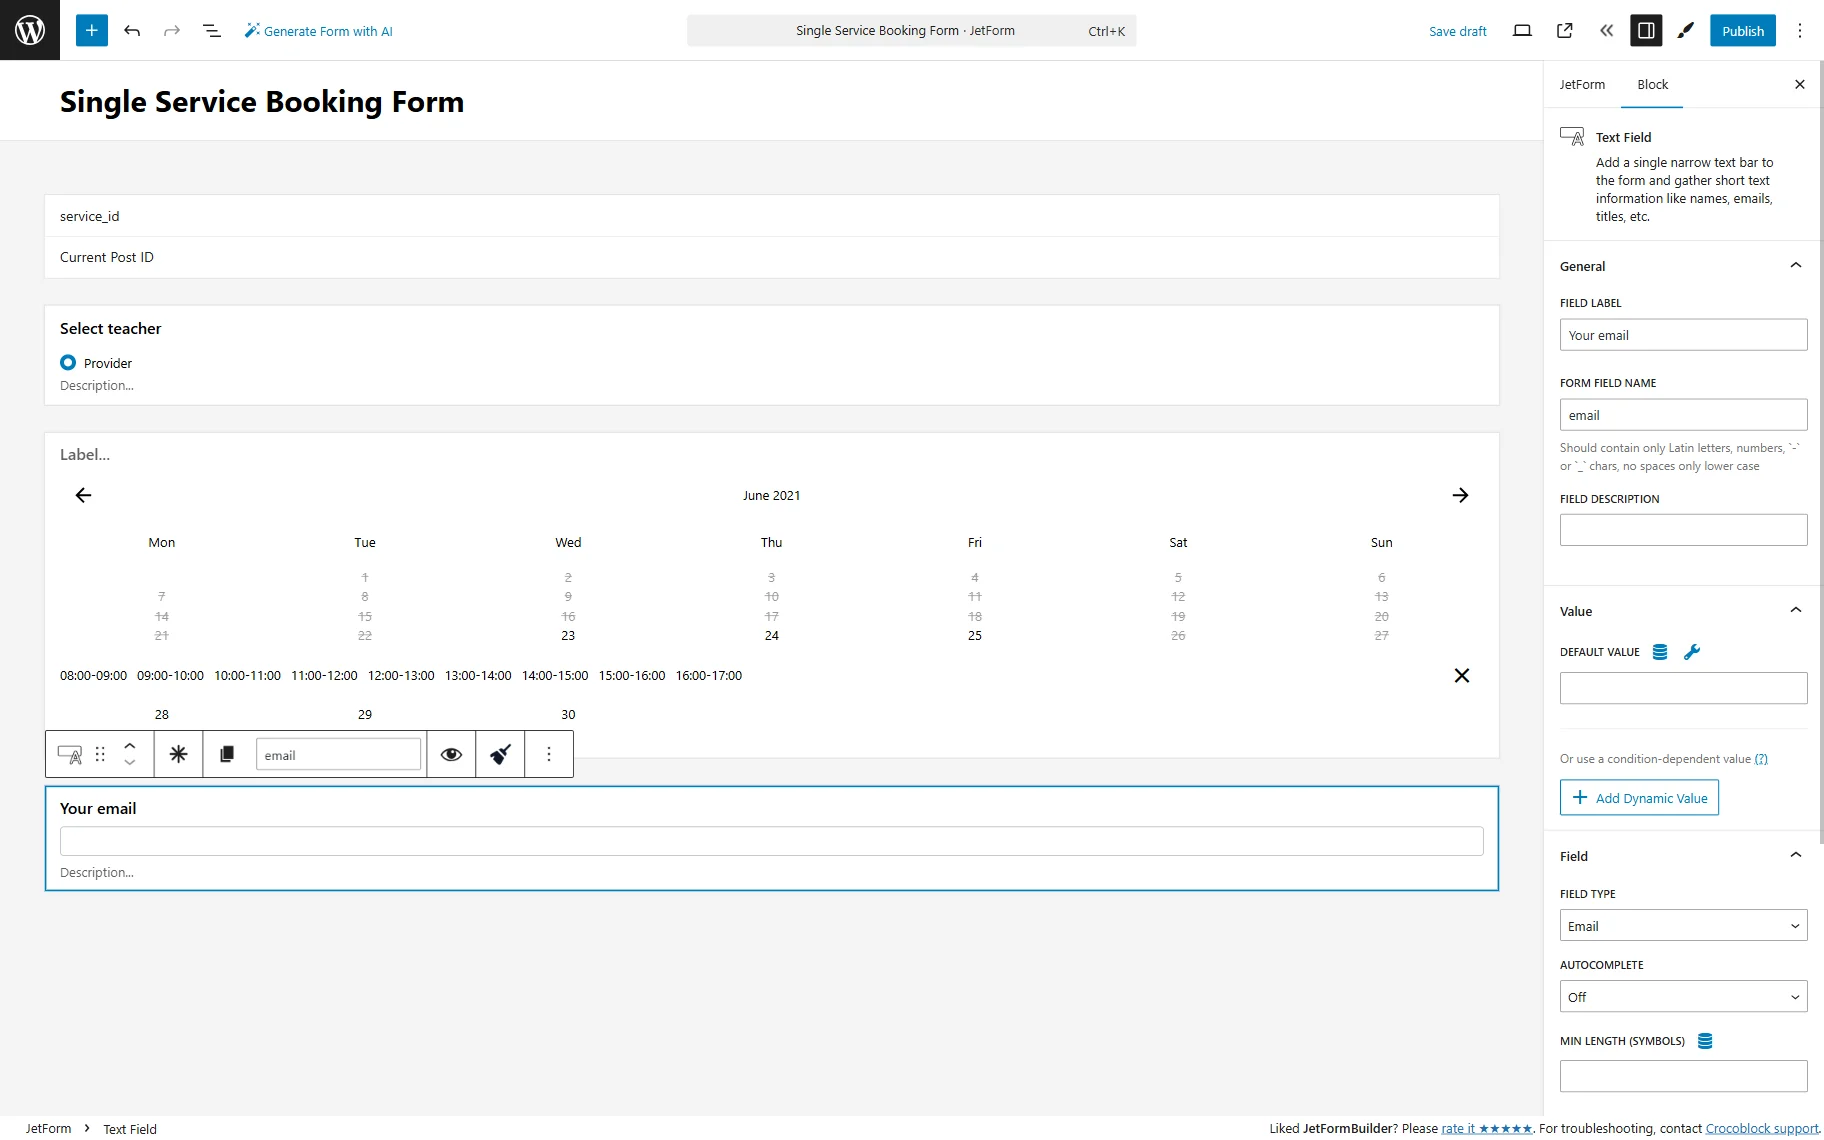
After these fields, we should also add the Text Fields, which collect the user data.
The first Text Field is set to collect the user’s email and has “Email” set as a FIELD TYPE.
Another Text Field is used to enter the name of the user.
The last field we add to the form is an Action Button field with the “Submit” text.
Lastly, configure the “Insert Appointment” post-submit action by proceeding to the JetForm settings and opening the Post Submit Actions section. By clicking on the “New Action” button, you can trigger a pop-up with the actions list.
Find an “Insert Appointment” action and click on it to open its settings.
Map the form fields to the fields of the JetAppointment plugin so the values are filled in the plugin fields accordingly.

Update the action and press the “Publish” button to save the changes.
Single Provider Booking Form
As for the Single Provider Booking Page, it should be placed on the Provider Single Page. This form is similar to the Single Service Booking Form.
Build a new form by proceeding to WordPress Dashboard > JetFormBuilder > Add New.
Add a Hidden Field with a “Current Post ID” FIELD VALUE selected.
This field will pull the ID of the current provider post. The value of this field will be used in the Appointment Date field to pull the data of available slots accordingly.
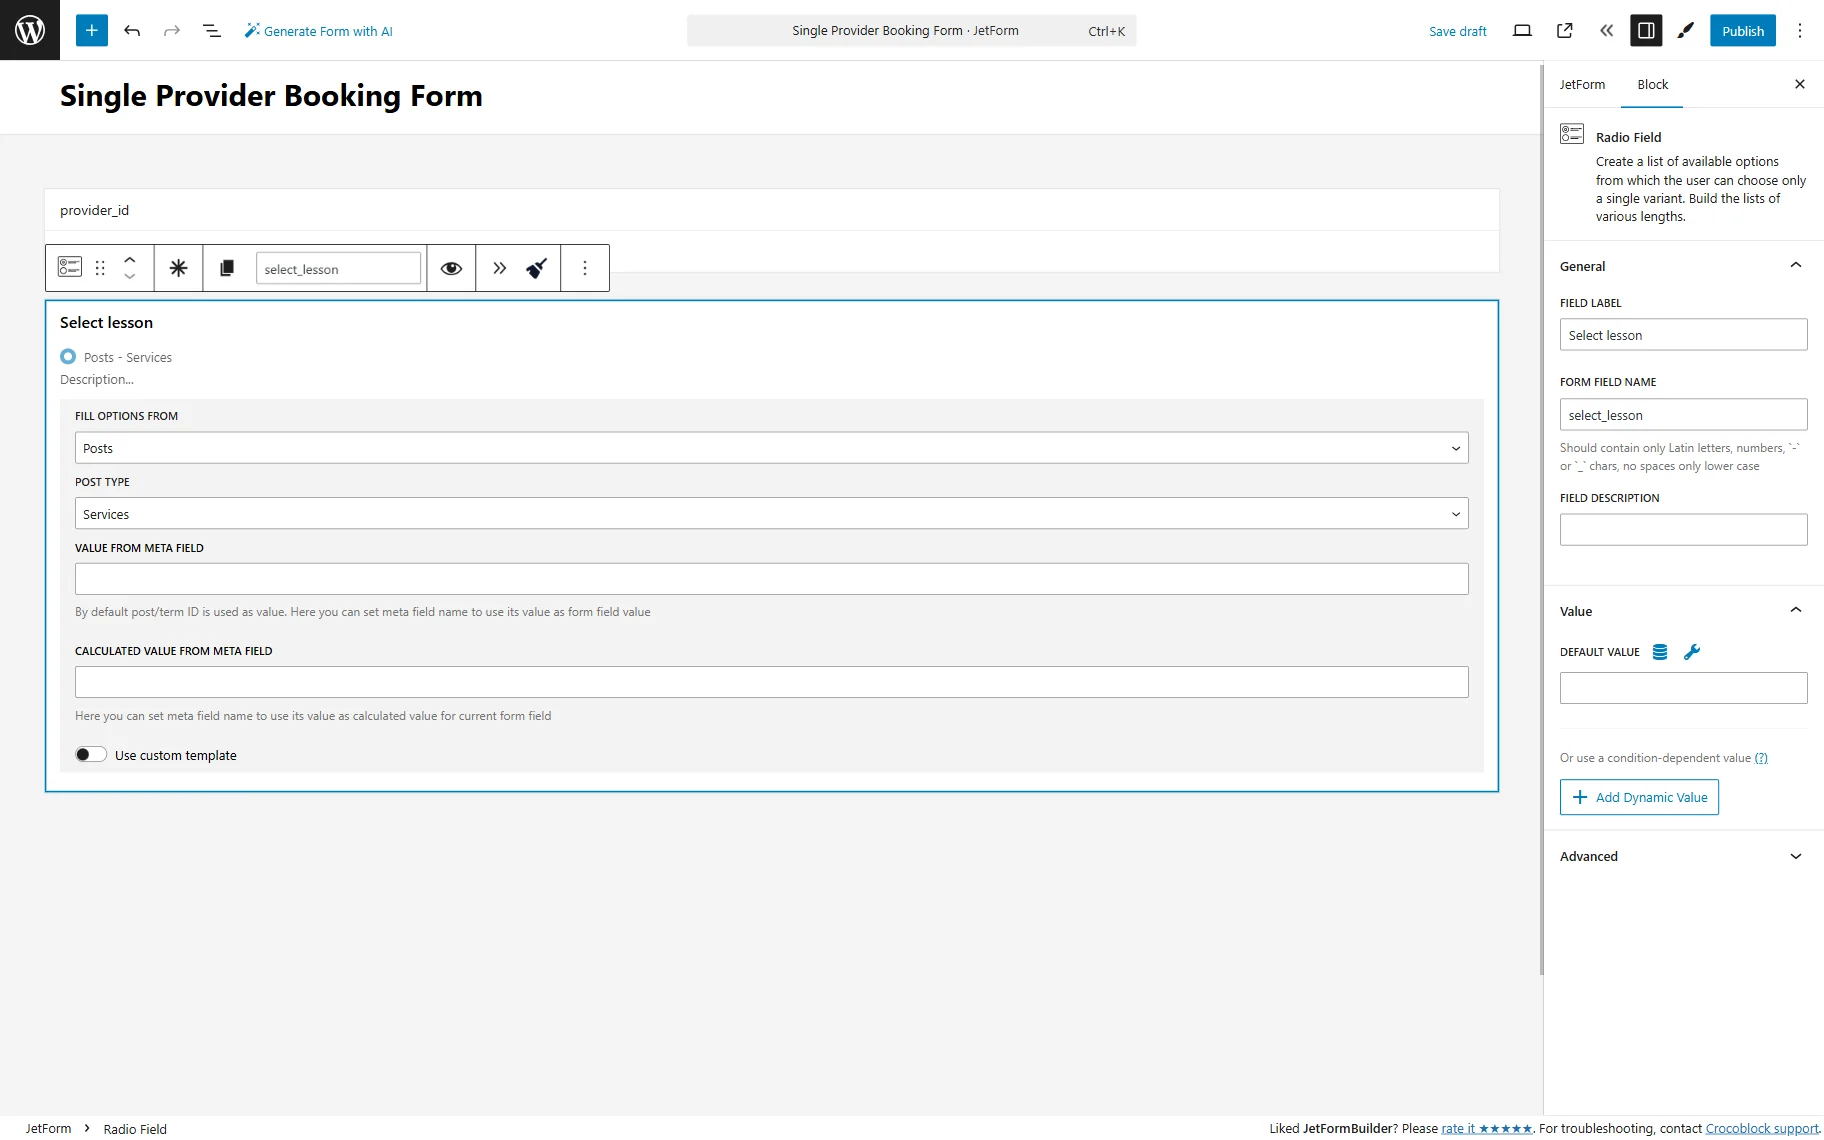
Then, add a Radio Field or Select Field to the form.
In the FILL OPTIONS FROM field, we pick the “Posts” option and select the POST TYPE with the services. In our case, it is the “Services” post type.
Next, we can add the Appointment Date field, which has the following settings.
In the GET SERVICE ID FROM field, we pick the “Form Field.”
In the SELECT SERVICE FIELD, we also choose the “Select lesson” field.
In the GET PROVIDER ID FROM field, we pick the “Form Field” as well, and in the SELECT PROVIDER FIELD, we opt for the “provider_id” field.
You can also activate the Auto-Select Single Slot toggle, so if only one time slot is available in a day, it will be automatically added to the appointment list immediately when the day in the calendar is clicked.

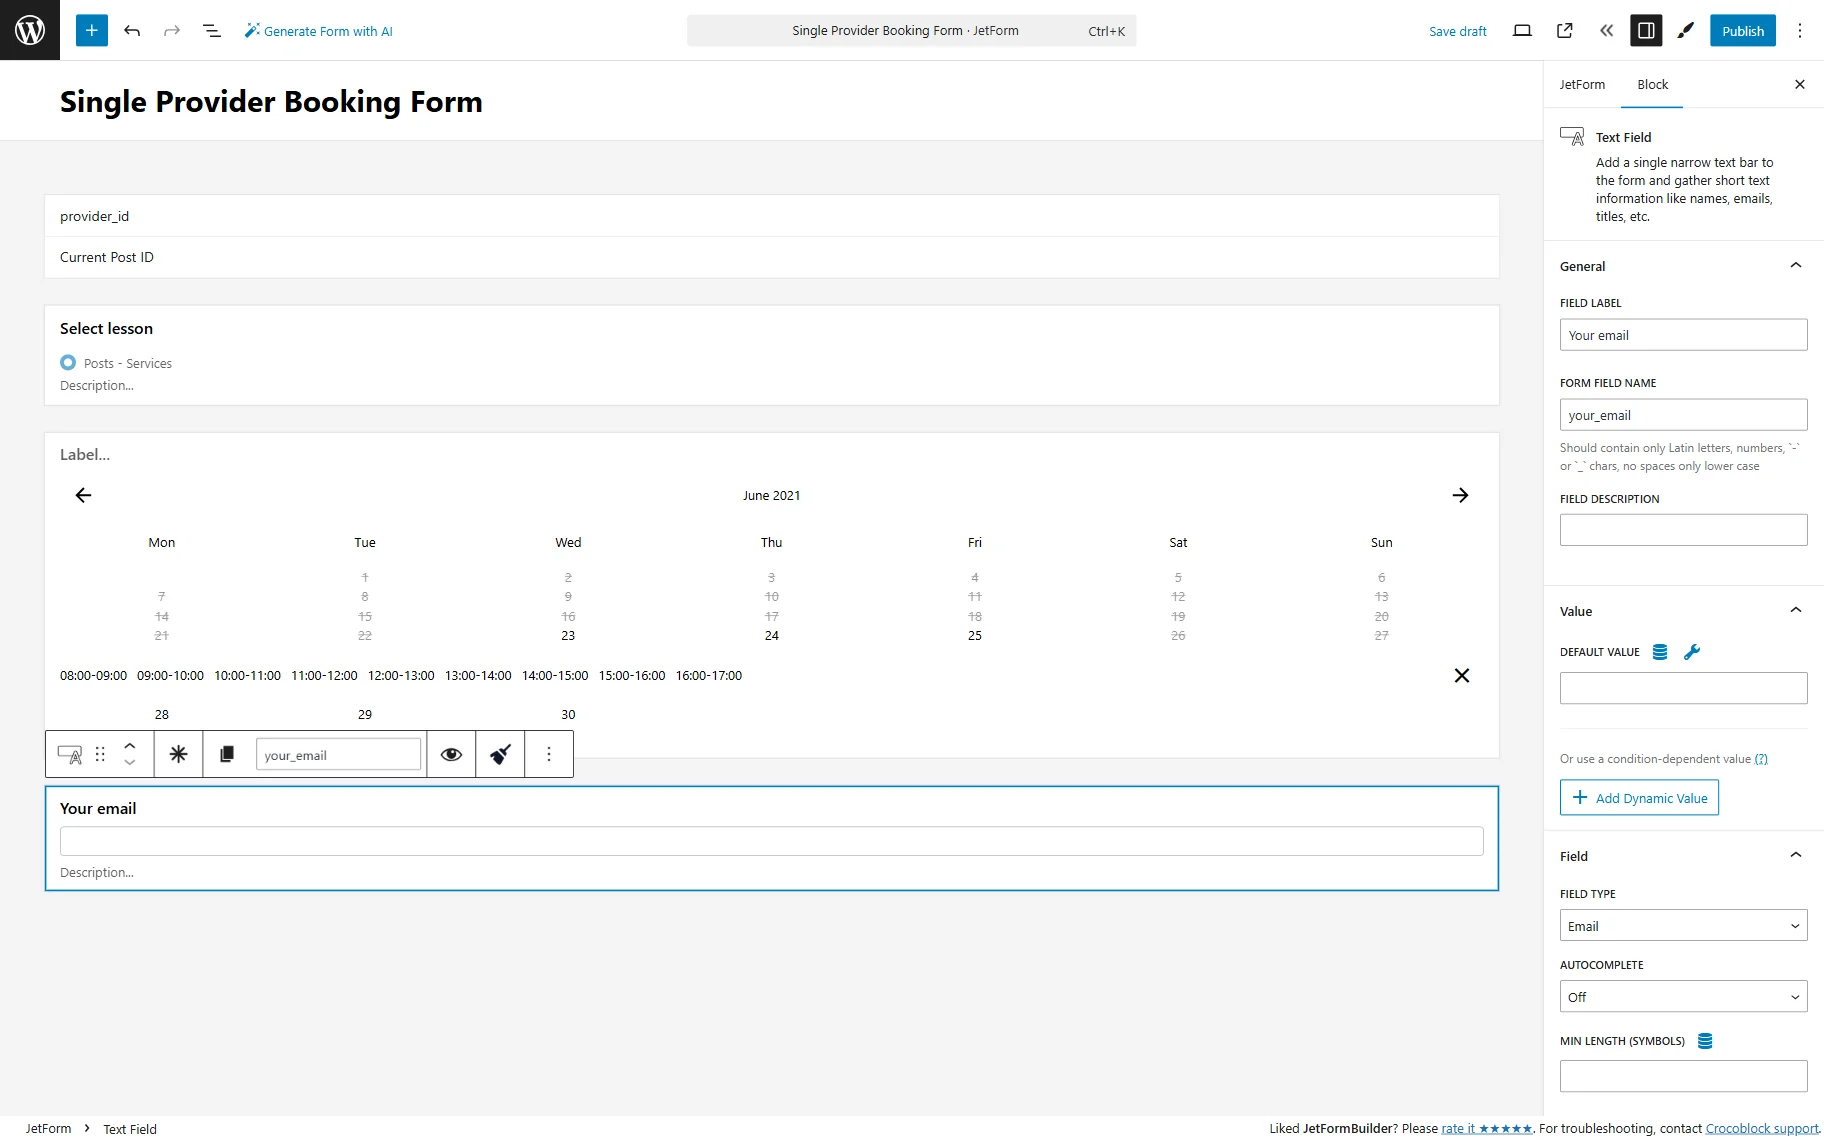
After these fields, we should also add the Text Fields, which collect the user data.
The first Text Field is set to collect the user’s email and has “Email” FIELD TYPE set.
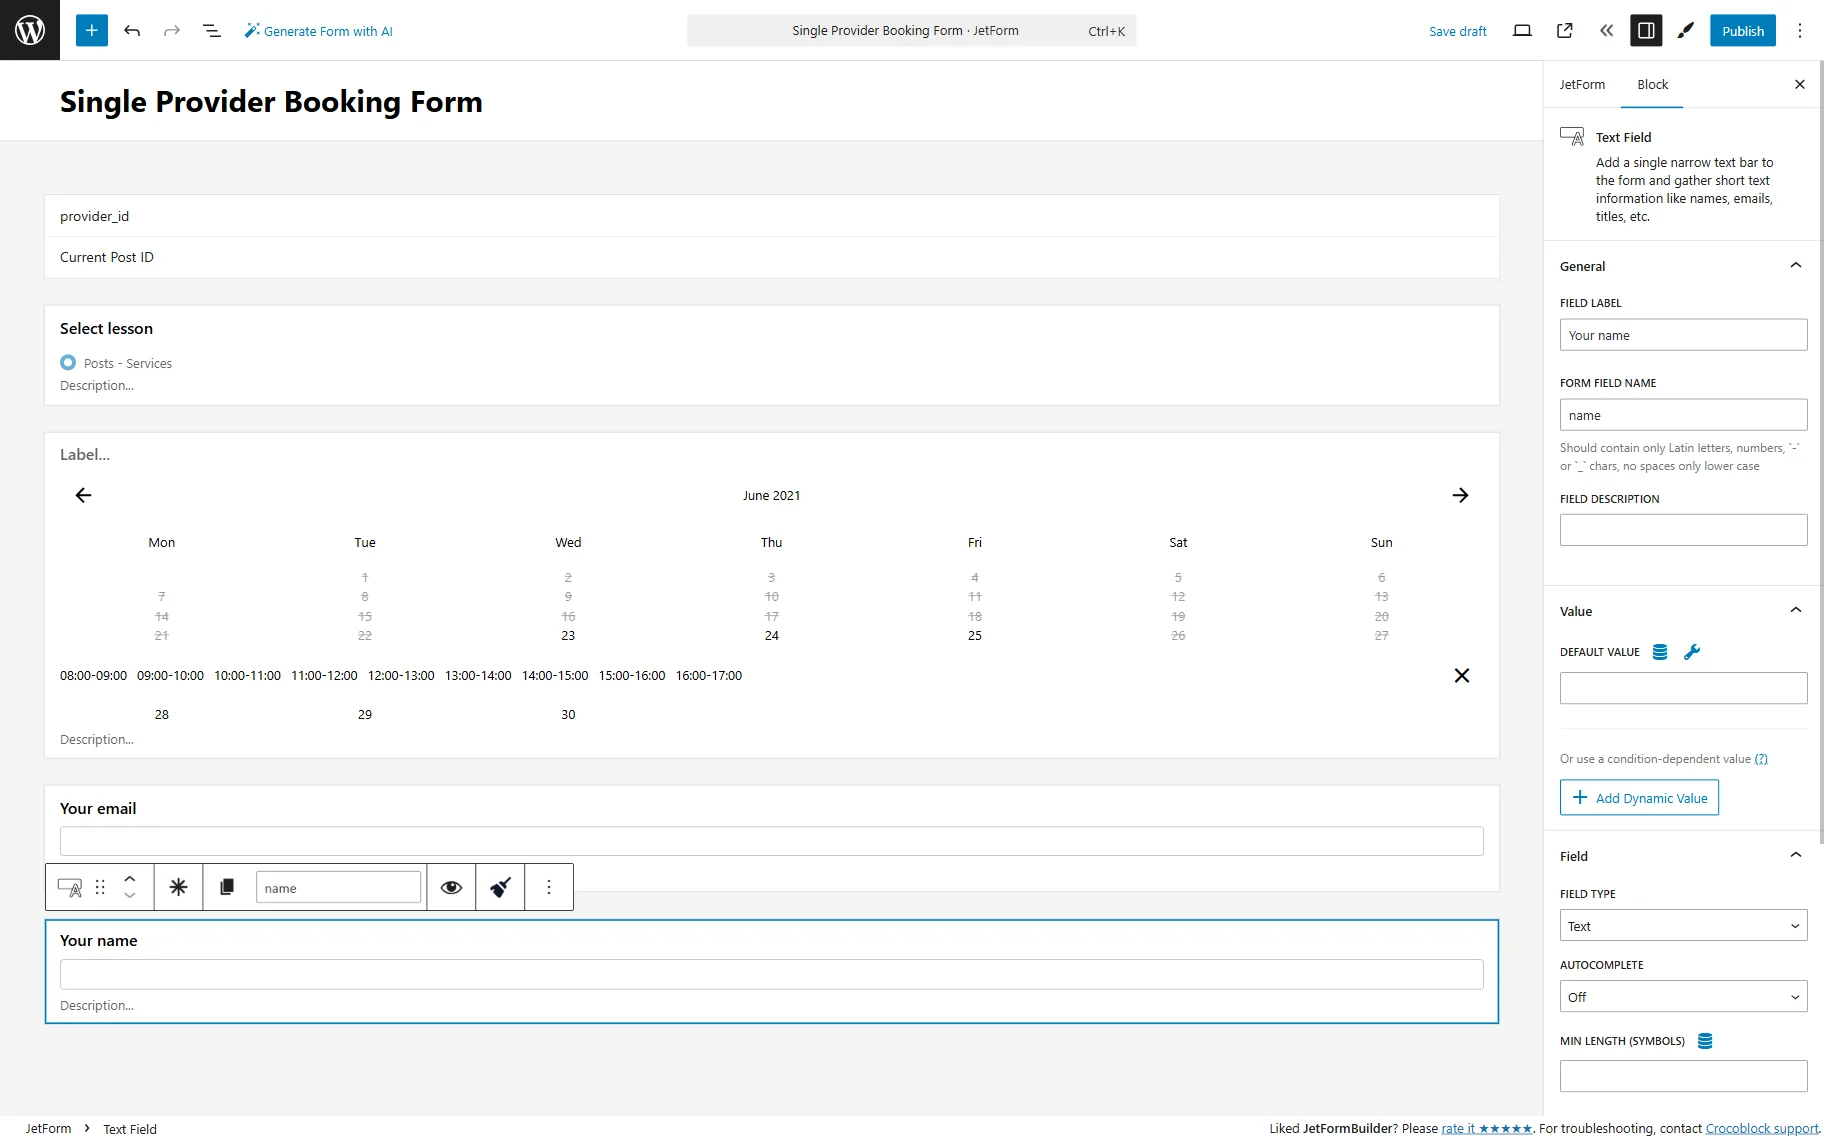
Another Text Field is used to enter the name of the user.
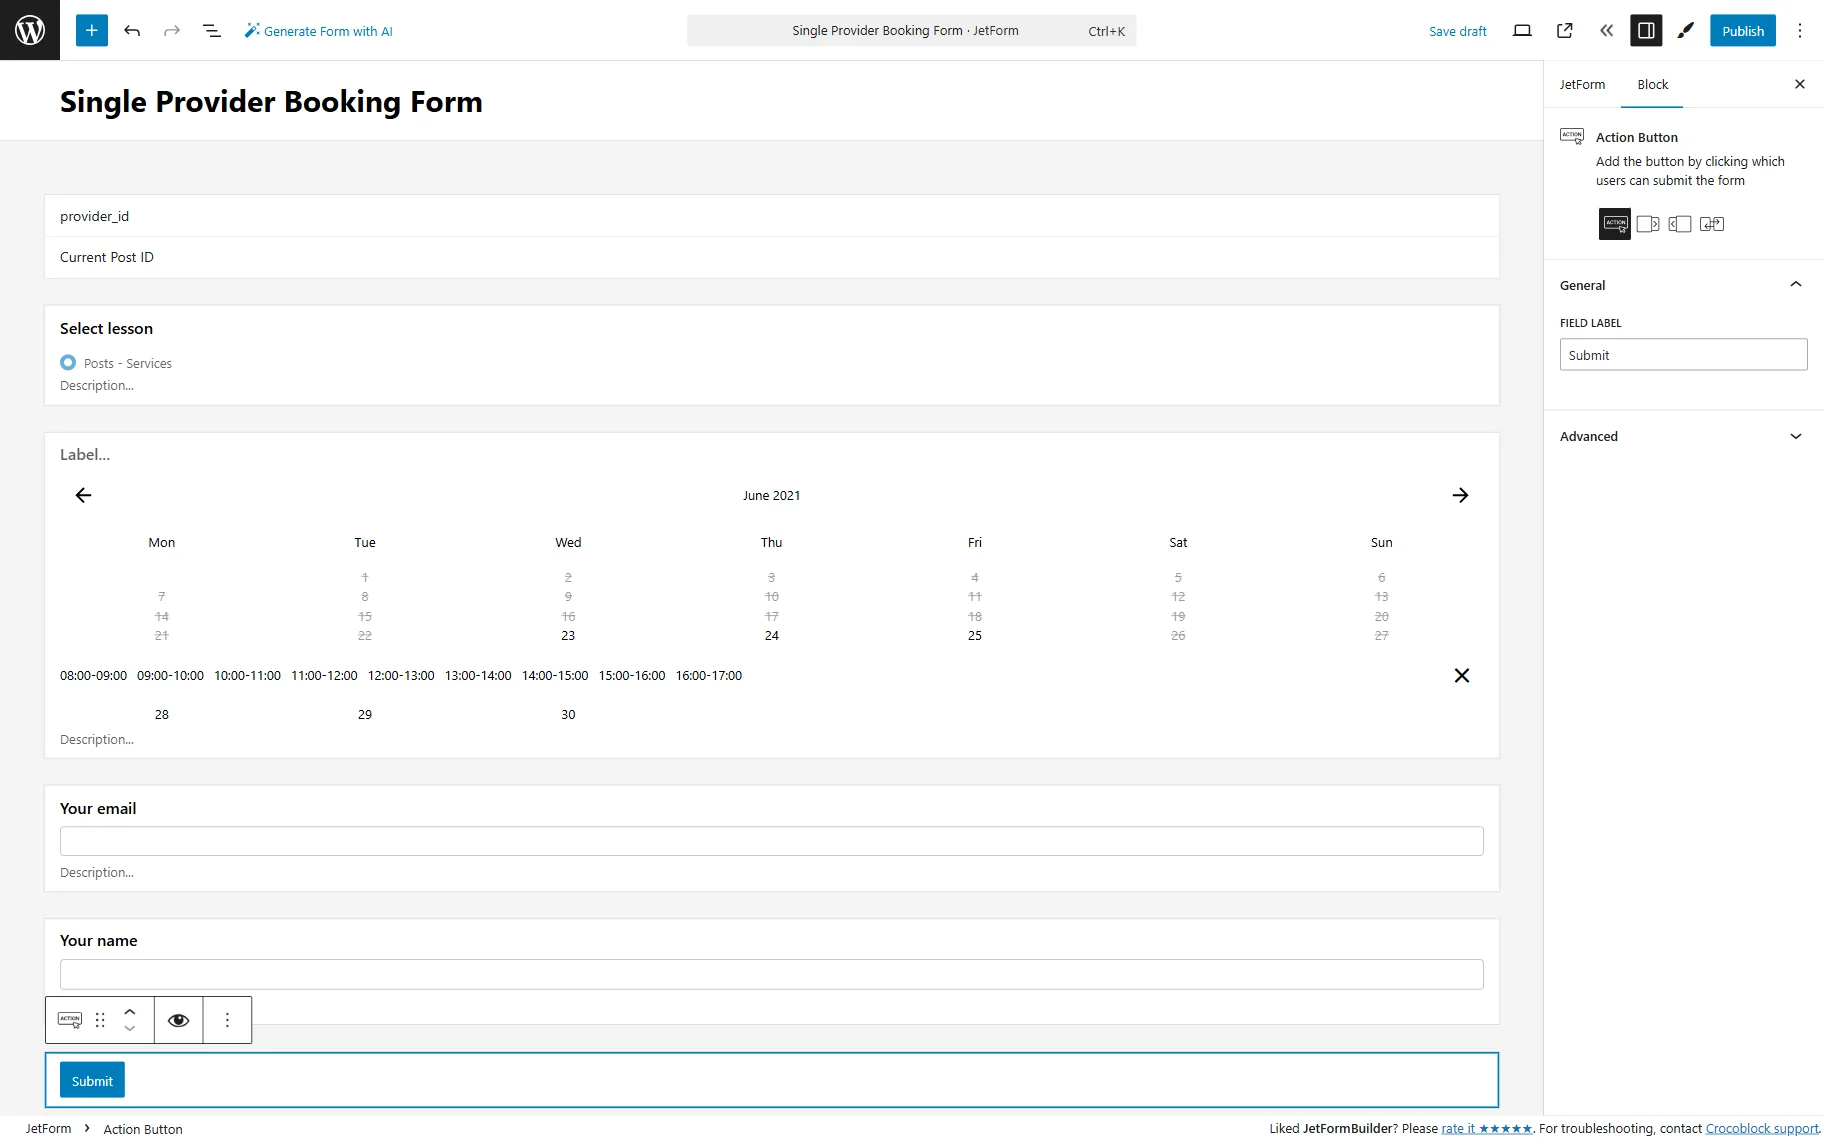
To finish the form, we add an Action Button field with the “Submit” text.
Lastly, we should configure the “Insert Appointment” post-submit action by proceeding to the JetForm settings and opening the Post Submit Actions section. By clicking on the “New Action” button, a pop-up with the action settings will be triggered.
Map the form fields to the fields of the JetAppointment plugin so the values are filled in the plugin fields accordingly. Update the action.
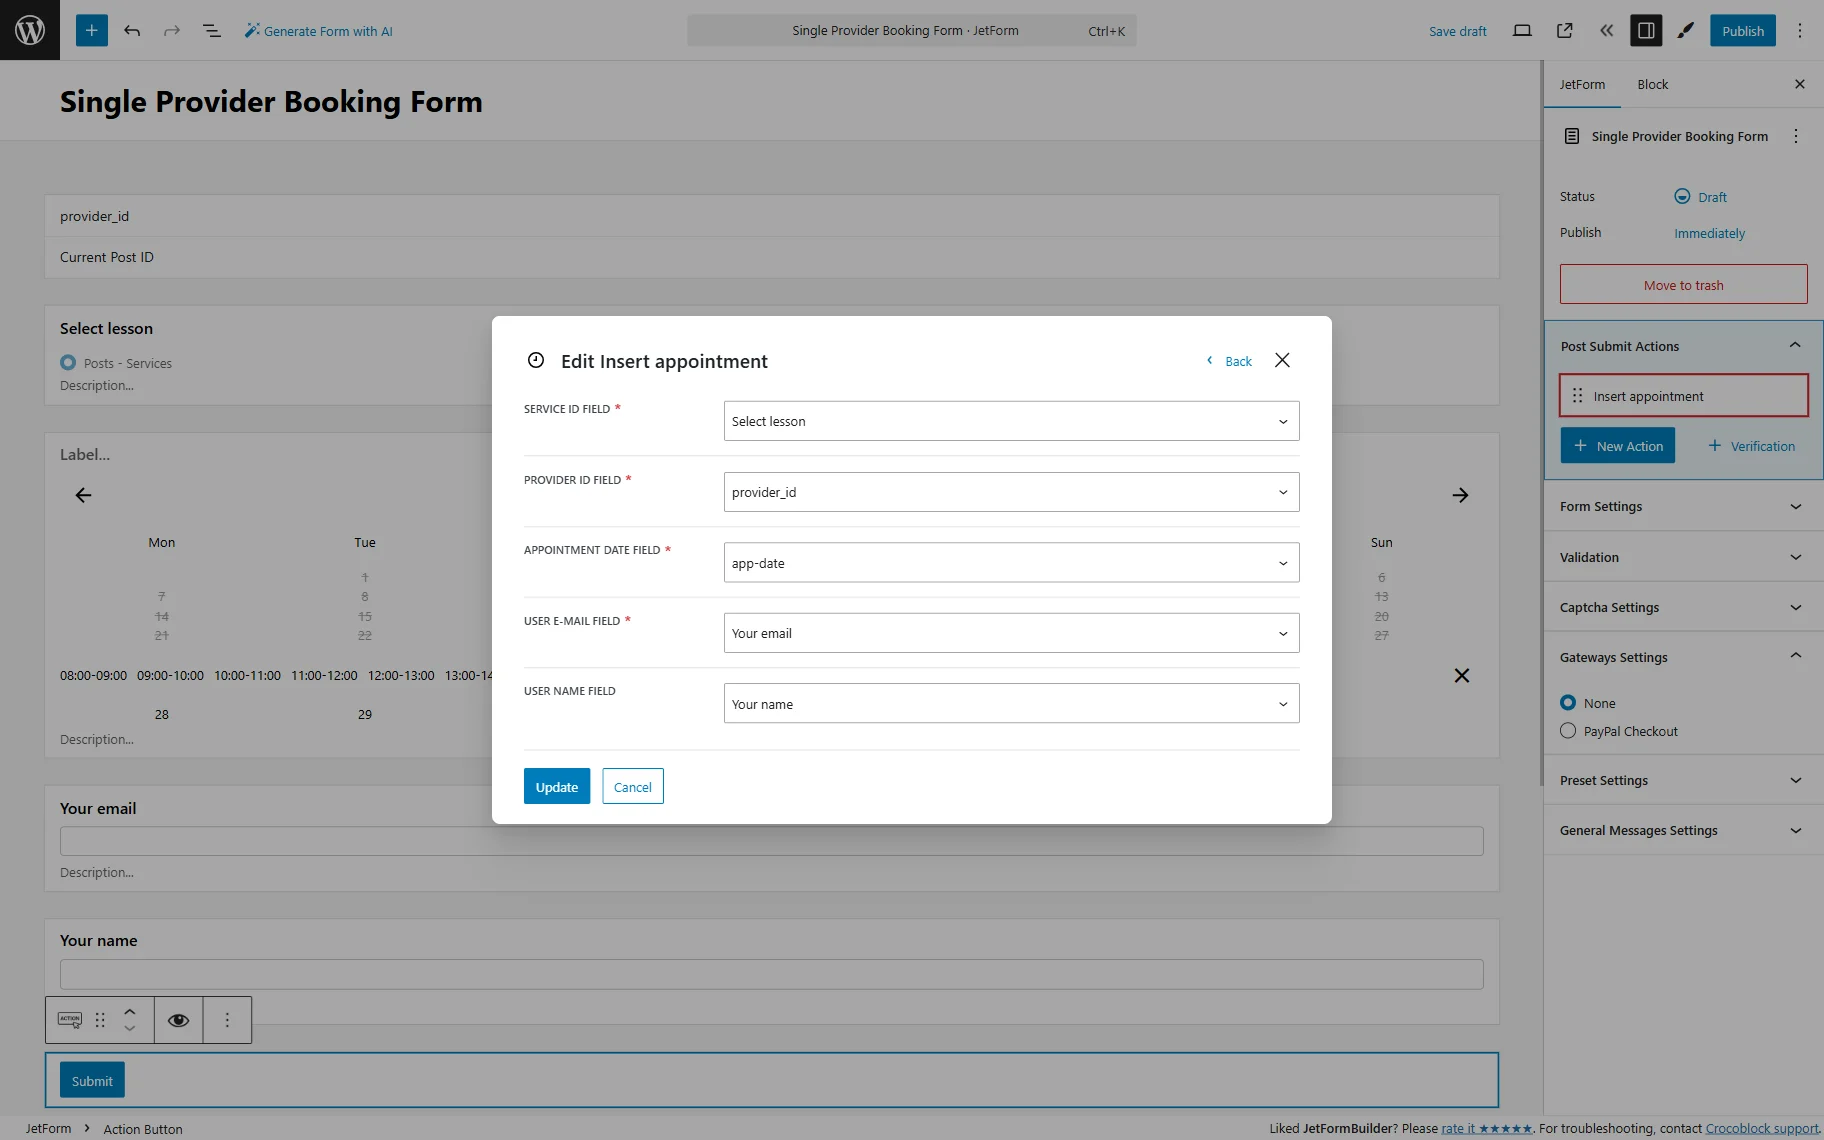
Don’t forget to “Publish” the form.
That’s all about setting appointment booking forms with JetAppointment and JetFormBuilder plugins on your WordPress website.