
Macros Guide for JetAppointment
Learn how JetAppointment macros work and how to use them in emails and forms to display dynamic appointment details in WordPress.
These macros display appointment information in the “Send Email” post-submit action for JetFormBuilder forms or in the JetEngine Forms module (legacy).
Macros List
%service_title% — returns the appointment service name.
%provider_title% — returns the appointment provider name.
%post-field|post_title_by_id% — returns the post title. Replace ‘post-field’ with the name of your form field.
%service_link% — displays the link to the appointment service.
%provider_link% — displays the link to the appointment provider.
%appointment_start% — displays the appointment start date and time. You can set the format for the date, for example, %appointment_start|format_date(F j, Y g:i)%. Learn more from the Customizing the Time and Date Format article.
%appointment_end% — displays the appointment end date and time. Also accepts date format.
%user_local_time% — shows the appointment time in the user’s local timezone (if timezone management is enabled).
%user_local_date% — shows the appointment date in the user’s local timezone (if timezone management is enabled).
%user_timezone% — outputs the user’s timezone (for example, ‘America/Vancouver’) if timezone management is enabled.
%appointment_price% — displays the individual price of the booked appointment.
%appointmens_list%
…
%appointmens_list_end% — displays a list of booked appointments if the Multi Booking is enabled in the WordPress Dashboard > Crocoblock > JetAppointments > Working Hours tab. You can place text and macros between these tags to format the output, for example:
%appointmens_list%

Appointment Start: %appointment_start|format_date(F j, Y g:i)%

Appointment  End: %appointment_end|format_date(g:i)%

%appointmens_list_end%
%appointment_meta|_cancel_url% — outputs the appointment cancellation link.
How to Use
Check the guide on How to Create an Appointment Form.
Proceed to JetForm > Post Submit Actions, press the “+ New Action” button, and select the “Send Email” action from the pop-up.
Set the action options according to your needs and select the CONTENT TYPE (“HTML,” for example).
In the CONTENT textarea, adjust the main body of the email, using the JetAppointment and form field name macros, for instance:
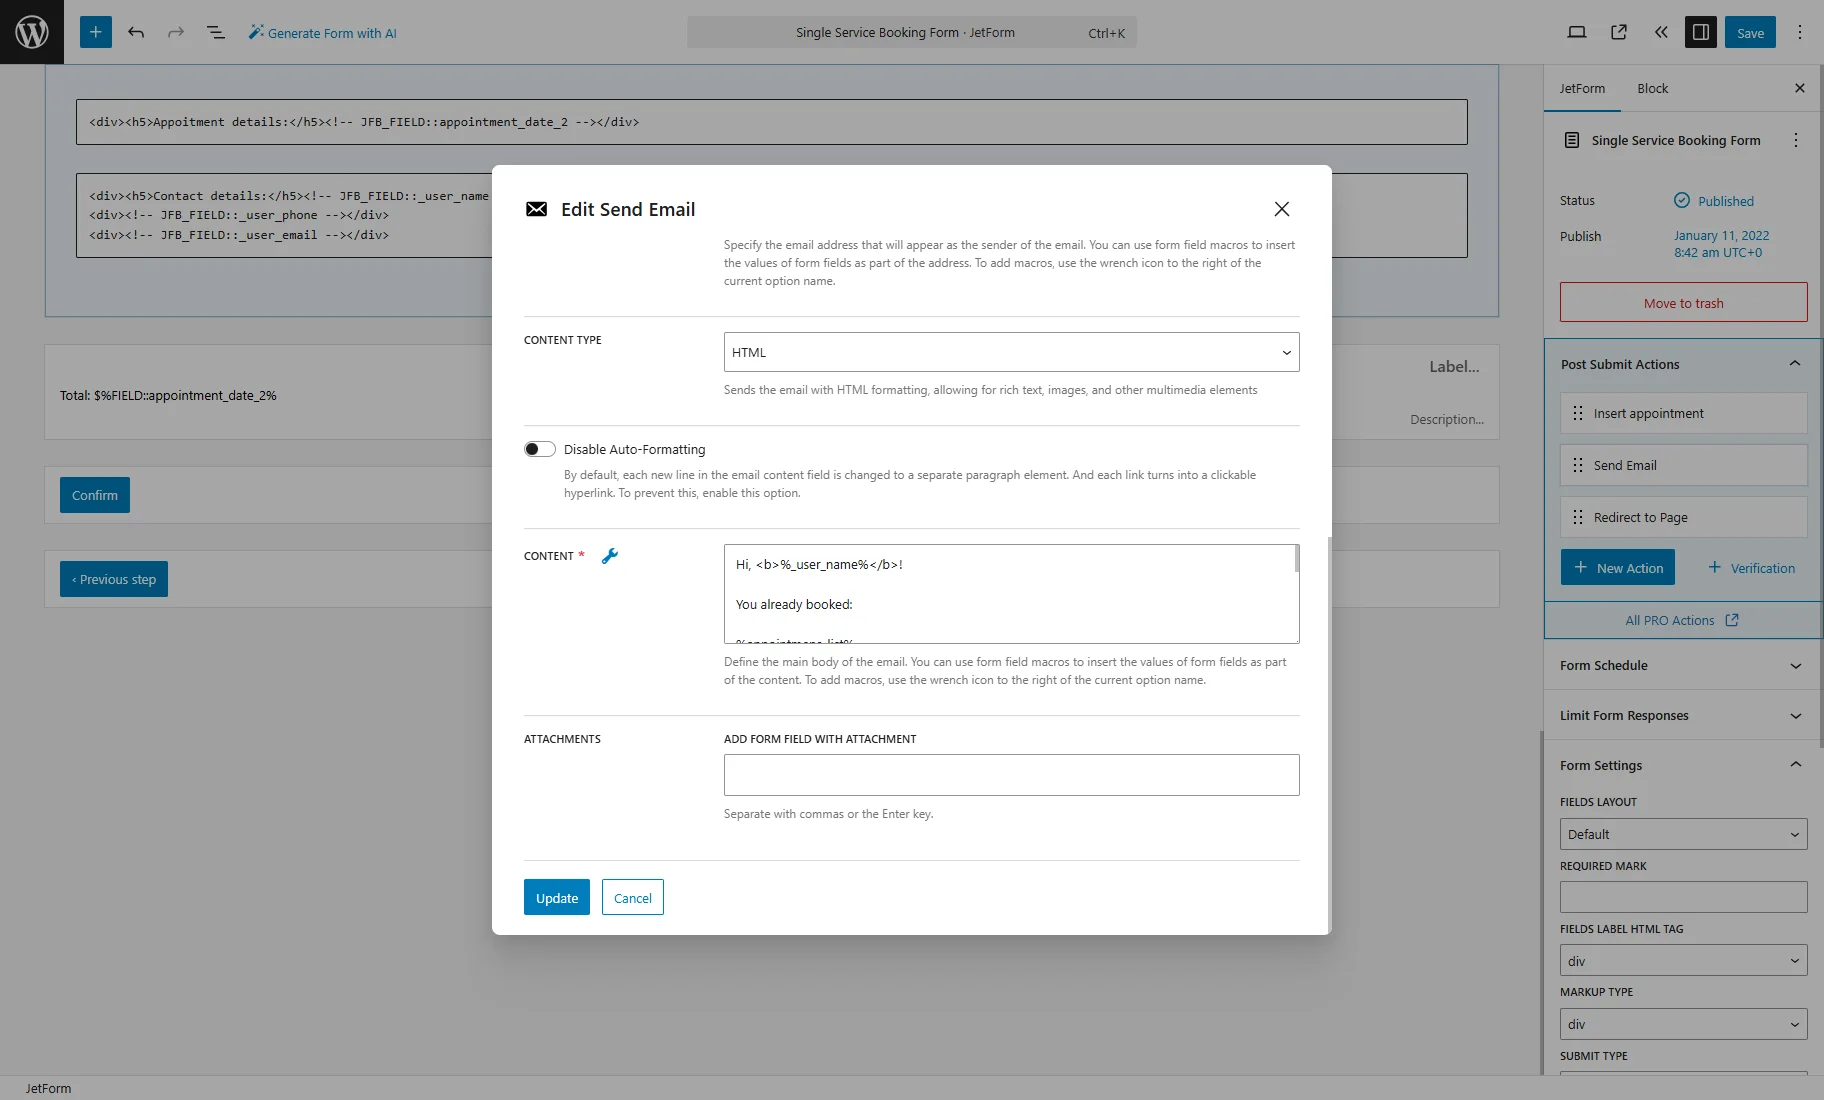
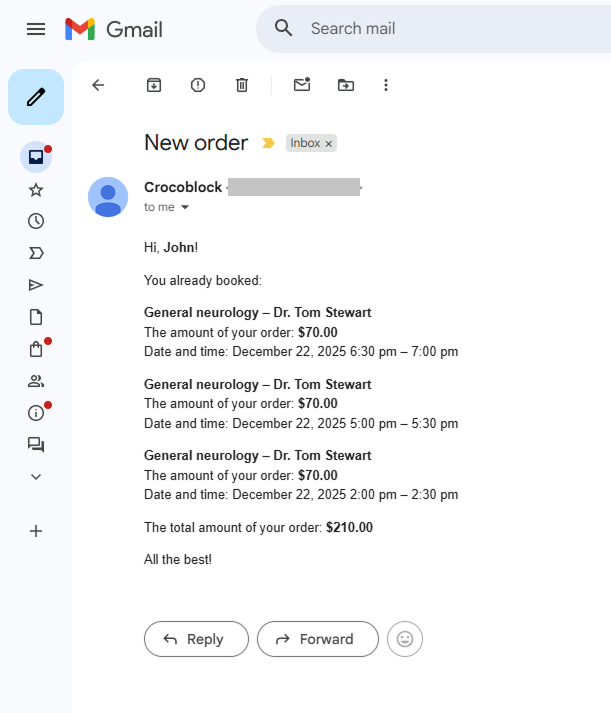
Hi, <b>%_user_name%</b>!


You already booked:


%appointmens_list%


<b>%service_title%</b> – <b>%provider_title%</b>
The amount of your order: <b>$%appointment_price%.00</b>
Date and time: %appointment_start|format_date(F j, Y g:i a)% – %appointment_end|format_date(g:i a)%


%appointmens_list_end%


The total amount of your order: <b>$%_total_1%</b>


All the best!
Where:
- %_user_name% — the form field name, inserts the name of the user who submitted the form;
- %appointmens_list% and %appointmens_list_end% — wrap the content that should repeat for each booked appointment;
- %service_title% — displays the booked service name;
- %provider_title% — displays the assigned provider;
- %appointment_price% — shows the price for a single appointment;
- %appointment_start% / %appointment_end% — display the appointment date and time. The format_date() modifier controls how the date is shown;
- %_total_1% — the form field name, outputs the total order amount calculated by the form.
Additionally, you can use line breaks or <br> tags to control spacing and HTML tags (like <b>, <i>) for styling.
On the front end, we select several appointments, submit the form, and obtain an email.
That’s all. Now you know how JetAppointment macros work and how to use them in emails and forms to display dynamic appointment details in WordPress. Additionally, you can check the general Macros Guide for JetEngine and other Crocoblock plugins.