How to Add Bookings to Google Calendar and Gmail
Learn how to connect Google Calendar, Gmail, and the JetBooking plugin using the Make platform. This connection will automatically transfer bookings made on the WordPress website to your Google Calendar date slots and users' emails.
Before you start, check the tutorial requirements:
- Make account
- JetBooking plugin installed and activated with Wizard setup
- JetFormBuilder plugin installed and activated with a Single Page Booking Form built
When users book apartments, it would be helpful to have all bookings displayed on the Google Calendar schedule and sent to the user’s email address.
To connect the JetBooking plugin to Google Calendar and Gmail, you can use Make automation software (formerly Integromat).
How to Connect the JetBooking Plugin to Google Calendar
Set up Make
Make is a free platform that allows you to connect apps and automate workflows using a no-code visual builder.
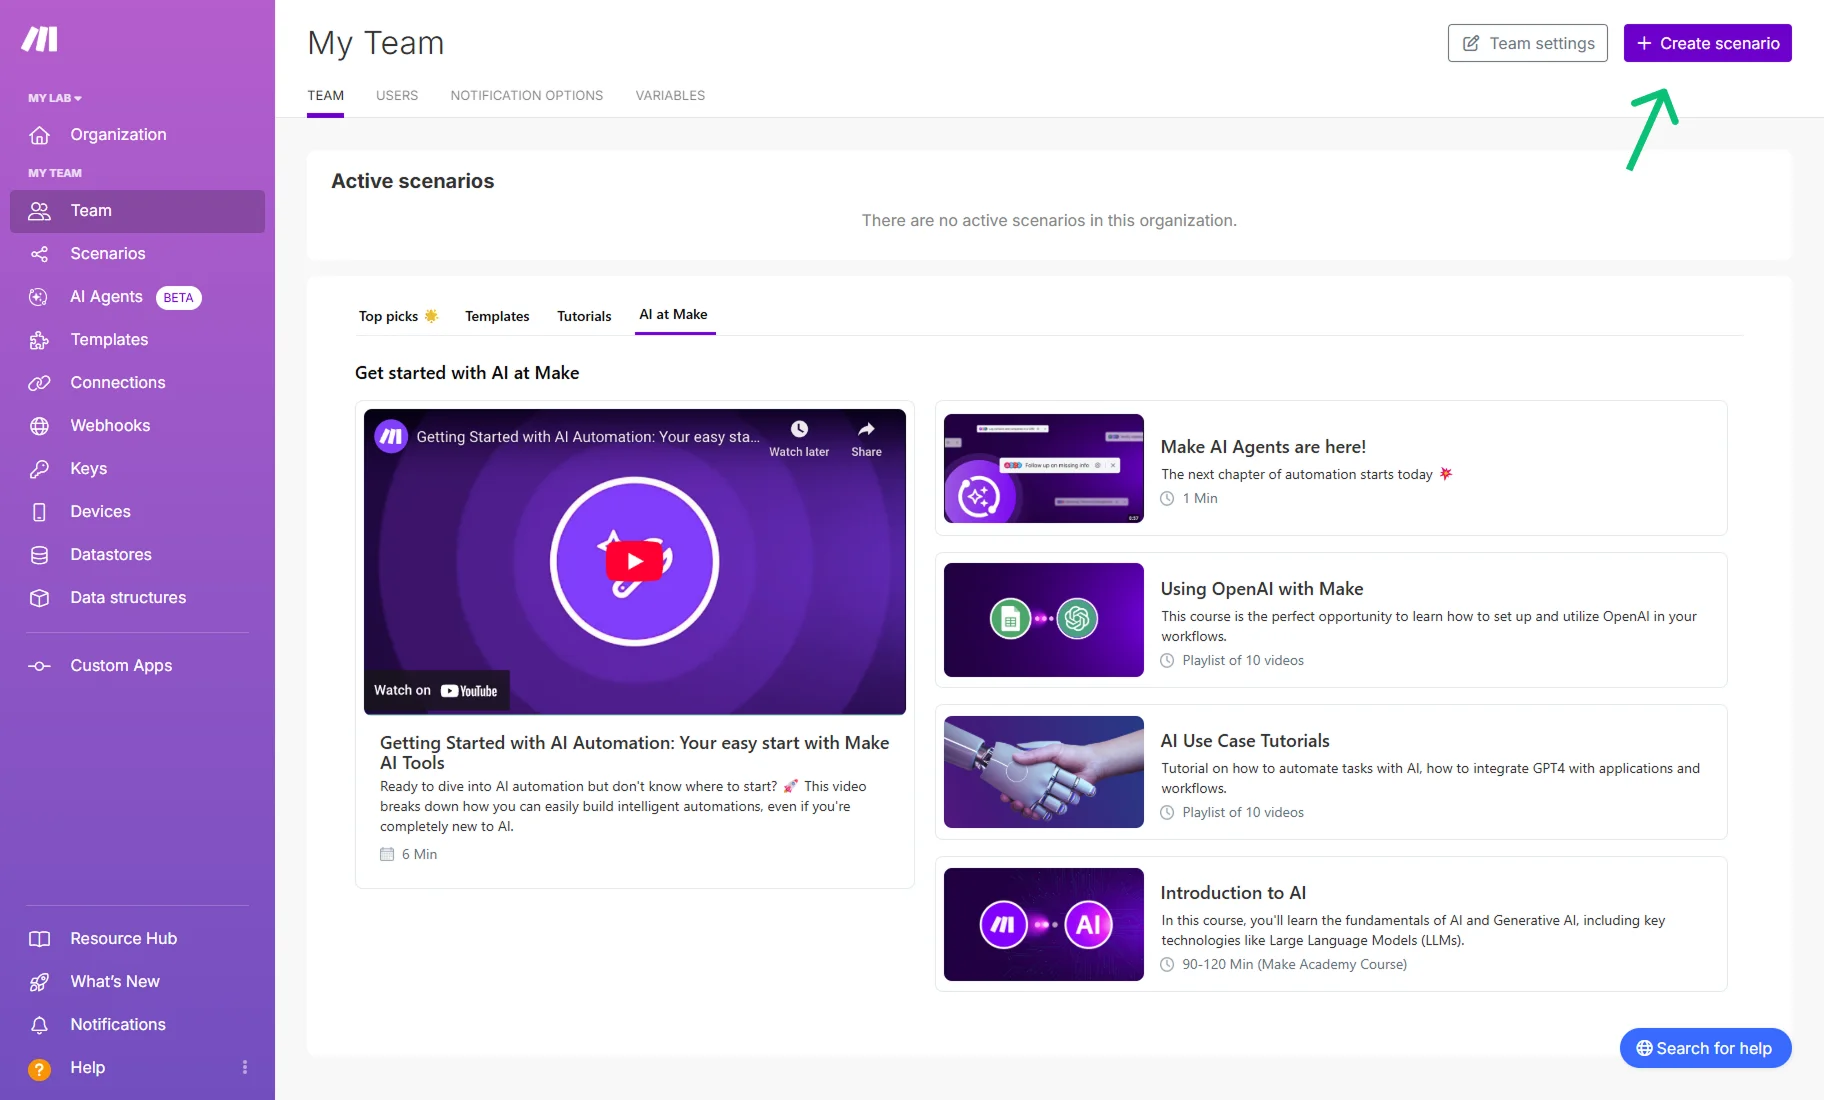
Sign in or sign up to the Make platform. After getting to the dashboard, press the “+ Create scenario” button in the upper right corner.
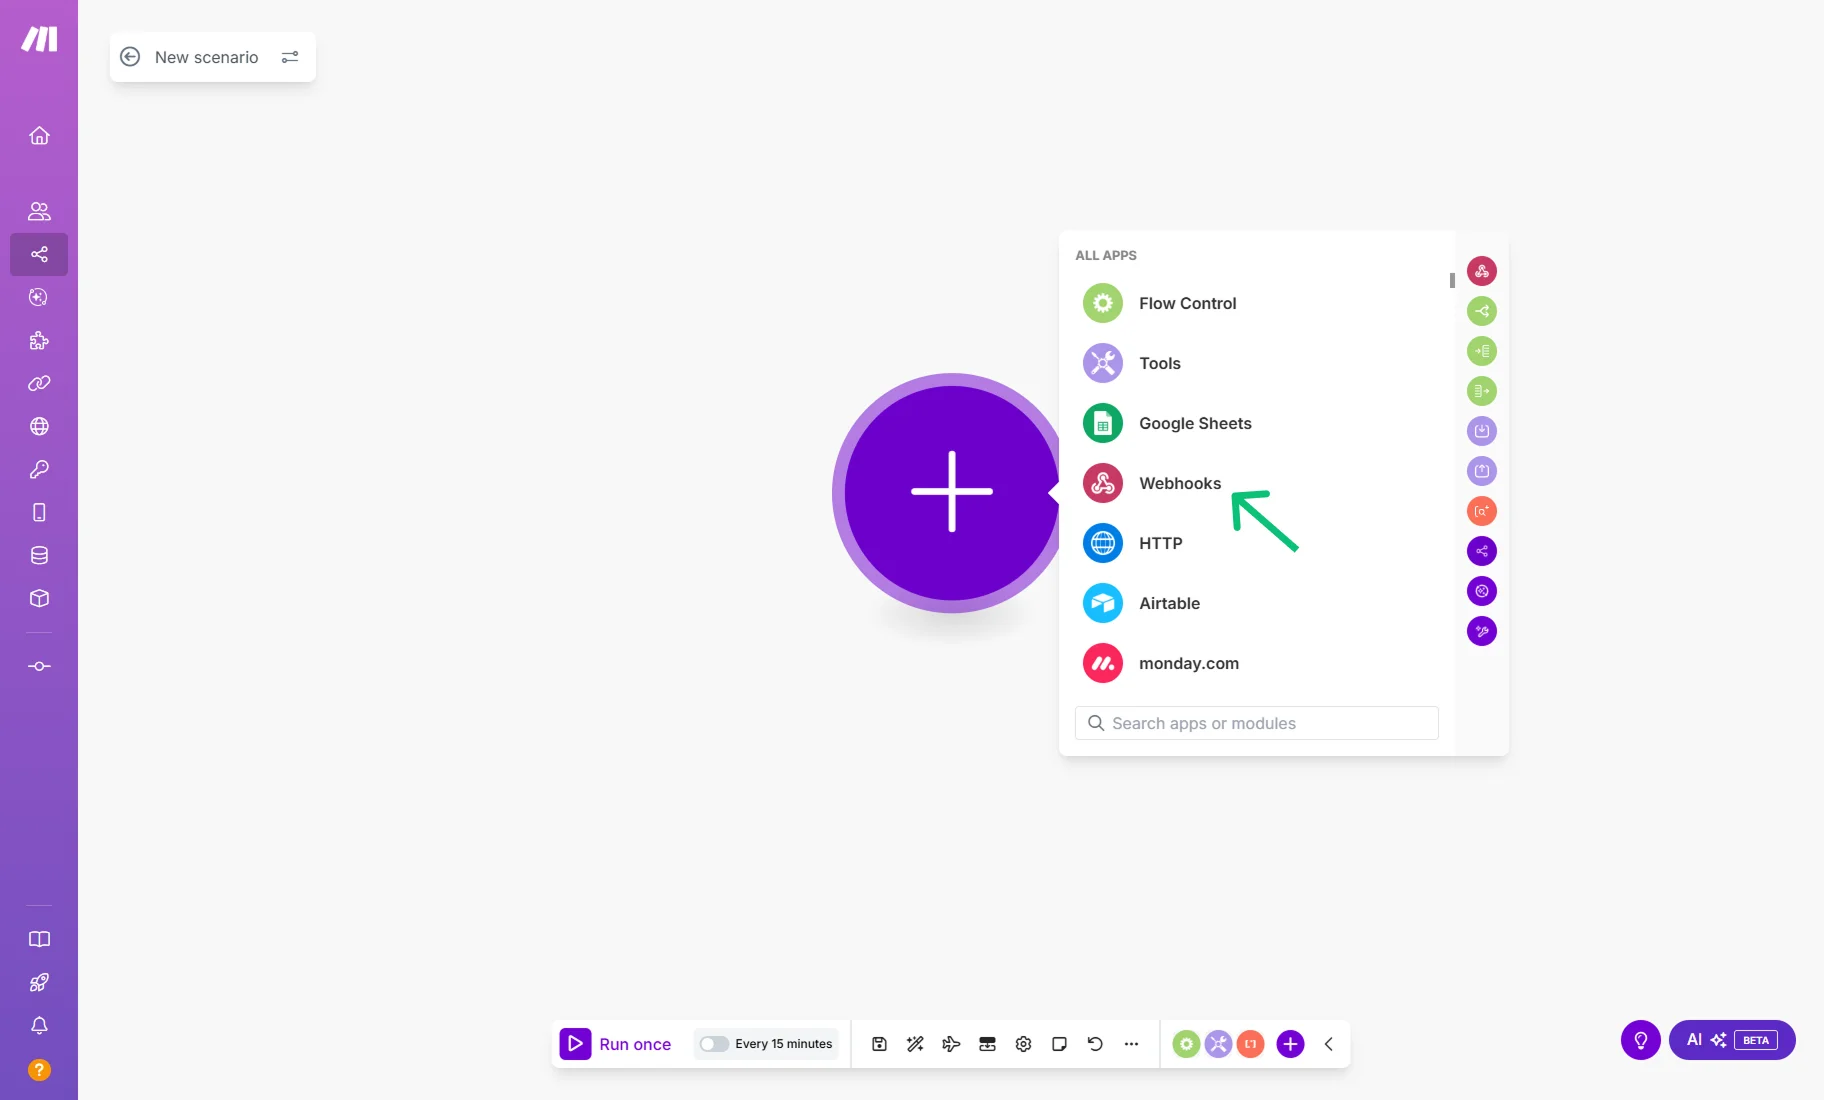
In a new scenario, choose the “Webhooks” module from the dropdown menu.
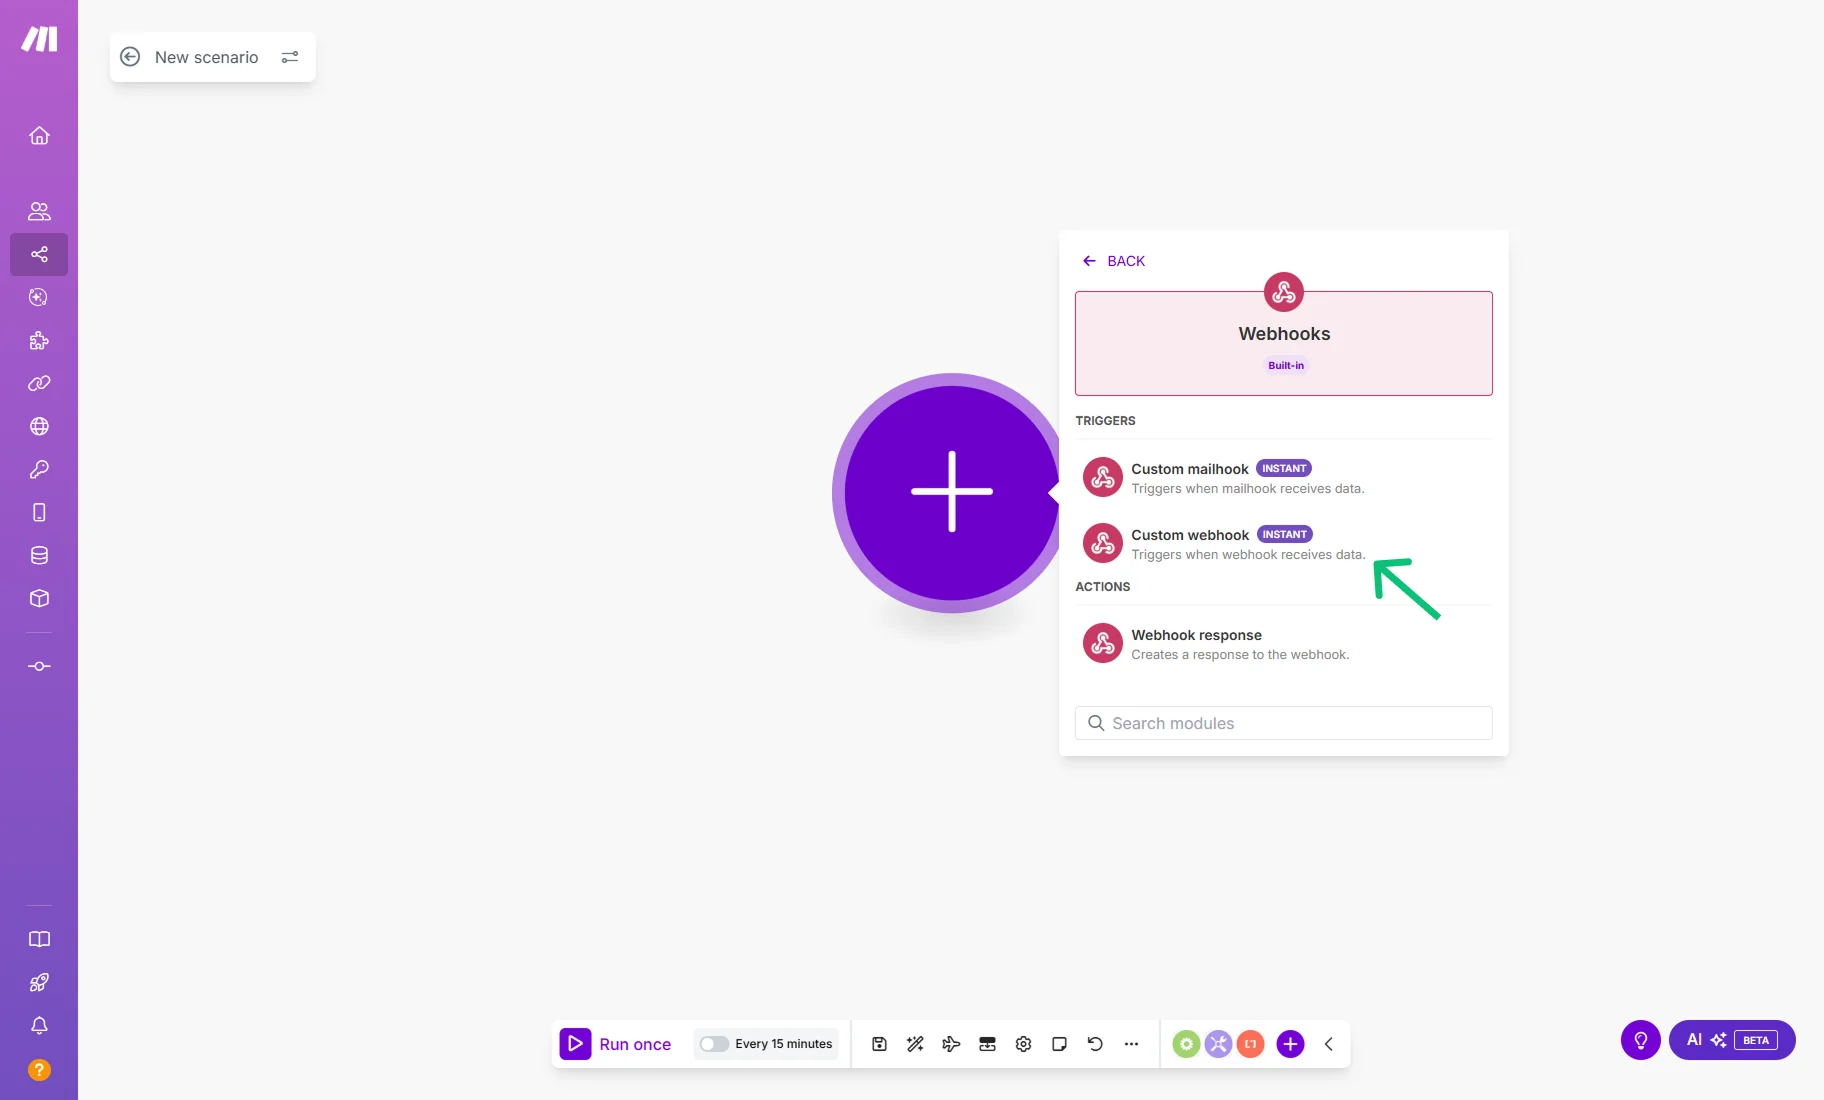
Then you’ll see the list of triggers and actions. You need to select the “Custom webhook.”
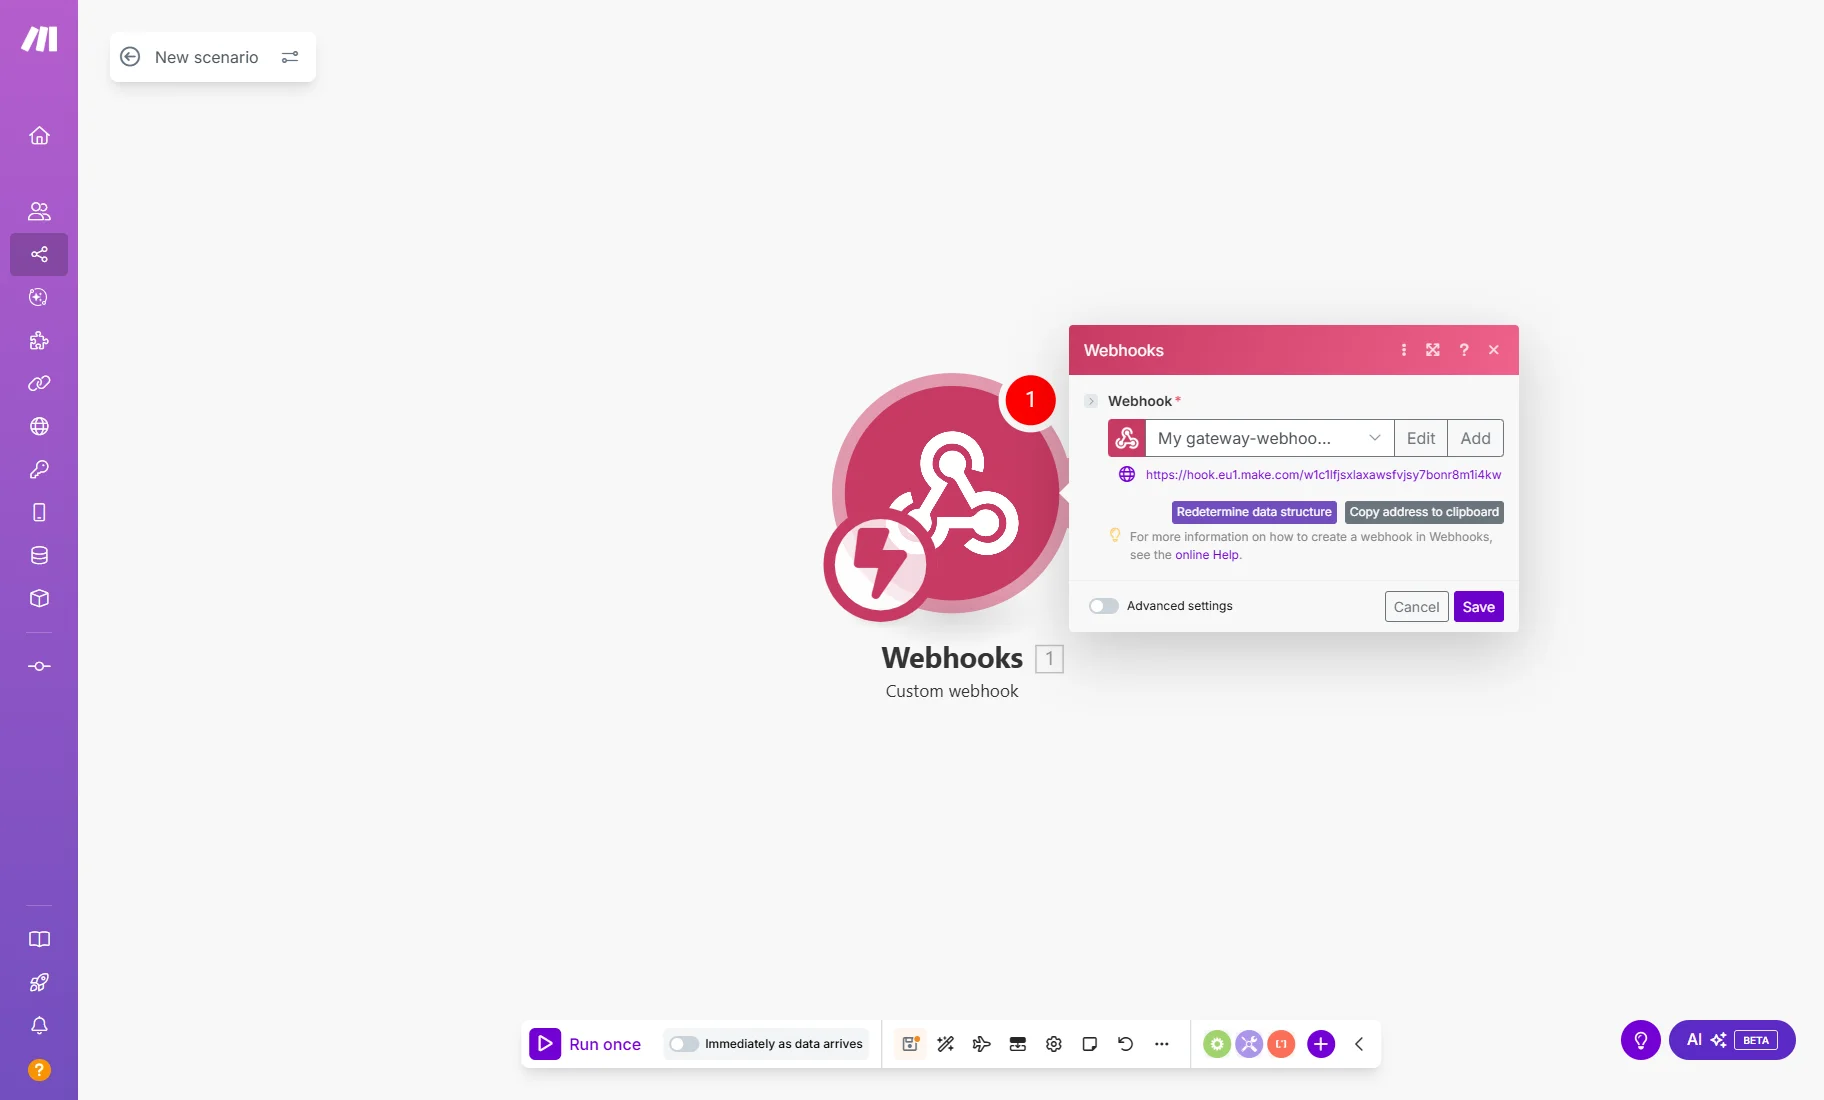
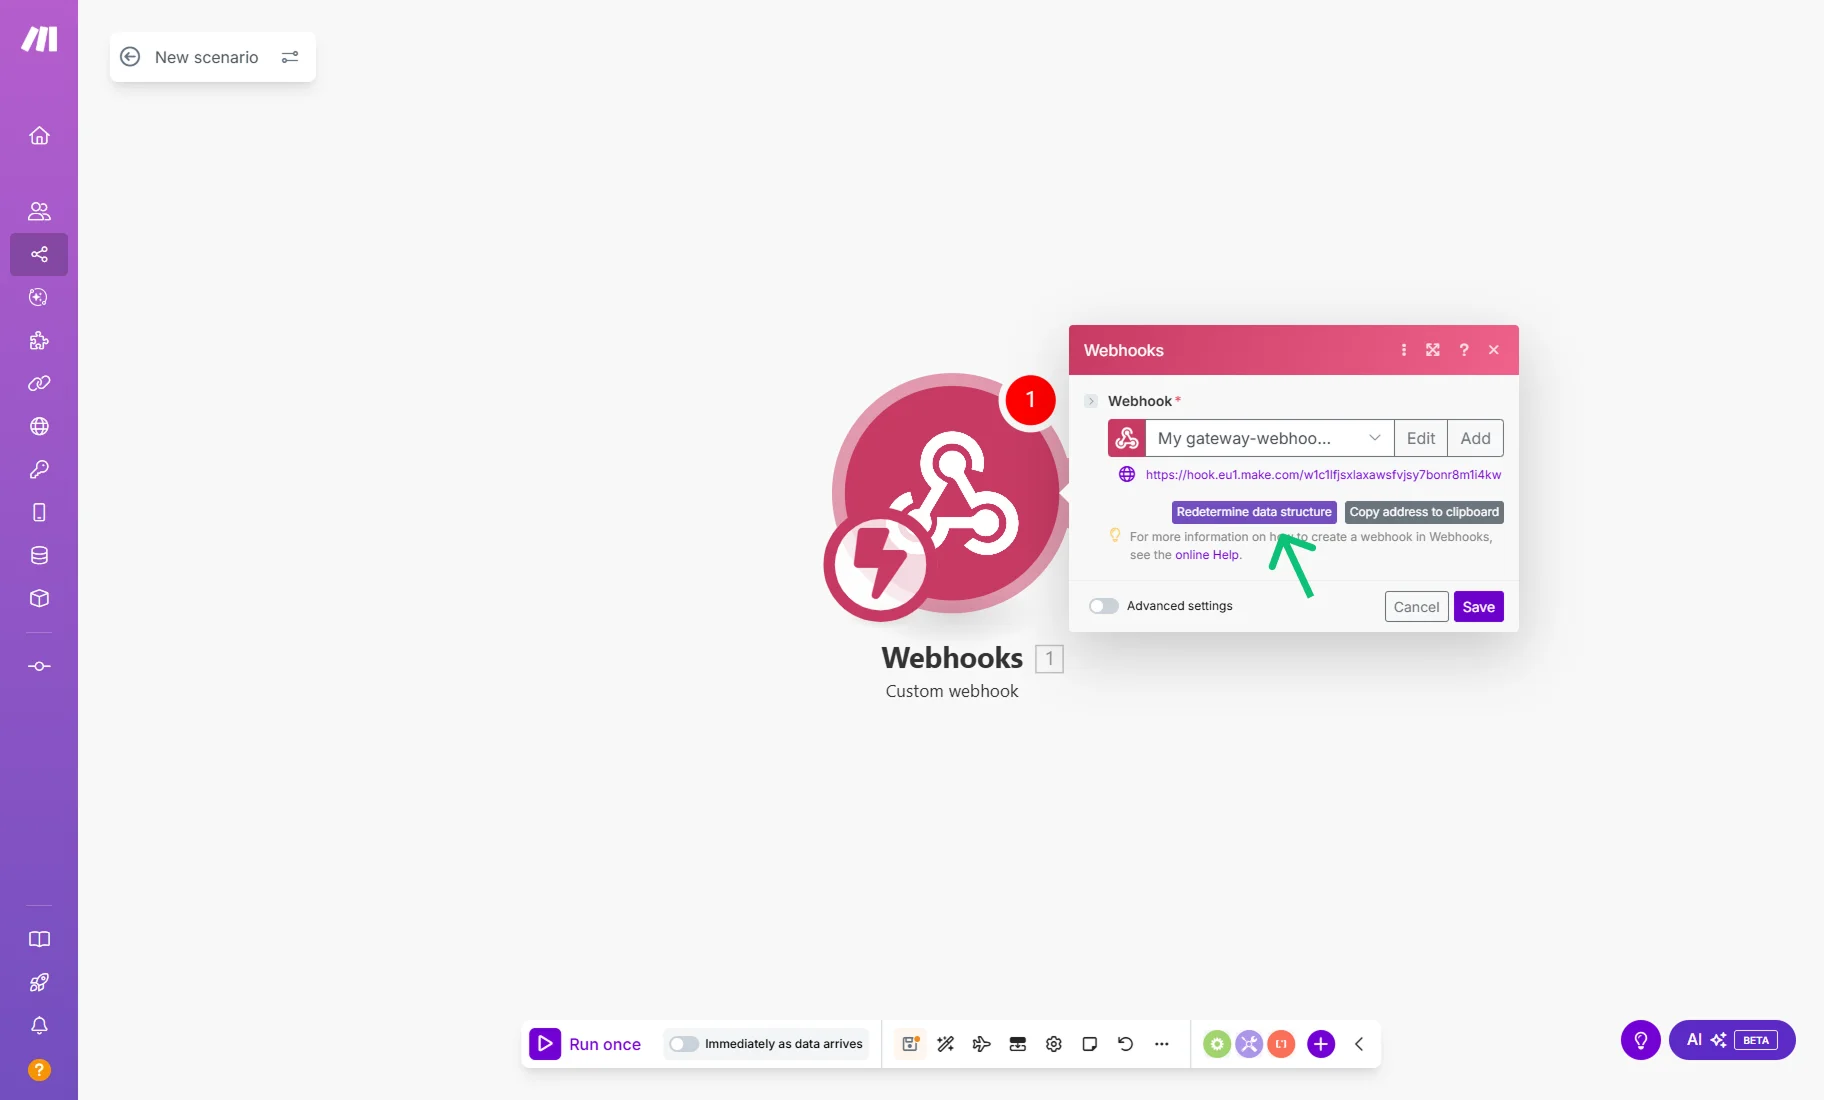
In the Webhook dropdown, select a “My gateway-webhook webhook” option (or add a new one) and press the “Copy address to clipboard” link. Then, proceed to your WordPress website without closing the Make window.
Set up the booking form
A detailed guide on how to create a booking form from scratch can be found in the How to Create a Booking Form tutorial. Also, you will have the default JetBooking form after the JetBooking setup.
Navigate to WordPress Dashboard > JetFormBuilder > Forms, and then click to edit the booking form to connect it with Make.
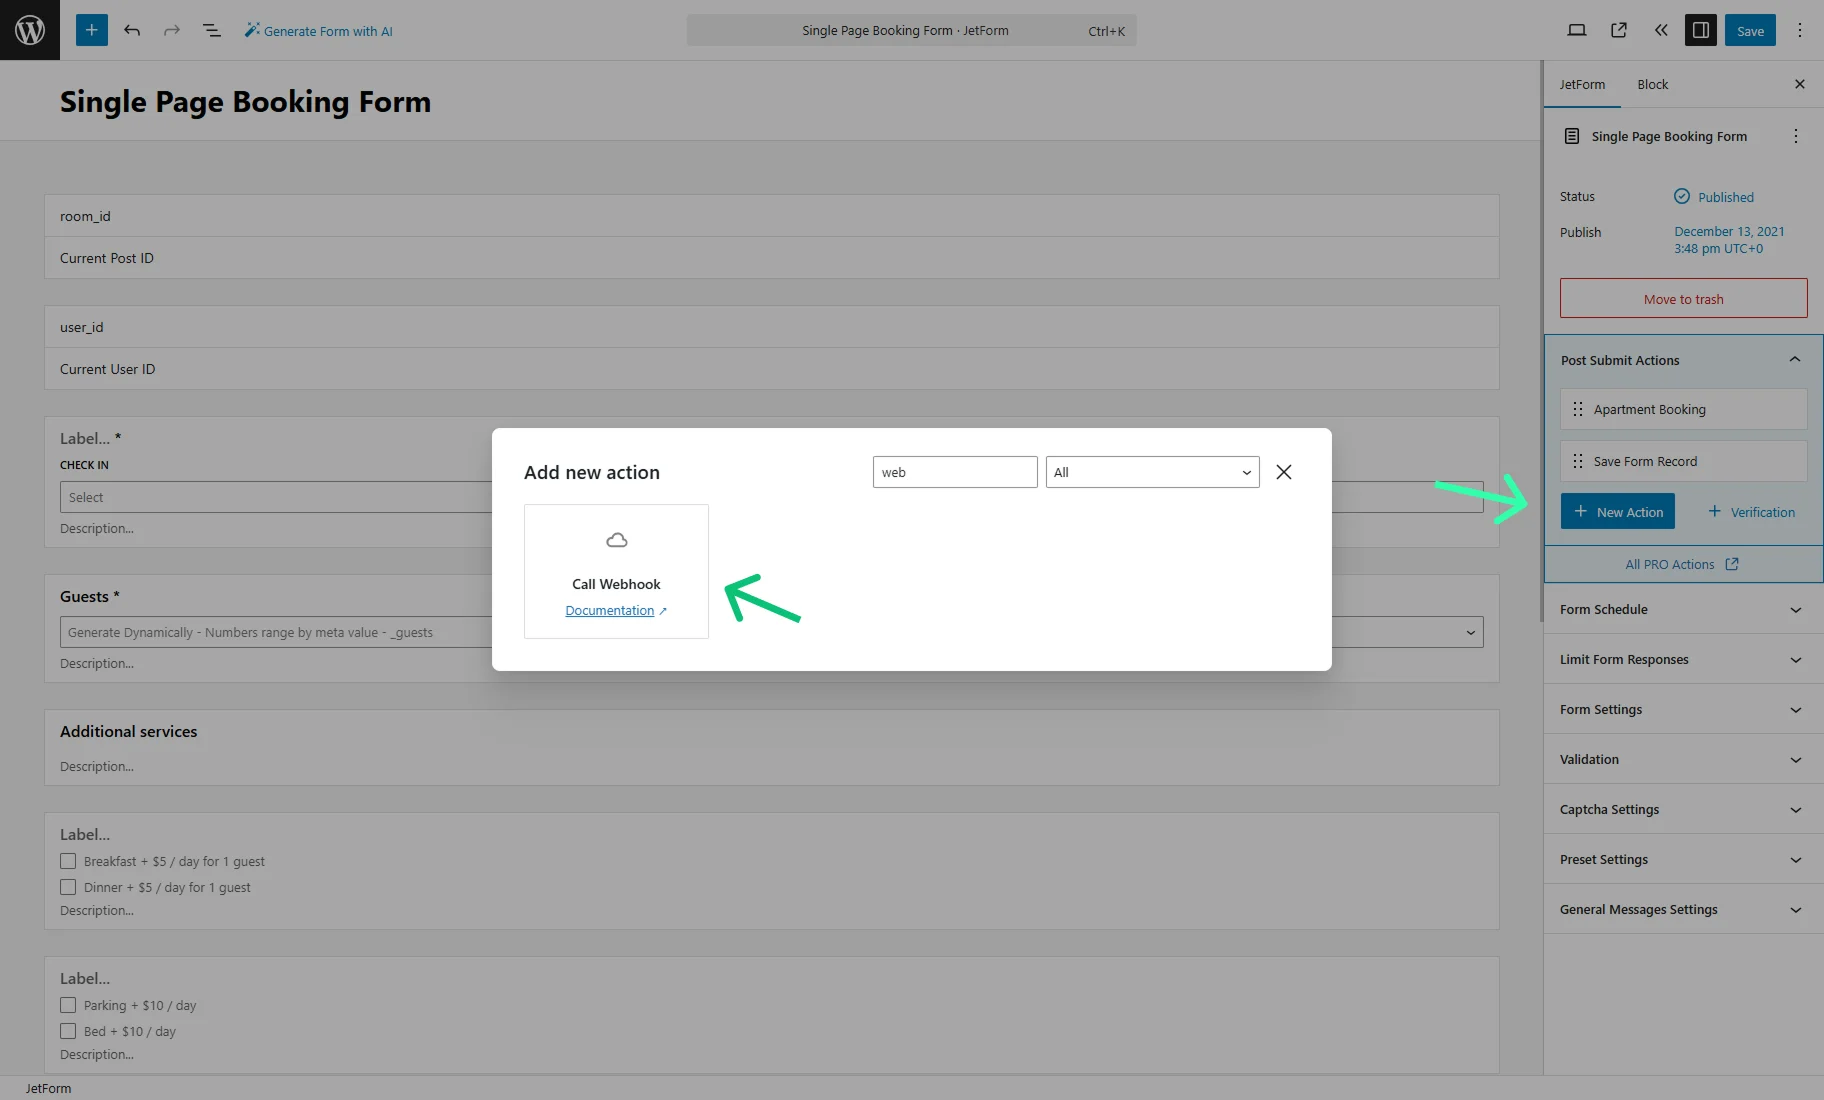
In JetForm > Post Submit Actions, push the “+ New Action” button and select the “Call Webhook” action from the pop-up.
Paste the link to the WEBHOOK URL field. Hit the “Update” button and “Save” the form.

Switch back to Make and click the “Redetermine data structure” button.
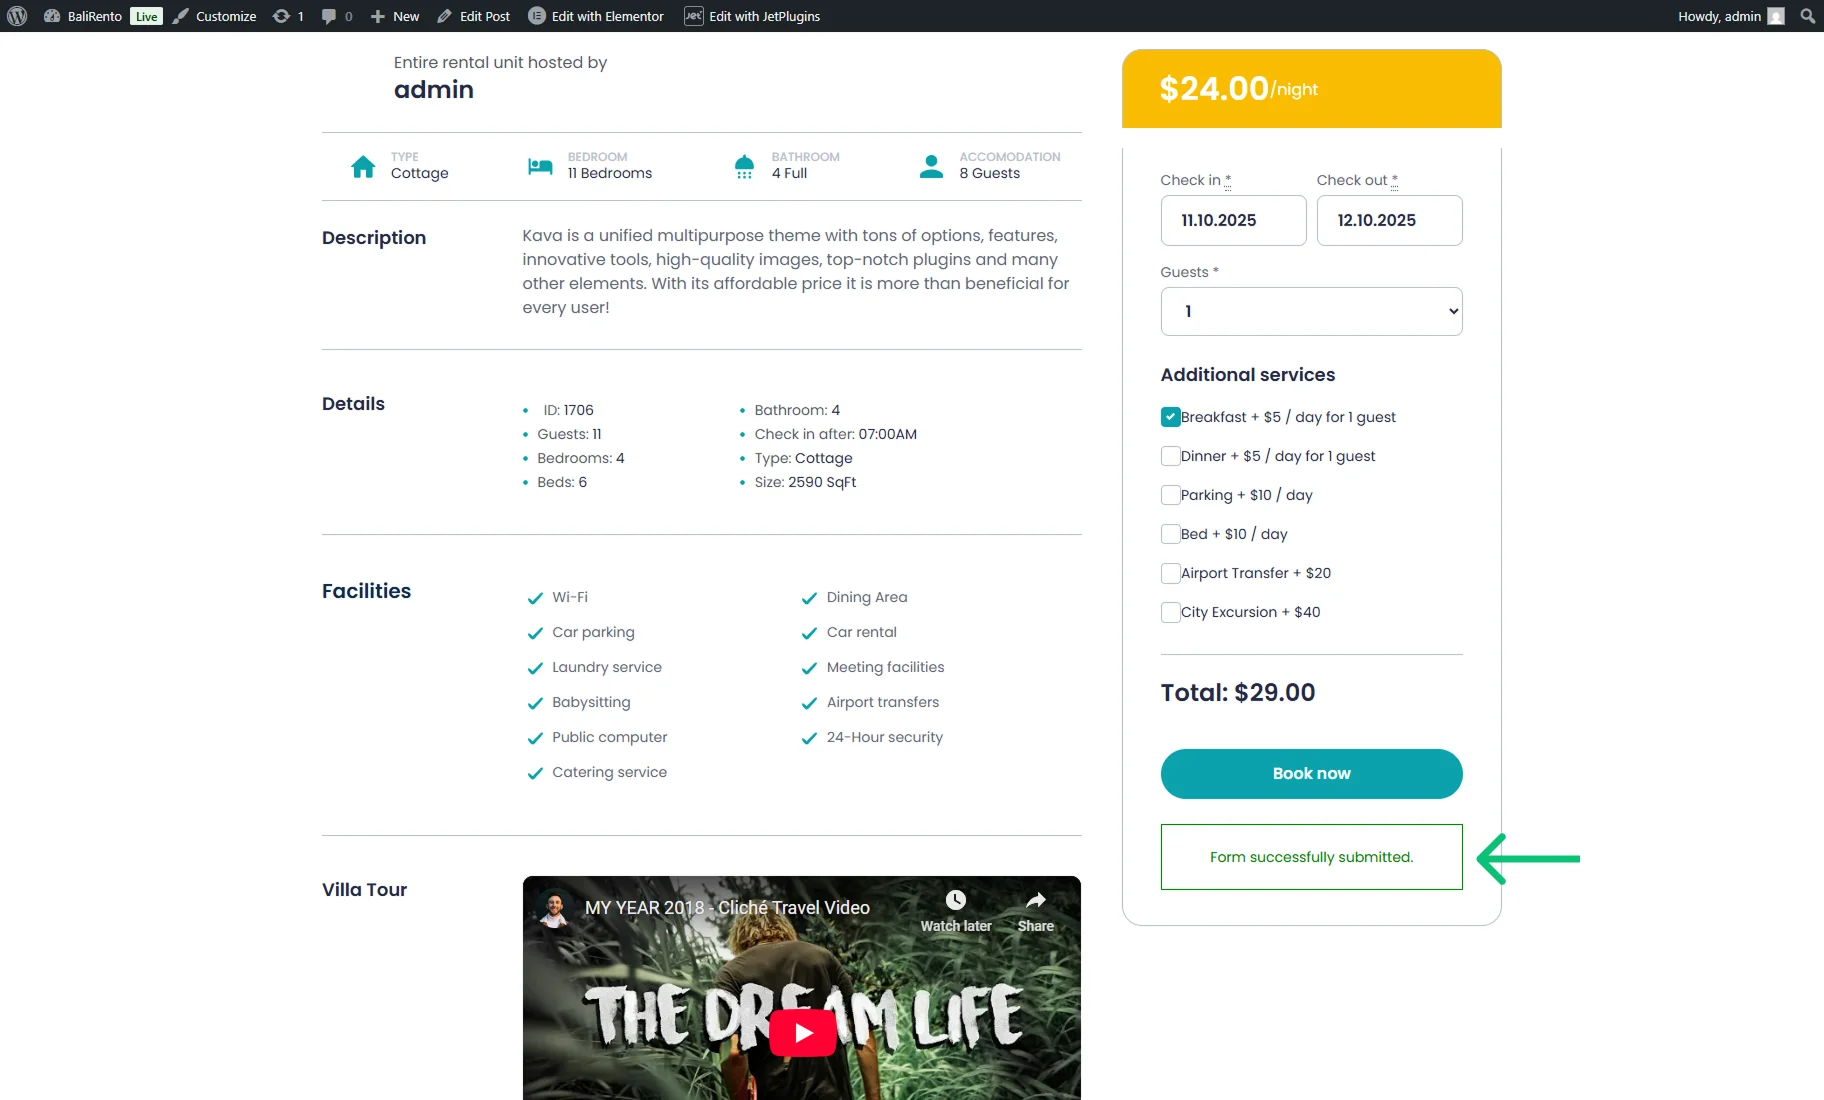
Next, navigate to the front-end page of your WordPress website that contains the form and submit it.
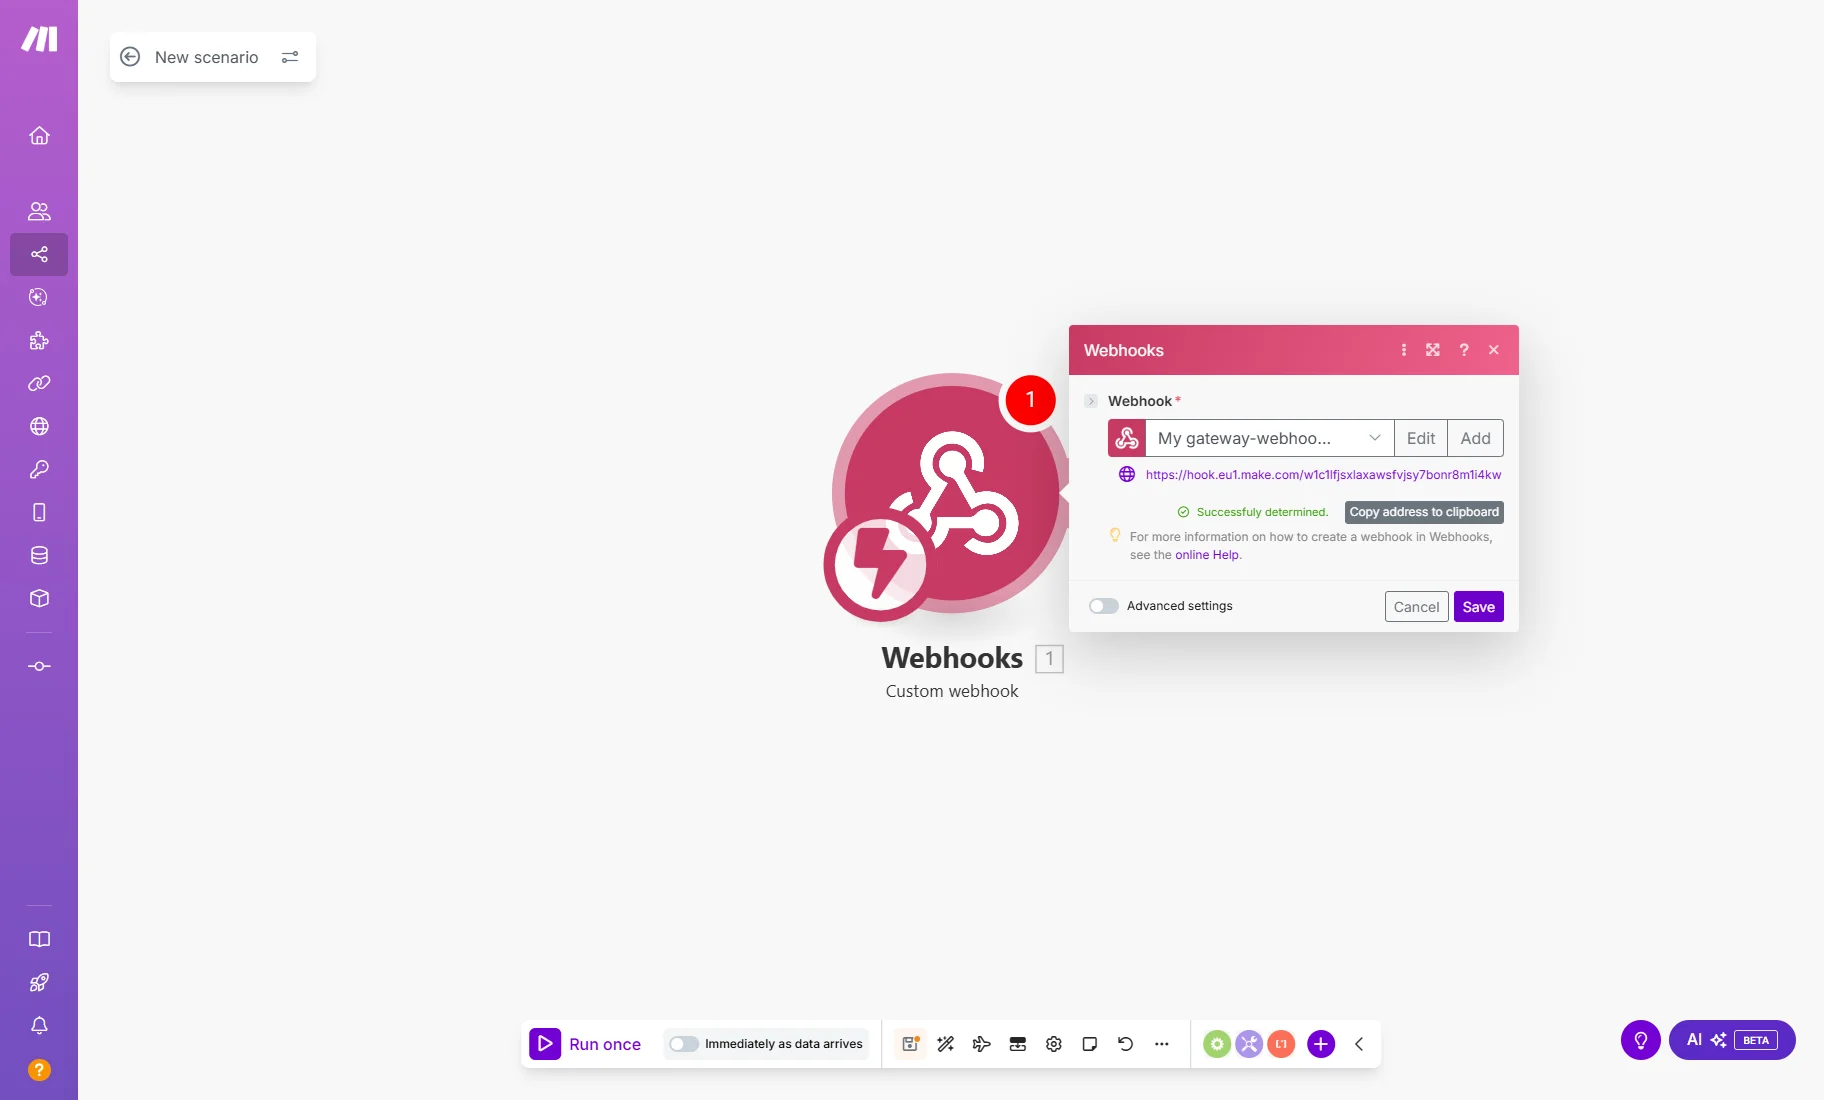
After that, return to Make and you’ll see the “Successfully determined” green note in the Webhook. Hit the “Save” button.
Add the Google Calendar module
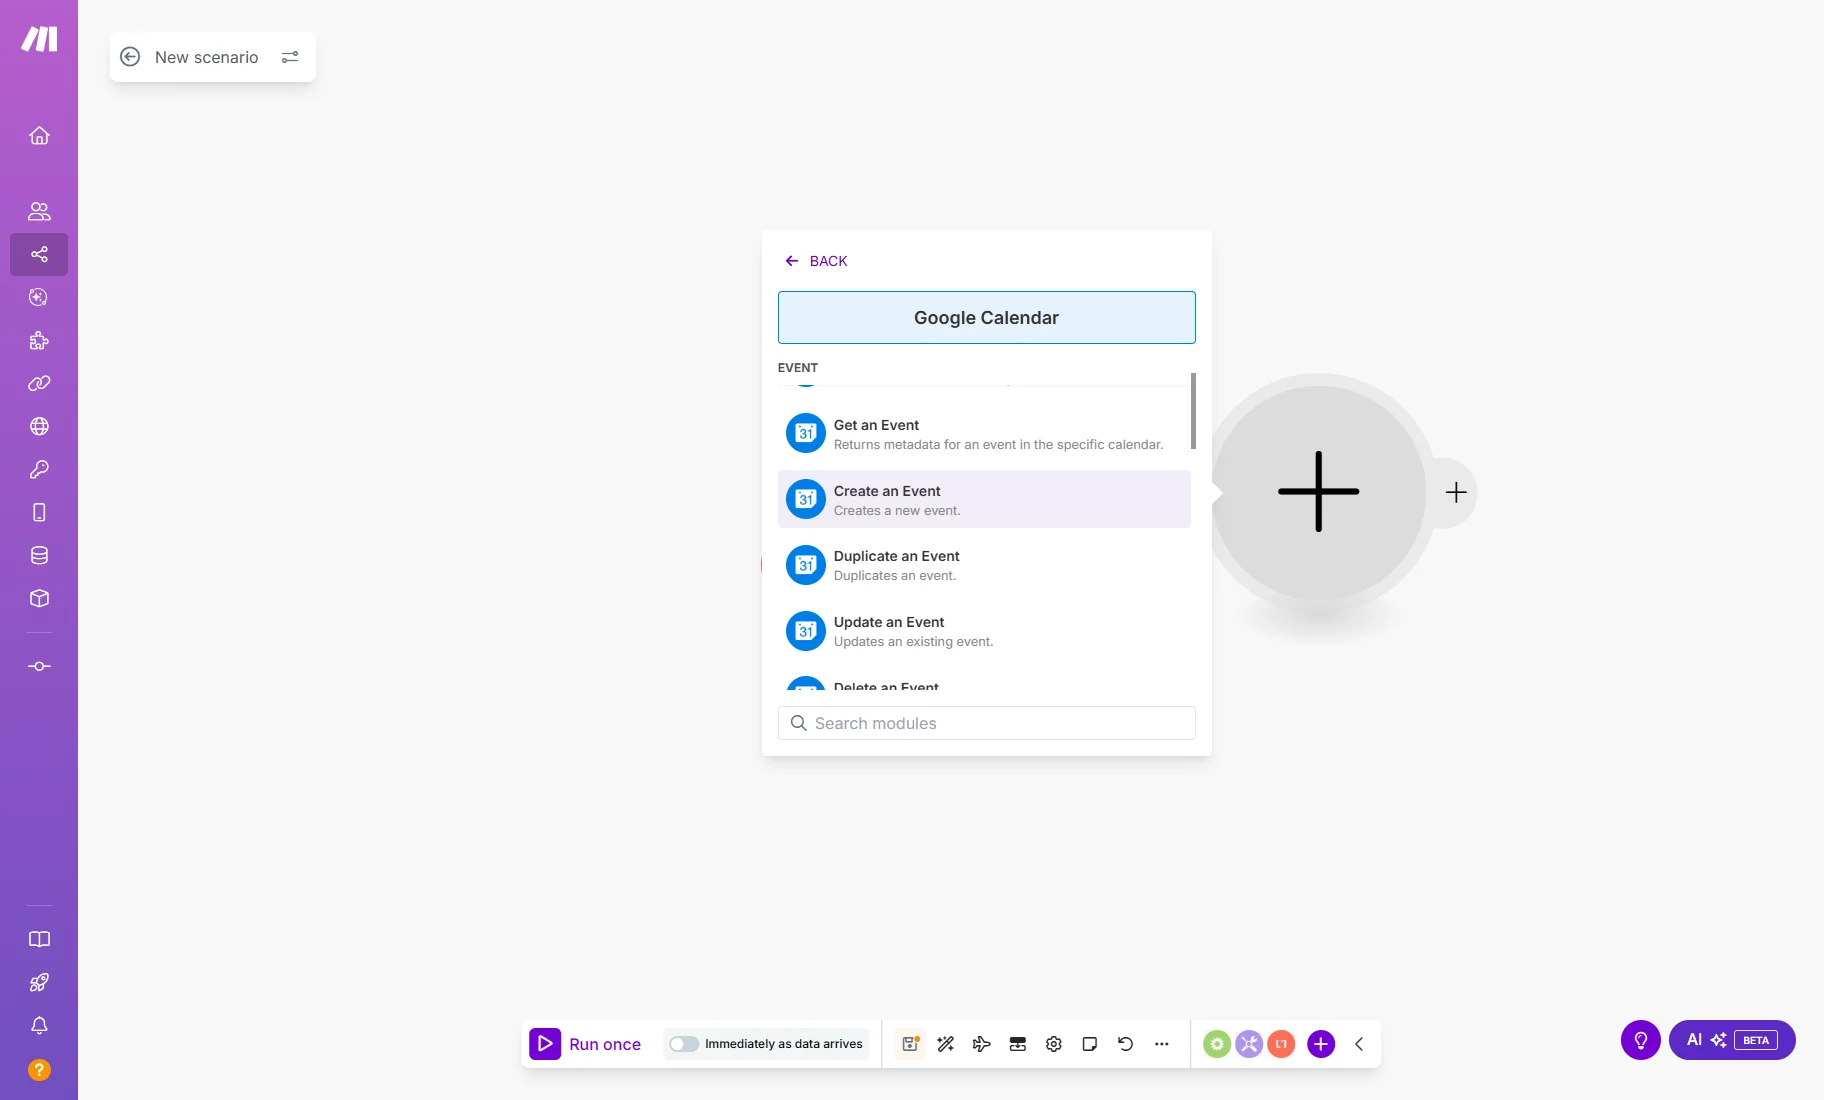
Click the “Add another module” button and insert the “Google Calendar” module.
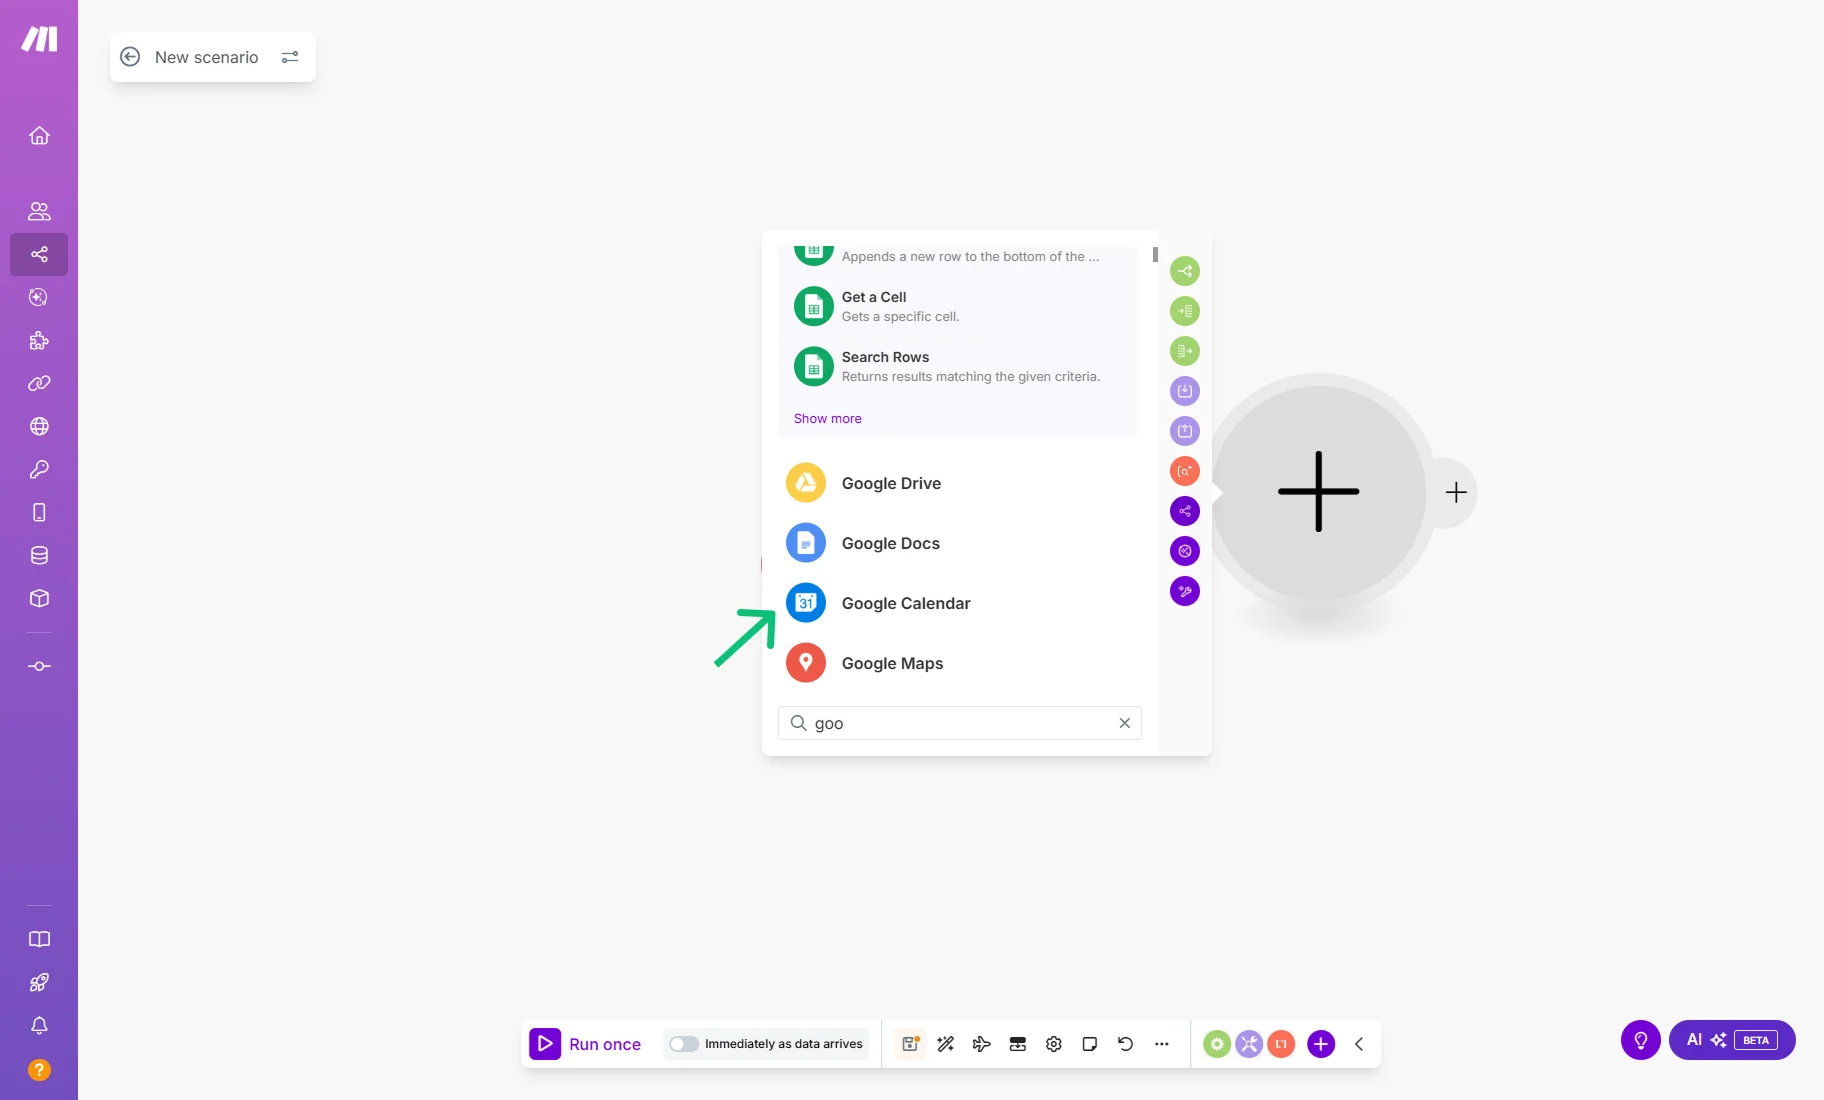
Pick the “Create an Event” option.
Click the “Add” button near the Connection bar to connect Make to your Gmail account, or select an existing connection from the dropdown.
In the Create an Event dropdown, select the “In Detail” option.
In the Calendar ID, select the calendar to which you want your bookings published.
When you click the Event Name, a pop-up will open with the booking form fields. Use plain text and field names to customize it, allowing values to be inserted dynamically. For example, we use ‘post_title’.
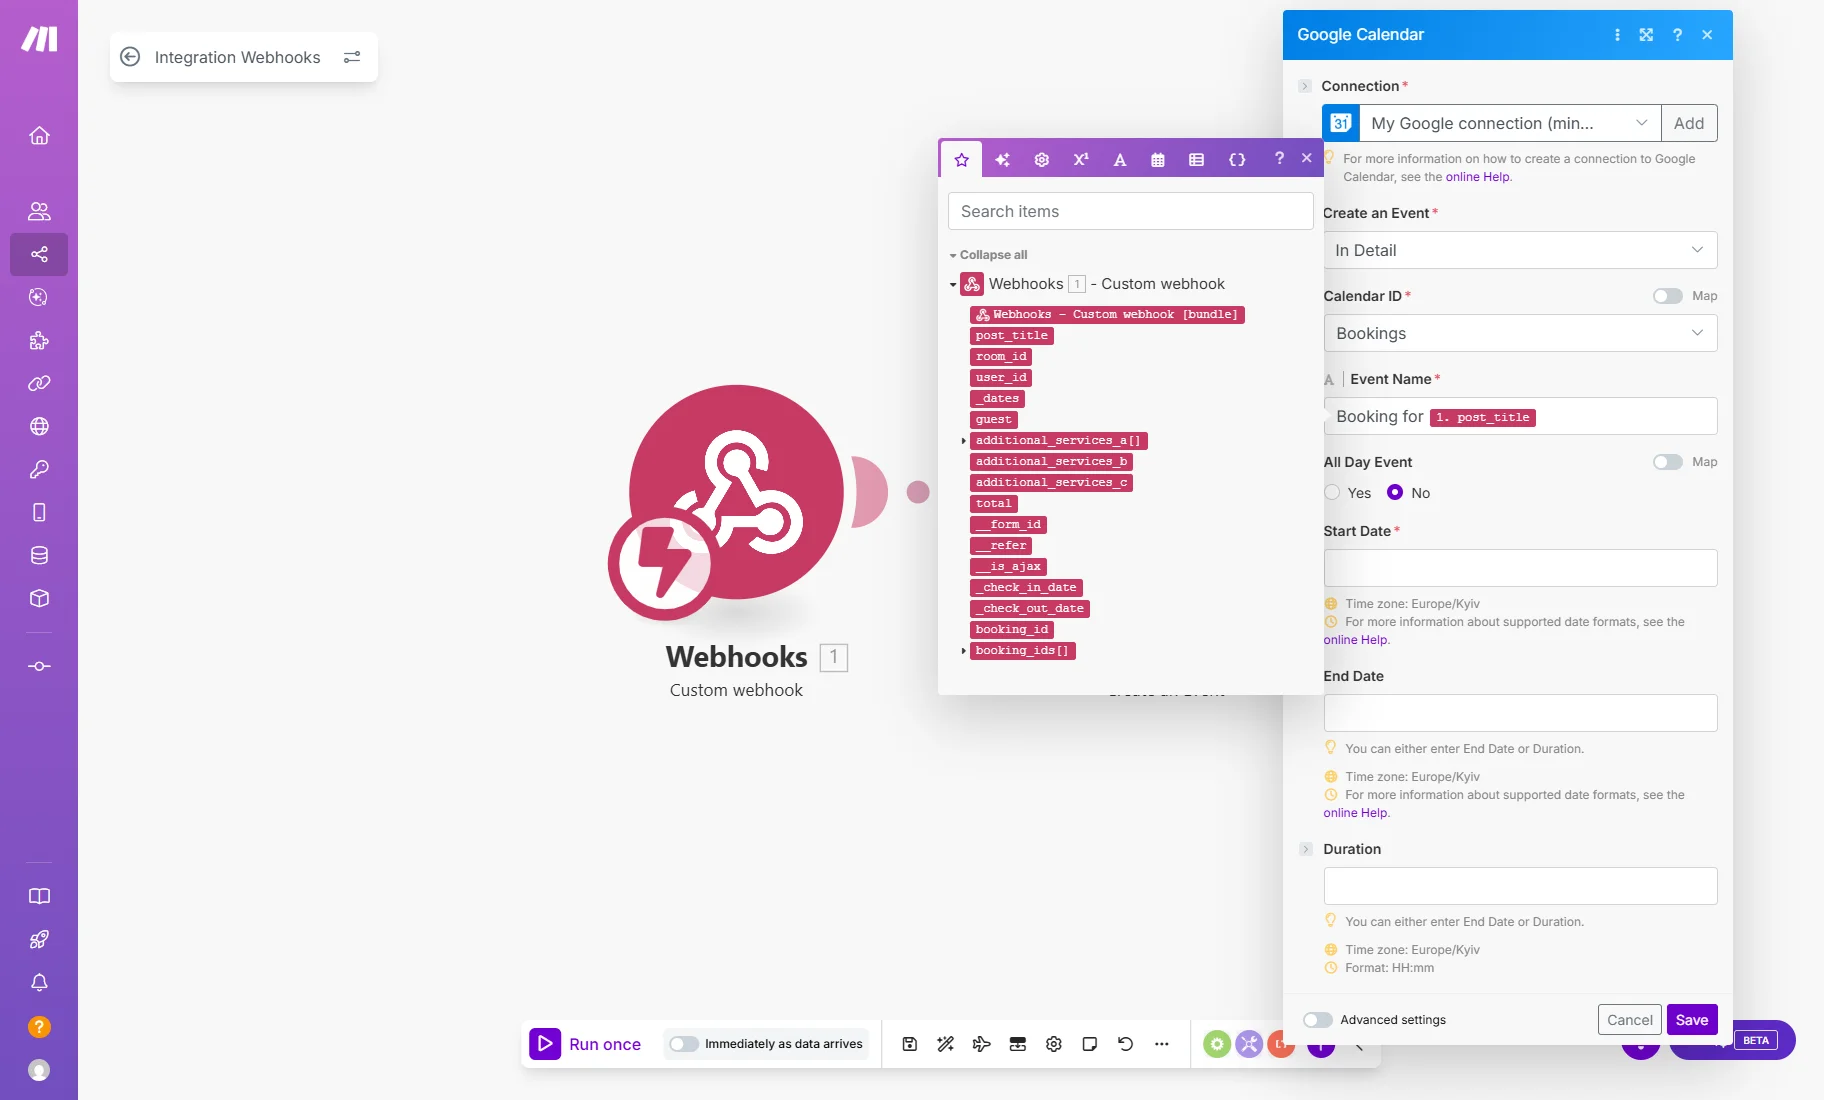
In the booking form, it’s a Hidden Field with the “Current Post Title” FIELD VALUE, which returns the name of the property.

Drag-n-drop the ‘_check_in_date’ item in the Start Date field and the ‘_check_out_date’ item in the End Date field accordingly.
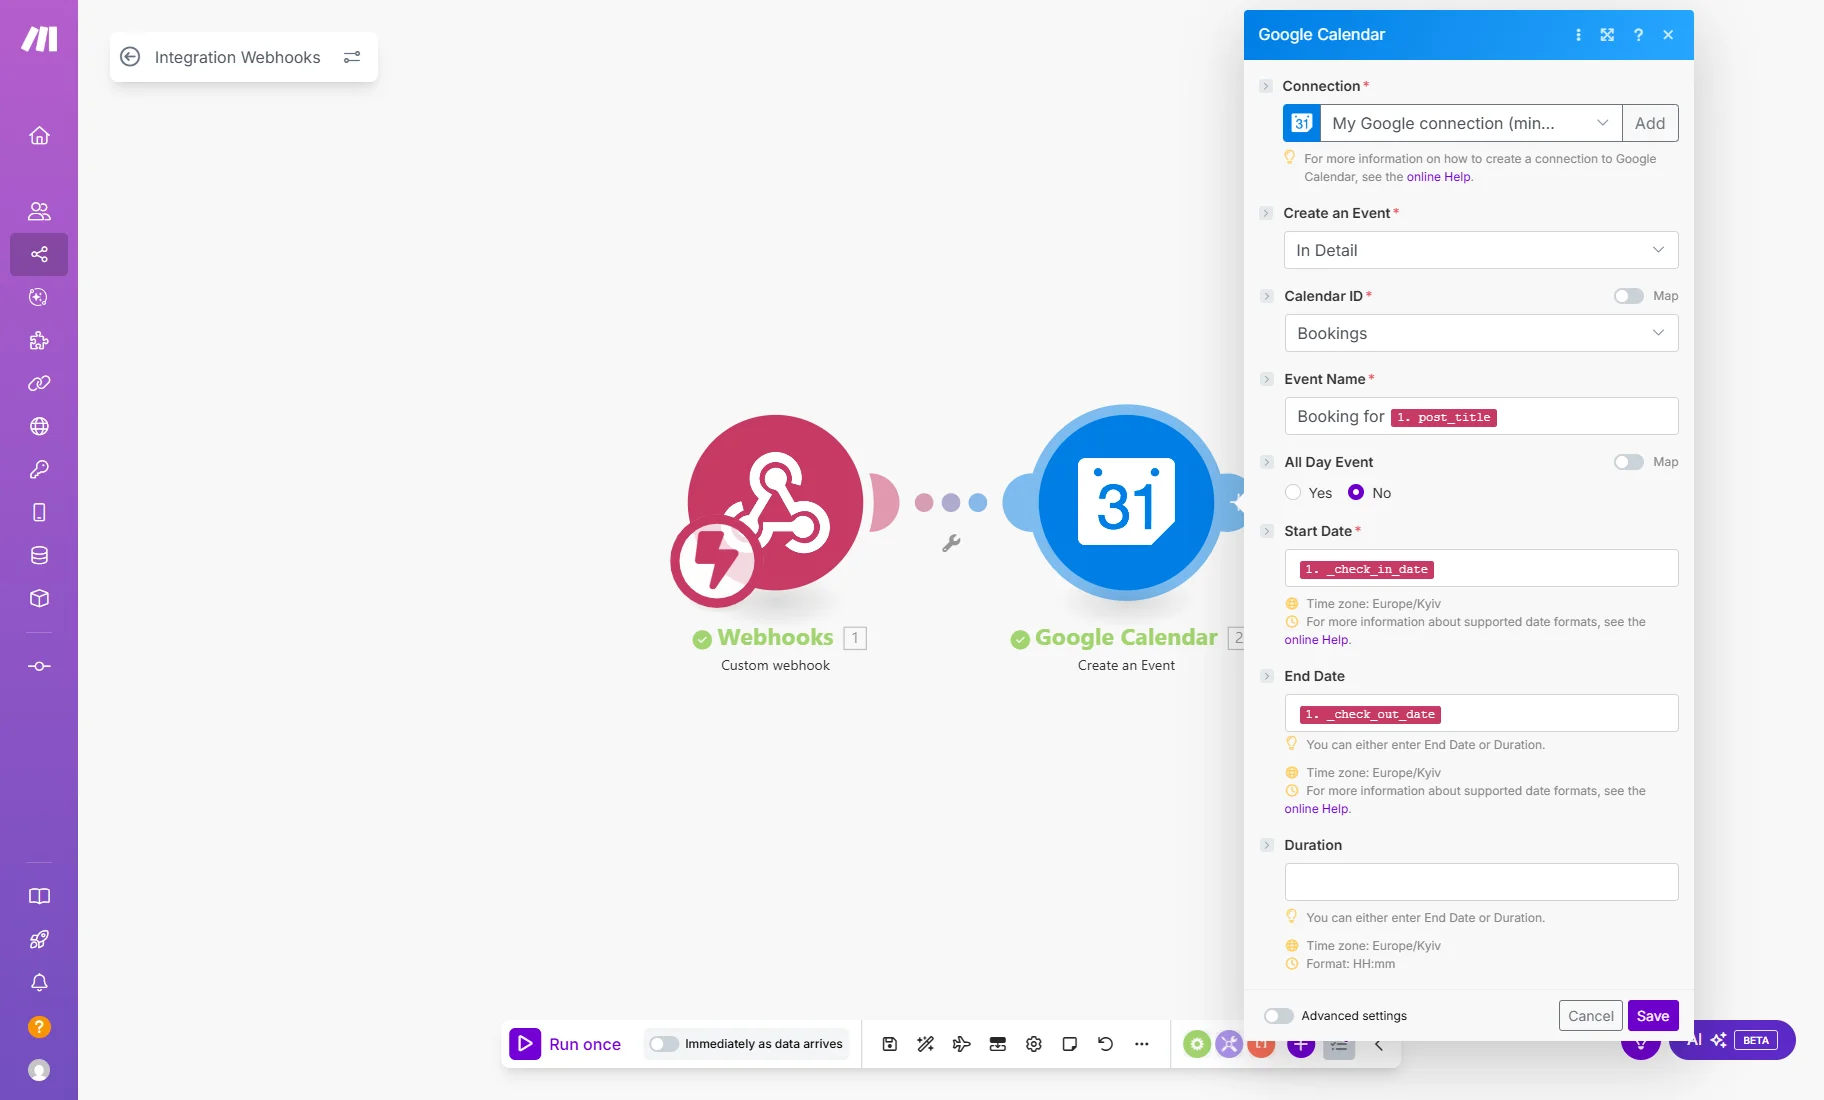
Next, you can enable the Advanced settings toggle and fill in the Description field with the booking details, including additional services, the number of guests, and the total price.
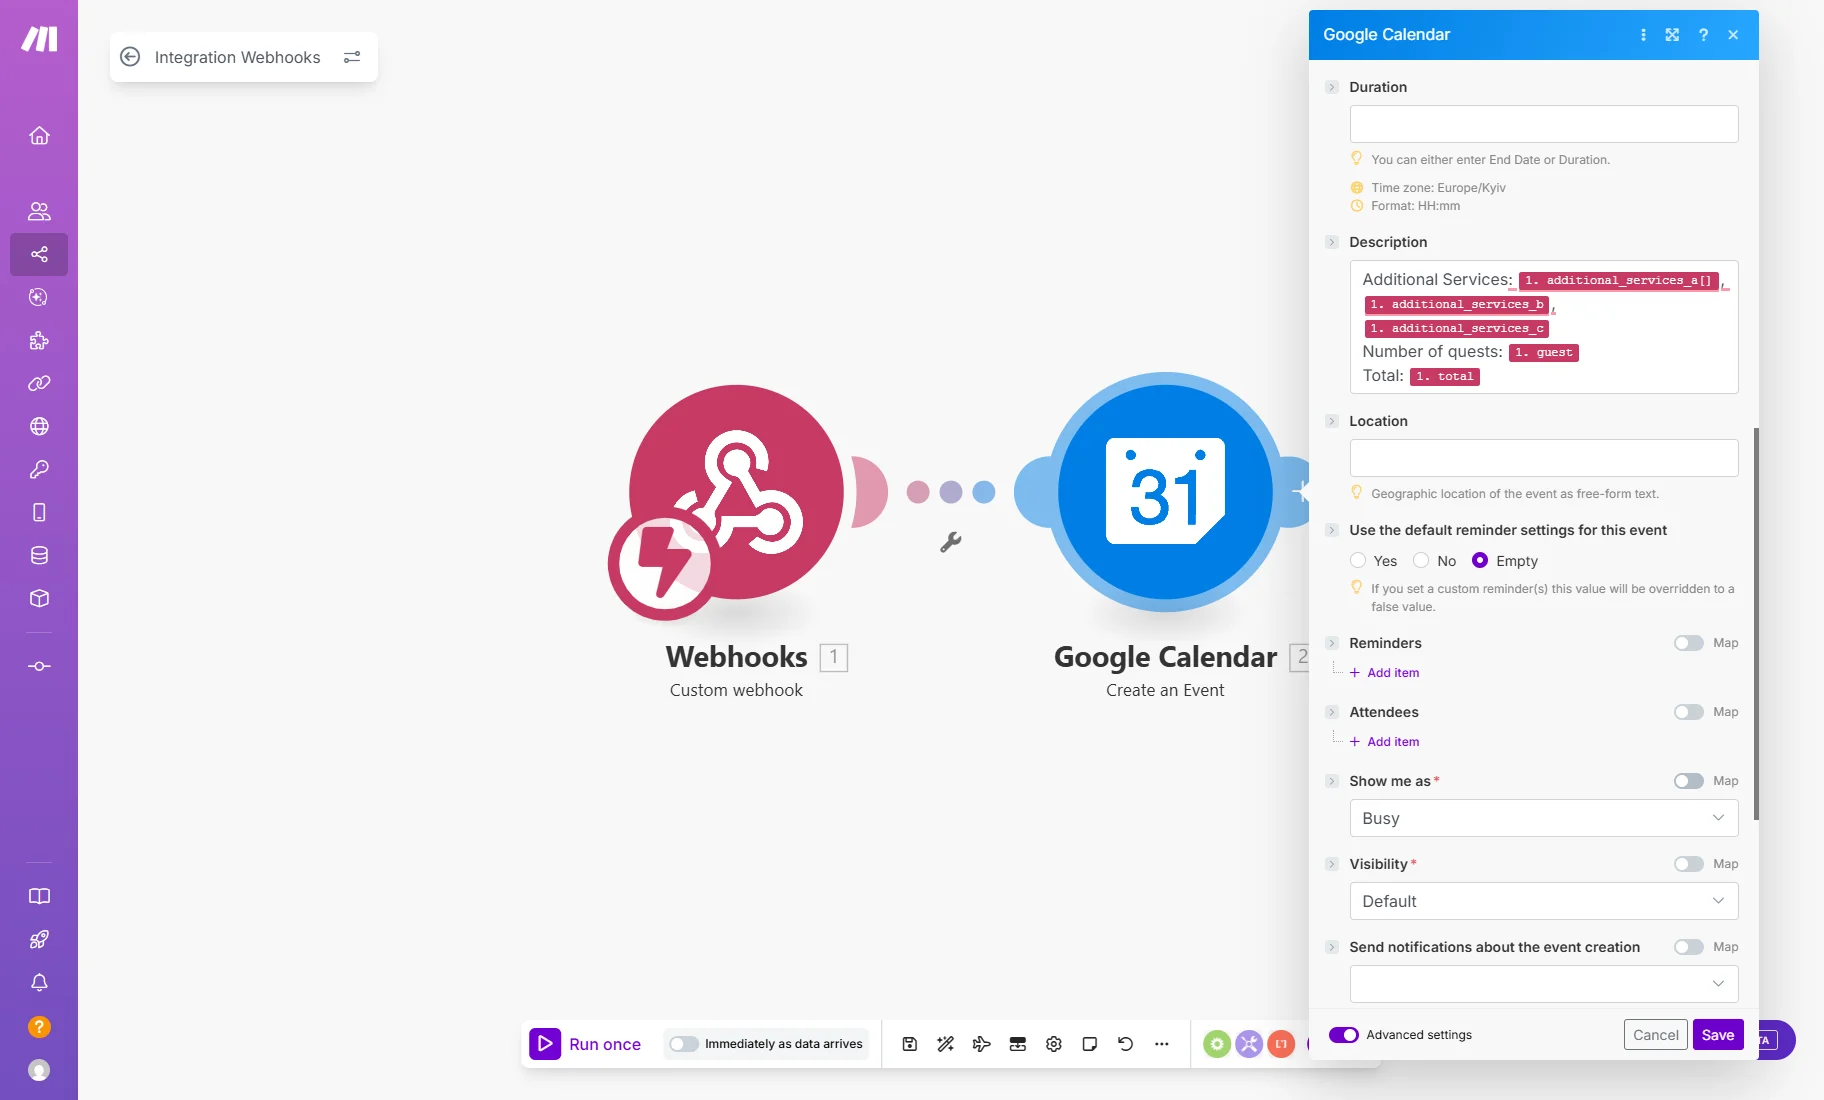
After adjusting all the settings, press the “Save” button at the end of the pop-up. Also, press the “Save” icon in the bottom toolbar to save the scenario settings.
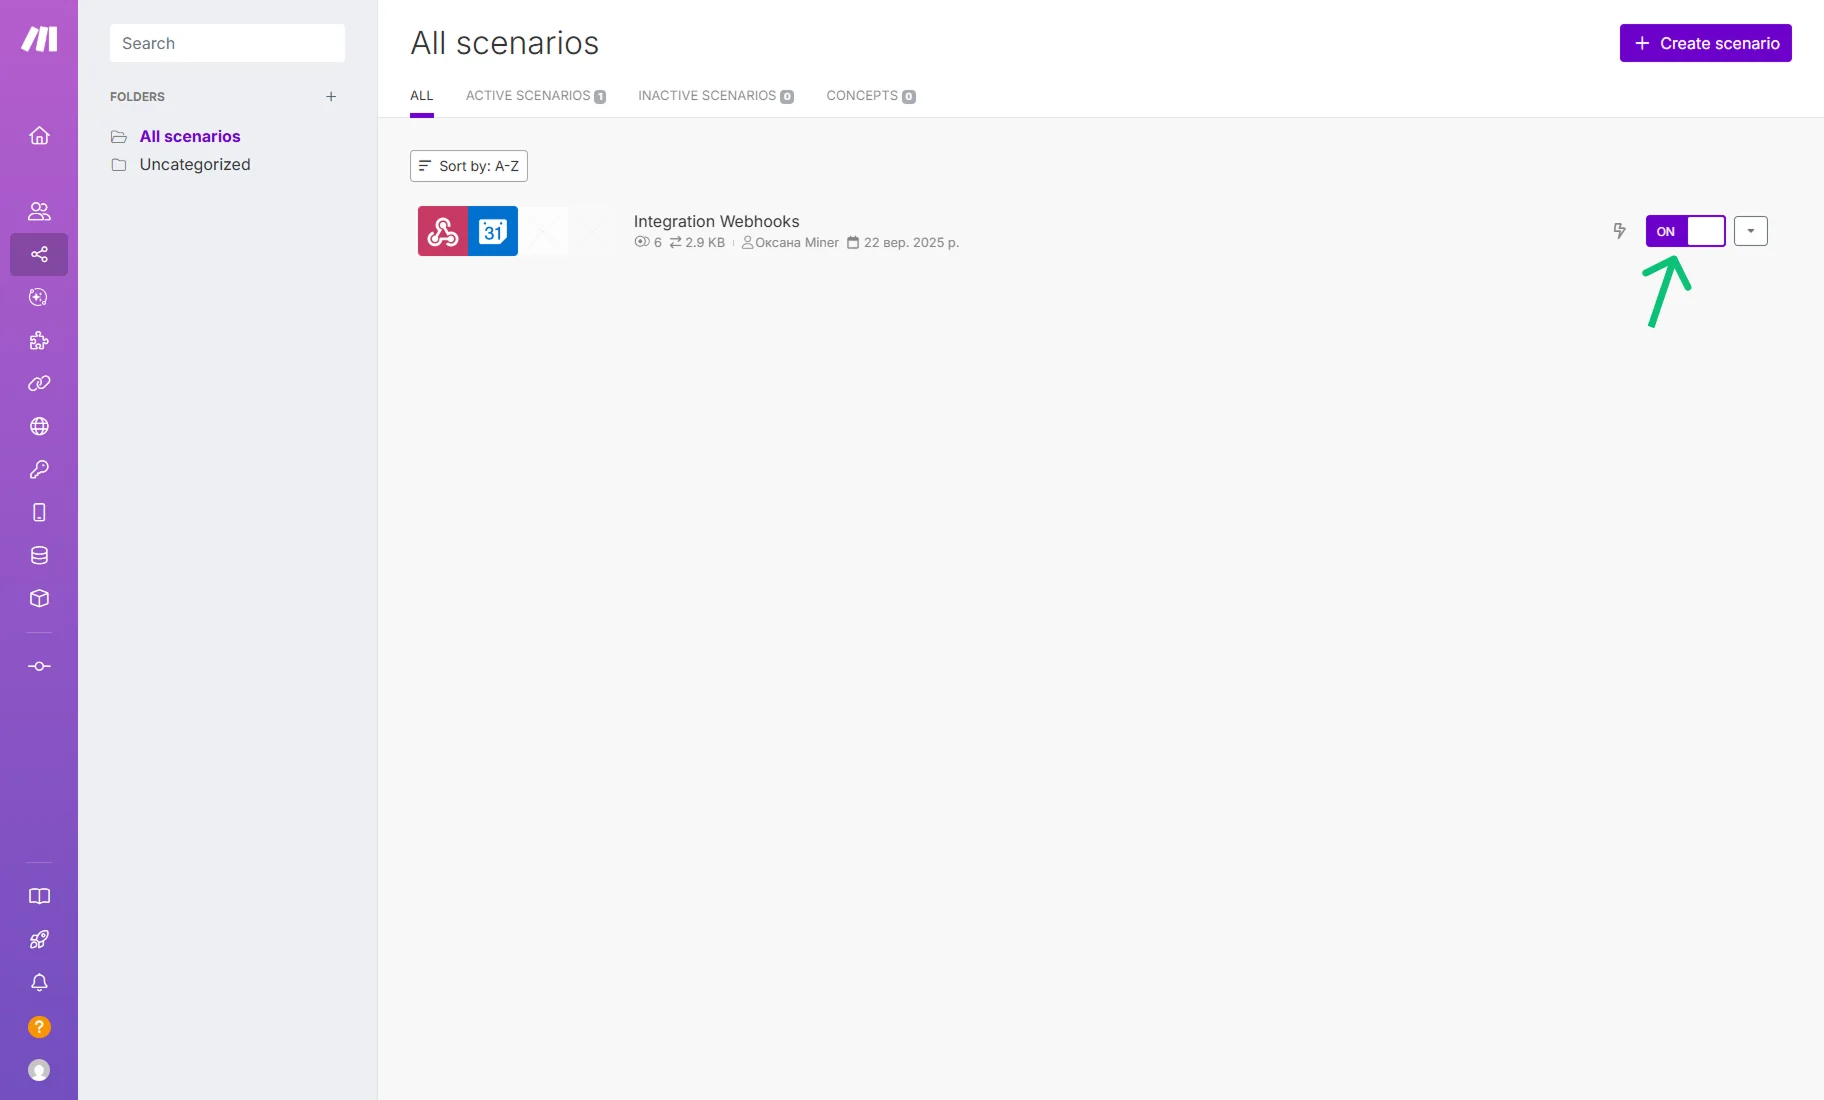
Then, go to the Scenarios tab and switch the toggle on.
Check the Result
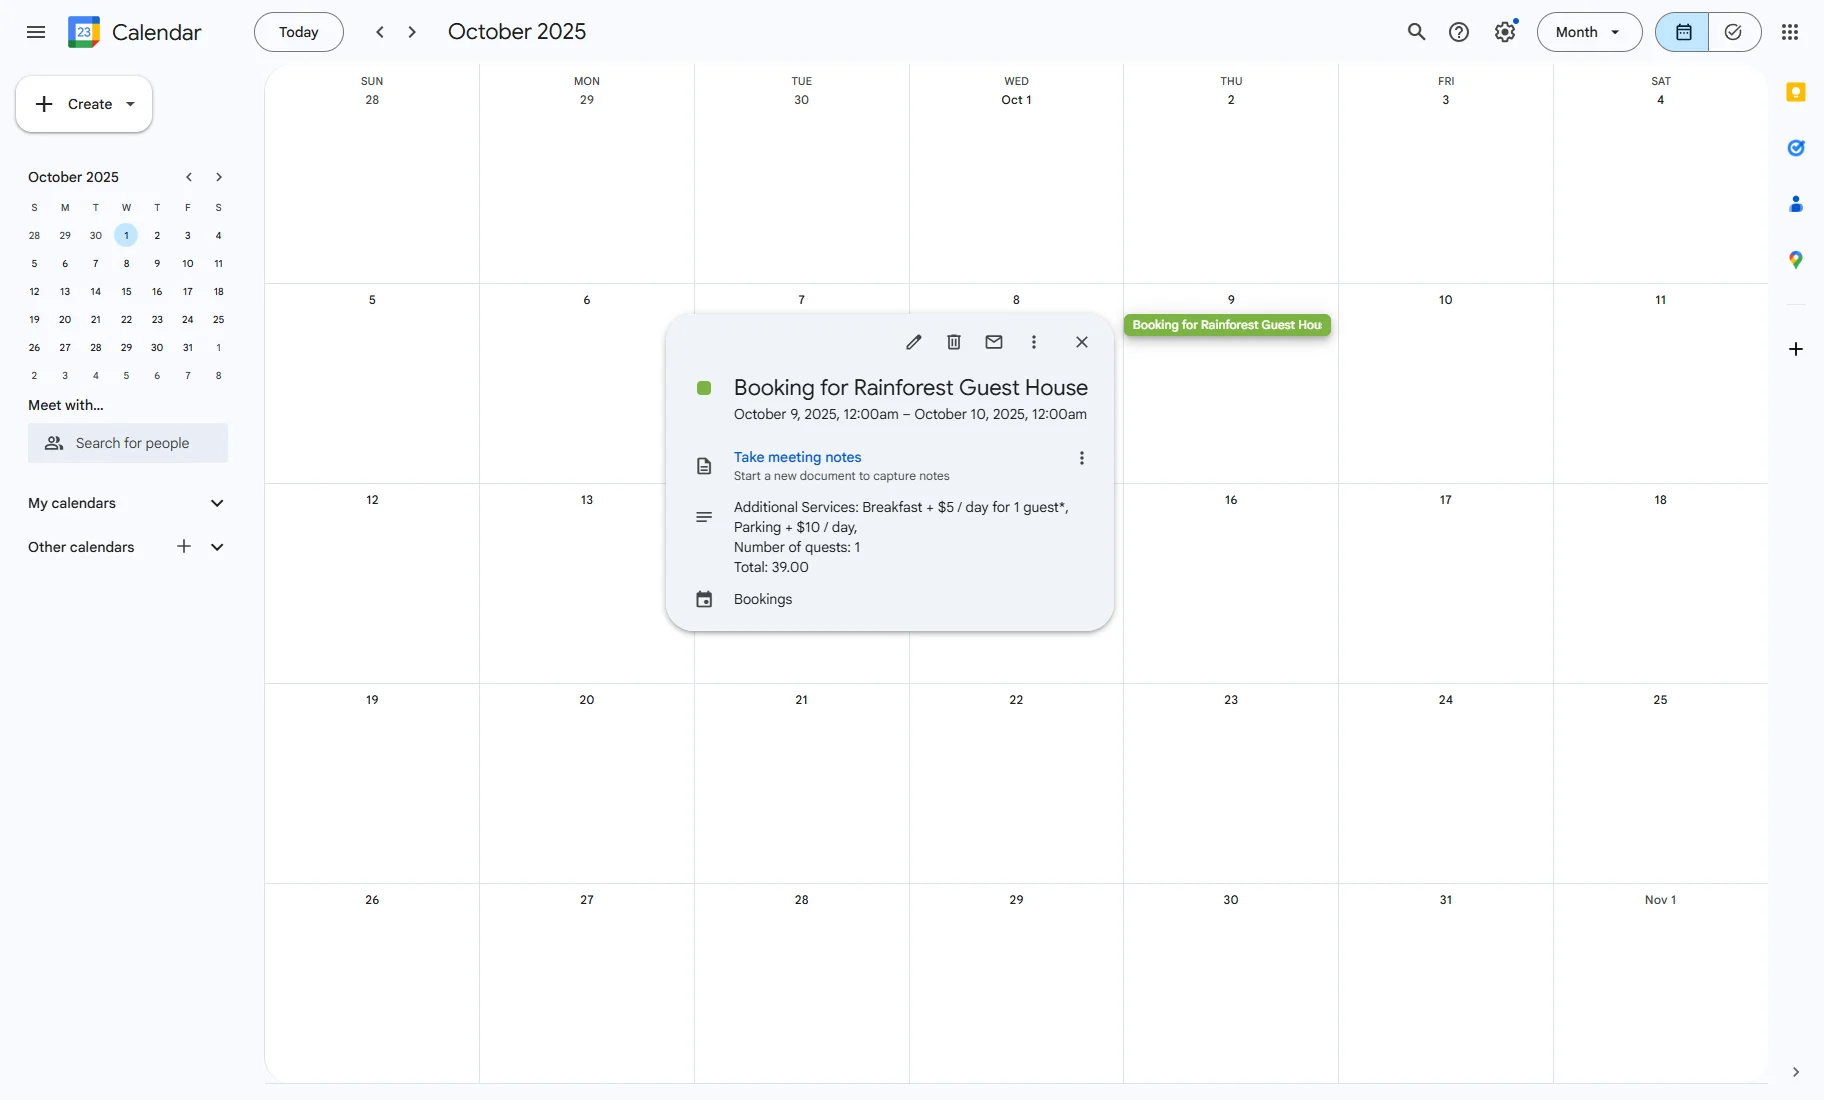
Submit the booking form from the WordPress website and proceed to the Google Calendar service. A new booking should appear here. Click it to view the booking details.
How to Connect Gmail to JetBooking and Google Calendar
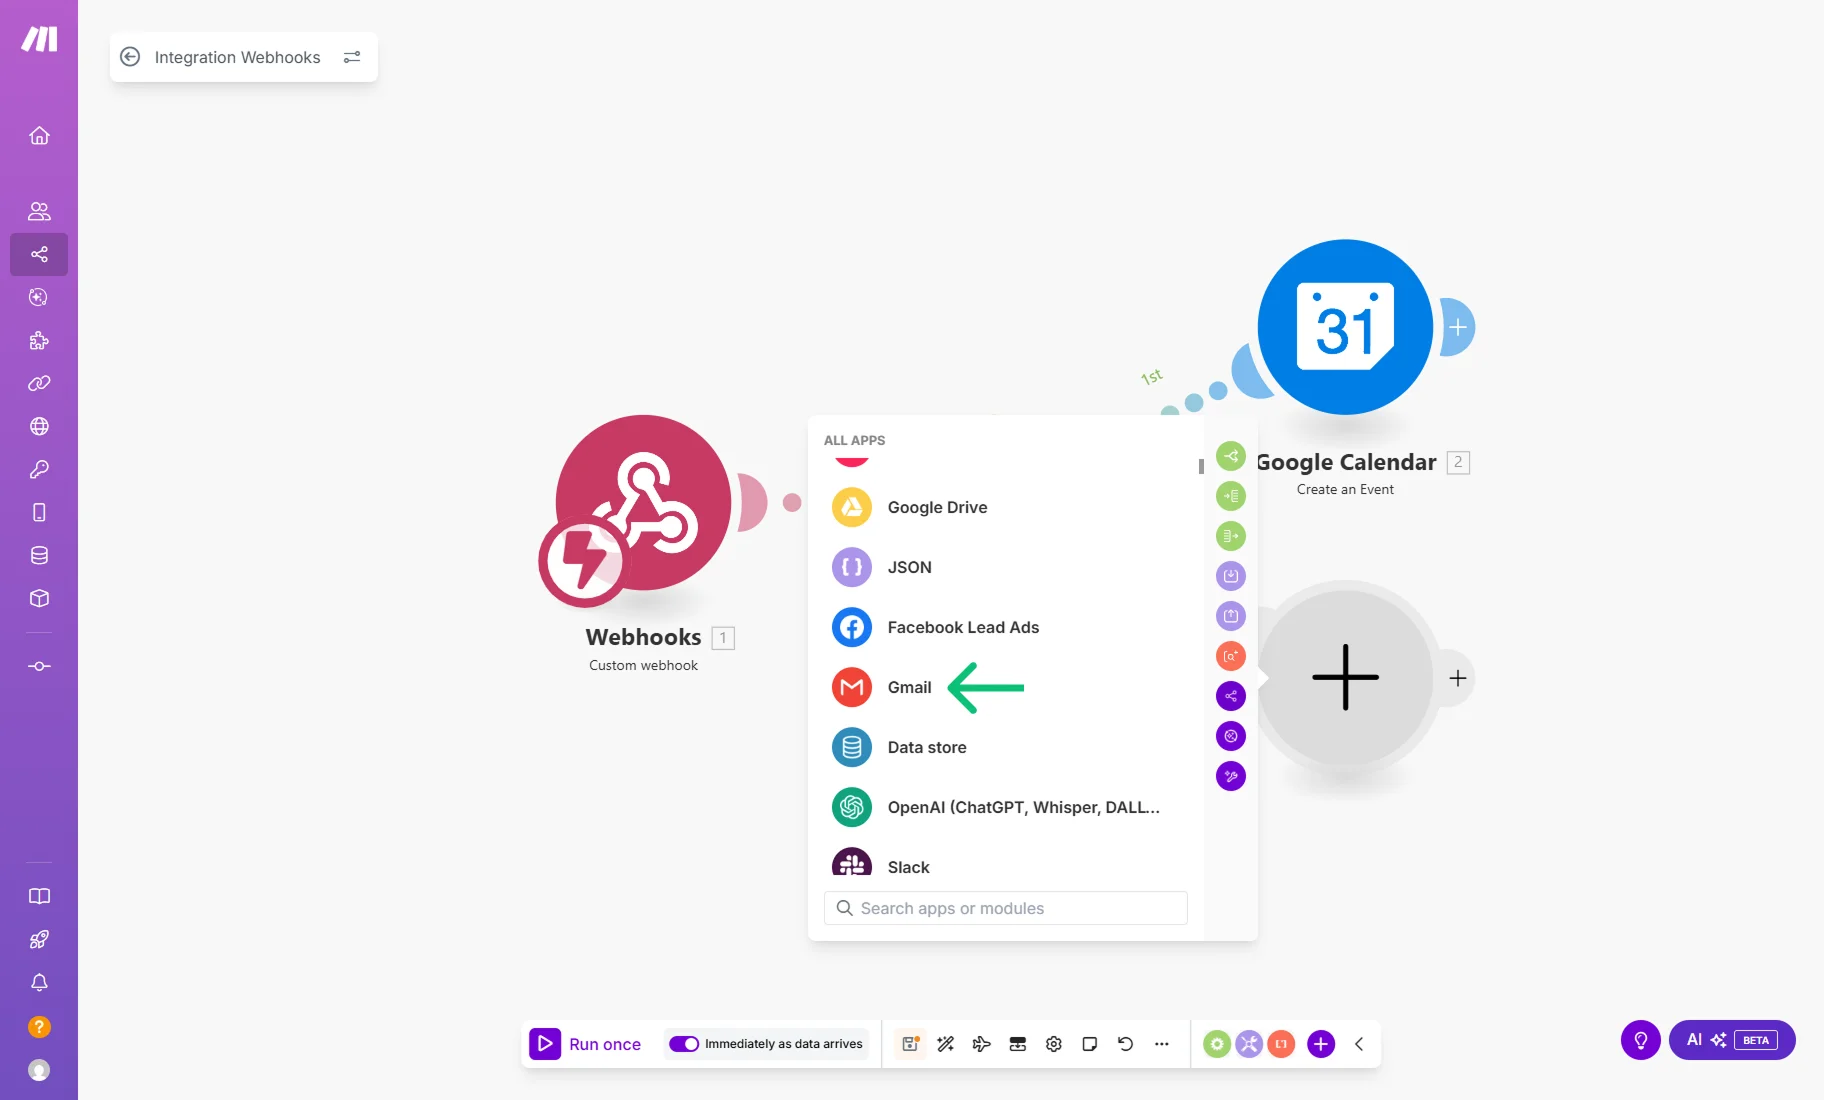
Click on the “wrench” icon between the Webhook and Google Calendar modules and press the “+ Add a router” option.

Add a new module and select “Gmail” from the list.
Then, select the “Send an Email” action.
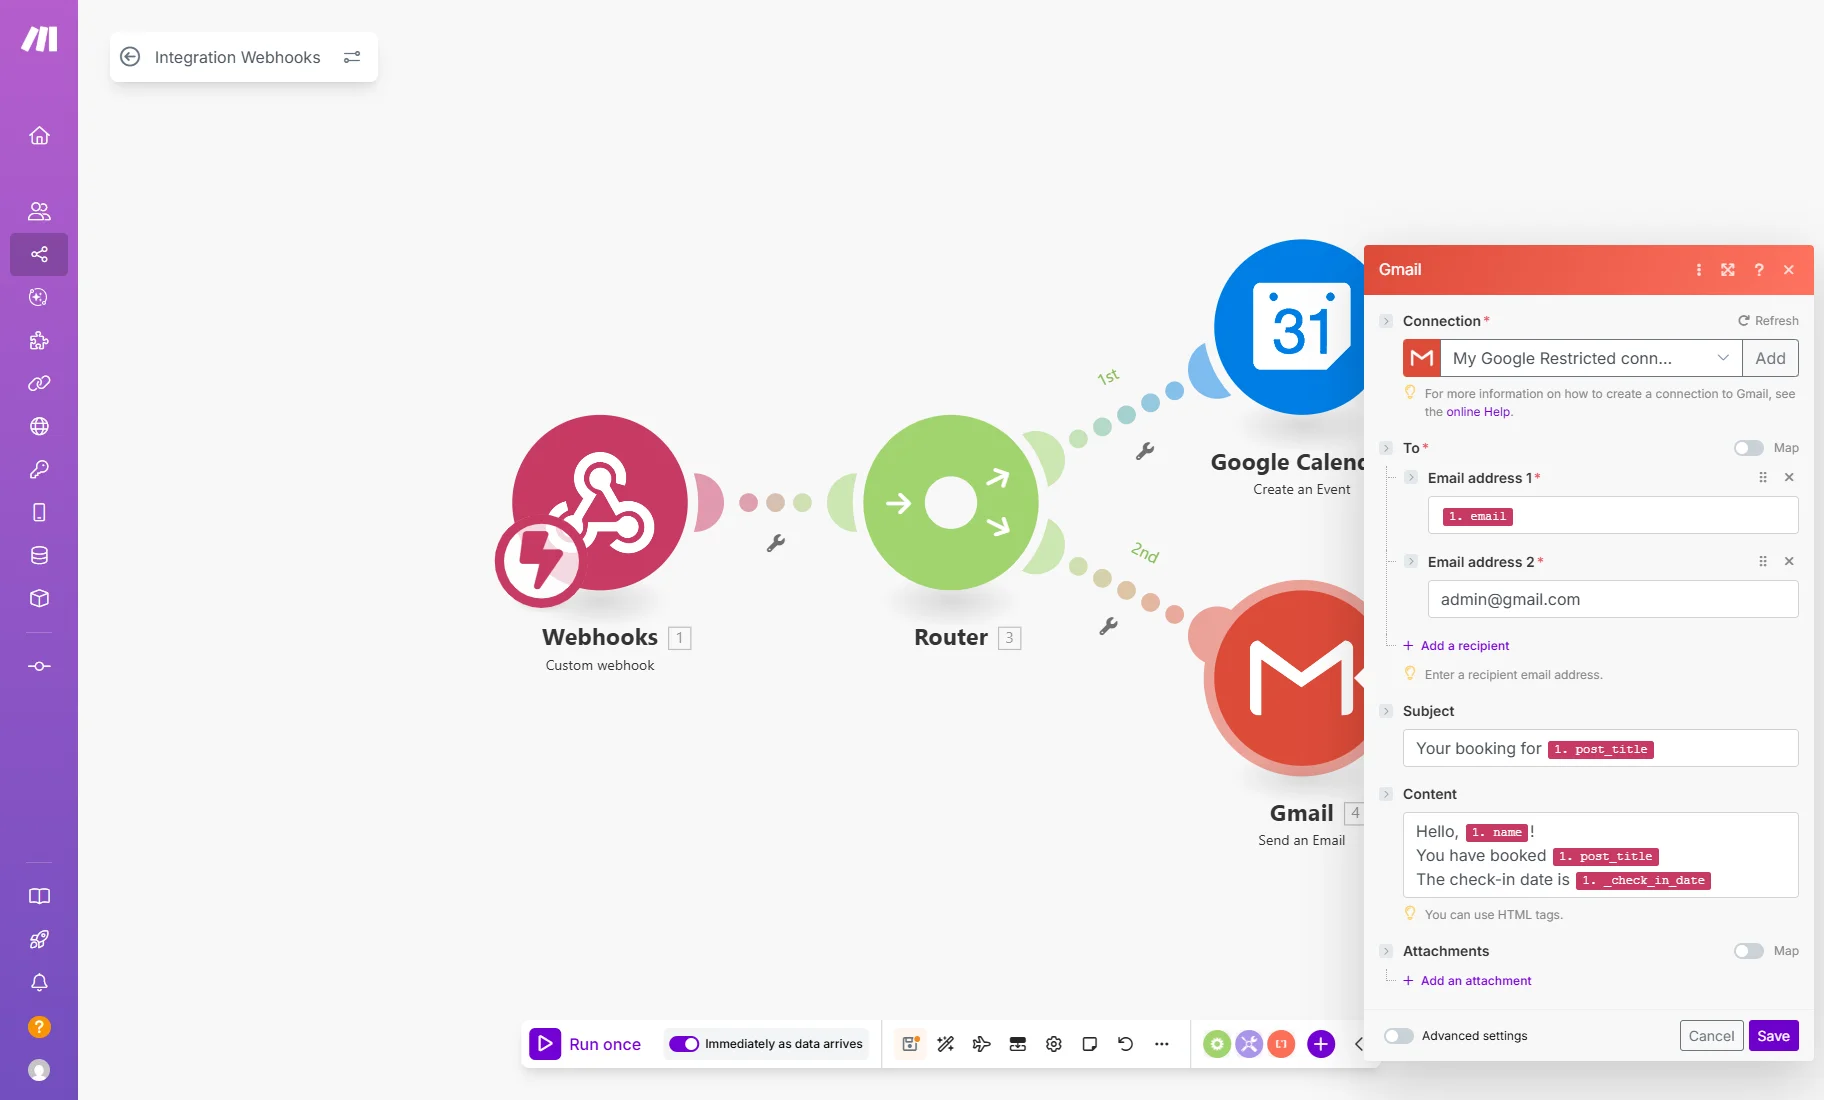
Click the “Add” button near the Connection bar and connect Make to your Gmail account, or select an existing connection from the dropdown.
In the To section, specify the emails to which the booking details should be sent. For example, you can set the email form field and the email of the site admin.
Additionally, you can customize the Subject and Content fields using the form field names and plain text. After that, press the “Save” button and save the scenario settings.
That’s it. By now, the Google Calendar and the JetBooking WordPress plugin are connected, displaying all bookings on the schedule. Additionally, with Gmail, both your users and you will receive booking information via email.