How to Set Up Booking with Wizard Setup
From this tutorial, you will find out how to set up the JetBooking plugin with a booking wizard.
Before you start, check the tutorial requirements:
- JetBooking plugin installed and activated
Use the wizard from the JetBooking plugin to set a booking for your website.
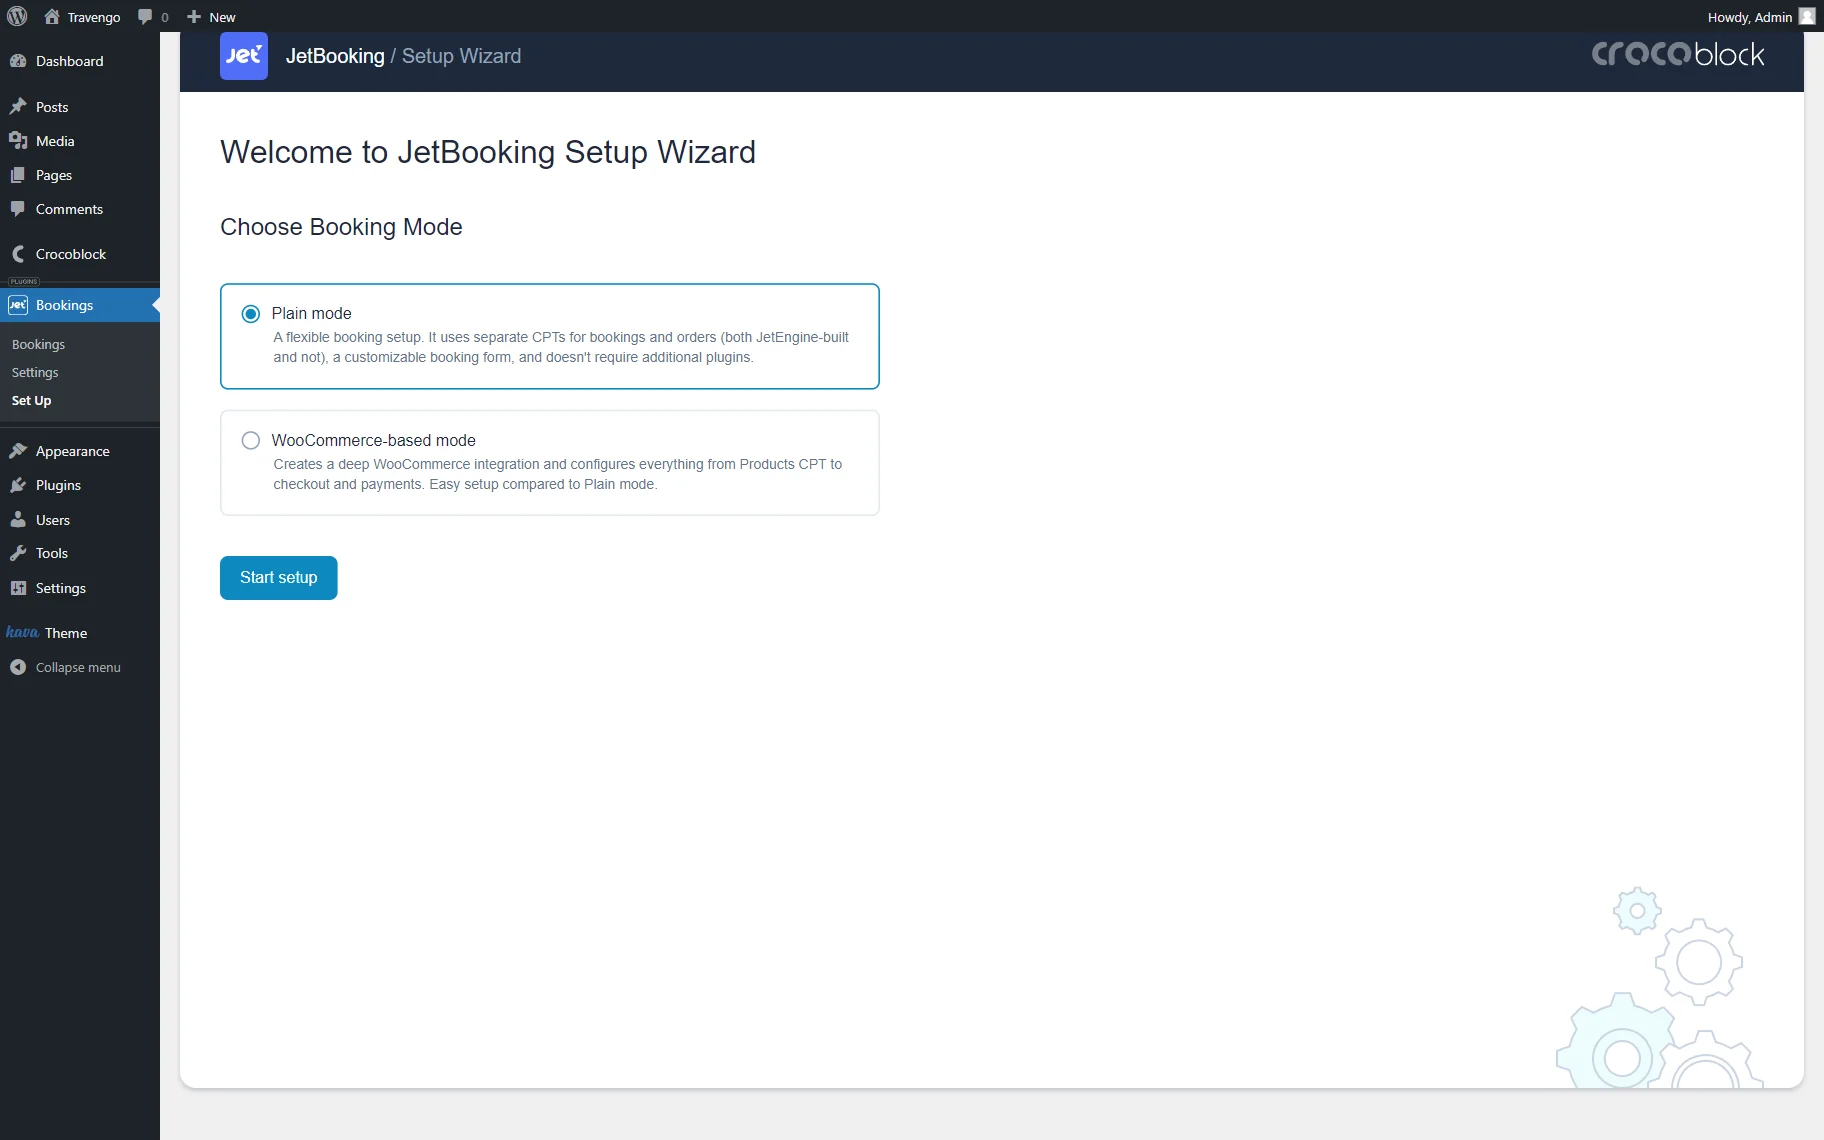
Navigate to WordPress Dashboard > Bookings > Set Up to start the setup.
In the first step, choose the booking mode. Here, you can select either the “Plain mode” or “WooCommerce-based mode” if you have the WooCommerce plugin installed and activated.
The “Plain mode” option lets you set up the post type for bookings and orders, create a booking form (required), and it doesn’t require additional plugins.
The “WooCommerce-based mode” option is available only when the WooCommerce plugin is installed and activated. When selected, bookings will be based on the WooCommerce products, and all the booking data will be taken from the WooCommerce product fields. All the bookings will then be stored in the WordPress Dashboard > Bookings directory.
Check more information in the How to Use Booking with WooCommerce Based Mode tutorial.
If you select the “Plain mode”, in the second step, you can set up a booking instance. Here, you can pick the Booking Post Type from the already-built post types. You can assign one or several post types to this field.

In the following step, set up the Order Post Type.
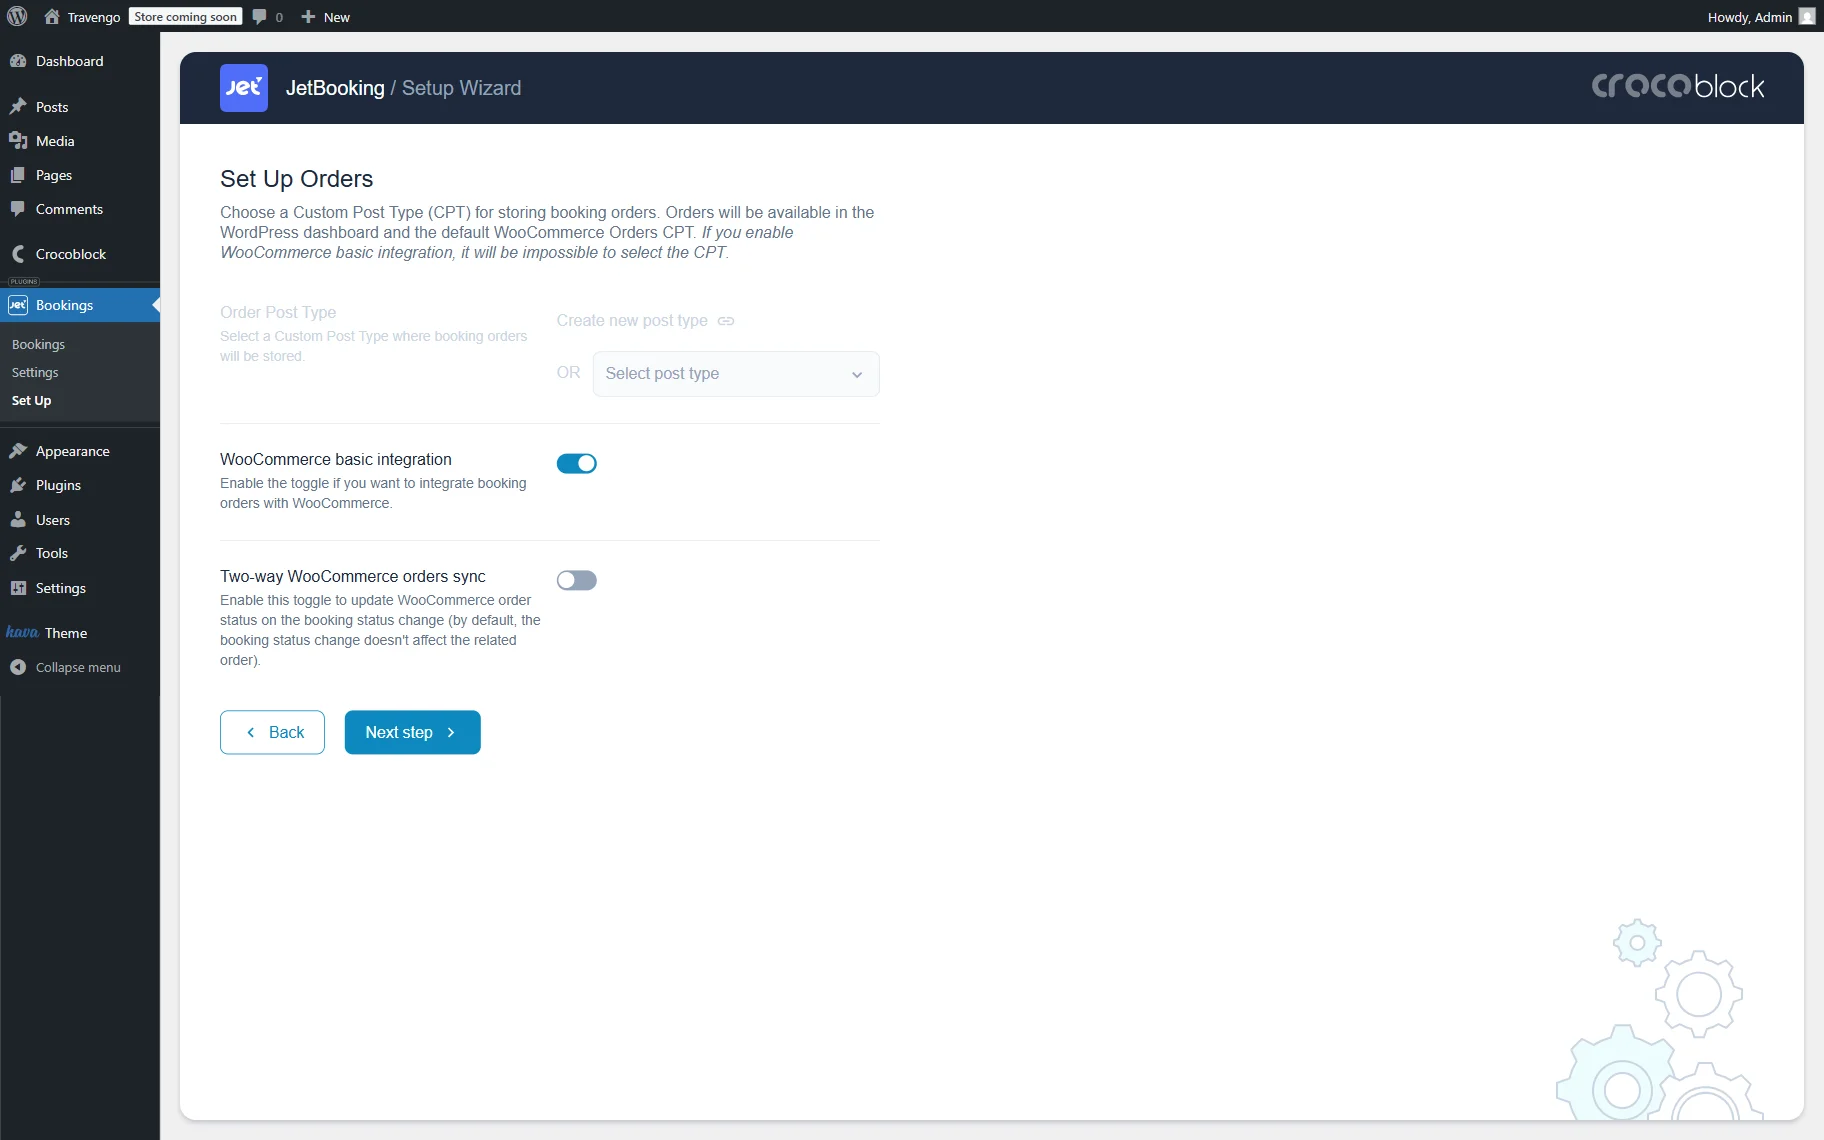
Alternatively, enable the WooCommerce basic integration toggle to manage the bookings with the help of the WooCommerce plugin. When this toggle is activated, JetBooking uses WooCommerce orders to store bookings instead of a CPT.
So, the key difference is:
- Plain Mode + WooCommerce basic integration — bookings are managed using WooCommerce orders, but the booking process itself is separate from WooCommerce products;
- WooCommerce-based mode — the entire booking process is fully integrated with WooCommerce.
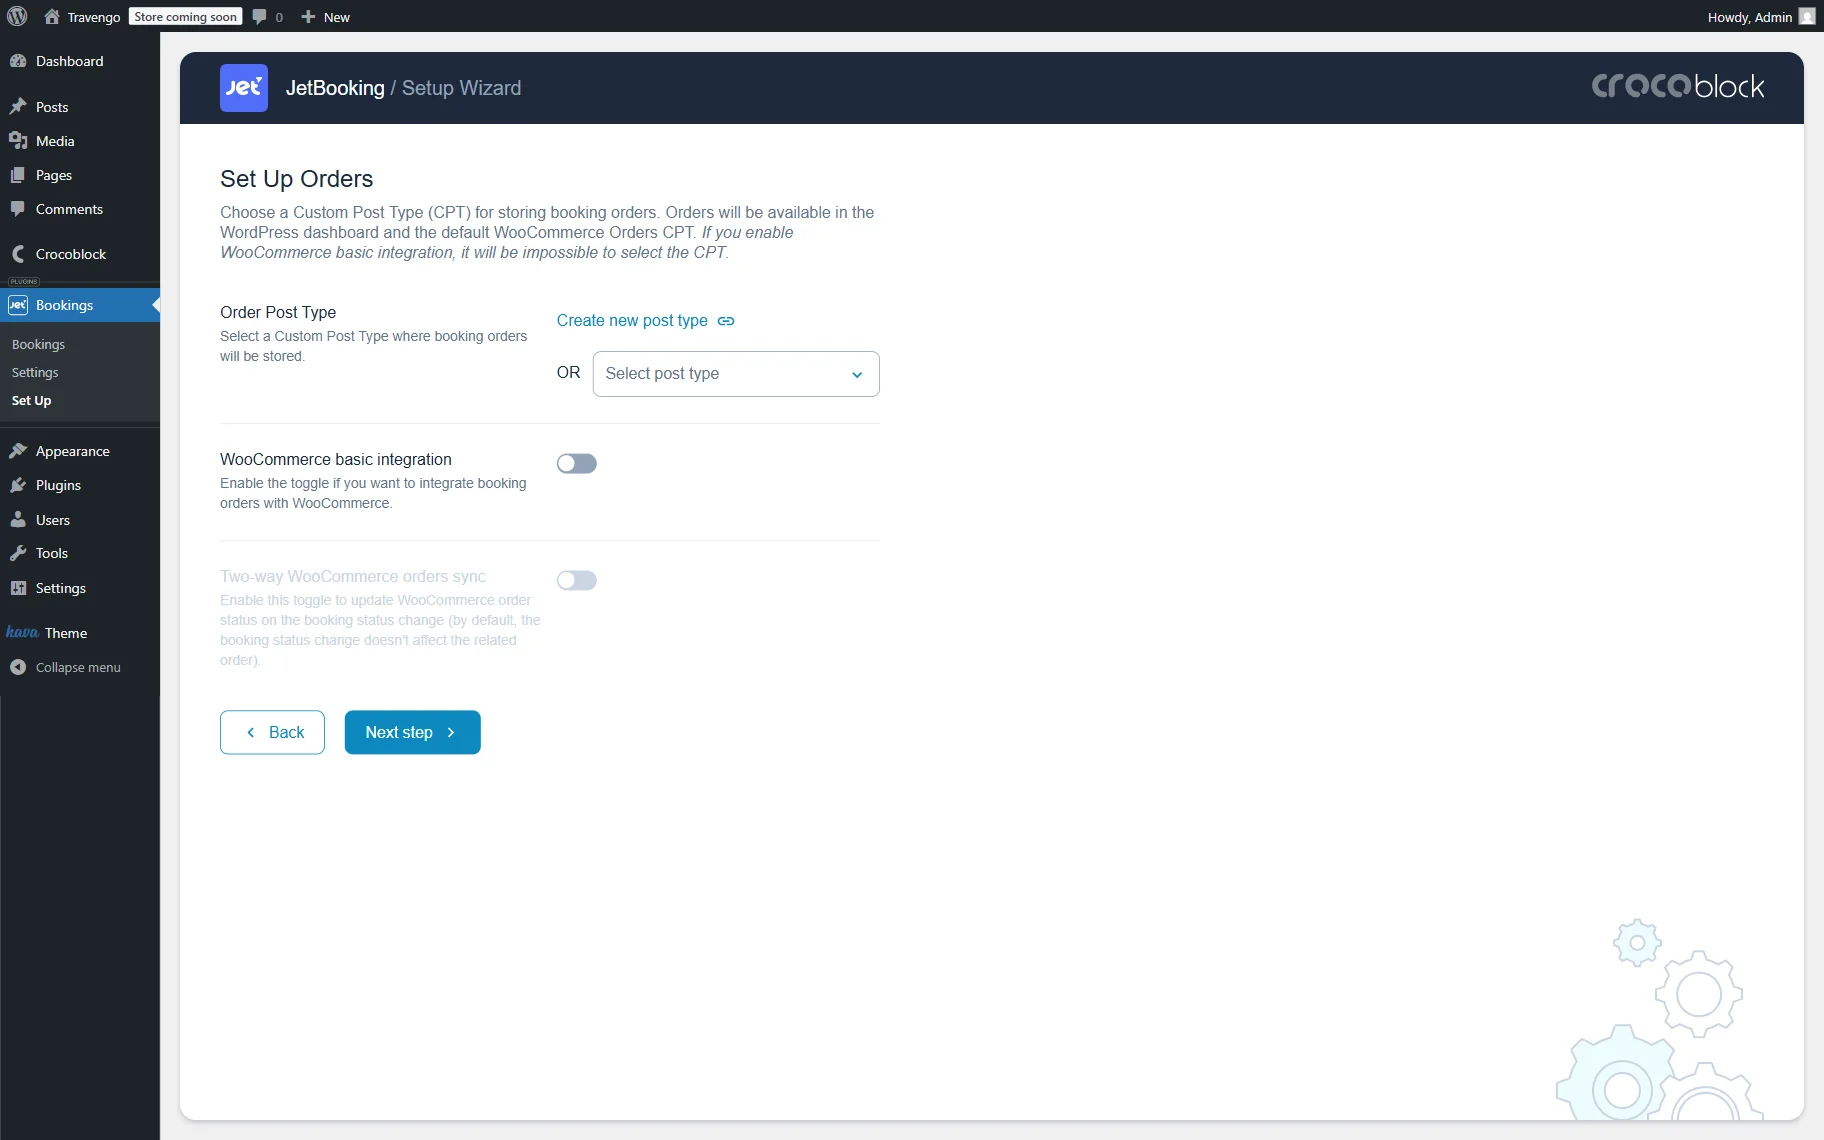
Also, if you enable the WooCommerce basic integration, you can activate the Two-way WooCommerce orders sync option. This allows the WooCommerce order status to update automatically with any booking status change, which isn’t the default behavior.
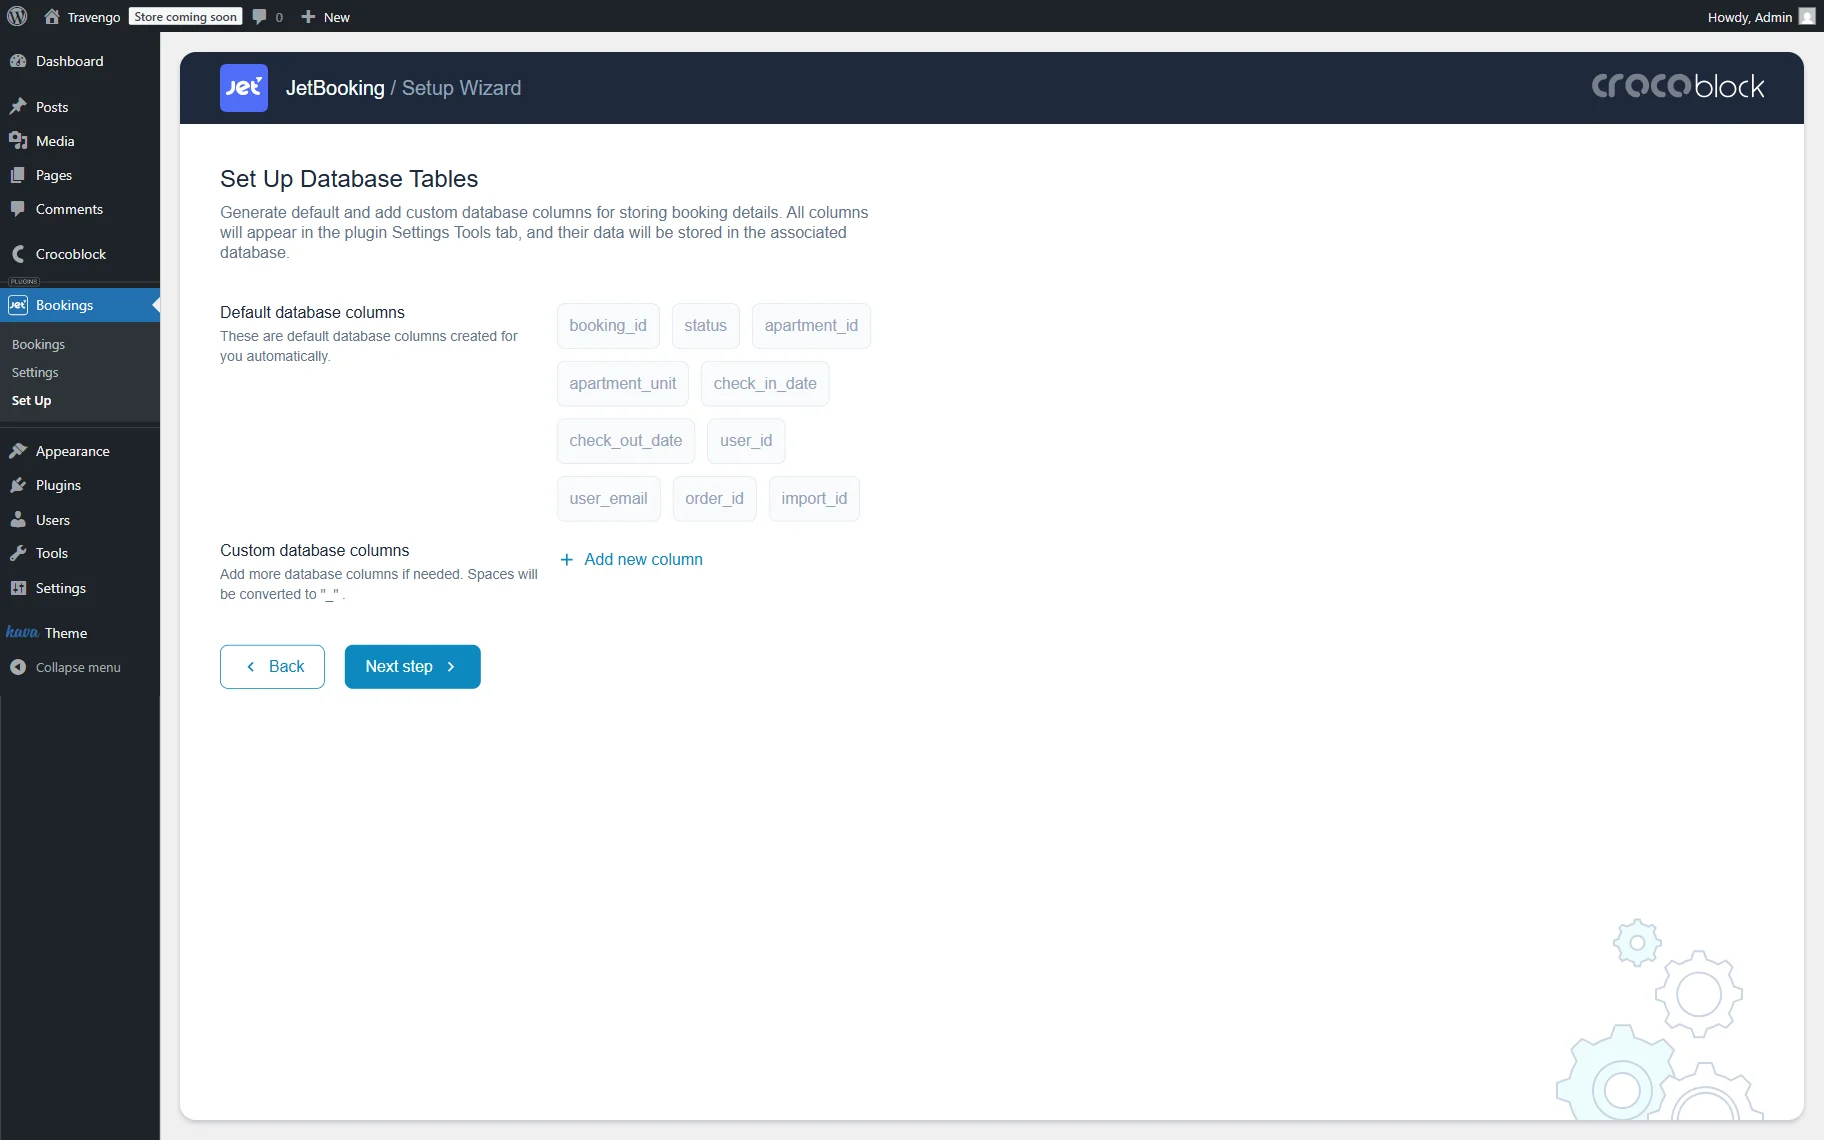
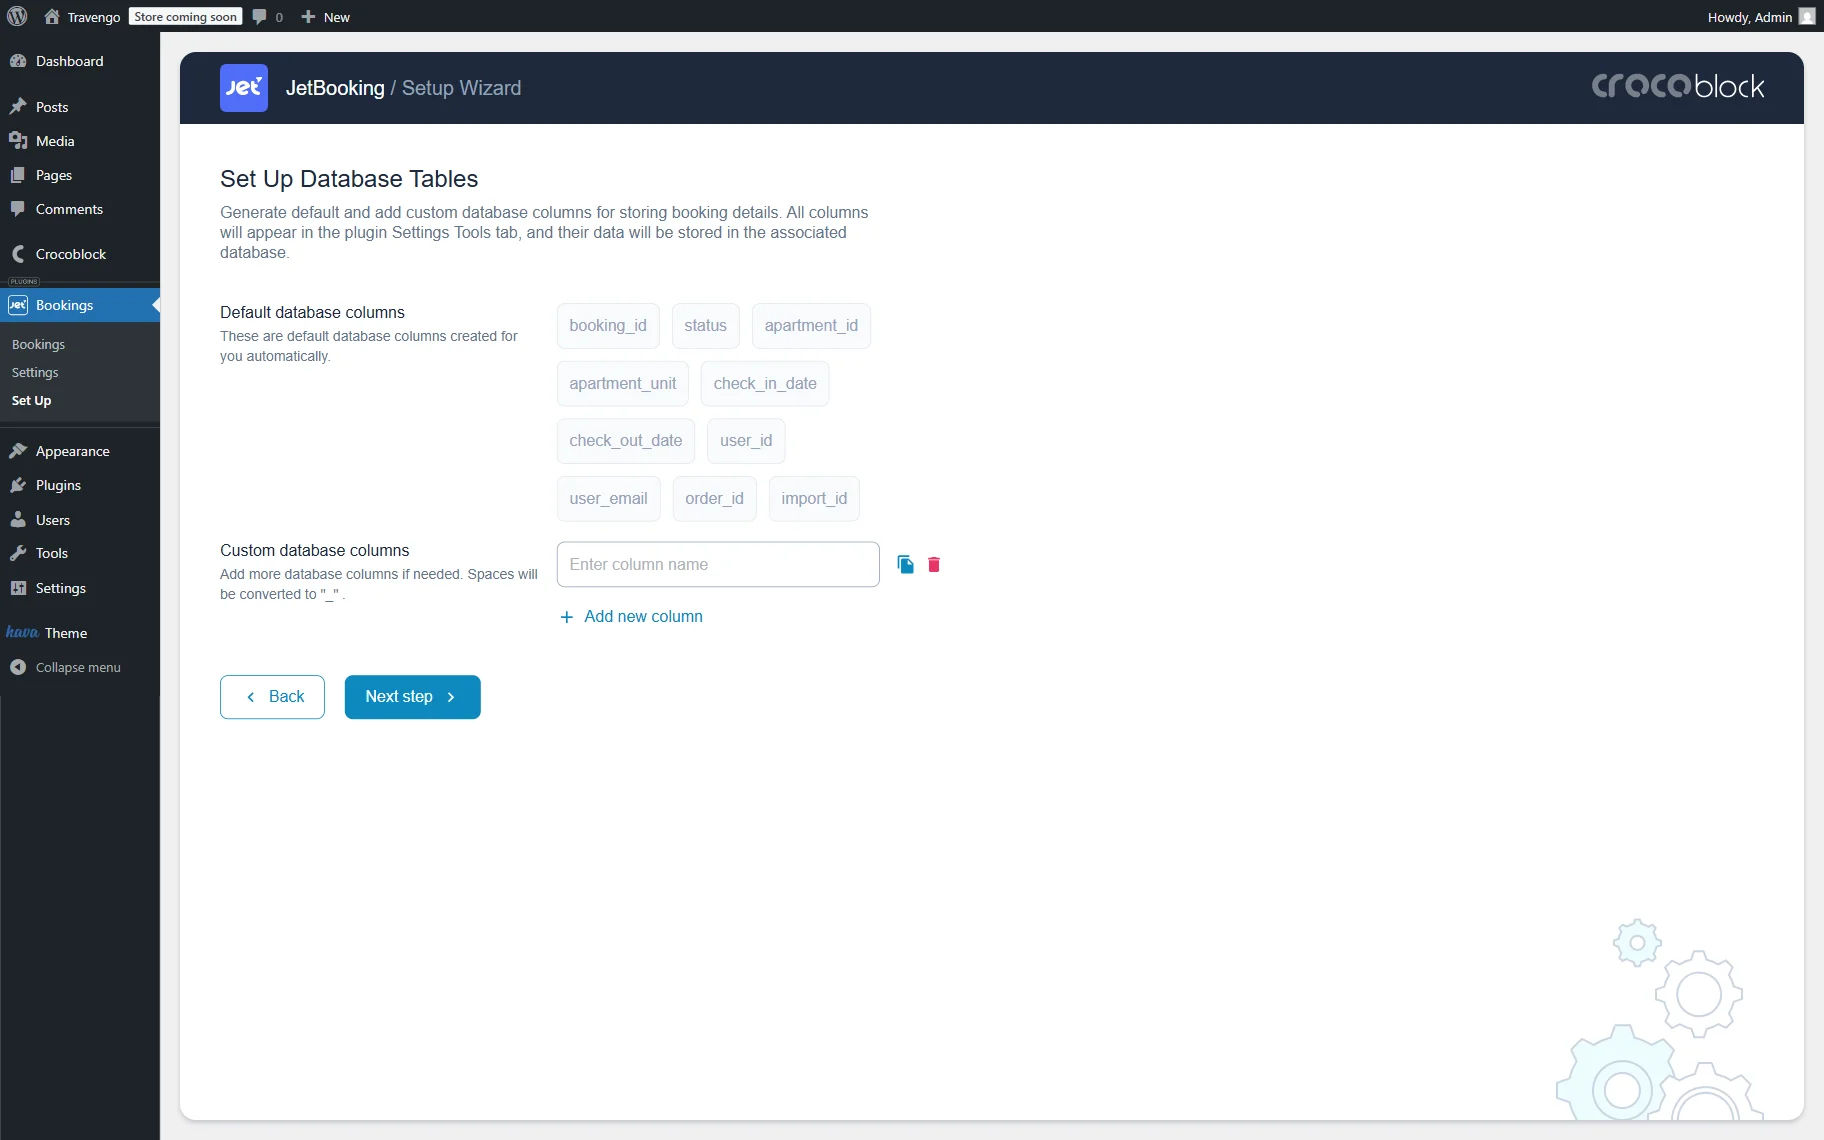
The next step is to set up database tables. Here, you will see a minimum set of the required columns next to the Default database columns title.
You can attach additional columns according to your needs by clicking the “Add new column” button.
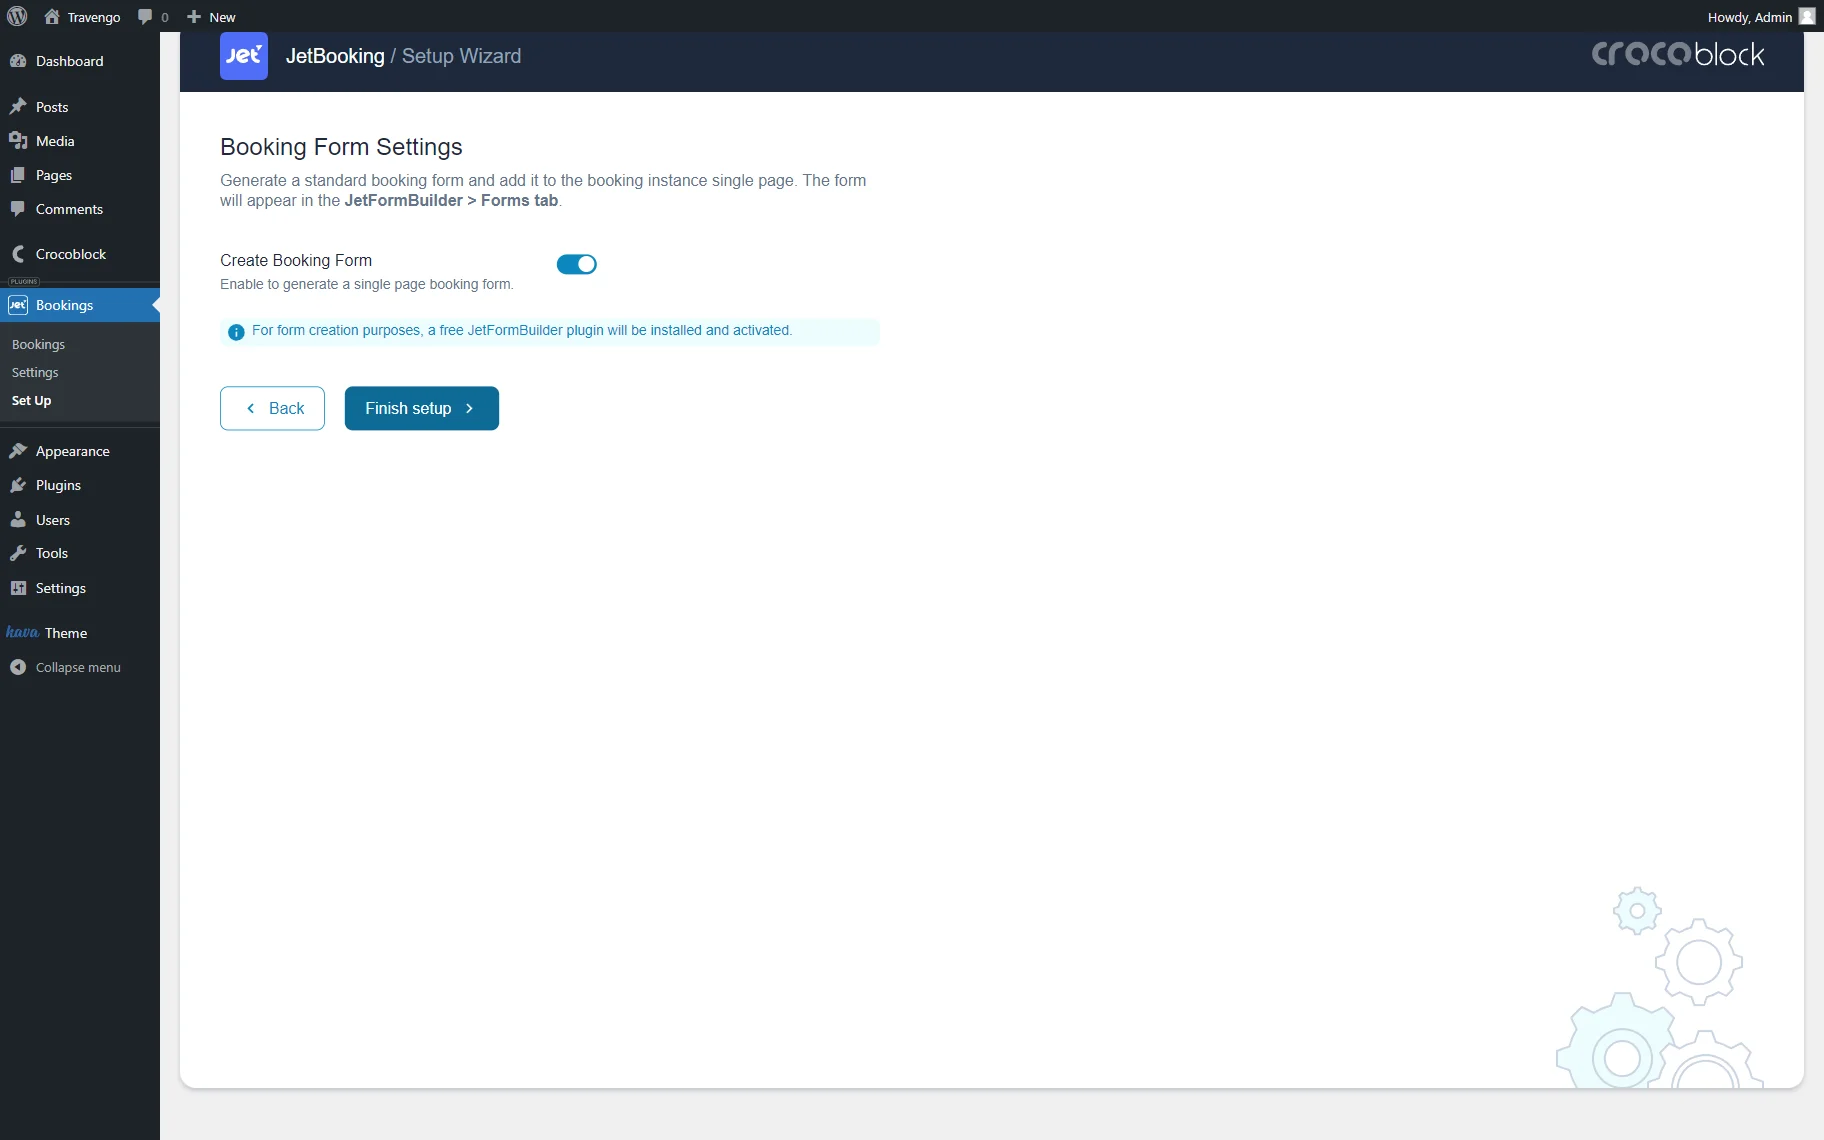
The final step is to create a booking form for the single booking page.
Click on the “Finish” button to save the changes.
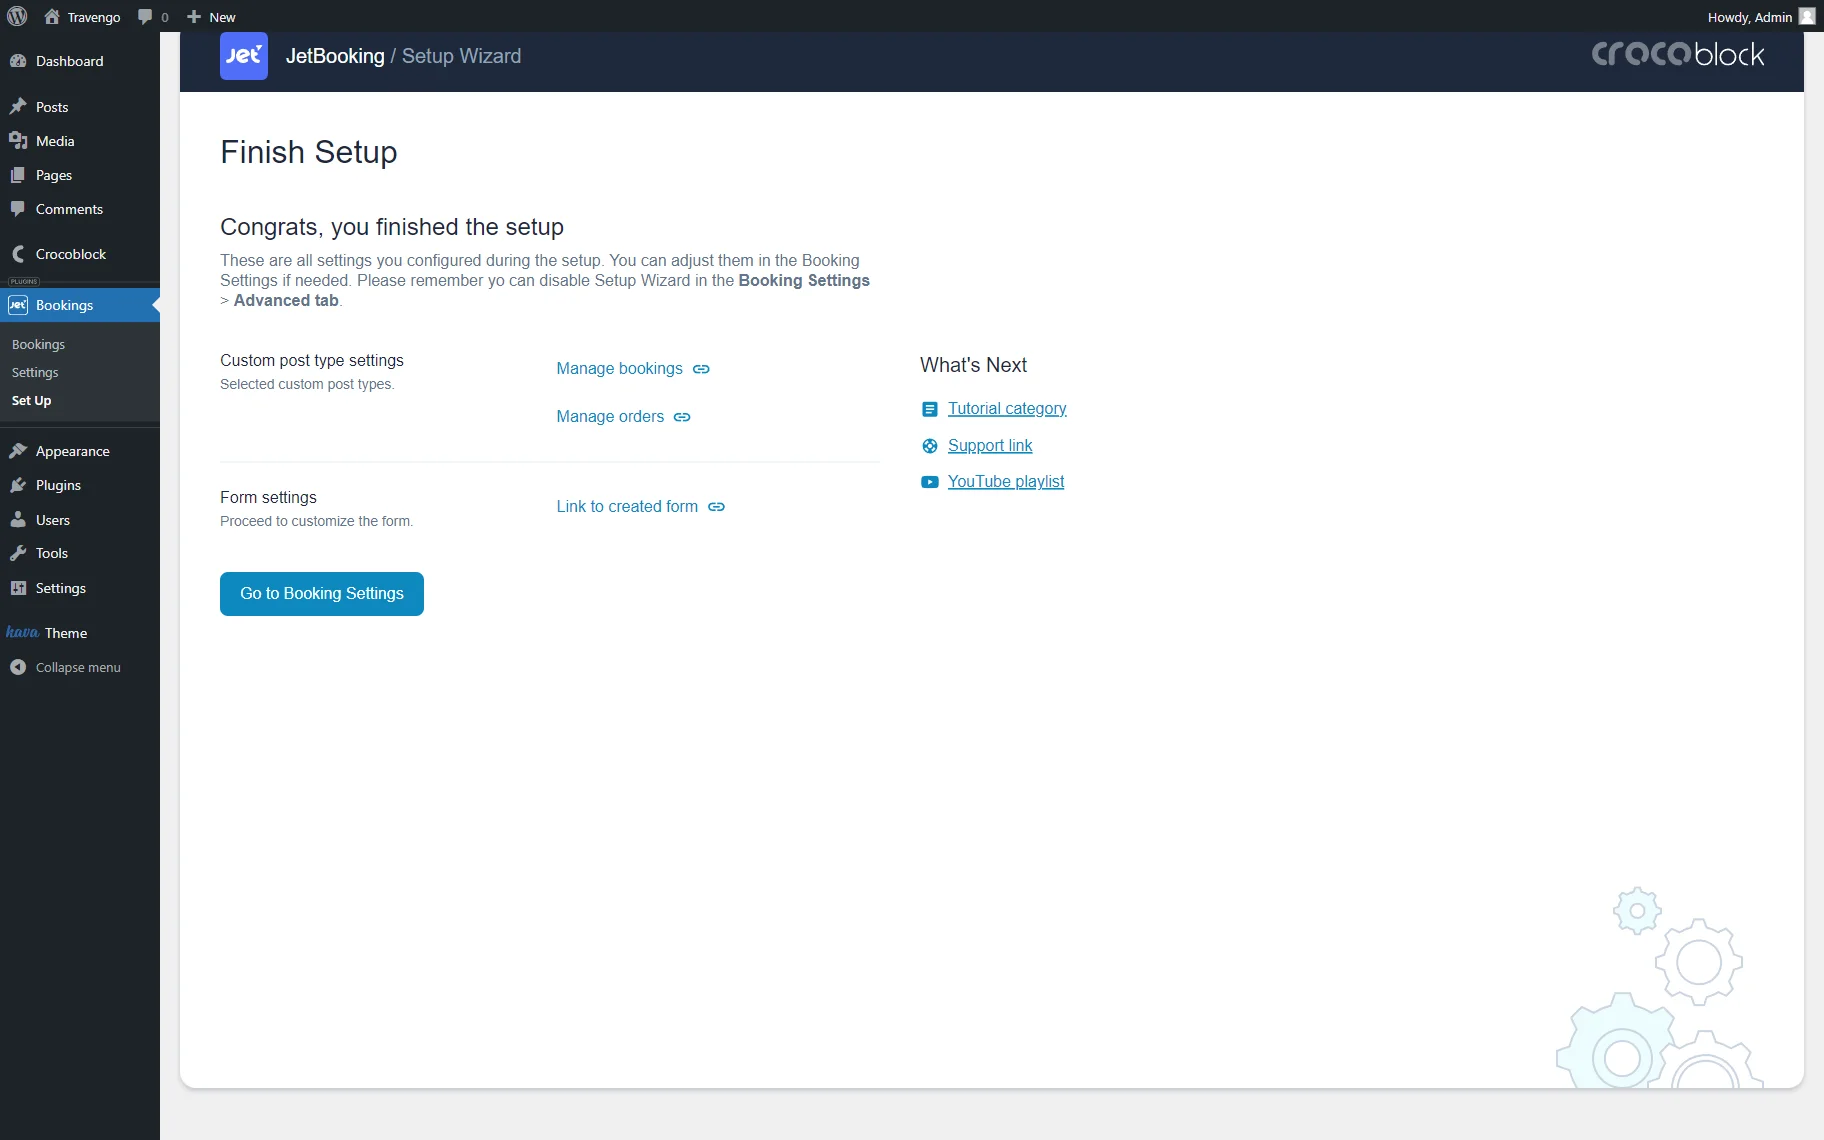
When you’re done with all the steps, the final window appears. It contains the information about the booking form you’ve already created.
Now, you can push the “Go to Booking Settings” button to alter the settings according to your wishes.
If you select the “WooCommerce-based” mode at the beginning of setup, all the required information will be automatically added to your WooCommerce products right after you click the “Start setup” button, and you will be redirected to the Finish Setup window immediately.
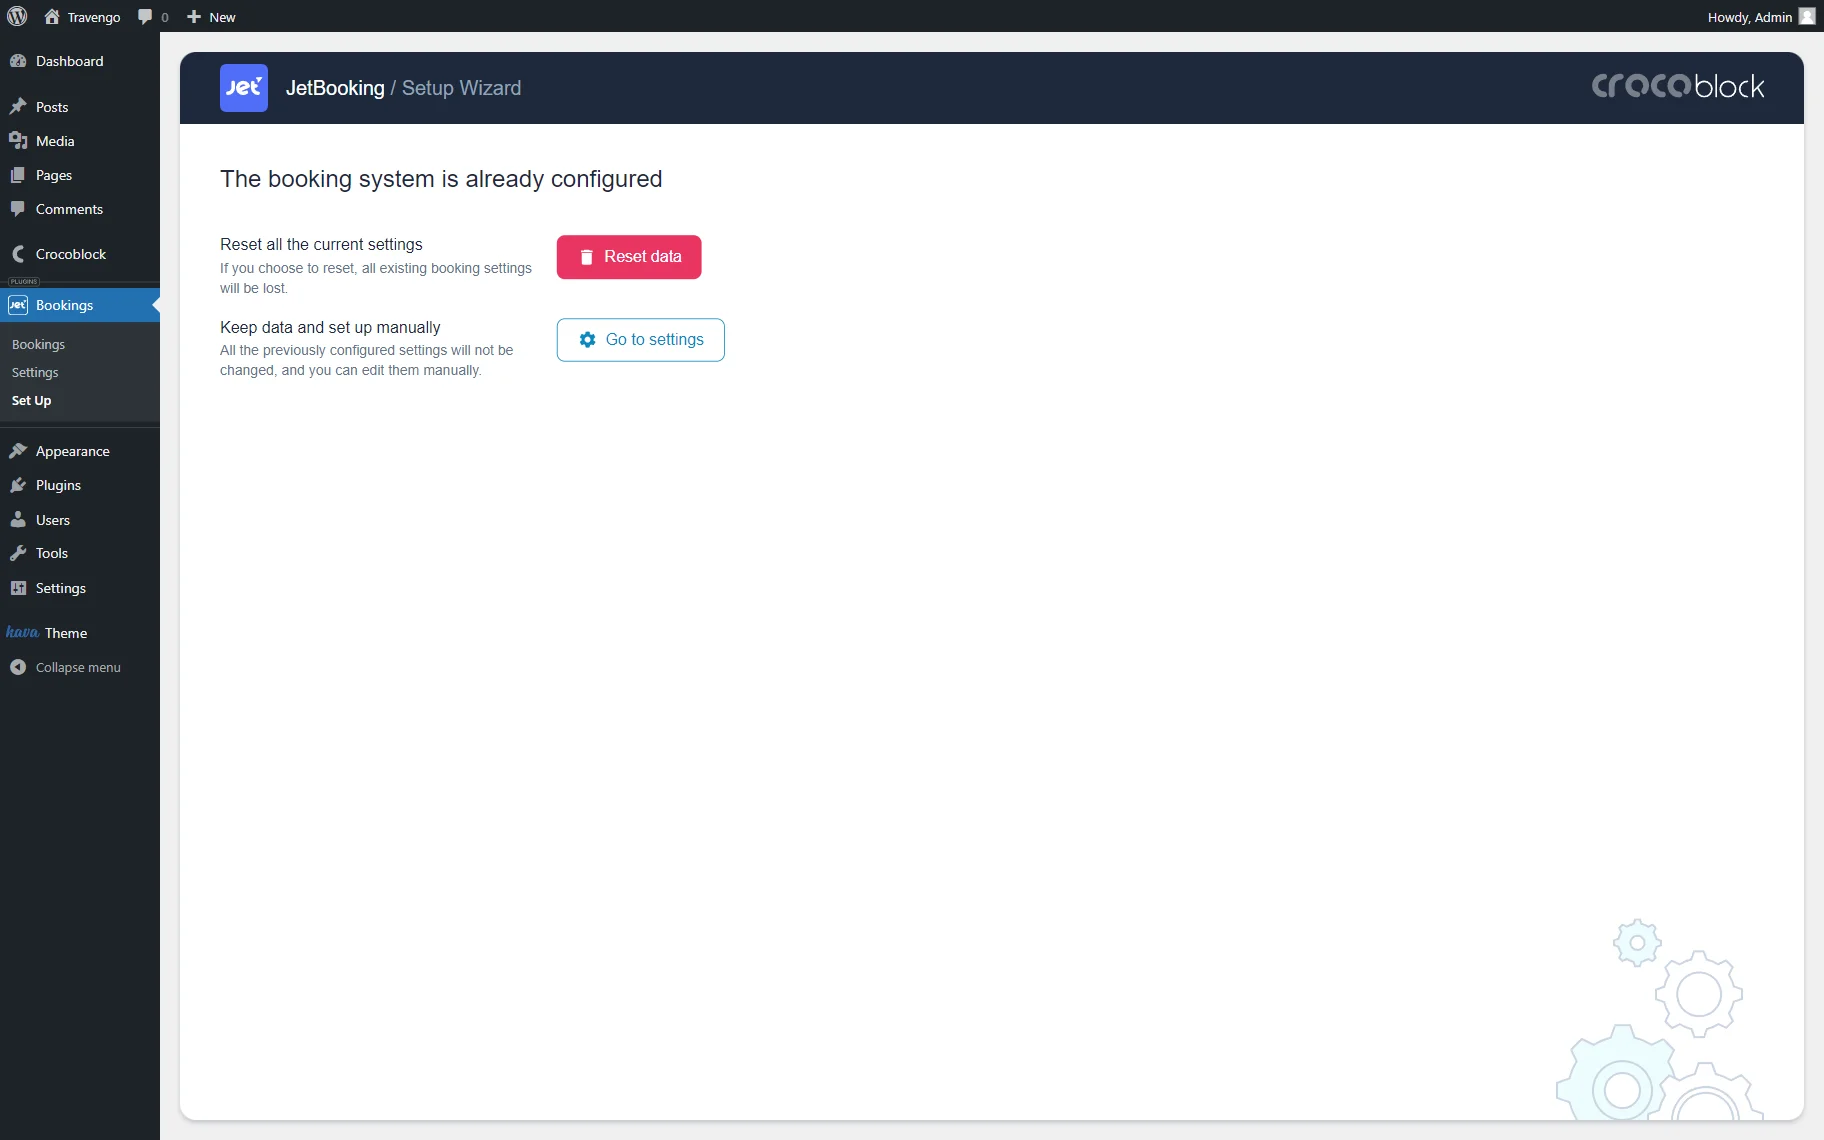
Now, if you return to the WordPress Dashboard > Bookings > Set Up directory again, you will be able to hit “Reset data” and start the setup all over again or access the settings.
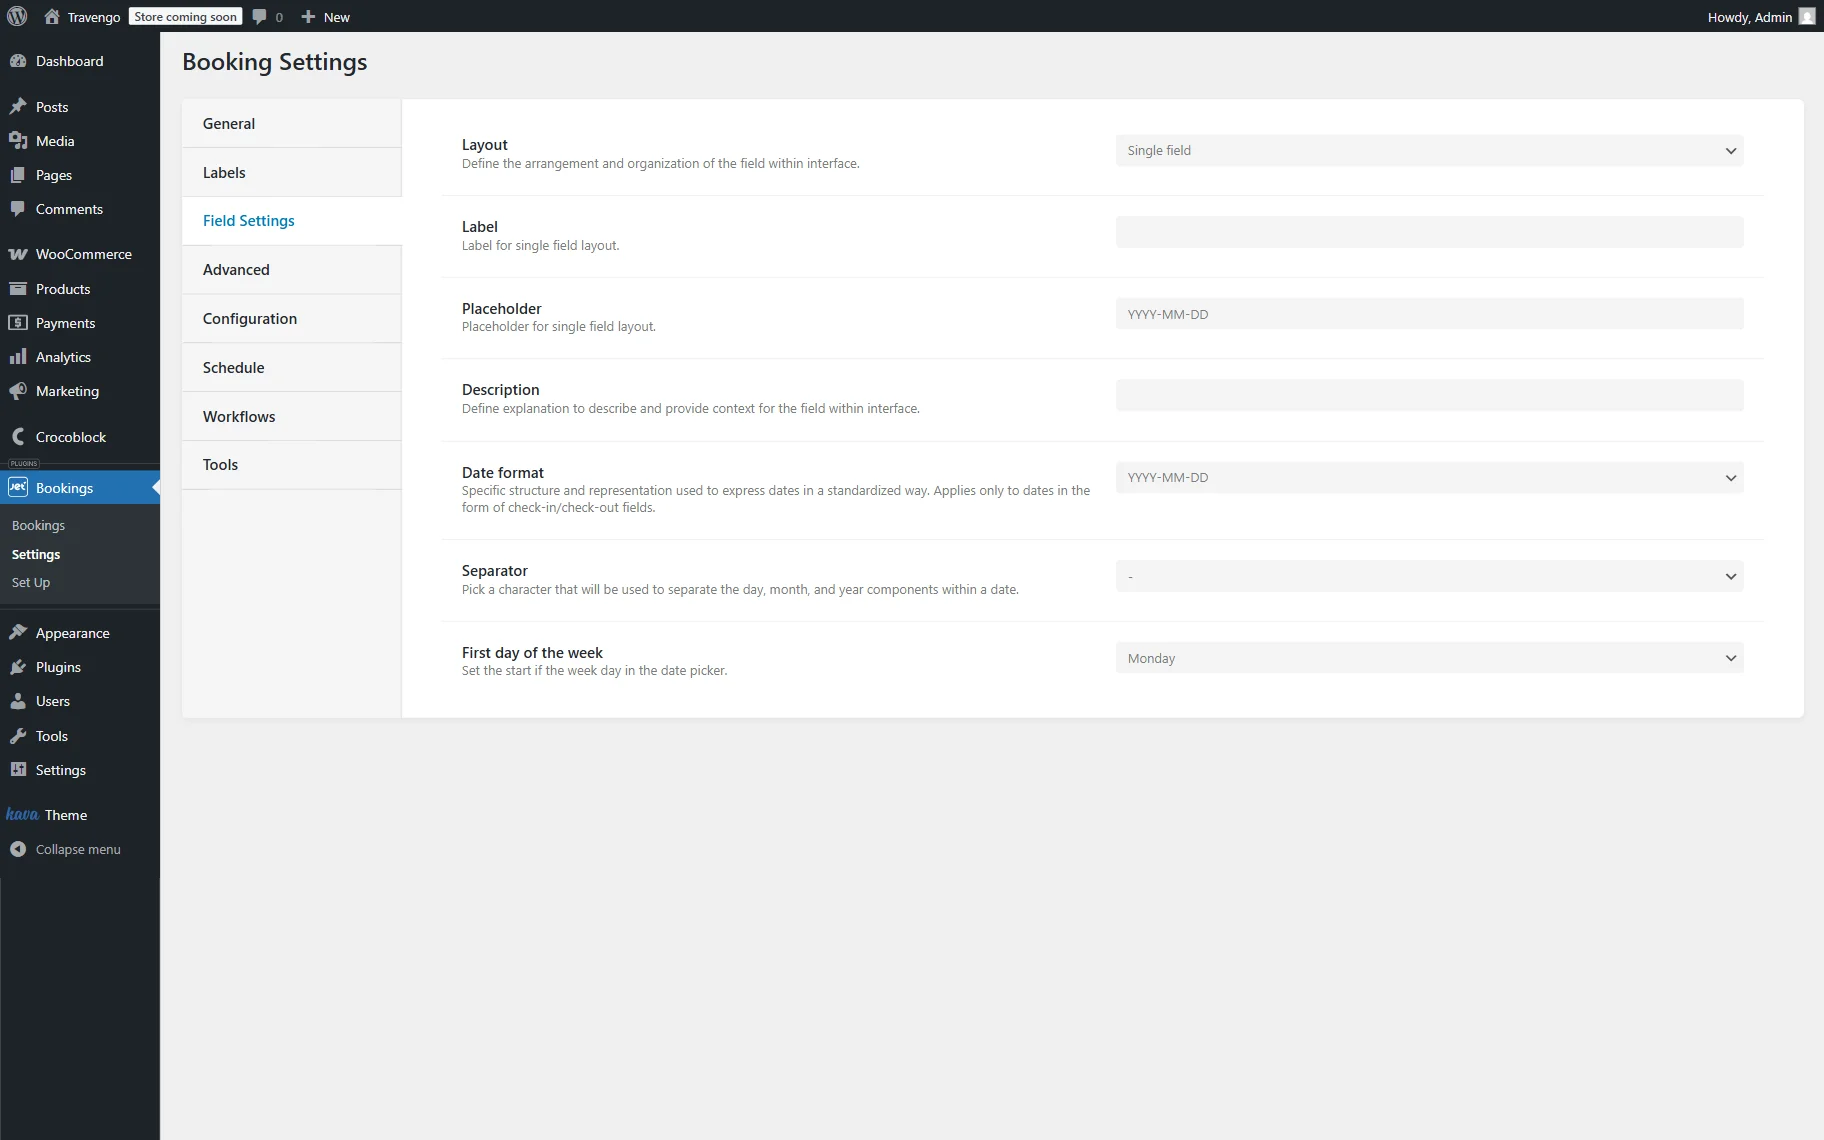
Also, mind that if you have selected the “WooCoomerce-based” mode, you can adjust the date fields settings in the Field Settings tab of the WordPress Dashboard > Bookings > Settings directory.
That’s all. Now, you know how to set up the JetBooking plugin to create bookings on your WordPress website.