How to Add Reserved Bookings Count to Listing
With this tutorial, you will learn how to show users how many times each property was booked by desired period.
Before you start, check the tutorial requirements:
- Elementor (Free version)
- JetEngine plugin installed and activated
- JetBooking plugin installed and activated
Edit Listing Template
The JetBooking plugin allows showing a bookings count for specific posts. To make this feature work, you need to add a widget with the Dynamic Tags option.
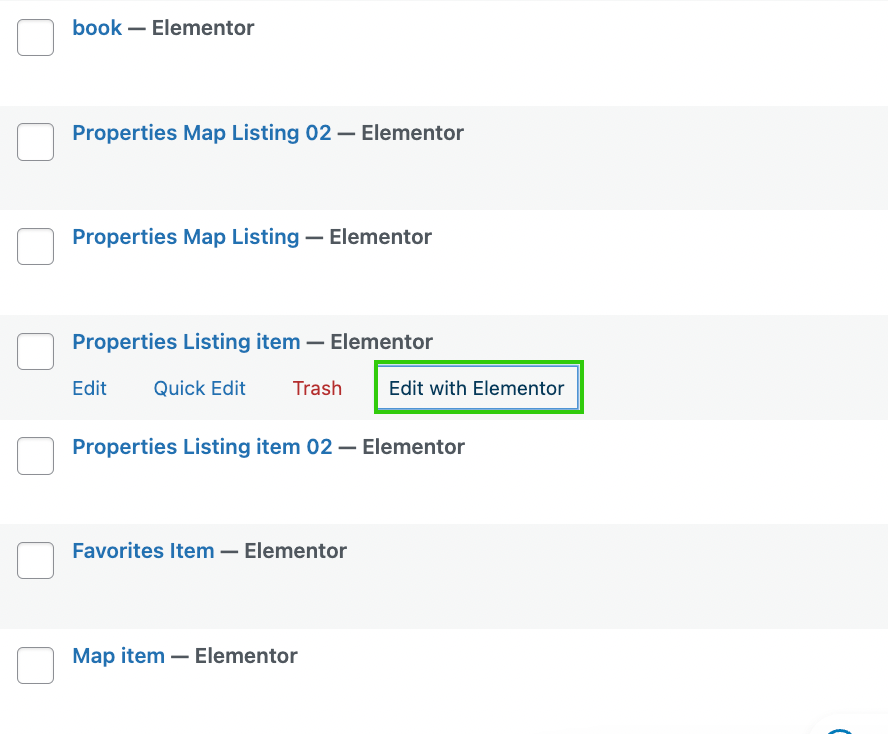
Go to WordPress Dashboard > JetEngine > Listings. Hover over the needed template which is added in the JetBooking as Booking Instance CPT, and press the “Edit with Elementor” button.

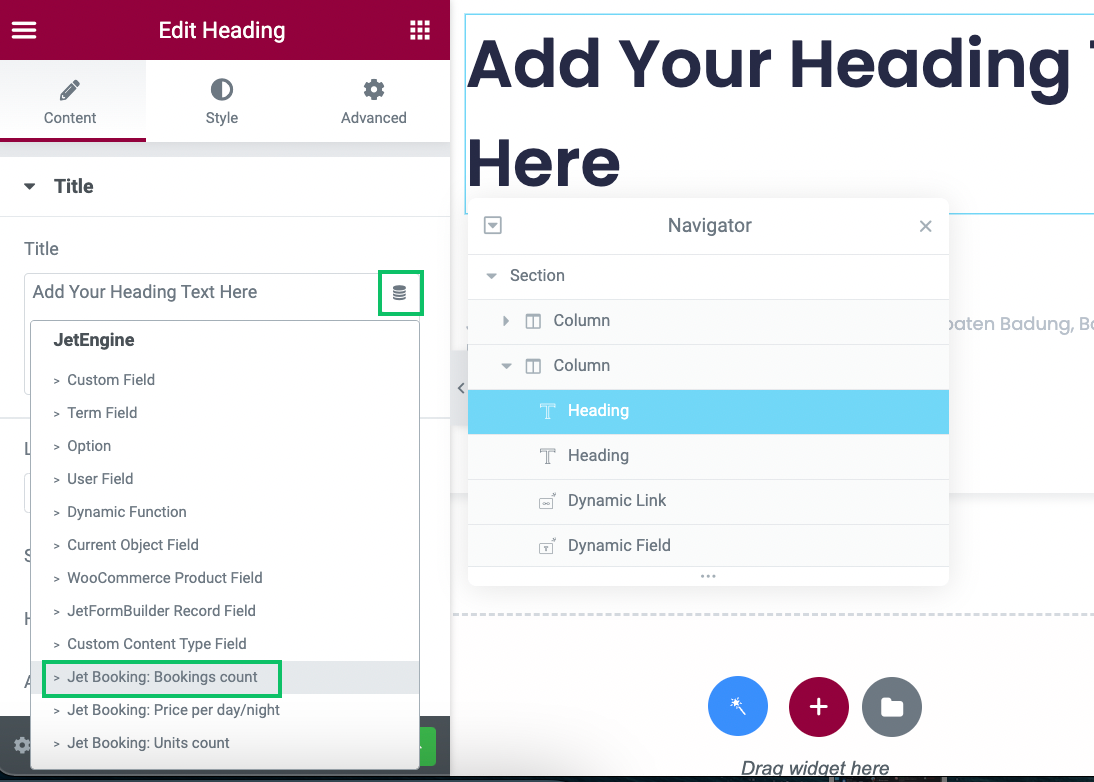
Find the Heading with the help of the search bar and drag-n-drop the widget into the content area.
Click the “Dynamic Tag” button and scroll to the JetEngine section. Here, find the “JetBooking: Bookings count” tag and select it.

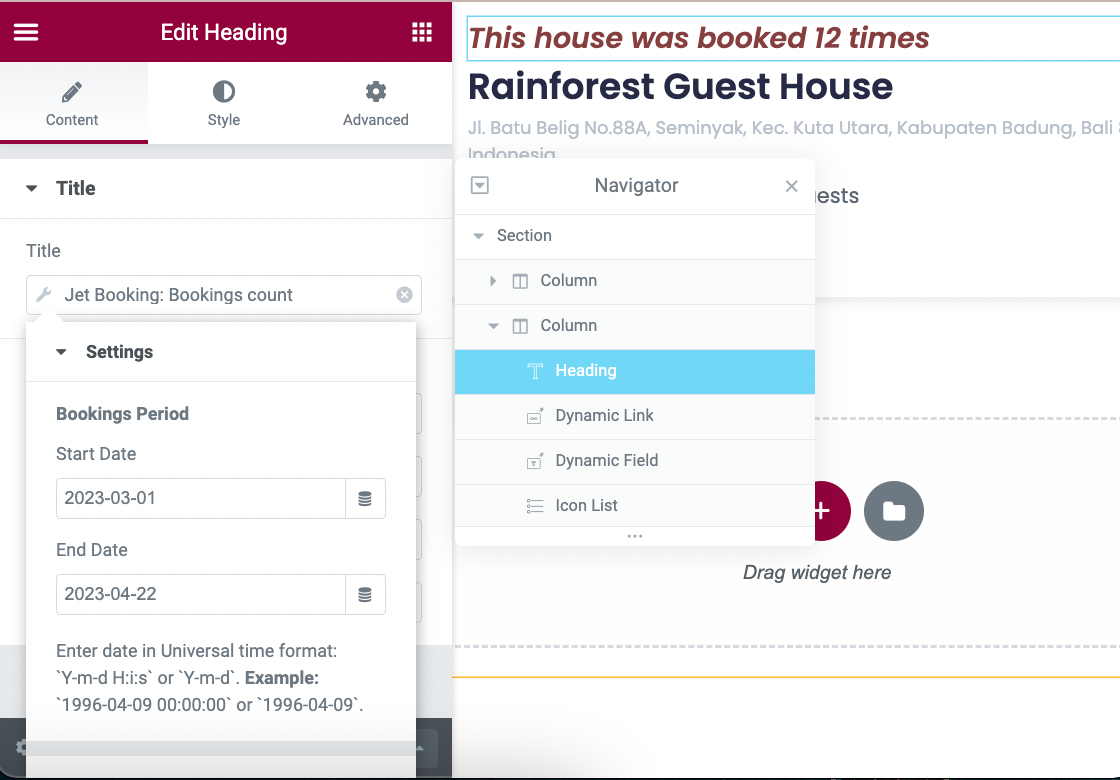
The next step is to set up this tag. Complete the Start Date and End Date fields in the Bookings Period section Before/After text in the Advanced section.
Once all customizations are made, hit the “Publish/Update” button to save the result.

Add Listing Grid to Elementor Page
Go to the needed page and add a Listing Grid widget. Adjust the settings and press the “Publish/Update” button.
Proceed to the front end of the edited page and check the result.

Now you know how to display how many times each property was booked from a specific period by using the JetEngine and JetBooking plugins.