How to Link the Booking Form with WooCommerce Checkout and Order Forms
This tutorial reveals how to link the Booking Form with the WooCommerce Checkout to show the submitted form data in the WooCommerce Order.
Before you start, check the tutorial requirements:
- Elementor (Free version) or WordPress Block editor (Gutenberg)
- JetBooking plugin installed and activated
- WooCommerce plugin installed and activated
- JetFormBuilder plugin installed and activated
The integration with the WooCommerce checkout helps manage payments and orders for bookings by the JetBooking plugin. Let us see how the fields from the booking form can be added to the orders.
Enable Woocommerce Integration in the JetBooking Settings
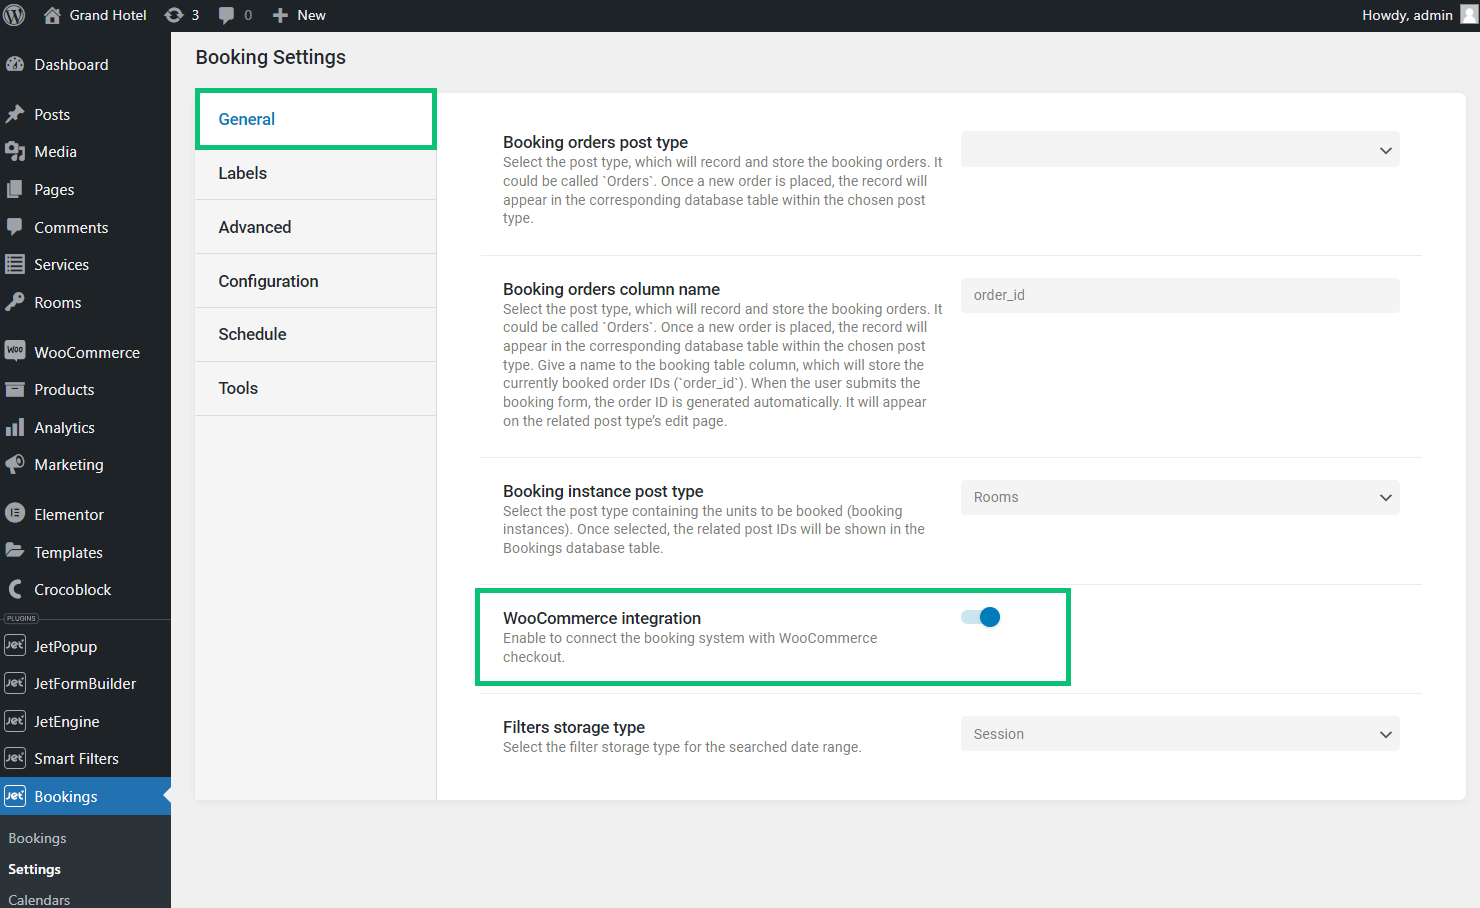
Firstly, let us make sure the integration with the Woocommerce checkout is enabled. Go to Bookings > Settings > General, and enable the Woocommerce integration toggle. This option ensures form redirection to the Woocommerce checkout after submission.
Set up Woocommerce Fields in the Booking Form
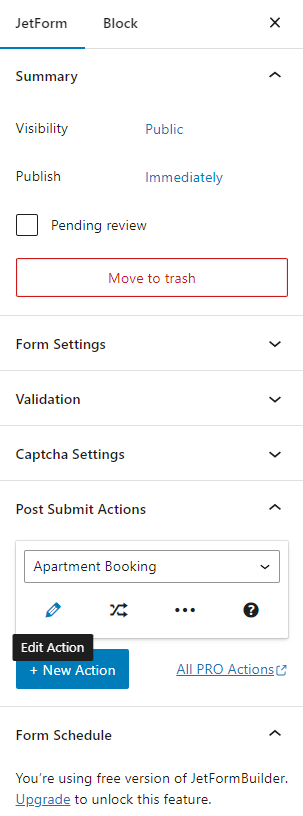
Proceed to the JetFormBuilder tab and click to edit the booking form or create a new one by pushing the “Add New” button. You can learn how to create a Booking Form from this tutorial.
In the booking form editing page, open the Post Submit Actions tab and select the “Apartment Booking” option. Then click the pencil icon to edit the action.
Disable Woocommerce integration
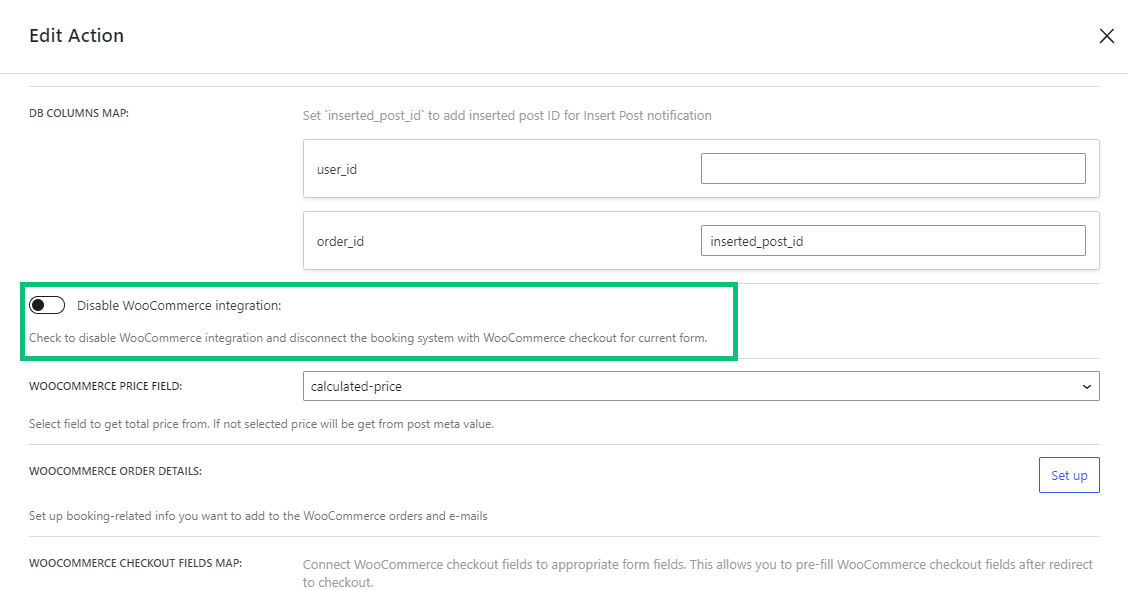
The first setting related to Woocommerce integration is the Disable Woocommerce integration toggle. You can enable it if the Woocommerce checkout is unnecessary for a particular booking form.
In our case, the integration is needed, so we keep the toggle disabled.
Woocommerce Price Field
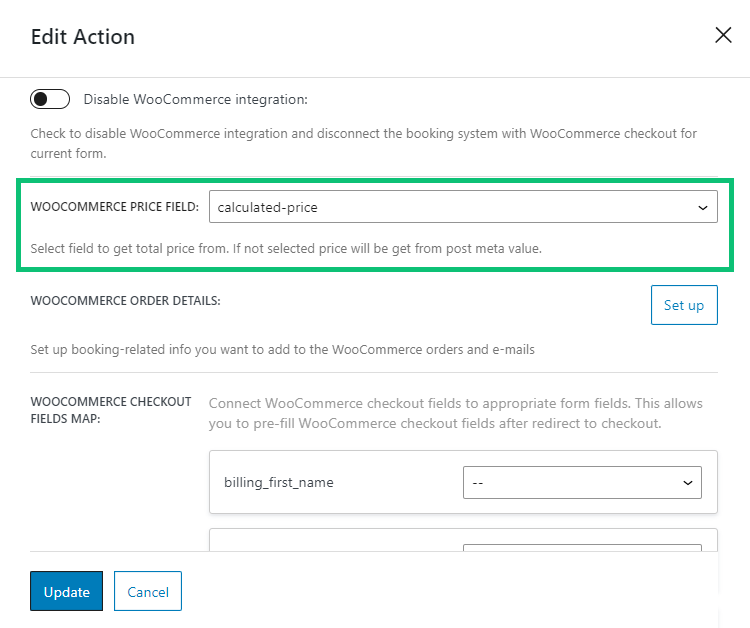
The next field is the WooCommerce Price Field. With this setting, you can specify from which form field the total price is pulled, which needs to be paid on the Woocommerce checkout. In our case, we selected a calculated field since we have a formula for the price calculation.
The How to Combine Hidden and Repeater Fields with the Calculated Field tutorial explains how to create advanced pricing calculations.
You can also keep the WooCommerce Price Field empty to automatically get the booking price from the Current Post _apartment_price field.
Woocommerce Order Details
Next, let us get to the Woocommerce Order Details option. Using this setting, you can specify which form fields will appear in the Woocommerce Order and Order email.
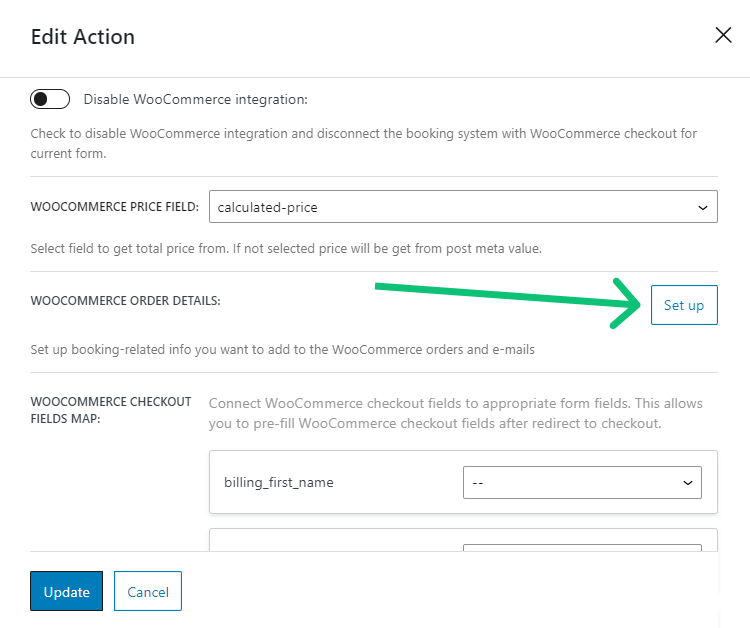
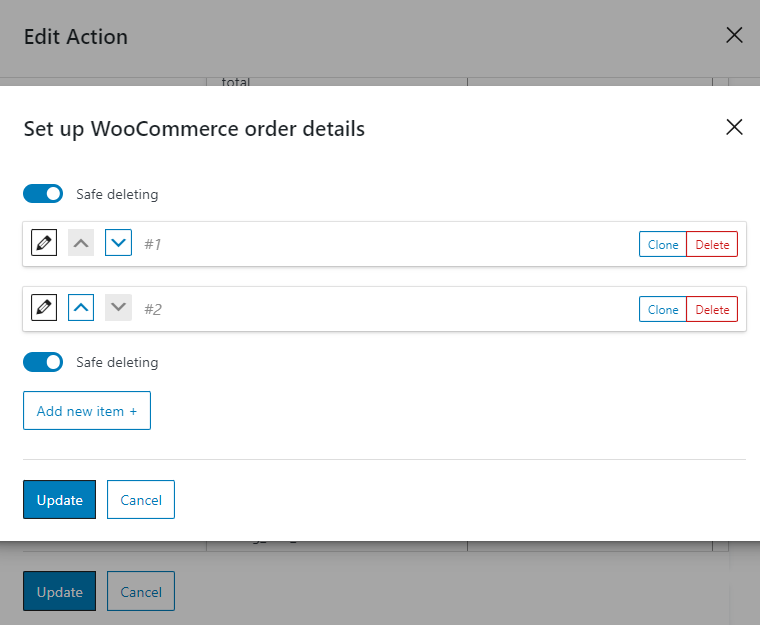
Upon clicking the “Set up” button, a popup with settings will appear. Press on the pencil icon to edit one of the items.
The following options for the Type field are available:
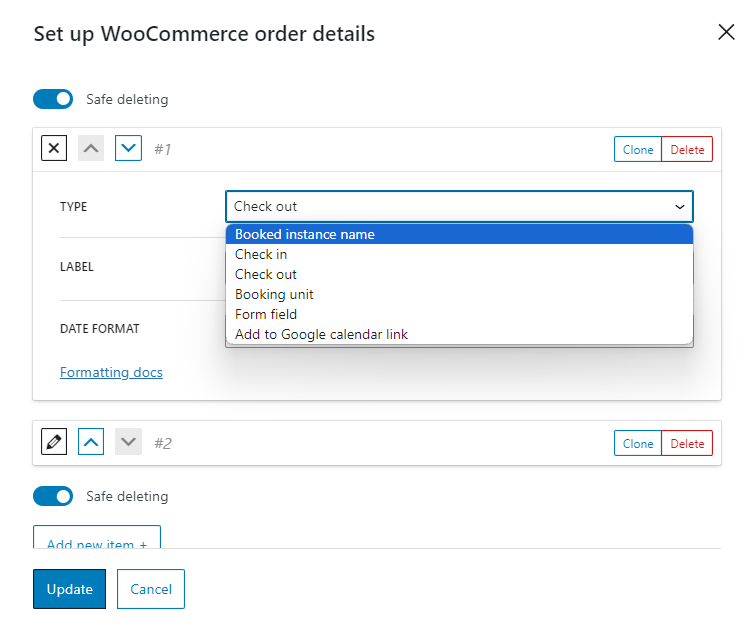
- Booked instance name. The title of the booked post;
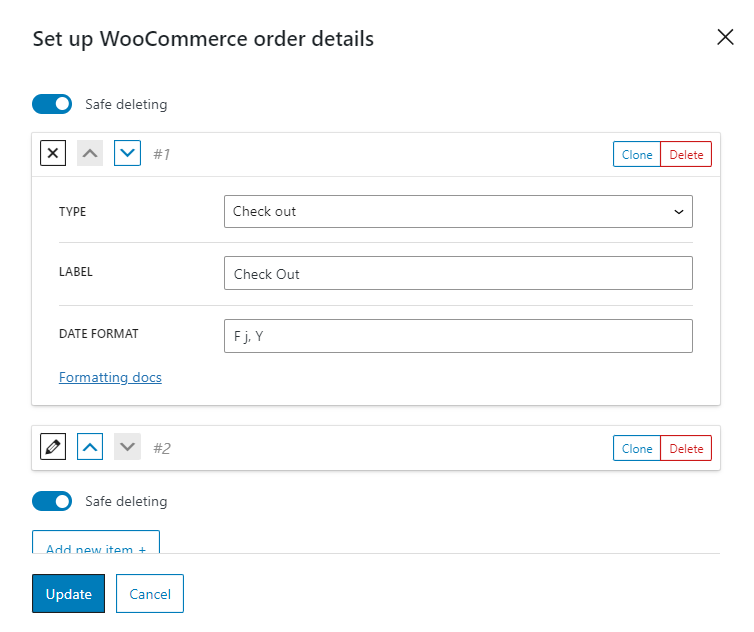
- Check in and Check out. The dates the user has selected in the Check-in/check-out dates field;
You can define the format of the dates in a special separate bar. Information about date formatting can be found on the official WordPress website.
- Booking unit. The unit of the post which is booked. Check the How to Manage Units via the WP Dashboard tutorial to learn more about units;
- Form field. You can show any form fields here: they will be listed in a drop-down menu;
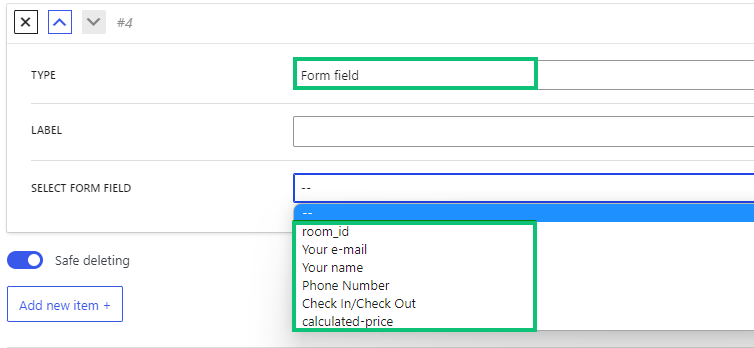
- Add to Google Calendar link. A link will be generated by clicking on which the booking will be added to the user’s Google Calendar on selected dates.
Set the items of the WooCommerce order details according to your needs and hit the “Update” button.
WooCommerce Checkout Fields Map
The WooCommerce Checkout Fields Map allows the pre-filling of the Woocommerce checkout fields with the data entered in the booking form.
You can map the form fields to the Woocommerce fields by selecting the form fields for the Woocommerce fields accordingly.
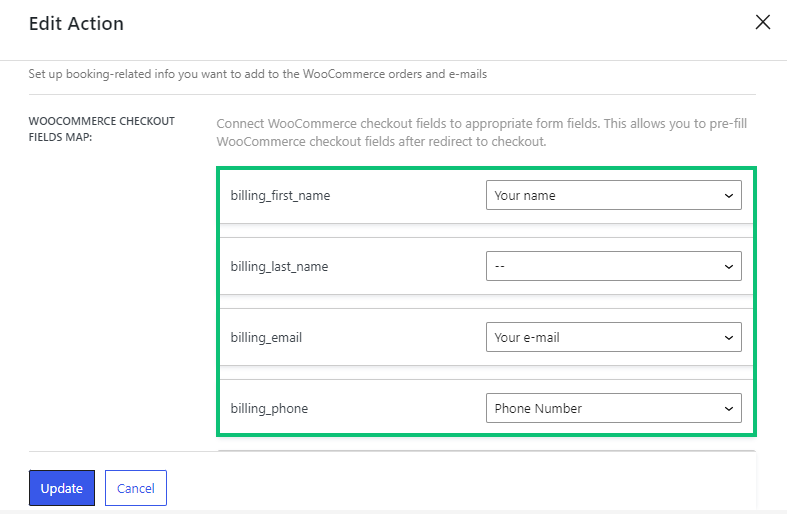
After mapping the fields, click the “Update” button to save the action settings. Update the booking form, either.
Check the Result on the Front End
To learn how to place the form on a page, navigate to the Adding the Form Block tutorial. Note that you can place the JetForm widget and block in the Elementor and WordPress Block (Gutenberg) editors.
Open the page with the form on the front end. Let us submit the form with these details.
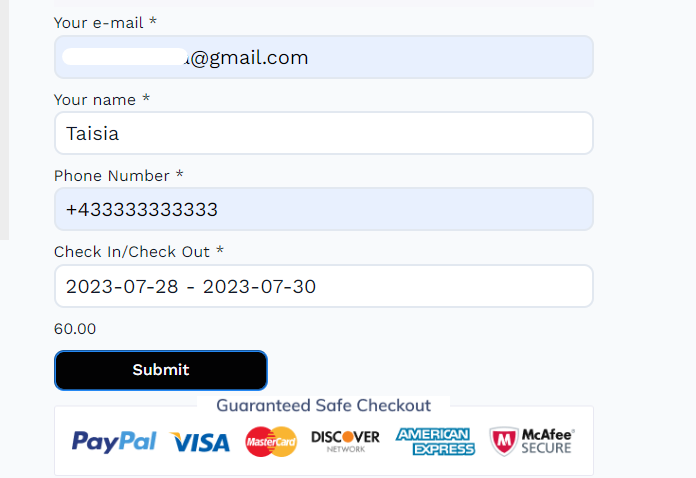
Now we can see the result. The price is transferred correctly. The phone number and email address are preset, and the data from the booking is added to the Order details.
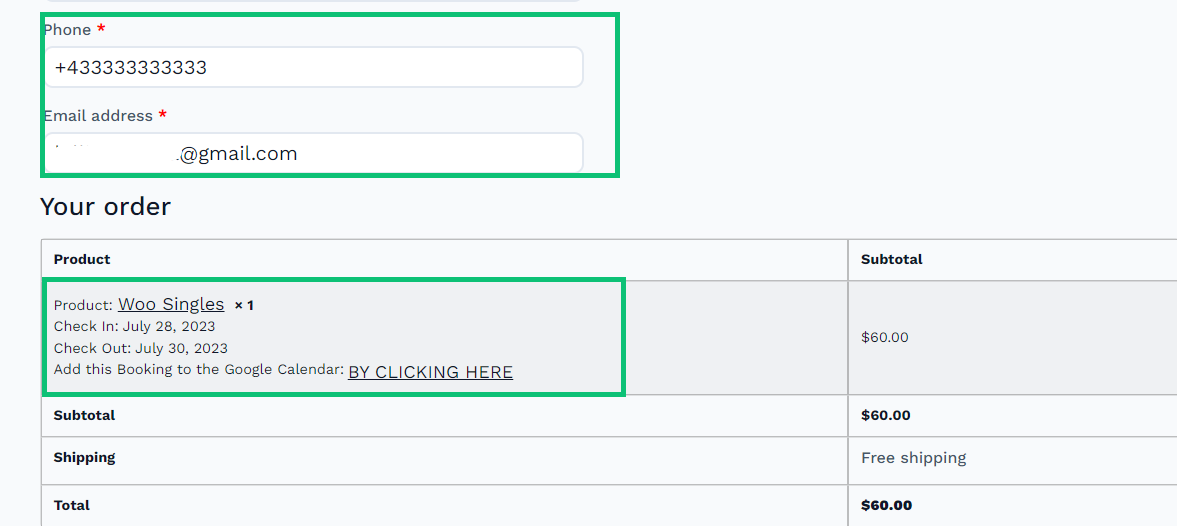
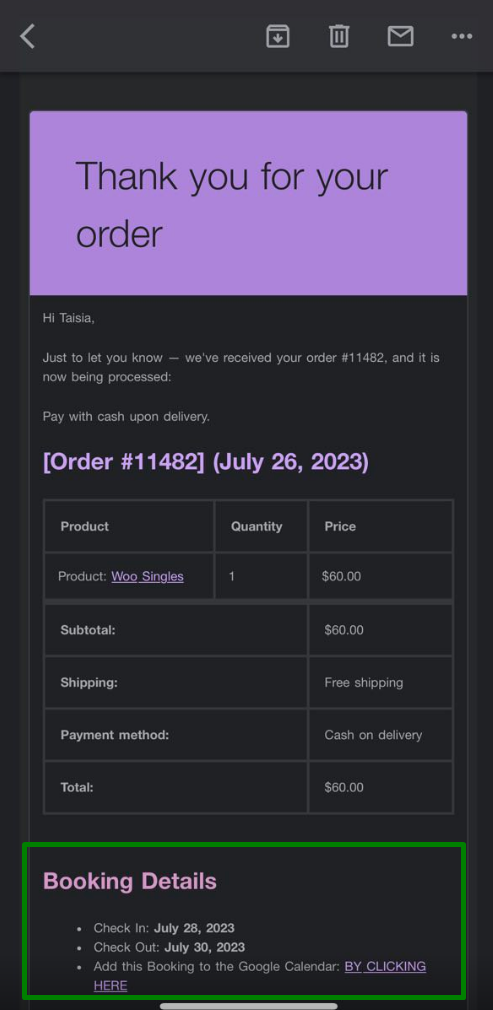
Let us also check the email confirming the order. The Order details contain the data as configured in the booking form.
That is it. Now you know how to set up the Woocommerce Checkout integration with the JetBooking and JetFormBuilder plugins.