How to Set Up the Seasonal Prices
This tutorial describes how to set the seasonal pricing with the WordPress JetBooking plugin and display it on the front end with the JetEngine forms.
Before you start, check the tutorial requirements:
- Elementor (Free version) and Block Editor (Gutenberg)
- JetEngine plugin installed and activated with CPT posts created
- JetFormBuilder plugin installed and activated
- JetBooking plugin installed and activated with CPT posts created
- JetThemeCore plugin installed and activated
JetBooking Settings for Seasonal Prices
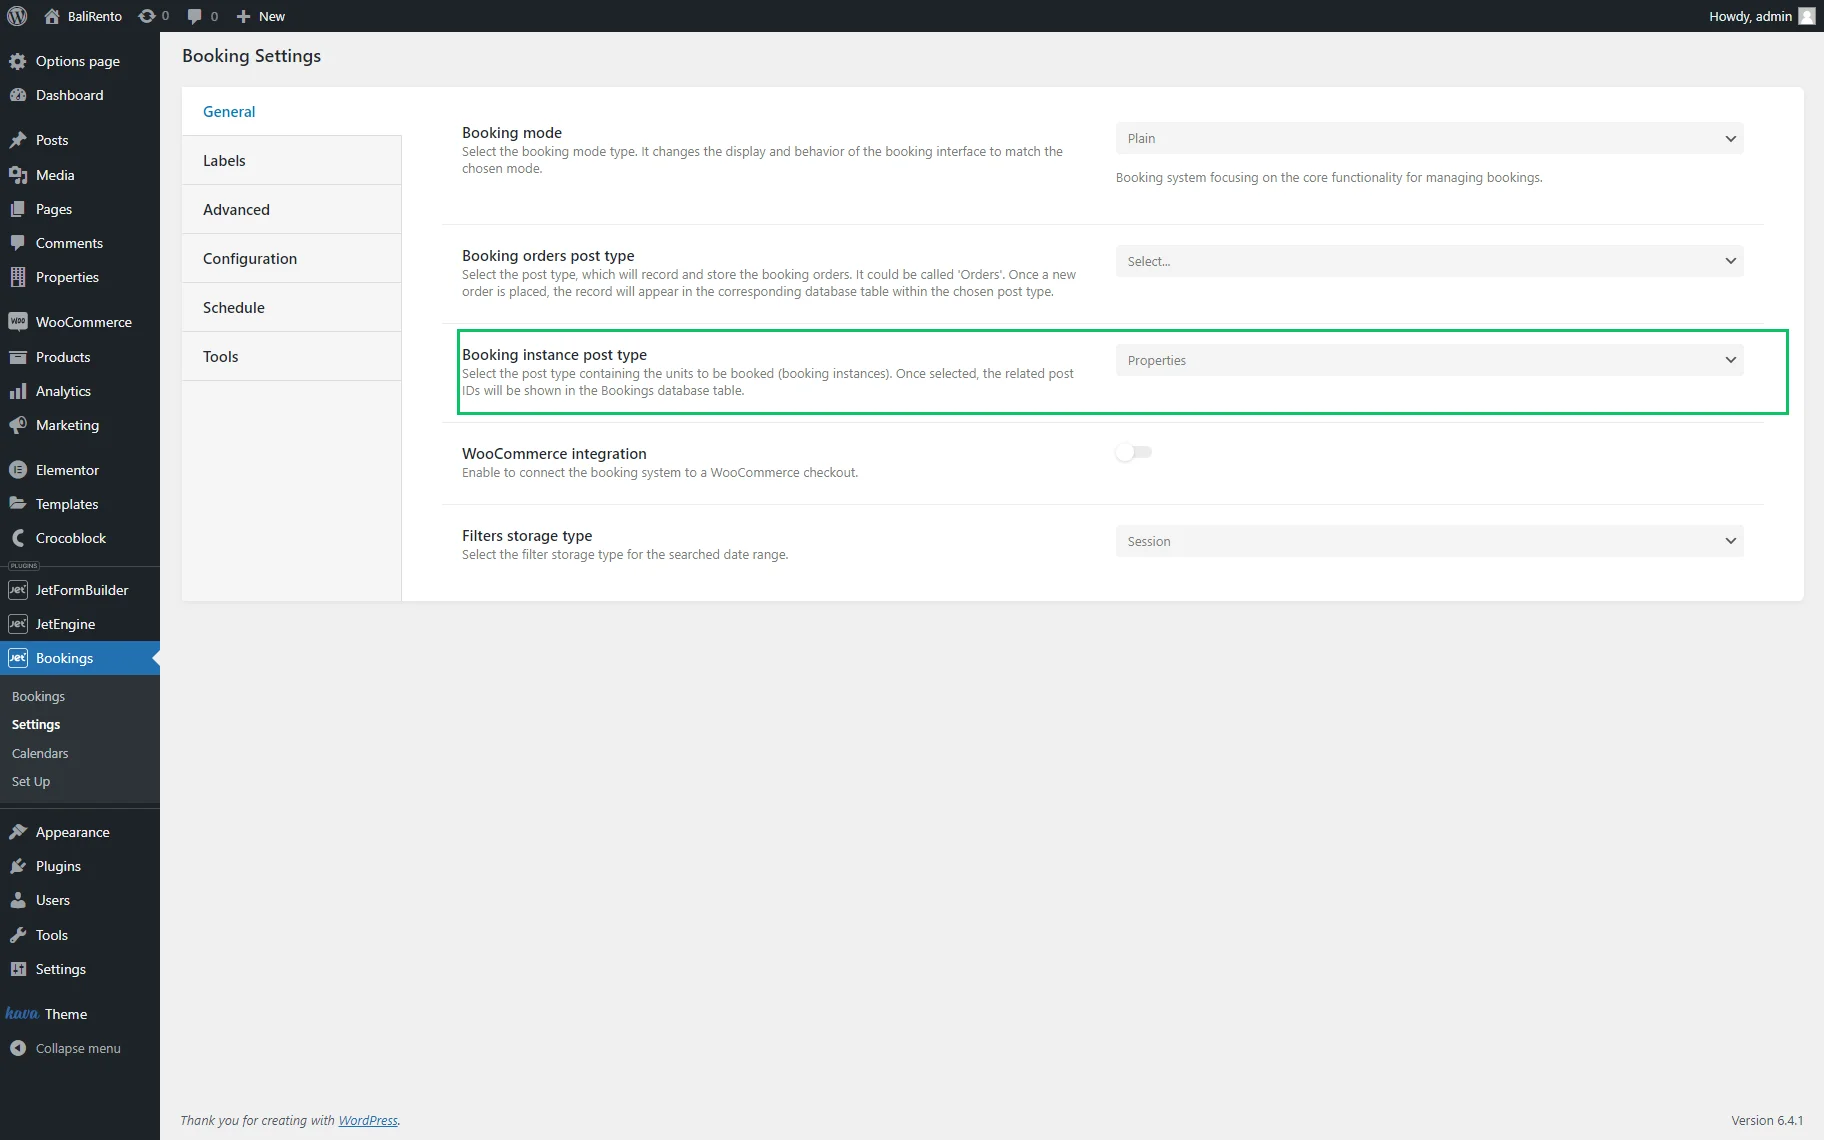
To specify the CPT for setting the seasonal prices, go to the Bookings > Settings > General tab. Select the necessary CPT from the Booking instance post type drop-down menu (here, Property).
Booking Settings in the CPT Posts
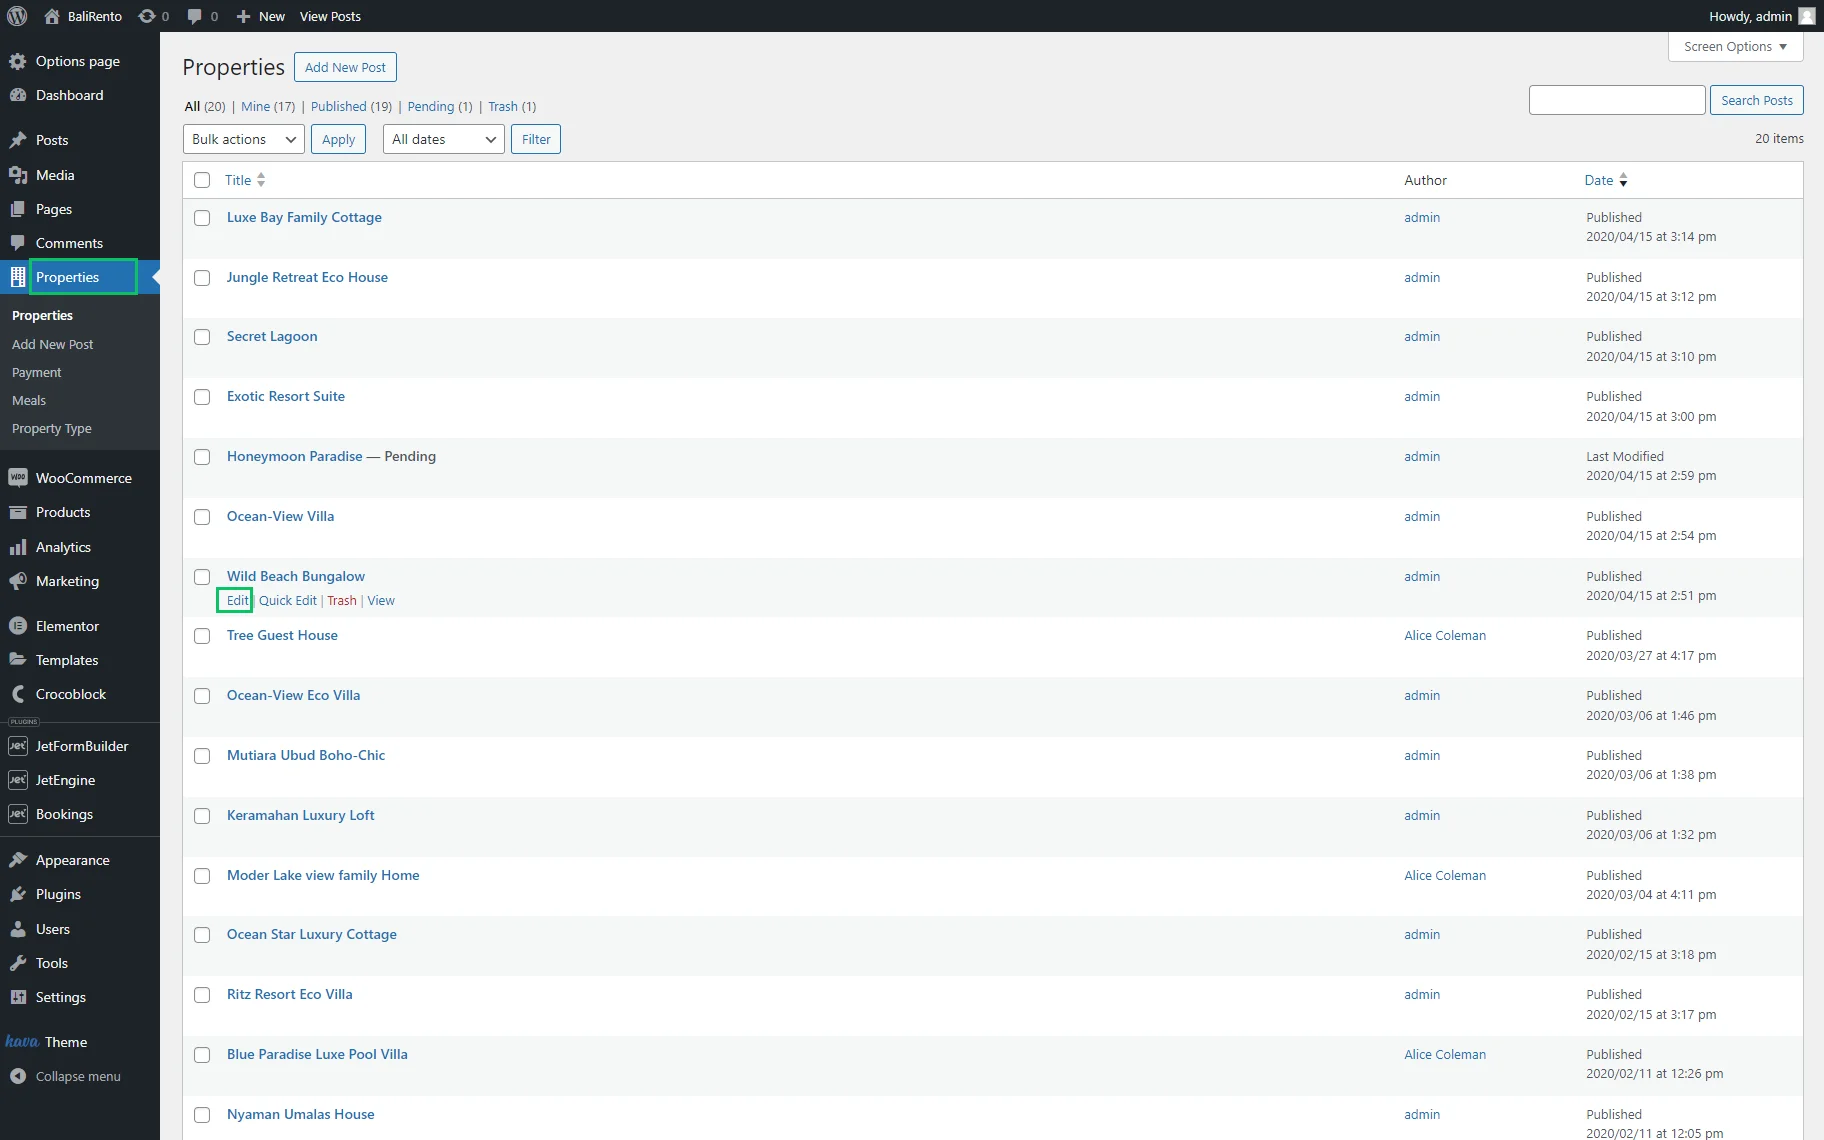
Move to the CPT list connected with JetBooking and click the “Edit” button under a post.
JetBooking adds the additional Pricing settings fields to every CPT post.
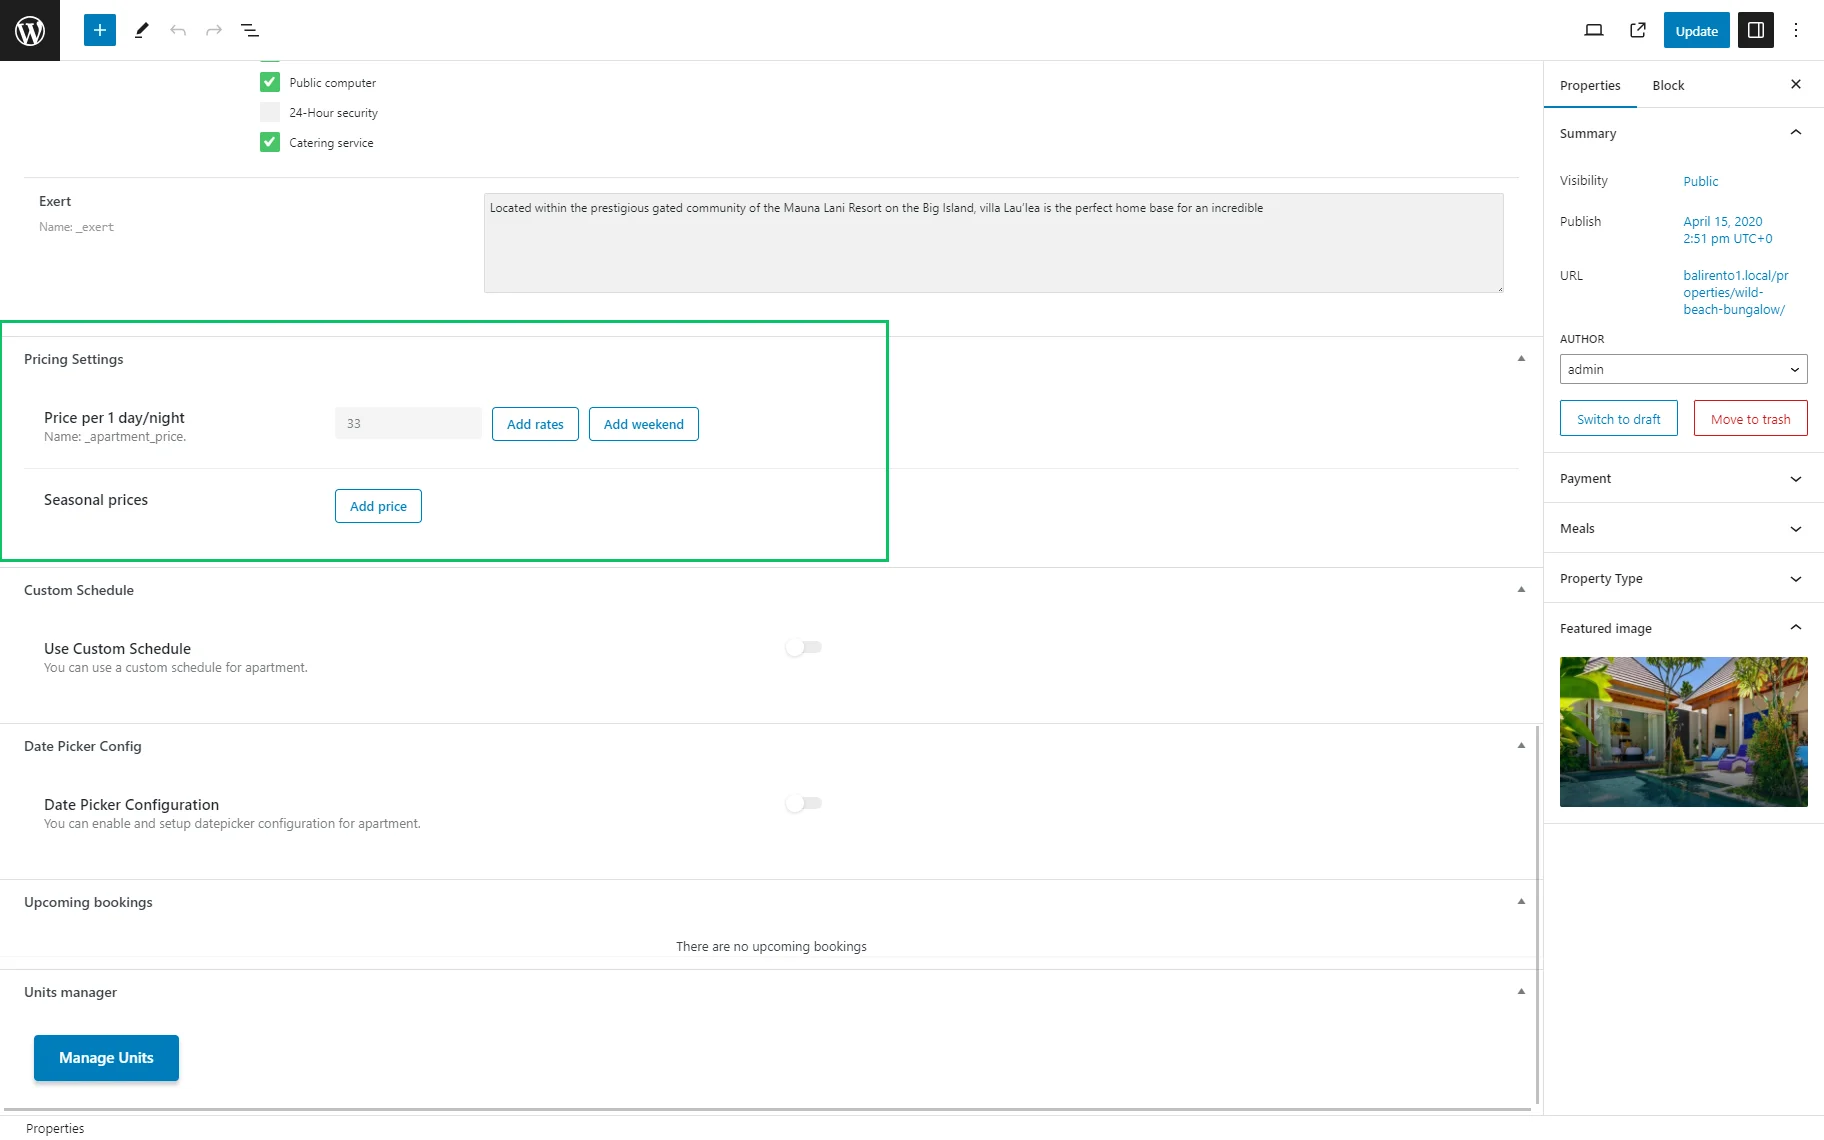
Hit the “Add price” button next to the Seasonal prices field to open additional settings fields.
There are such settings available:
- Title – enter the name of the season;
- Price per 1 day/night – set the price for one season;
- Start Date – specify the start date of the season;
- End Date – specify the end date of the season.
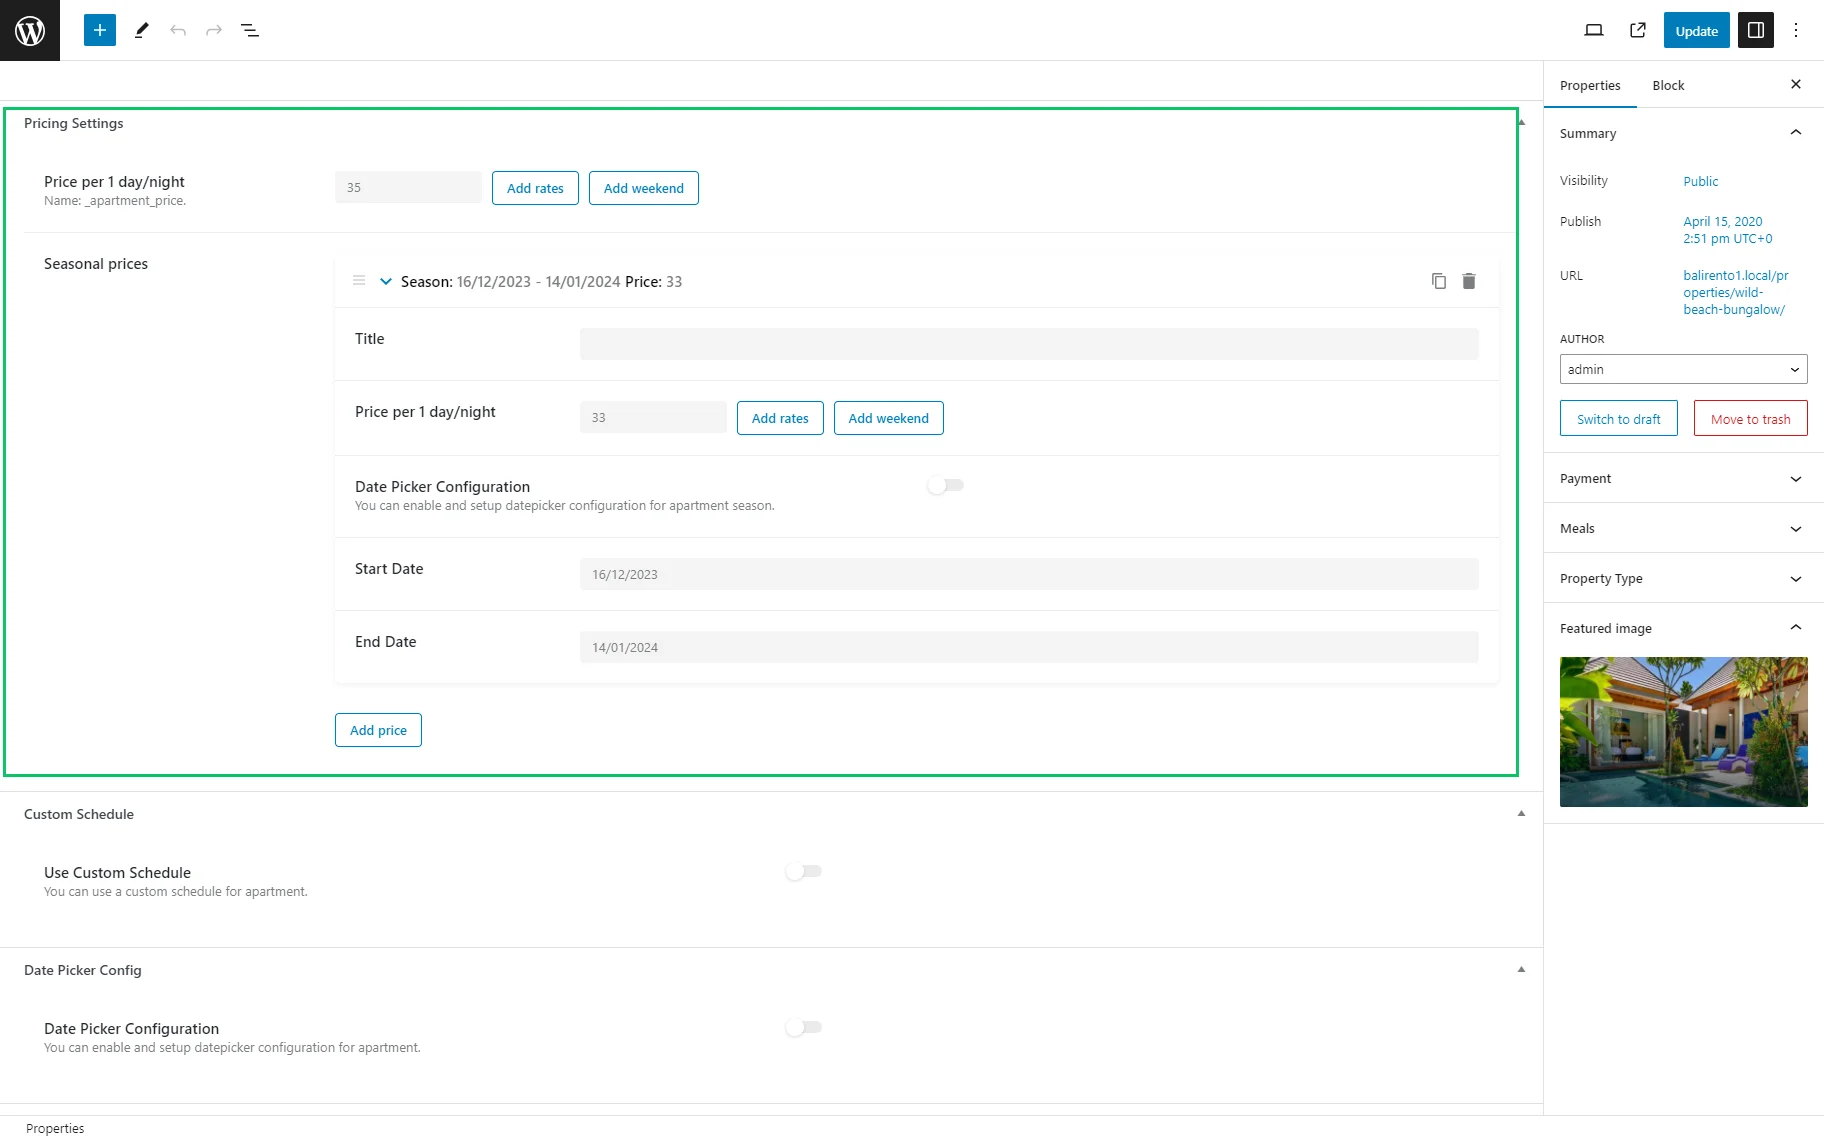
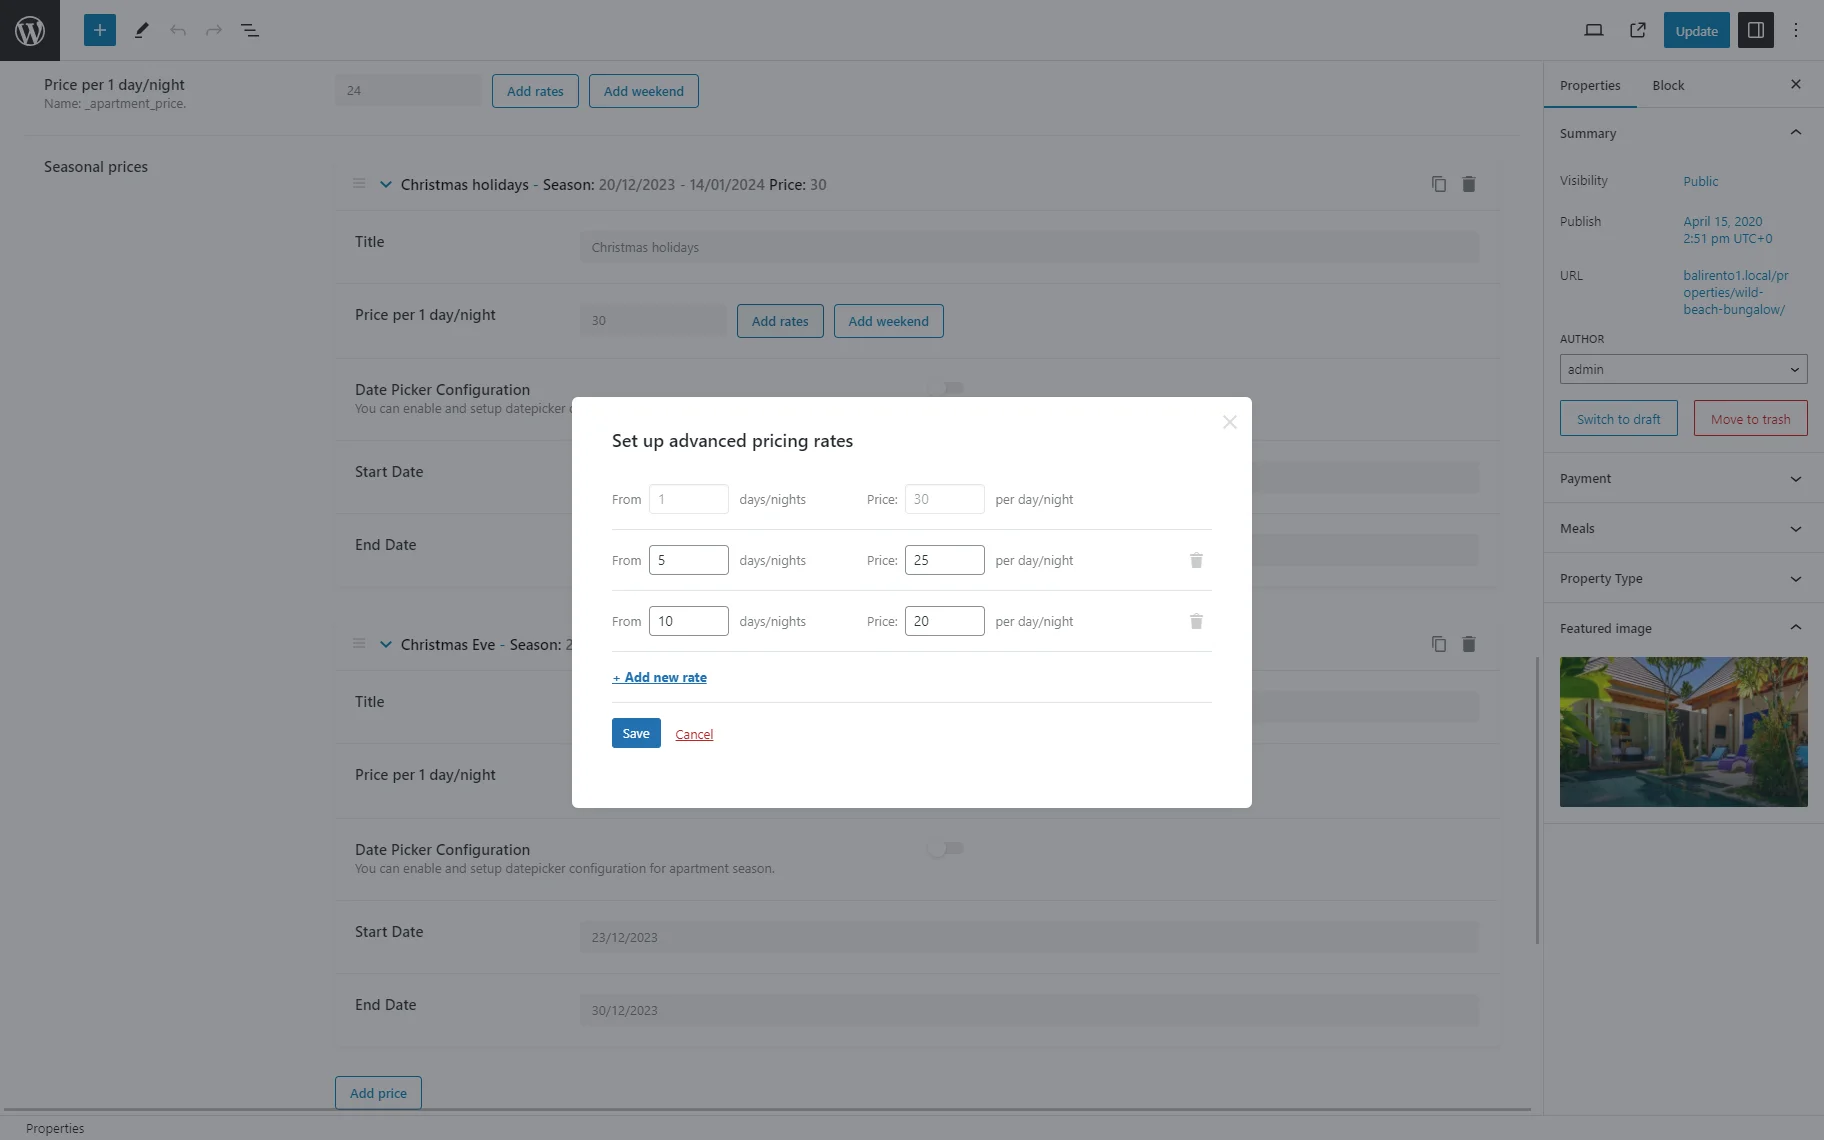
Hit the “Update” button to save a new seasonal price.You can also set the rates for each season. For example, you can configure the discount for users who want to book several days. Push the “Add rates” button and set the number of days and dedicated price per day/night. Press the “+ Add new rate” button to add a new rate. After you finish, tick the “Save” button.
Clicking the “Add weekend” button opens a pop-up window where you can set weekend prices that differ from prices for other dates specified in the Start Date 一 End Date range or from those in the Bookings > Settings > Schedule tab. You can set the weekend pricing for the entire year or a particular season. If users book the weekend date included in the season, the form displays the weekend price you’ve set up in the Schedule section. If the weekend date is out of the season, the form displays the weekend price you’ve set up in the Price per 1 day/night field.
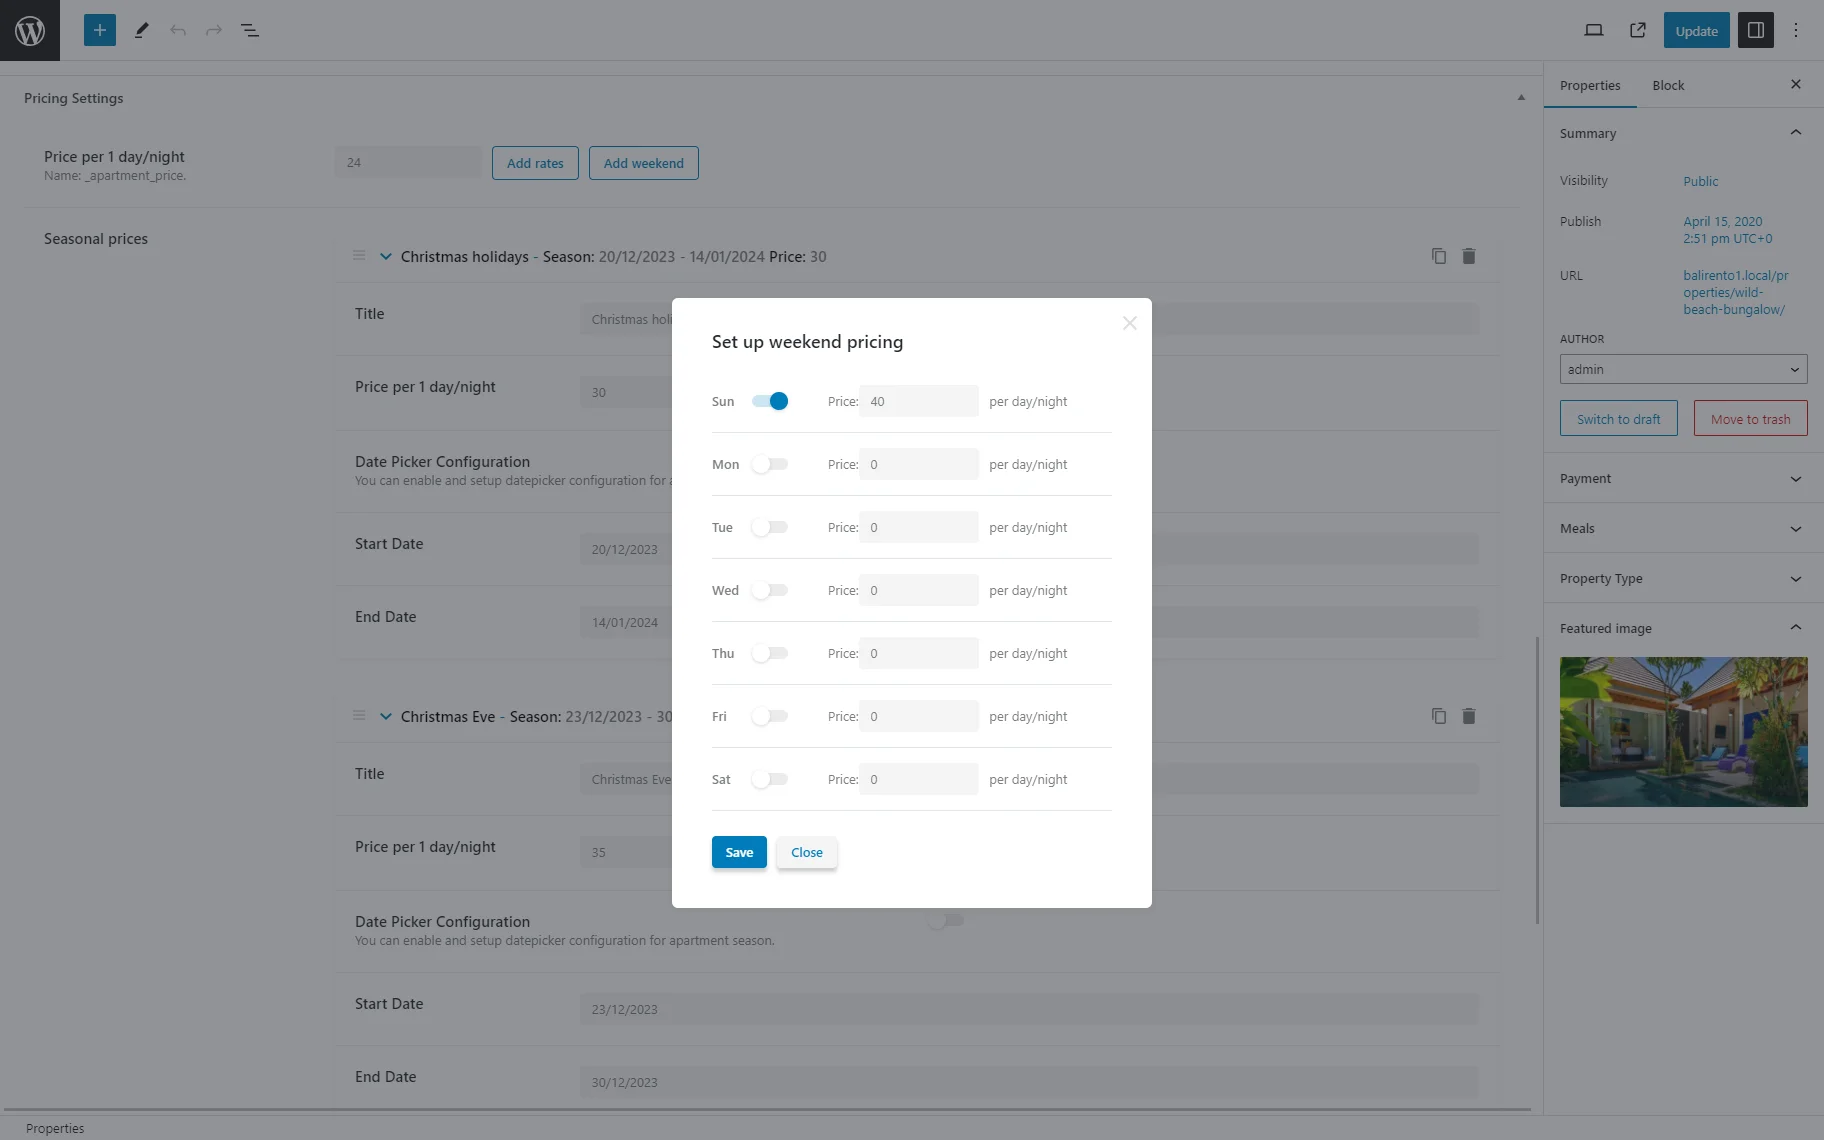
After setting weekend prices, press the “Save” button.Update the post. You need to create forms with the Calculated fields to display the seasonal price.
Applying Seasonal Prices in Form’s Calculated Fields
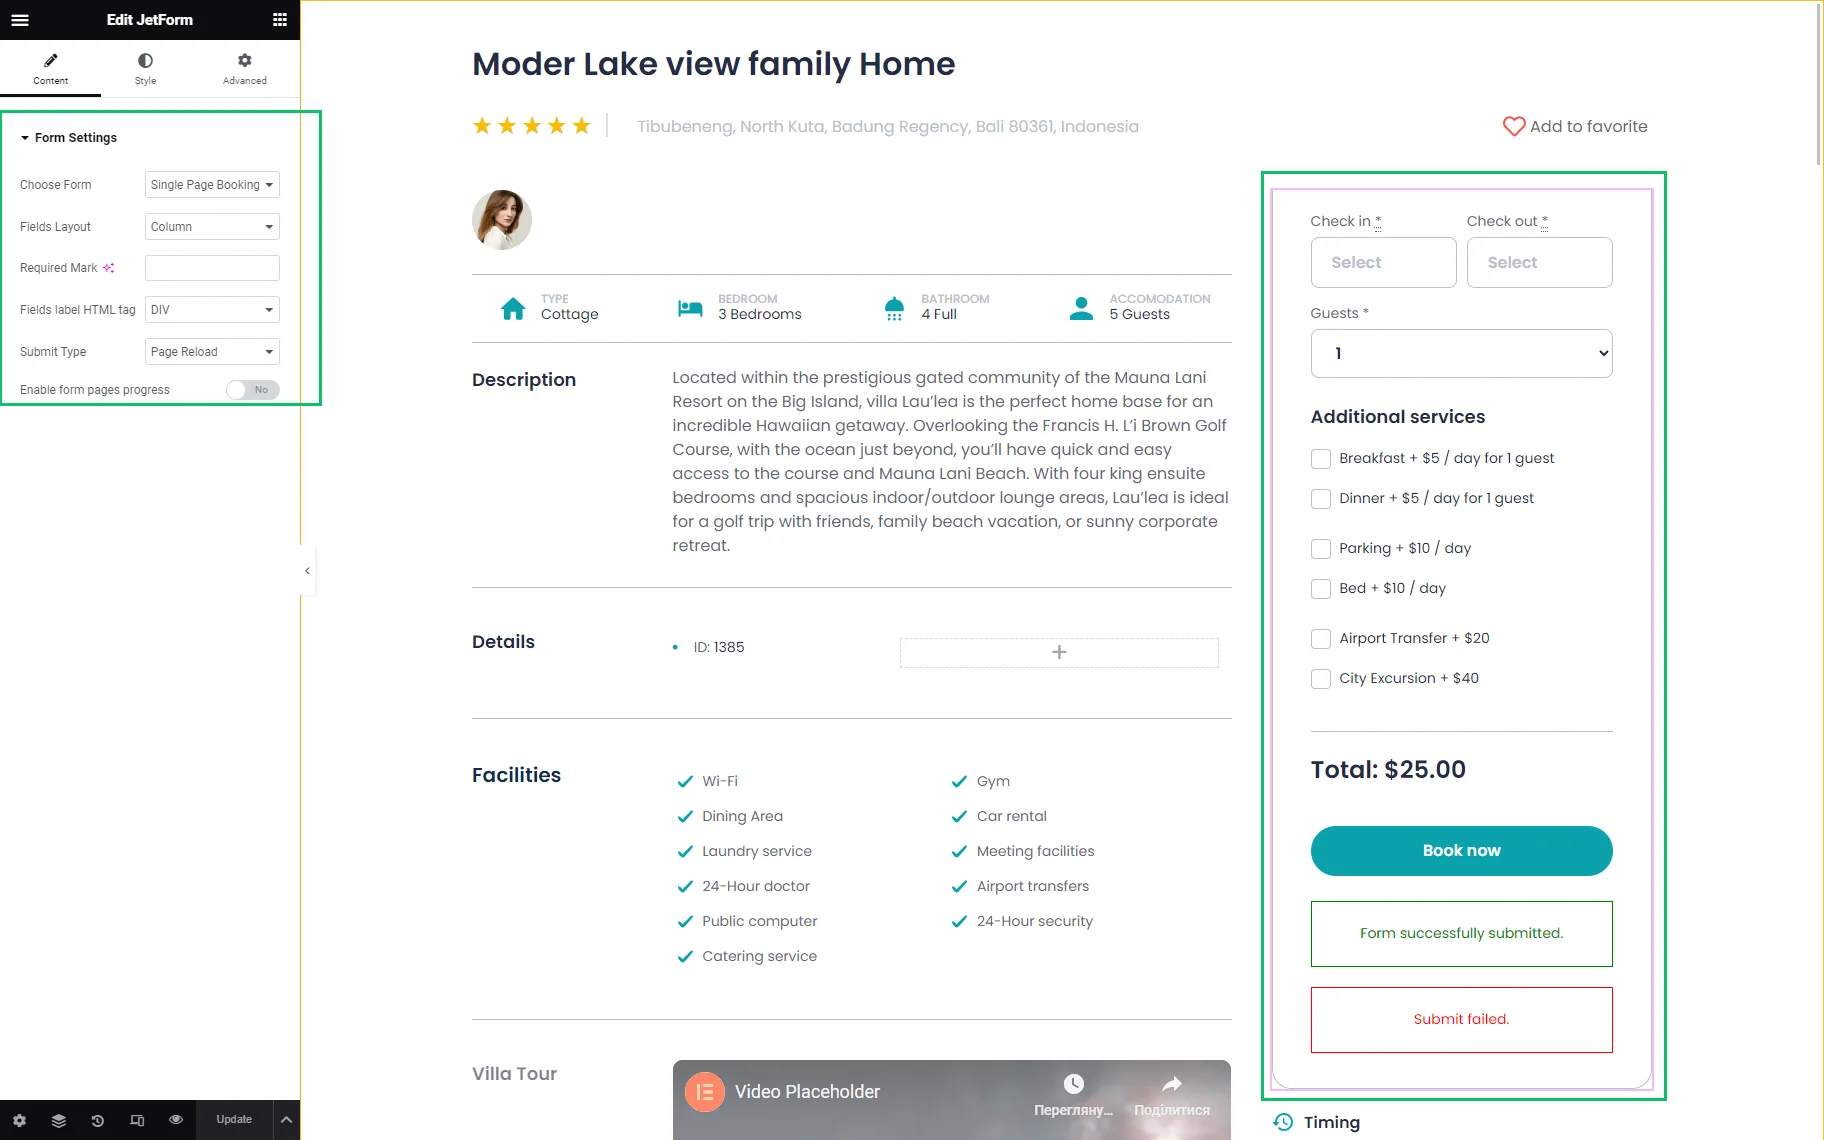
To create a form, navigate to the JetFormBuilder > Add New tab. The form should have the following block fields:
- Hidden field with the default settings. If you want, you can change the field’s name, for example, from the post_id to the room_id;
- Check-in/check-out dates field;
Add other fields as you need, i.e., for the guests, additional services, etc.
Finally, you need to create the Calculated field block. This field provides calculations using meta fields of the CPT, macros, and the data users input into the form’s block field.
For example, the Calculated field below returns the total price by the formula:
%FIELD::_dates%*%ADVANCED_PRICE::_check_in_out%+
%FIELD::additional_services_a%*%FIELD::guest%*%FIELD::_dates%+
%FIELD::additional_services_b%*%FIELD::_dates%
+%FIELD::additional_services_c%
where
%FIELD::_dates%*%ADVANCED_PRICE::_check_in_out% 一 the form field _dates is multiplied with the macro _check_in_out.
%FIELD::additional_services_a%*%FIELD::guest%*%FIELD::_dates% 一 the form fields _additional_services, _guest, and _dates are multiplied.

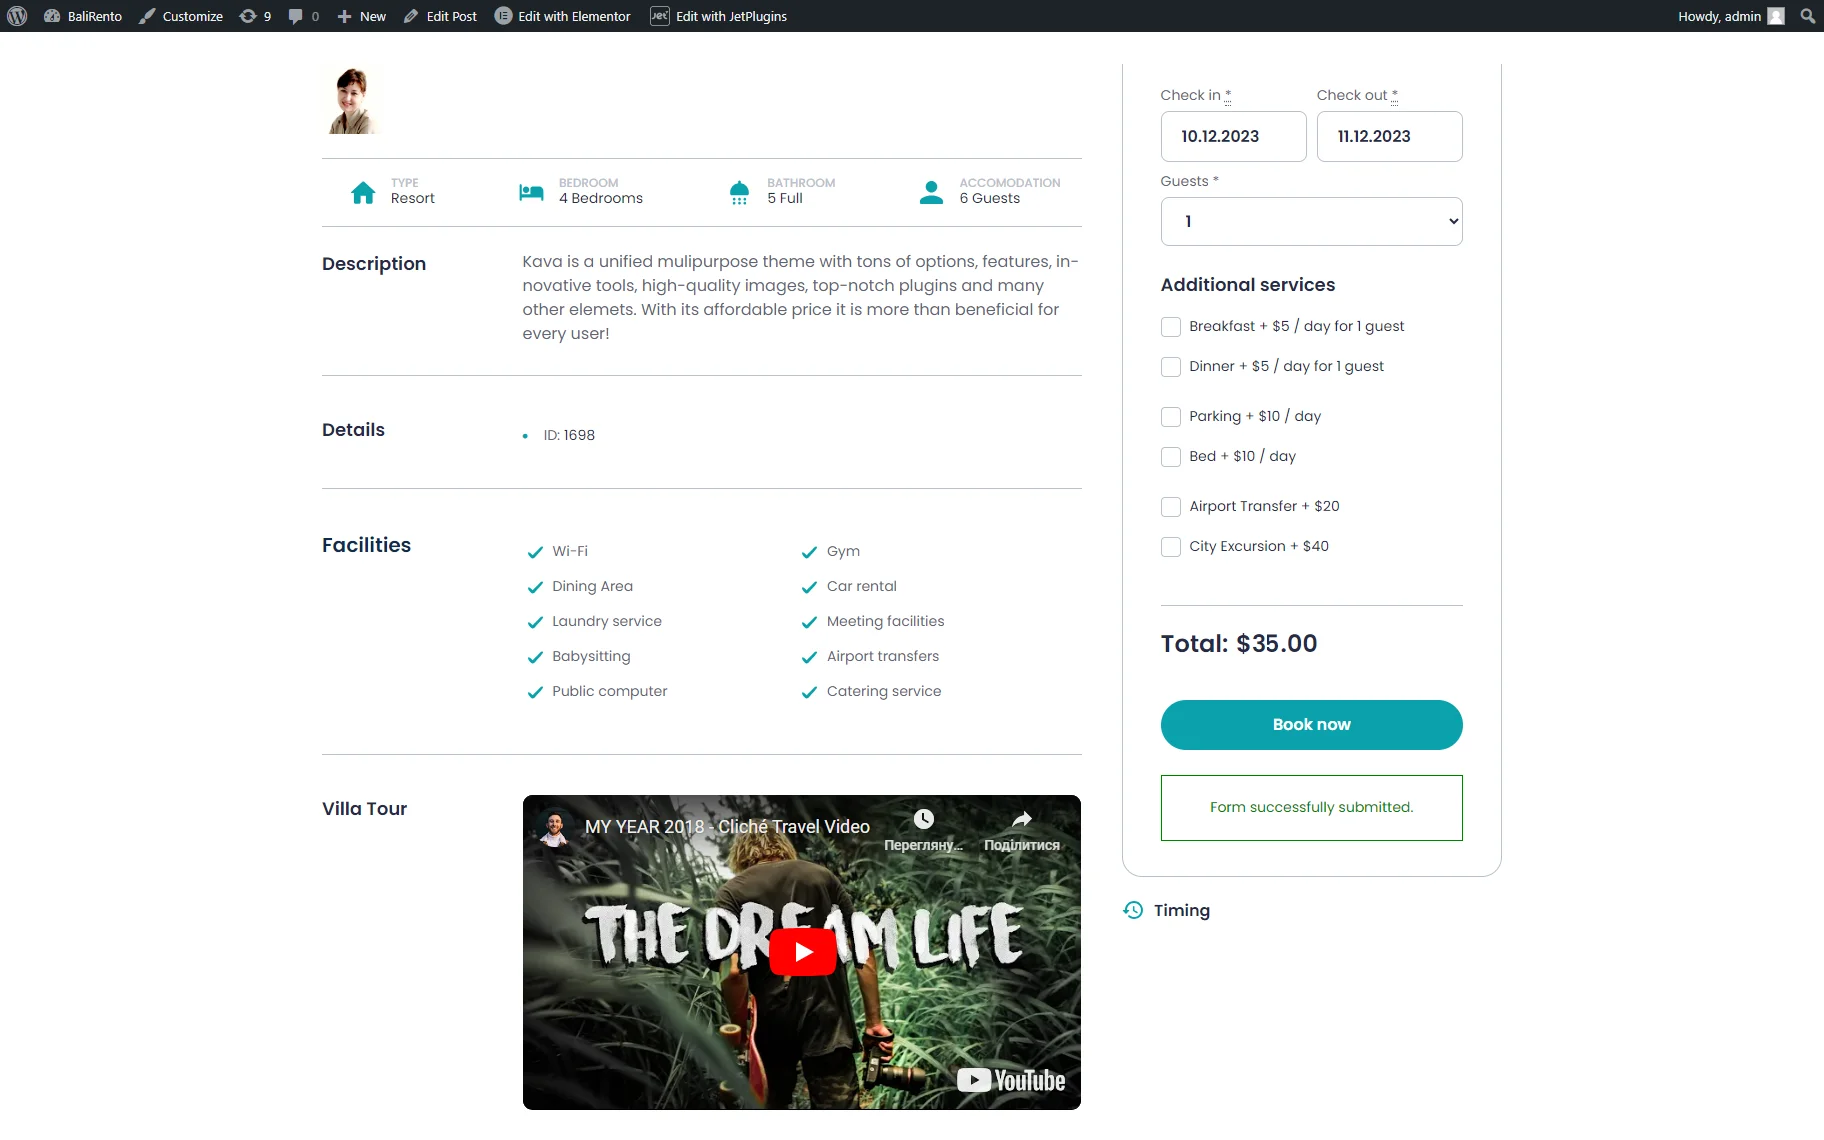
To finish the form, press the “Update” button.To display the form, navigate to a Single Page created for the current post type and place the form here.
Proceed to the front end and complete the booking for the period within the previously specified seasonal prices period. You can observe that the price changes according to the relevant weekend price settings.

Create another booking for a period outside the predefined season to compare and observe the differences in pricing.
That’s it. You know now how to configure the seasonal price with the WordPress JetBooking plugin.