
Instagram Widget Overview
This tutorial uncovers how the Instagram widget is used from the JetElements plugin, its features, and its settings.
You will find out how to add an Instagram feed to the web page via the Elementor page builder using the JetElements Instagram widget. You can change the layout and the style of the photos without ever touching a line of code.

Preparation
To work with the Instagram widget, you need either an Instagram Access Token or an Instagram Graph API key. If you want to show the photos from your personal account – follow this Access Token tutorial. And if you want to add a feed filled with the tagged photos of various users – check out our Graph API key guide.
After getting the key you need and adding it to the corresponding fields in the Crocoblock > JetPlugins Settings > Jet Elements > Integration, it is time to add the Instagram widget to the page and go through its settings.
Instagram Settings section
In this section, you decide what to show in the feed. If in the What to display drop-down menu you choose the “Tagged Photos” option, you will have to get the Graph API key and enable the Use Instagram Graph API toggle. In this case, after adding a Hashtag to the field, you will get the relevant tagged photos in the feed.
And if you choose the “My Photos” option and enter the Access Token, your feed will be filled with the photos that you add to your account.
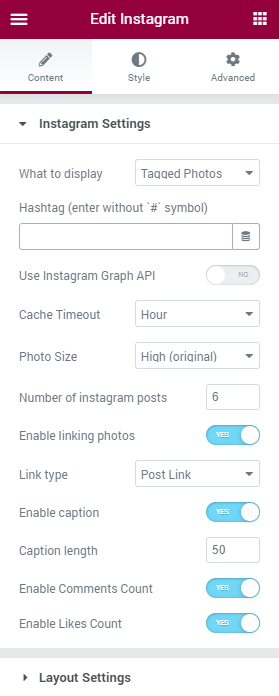
Let’s take a look at the other features in this section:
- Cache Timeout. In this drop-down list, you can pick the photos updating period. The widget can update and pull the latest Instagram publications every minute, hour, day, or week;
- Photo Size. You can choose how big the photos shown will be. There are four variants, from the smallest, which is only 150×150 pixels, to the largest, its original size;
- Number of Instagram posts. The Instagram widget can show from 1 to 50 photos in one feed, and you can choose the exact number here;
- Enable liking photos. When this toggle is enabled, the users of the website will be able to leave likes on the photos they love;
- Link type. In this drop-down, you can choose either the photos users click on will open in the Lightbox or in the separate page where the Post Link leads;
- Enable caption. If you want the users to see the caption author added to the photo – enable this toggle. You will also be able to choose the Caption length;
- Enable Comments Count, Enable Likes Count. These two toggles enable the displaying of likes and comments on the photos.
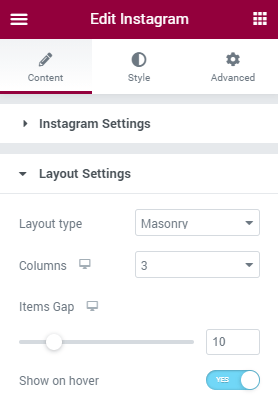
Layout Settings section
The settings presented in this section affect the general look of the feed:
- Layout type. This is how the photos will be placed in the feed. Masonry means that all the photos will have a similar width. Grid layout is the one where all the items have equal size. If you choose the List option, the photos will be placed one under another;
- Columns. If you have chosen the Masonry or Grid layout, here you can choose from 1 to 6 columns that will be shown in the feed;
- Items Gap. Define the gap between photos either by moving the slider or typing in the value;
- Show on hover. When this toggle is enabled, all the additional information about the photo will be shown on hover.
When you are down with all the settings – don’t forget to press the “Update” green button at the bottom of the menu to save the changes.
Congratulations, now you have all the features of the Instagram widget of the JetElements plugin. Enjoy!