How to Use WooCommerce Product Widget
This tutorial explains how to add the WooCommerce Product widget from the JetElements plugin to your website.
With the WooCommerce Product widget, you can display products in the easiest way using the JetElements plugin. This widget is perfect for adding custom products to your website’s page by their IDs or an SKU number.
Here you will learn how to showcase products on your website’s page built with Elementor with the help of WooCommerce Product widget.
1 Step — Copy the ID or SKU
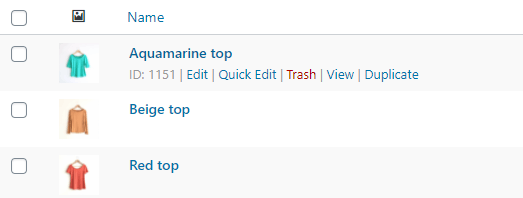
Open your WordPress Dashboard and navigate to the Products > All Products. Here you’ll see the list of all your products. To showcase a certain product, you’ll need its ID number. You can simply hover over the product to see its ID.

Also, there’s an option to display products by their SKU number. SKU refers to a Stock-keeping unit, a unique identifier for each distinct product and service that can be purchased.
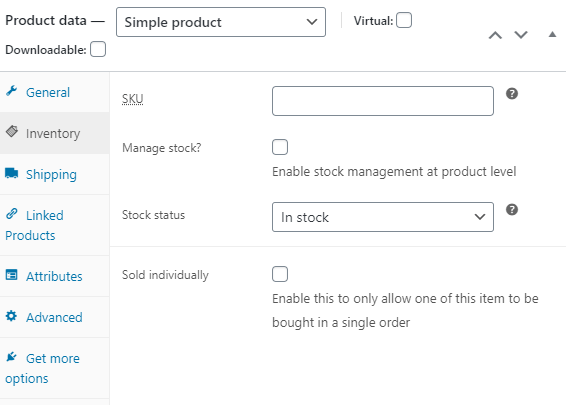
You can use an already generated SKU number or set your own. To set your own SKU number, choose the product, and click on the “Edit” button. Then, navigate to the Inventory section and set the number in the SKU field. Don’t forget to click on the “Update” button to save the changes.

2 Step — Add the widget to the page
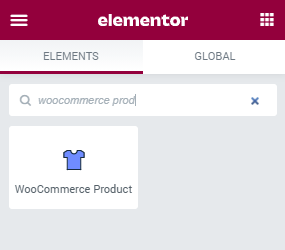
Afterward, open the page to which you want to add a WooCommerce Product widget and drag the widget to the needed section.

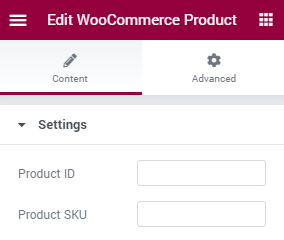
In the Content Settings block, you need to paste the Product ID of the product which you want to display on the page.
There’s also an option to set the Product SKU, so you can show a product from stock on your page.

The last step in to save the changes. Click on the “Publish” button and preview the result.
You’re done! Now you know how to add a certain product to your website using the WooCommerce Product widget. Hope this tutorial was useful.