How to Create a Shop Page Template
Find out how to create a shop page template and set it as a global template in WooCommerce using the JetWooBuilder and JetThemeCore plugins.
Before you start, check the tutorial requirements:
- Elementor (Free version), Block editor (Gutenberg), or Bricks
- WooCommerce plugin installed and activated
- JetWooBuilder plugin installed and activated
The JetWooBuilder plugin makes WooCommerce shop page customization effortless. This tutorial will guide you through the process step-by-step.
The JetWooBuilder plugin is enough for the shop template, but if you want to create a page template with a header, body, and footer, JetThemeCore is required.
How to Create a Shop Template with the JetWooBuilder Plugin
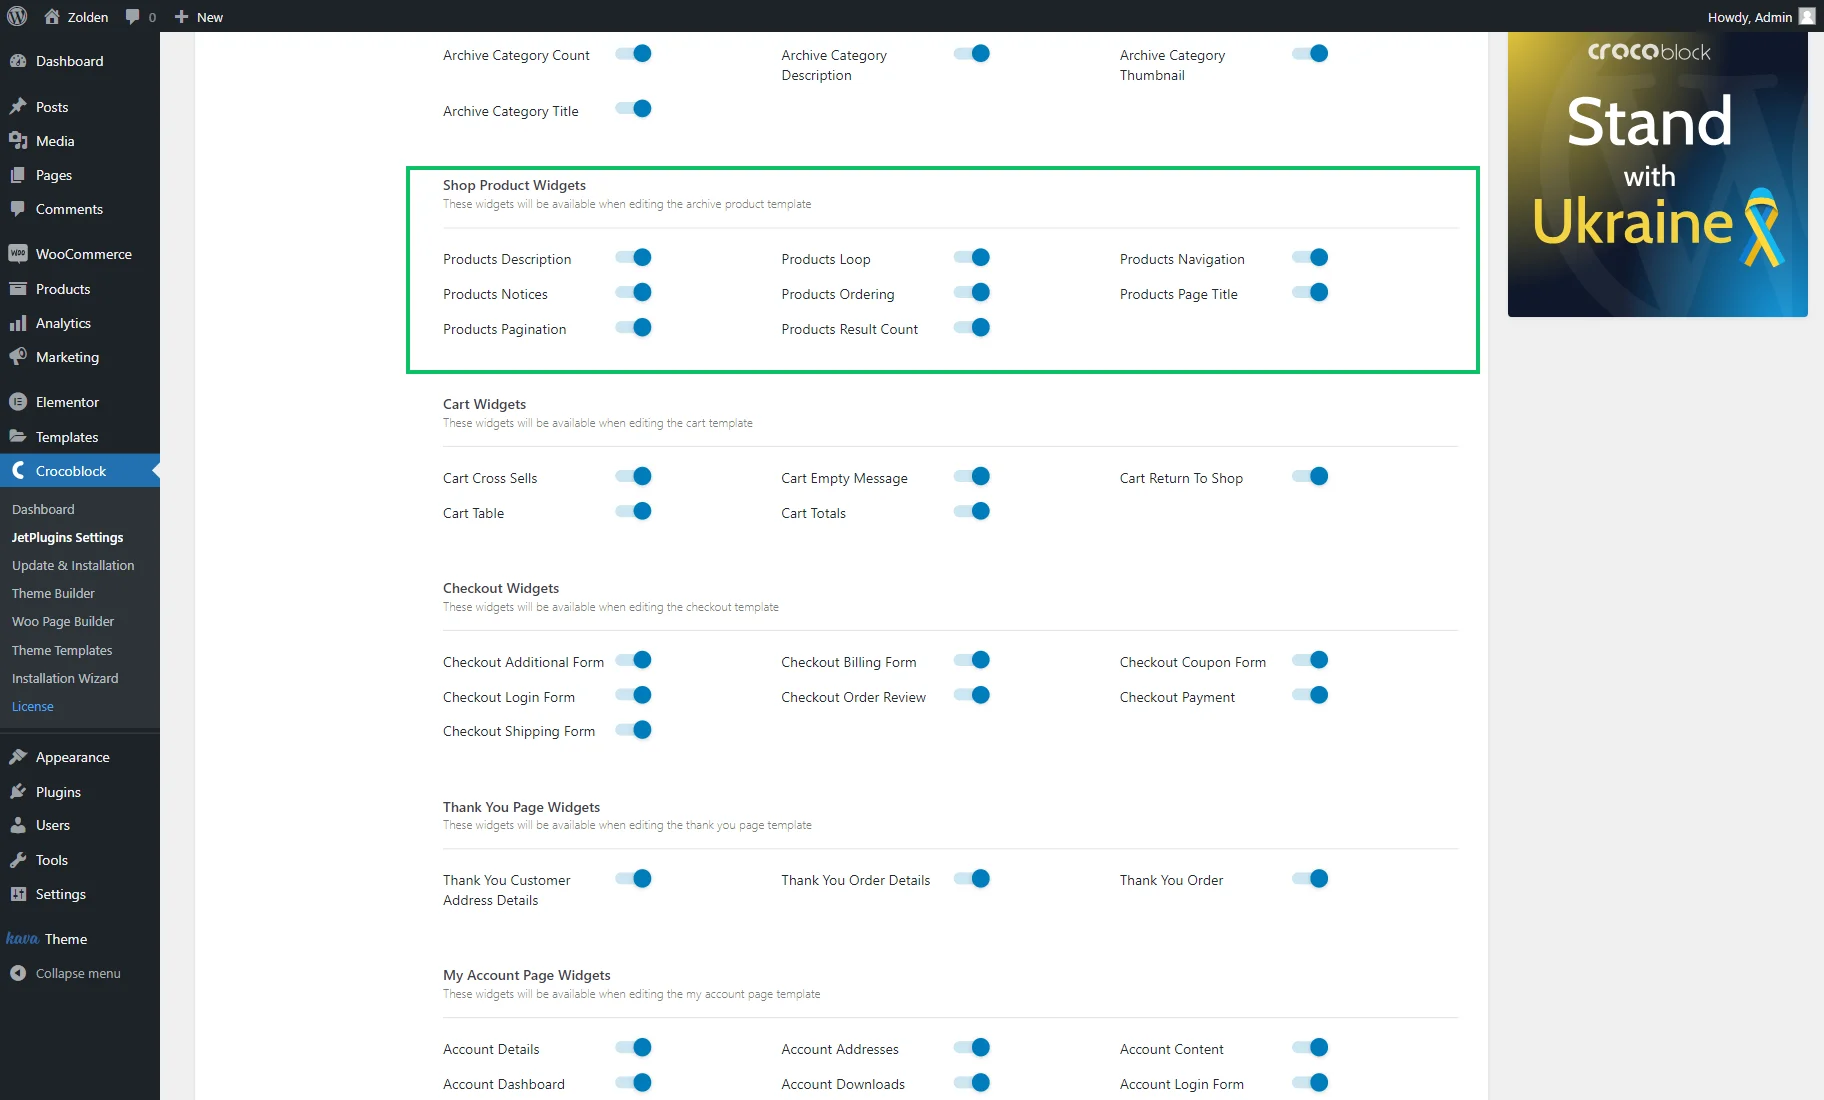
Enable Shop widgets
Go to WordPress Dashboard > Crocoblock > JetPlugins Settings > JetWooBuilder > Widgets, scroll to the Shop Product Widgets block, and enable the widgets you want to use while creating a Shop template.
Create a template
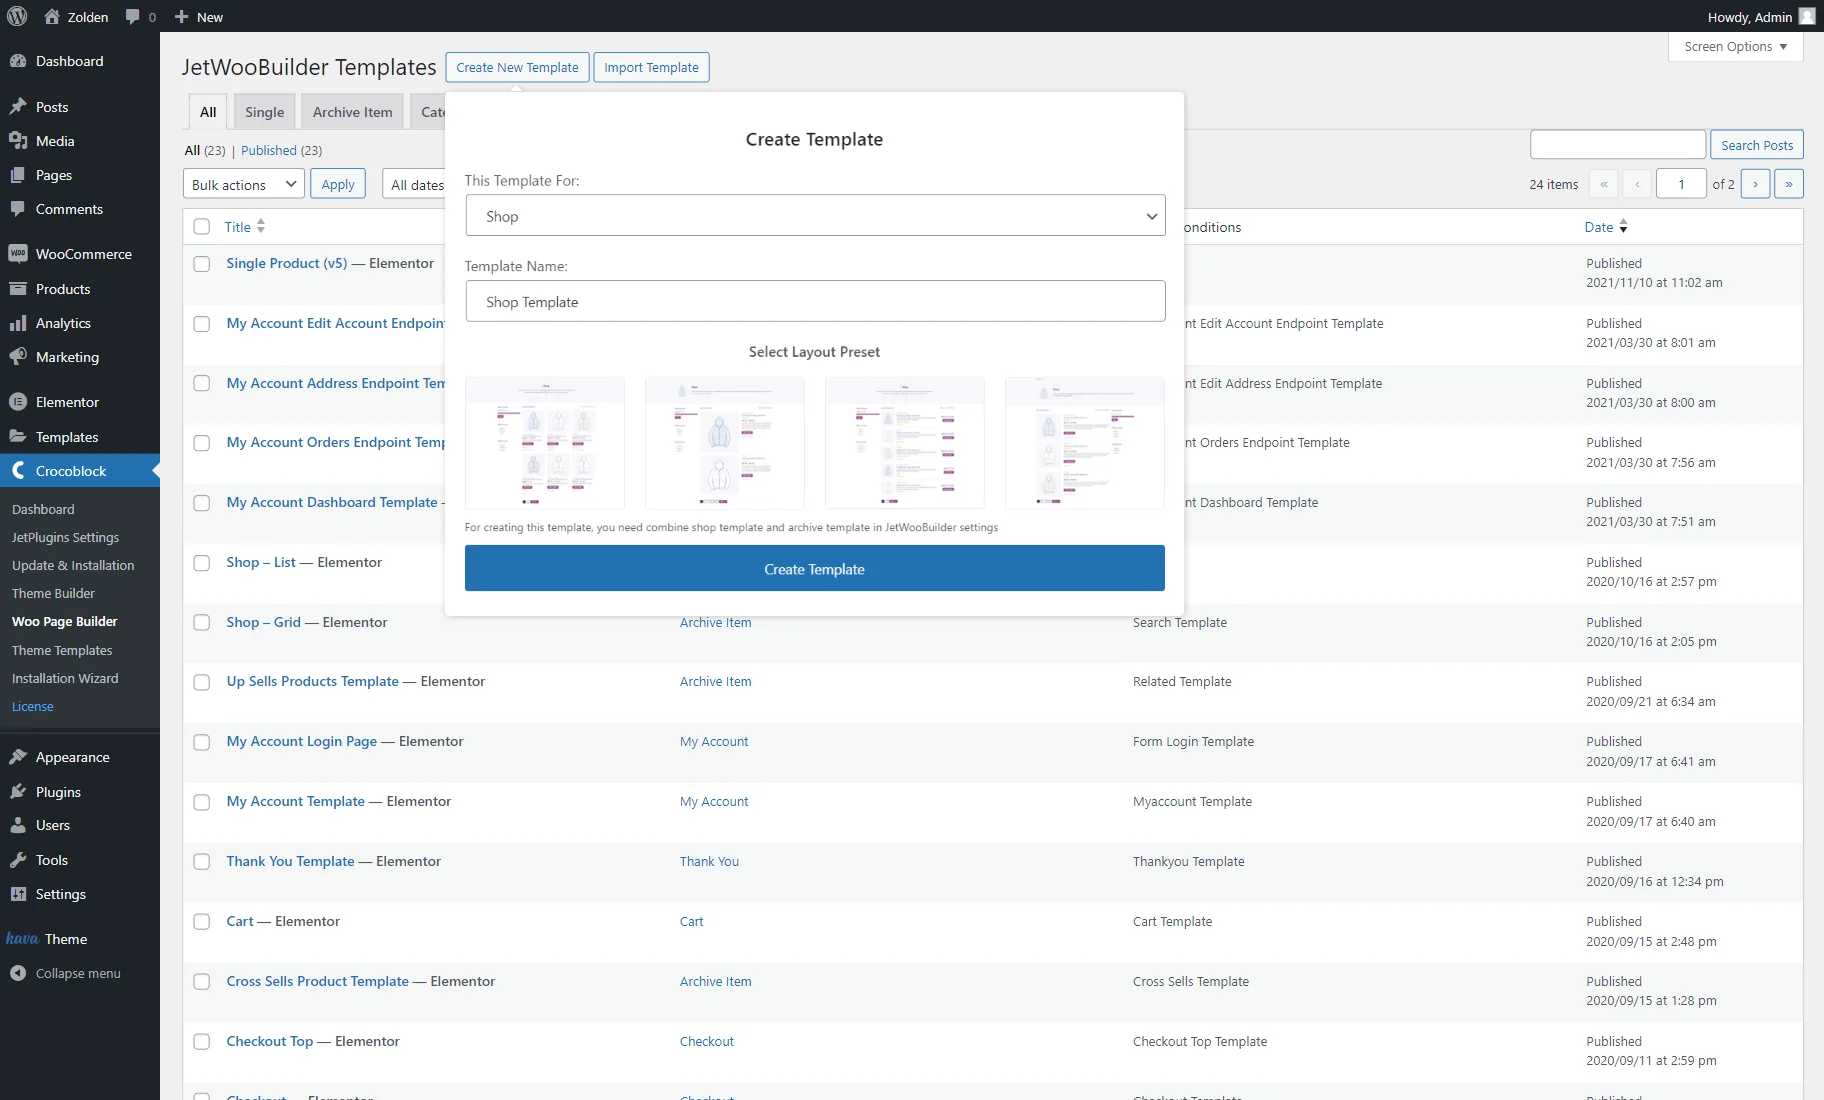
Proceed to the WordPress Dashboard > Crocoblock > Woo Page Builder tab and click the “Create New Template” button.
There will be a starting pop-up window. Select the “Shop” option in the This Template For drop-down menu and type in the Template Name. If you are confused about the shop page layout, choose a pre-set in the Select Layout Preset section. Afterward, click the “Create Template” button.
For more visual instructions, watch the video tutorial on creating a Shop page template with JetWooBuilder.
Fill the Shop template with widgets
You can start editing the Woocommerce shop page by filling it up with all the needed widgets. The shop template is applied when you open one of the product category pages, and it shows the elements you’ve included in the template.
There are eight widgets available for the shop template, so let’s take a brief look at each of them.
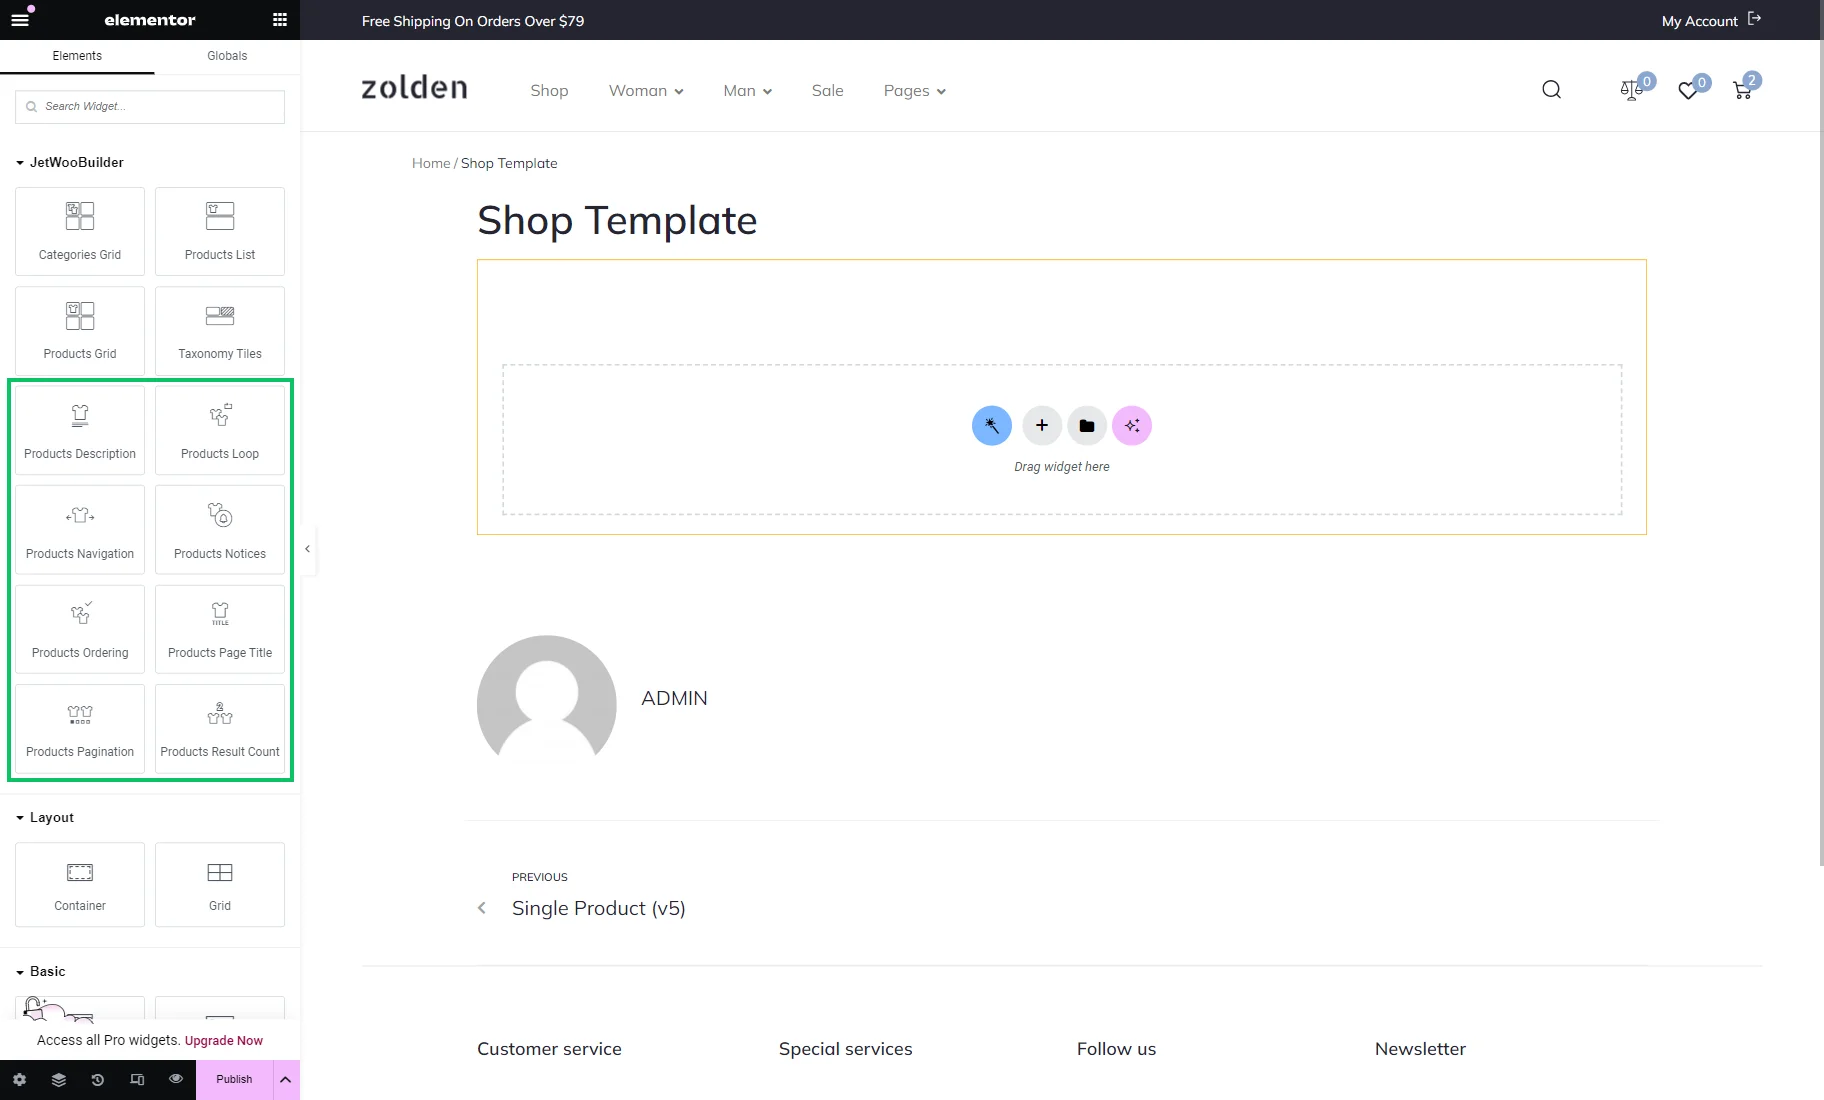
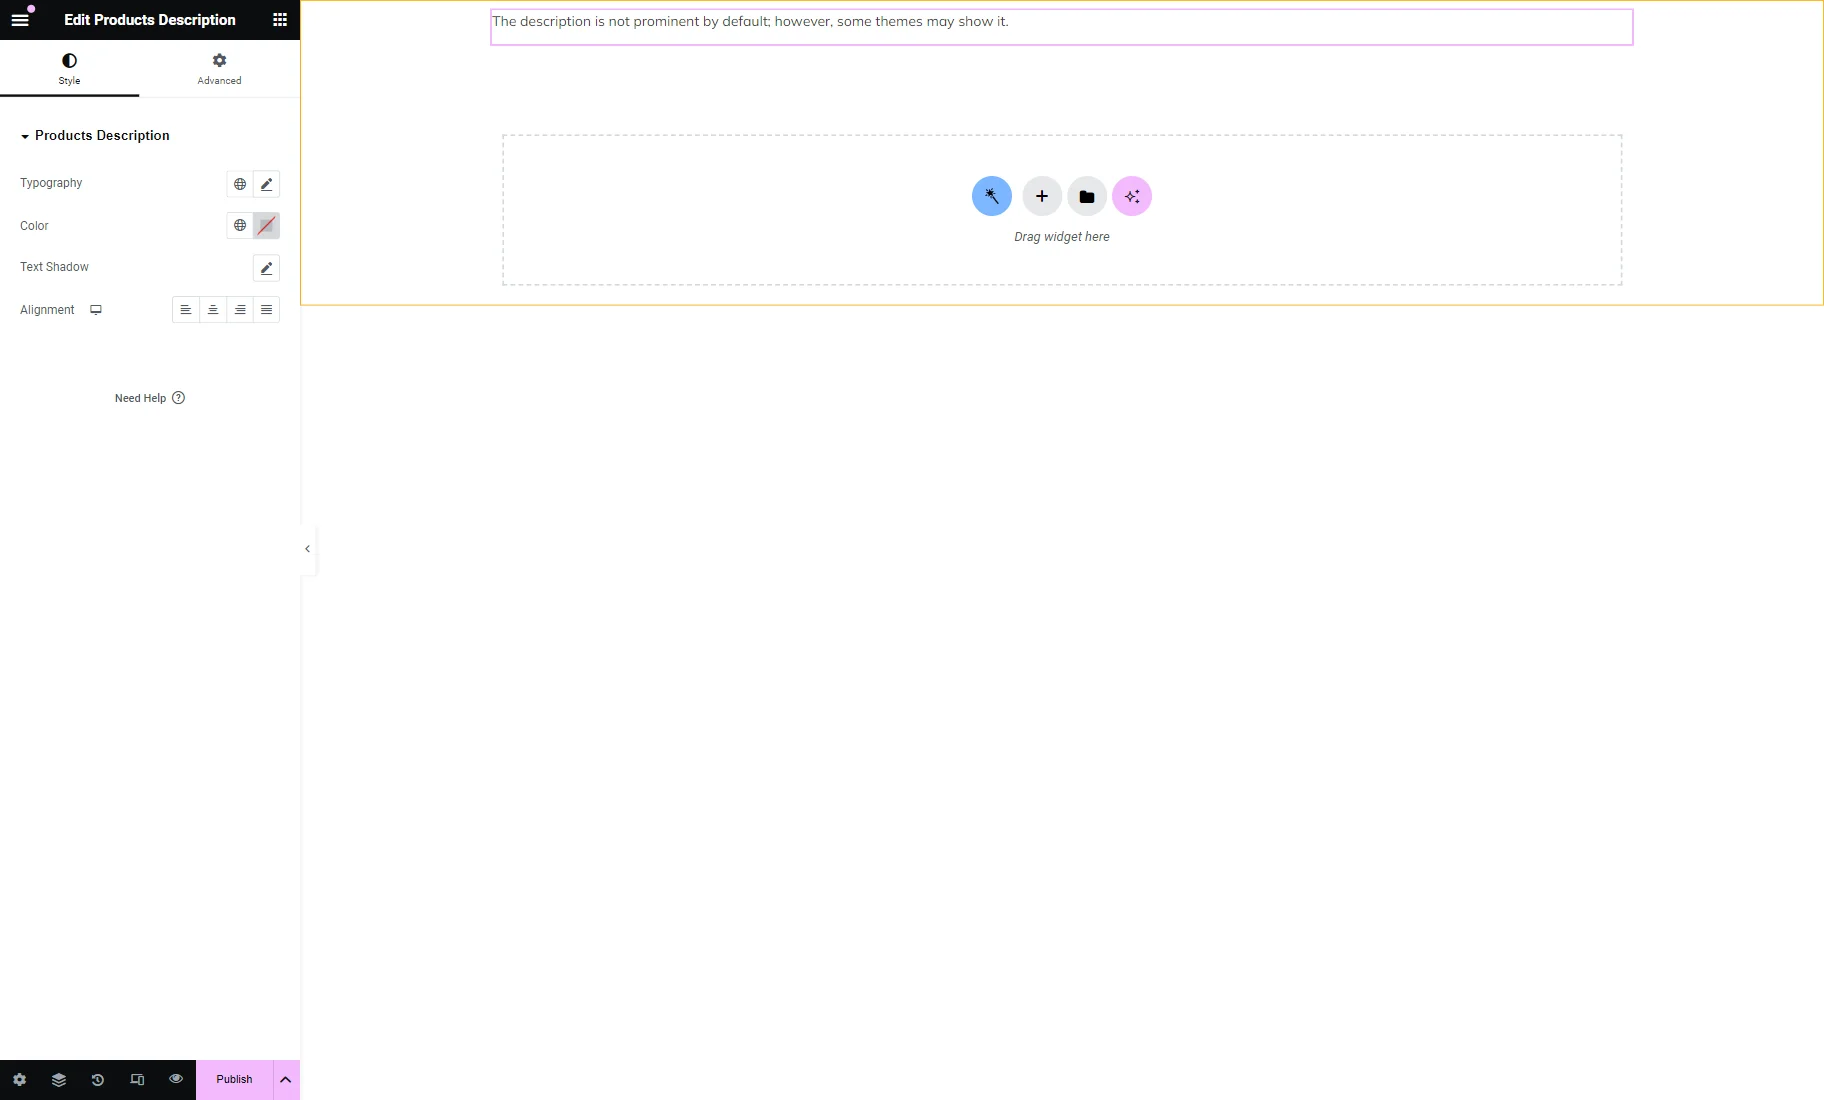
Products Description
This widget displays the description you wrote for the specific category.
In the Style tab, you can choose the Typography, Color, Text Shadow, and Alignment of the displayed text.
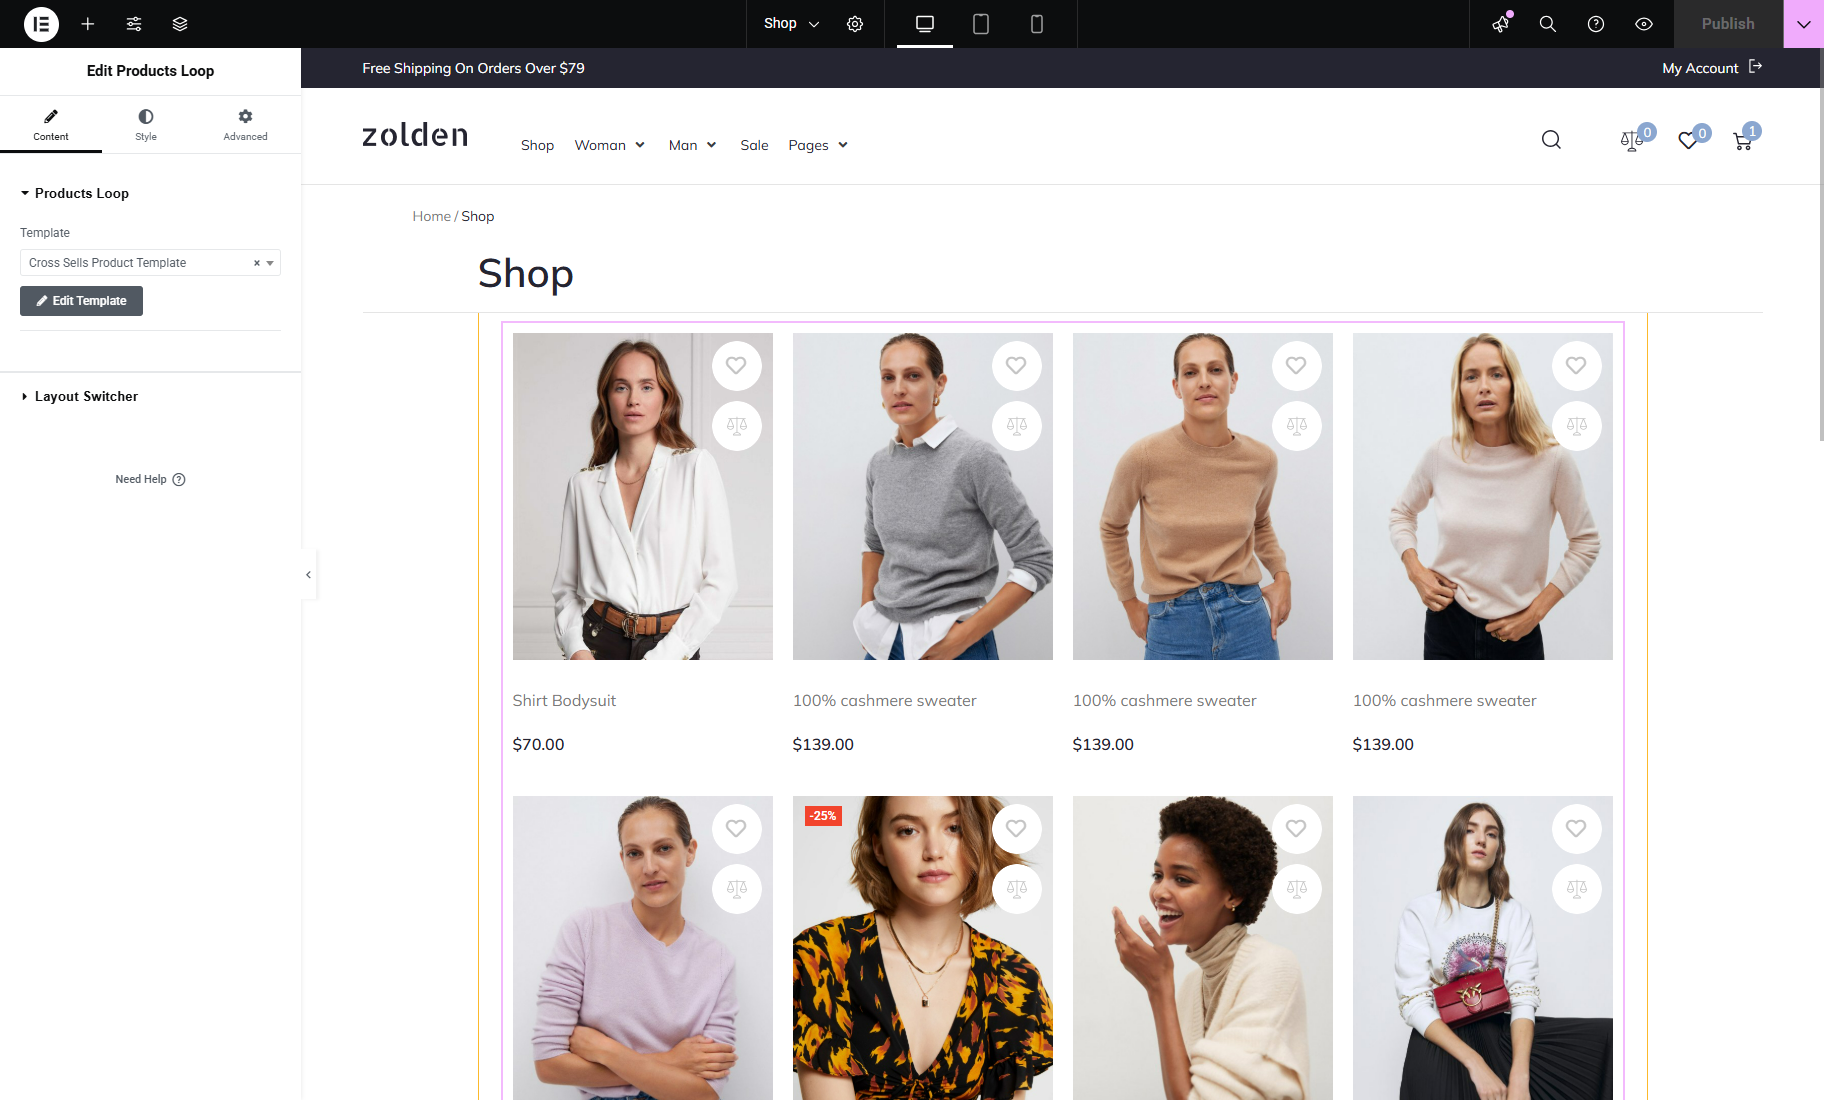
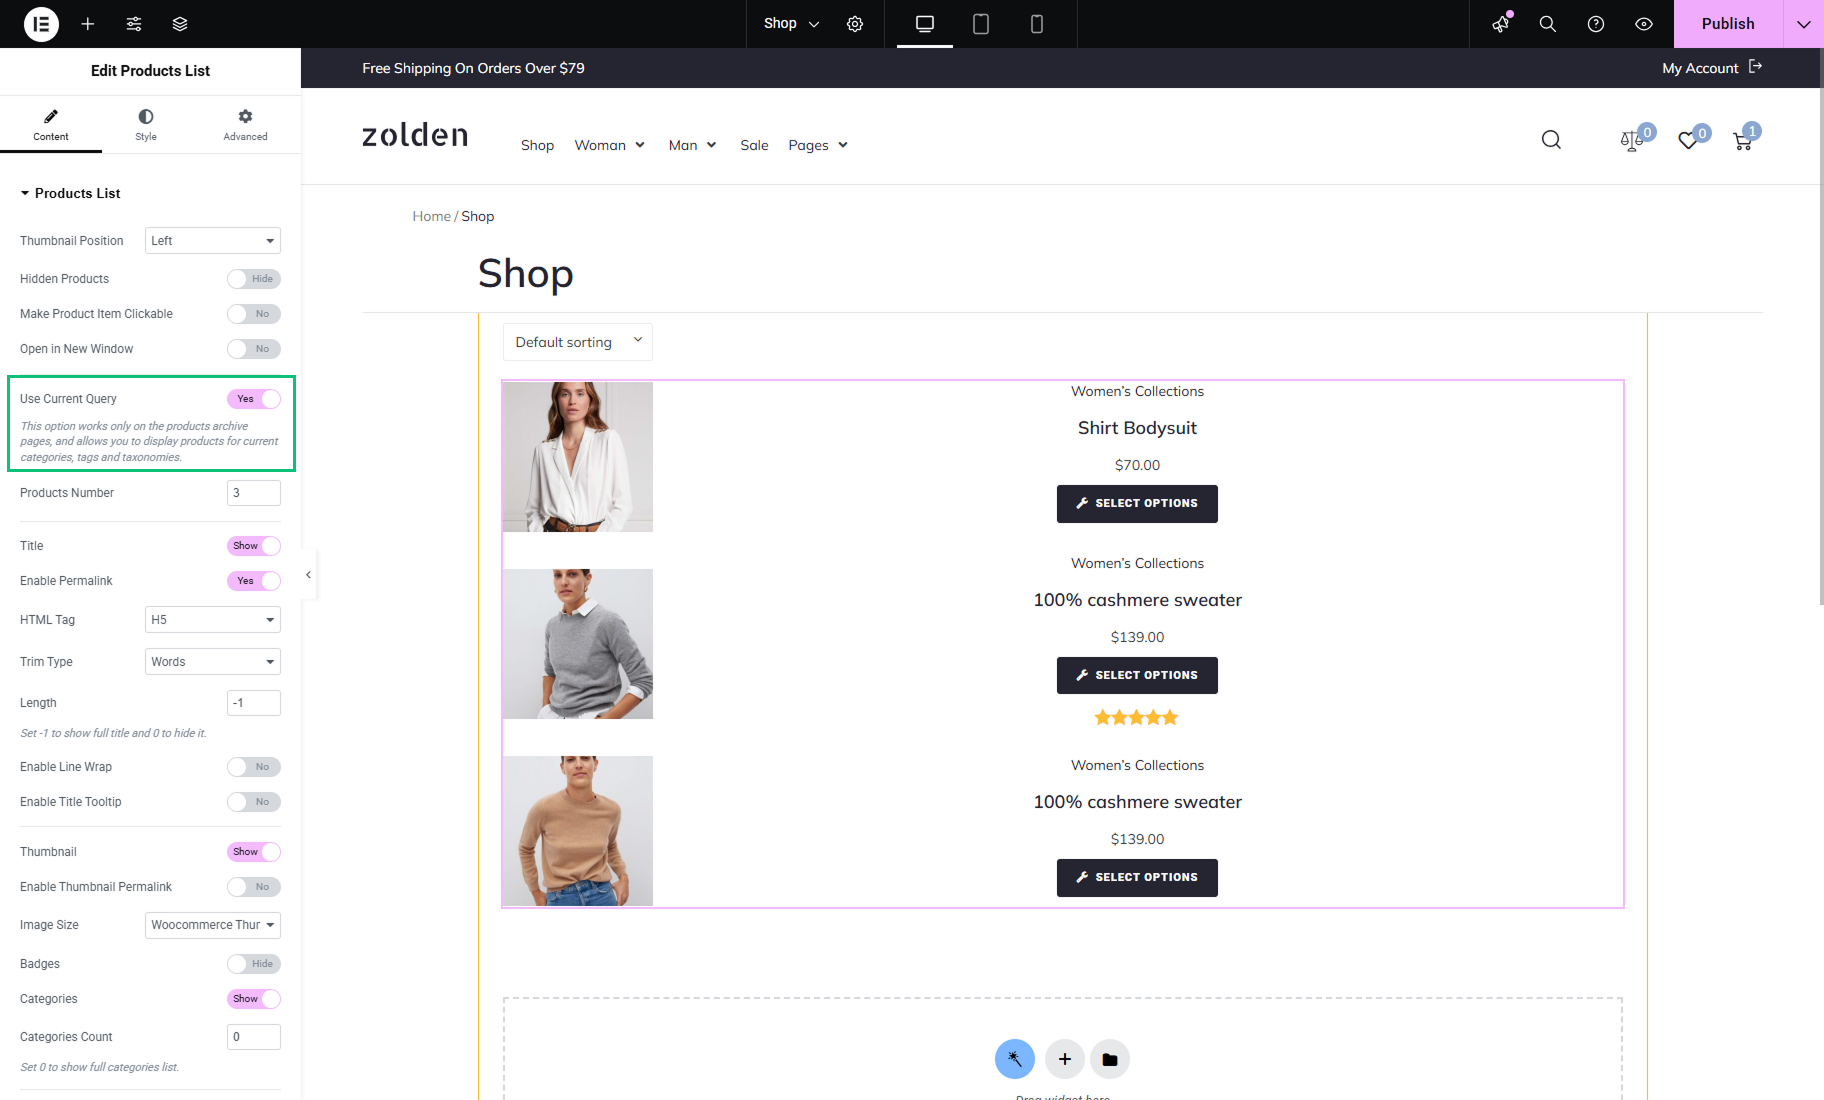
Products Loop
The Products Grid widget displays a grid containing a specified number of products on the page, whereas the Products List widget displays the same products in a list. The Products Loop widget, besides showing an endless loop of products, allows you to switch between the grid and list views.
The Products Loop widget shows the archive products template layout by default. Still, you can create a dedicated archive template with a dedicated product displaying design and attach it in the Template drop-down of the Products Loop section so that different product loops on different pages will show distinct template layouts.
In the Layout Switcher section, you can activate the Enable toggle to switch between the grid and list view. The following features are presented:
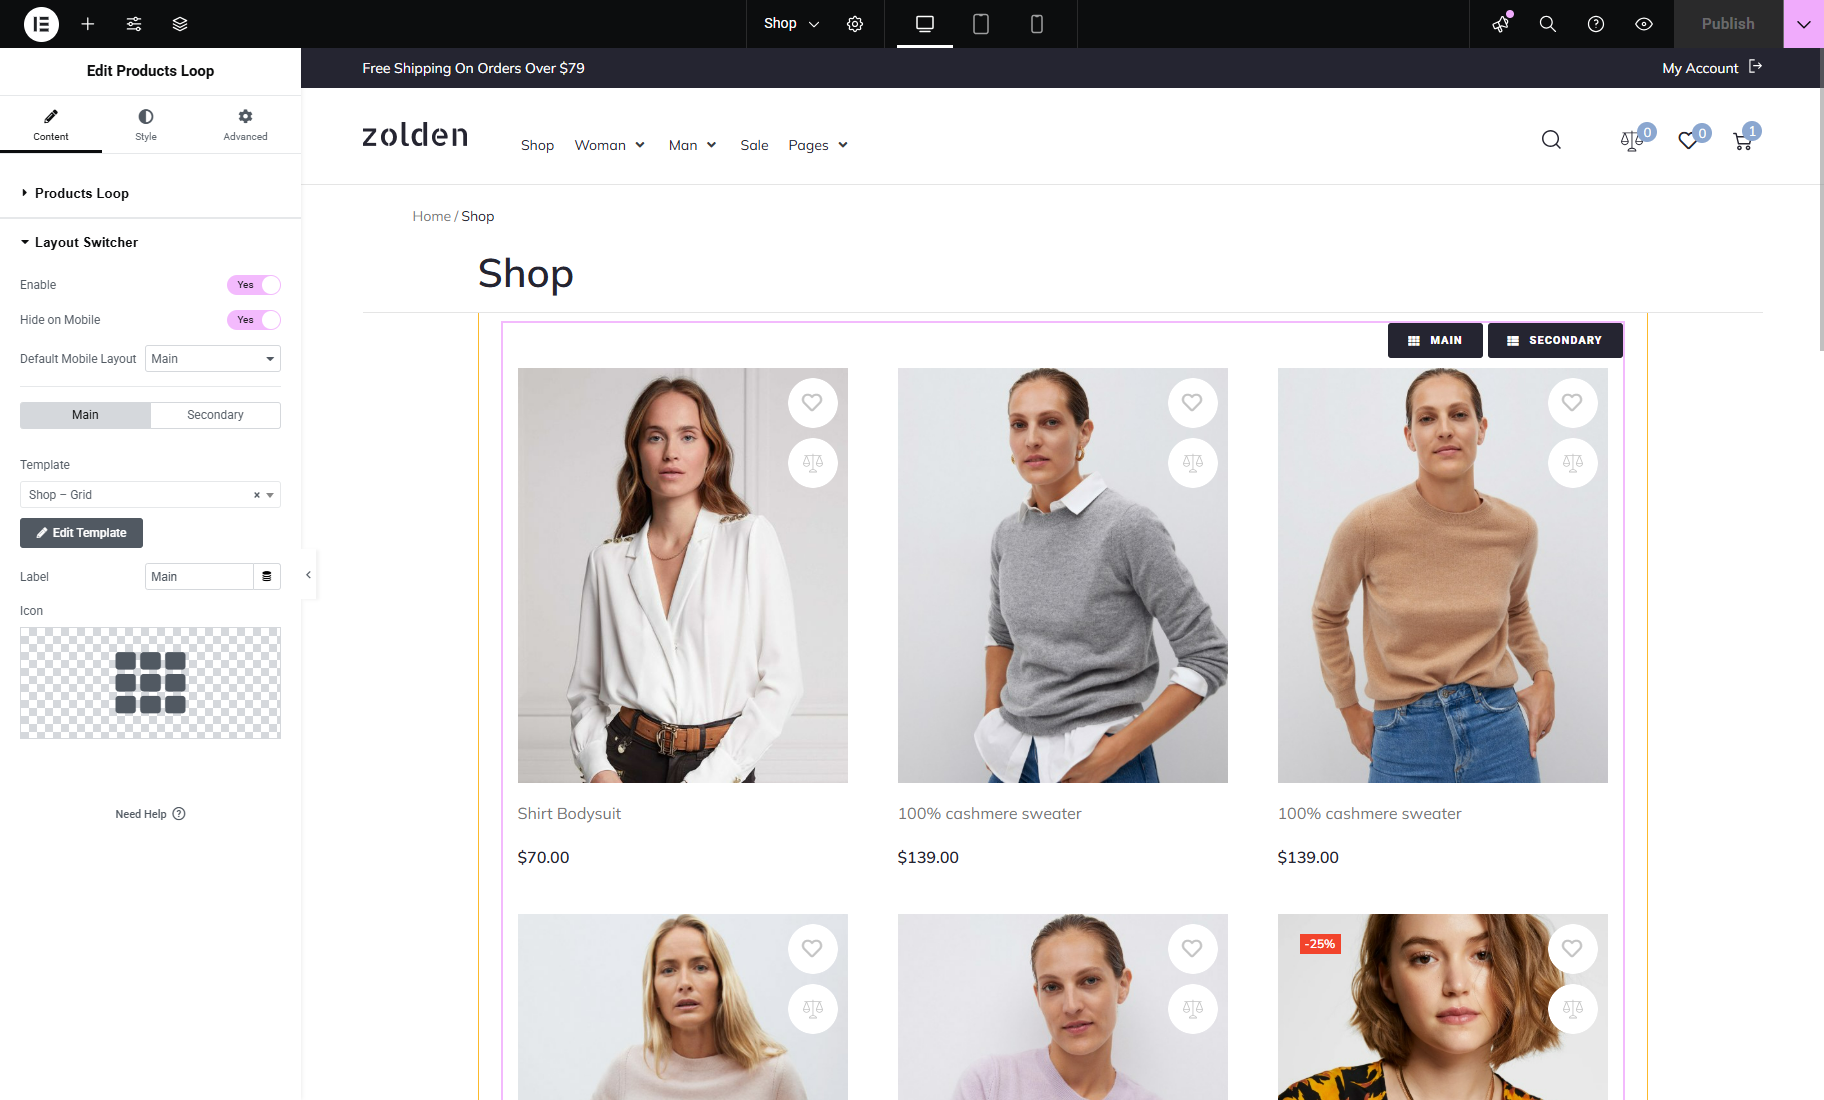
- Hide on Mobile — hides the grid/list layout switcher on mobile devices. It activates the Default Mobile Layout dropdown, which allows setting the “Main” or “Secondary” layout as the default for mobile devices;
- Main/Secondary — a switcher that allows you to switch between the layout settings. By default, the main layout is a grid;
- Template — a selector where the needed templates should be attached. Create two archive templates for each layout and attach the templates here. For instance, it can be a grid and list layout;
- Label — a field where you can type the layout names;
- Icon — a field where you can select the proper icons for the layouts.
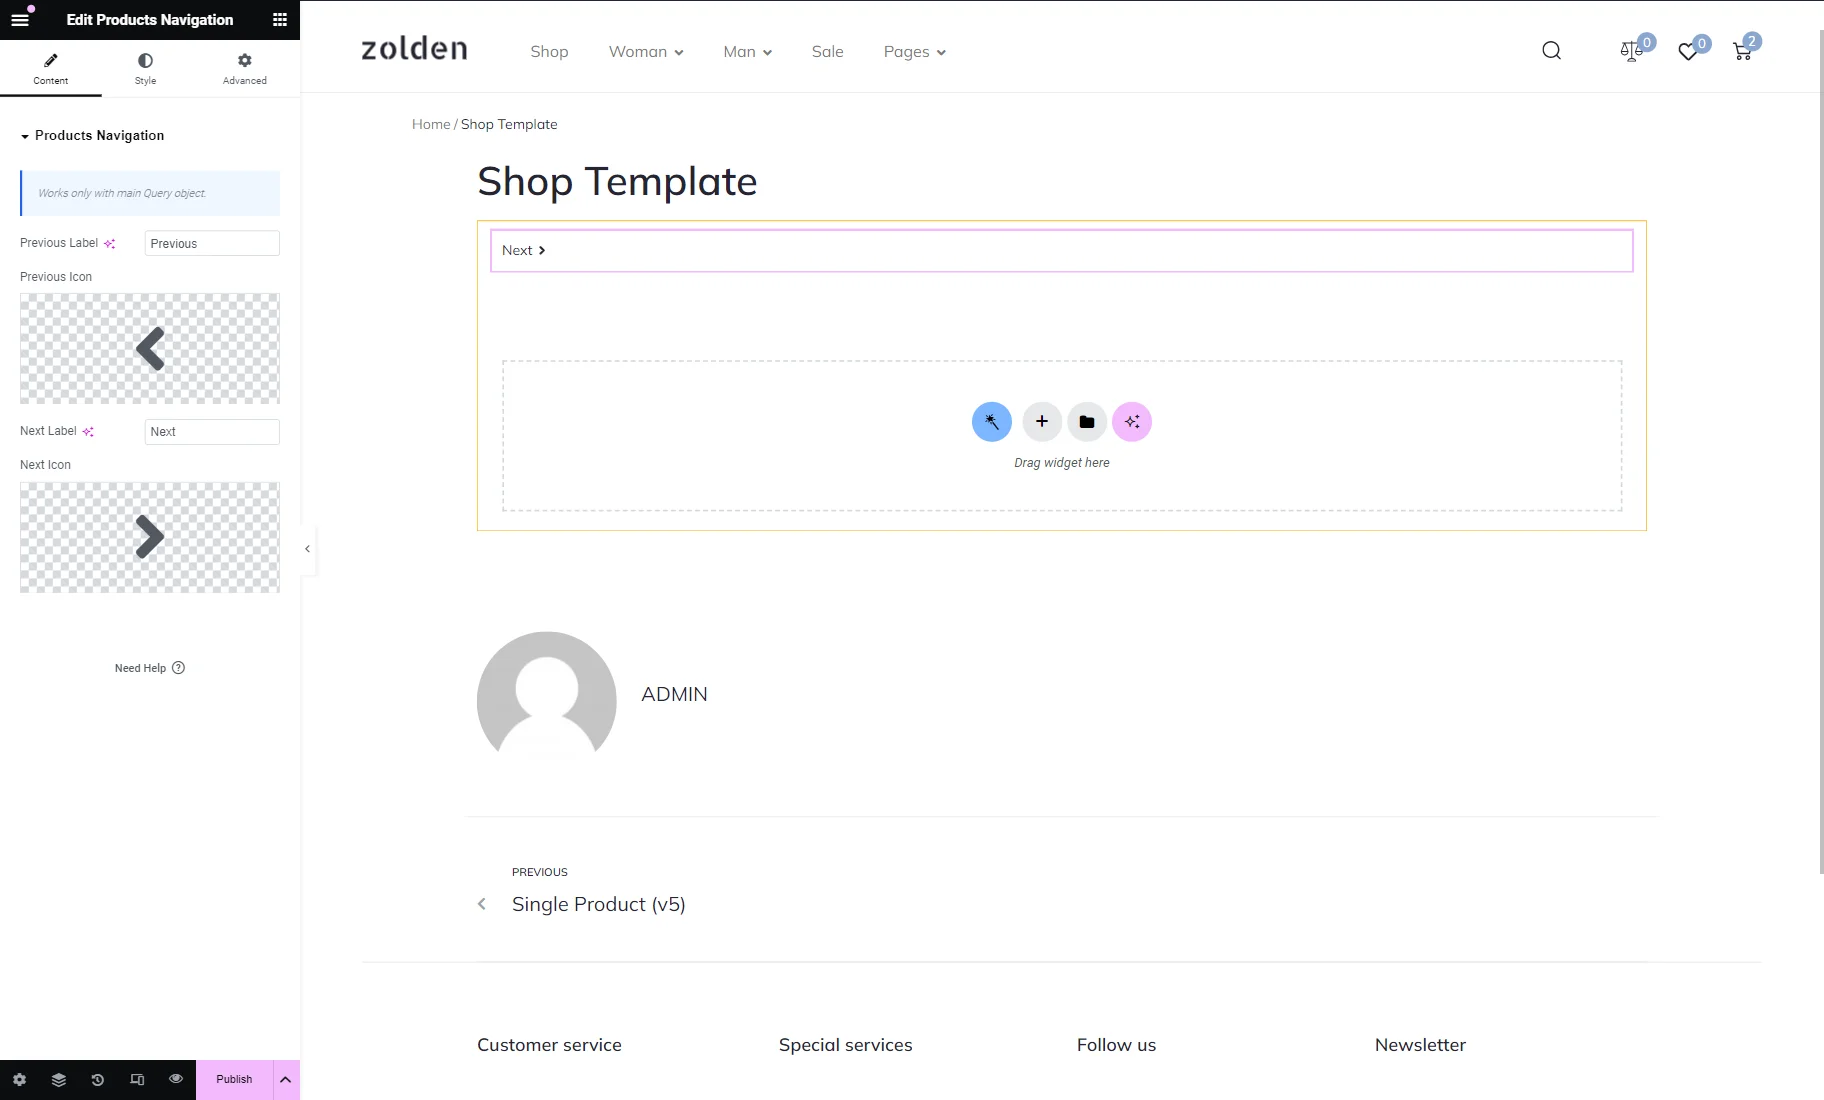
Products Navigation
If there are many products in the shop, they should be naturally paginated. This widget adds controls that allow customers to go to the next or previous page. In the Content menu tab, you can choose the button’s icon and give it a title.
In the Style tab, you can change the button’s appearance.
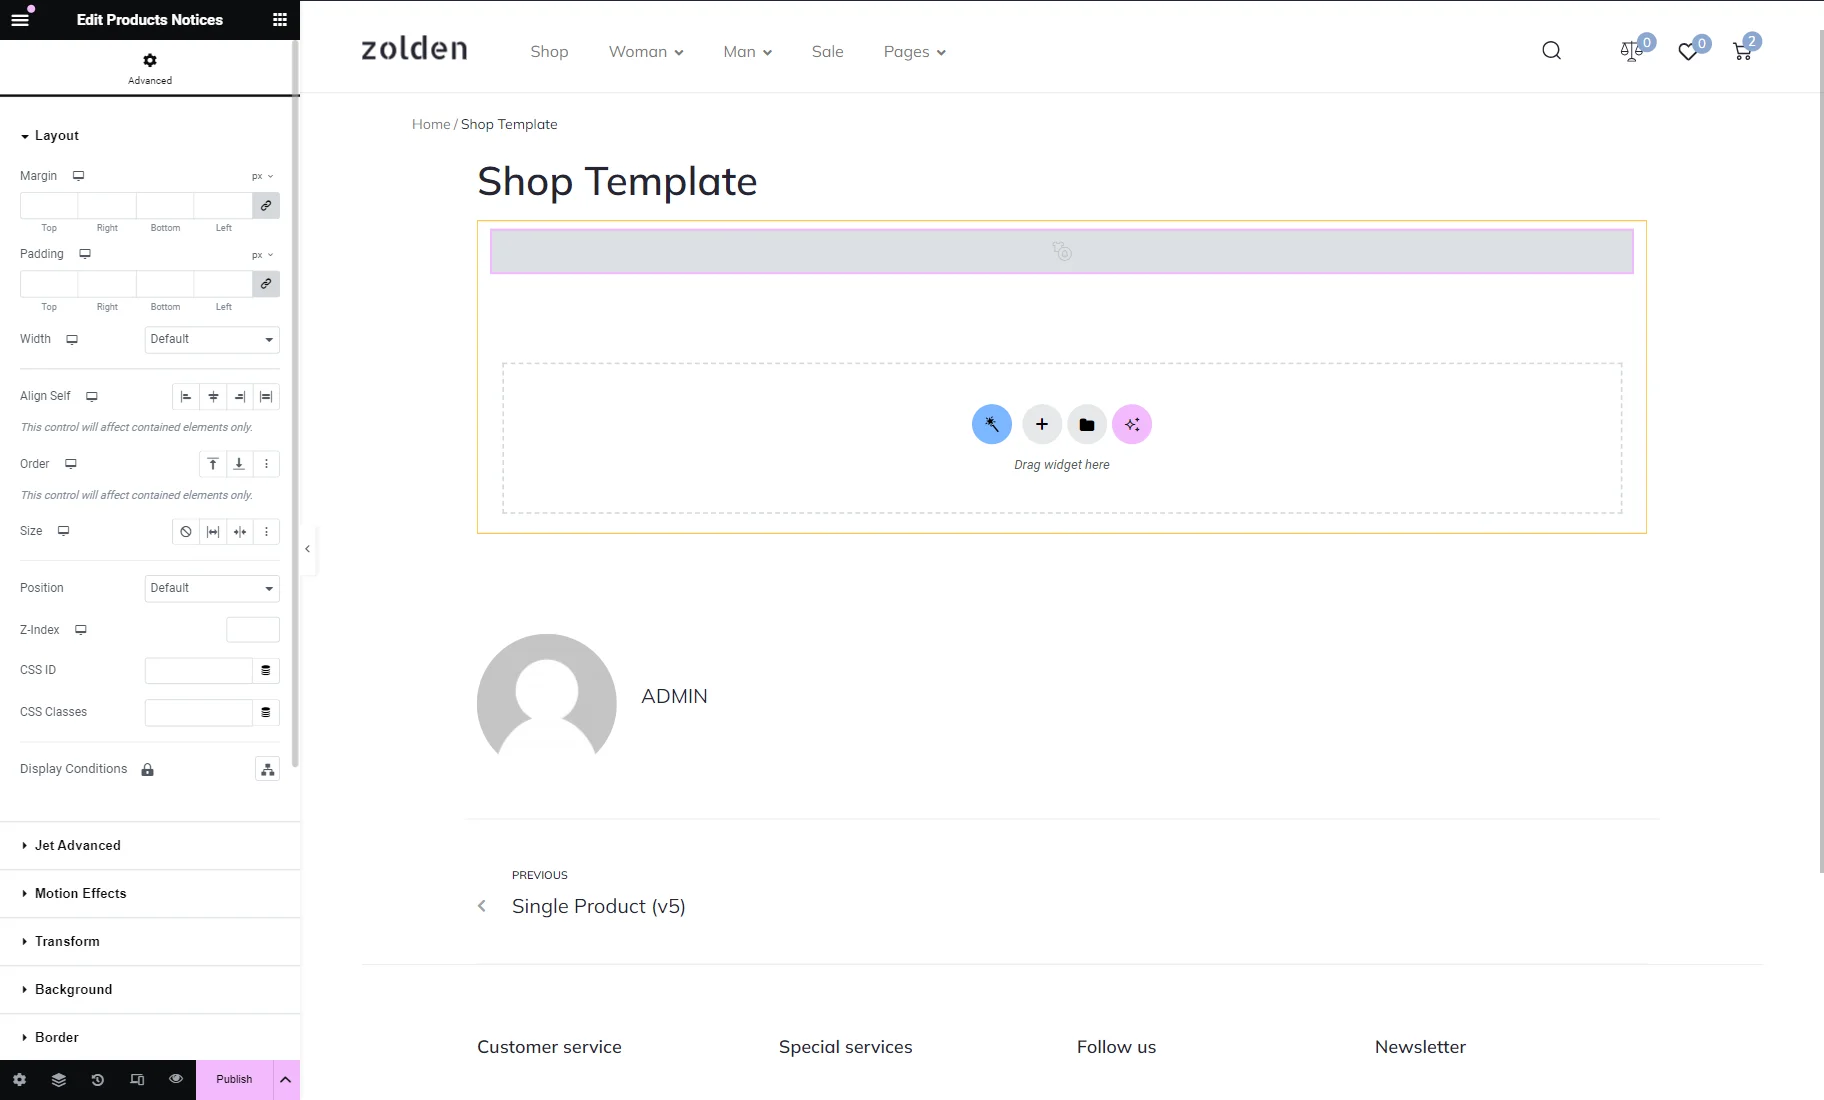
Products Notices
There are several notifications that a WooCommerce shop could show to the user. This widget displays those messages on your custom shop page.
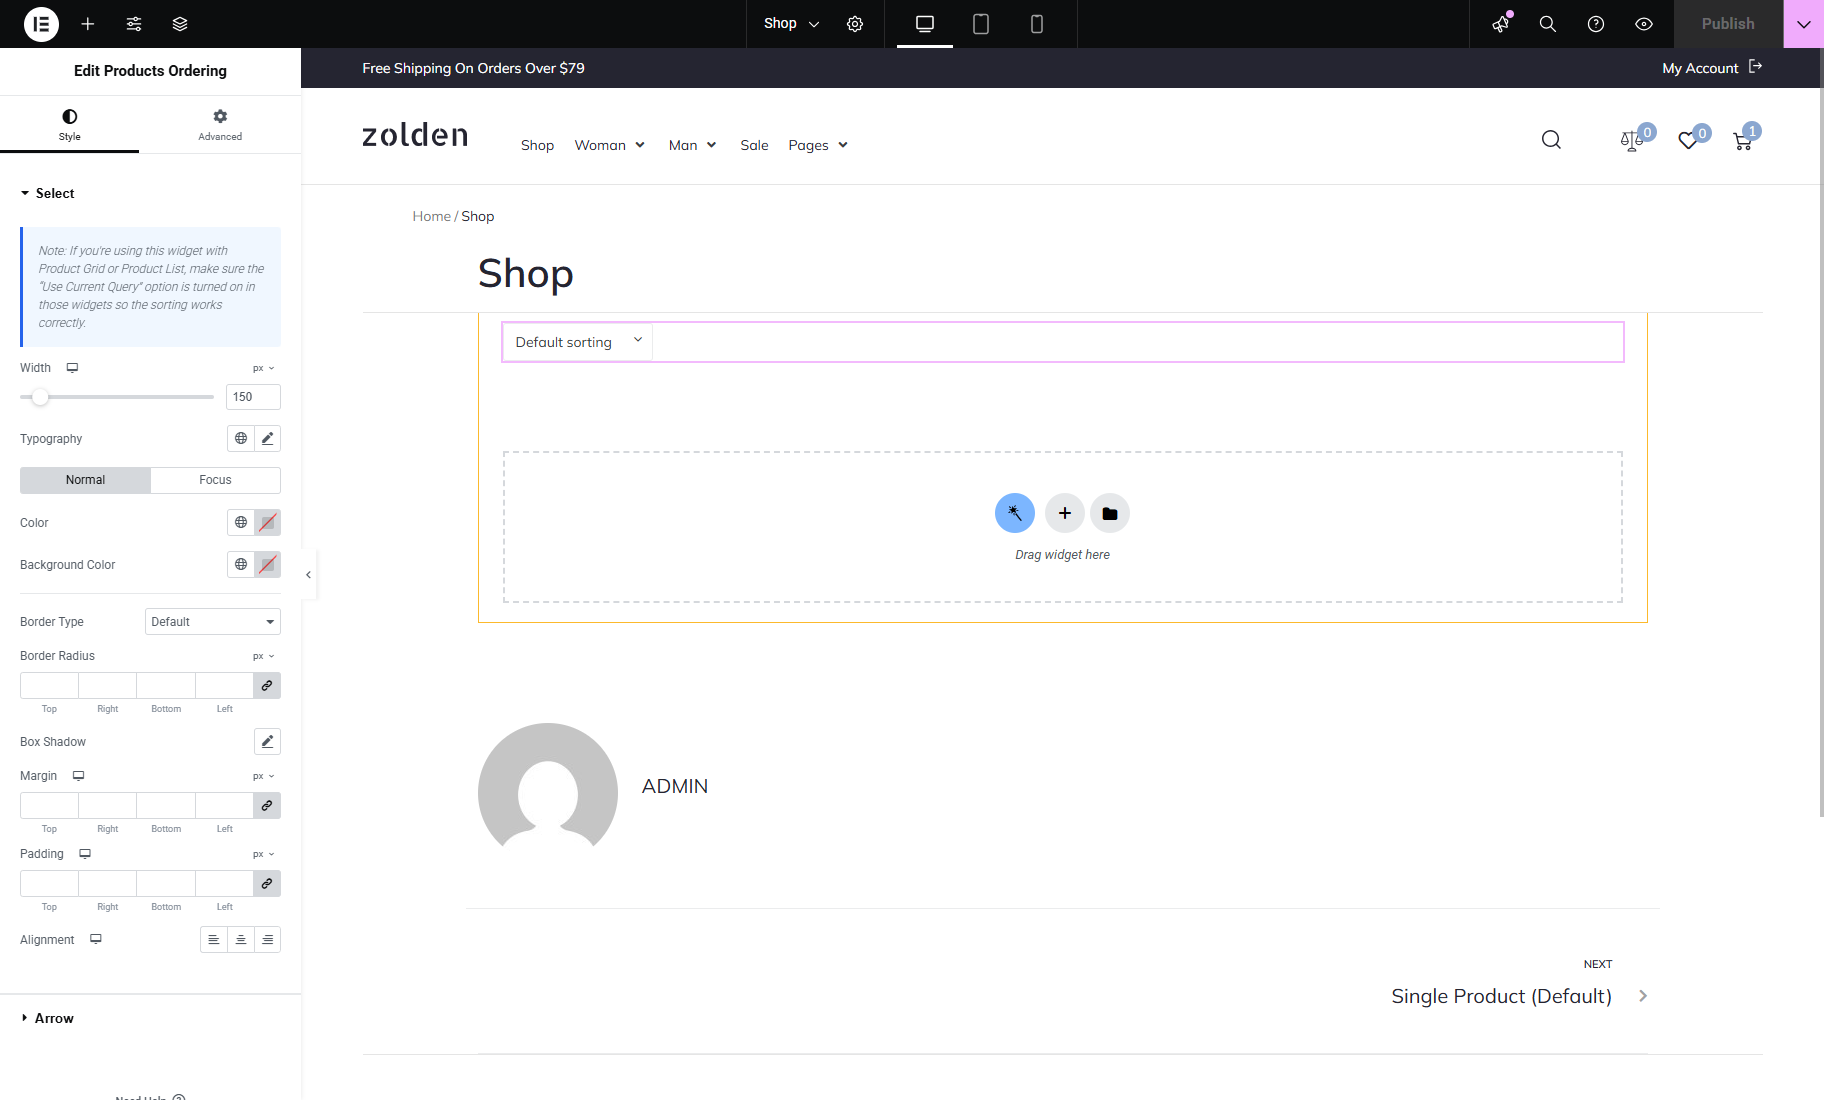
Products Ordering
This widget allows you to add sorting options to the shop template. The products can be sorted by popularity, average rating, latest additions, and price. Clients can choose the type of filter in the drop-down menu.
You can define the design of the sorting element in the Style settings tab.
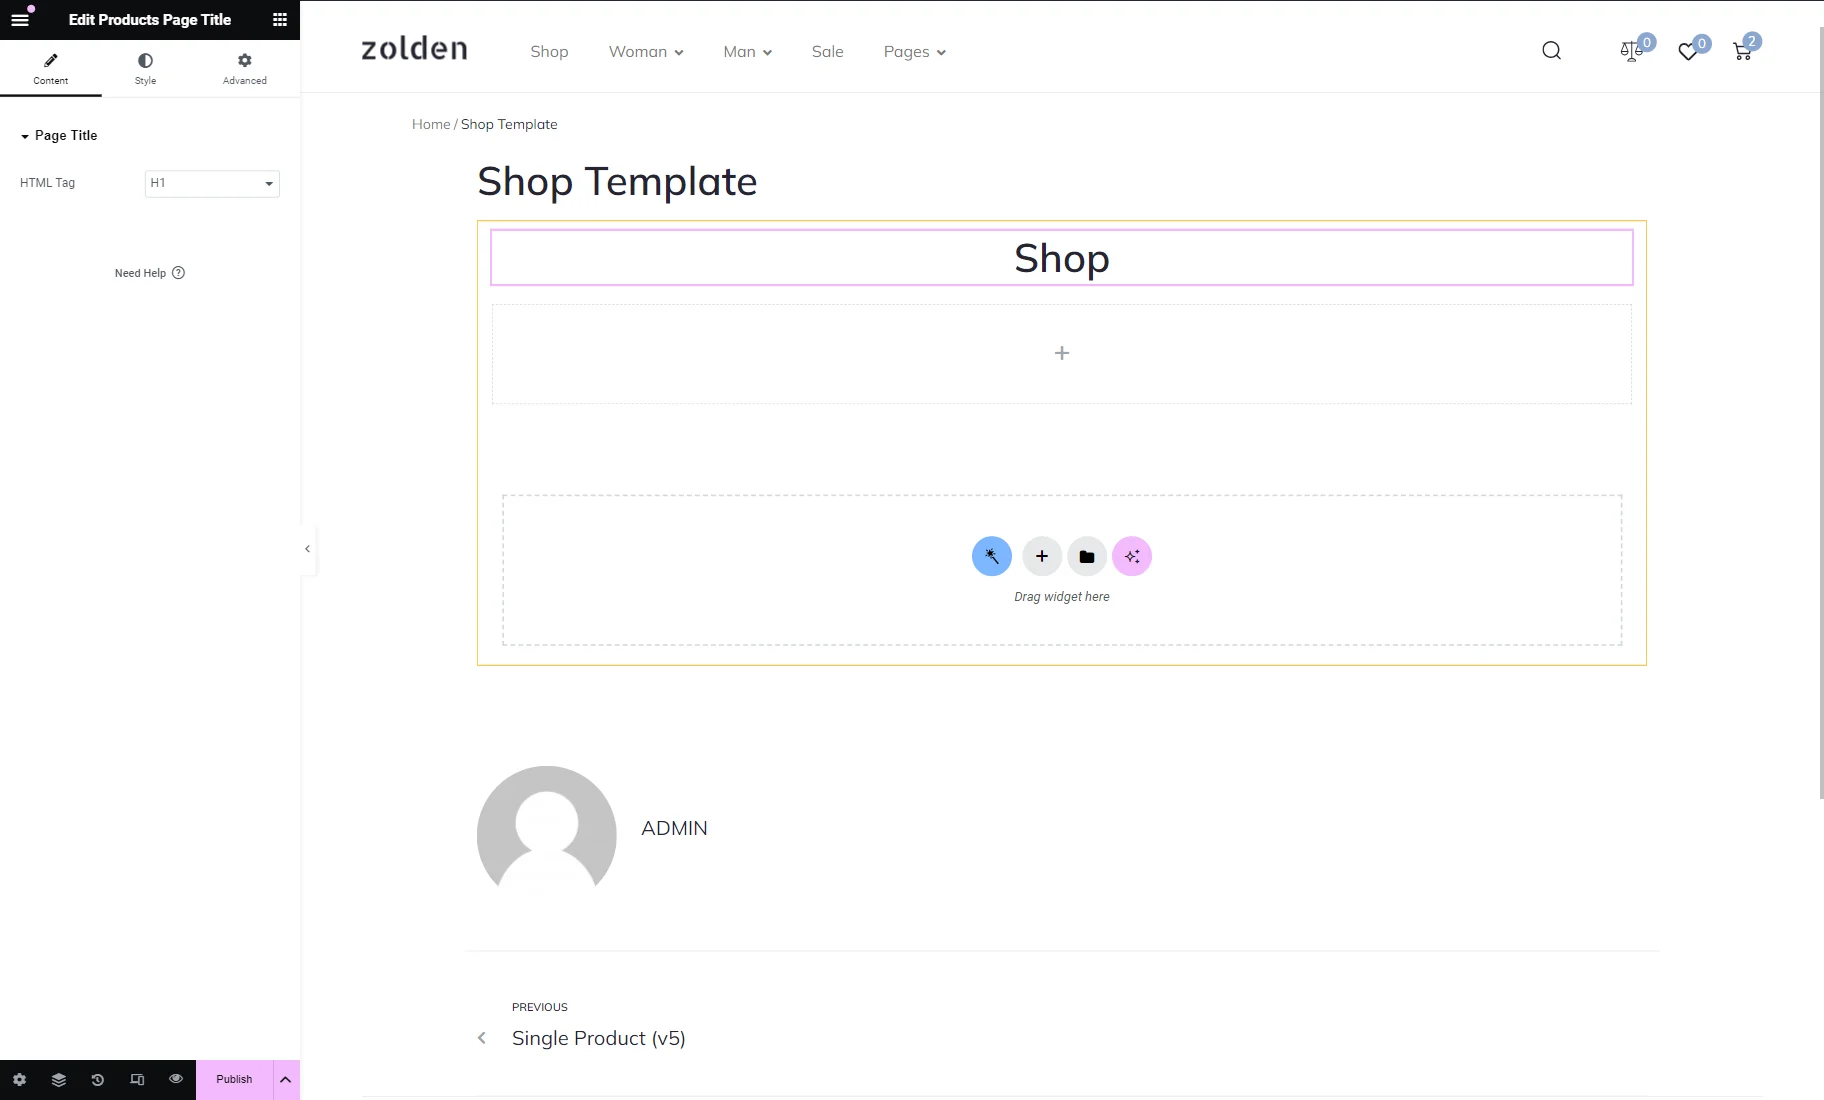
Products Page Title
As previously written, the shop template is applied to a product category page, and this widget displays its name. For example, if you navigate to the “Women’s Collection” category page on the front end, you will see the corresponding title. In the Content menu tab, you can choose the HTML Tag for the title.
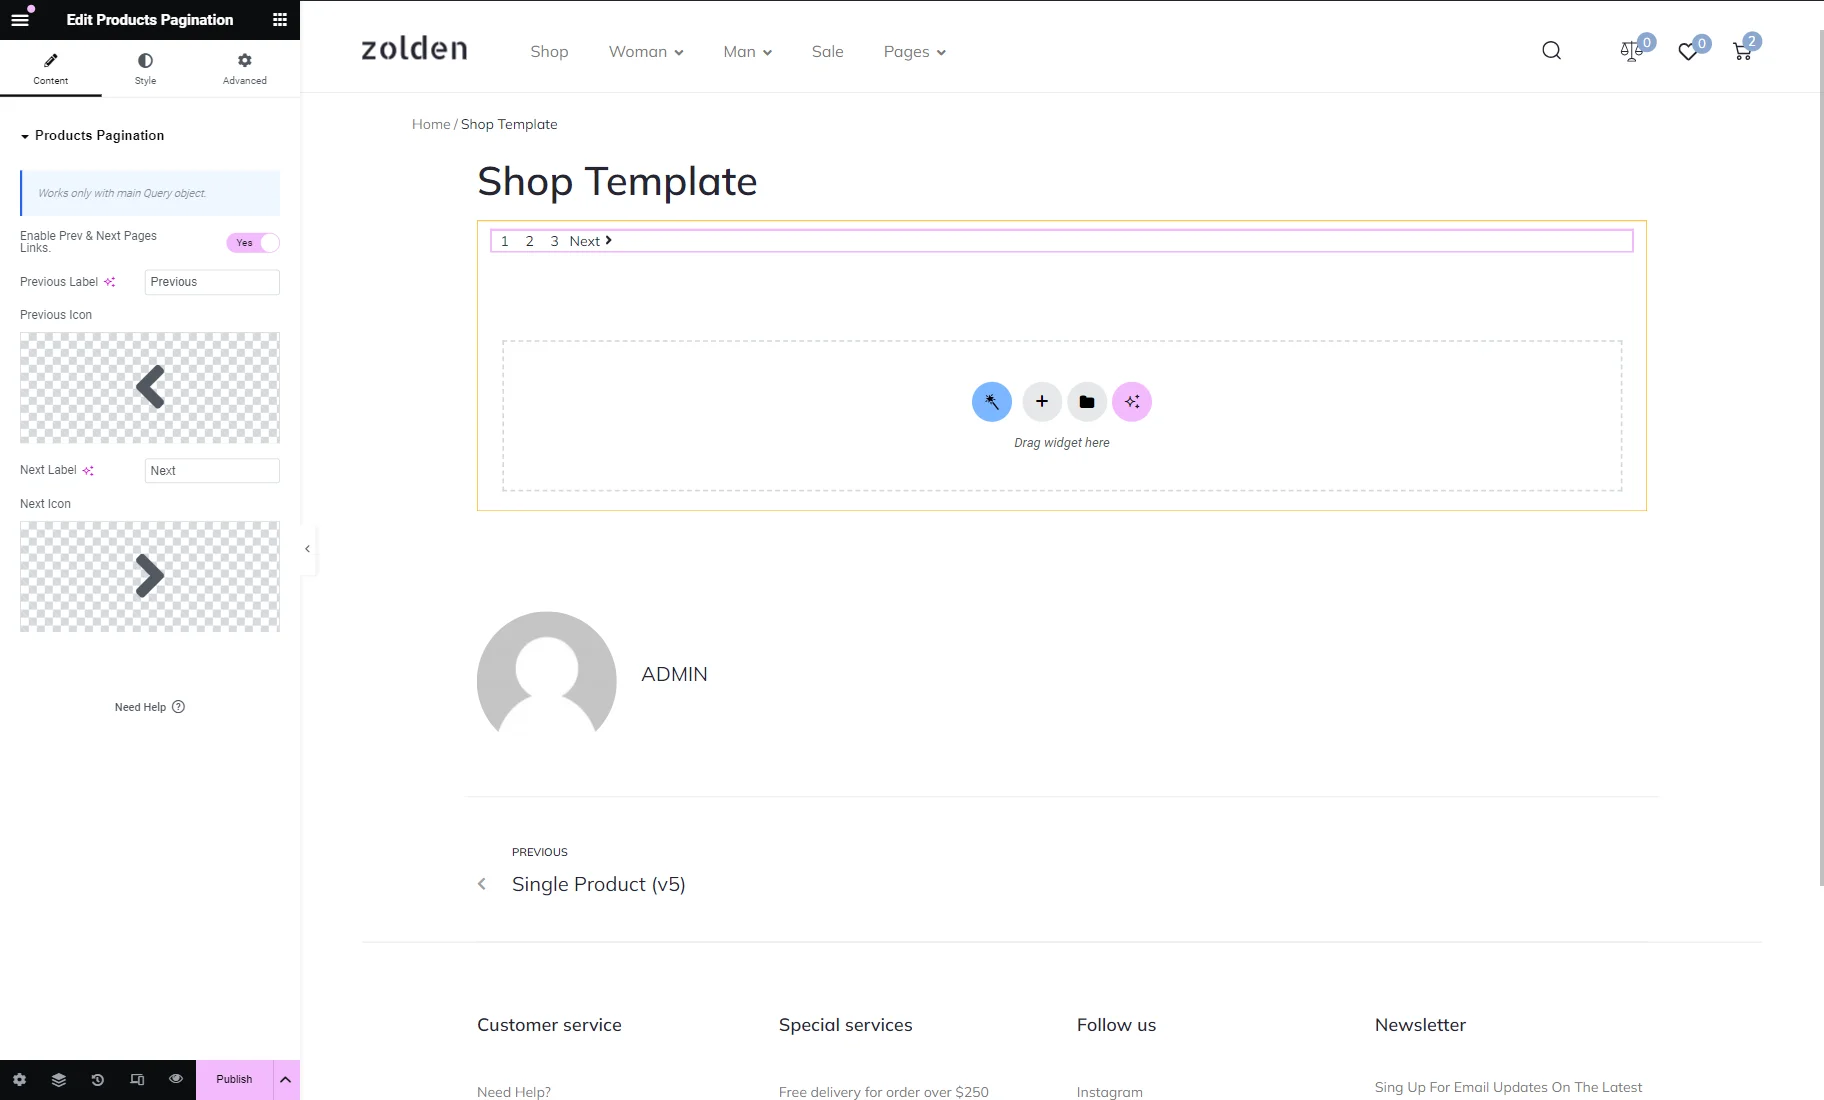
Products Pagination
This widget is similar to the Products Navigation. It lets users surf through the product listing pages, and it works with the main query object only as well. The difference is that this widget shows not only the control buttons but also the number of pages.
Products Result Count
We strongly recommend using this widget with the Products Ordering, Products Pagination, or Products Navigation widgets. It shows the number of filtering results shown on the page.
In the Style tab, you can change the color of the text, its typography, and alignment.

Assign the template to WooCommerce
When you are done with filling out the layout and designing it, click the “Publish/Update” button.
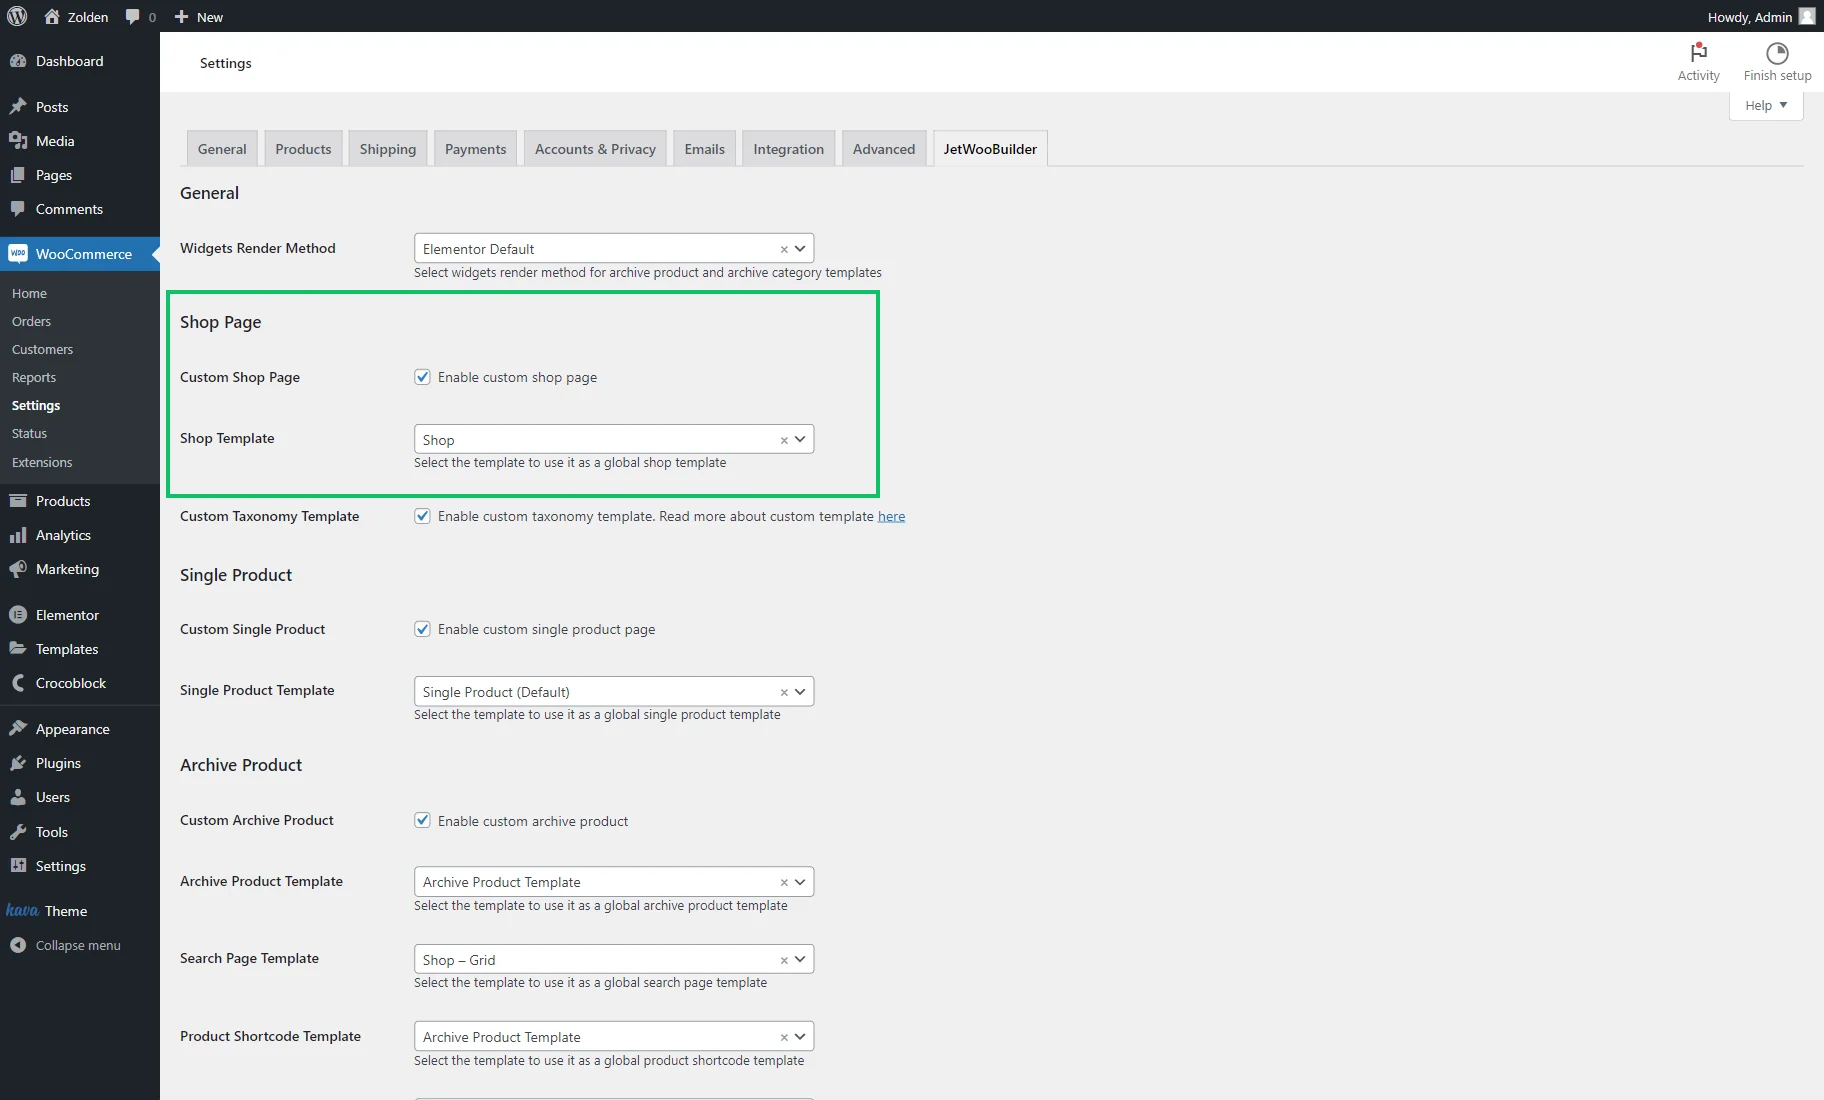
Navigate to WordPress Dashboard > WooCommerce > Settings and open the JetWooBuilder tab.
Tick the Enable custom shop page option, and in the Shop Template drop-down menu, choose the title of the template you’ve created, and click the “Save Changes” button.
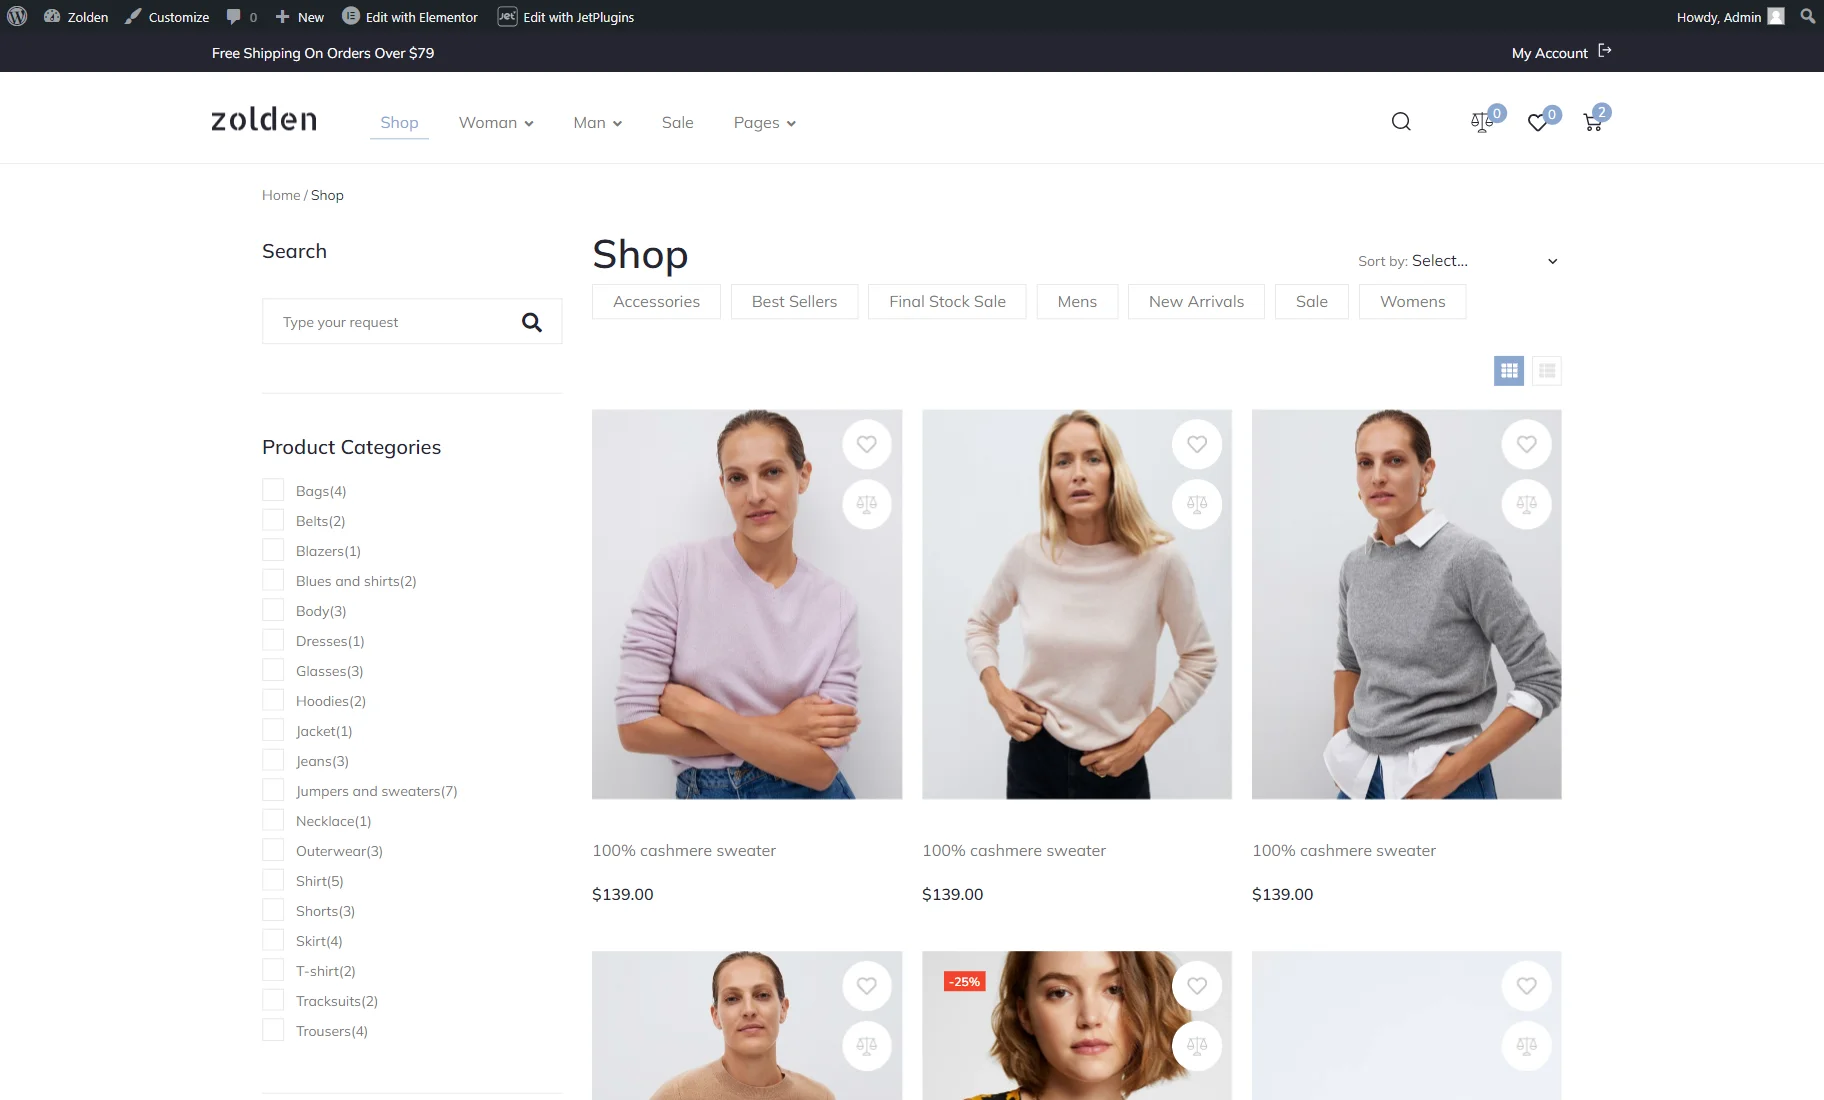
Proceed to the front end and check how products look with the newly created Shop Template.
How to Create a Shop Page Template with the JetThemeCore Plugin
JetThemeCore is the WordPress builder for the Elementor and Gutenberg editors. With its help, you can create a page template with a header, footer, and the JetWooBuilder template as a body.
Enable Shop widgets
Go to WordPress Dashboard > Crocoblock > JetPlugins Settings > JetWooBuilder > Widgets, scroll to the Shop Product Widgets block, and enable the widgets you will use while creating a Shop template.
Create a page template
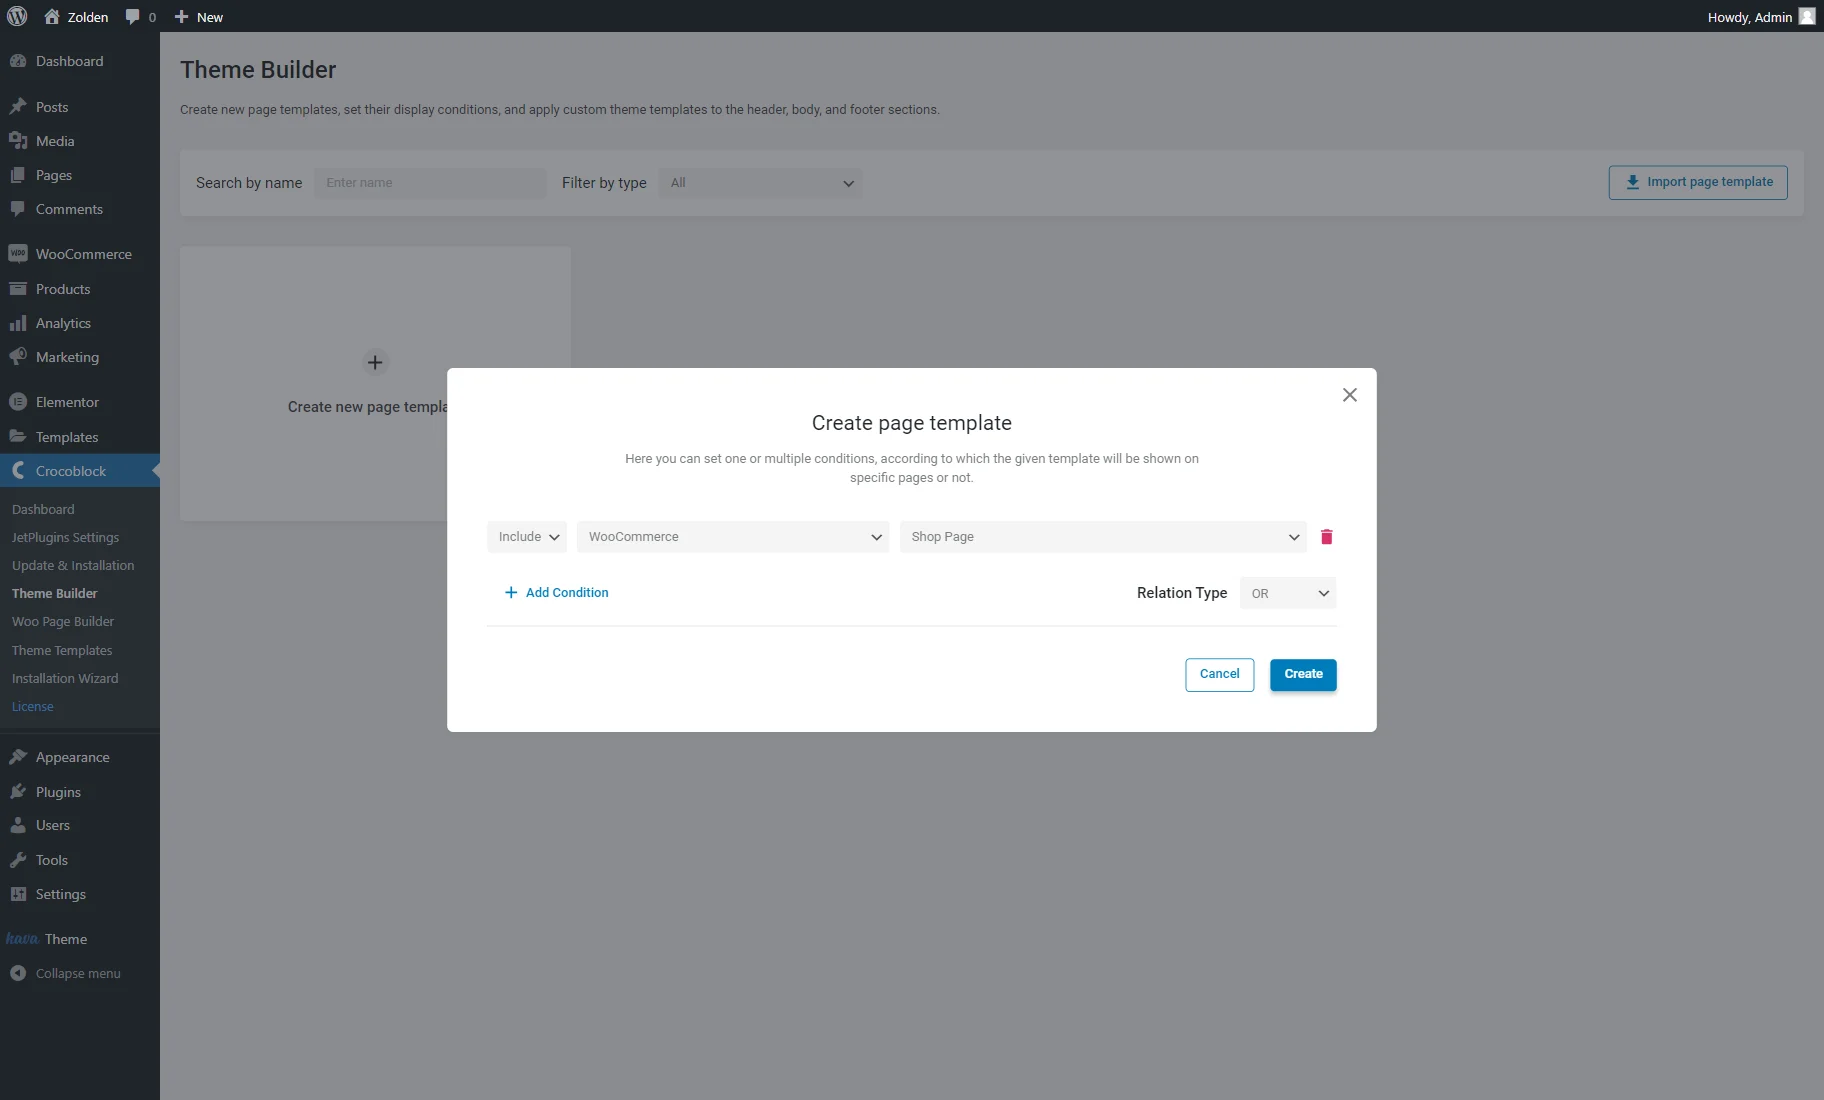
Go to the WordPress Dashboard > Crocoblock > Theme Builder tab, and click the “Create new page template” button.
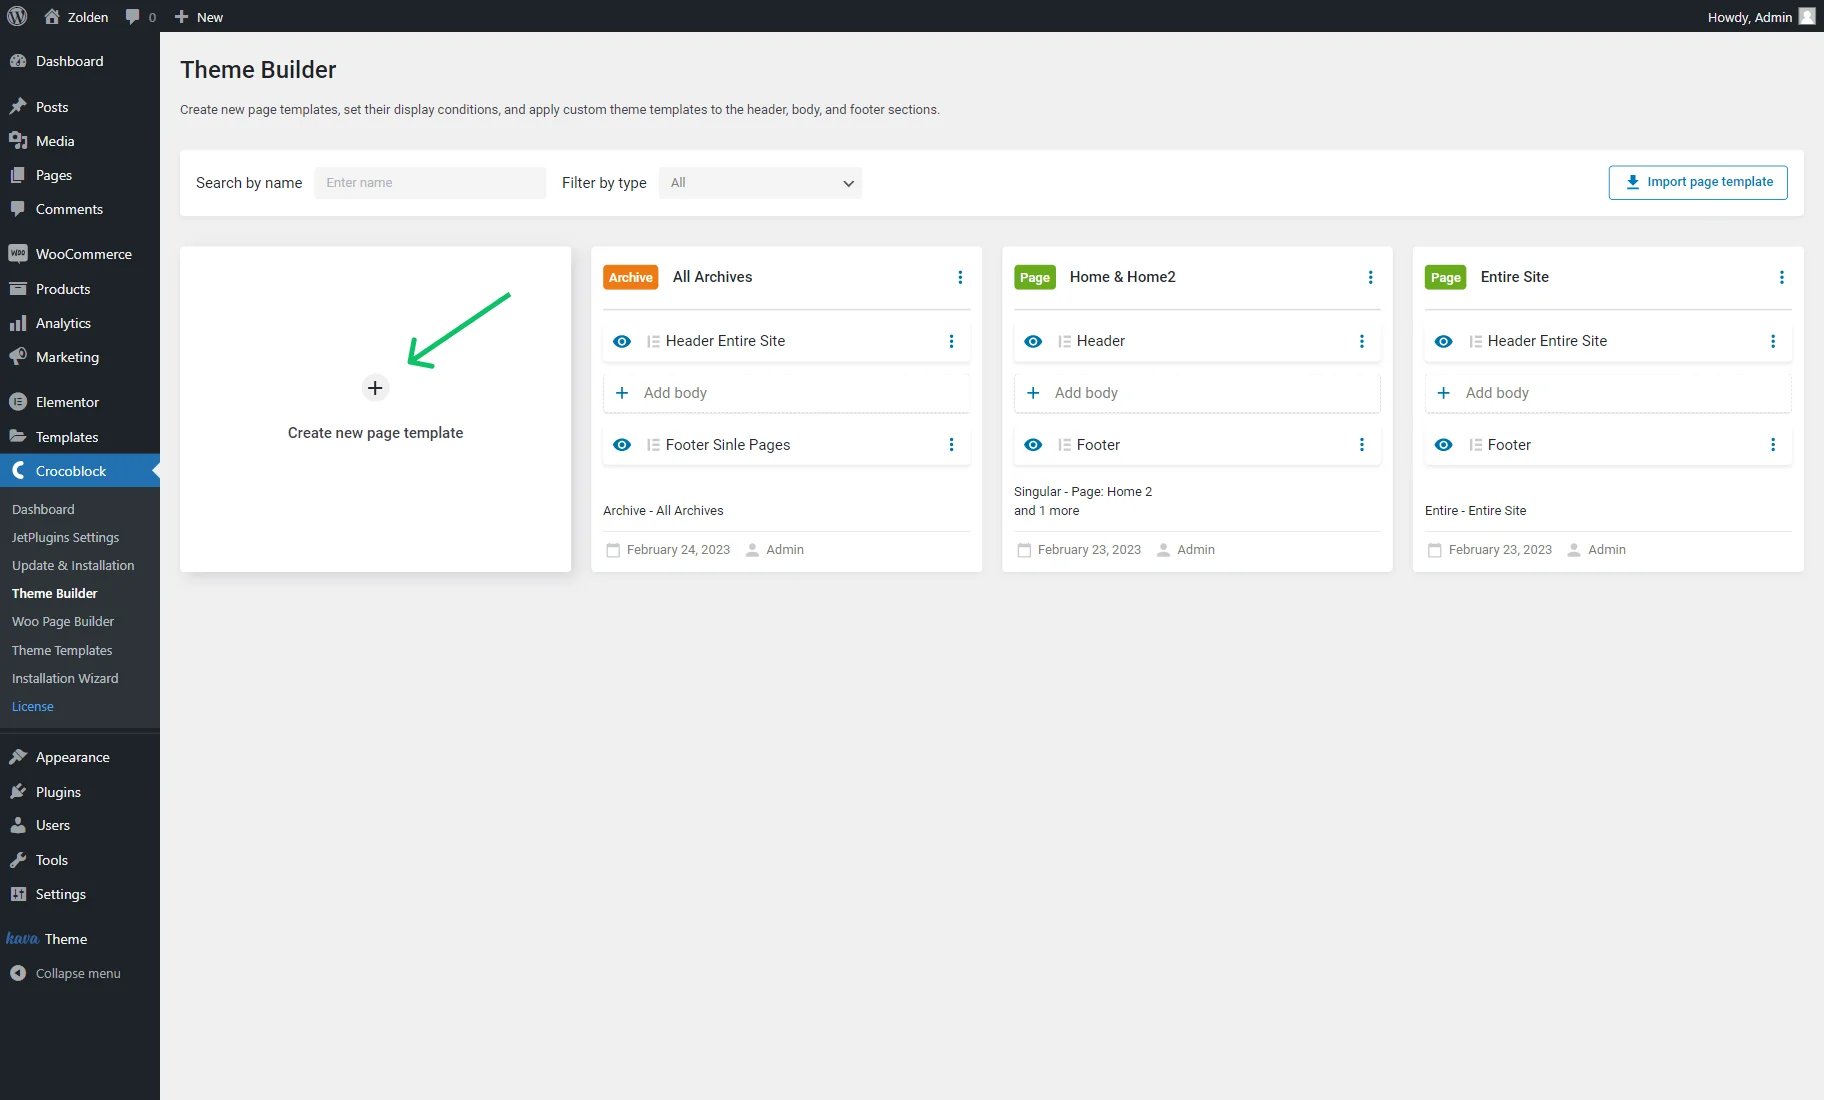
In the pop-up, hit the “Add Condition” button, and choose the “Include,” “WooCommerce,” and “Shop Page” options.
Find out more about the template conditions. For instance, you can create dedicated templates for different devices, user roles, and requests.
When you’re done, click the “Create” button.
Add Body, Header, and Footer to the Shop page template
In the newly created page template, click on the “Add body” button.
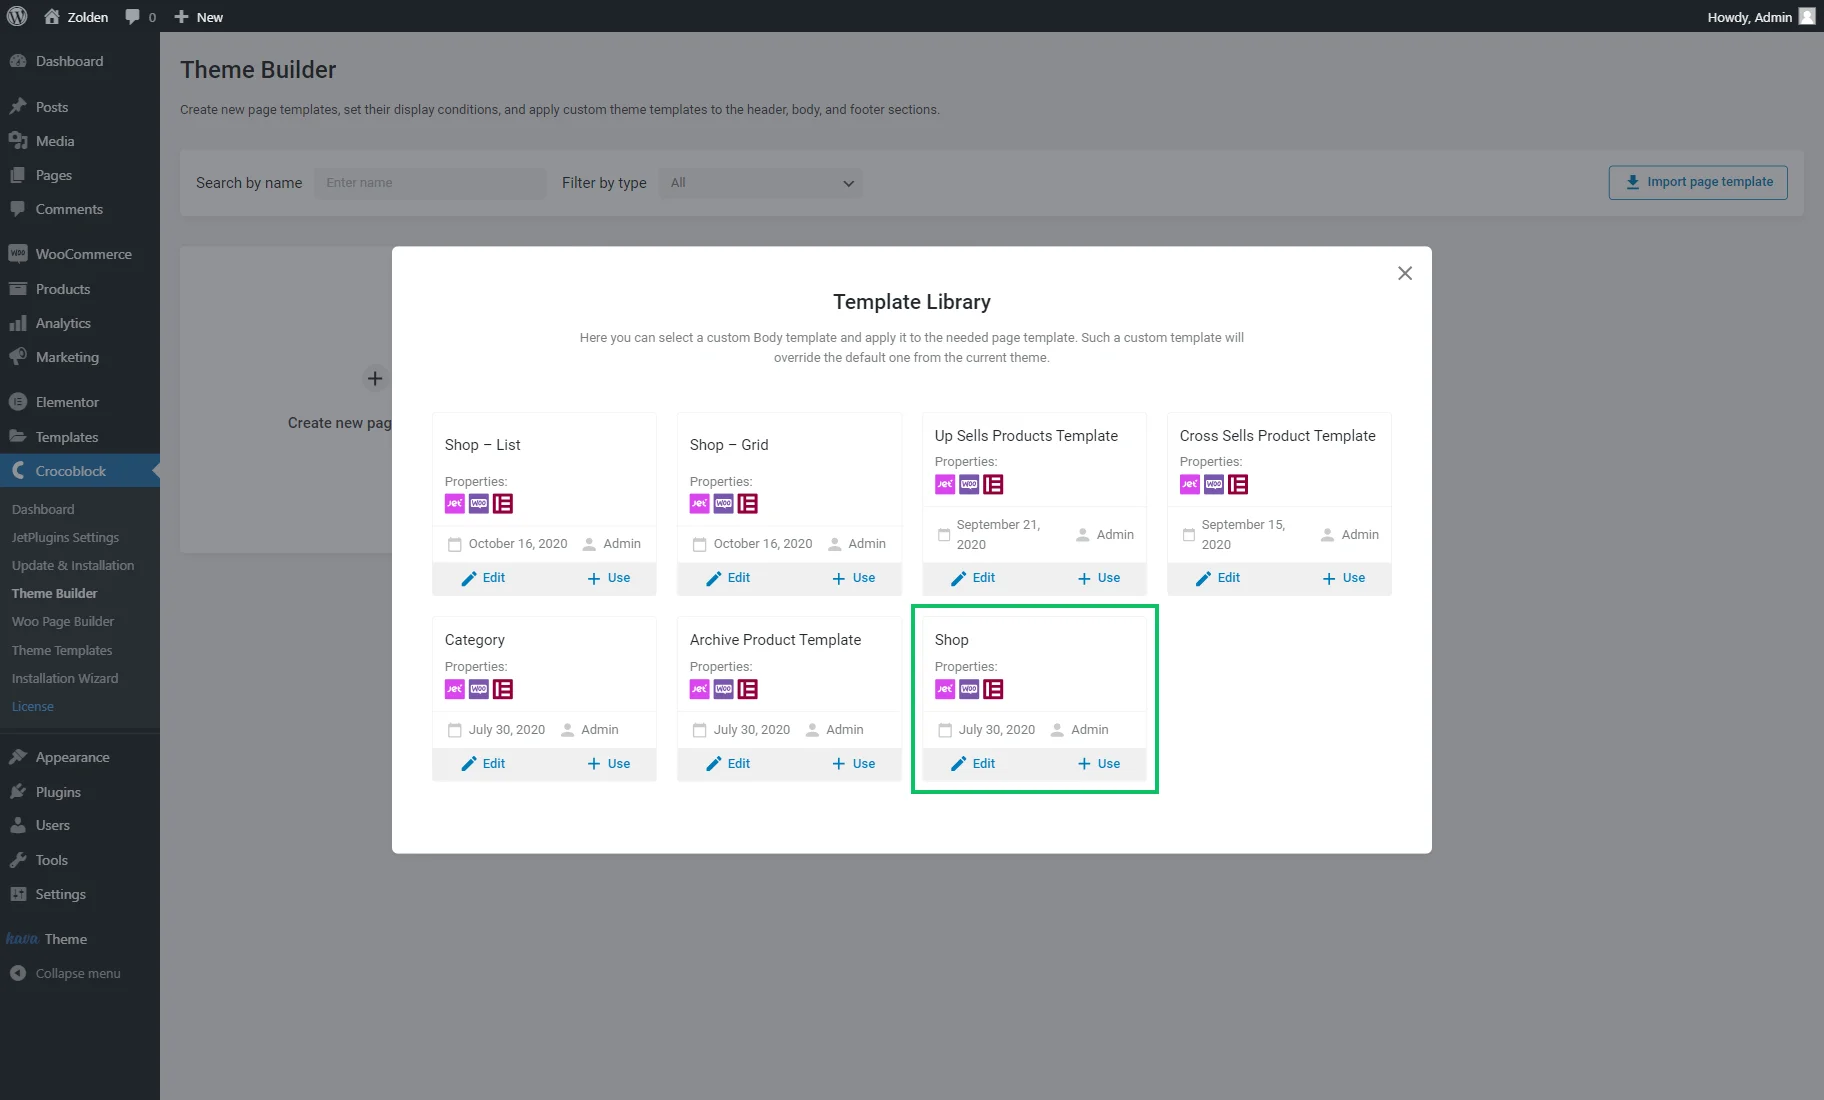
As you can see, you can create a brand new template for the page (“Create template”) or add the existing one (“Add from library”).
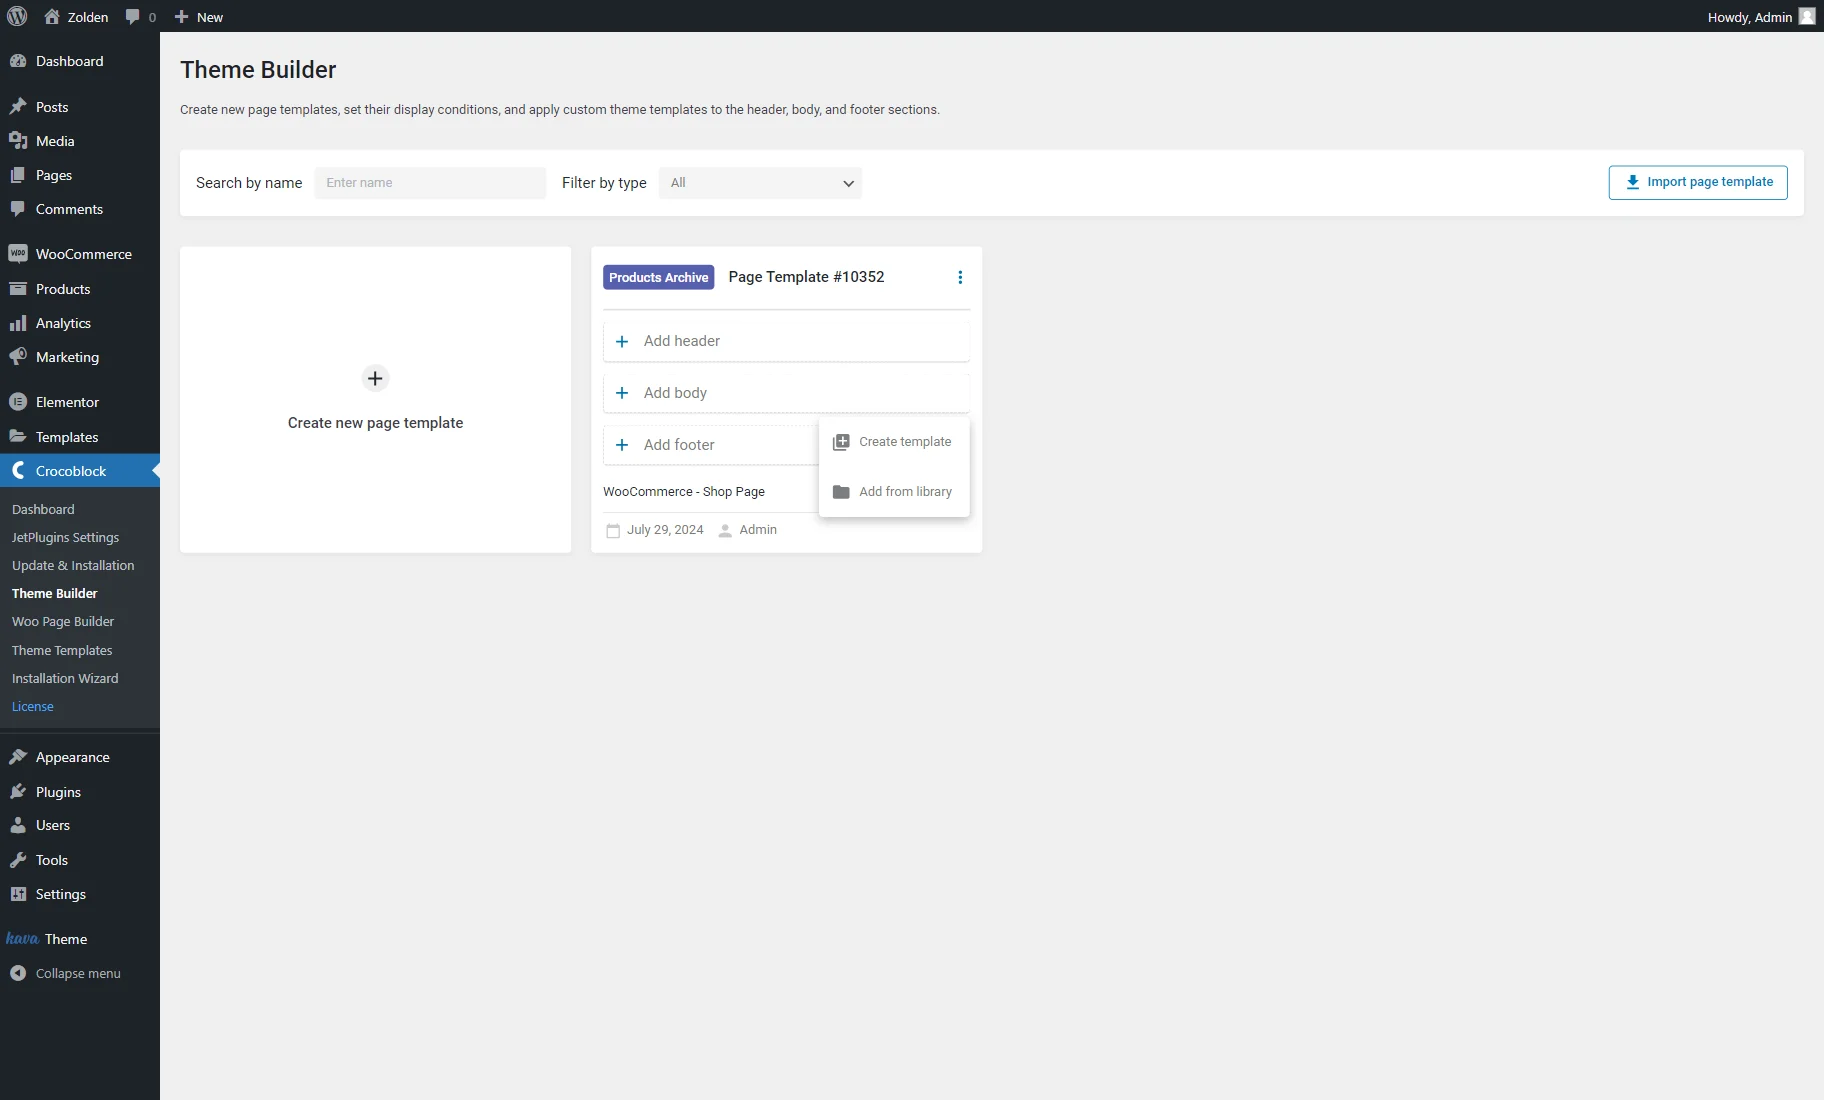
If you have already created the shop template with JetWooBuilder, hit “Add from library” and select the needed template.
You can also create a body template with the JetThemeCore plugin. For that, press the “Create template” button.
Select the Template content type, type the Template name, and push the “Create” button.
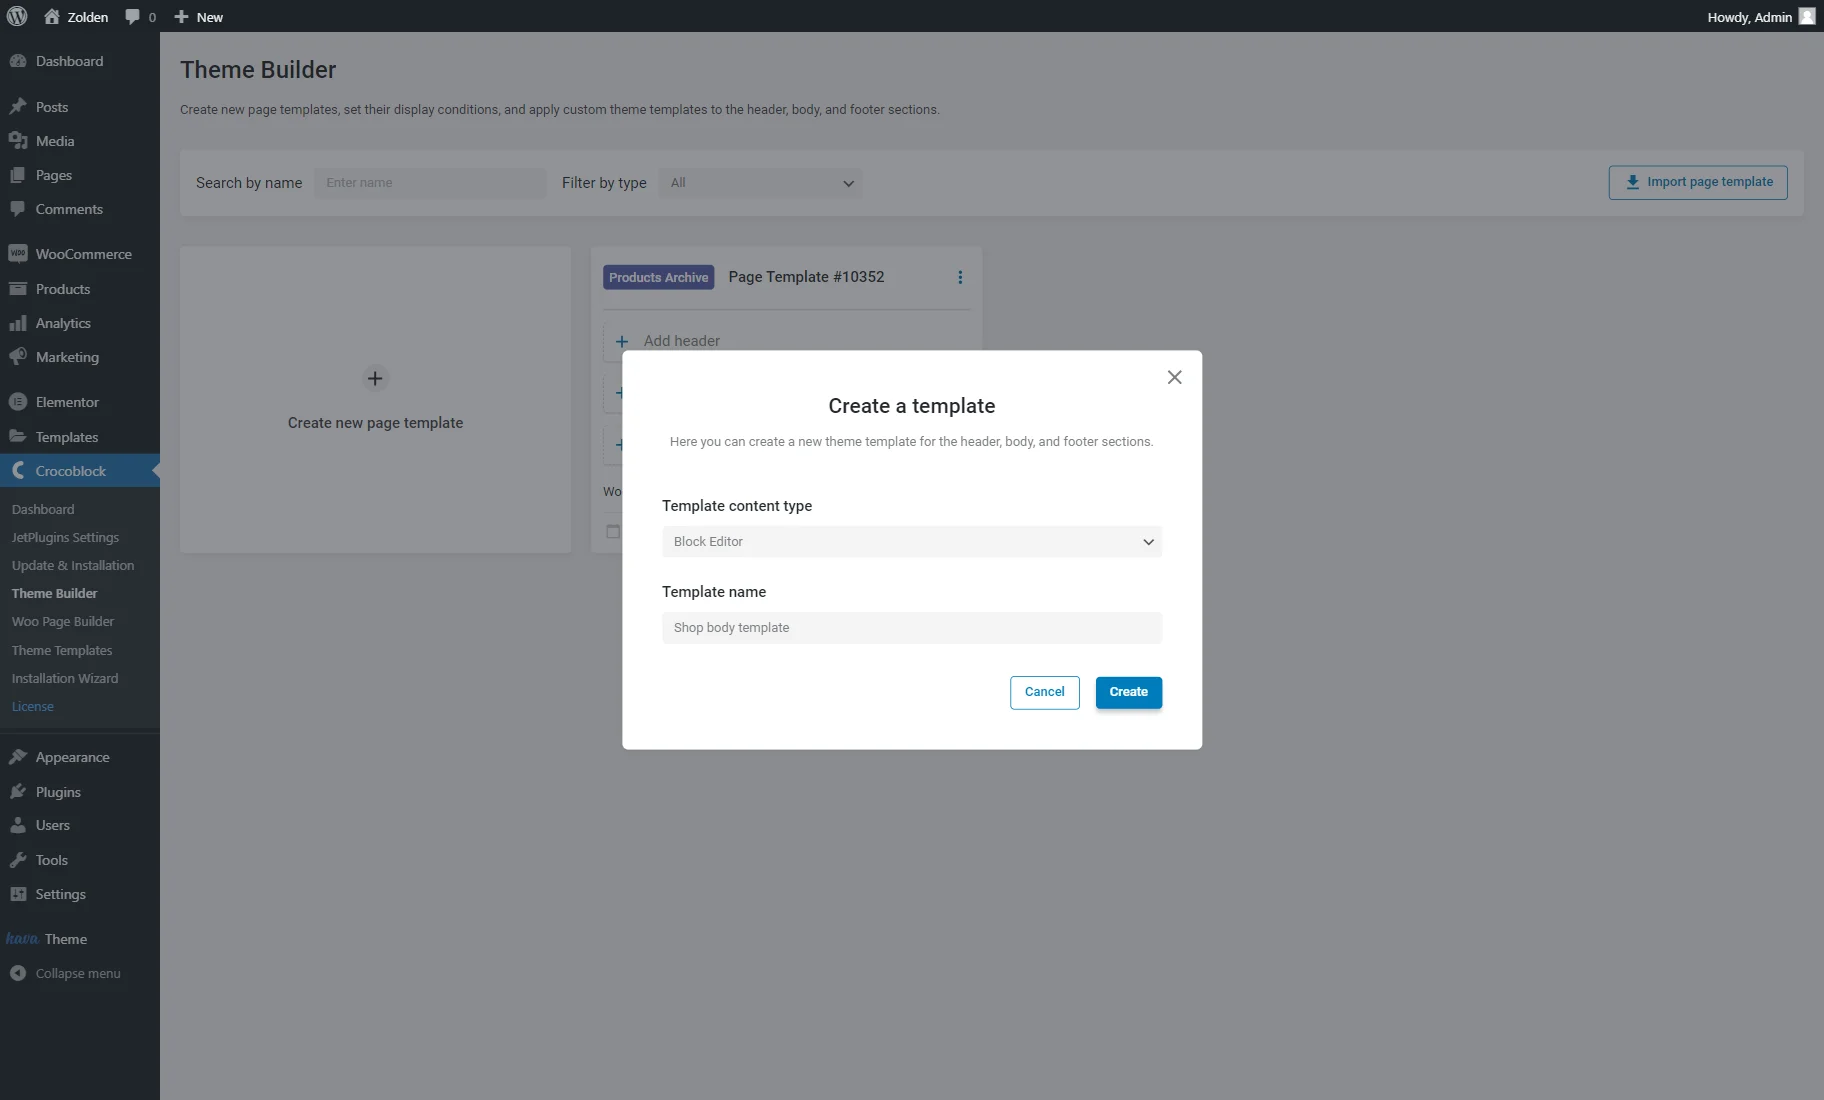
Then, hit the “Go to editor” button, and you’ll proceed to the editor page.
Fill the template with content. You can use the shop product widget described in the Fill the Shop template with widgets step.
When you finish, click the “Publish/Update” button.
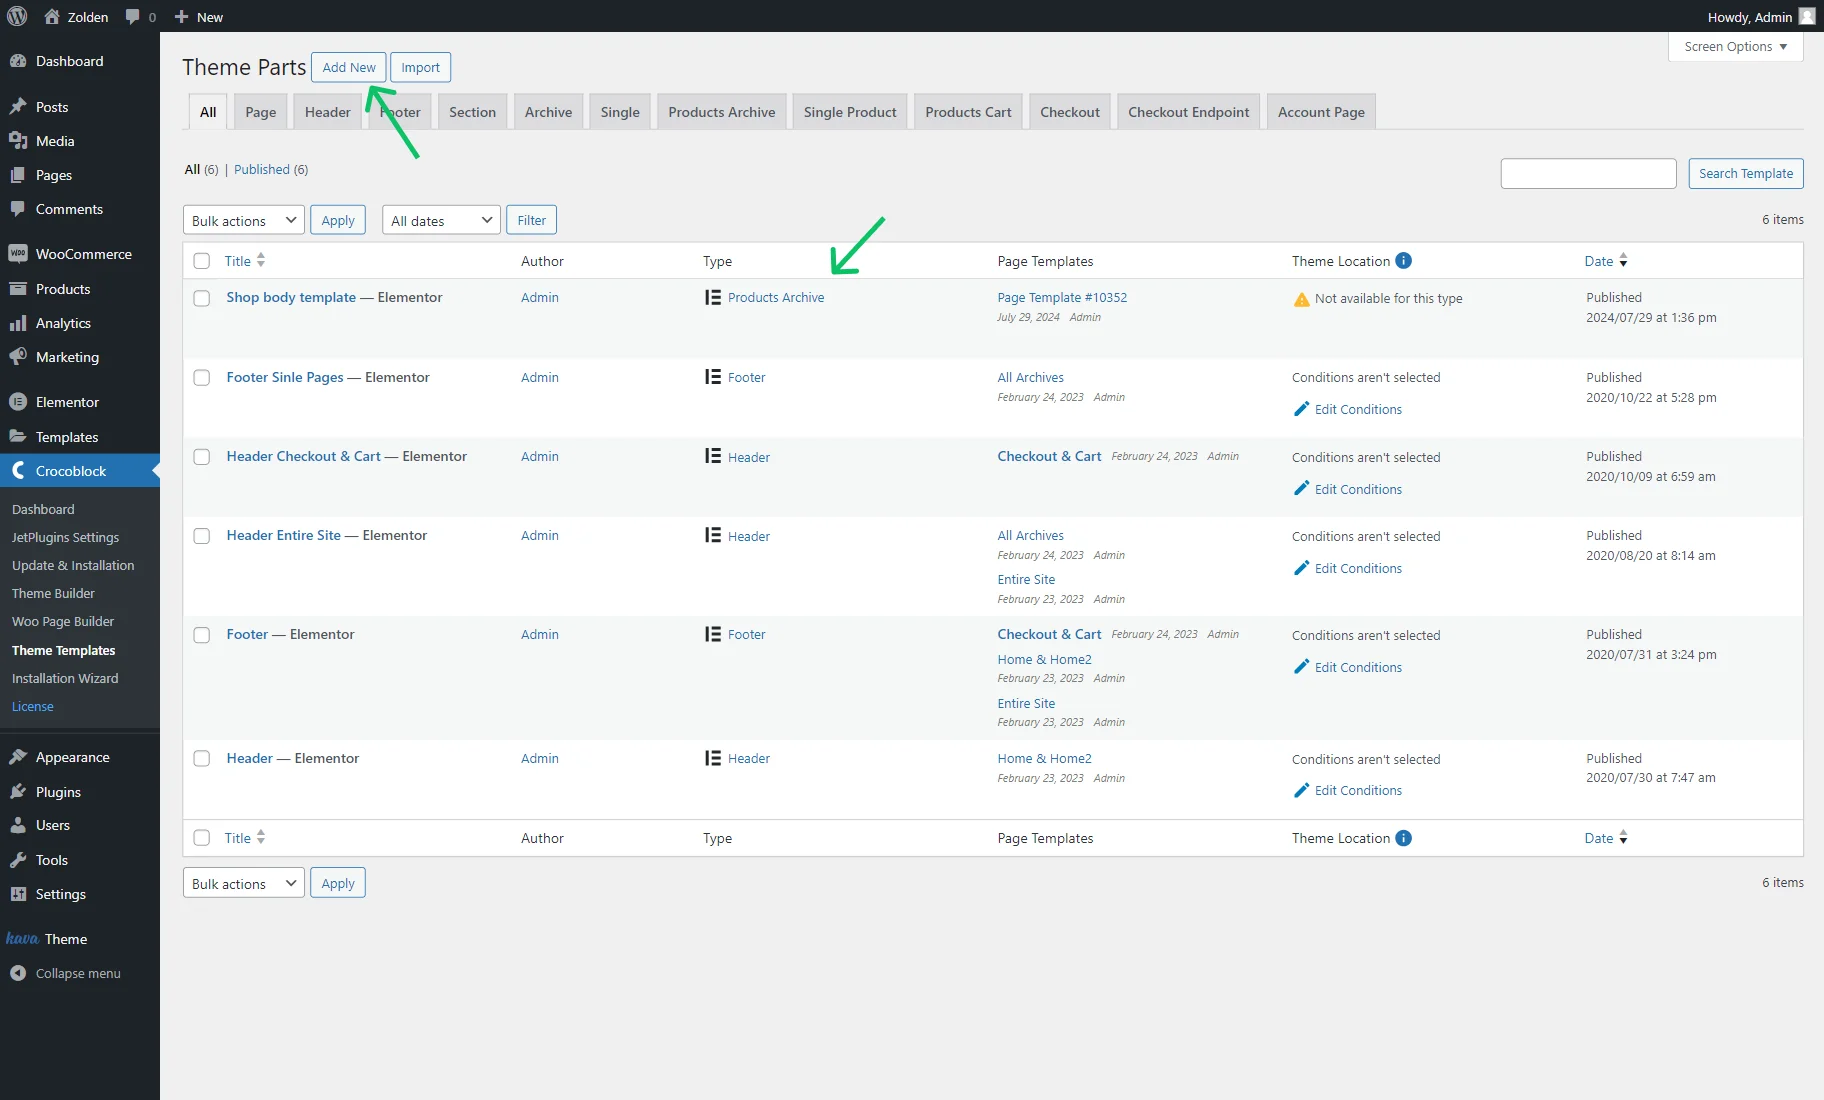
If you navigate to WordPress Dashboard > Crocoblock > Theme Templates, you’ll see the newly created body template was saved as the products archive template, according to the page template condition.
You can also build template parts right here by clicking the “Add New” button and customizing the template as desired, similarly to the previously described steps.
If you haven’t done this yet, return to the page template and add a header and footer from the library or create new ones. You can check our tutorials for creating headers and footers with JetThemeCore.
Proceed to the front end and check how products look with the newly created Shop Page template.

That’s all. Now you know how to create a WooCommerce shop page template with the JetWooBuilder and JetThemeCore plugins. Enrich a shop template with the content using an abundance of customization widgets.