How to Build Data Stores with Bricks
Learn how to create a Data Store for a WordPress website using the Bricks theme builder and JetEngine plugin. With this feature, you can create a favorite page for users to add items.
The JetEngine Data Stores module and Bricks builder allow you to create a Wishlist or Favorite page where users can add items they like.
In this tutorial, we will show you how to create a Favorite page for the Products post type.
This is a plan of what we should do:
- Create a Data Store for favorite products;
- Add a Data Store button to the Listing template. In such a way, the “Add to Favorite” button will be alongside every product in the main list;
- Create the page with the product list. From this page, users can add products to Favorites;
- Create the Favorite page.
This ensures Bricks can work with WordPress Pages and JetEngine Listing templates.

Creating a Data Store
Go to WordPress Dashboard > JetEngine > JetEngine > Modules > Default Modules, enable the Data Stores toggle, and press the “Save” button.

After enabling the module, you’ll see a new tab in the JetEngine dashboard — Data Stores.
The Data Store is a “container” where user data (like favorites) will be saved.
We click the “+ New Store” button and create a store with the “Favorites” Name.
To learn more about the settings, check the Data Stores Overview.

Adding the “Add to Favorite” Button to the Listing Template
Navigate to the WordPress Dashboard > JetEngine > Listings tab and click to edit a Listing template or create a new one. In our example, we create a Listing for products.

Fill in the template with the content if you haven’t done so already. More details are provided in the How to Create Listing Items with Bricks tutorial.
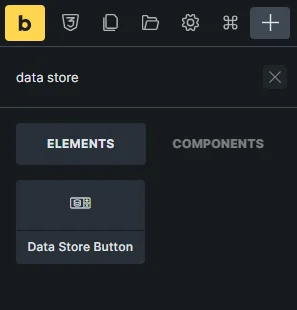
Find the Data Store Button element and add it to the work area.
This button lets users add or remove items from their Favorites list.
Its settings are described in the Data Store Button Widget Overview.
In our example, we choose “Favorites” in the Select store dropdown, clear the Label field, and set the Icon (“heart”).
Then, we pick the “Remove from store button” option in the Action after an item added to store dropdown and set the Icon after added to store (“circle-xmark”).

Also, you can style the button. For example, in STYLE > ICON, you can change the button color in a usual state and when an item is added to the store.
When you finish customizing the Data Store Button, hit the “Save” button to save the changes in the Listing template.
Creating a Posts Query via JetEngine Query Builder
This query returns only the items the user has saved in the Favorites list.
Proceed to WordPress Dashboard > JetEngine > Query Builder and press the “Add New” button. Give your new query a Name and keep the “Posts Query” Query Type in the General Settings section.
In Posts Query > General, select the name of the Posts Type for which the data store was created (“Products” in our case).

Open the Post & Page tab and hit the “database” icon near the Post In field. Select the “Get store” macro from the dropdown menu, pick the needed Store, and push the “Apply” button.
To save the query settings, click the “Add/Update Query” button.

Building a Page with All Items
Create a page in Bricks where you plan to display all items (products) or edit an existing one.
Place the Listing Grid element, select the previously created Listing, and “Save” the page settings. Now, the page displays the product list, with the Data Store Button next to each item.

On the front end, add several products to Favorites. The buttons next to these products will update their icons, turning into “Remove” buttons that let users delete items from Favorites.

Building the Page for the Data Store
Create a Favorite page in Bricks and place another Listing Grid element here.
Select the same Listing and open the Custom Query tab. Enable the Use Custom Query toggle and choose the name of the created post query for the Data Store in the Custom Query selector.
Now, the Listing Grid shows the products we added to Favorites. They can be removed on the front end by clicking the “Remove” icon.
After you finish customizing and stylizing the “Favorite” page, push the “Save” button.

That’s all. Now you know how to create the favorite page with the Data Store feature for the WordPress website with the Bricks builder and JetEngine plugin.