How to Create “Recently Viewed” Section Using the Data Stores Module
Learn how to apply the JetEngine plugin for WordPress to create a data store to show posts/pages, or CPTs that a user visited.
Before you start, check the tutorial requirements:
- Elementor (Free version), Block editor (Gutenberg), or the Bricks theme
- JetEngine plugin installed and activated, with the Data Stores Module enabled, and a Custom Post Type and a Listing Item created
The Recently Viewed section lists the pages users have visited before. It is popular in online stores and displays products that users viewed. The Recently Viewed section makes website navigation easier and improves user experience. The JetEngine plugin allows you to create the section using the Data Stores module.
Create a Data Store
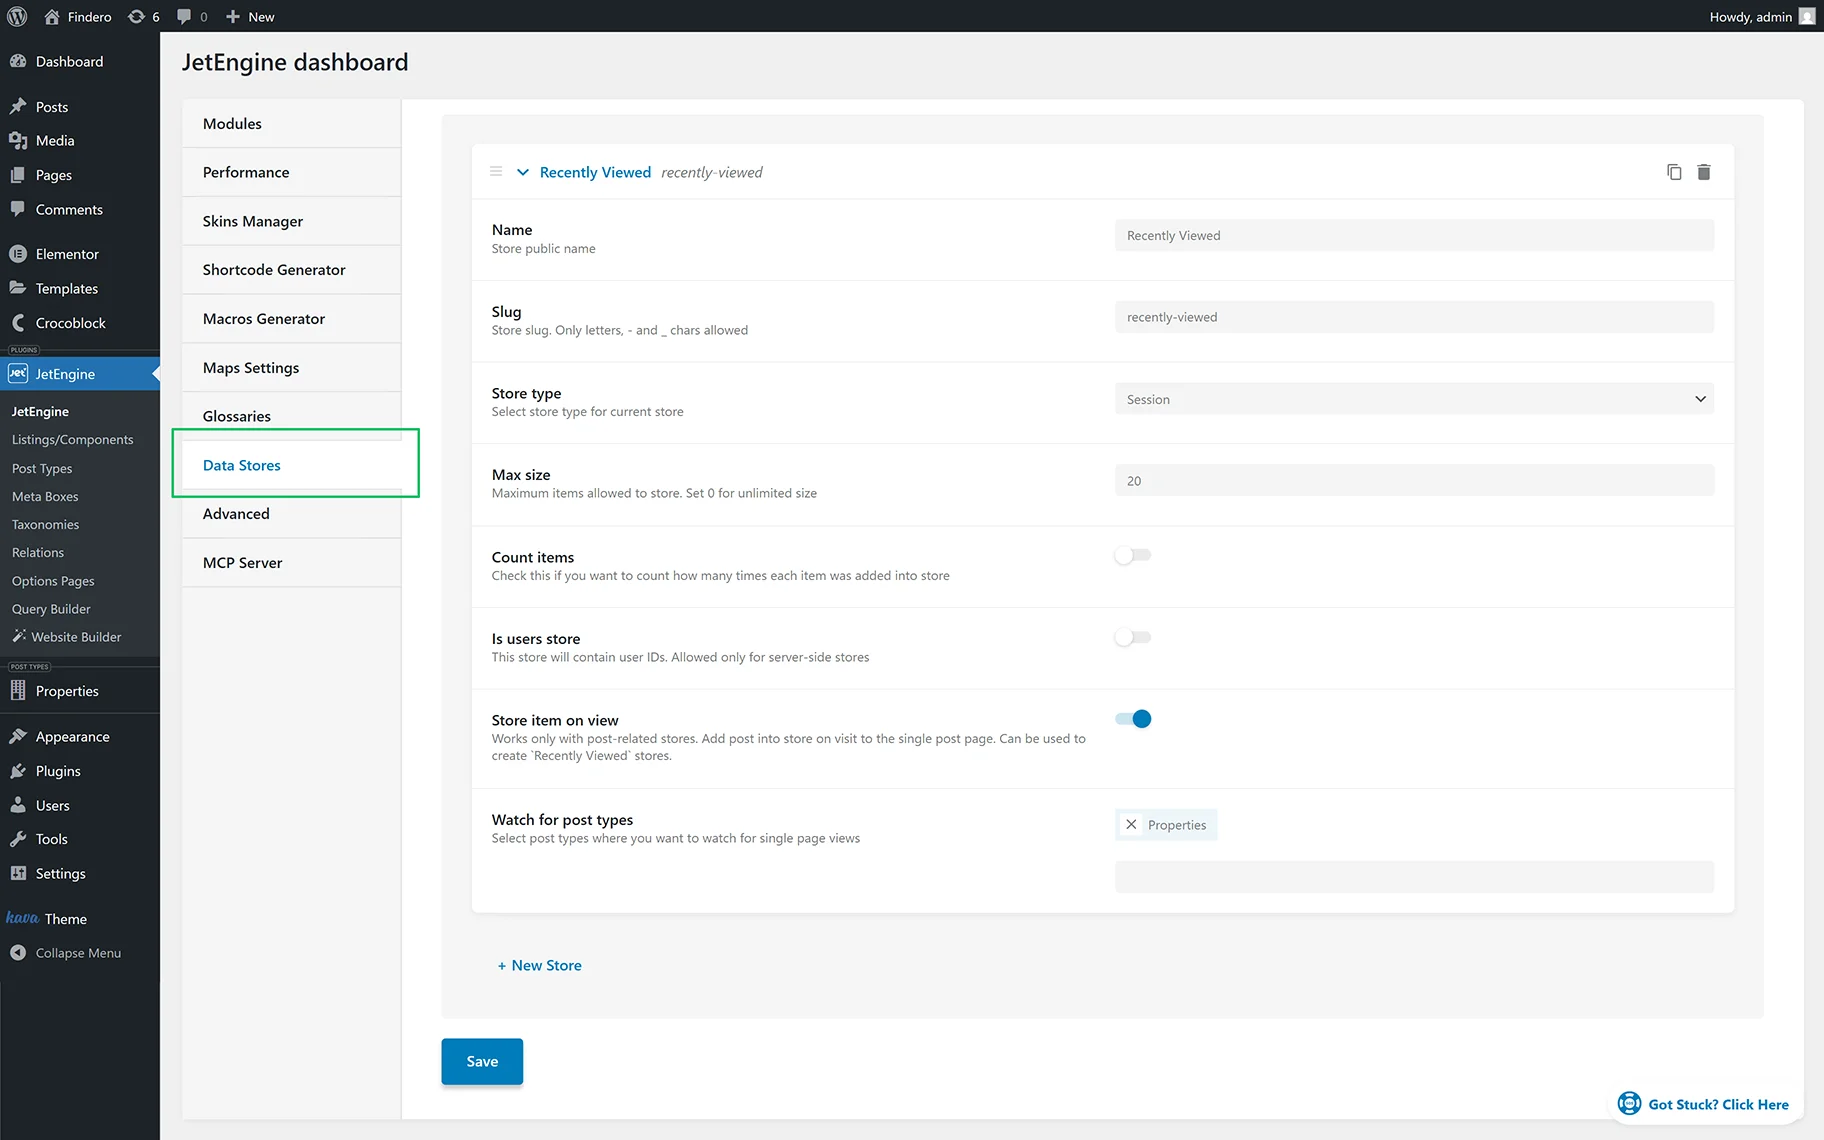
Proceed to WordPress Dashboard > JetEngine > JetEngine Dashboard > Data Stores and hit the “New Store” button. Choose the Name (here, “Recently Viewed”), Store type (here, “Session”), and other features.
Read more about Creating a Data Store in this tutorial.
Turn on the Store item on view toggle to allow adding the pages/posts to the store after the user visits them. You can also specify the post type in the Watch for post type drop-down menu (here, “Properties”). Hit the “Save” button.
Build a Query to Output the CPT Posts
Navigate to WordPress Dashboard > JetEngine > Query Builder.
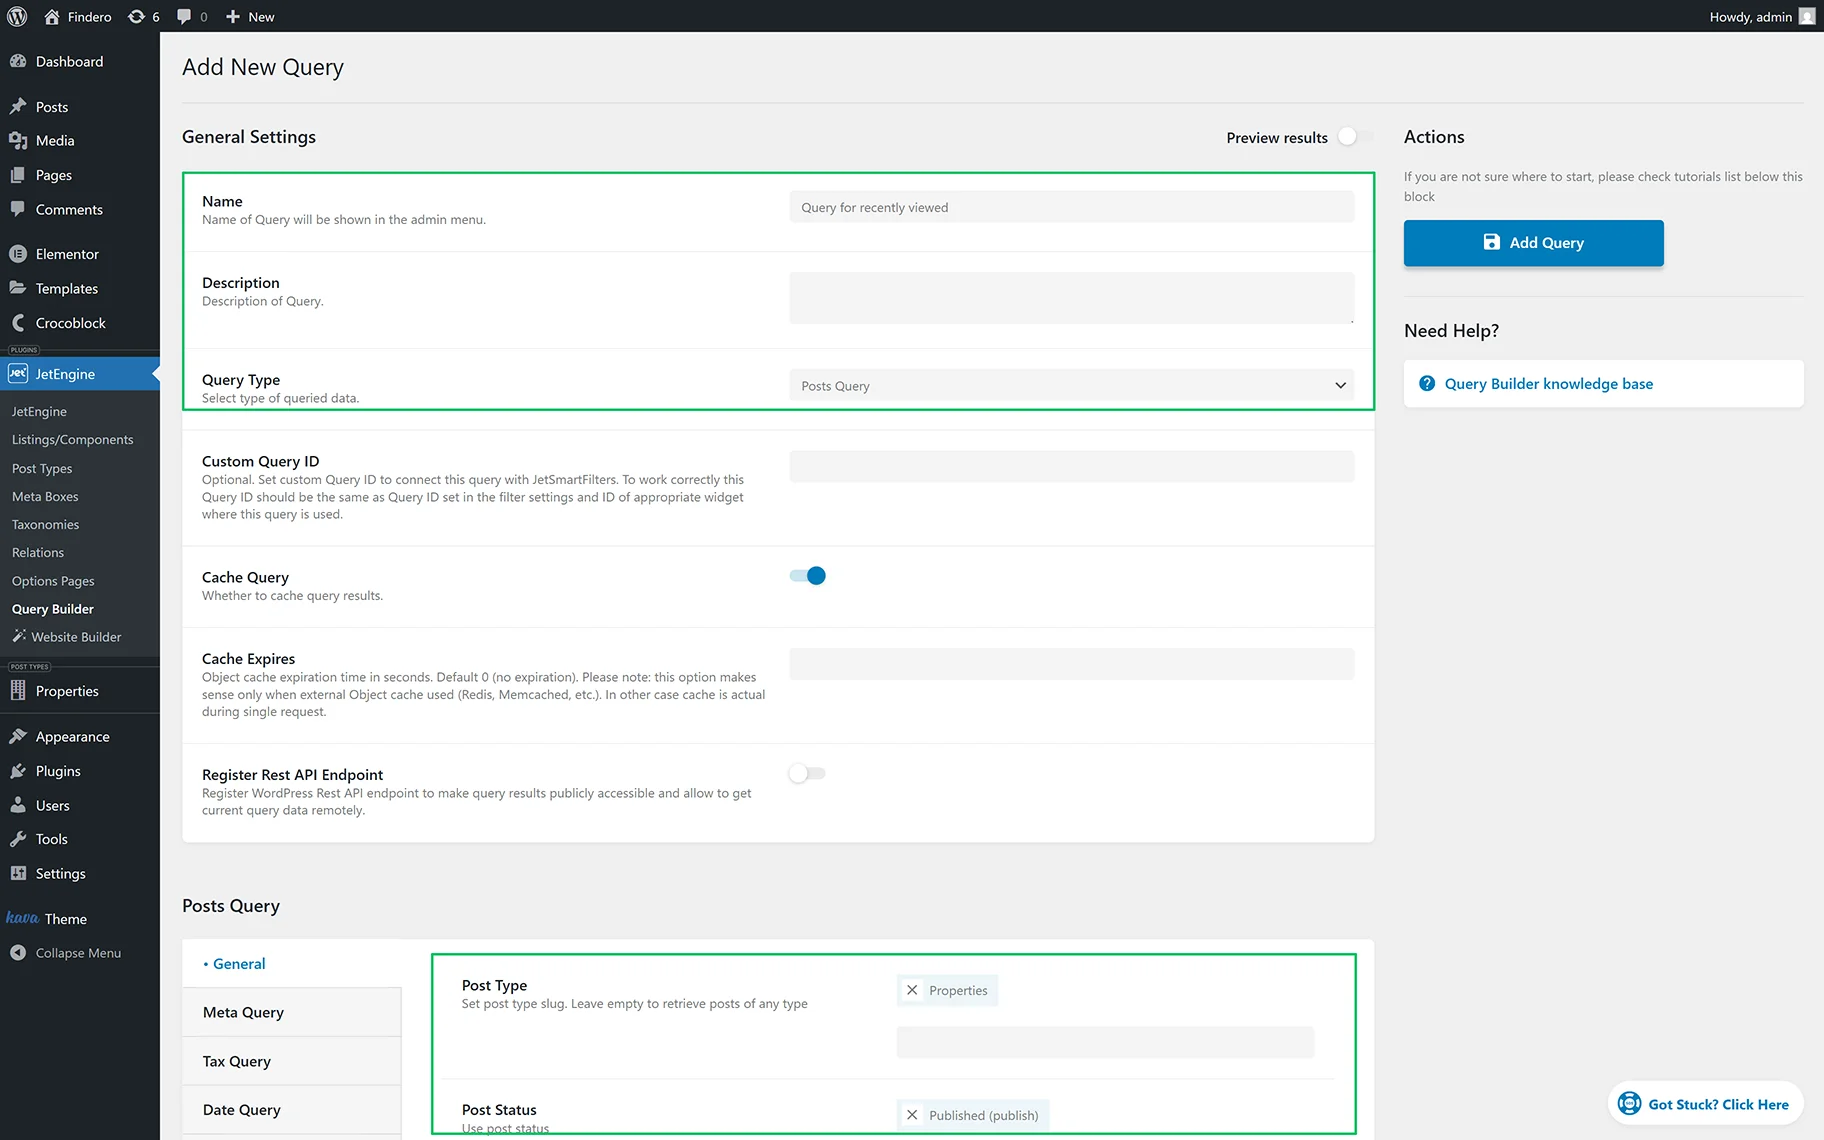
Press the “Add New” button, specify the query name (here, “Query for recently viewed”), and select the type of queried data from the Query Type drop-down menu (here, “Posts Query”).
Next, move to the General tab, and select the Post Type from the drop-down menu (here, “Properties”) and the “Published (publish)” option from the Posts Status drop-down.
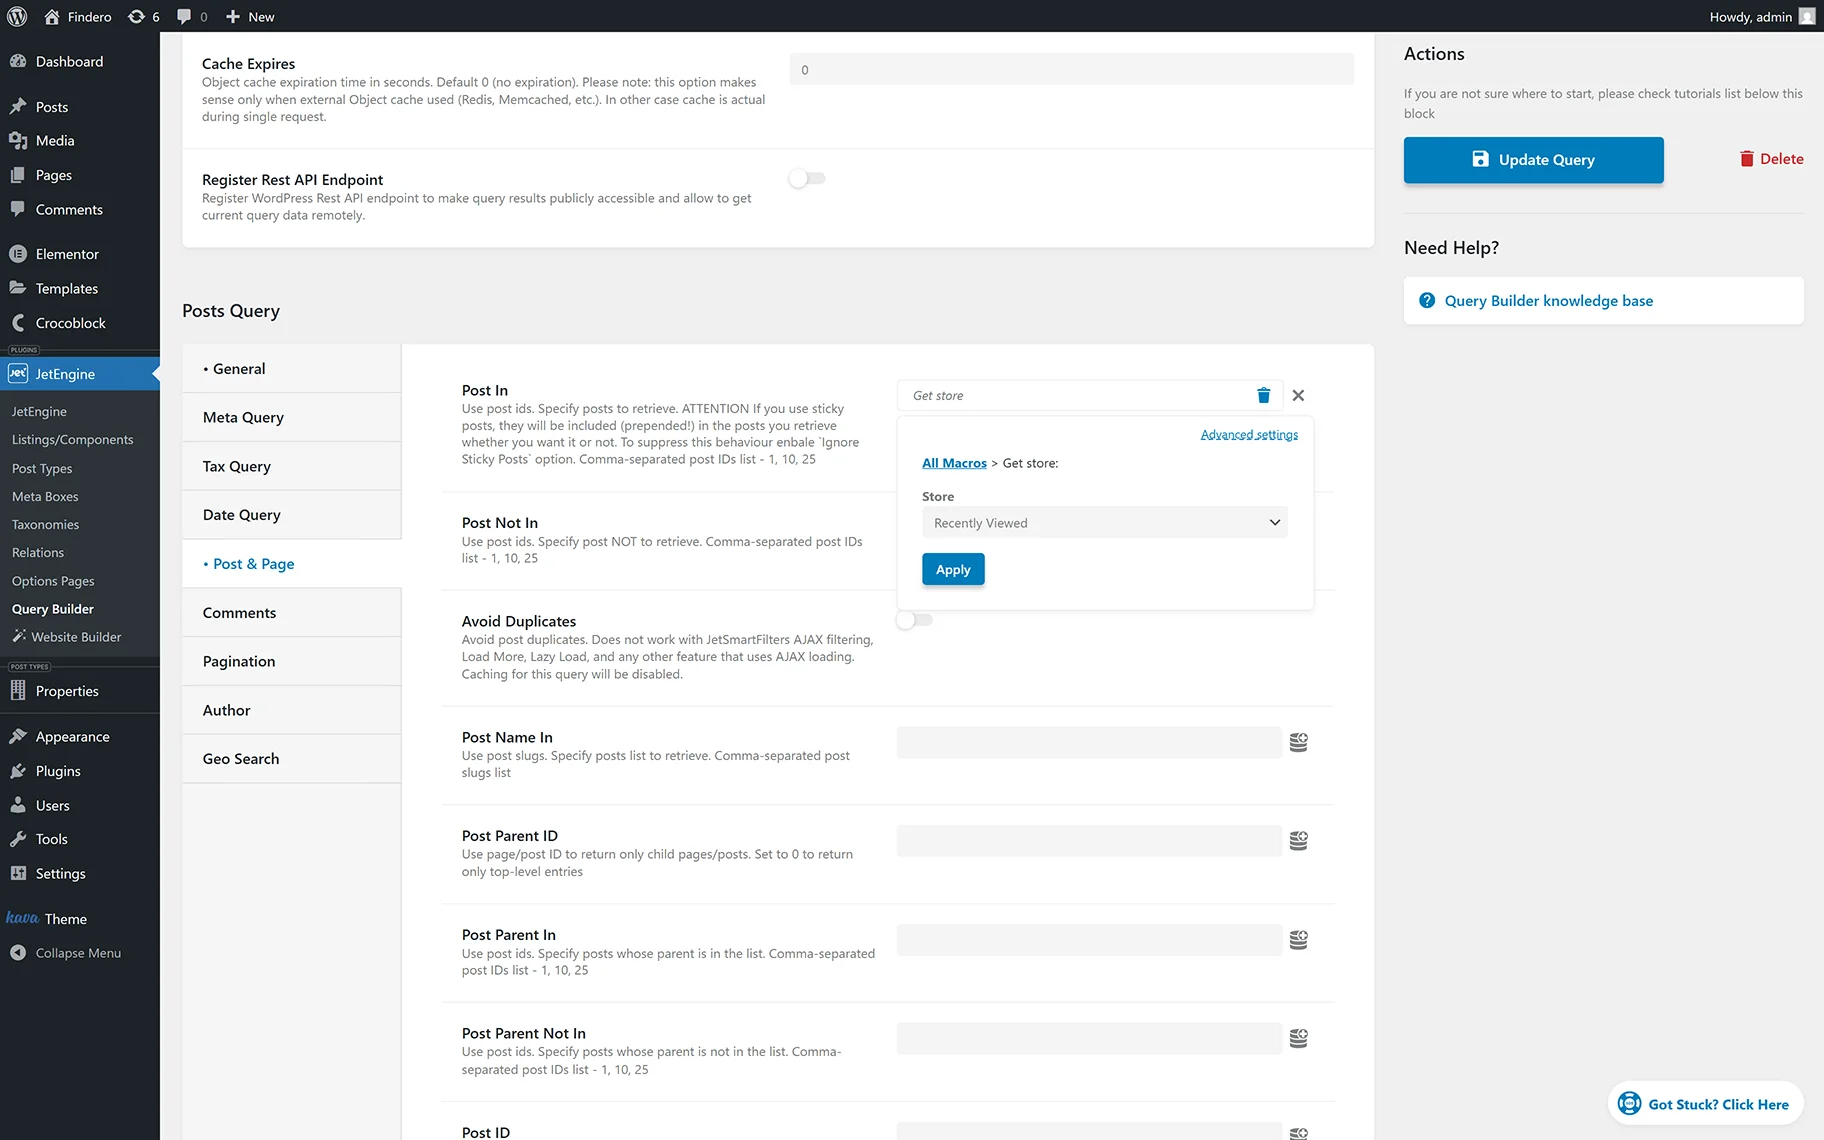
In the last step, navigate to Post & Page > Post In. Press the “Dynamic Tag” button (“database” icon) and select the “Get store” option from the drop-down menu.
Choose the data store you have previously created (here, “Recently Viewed”) and press the “Apply” button.
Save the query by pressing the “Add/Update Query” button.
Output the Recently Viewed Posts in Elementor
Create or open a page in Elementor, add the Listing Grid widget, select the Listing with the CPT posts, and save the changes by pressing the “Publish” button.
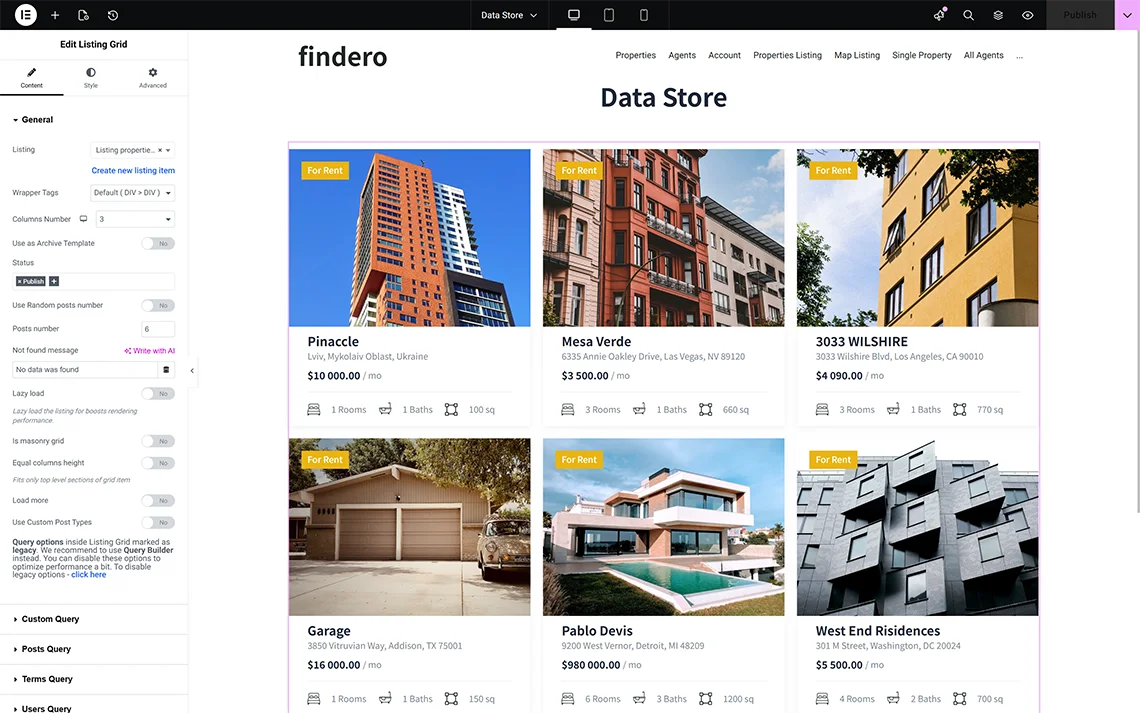
Adjust the “Recently Viewed” section, then copy and paste the Listing Grid widget with the same Listing to display the recently viewed items.
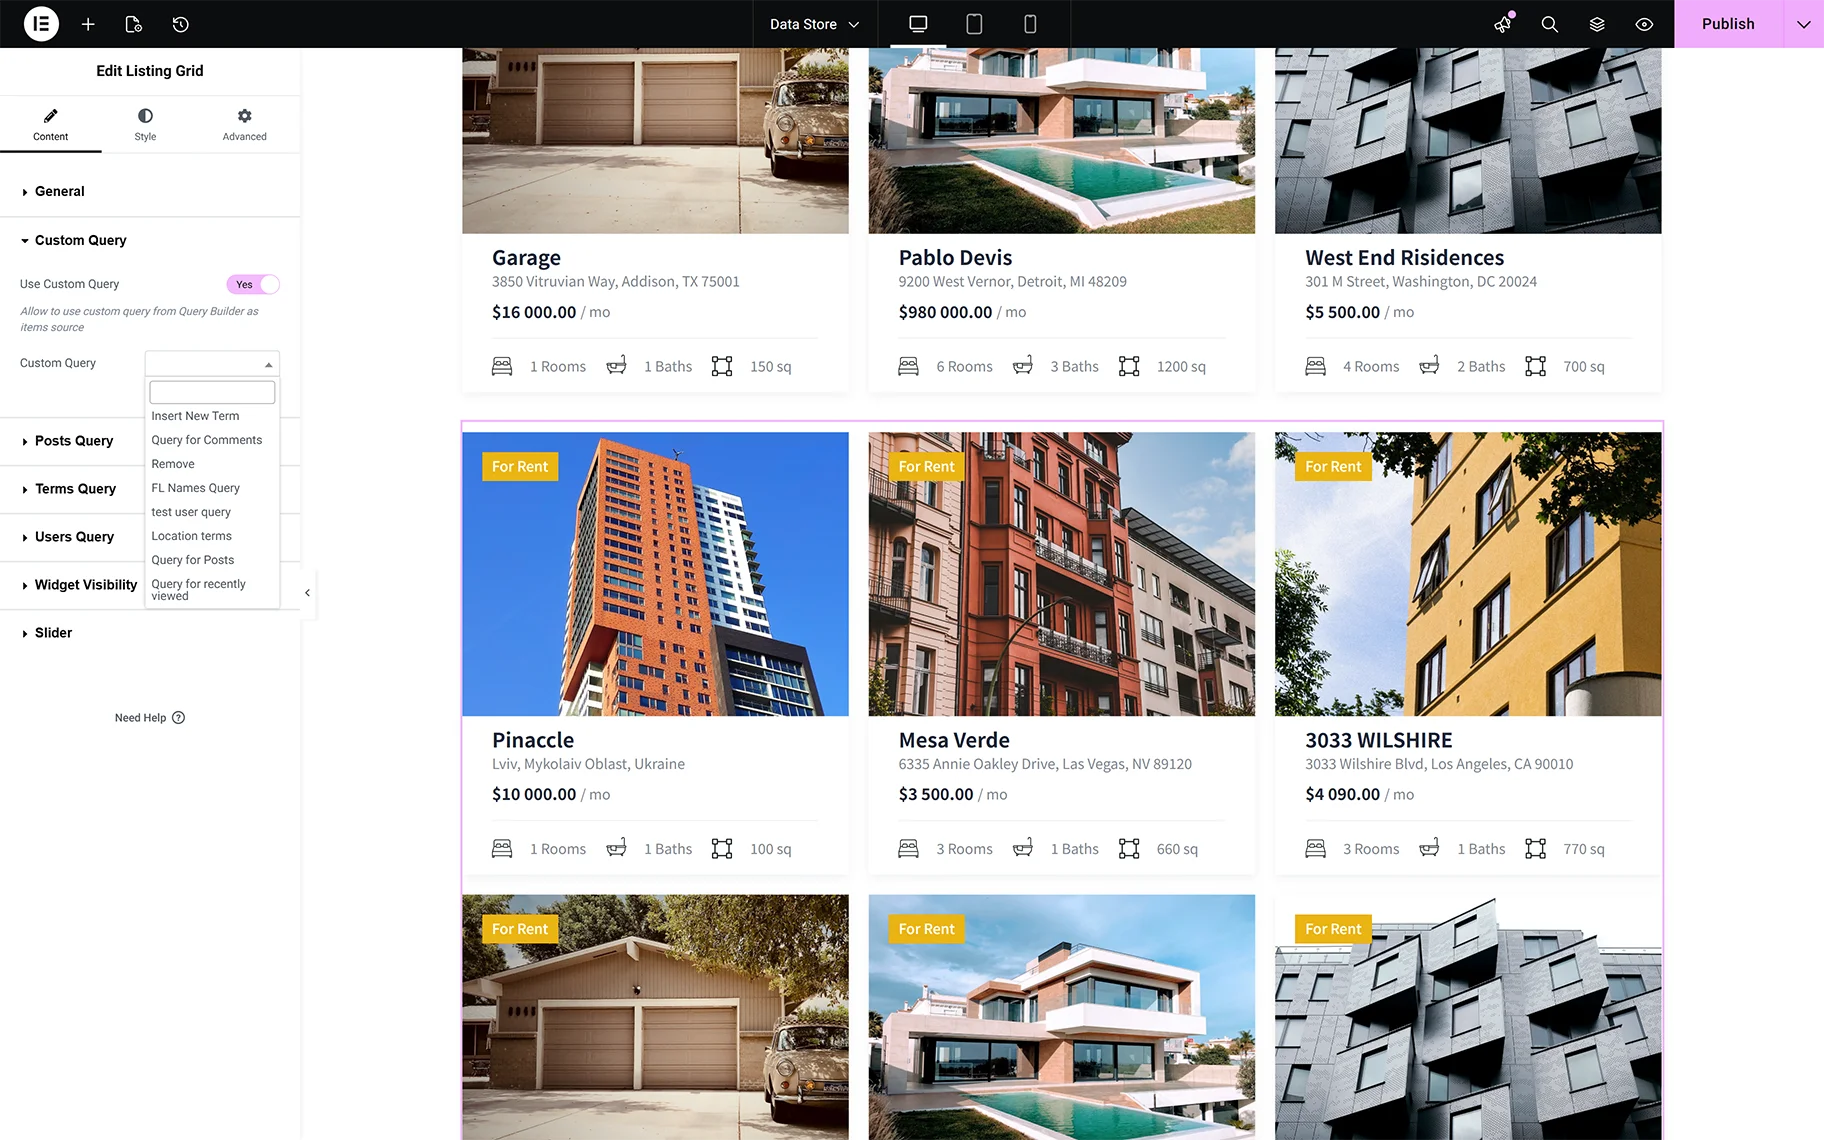
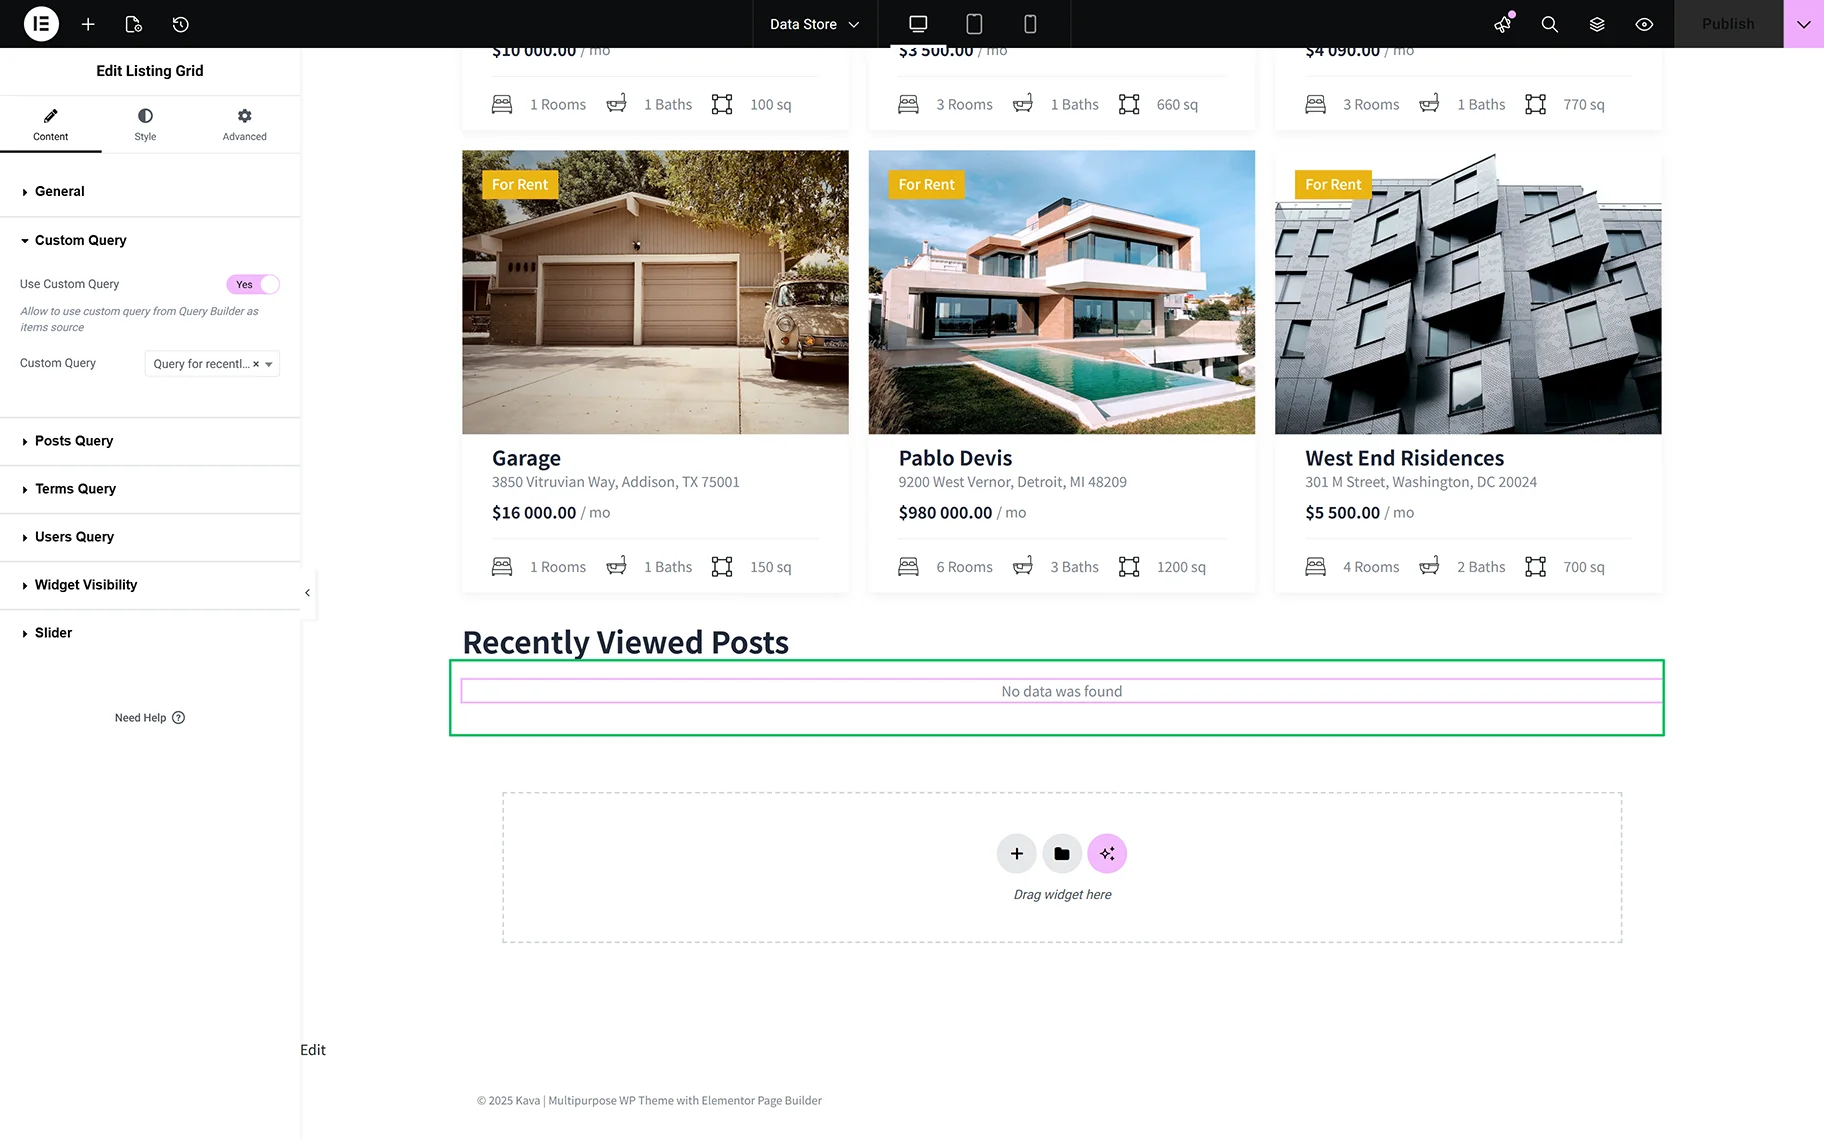
Navigate to the Custom Query tab of the second Listing Grid, move the Use Custom Query toggle, and select the built query (here, “Query for recently viewed”).
For now, the Listing Grid widget shows no data.
Publish the page and click the posts you like. Return to the page, scroll down, and see the recently viewed items listed.

Output the Recently Viewed Posts in the Block Editor
The workflow for displaying recently viewed posts in the Block Editor is the same as in Elementor.
Open a page or post in the Block Editor and add two Listing Grid blocks with the same Listing displayed.
Then, navigate to the second Listing Grid block (intended to display the recently viewed pages), unroll the Custom Query settings, and assign the created query in the Custom Query tab.
Finally, publish the page and click on some posts to make them recently viewed.
Output the Recently Viewed Posts in Bricks
The workflow for displaying recently viewed posts in the Bricks editor is the same as in Elementor.
Open a page or post in Bricks and add two Listing Grid elements with the same Listing. The first one displays all CPT posts, and the second shows the recently viewed posts.
After that, configure the second Listing Grid element: move to the Custom Query settings and assign the created query in the Custom Query tab.
Finally, publish the page and click on some posts to make them recently viewed.
Additionally to this case, check how to Output the Most Popular Posts via Listing Grid and Order Them.
That’s all about how to apply the JetEngine plugin for WordPress to create a data store to show items that users visited.