How to Output the Submitted Fields' Data to a Thank You Page via the Dynamic Widgets
Learn how to display the submission data on the Thank You page with dynamic widgets. Use the JetEngine and JetFormBuilder plugins to create the form and Thank You page for the WordPress website.
Before you start, check the tutorial requirements:
- Elementor (Free version) or Block editor (Gutenberg)
- JetEngine plugin installed and activated
- JetFormBuilder plugin installed and activated with the front-end form created. Learn more how to do it in this tutorial
With the “Query Variable” Source for the Dynamic Field widget/block, you can display the form field value on the Thank You page, so users can see the information they enter into the form.
It can be helpful:
- for the WooCommerce shop website, when you want to display order details, where the order is a post of the Order CPT (to integrate Gutenberg-built forms and WooCommerce checkout, use the WooCommerce Cart & Checkout Action addon);
- when users buy subscriptions, e.g., the online course subscription, you can display such details as a course theme, number of lessons, user’s level, etc. To set such a form for the PayPal subscription payment, use the PayPal Recurring Payments add-on;
- for the booking form;
- for the add new form when users post items for sale (e.g., ads).
Create a Thank You Page
Proceed to the Page tab on the WordPress Dashboard and click to edit the Thank You page if you already have one, or hit the “Add New” button.
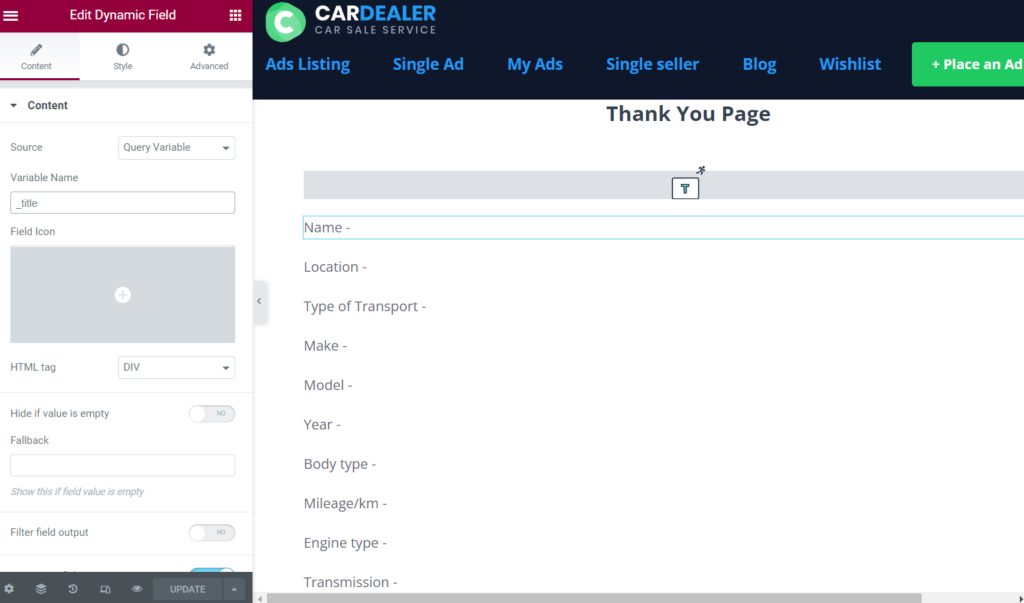
Drag-n-drop the Dynamic Field widget or block and select the “Query Variable” Source in the Content settings. Duplicate widget or block as many times as needed.
In the Variable Name field, enter the Form Field Name to display the field value.
You can display such field types:
- Text;
- Number;
- Media (with the “Get Image by ID” сallback)
- Checkbox, Radio, and Select:
- with terms (with the “Get term name” сallback);
- with Glossary values (with the “Get labels by the glossary data” сallback).
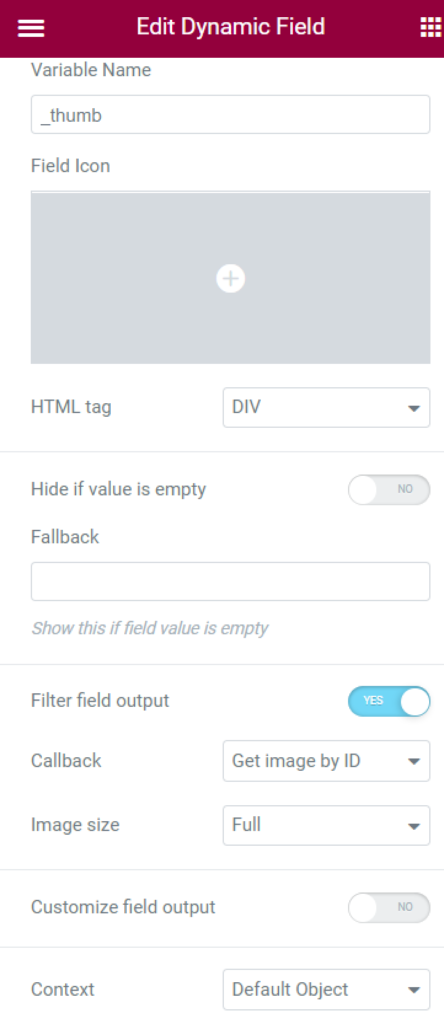
If you want to display an image from the Media Field, you need to enable the Filter field output toggle and pick the “Get Image by ID” Callback.
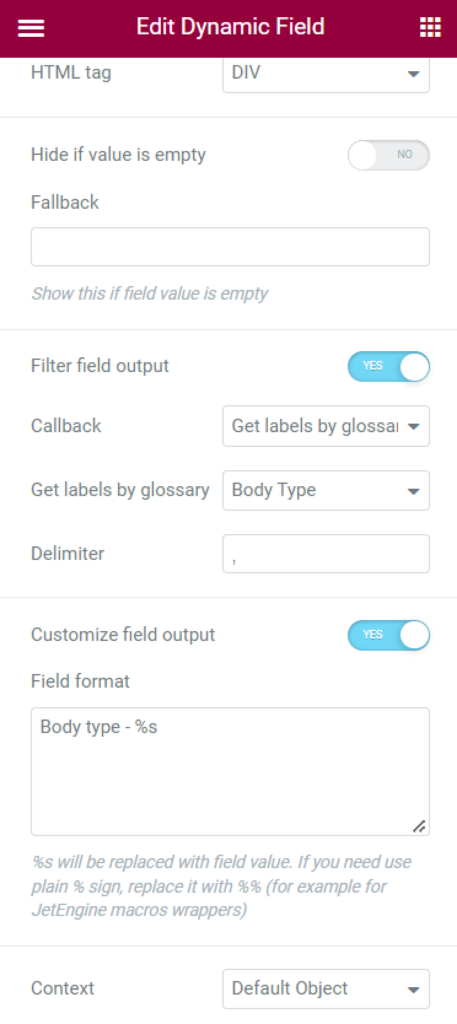
If you want to show the Glossary option from the Select, Radio, or Checkbox fields, enable the Filter field output toggle, pick the “Get labels by the glossary data” Callback and select the needed glossary in the Get labels by glossary field.
If you want to show the term name from the Select, Radio, or Checkbox fields, enable the Filter field output toggle, and pick the “Get term name” Callback.

When you finish customizing the page, hit the “Publish/Update” button.
Set the Redirect to Page Action in the Form
Proceed to JetFormBuilder > Forms and click to edit the form, which field values you will display on the Thank You page.
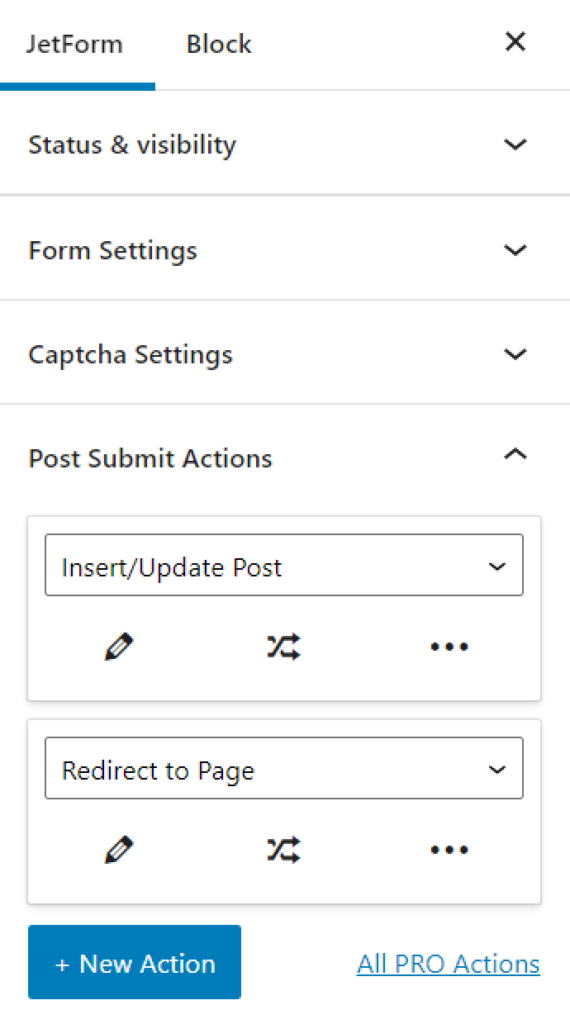
Go to the JetForm > Post Submit Actions tab, hit the “+ New Action” button, and select the “Redirect to Page” option.
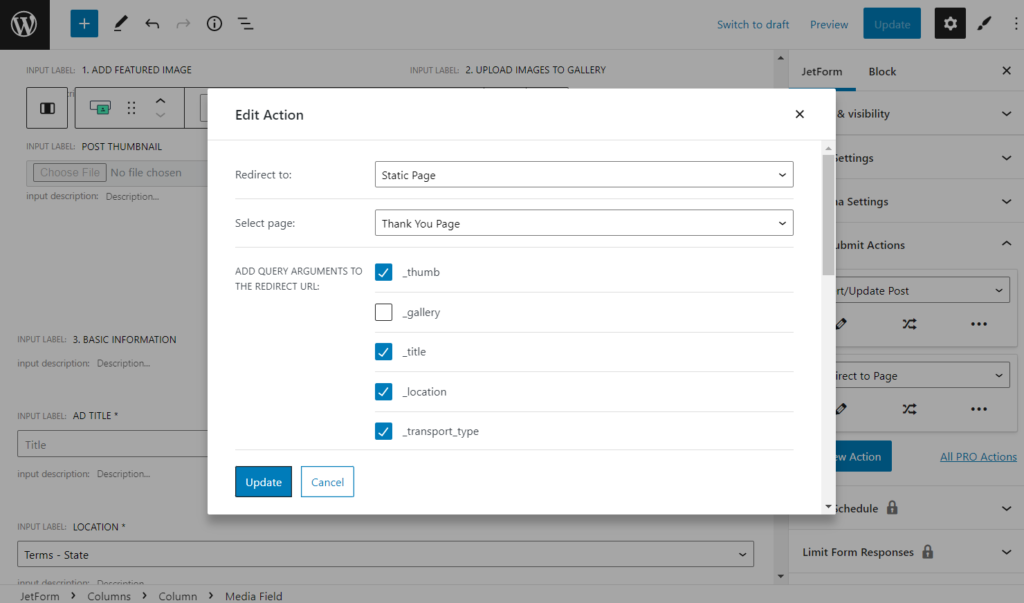
Press the “Edit Action” button. Pick the “Static Page” option in the Redirect to field, choose the Thank You page in the Select page field, and check all query arguments that match form field names which values will be shown on the page. Then, push the “Update” button.
If you use Stripe or PayPal payment integration, you need to set the action event.
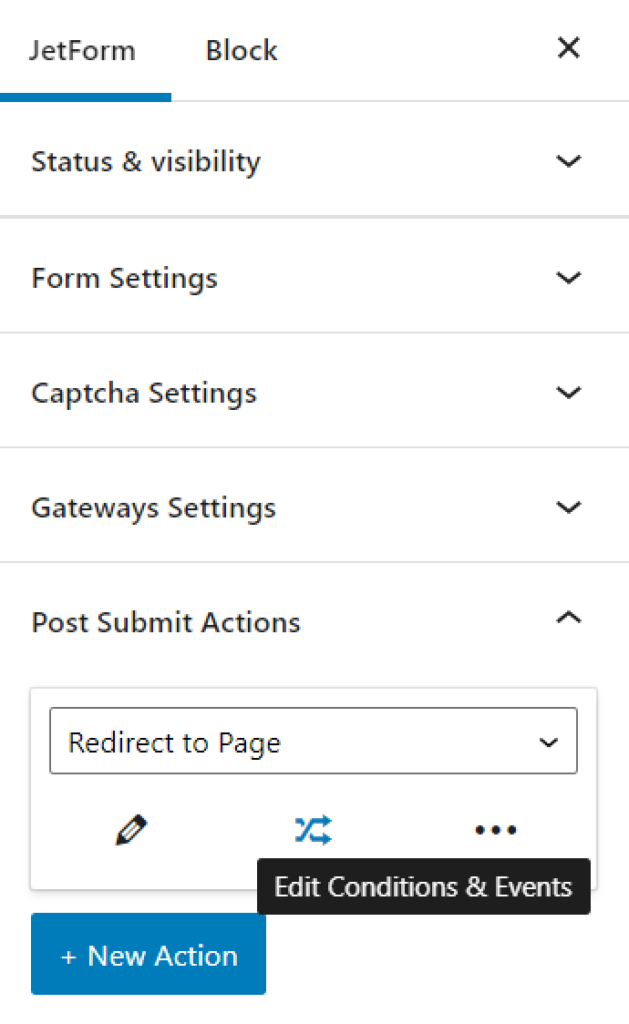
For that, hit the “Edit Conditions & Events” button under the “Redirect to Page” action.
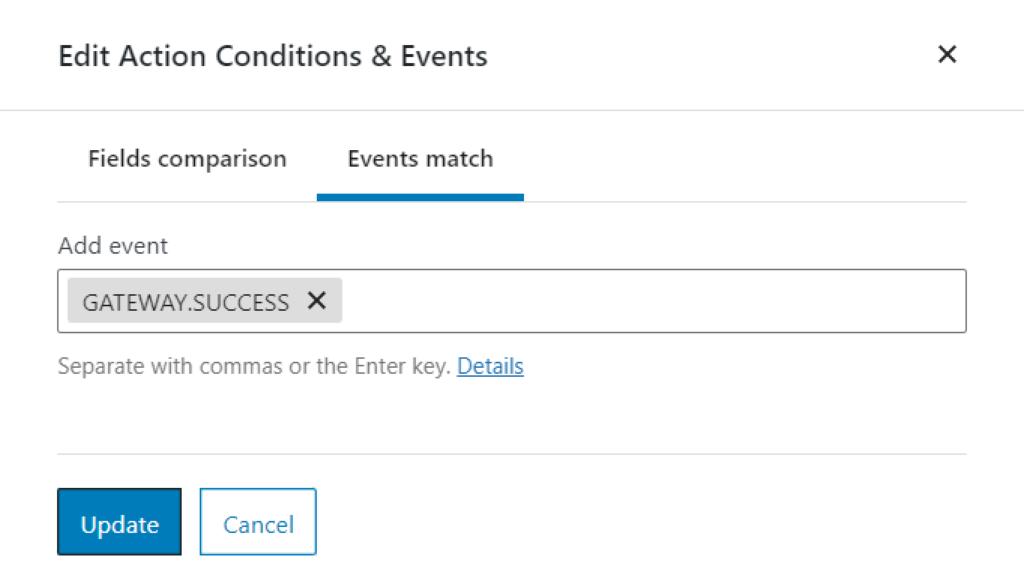
Move to the Events match tab and select the GATEWAY.SUCCESS event. With this event, users will be redirected to the Thank You page after they pass the checkout page on the side of the payment system.
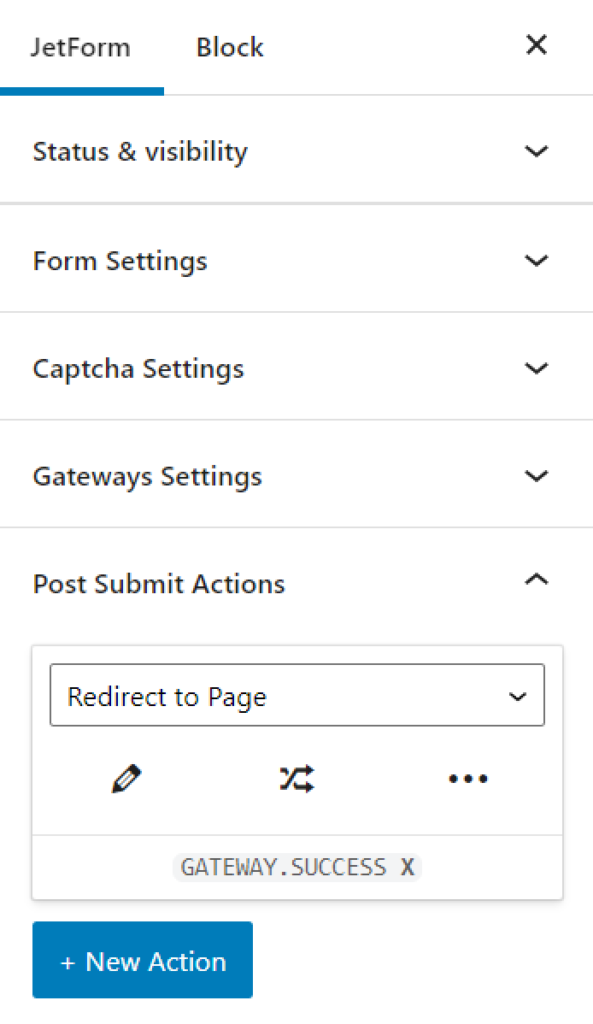
Press the “Update” button. The event in the submit action will look like that:
When you finish, update the form.
Check the Results
Proceed to the page with the form on the front end, fill in the fields and submit it.
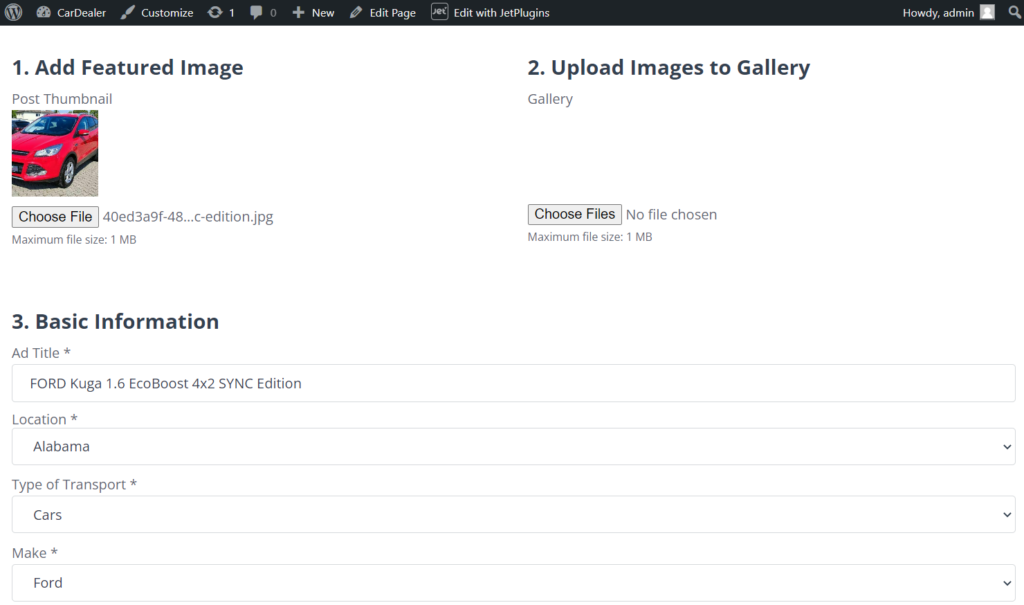
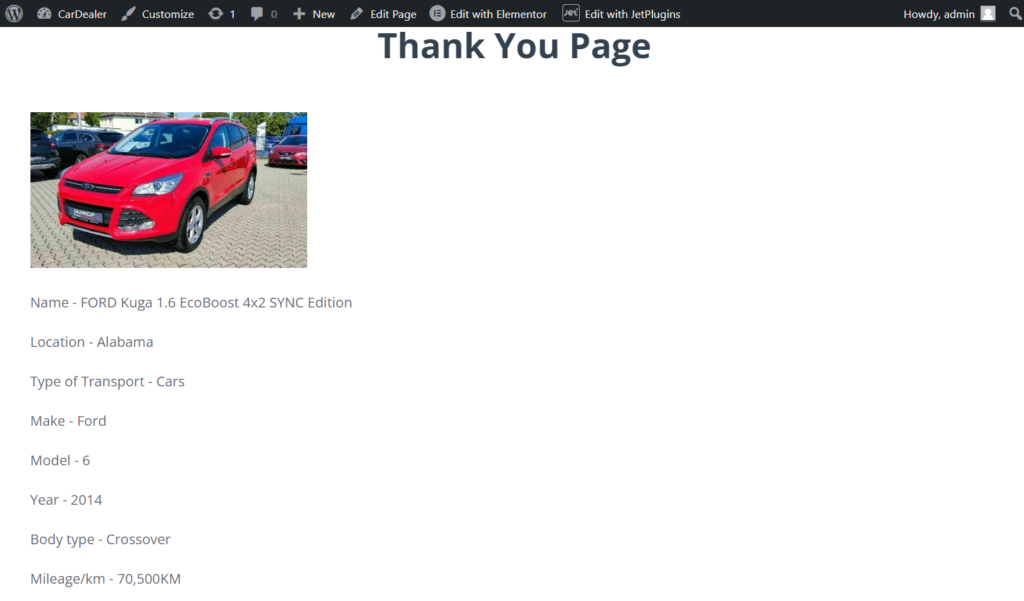
After the form submission, I was redirected to the Thank You page, where dynamic fields display the information I entered into the form.
That’s all. Now you know how to display the submission data on the Thank You page with dynamic widgets. Use the JetEngine and JetFormBuilder plugins to create the form and Thank You page for the WordPress website.