Dynamic Terms Block Overview
In this overview, you will find a detailed description of all Dynamic Terms block settings. You will learn how to customize the block so it will suit your website needs.
Dynamic Terms block is used to display terms or taxonomies that are connected with the post of a certain post type. If you add it to the Listing template and then use that template in the Listing Grid – it will show the values independently for every item.
Add Dynamic Terms Block
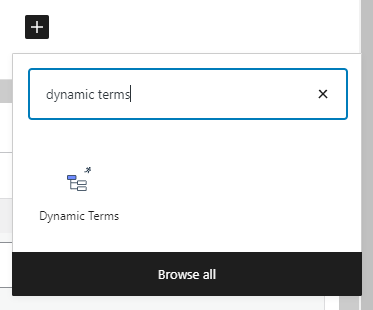
When you install and activate the JetEngine plugin, the Dynamic Terms block appears in the Design section of the blocks menu. However, it is more useful when added to the Listing template. So, open the admin dashboard and go to JetEngine > Listings. Create a new listing by clicking the “Add New” button or open the existing one and press the “Add Block” button with a cross-shaped icon. Find the Dynamic Terms block and click on it to add it to the page.

And now, let’s go through the settings.
Dynamic Terms Block Settings

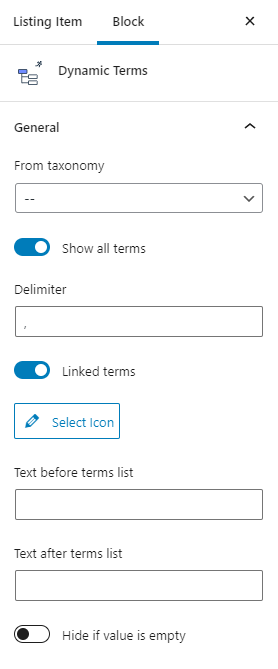
- From taxonomy. In this drop-down list, you will see all the terms, taxonomies, and categories that exist on your website. Choose those you would like to display;
- Show all terms. By default, this toggle is enabled and adds terms that are related to the taxonomy. However, you can disable it and choose the number of terms that will be shown in the Terms number to show bar;
- Delimiter. The symbol you will add here will be used to separate the terms in one line;
- Linked terms. If this toggle is on, all the displayed terms will be active links, which redirect the user to the term page once clicked;
- Select Icon. This button opens the Media Library, and you can upload an icon from it that will be added to the terms line;
- Text before terms list. The text you will add here will be added as a prefix to the terms list;
- Text after terms list. This text will be shown after the list of terms;
- Hide if value is empty. If this toggle is turned on and there are no terms, connected to the item, the Dynamic Terms block won’t be displayed.
Dynamic Terms Style Settings
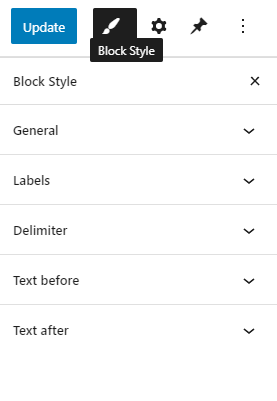
To be able to change the appearance of the JetEngine elements, you have to install and activate the JetStyleManager plugin. In this case, you will see the “Block Style” button with the brush-shaped icon on it in the top toolbar. Clicking on it opens the menu tab, which contains all the style settings of the block. If you need a hint about how to use the styling features, check out the styling tutorial.

That’s all about the Dynamic Terms block settings. As you can see, it is quite simple to customize it according to your needs.