
How to Build WooCommerce Products Listings with the Dynamic Tag
This tutorial explains how to build a full-featured product listing using only dynamic tags and JetEngine tools to get WooCommerce data.
The tutorial describes how to build listings with the WooCommerce Product Field, WooCommerce Product Image, WooCommerce Product Gallery, button URLs, and a custom class with custom CSS to style the regular and discounted price appearance. The listing uses the WooCommerce dynamic tags with a WooCommerce Product Query.
Building a WooCommerce Query
Navigate to the JetEngine > Query Builder tab. Press the “Add New Query” button.
Set the following settings of the query:
- type the Name of the query (here, Products);
- select the WC Products Query option from the Query Type drop-down menu;
- select the Any option from the Products Status drop-down menu.
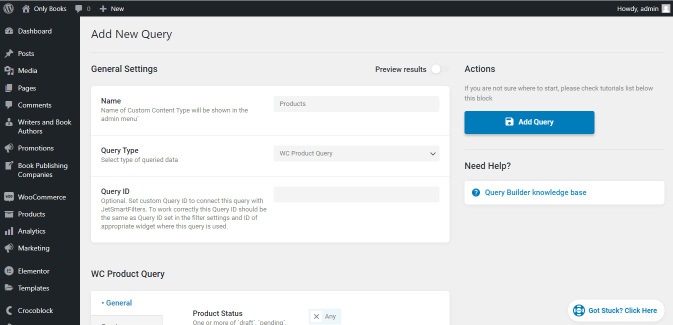
Press the “Add Query” button to save changes.
Building a Listing for WooCommerce Products
Settings of the Listing Item
Navigate to the JetEngine > Listing tab and press the “Add New” button to create a new listing item with the following settings:
- select the Query Builder option from the Listing Source drop-down menu;
- choose the previously built query (here, Products) from the Query drop-down menu;
- type the Listing item name (here, Products_listing_items);
- select the Elementor option from the Listing view drop-down menu.
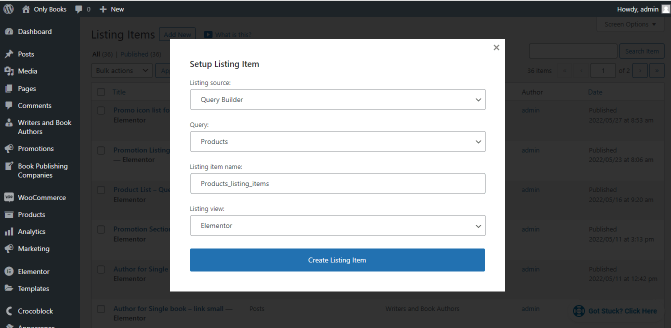
Press the “Create Listing Item” button.
Adding dynamic tags to the listing image
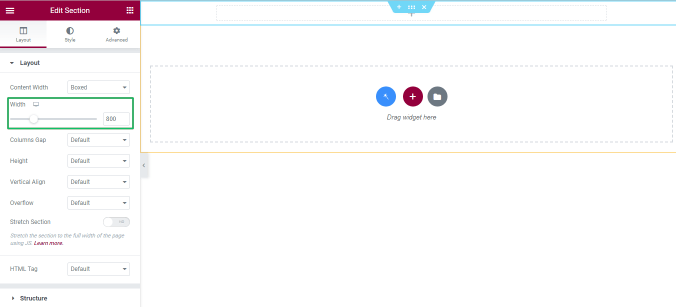
Press the “Add New Section” button and select one section as a structure of the listing item.
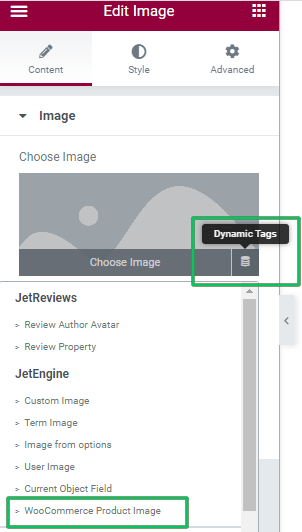
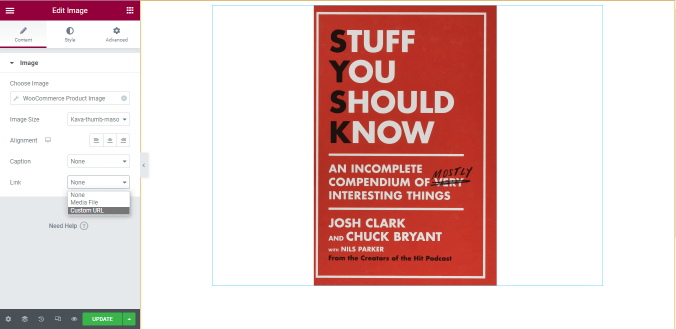
Add the Image widget to the listing item, then navigate to the Choose Image field of the Image widget settings. Press the “Dynamic Tags” button at the bottom left corner of the field.
Choose the WooCommerce Product Image option from the drop-down menu.
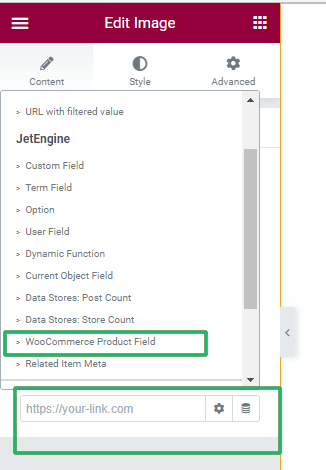
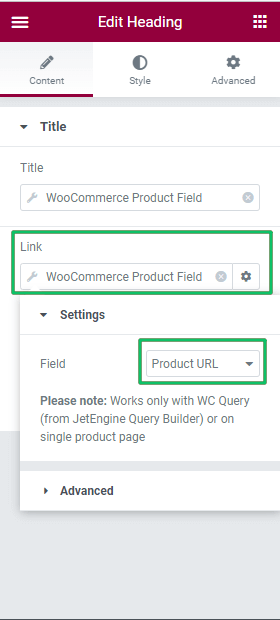
Navigate to the Link drop-down menu of the Image widget settings. Select the Custom URL option from this drop-down menu.
If enabled, this option turns on the field to select the link: press the “Dynamic tag” button and select the WooCommerce Product Field tag from the drop-down menu.
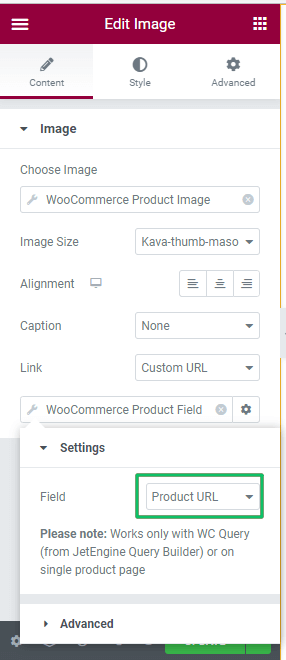
Select the Product URL option from the Settings drop-down menu.
Press the “Update” button to save changes.
Adding the product title field
Add the Heading widget to the listing item. Click the “Dynamic Tag” button. Select the WooCommerce Product Field tag from the drop-down menu.
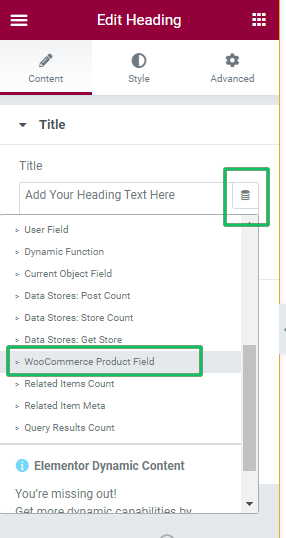
Select the Title option from the Settings drop-down menu.

Navigate to the “Link” field, press the “Dynamic Tag” button, and select the WooCommerce Product Field tag from the drop-down menu. Choose the Product URL option from the Settings drop-down menu.
Press the “Update” button to save changes.
Applying the Rating widget
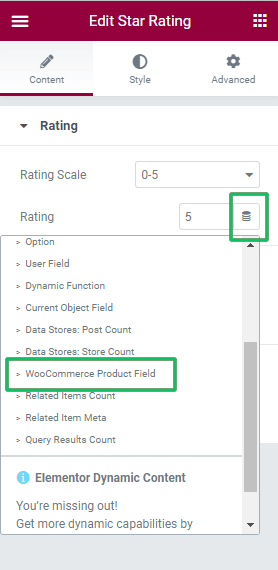
Add the Star Rating widget to the listing item. Press the “Dynamic Tag” button and select the Product URL option from the drop-down menu.
Select the Average Rating option from the drop-down menu in the Settings window.
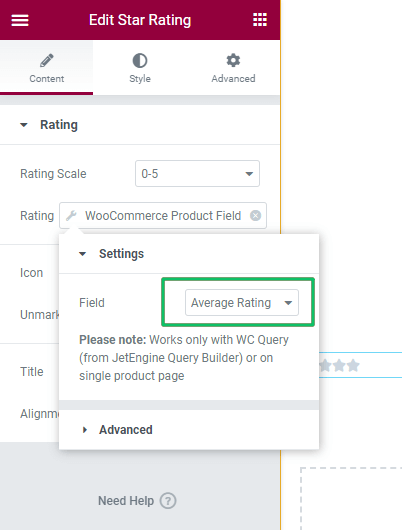
Press the “Update” button to save changes.
Adding price
Add the Text Editor widget to the listing item. Press the “Dynamic Tag” button and set the WooCommerce Product Field tag.
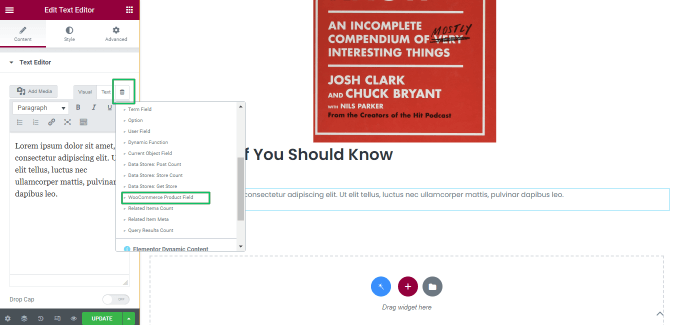
Set the Price HTML String option in the Settings window.
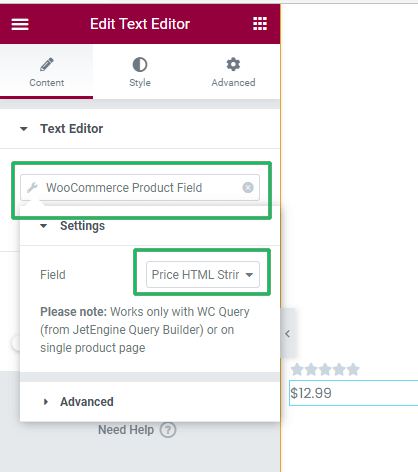
Press the “Update” button.
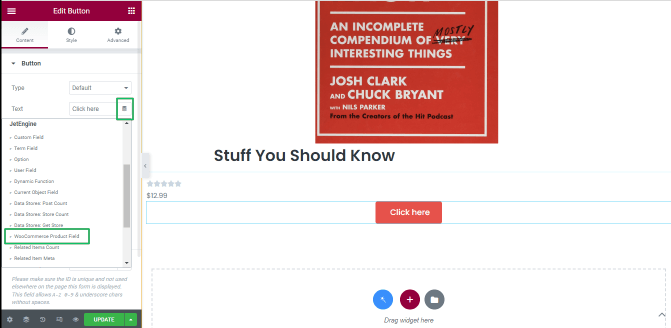
Adding the Button widget
Here add to the cart functionality is implemented through the standard Elementor button. It allows displaying the correct text and URL depending on the product type.
Add the Button widget to the listing item. If needed, align the widget position.
Press the “Dynamic Tag” button and set the WooCommerce Product Field tag.
Set the Add to Cart Text option in the Settings window.
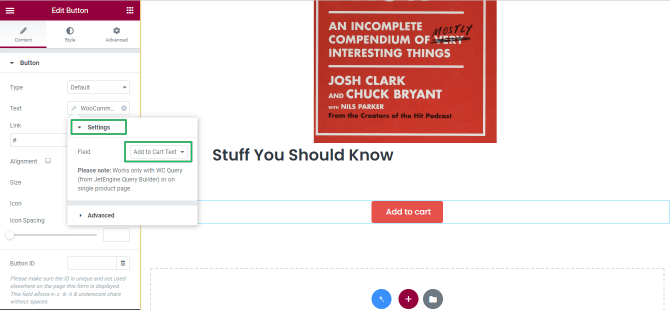
Navigate to the Link field, press the “Dynamic Tag” button, select the WooCommerce Product Field tag, and choose the Add to Cart Text URL option in the Settings field.
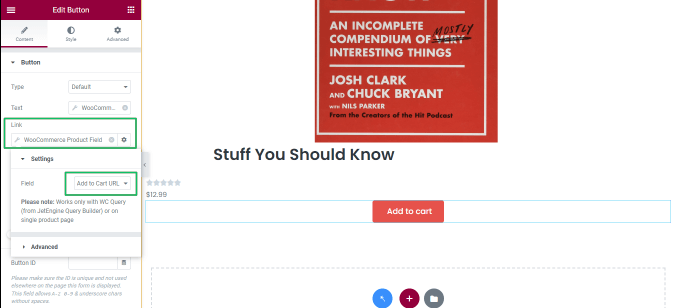
Press the “Update” button.
Adding the Listing Item to a Page
Open a page where you want to place the listing item. Drag and drop the “Listing Grid” widget. Specify the listing item (here, Products_listing_item) as a source and set the listing grid settings.
Read the tutorial to Get to Know All Listing Grid Widget Options.
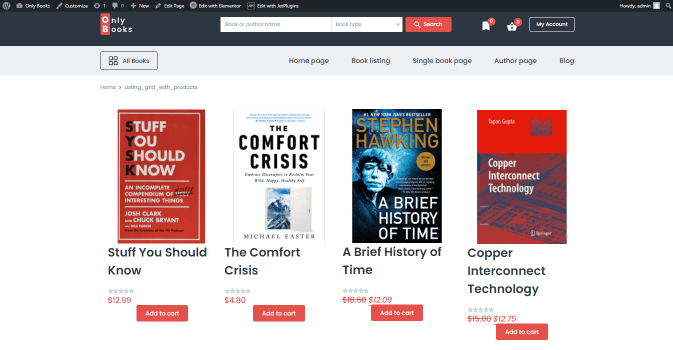
The frontend view of the page with the listing grid looks as follows.
Styling the Sale Price
To apply the same style to the discount price text (regular, not italic as it is now), add a code for the price widget custom class with custom CSS and edit the styles you want.
Listing Item Settings
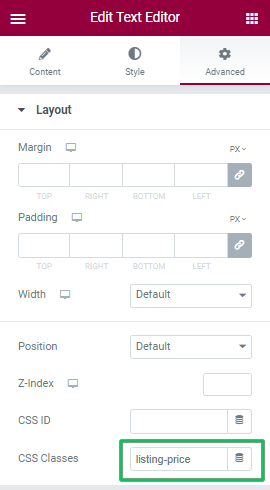
Open the built listing Item (here, Products_listing_items). Navigate to the Text Editor widget settings, click the Advanced setting tab, and unroll the Layout settings.
Type “listing-price” into the CSS class field:
Press the “Update” button.
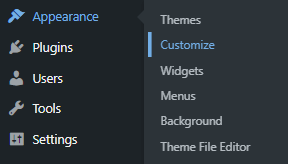
Navigate to the WordPress dashboard > Appearance > Customize tab.
Unroll the Additional CSS tab.
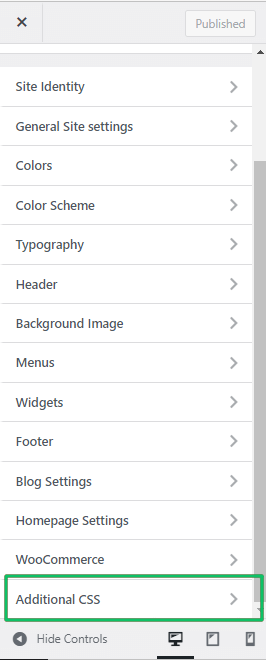
Paste the code into the Additional CSS field:
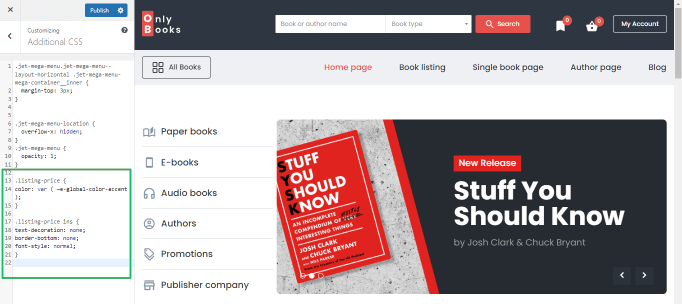
Press the “Publish” button to save the changes.
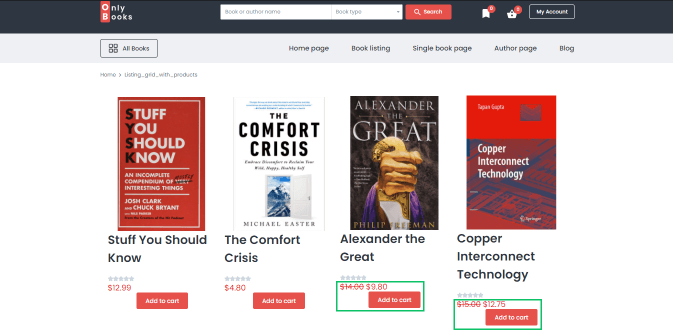
Customized price style
Open the page with the listing grid (here, Listing_grid_with_products). Update the page. Now the prices have the same style.
That’s all about building WooCommerce product listings with dynamic tags and customizing their appearance using a custom class with custom CSS.