How to Create a Listing for WordPress Media Library
This tutorial explains how to create a Listing template using the JetEngine plugin to show a list of WordPress Media library images that can be displayed and downloaded.
Before you start, check the tutorial requirements:
- Elementor (Free version), Block editor (Gutenberg), or Bricks
- JetEngine plugin installed and activated
- Images to WordPress Media Library uploaded
Create Custom SQL Query
Let us start with creating a custom query by following WordPress Dashboard > JetEngine > Query Builder.
Add a new query by pressing the similarly named button.
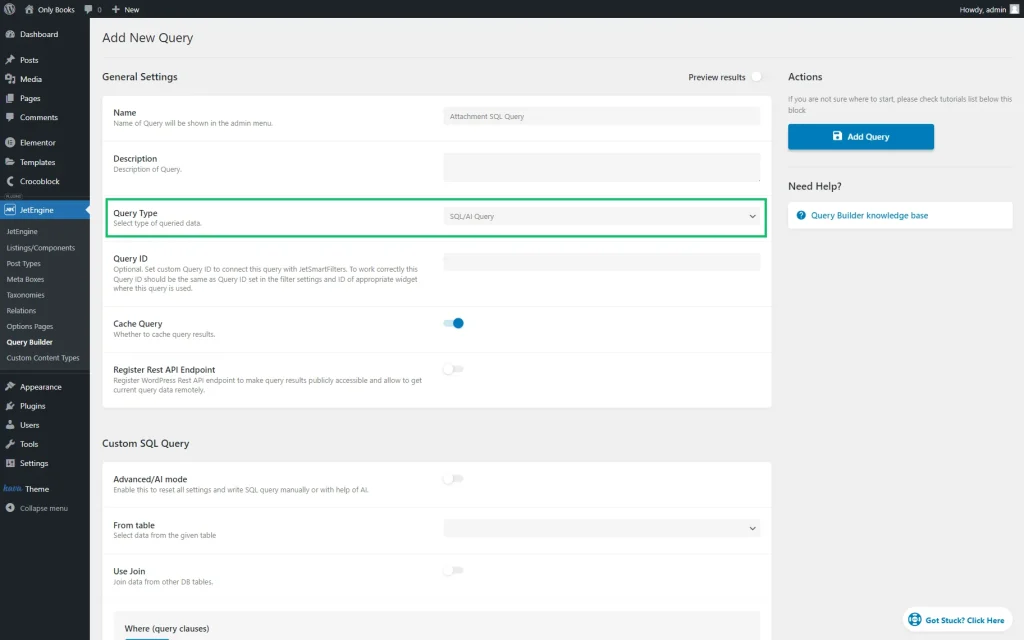
Give a Name to the query and select “SQL/AI Query” Query Type.
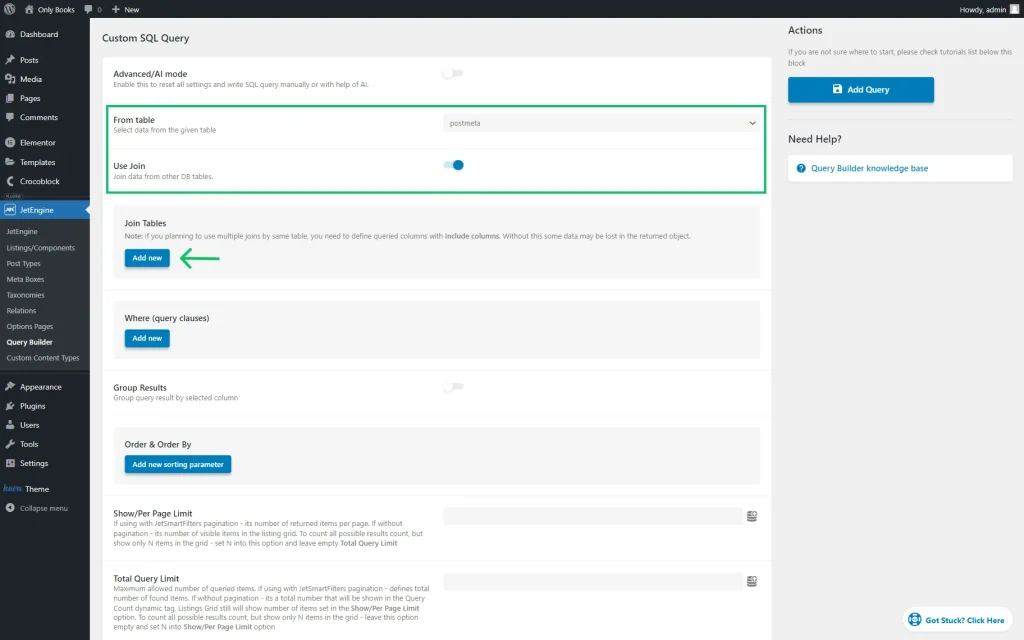
In the Custom SQL Query section, select the “postmeta” option in the From table drop-down and enable the Use Join feature.
Press the “Add new” button in the Join Tables section.
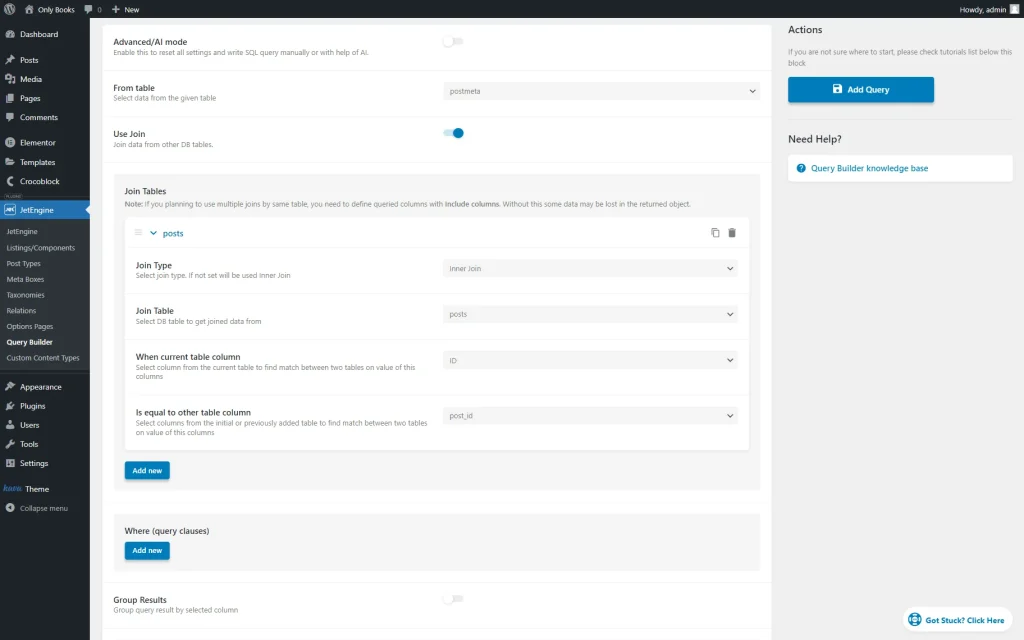
The Join Type should be set to “Inner Join” with the Join Table “posts.”
The table columns “ID” and “post_id” are to be selected, respectively, in the following When current table column and Is equal to other table column fields.
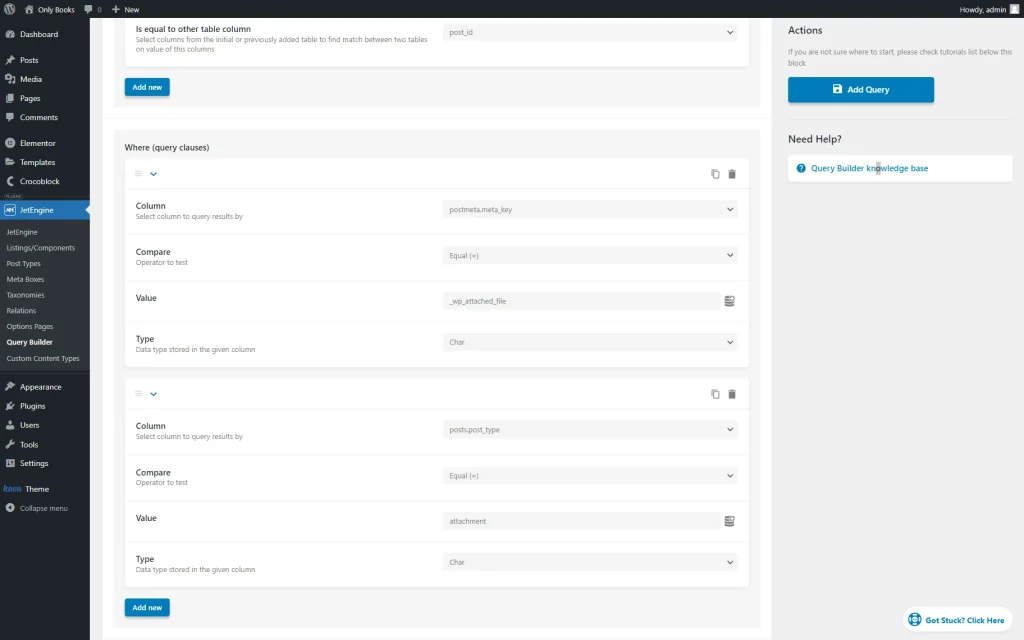
After that, you should add two query clauses by pressing the “Add new” button in the Where (query clauses) section.
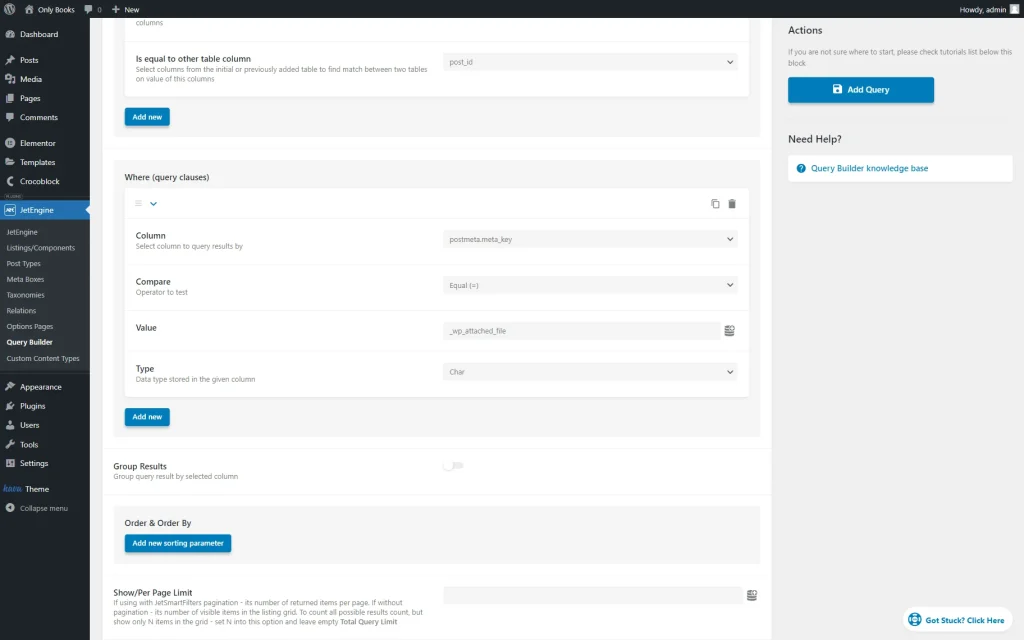
In the first clause, you should select the “postmeta.meta_key” Column to be “Equal” (Compare field) to the “_wp_attached_file” Value.
Also, mind selecting “Char” as the Type.
In the second meta clause, you should add the “attachment” Value as a post type from which to get the posts, which are the images in our case.
So, the Column should be set to “posts.post_type,” the Compare operator to “Equal,” and the Type to “Char.”
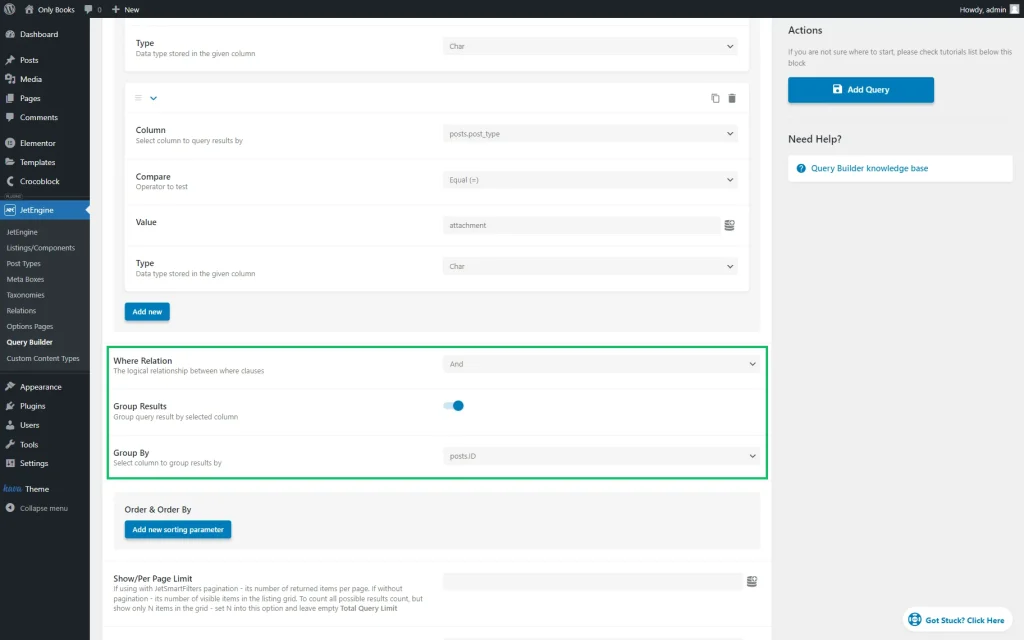
Also, mind picking the “And” option in the Where Relation field. Then, activate the Group Results toggle and set the “posts.ID” Group By option.
This way, the media files will not be doubled if one media file is attached to several posts.
Once the custom query is completed, press the “Add Query” button.
We will now create a Listing Template for this SQL query.
Build Listing Template for Custom Query
Head to WordPress Dashboard > JetEngine > Listings/Components.
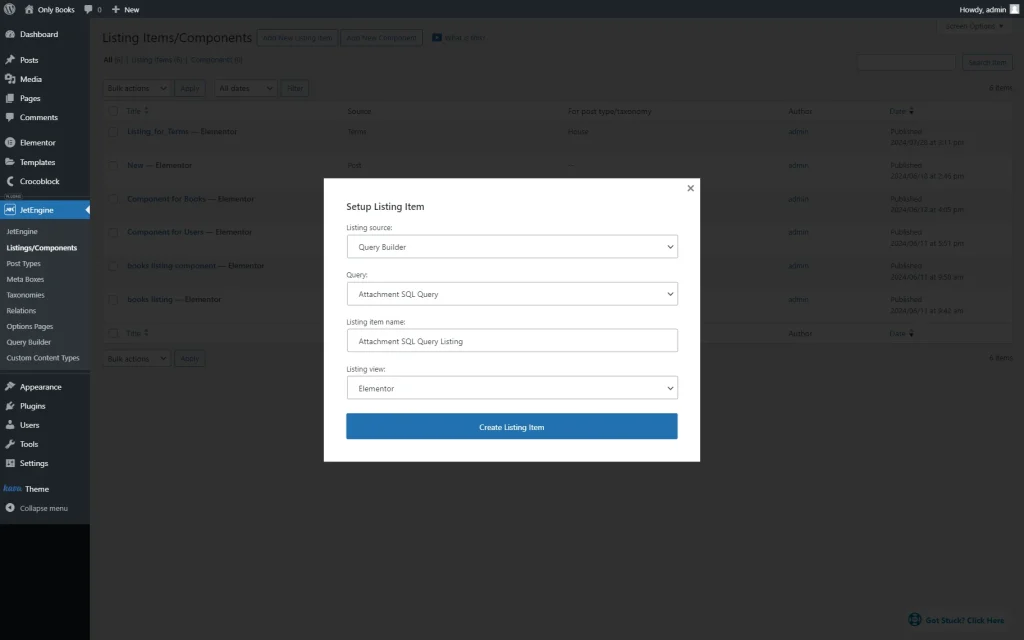
Click the “Add New Listing Item” button, and select “Query Builder” as a Listing source. Then, select the custom Query that has just been created.
Complete the Listing item name field and choose the desired Listing view.
Push “Create Listing Item.”
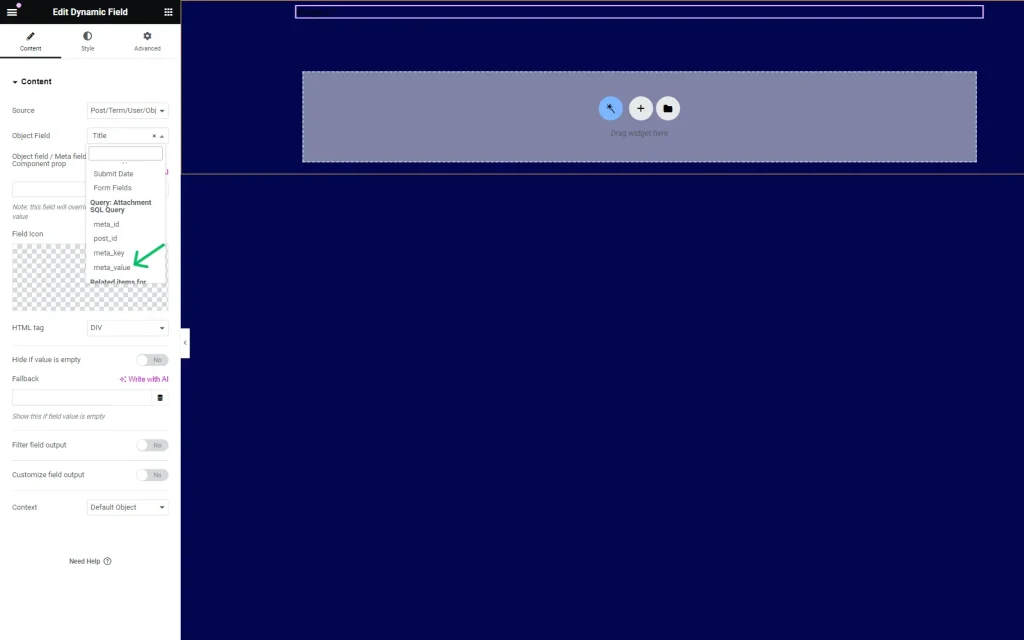
In the editor, add a Dynamic Field widget to the page.
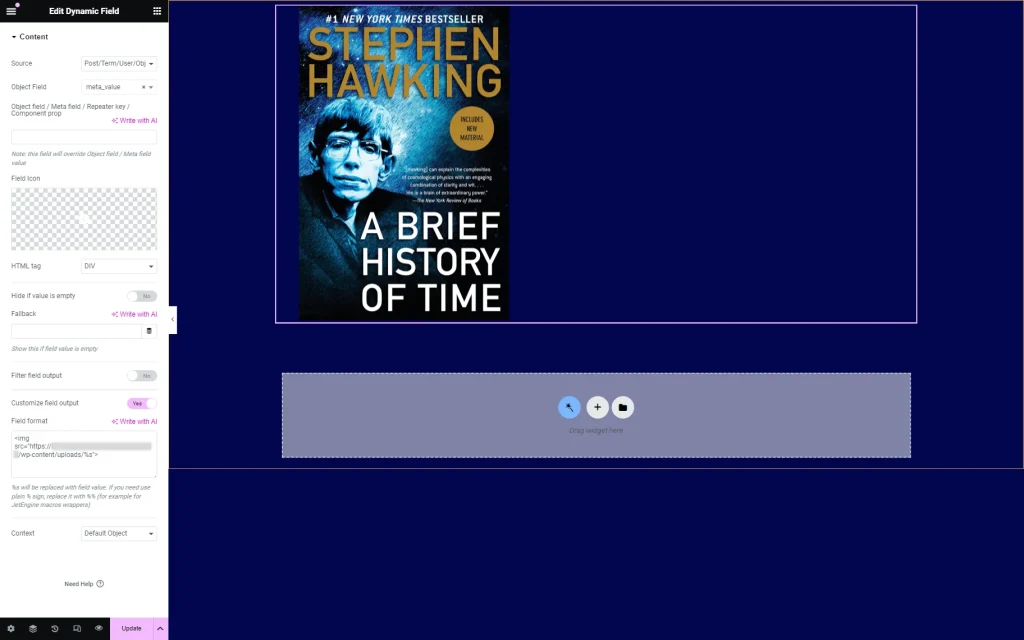
Firstly, output the image from the Media Library itself. To do so, select “Post/Term/User/Object Data” as the Source and “meta_value” as the Object Field.
The “meta_value” column stores the media file URL as a value. So, we need to activate the Customize the field output toggle to transform the image’s URL into the image itself. HTML tag <img> can help with this.
Check a recommended Field Format:
<img src="https://your-domain.com/wp-content/uploads/%s">As you can observe, the image is already displayed in the editor.
Let’s create a button that can download the image by clicking on the button.
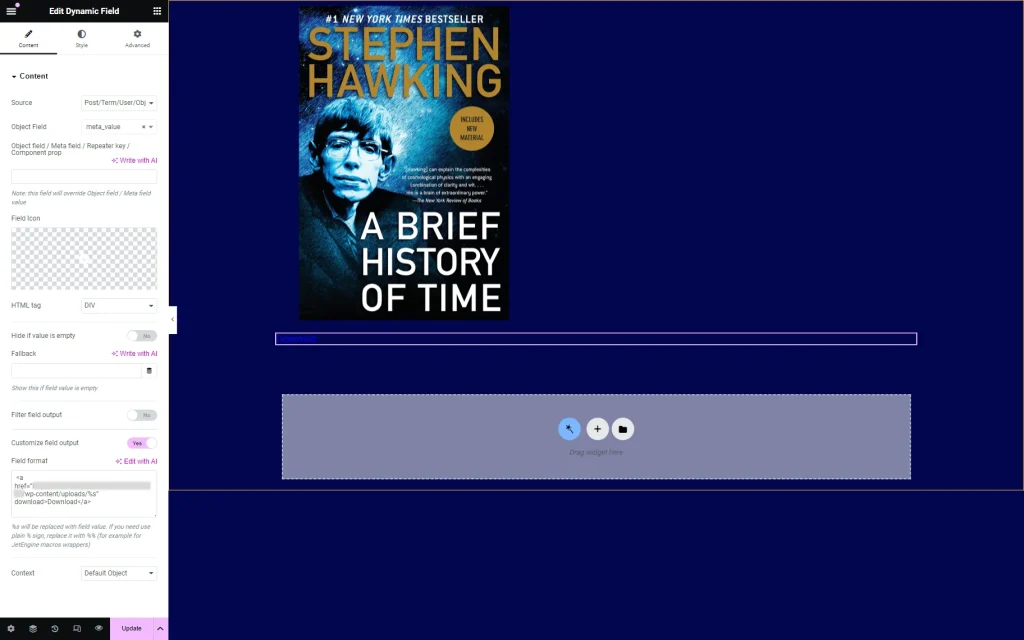
Add another Dynamic Field widget, and select “Post/Term/User/Object Data” as a Source and “meta_value” as an Object Field.
Then, activate the Customize field output toggle and add the following Field Format to make the image downloaded on your device:
<a href="https://your-domain.com/wp-content/uploads/%s" download>Download</a>Make image downloadable
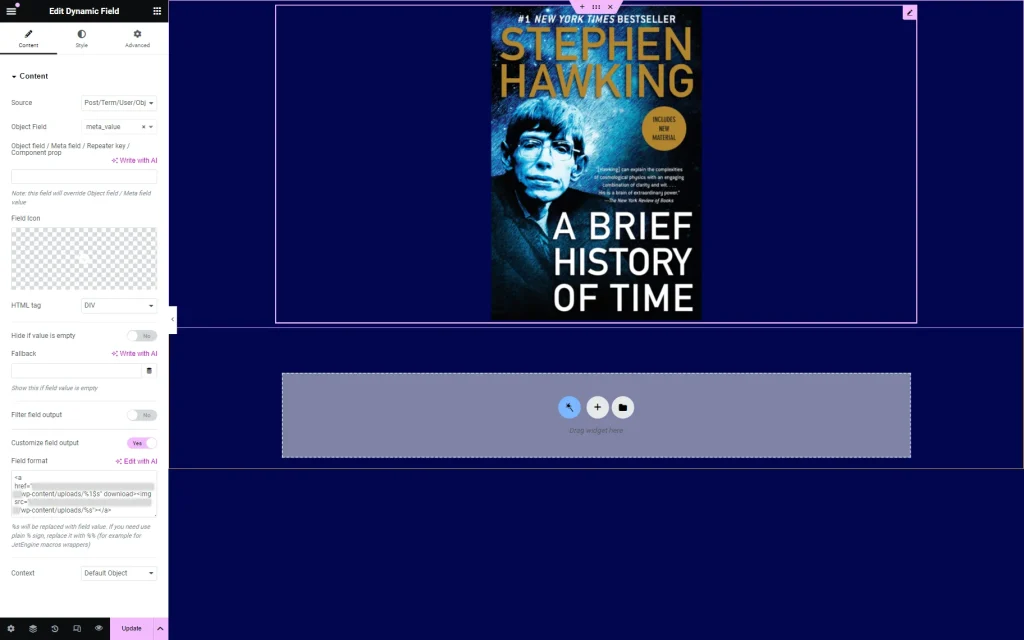
Let’s also add another option for displaying and downloading the image using just the Dynamic Field widget.
Activate the Customize field output toggle and add the following Field format:
<a href="https://your-domain.com/wp-content/uploads/%1$s" download><img src="https://your-domain.com/wp-content/uploads/%s"></a>This way, an image can be downloaded by clicking on it.
Customize the listing and press the “Update” button to save the changes.
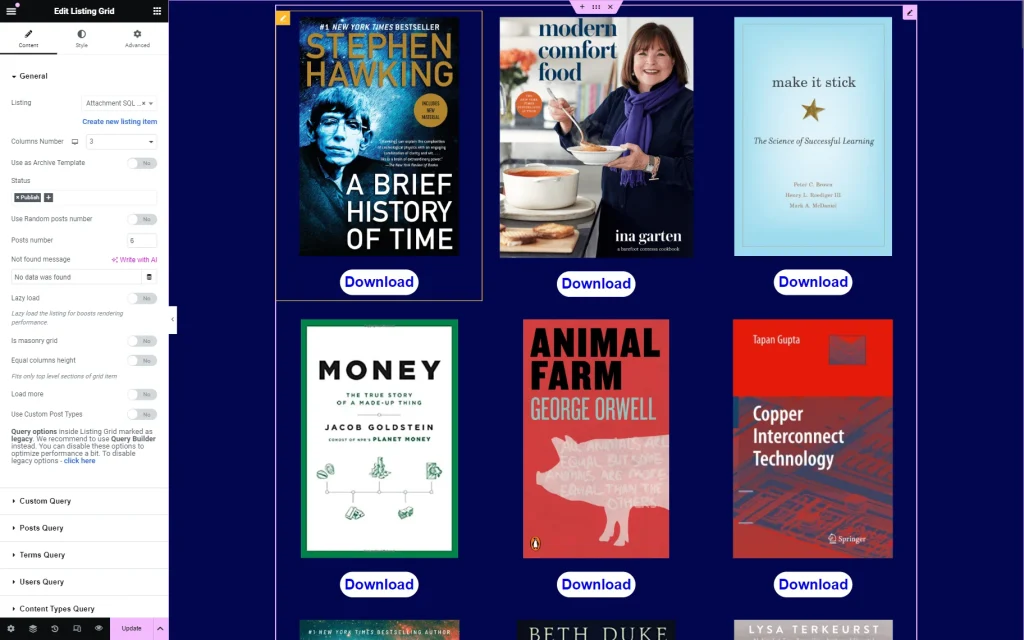
Check the result by outputting the listing for Media Library with the Listing Grid widget on the needed page.
You should only add the Listing Template to the Listing Grid without applying the custom query since it is already based on the custom query.
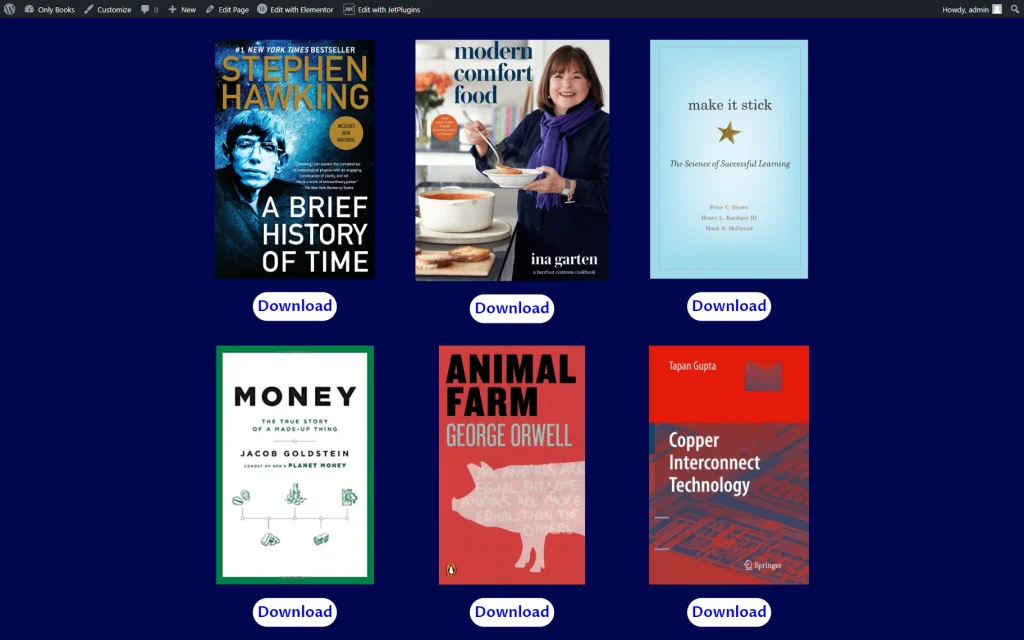
Check the Listing Grid with the images from the WordPress Media Library on the front end.
Not only is the image displayed, but it can also be downloaded by clicking on the button or on the image itself.
That’s it; now you know how to create a JetEngine Listing Template that will display the WordPress Media Library items on the front end and make it downloadable.
