How to Display Recurring Events with Bricks
The tutorial explains how to display repeated events via the Calendar widget of the JetEngine plugin with the Bricks theme.
Before you start, check the tutorial requirements:
- Bricks theme installed and activated
- JetEngine plugin installed and activated with the Custom Post Type built
Add the Advanced Date Field to a CPT
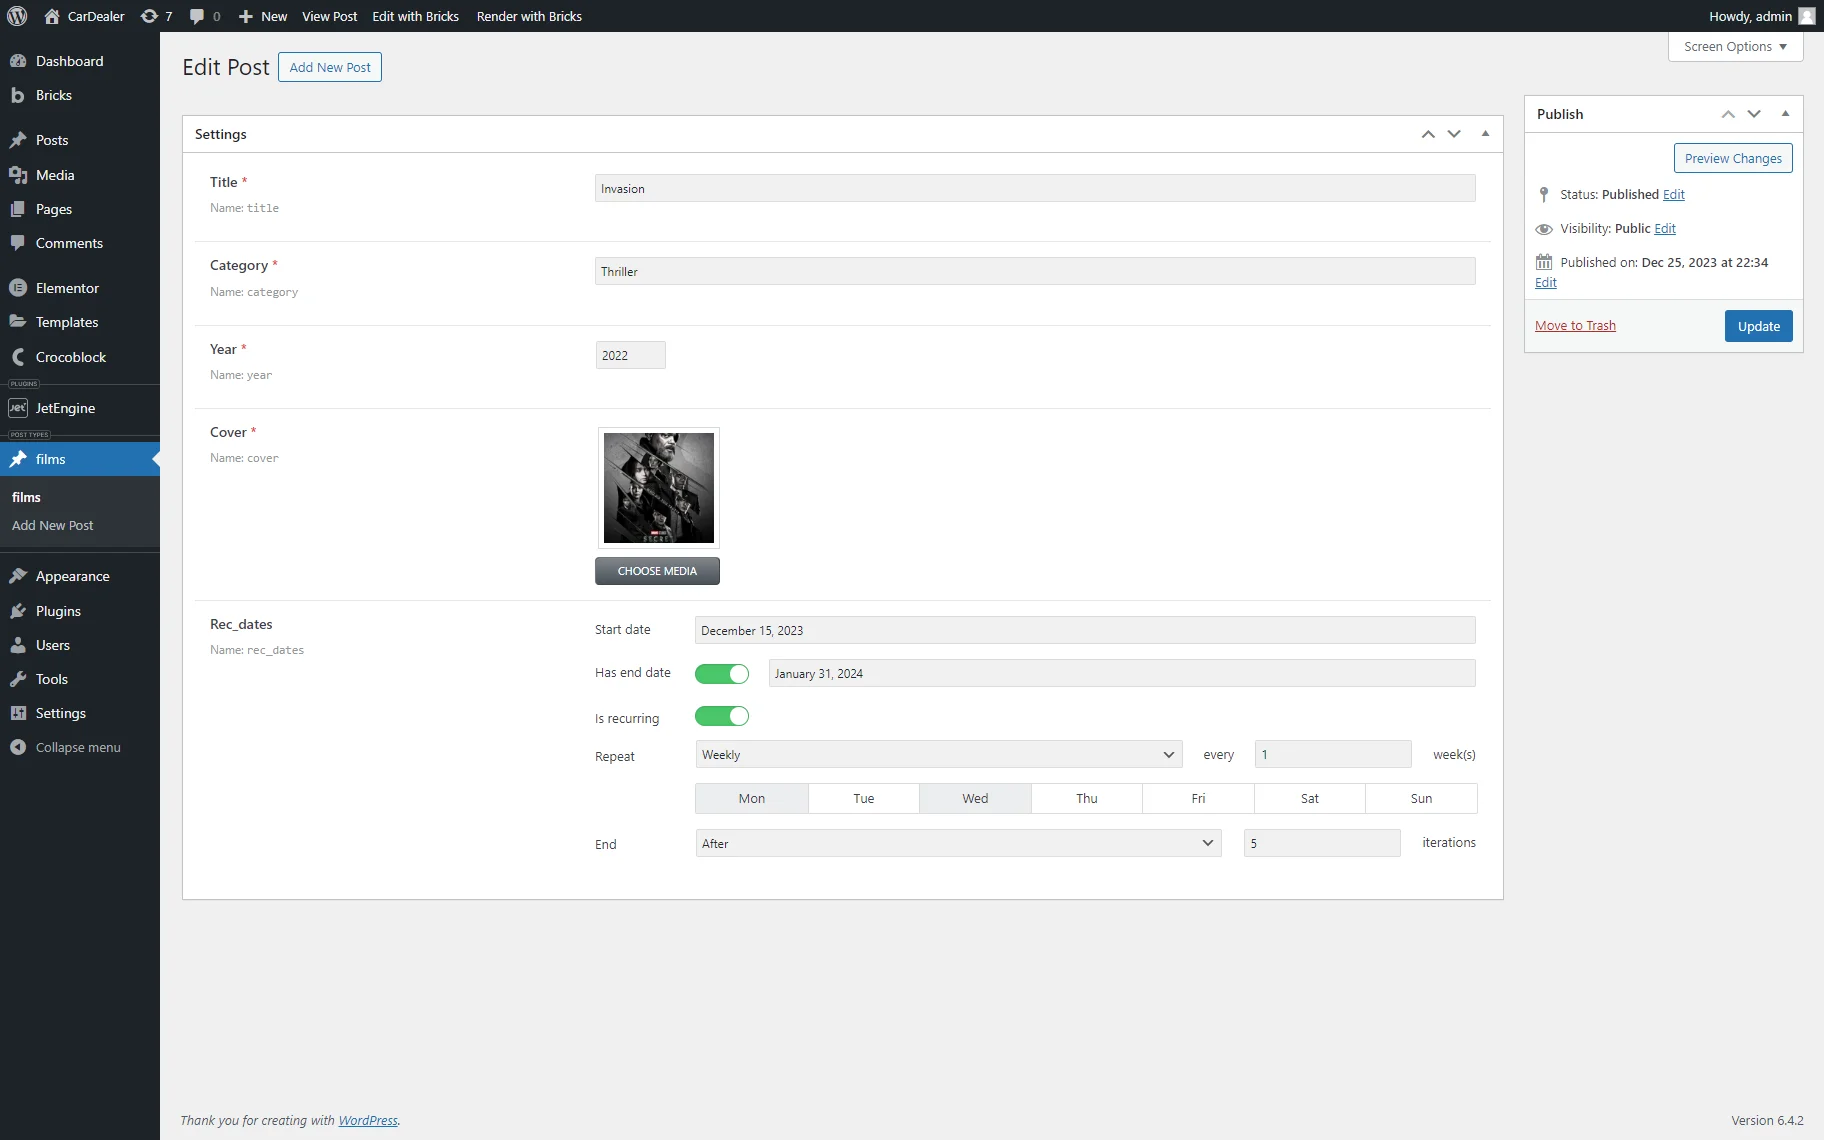
Create a CPT (here, Films) with the necessary fields. To display the recurring events, add the Advanced Date field.
Open the CPT posts, scroll them down, and fill in the following fields of the Advanced Date field (here, “Rec_dates”):
- Start date calendar field to select a date when the event starts;
- enable the Has end date toggle to select the end date for multi-day events;
- enable the Is recurring toggle to turn on the Repeat drop-down menu with the “Daily,” “Weekly,” “Monthly,” and “Yearly” options. Every option, if selected, turns on the appropriate fields to specify the displaying conditions. For example, the “Weekly” option turns on the buttons to select days of the week for displaying recurring events;
- End drop-down menu to select the “After” or “On date” options and specify the number of iterations or the end date, respectively.
Fill in the CPT posts and publish them.
Settings of the Bricks Theme
Navigate to the Bricks > Settings > General tab. Toggle the necessary Post Types – the Listing Items and the CPT (here, Films) toggles.
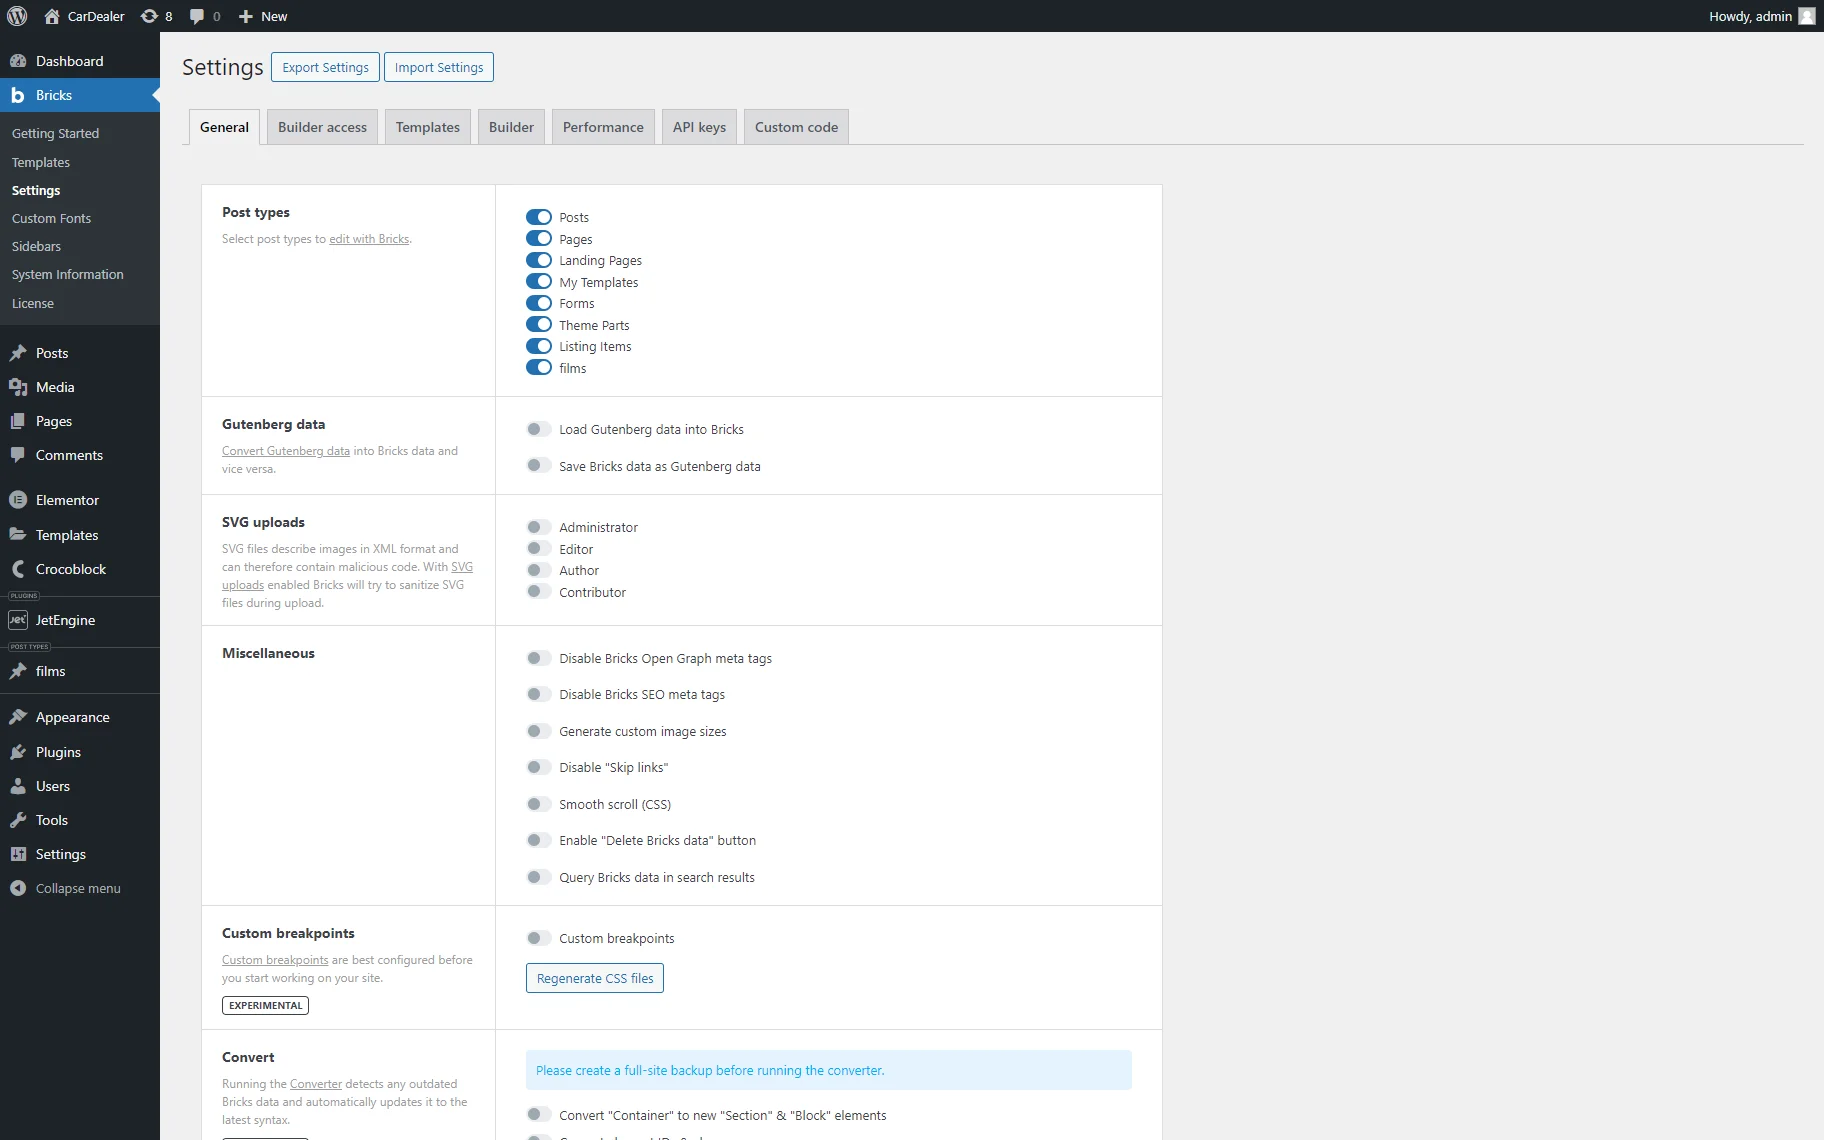
Scroll down the page and press the “Save Settings” button.
Create a Listing Item
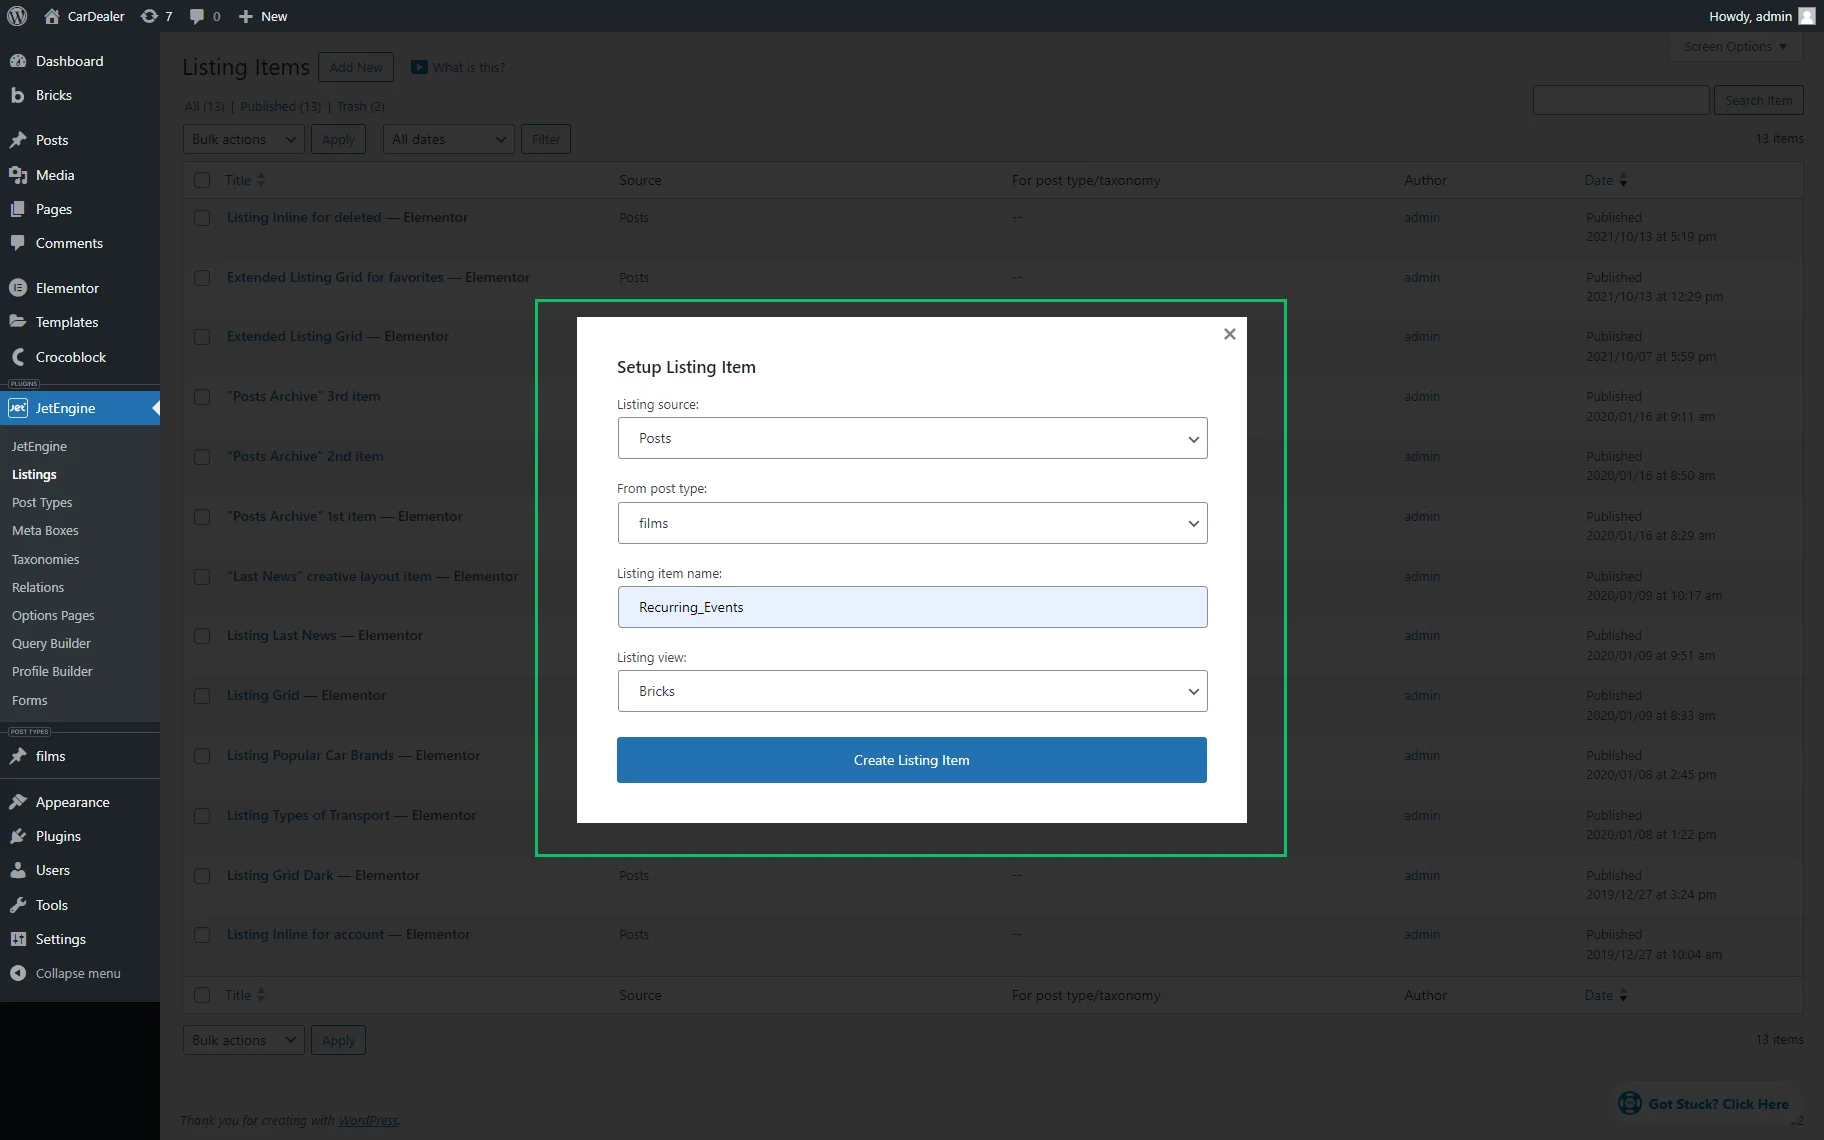
Navigate to the JetEngine > Listings tab and create a listing item (here, Recurring_Events) for the created CPT (Films).
Add the necessary widgets (i.e., the Dynamic Image, Dynamic Field widgets).
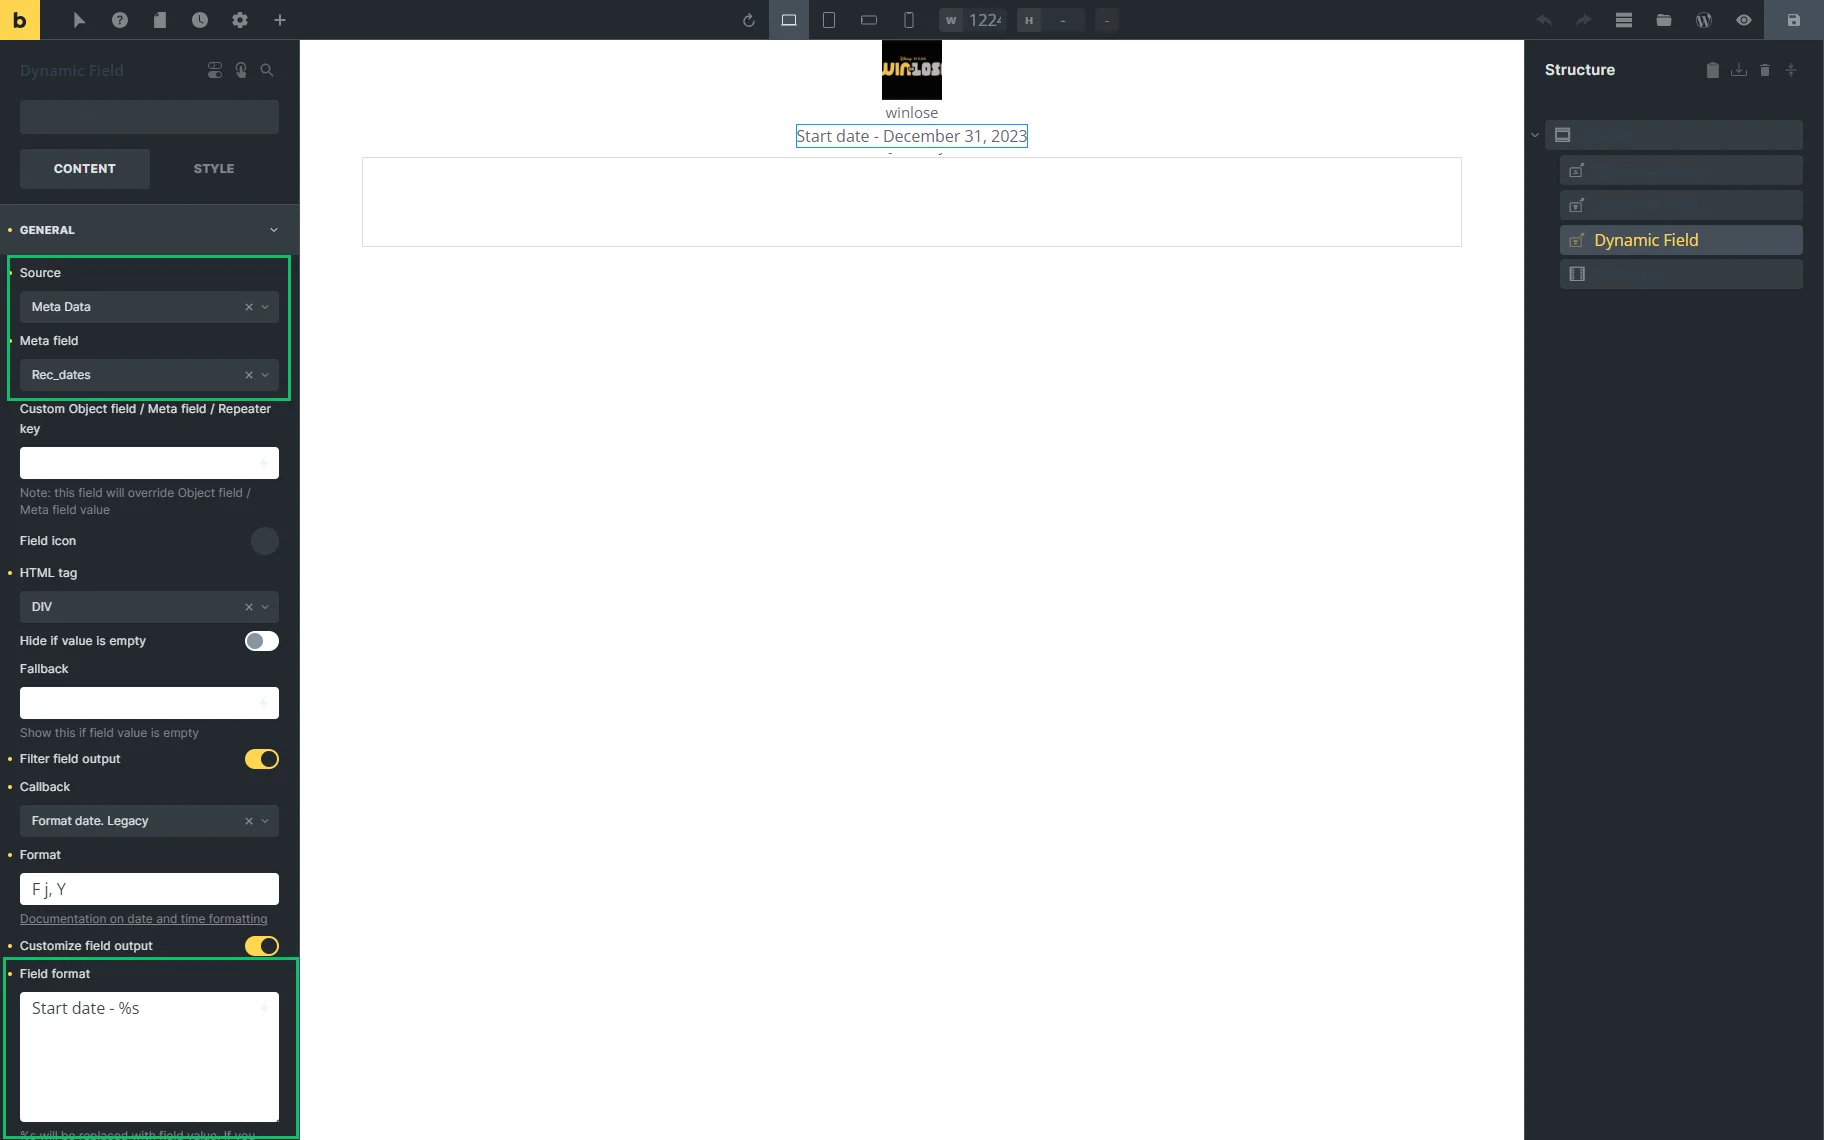
Add the Dynamic Field widget, unroll the GENERAL settings tab. To display the start date:
- select the “Meta Data” option in the Source drop-down menu;
- select the previously created Advanced Date meta field (“Rec_dates”) in the Meta field drop-down menu;
- scroll down the GENERAL settings tab and enable the Filter field output toggle;
- select the “Format date” option from the Callback drop-down menu;
- type the necessary text to display the date options on the front end, such as “Start date 一 s%,” in the Field Format field.
To display the end date:
- select the “Meta Data” option in the Source drop-down menu;
- type the name of the previously created Advanced Date meta field with the additional text in the Custom Object Field/Meta field/Repeater key field (i.e., for this case, we typed the following text: “rec_dates__end_date”);
- scroll down the GENERAL settings tab and enable the Filter field output toggle;
- select the “Format date” option from the Callback drop-down menu;
- type the necessary text to display the date options on the front end, such as “Start date 一 s%,” in the Field Format field.
Display the Recurring Events in the Calendar Element
Create a page and open it in Bricks for editing. Find the Calendar widget and drag and drop it to the page.
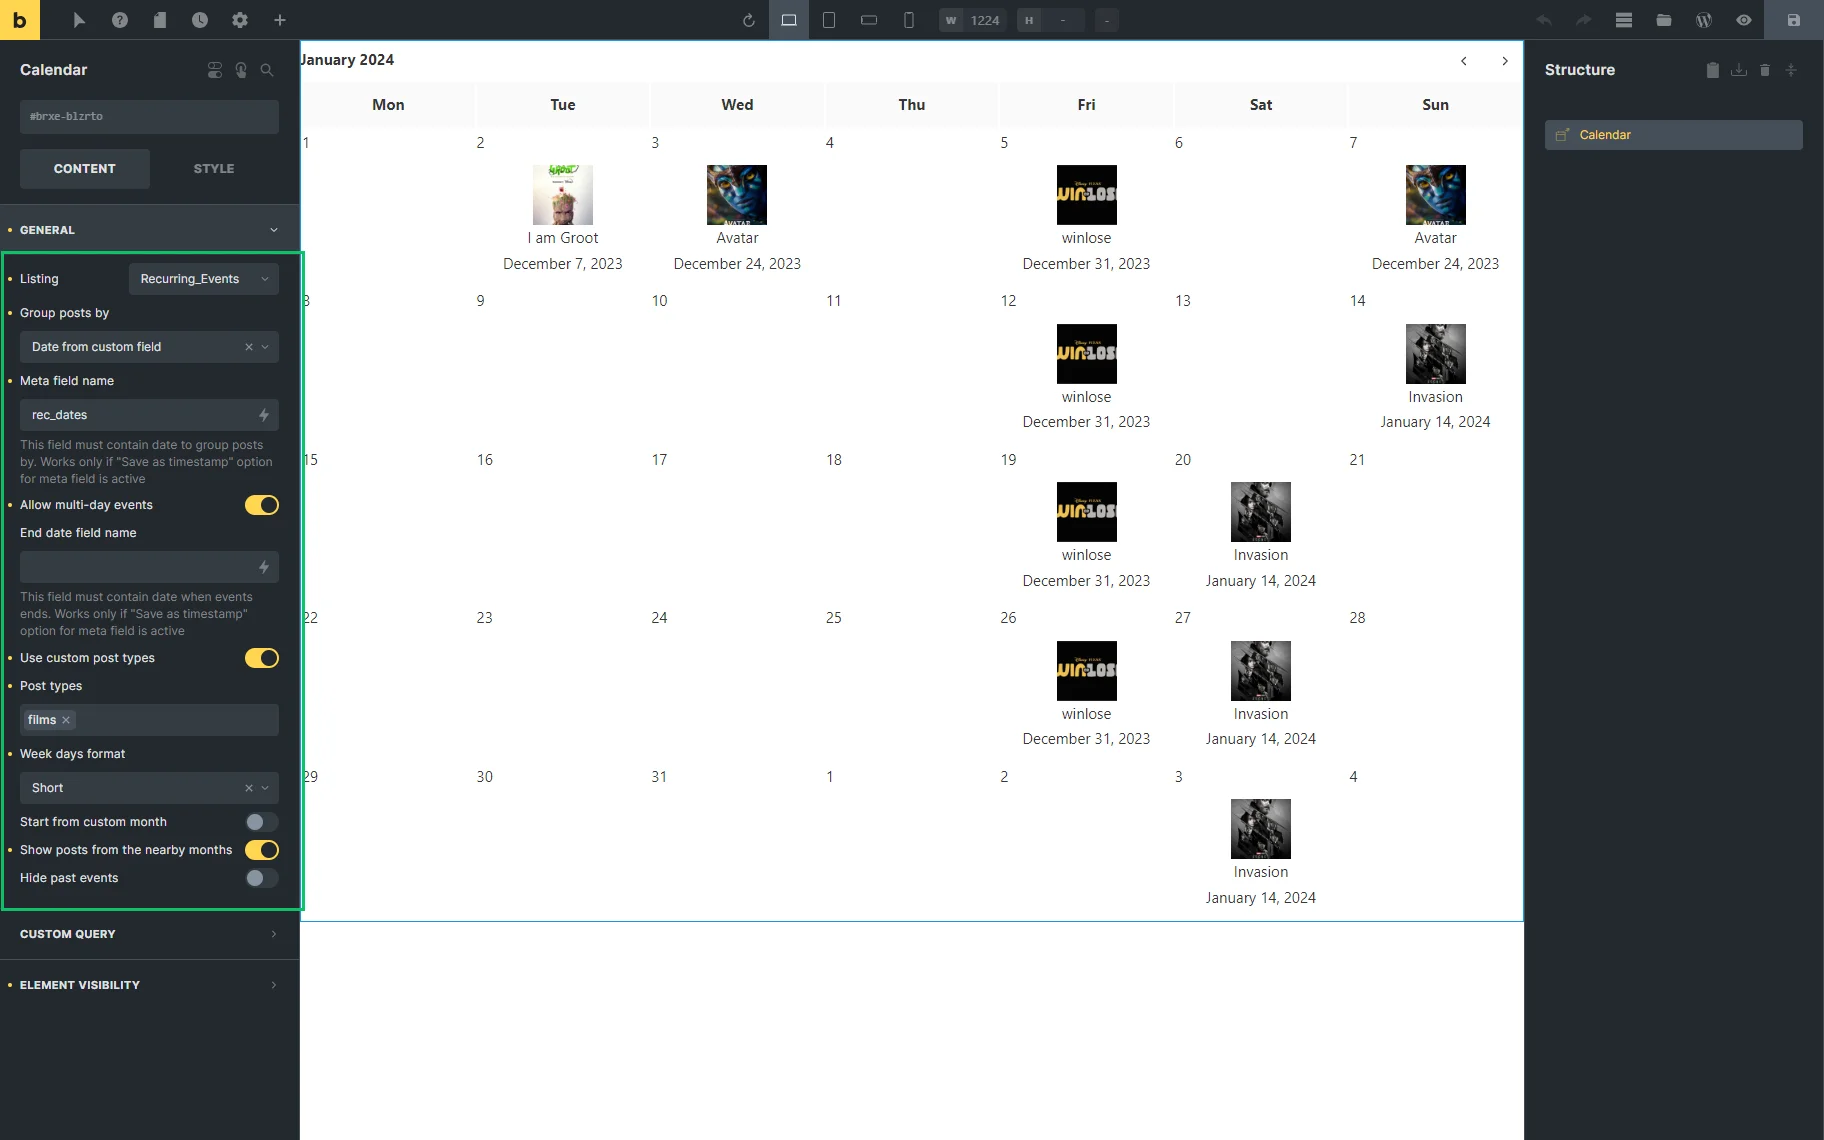
Unroll the GENERAL settings tab and set the following settings of the Calendar widget:
- select the listing you need from the Listing drop-down menu;
- select the Date from custom field option from the Group by drop-down menu;
- type the Advanced Dates meta field’s name into the Meta field name field (here, “rec_dates”);
- move the Allow multi-day events toggle;
- type the Advanced Date meta field’s name into the End date field name field (here, “rec_dates”);
- activate the Use custom post types toggle and select the necessary CPT from the Post Type drop-down menu.
Save the template.
Pressing the eye-shaped icon in the top right corner turns on the preview mode.
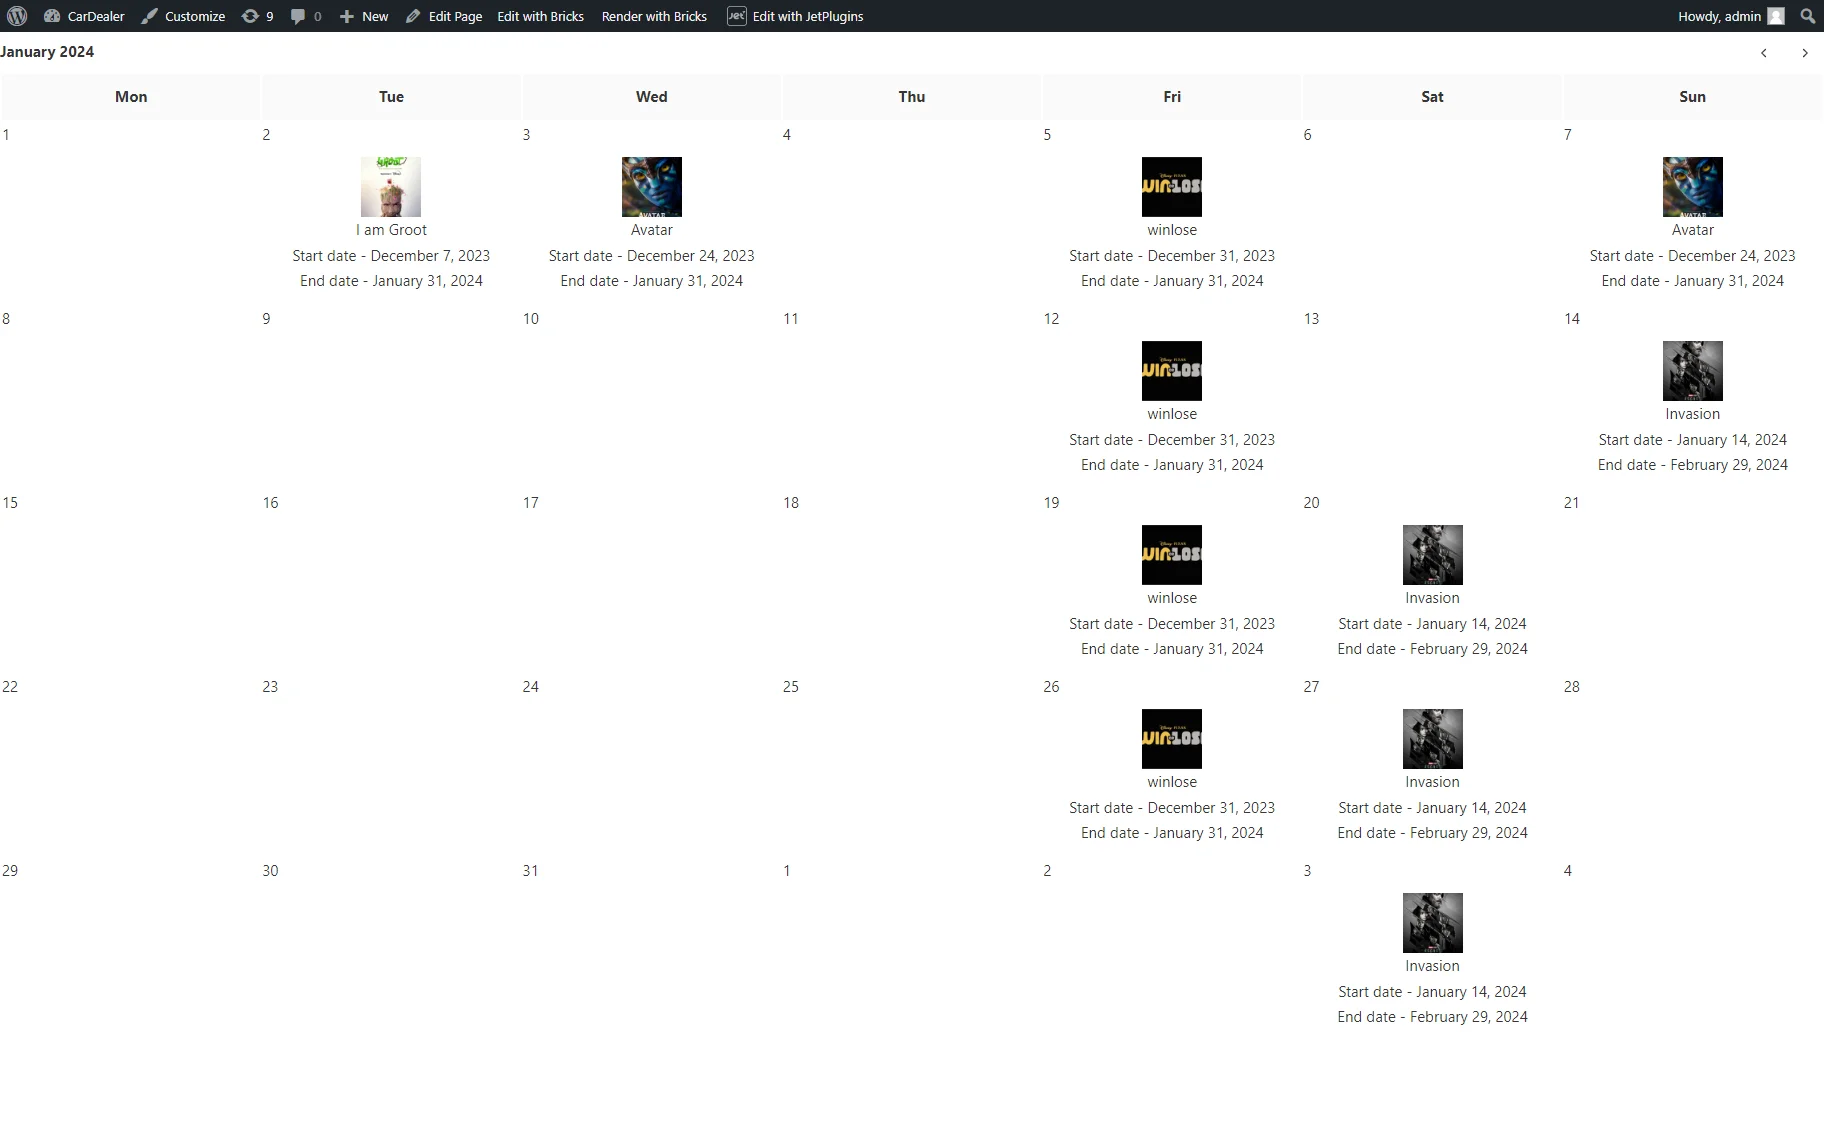
That’s all about displaying the recurring events via the JetEngine Calendar element with Bricks.