Custom Post Type Overview
The tutorial overviews the main features of Custom Post Types, and details how to create the CPTs, and manage their settings using the JetEngine plugin for Elementor and Gutenberg.
CPT Location in the Dashboard
CPTs are located at the JetEngine > Post Types tab of the WordPress dashboard.

The Post Types tab displays the list of CPT built by the JetEngine plugin. To see all CPTs created by other plugins, move the Built-in switcher.
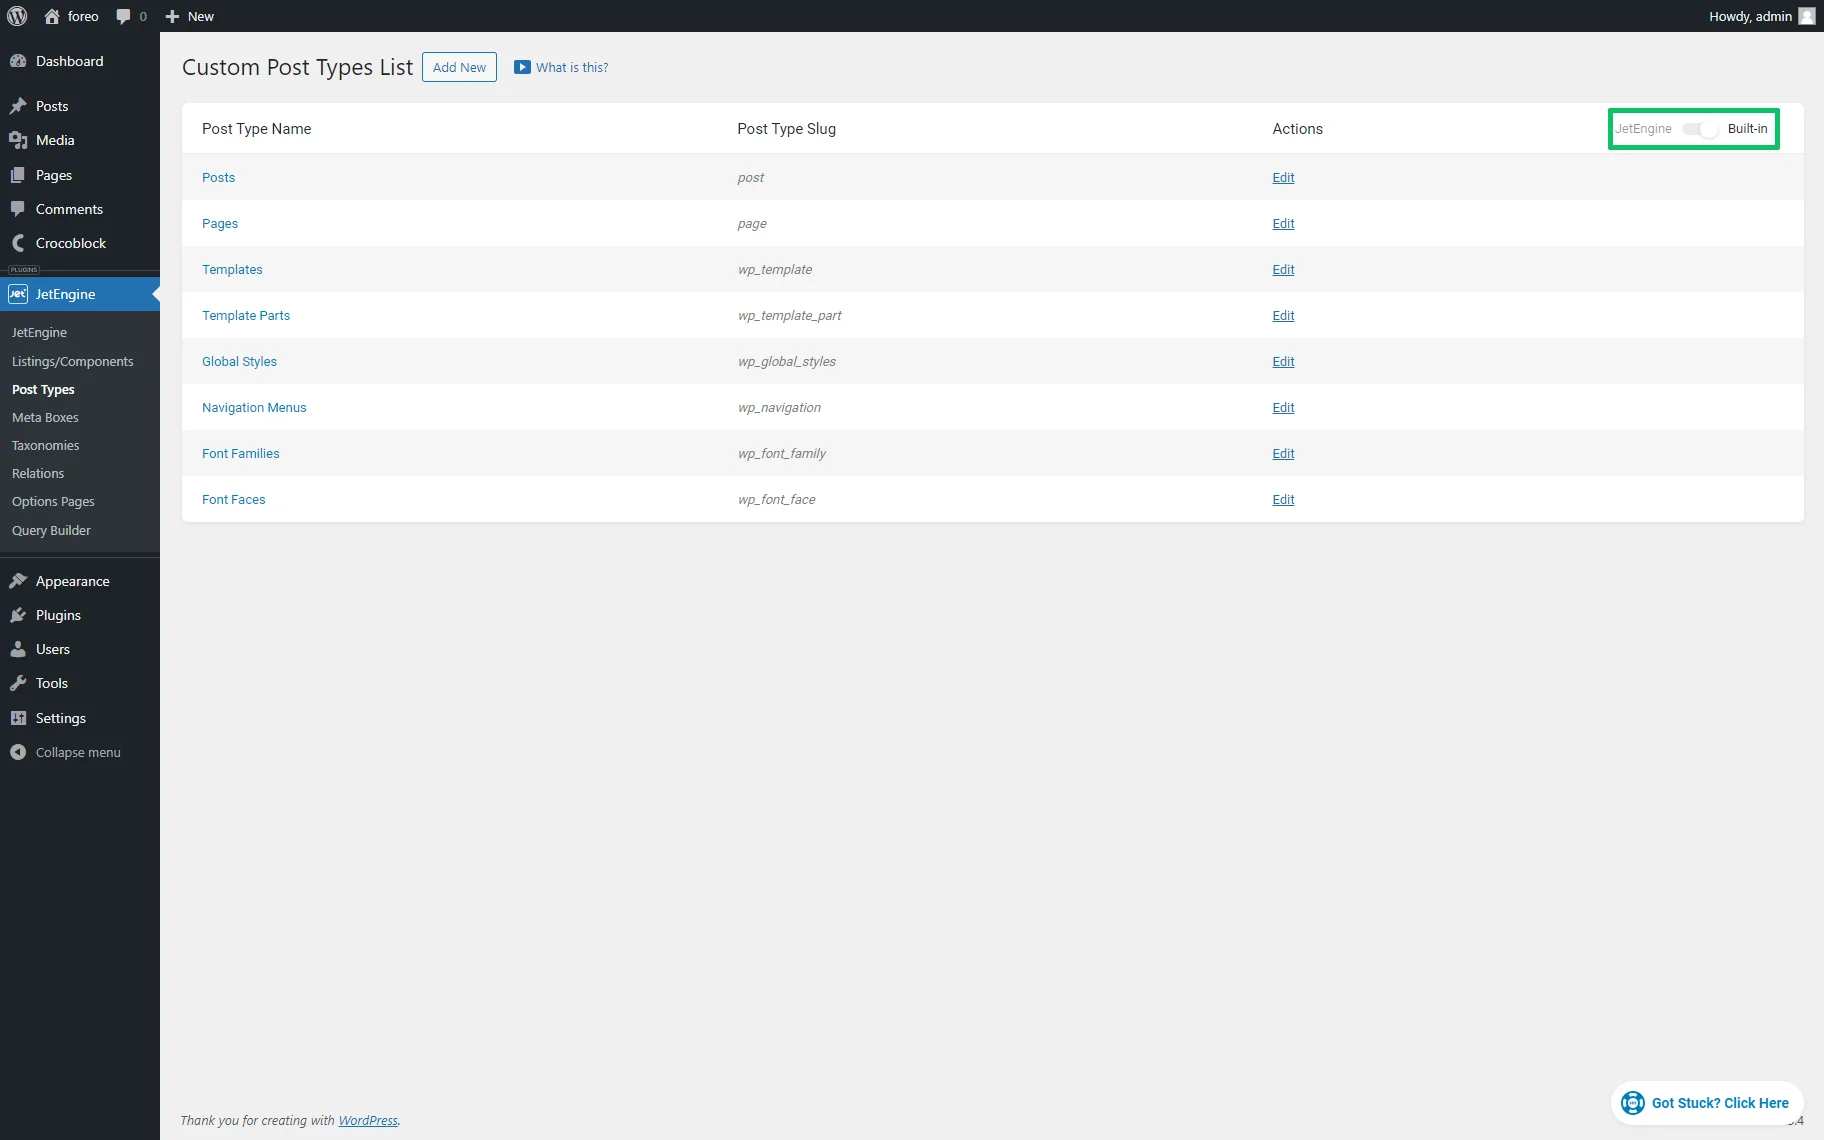
The “Add New” button creates a new CPT, and the “Edit” link allows editing an already created CPT.
Settings of the CPTs
The Add New Post Type tab has the following groups of settings:
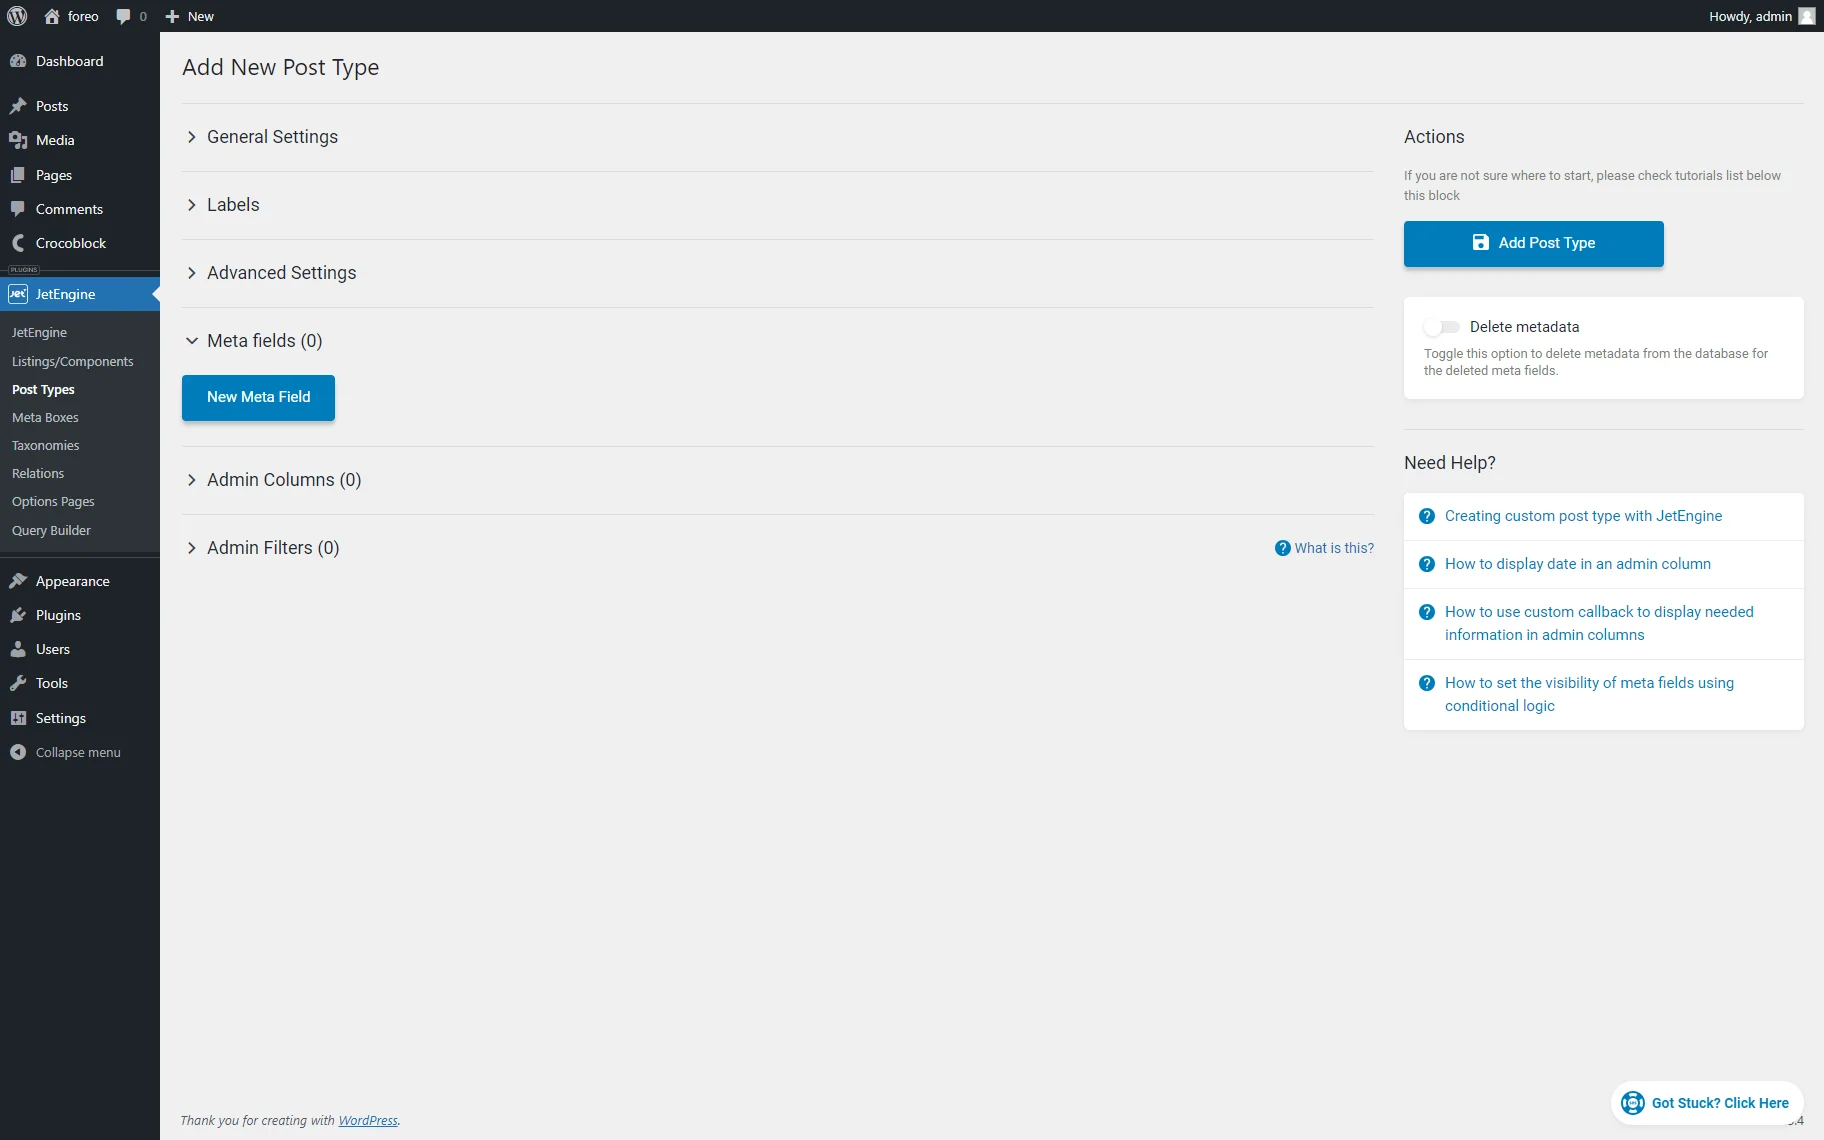
- General Settings;
- Labels;
- Advanced Settings;
- Meta fields;
- Admin Columns;
- Admin Filters.
General Settings
The General Settings tab has the following settings:
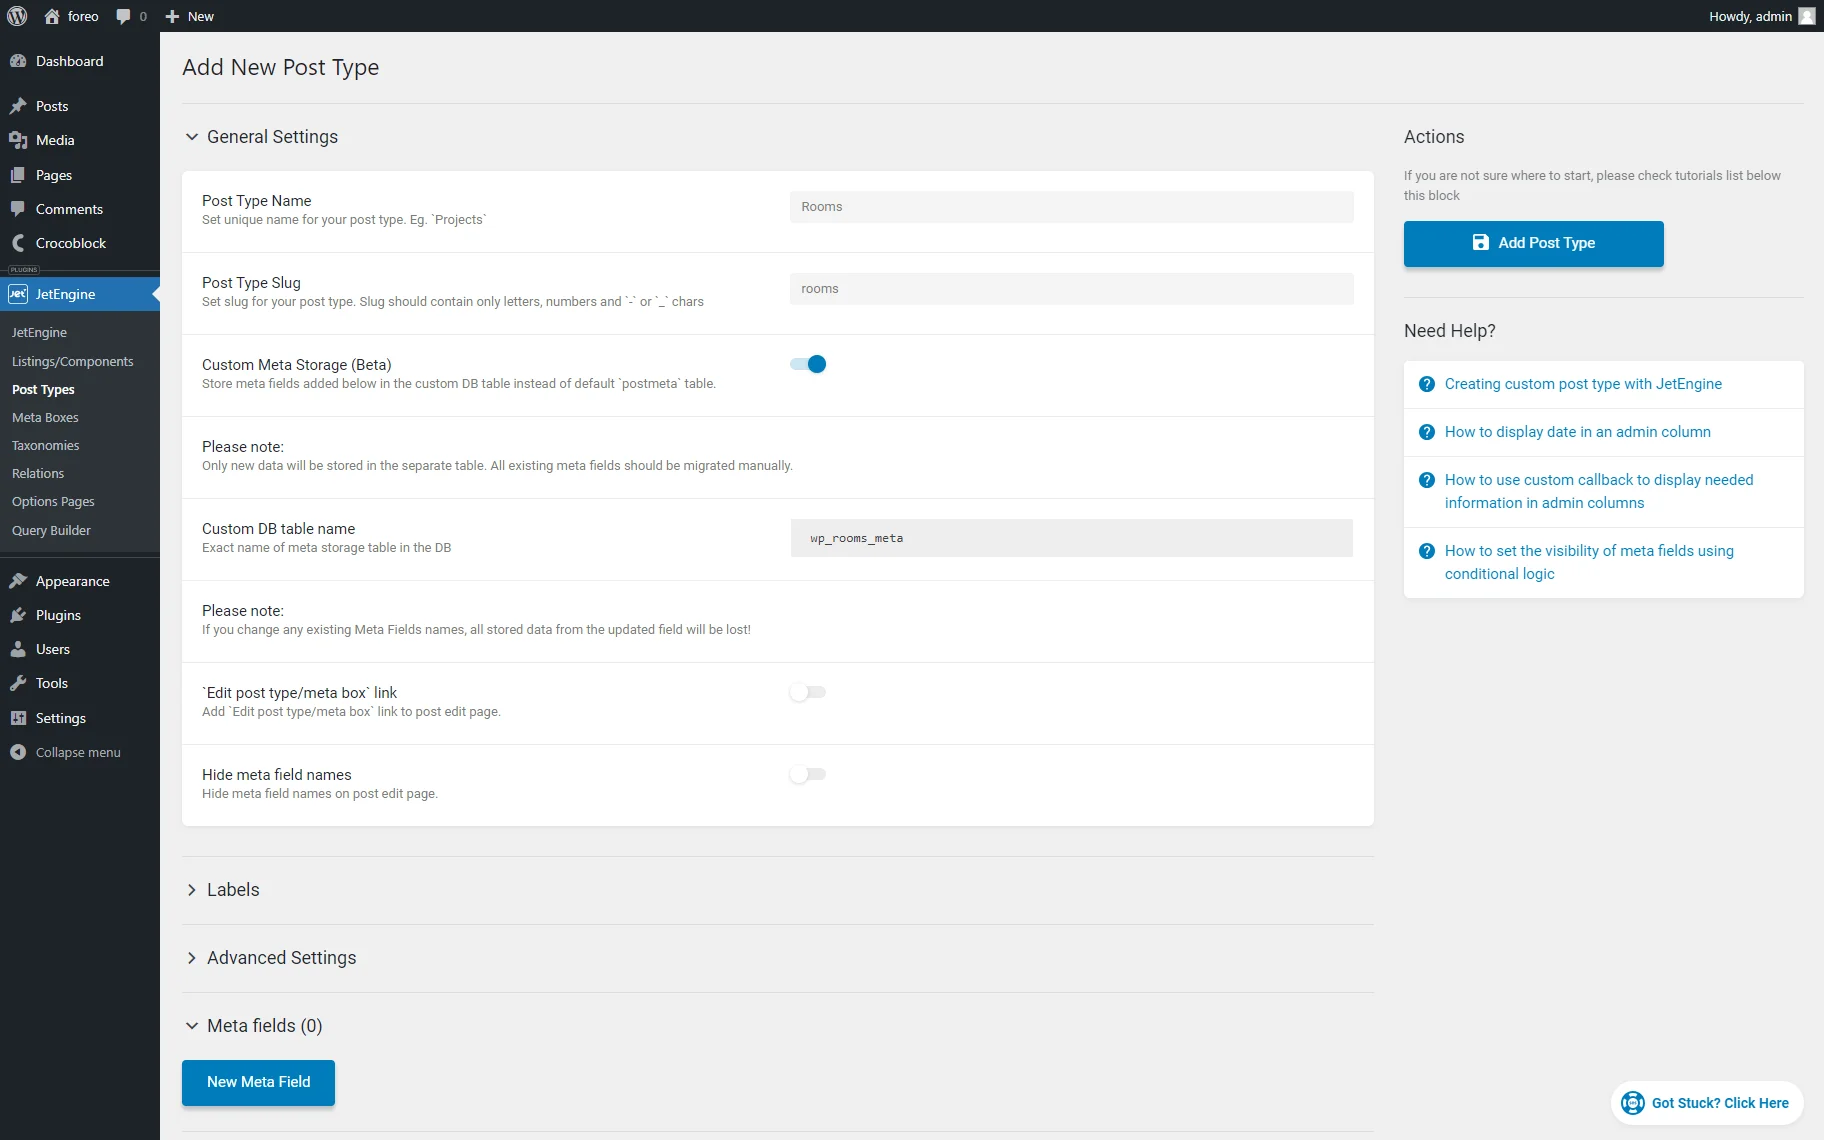
- Post Type Name 一 is a field to type a unique name for the CPT. This field allows the usage of upper or lowercase letters, numbers, hyphens, underscores, and punctuation marks;
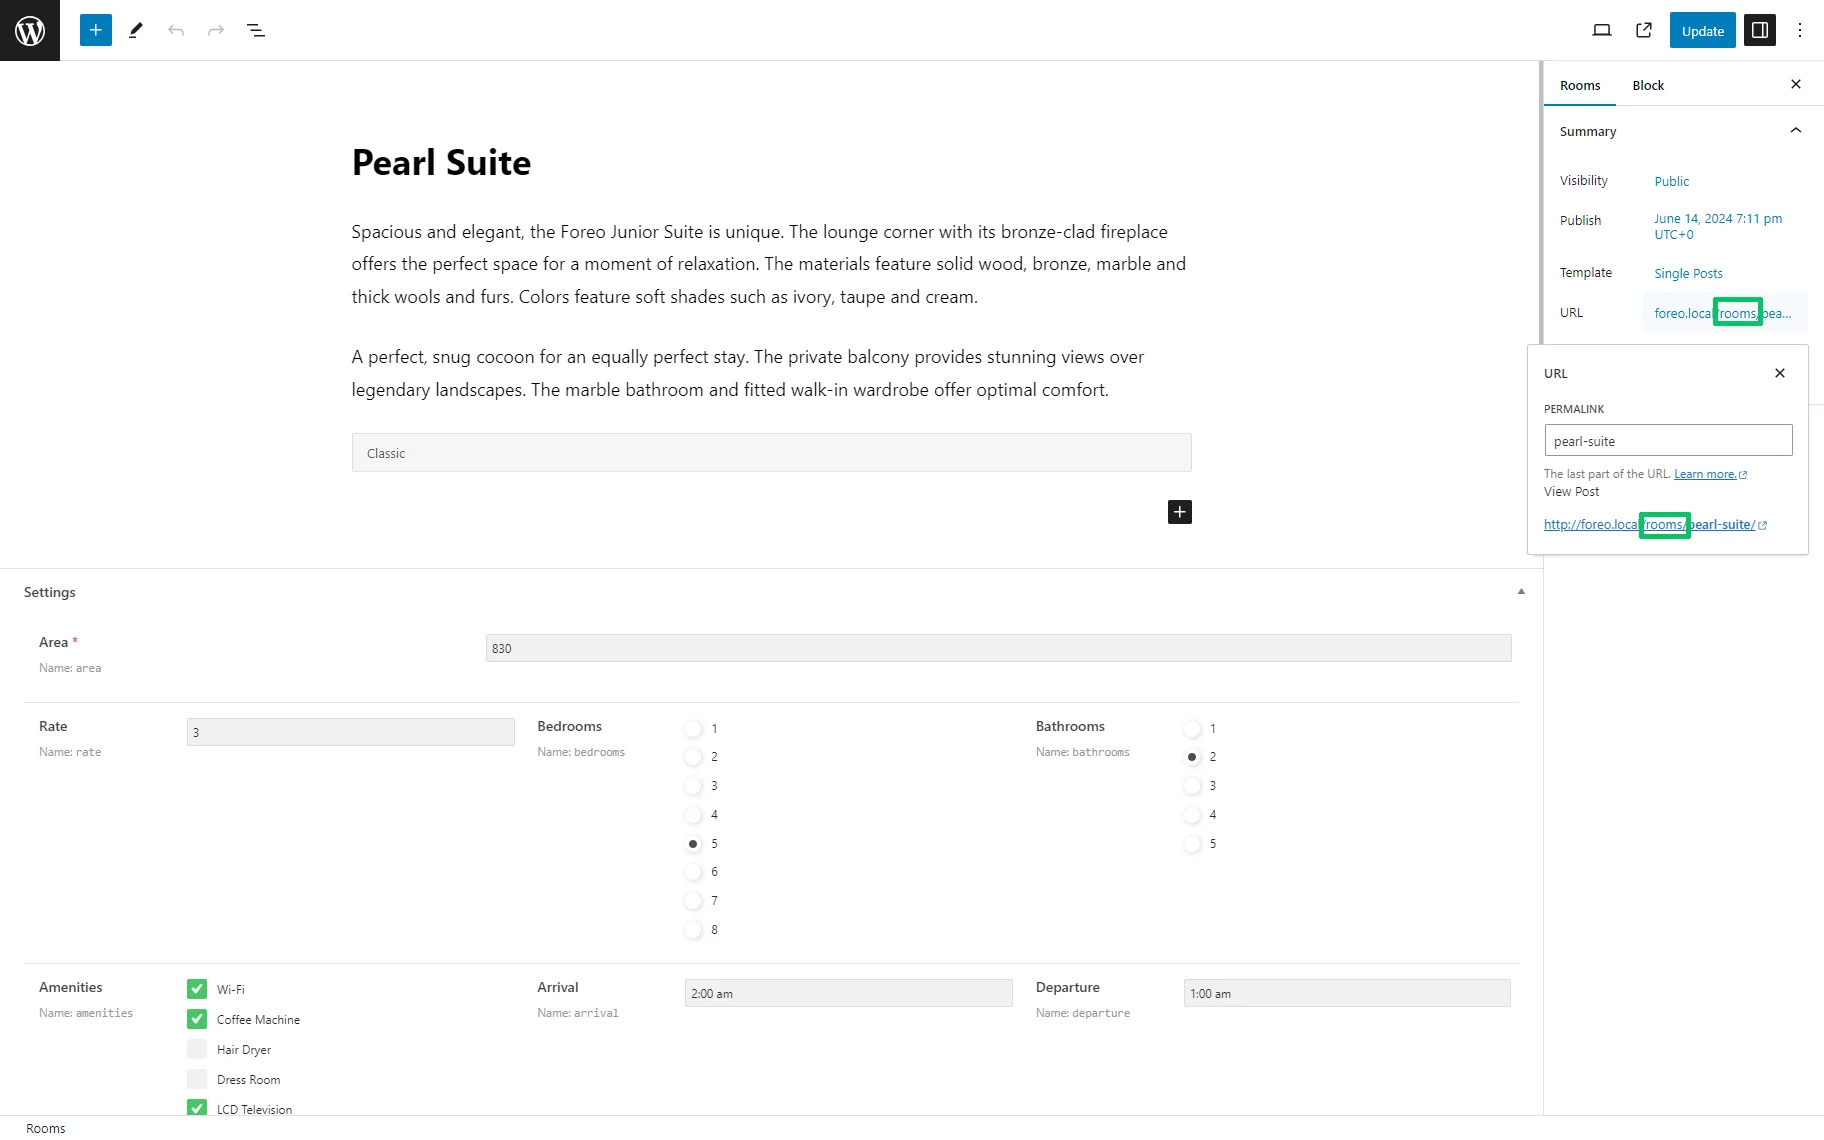
- Post Type Slug 一 is a field to type a slug for your post type. After filling in the Post Type Name field, the post type slug will be added automatically. The slug should be unique. Users can add a custom slug and should use lowercase letters only, numbers, hyphens, or underscores. The slug is the same for all posts created by this CPT and is displayed in the URL field of every post (here, the rooms slug);
The tutorial details How to Create and Change WordPress Slugs and Permalinks.
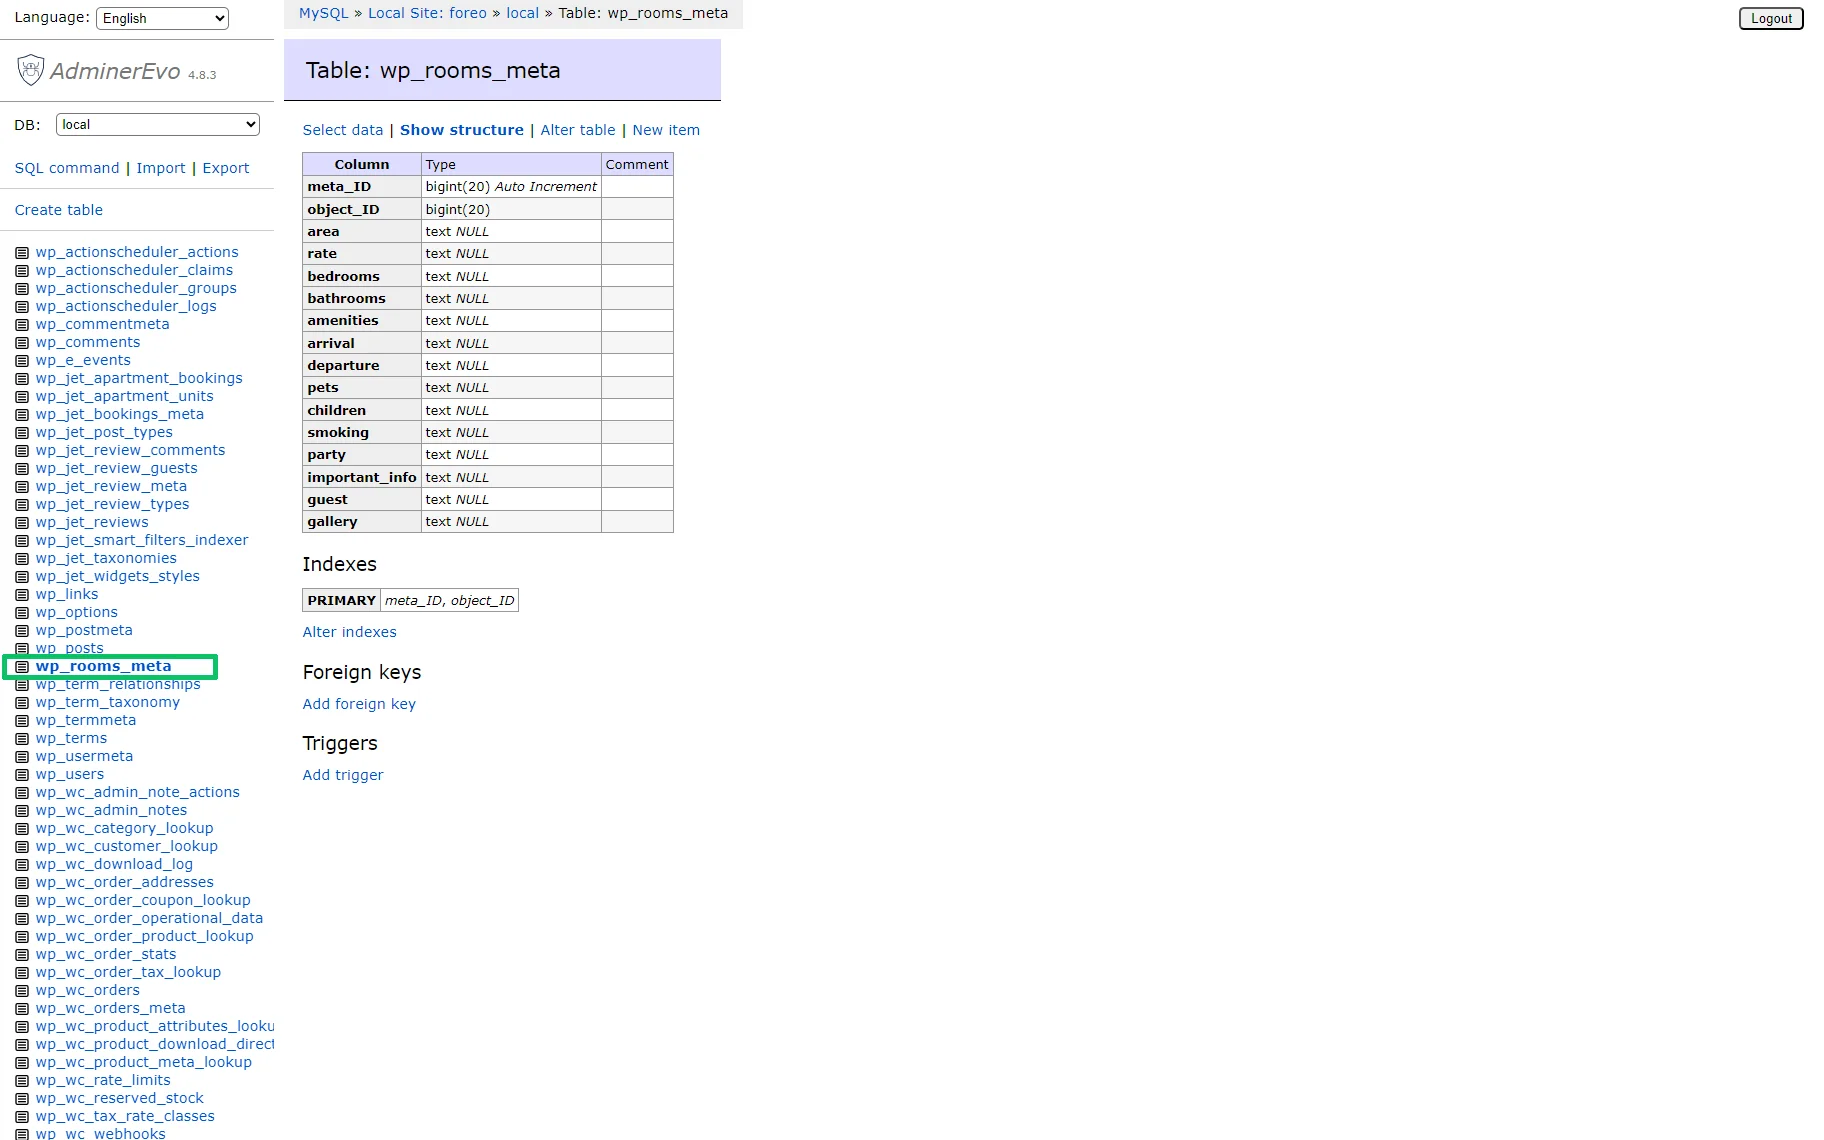
- Custom Meta storage 一 is a toggle that, if enabled, allows storage of meta fields of a CPT in a separate table of the WordPress database. If the Custom Meta storage toggle is activated, the separate table with the name specified in the Custom DB table name text field will be created, and all metadata of the appropriate CPT posts will be stored in this separate table;
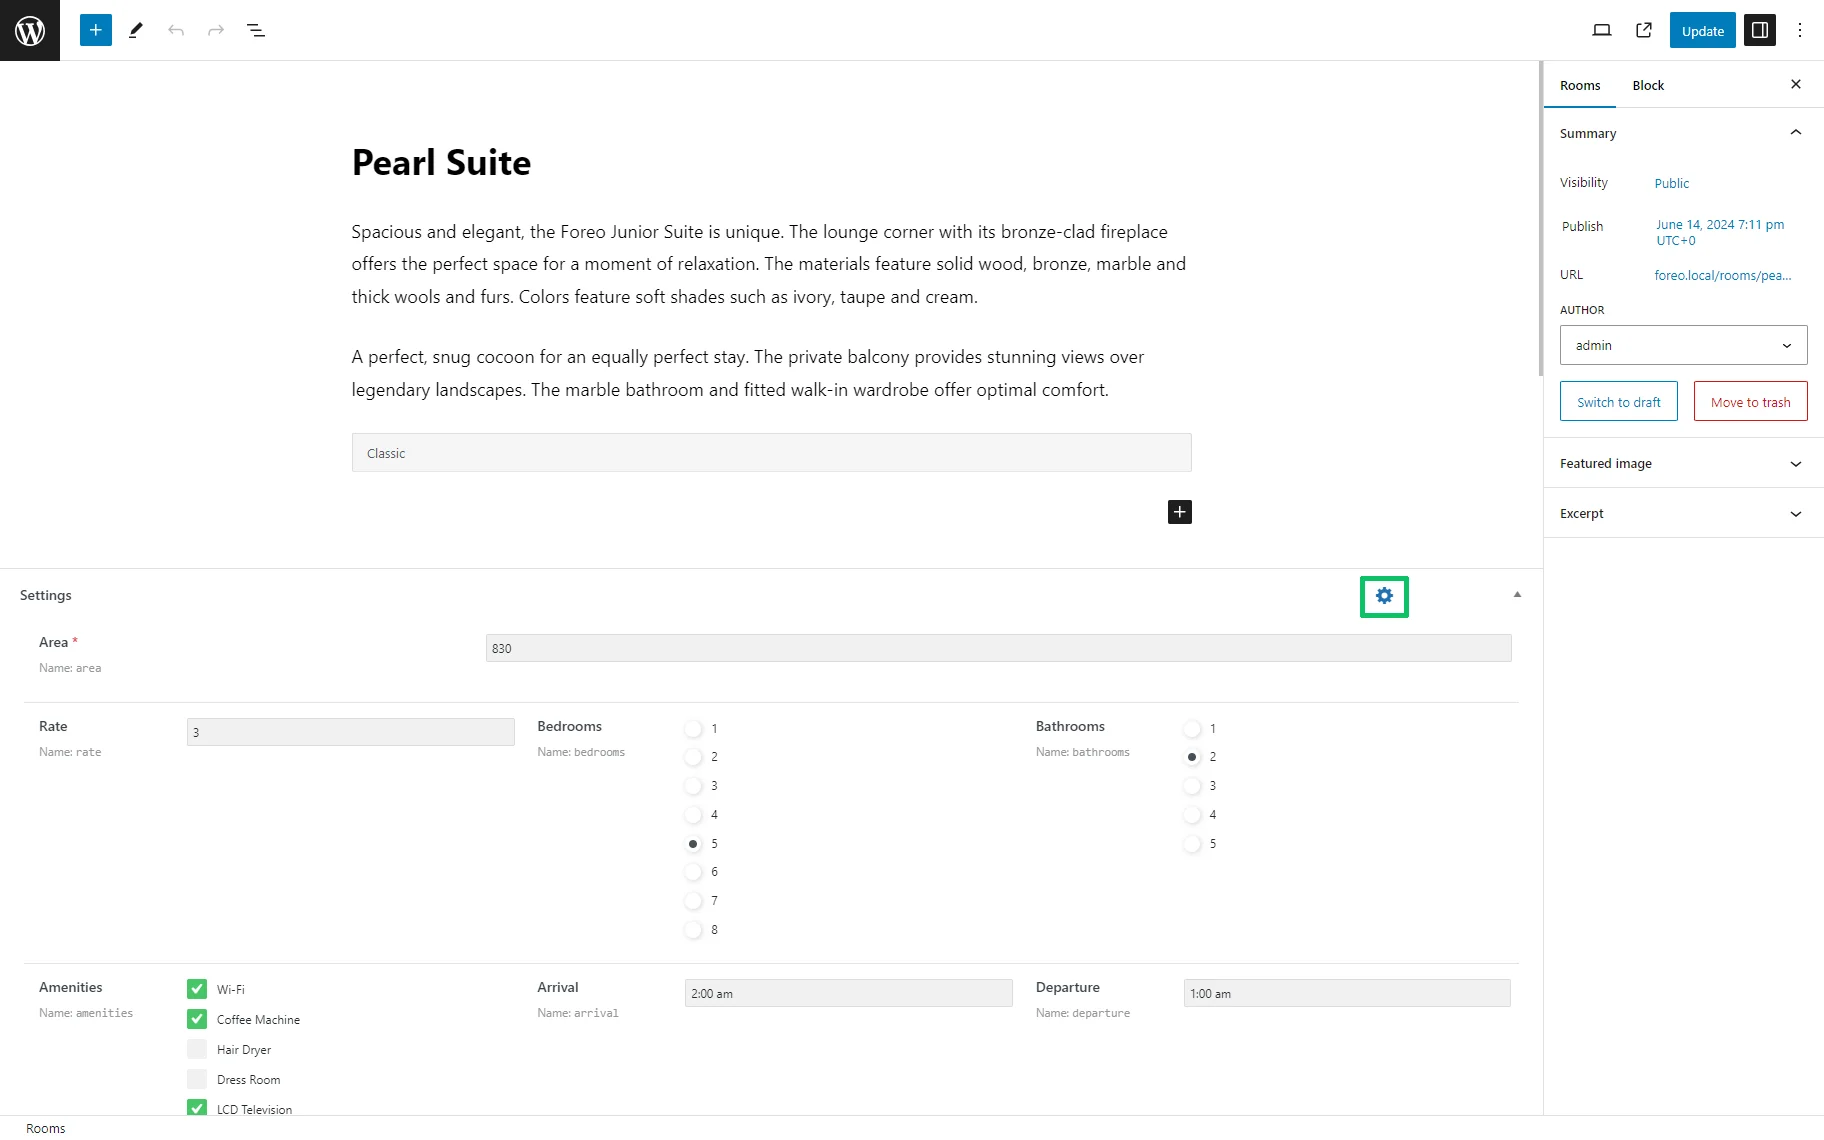
- `Edit post type/meta box` link 一 is a toggle that, if enabled, adds the `Edit post type/meta box` link to the post edit page to edit the structure of fields in posts more conveniently. It creates a shortcut (the “gear” icon) from every post-editing page of the current CPT to the meta field editing page;
- Hide meta field names 一 is a toggle that, if enabled, hides meta field names on the post edit page.
Labels
The Labels settings tab specifies the texts displayed for the CPT posts on the dashboard (on post creation and edit screens). All Labels settings refer to the current CPT but do not cover all other CPTs.
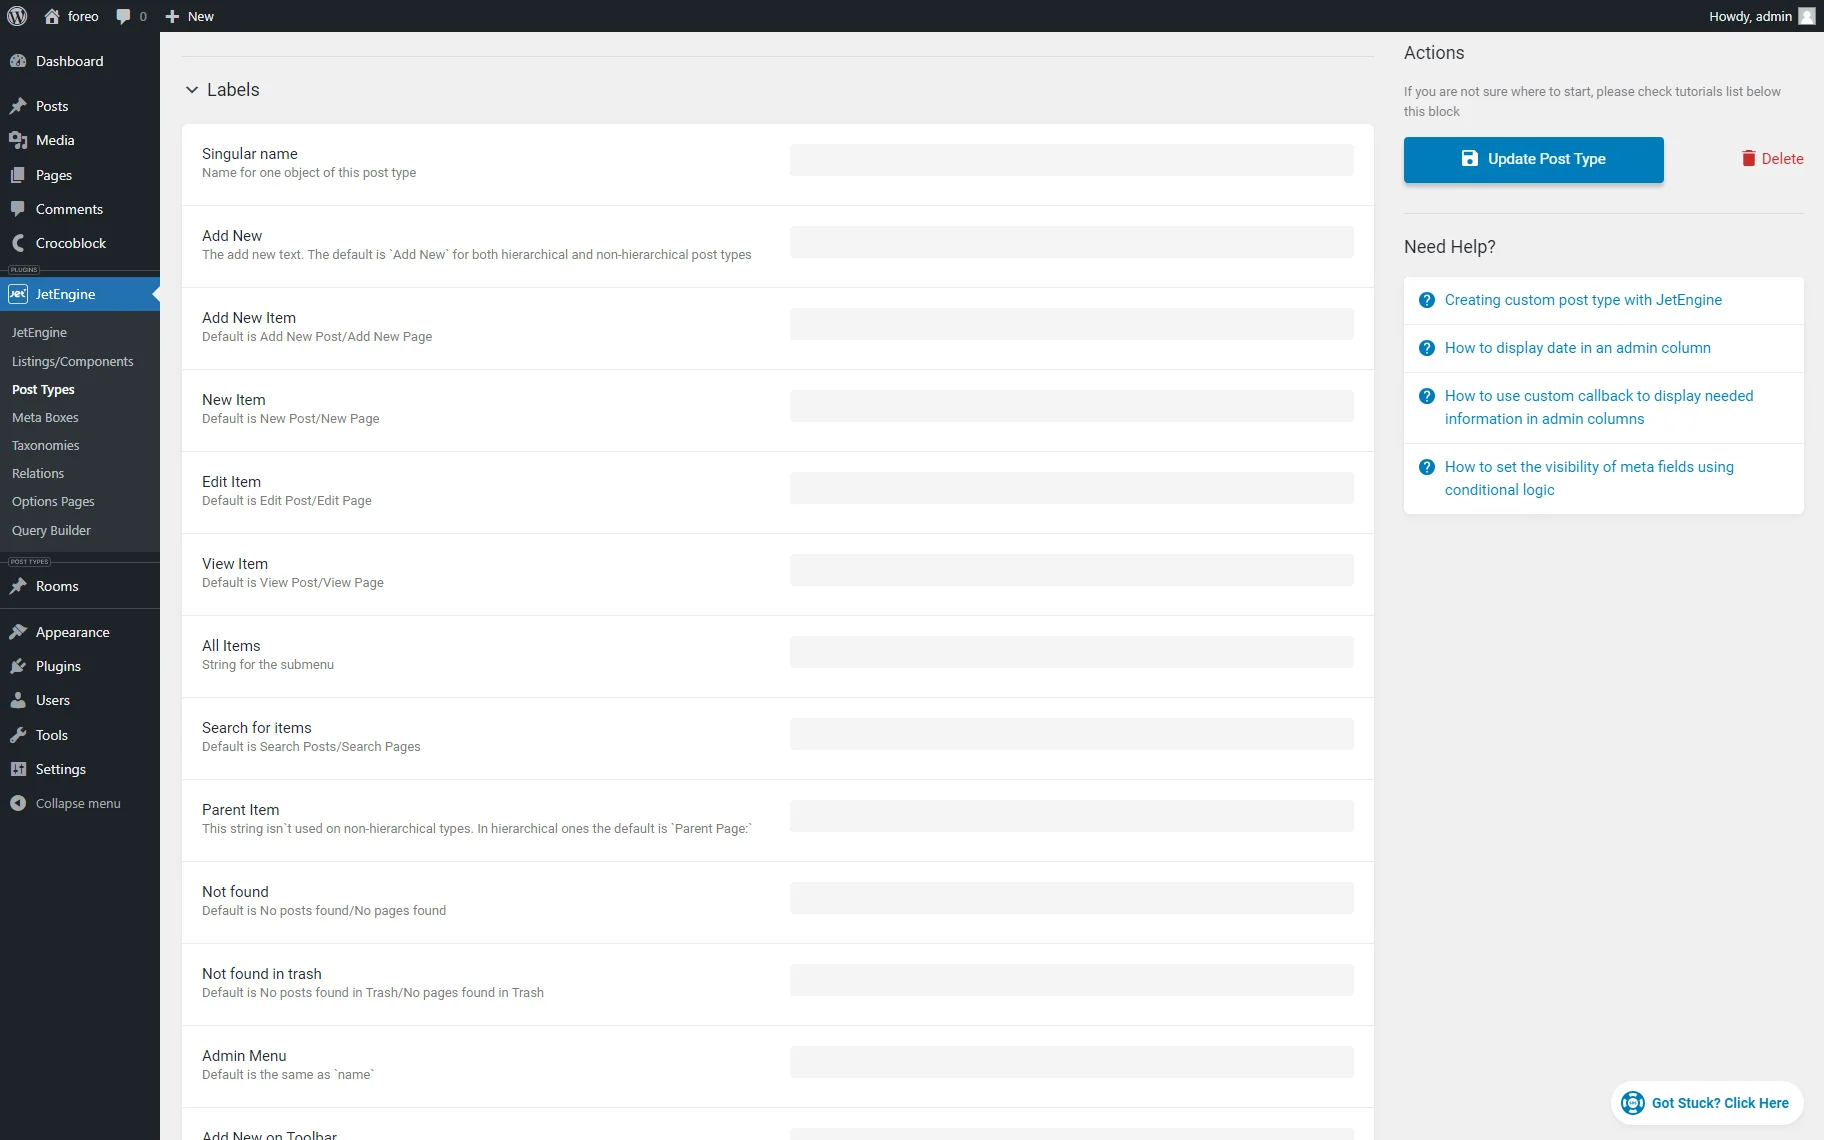
The Labels settings include the following 20+ fields to type texts instead of the default texts on the appropriate buttons:
- Singular name 一 is a field intended to type a name for one object of this post type;
- Add New 一 is a field intended to type a text instead of the default “Add New” text for both hierarchical and non-hierarchical post types;

- Add New Item, New Item, Edit Item, etc. 一 are the fields intended to type the names of the appropriate objects and the texts shown on the corresponding buttons.
Advanced Settings
The Advanced settings are:
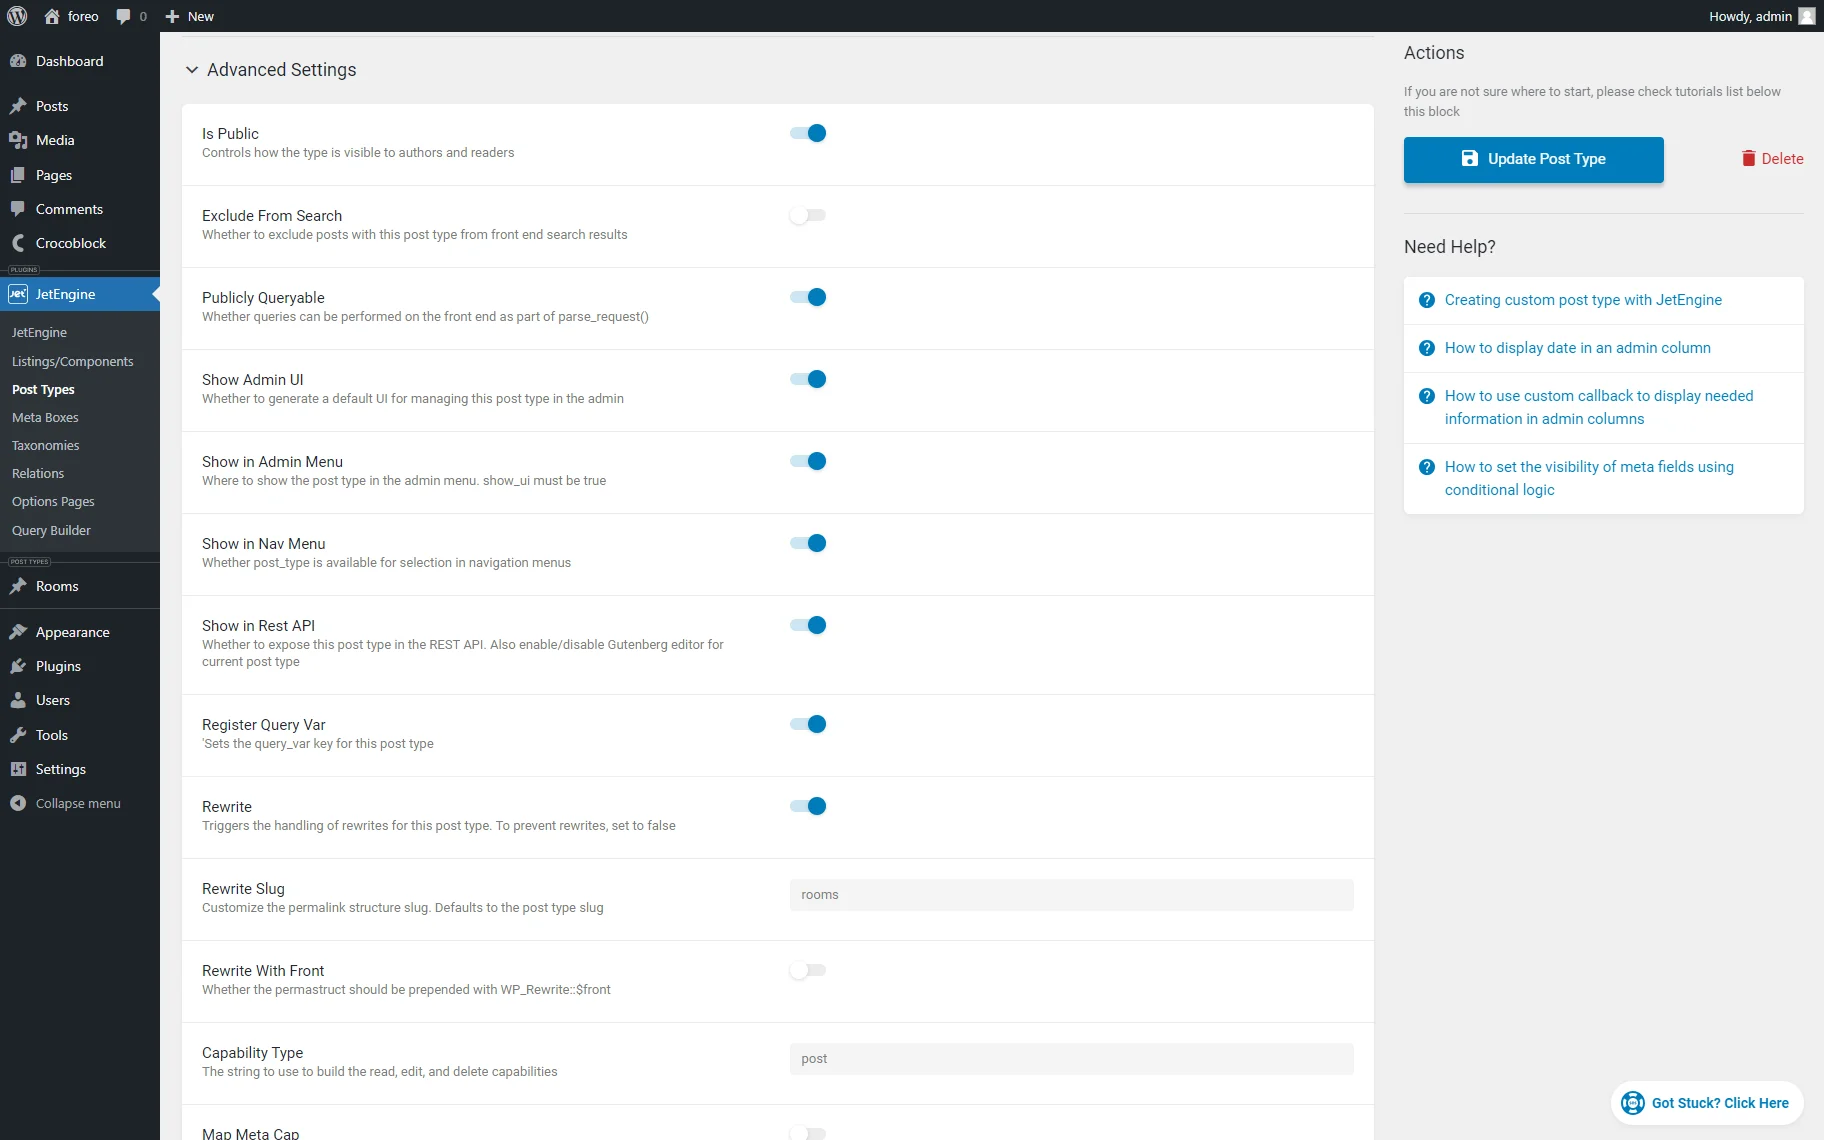
- Is Public 一 is a toggle enabled by default that makes the CPT visible and editable to authors and readers on the dashboard. If enabled, it turns off the Exclude From Search toggle and turns on the Publicly Queryable and Show Admin UI toggles;
- Exclude From Search 一 is a toggle that excludes posts with this post type from front-end search results;
- Publicly Queryable 一 is a toggle enabled by default. It allows performing queries referred to this CPT on the front end as part of parse_request();
- Show Admin UI is enabled by default and generates a default UI for managing this post type in the admin. If disabled, the CPT will disappear from the dashboard;
- Show in Admin Menu, Show in Nav Menu, and Show in Rest API 一 are the toggles enabled by default that accordingly set the CPT visibility in the Admin Menu, Navigation Menu, or REST API;
- Show in Admin Menu, Show in Nav Menu, and Show in Rest API toggles are enabled by default. They accordingly set the CPT visibility in the Admin Menu, Navigation Menu, or REST API;
- Register Query Var 一 is a toggle activated by default. It sets the query_var key for this post type and registers the query variable for this CPT. The query_var defines a query for WordPress posts, and the query variables are the variables in the query string that determine the results in the query performed against the database;
Read about the Query Builder Posts Query Type in this tutorial.
- Rewrite 一 is a toggle enabled by default. This toggle triggers the handling of rewrites for this post type. (The WP_rewrite is a WordPress class for managing the rewrite rules, allowing the Permalink feature usage. It generates the rewrite rules from values in the database.) To prevent rewrites, set it to false;
- Rewrite Slug 一 is a field that allows typing a custom permalink structure slug, which defaults to the post-type slug. Users can choose to rewrite with the front.
- Rewrite With Front 一 is a toggle that, if enabled, allows the permastruct (permalink structure) to prepend with WP_Rewrite::$front;
- Capability Type 一 is a field to type what WordPress string to use to read, edit, and delete capabilities of this CPT;
- Has Archive 一 is a toggle that, if enabled, enables the possibility of having post-type archives for this CPT;
Read How to Create Archive and Single Templates for Custom Post Type in this tutorial.
- Hierarchical 一 is a toggle that allows hierarchically adding the posts of this CPT into a site. To toggle the grouping of posts with the hierarchical option in a certain way, a parent page should be set, and order should be established;
- Menu Position 一 is a field to type a number of this CPT, which is shown among other CPTs on the dashboard;
- Menu Icon 一 is a menu that allows selecting a CPT icon visible in the admin menu;
- Supports drop-down menu allows the selection of additional support blocks, which will be shown on the CPT’s editor page. It registers support of specific feature(s) for a current post type.

Meta Fields
Add the necessary meta fields to the CPT.
This tutorial explains How to create a custom meta field with the JetEngine plugin.
After adding the necessary meta fields, press the “Add New Post Type” button.
Admin Columns and Admin Filters
The Admin Columns display the prespecified meta fields in the admin panel. Users can show meta field values, category names, post IDs, or custom or predefined callbacks.
Read the Admin Columns Overview to learn more.
The Admin Filters are intended to filter the data shown in the Admin Columns.
The Admin Filters Overview explains how to manage the filters.
Custom Post Type Data Storage in WordPress
WordPress saves all created CPT in its base in the wp_posts table.
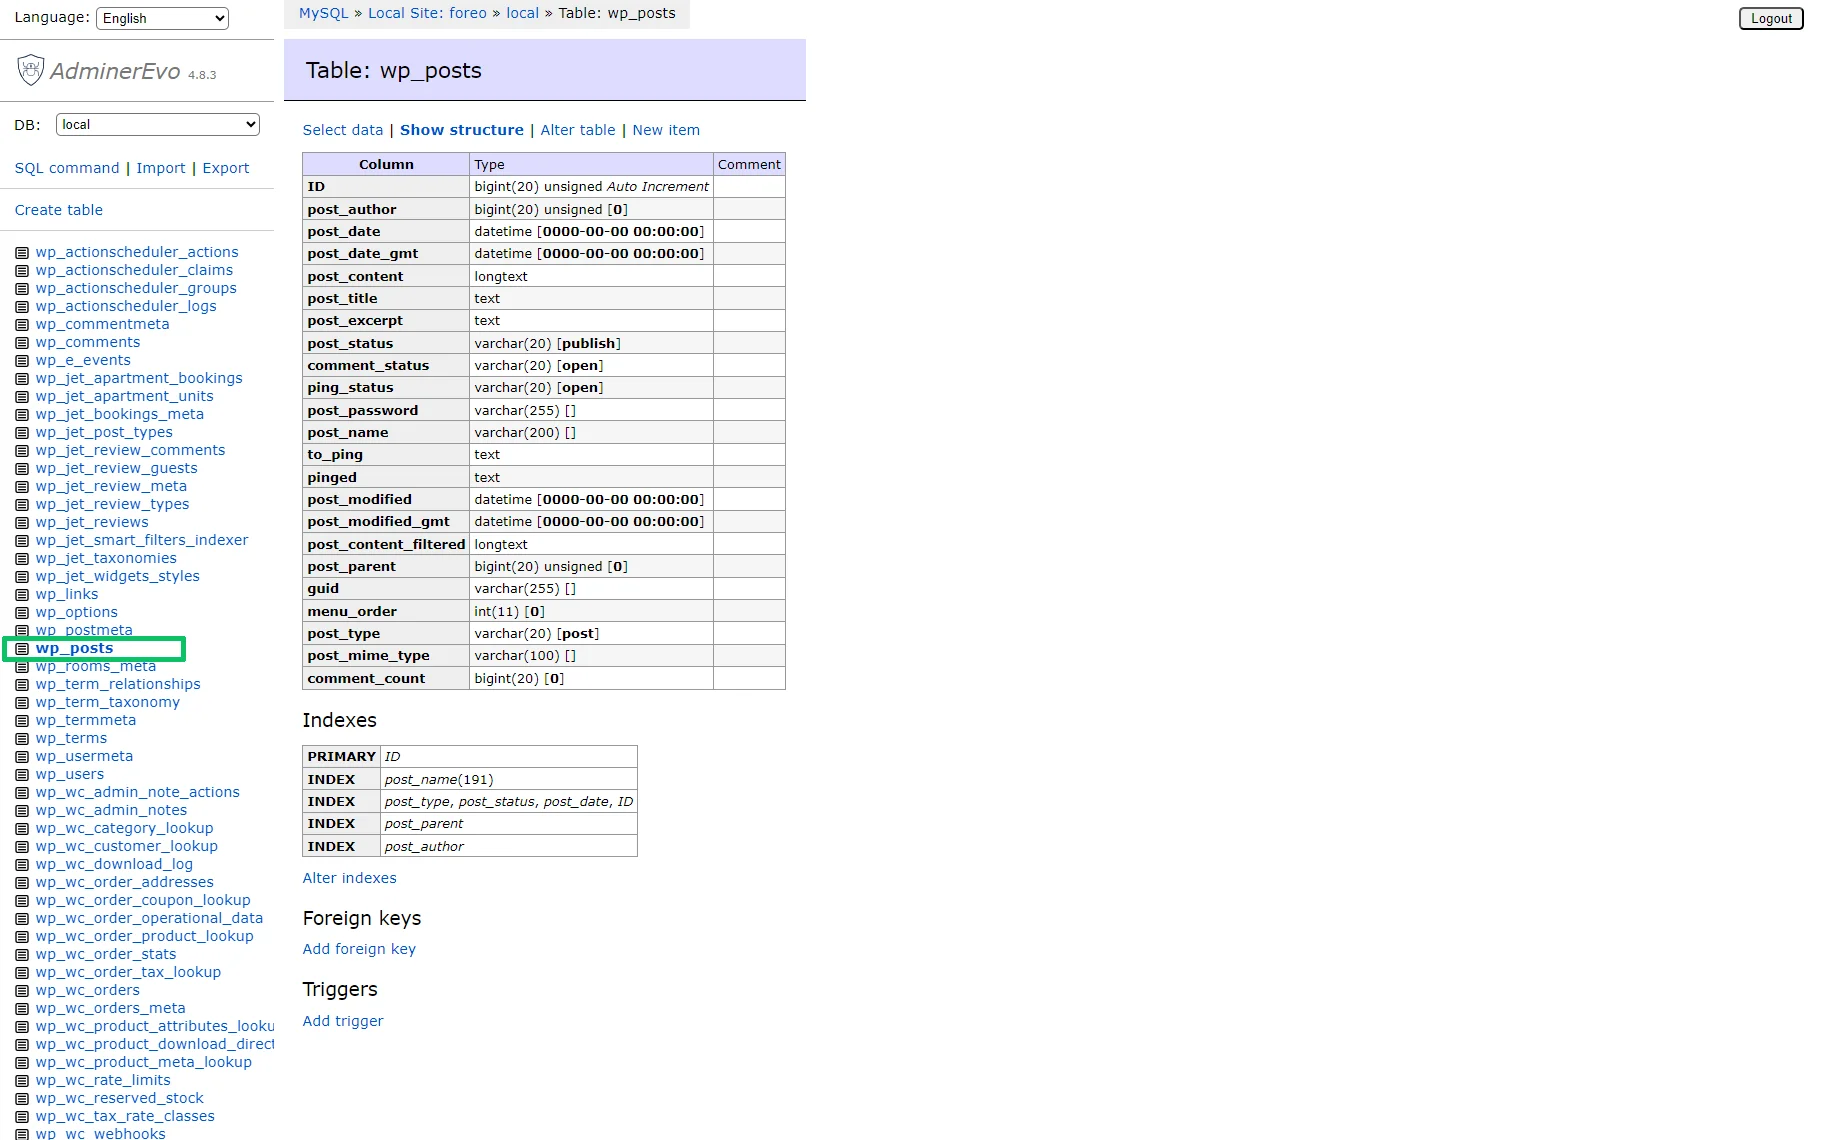
Metadata for all CPT posts will be saved and stored in the wp_postmeta table.
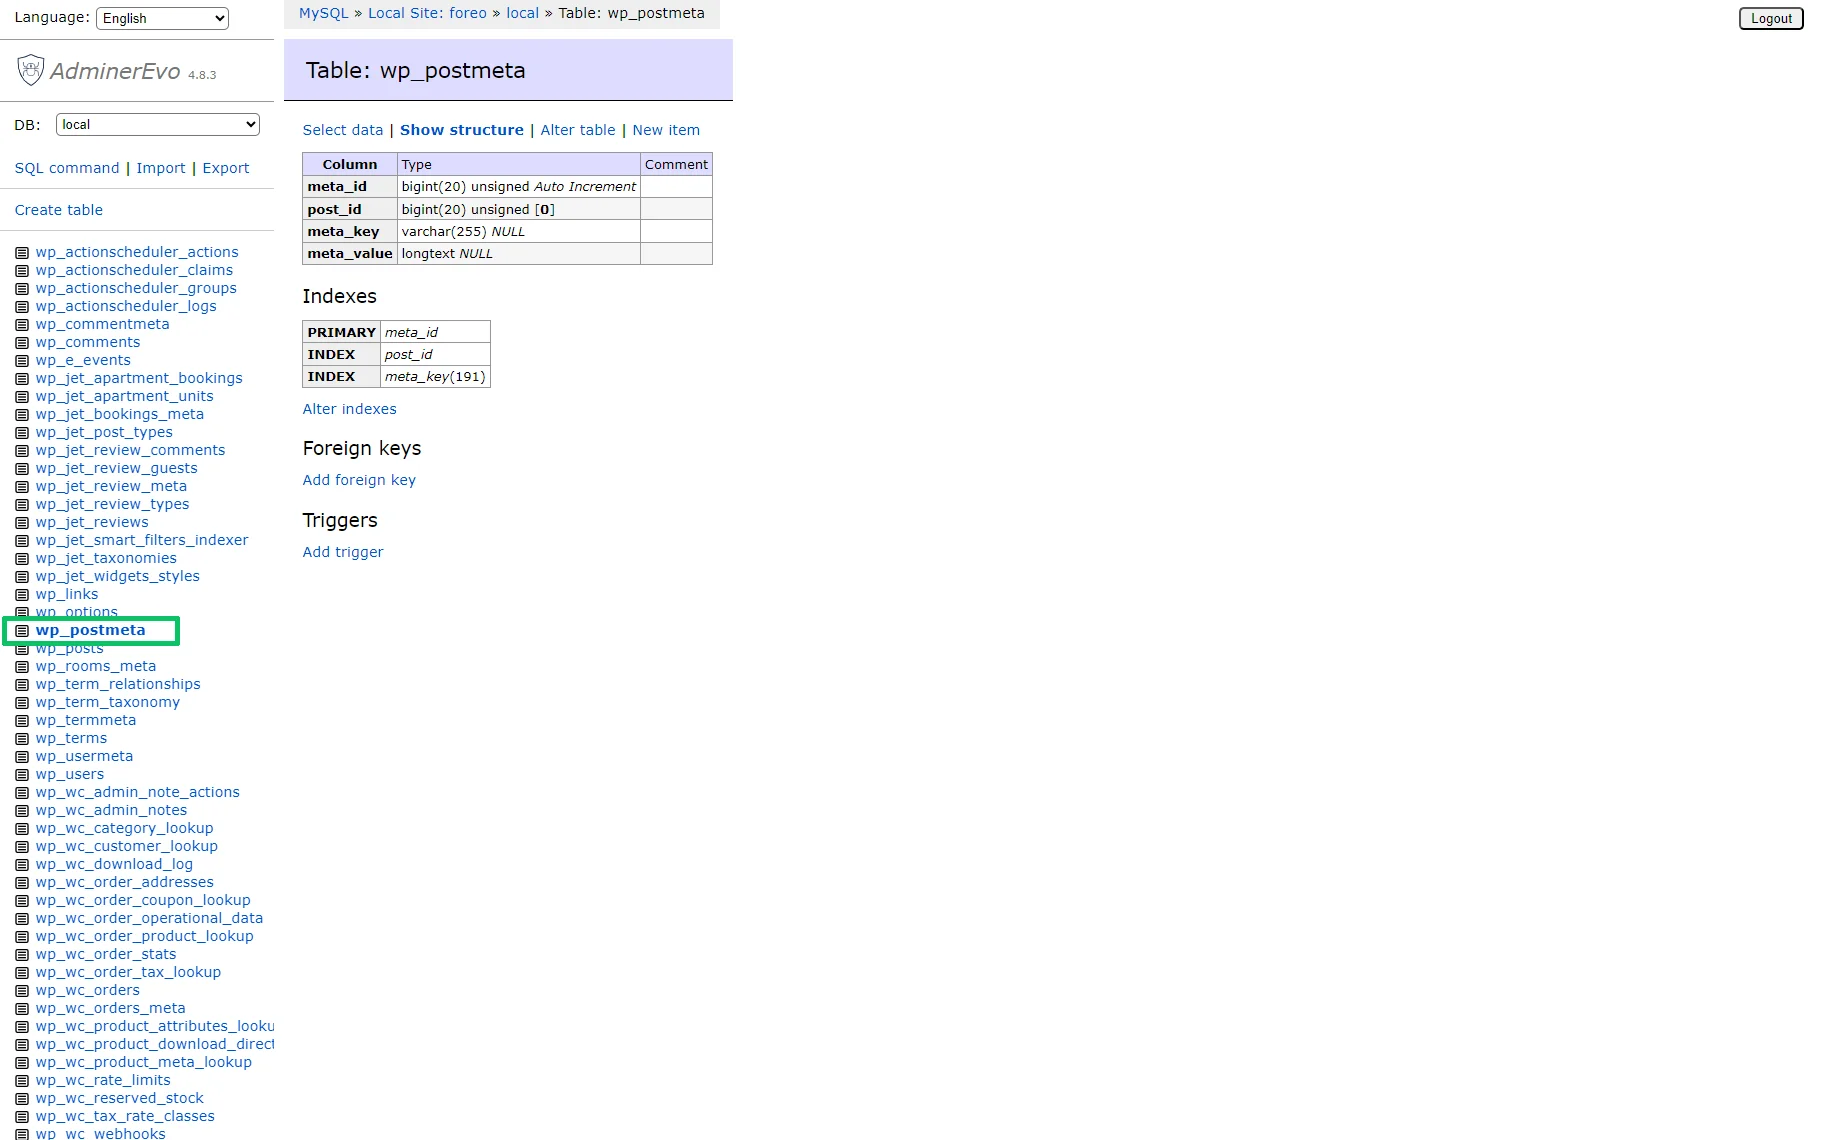
Additionally, if users create the CPT in the WordPress Dashboard, the wp_jet_post_types table will be created. This table includes the CPT title, slug, and settings, but the posts are saved in the wp_posts table.
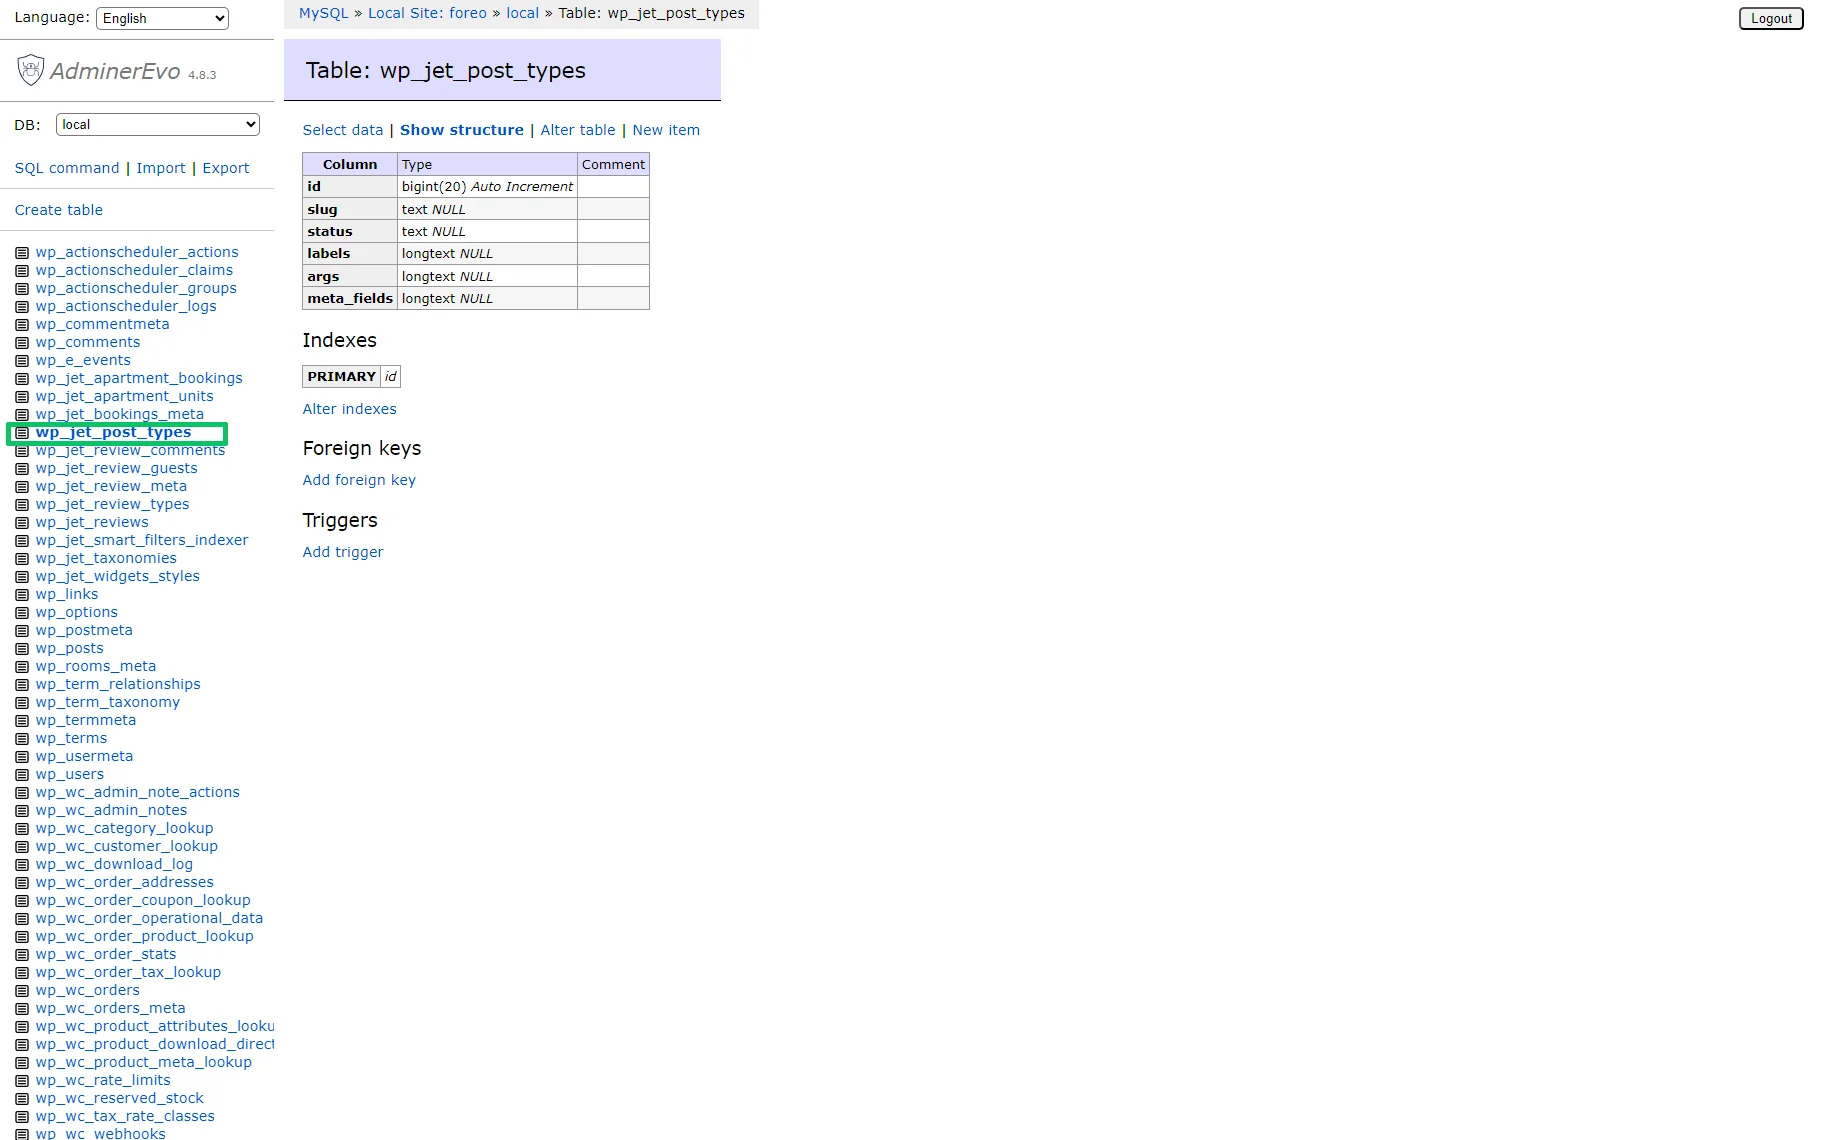
If users enable the Custom Meta storage toggle in the General Settings tab, a separate table will be created in the WordPress database.
That’s all about the general settings of the Custom Post Types built by the JetEngine plugin.