How to Order Posts by Custom Meta Fields
Find out how to query items with Query Builder depending on two meta fields created with the JetEngine plugin.
Before you start, check the tutorial requirements:
- Elementor (Free version) or Block editor (Gutenberg)
- JetEngine plugin installed and activated with Post Type built, Listing created for the post type item, and two meta fields attached to the needed post type.
In this tutorial, we will learn how to set the query depending on the two JetEngine meta fields data entered in the posts. We will achieve posts queried depending on the numeric data of the team member’s experience and text value — the team member’s name.
The number value will have priority over the text one. However, the text field parameter will work if the team member’s years of experience are the same as the other’s team member.
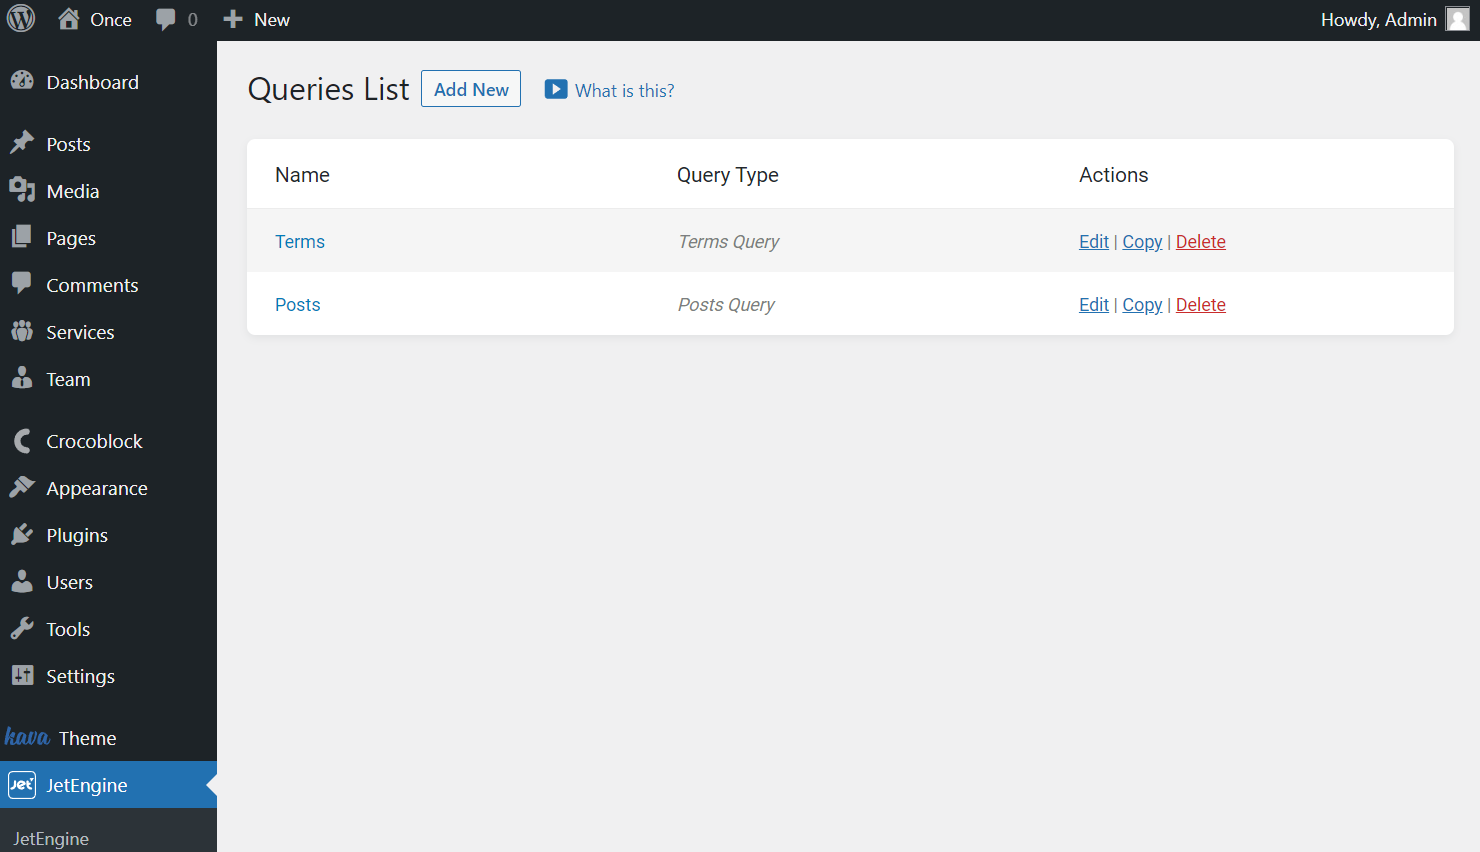
Add New Query
Begin by proceeding to WordPress Dashboard > JetEngine > Query Builder. Press the “Add New” button to create a new query.
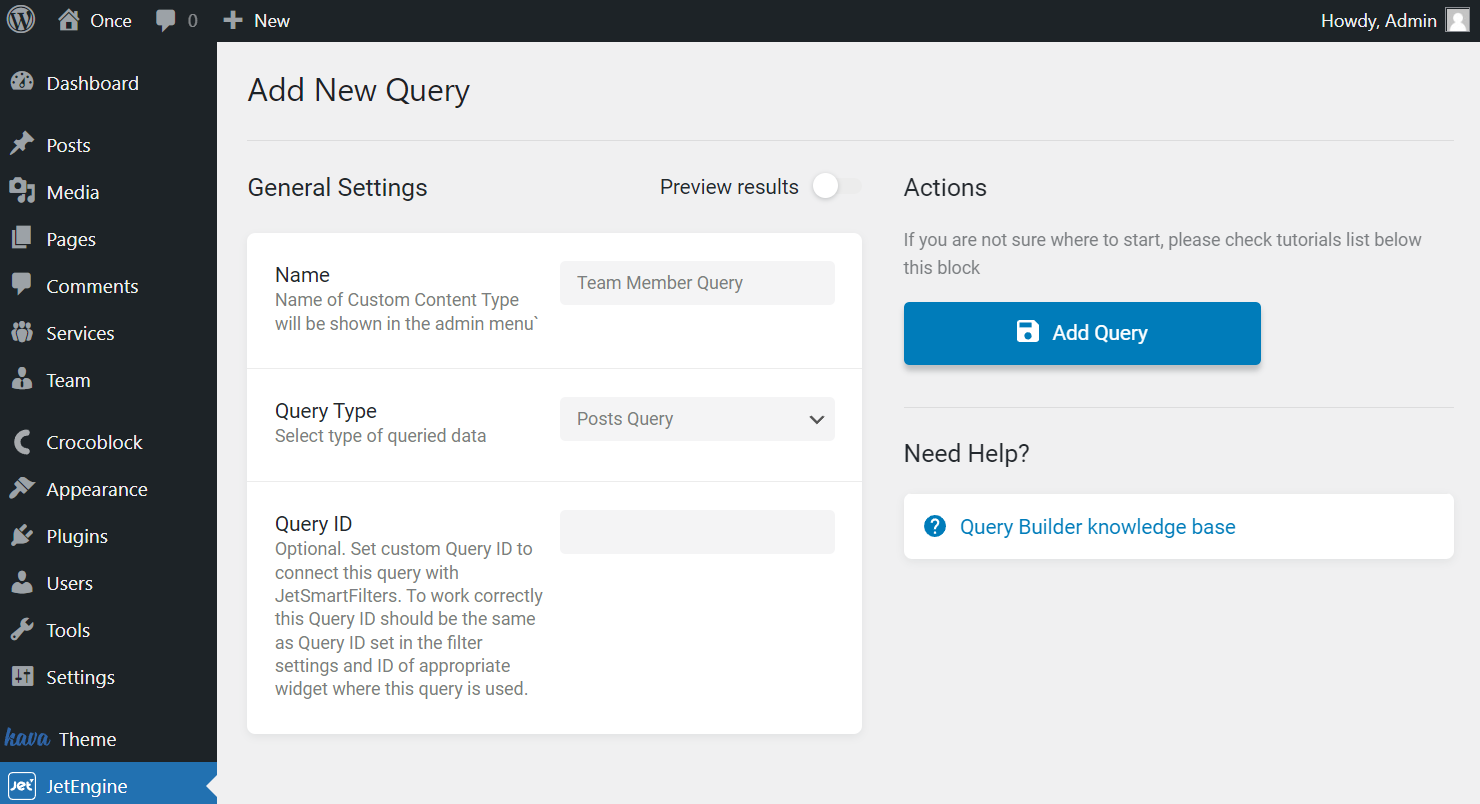
In the General Settings tab, give a Name to the query and select the “Posts Query” option as Query Type.
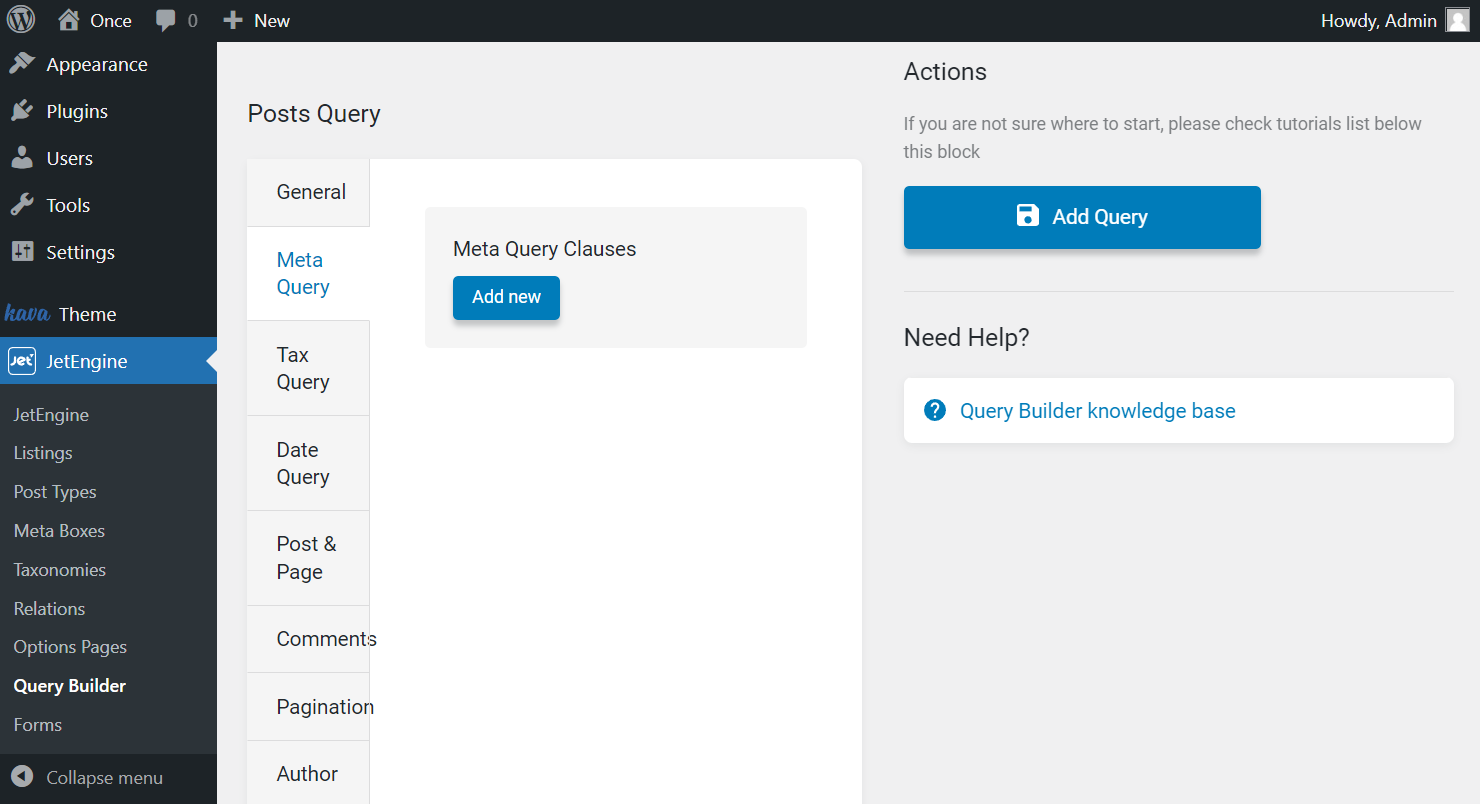
In the proceeding Meta Query tab, click the “Add new” button to adjust a new meta clause.
Let’s look at the values you should put in the fields.
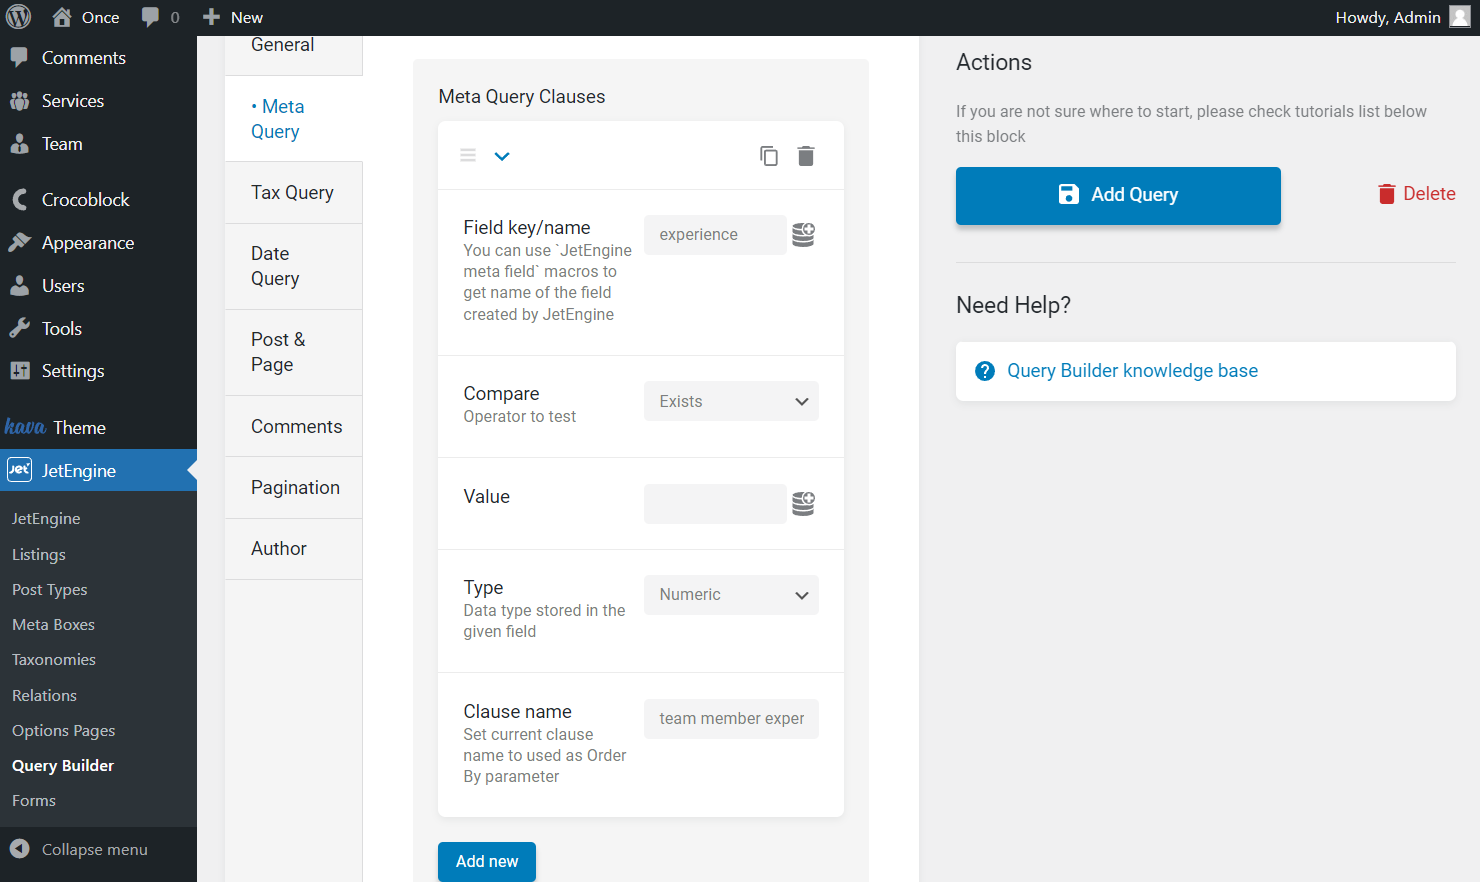
In the Field key/name field, complete the meta field key, you created earlier for the post type items. For instance, we complete this field with the “name” value which is the meta field of the “Team” post type. That means we will query the listing depending on the team member’s name.
Select the “Exists” option as the Compare operator. It displays all posts that contain the Field key/name, so we don’t need to put the following Value; we’ll leave the field empty.
As the member’s name contains only characters, we pick the “Char” Type, and don’t forget to type in the Clause name that will be used later in the Order by section.

Then let’s adjust one more clause by pushing the “Add new” button again. This one will include years of experience.
Mind that now we select the “Numeric” Type, as the “experience” meta field is set to be the “Number” Field.
You can add more clauses if needed. Now we move on to the General tab and select the required Post Type.
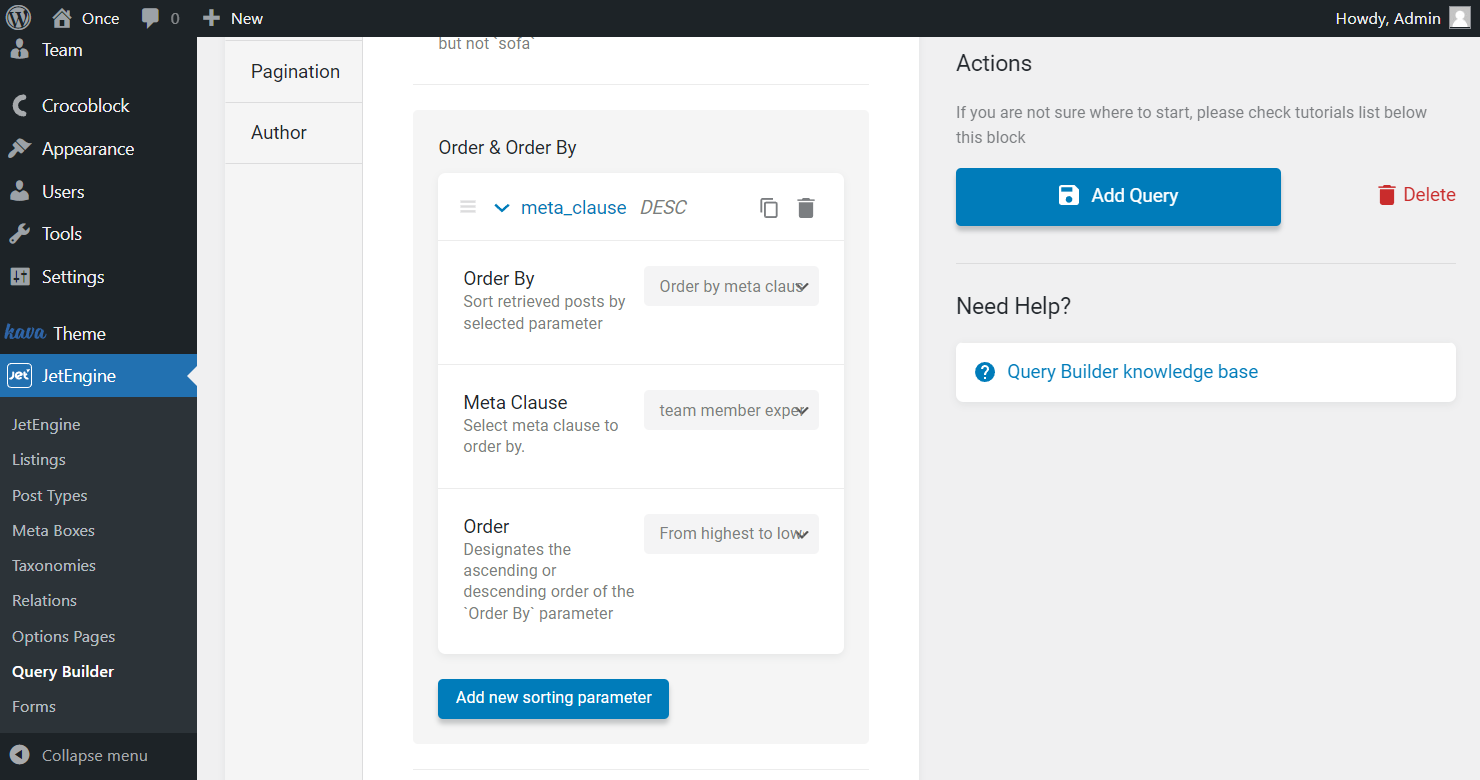
Then proceed to Order & Order By section. Hit the “Add new sorting parameter” button.

Once clicked, you will see fields for further customizations. Choose the “Order by meta clause” Order By parameter and define the needed Meta Clause — right here, we need to select one of the clause names you came up with earlier. We begin with the “team member experience” one to make it a bigger priority.
Then we pick whether we went the order to be descending or ascending. In the exact case, we will query by descending years of experience (“From highest to lowest”).
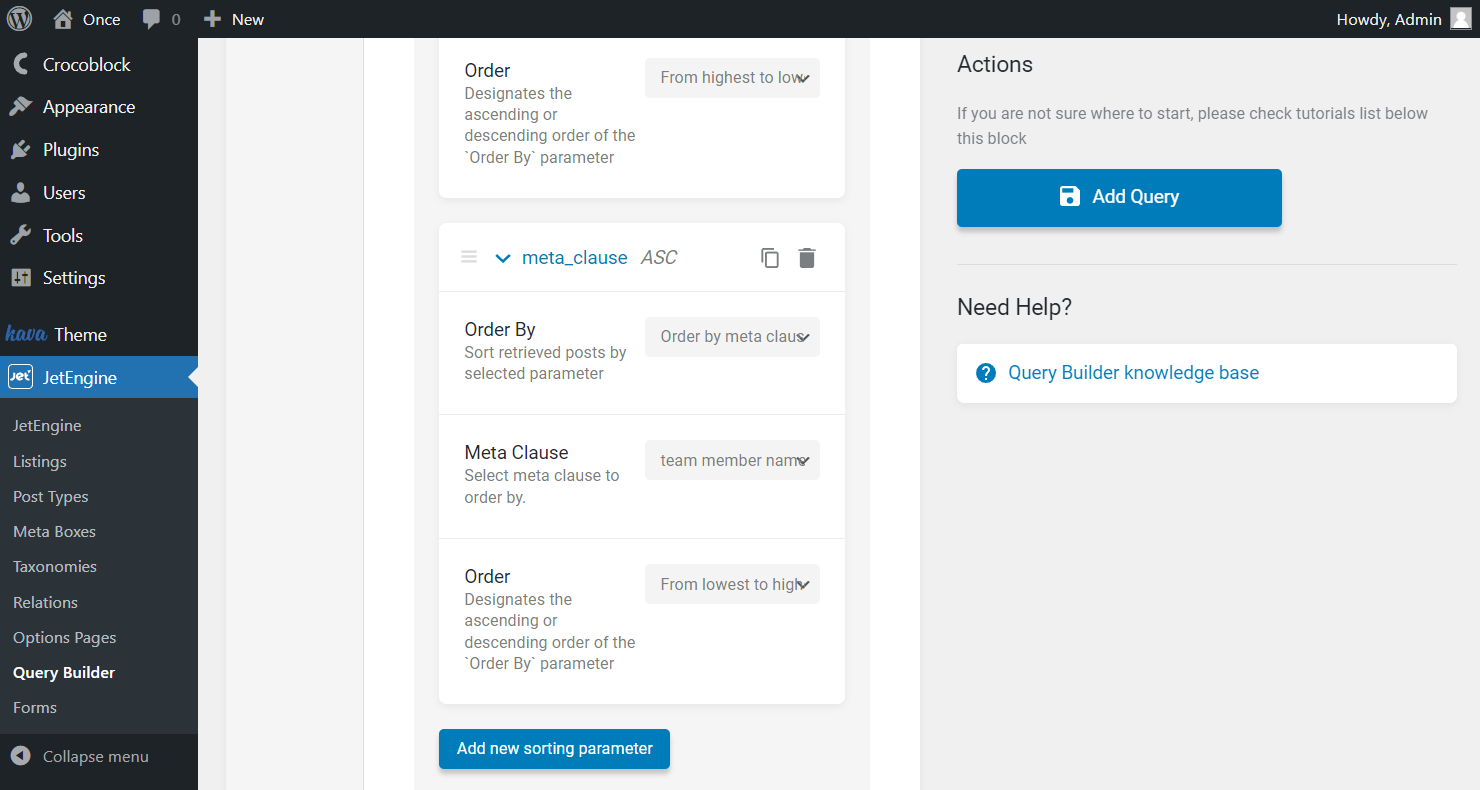
Click the “Add new sorting parameter” button to create one more order by team member name.
We repeat the same steps with the “team members name” clause; however, this time, selecting “From lowest to highest” Order.
That’s it for the query customization; press the “Add Query” button.
Set Order for Listing
Head to the page where you want to place the Listing Grid. It can be any page you need; now, we will proceed to WordPress Dashboard > Pages and edit the existing one.
Place listing In Elementor
Place the Listing Grid widget on the page. Select the needed Listing you have created beforehand. Sett all the parameters in the General tab to get the desired result.

The next step is to go to the Custom Query tab. Here enable the Use Custom Query toggle and specify the Custom Query by selecting the one you have just created.
As you can see, all team members are now located depending on their experience. And, not less important, if several members have the same “Experience” values, they are placed depending on their names (ascending character order).

Adjust listing In Gutenberg
You can repeat the same steps if you work with the Block Editor. Proceed to the page you want to edit and add the Listing Grid block.
Pick the needed Listing and adjust the following General settings fields.

Moving to the Custom Query tab, activate the Use Custom Query toggle and pick the needed item in the Custom Query filter to achieve the result.

Other Meta Clause Order
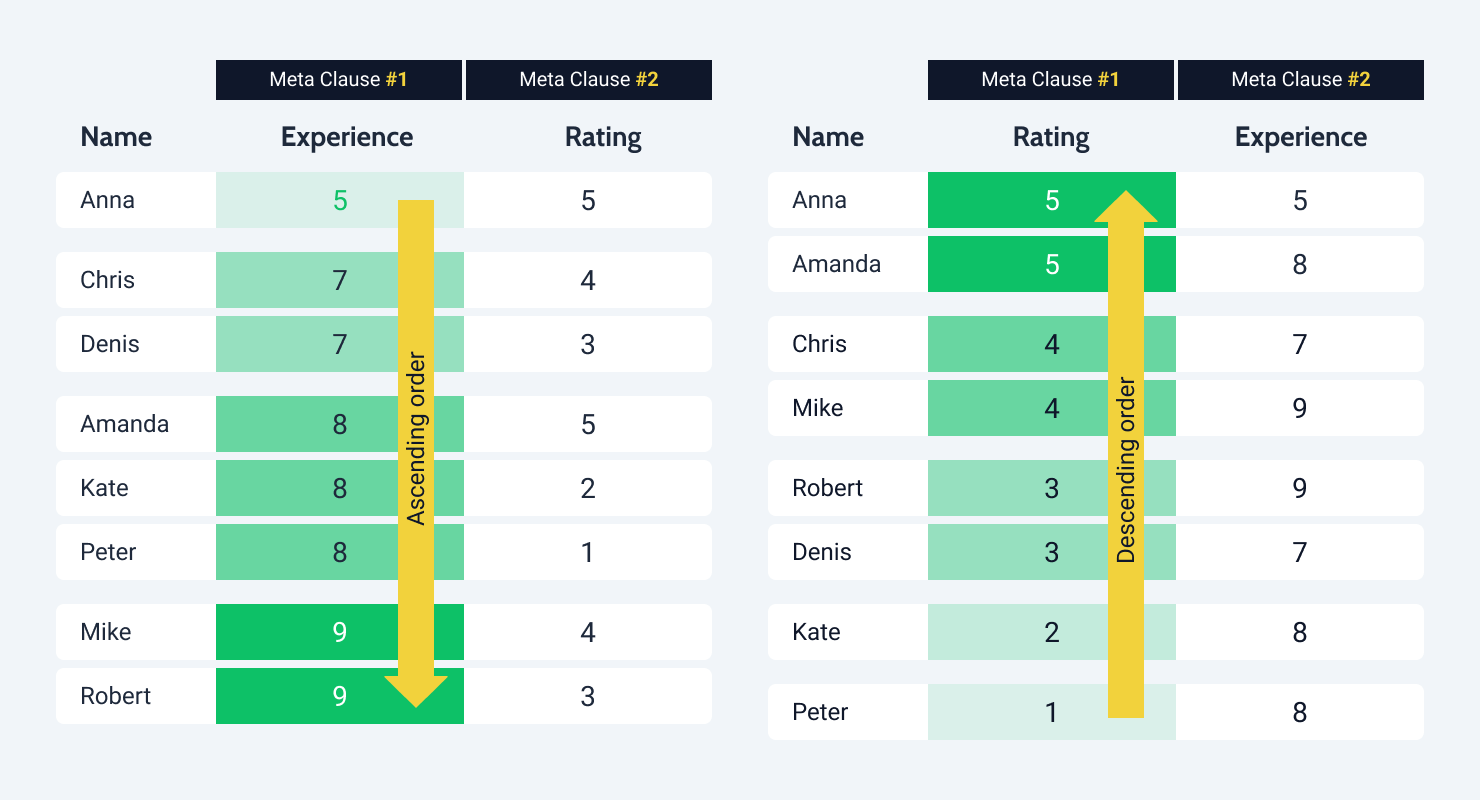
Let’s check what will happen if the meta clause order is changed. Now we will use the “name”, “experience”, and “rating” meta fields to see the difference.
The result you observe in the following picture is two options you can set.
The first table is set to be filtered initially by ascending “experience” and the second one by descending “rating”; now, look at the result.
Now everything is set up. Mind altering some values to get the exact result you need with the Query Builder functionality from the JetEngine plugin.