Listing Grid Terms Query Overview
From this overview, you will learn how to change the Terms Query settings to show not all but only some specific terms or categories in the Listing Grid.
The Listing Grid widget can display the tables of available terms, taxonomies, or categories if you create a Listing template for them. However, if you just place the template in the Listing Grid, it will show all the terms that are connected to a certain taxonomy. If you want to specify the shown terms, the Terms Query settings can help you. Let’s go through the settings.
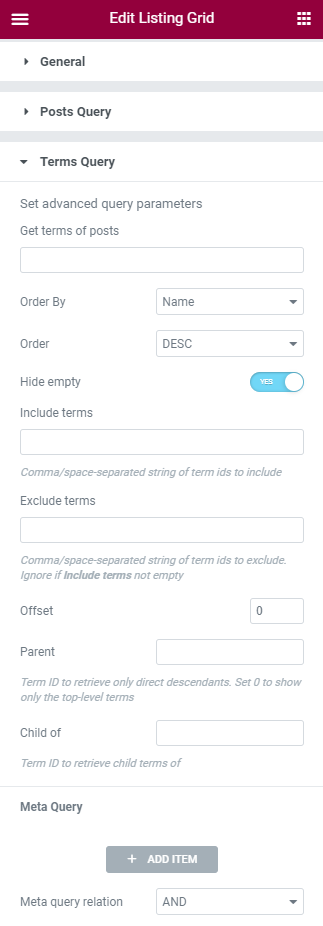
Main Settings
- Get terms of posts. If you want to display the terms attached to a concrete post, type the ID of that post here. You can insert several IDs, separating them with commas;
- Order By. In this drop-down menu, you can choose by which parameter the terms will be sorted:
- Name – by the first letters of term’s title;
- Slug – by the first letters of term’s slug;
- Term Group – by the number of groups determined in the DataBase;
- Term ID – by numbers of term’s ID;
- Description – by the first letters of the description’s first word;
- Parent – by the first letters of the parent’s name;
- Count – by the number of posts that are assigned to this term;
- Include – by the order in which you put the IDs to the Include terms bar;
- Order. It can be ascending (ASCD), which means from the smallest value to the biggest, or descending (DESC) – from the largest to the smallest;
- Hide empty. If the item has no defined value, it won’t be shown in the grid;
- Include terms. In case you want to display only some specific terms, type their IDs separated by commas into this bar;
- Exclude terms. Type here the IDs of terms that you don’t want to be shown in the Listing Grid;
- Offset. When you type the number into this bar, that number of terms that go first in the list won’t be shown in the grid;
- Parent. Type in the ID of the term here and the parent taxonomy of that term will be shown in the grid. If you set this feature to 0, it will leave only the top-leveled terms in the grid (the ones that have no parent taxonomies);
- Child of. If you want to display in the grid only the terms of a specific taxonomy, type its ID here.
Meta Query
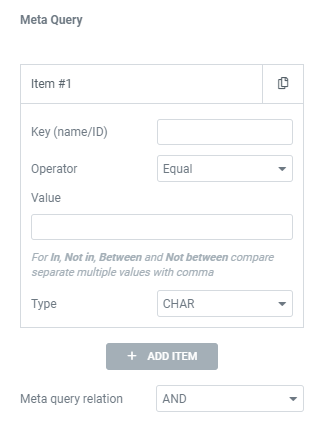
JetEngine plugin allows you to add meta fields to the terms and taxonomies. In the Meta Query section, you can make the Listing Grid show the terms only if the value in some of their meta fields meets the conditions.
Every item you add to this section by clicking the “Add Item” button allows you to set one condition. You choose the Key meta field that is attached to the term or taxonomy, the Meta Query takes its value and compares in some way with the data you put into the Value bar. If they match, the term will be shown in the grid.
Key (name). You have to insert the name of the meta field that is attached to the term into this bar. The value of that field will be compared to the value in the Value bar;
Operator. In this drop-down menu, you can choose how the value from the meta field and the Value bar will be compared:
- Equal – if the values are equal, the term is shown;
- Not Equal – the term is shown if the values are not equal;
- Greater/Less than – this operator works with numeric data only. If the value in the field is greater/lesser than the value in the Value bar, the term is shown;
- Greater or equal – the term is shown if the value in the field is greater or equal to the one in the Value bar;
- Equal or less – shows the term if the value in the field is lesser or equal to the set value;
- Like – this operator searches through the content of the Key field, and if there is a word or number that you set in the Value bar, the term is shown in the Listing Grid;
- Not like – displays the terms if the word or number mentioned in the Value bar can’t be found in the Key field’s content;
- In – you can add several values separated by commas to the Value field, and if at least one of them is mentioned in the field’s content, the term is added to the grid;
- Not in – displays the term if the Key field contains any values except the ones you typed into the Value field;
- Between – this operator allows you to insert a range into the Value bar. It can be either the numeric or alphabetical range, from smaller to bigger value, separated by a comma. If the Key field has a number that falls in the range or a word that starts from a letter that falls in the alphabetic range, the term is displayed in the grid;
- Not between – shows all the terms except the ones that have a value that matches the set interval in their Key field;
- Exist/Not exist – if the term has/has not the Key field attached, it will be displayed in the grid.
Type. This drop-down menu allows you to define the type of values that will be compared:
- NUMERIC – whole numbers only;
- BINARY – data that is sensitive to case;
- CHAR – alphabetic data that is not sensitive to case;
- DATE – date values;
- DATETIME – date and time;
- DECIMAL – fraction number data;
- SIGNED – whole numbers, both positive and negative;
- UNSIGNED – whole numbers, only positive.
Meta query relation. This option defines whether the term has to match all the conditions you add as items to this section (AND) or at least one of them (OR) to be shown in the Listing Grid.
Those are all settings of the Terms Query section. You now know how to customize them and show only specific terms in the Listing Grid.