JetReviews Dashboard Overview
This overview reveals all the features and functionalities of the JetReviews dashboard in great detail.
JetReviews is a flexible and precise tool that can help to create a review section, convenient both for you and the visitors of your website. It doesn’t matter whether you have a set of pre-made reviews and just want to show them to the audience or prefer to give the users an opportunity to leave comments. This plugin can furnish you with all the necessary instruments.
After downloading and installing the JetReviews plugin, you will see the additional submenu in the WordPress dashboard. Let’s take a closer look at all its tabs.
JetReviews Stats
The first tab of the JetReviews dashboard is dedicated to showing statistics. It could be useful for analytics and will definitely keep you informed about the activity on the website.
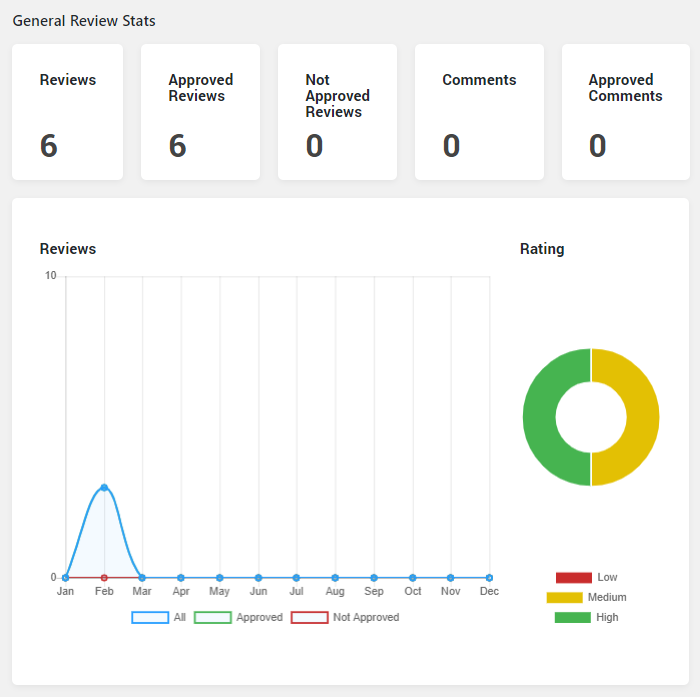
General Reviews Stats are displayed at the top of the web page, so that will be the first thing you see after opening this tab. It shows in numbers how many reviews and comments were left by users, how many of them are already approved, and how many are waiting for approval. The graphic illustrates that stats better, taking into account the period of time they were added. The diagram clearly displays the data about the rates of the added reviews.
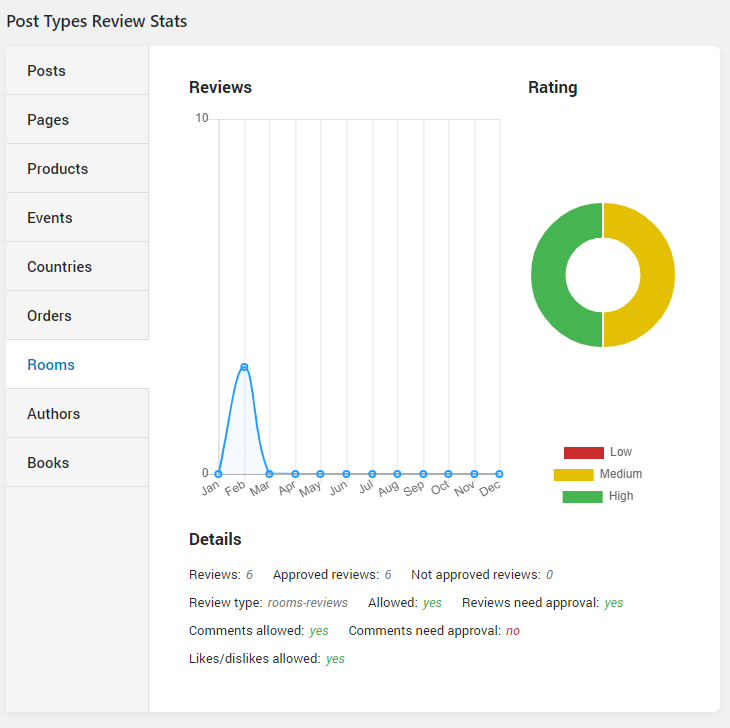
Post Types Reviews Stats gives you all the same information yet divided according to the post types. That lets you analyze activity in the chosen part of the website.
All Reviews
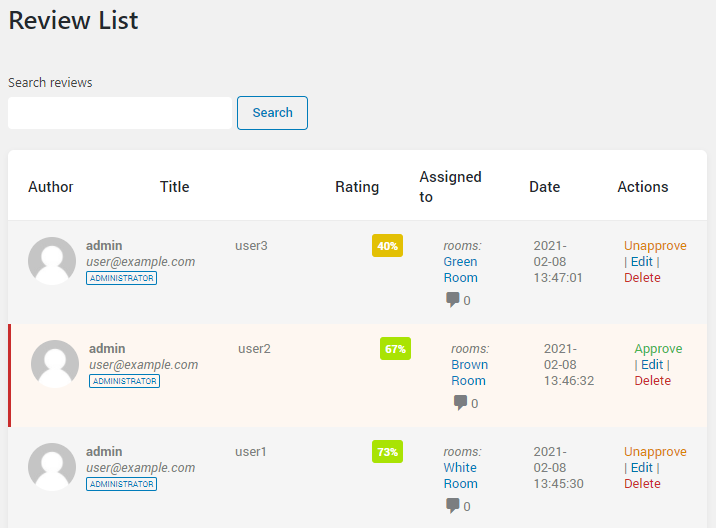
The reviews left by the visitors of the website are stored here in a table. It shows the review author’s name and email, the title of the review, its average score, a post the review is assigned to, and the date it was added. Additionally, the table contains the necessary action buttons:
- “Approve” – by clicking this button you allow the review to be shown on the website;
- “Unapprove” – with this button you can hide the already published review;
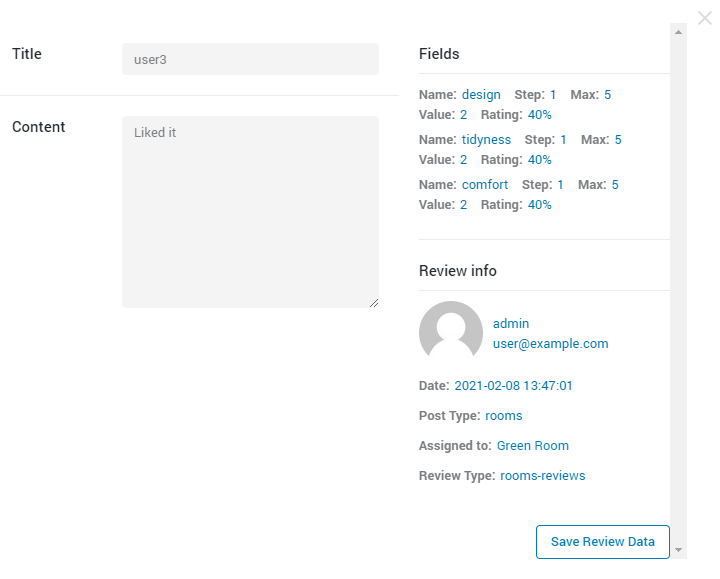
- “Edit” – this button gives you access to the review’s summary title and description, so you can change it quickly and easily if needed;
- “Delete” – as it is obvious from the name, this button deletes the review.
This tab also has a search bar that helps to find any given review on the list.
Review Types
JetReviews allows you to create different types of reviews for different purposes. If you added a few custom post types for the website, the reviews for them can’t probably look the same. Reviews for pages and posts will also have different assessment criteria. So, in this tab, you can create, store, edit, and delete review types.
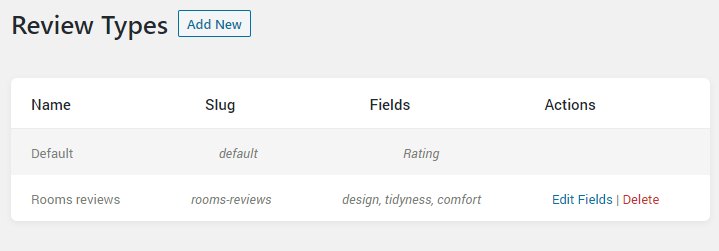
When you open the Review Types tab for the first time, you will see only the Default type. It has one field, named Rating and can’t be edited or deleted. This type is applied to posts and pages by default.
To create a review type, you need to click on the “Add New” button.
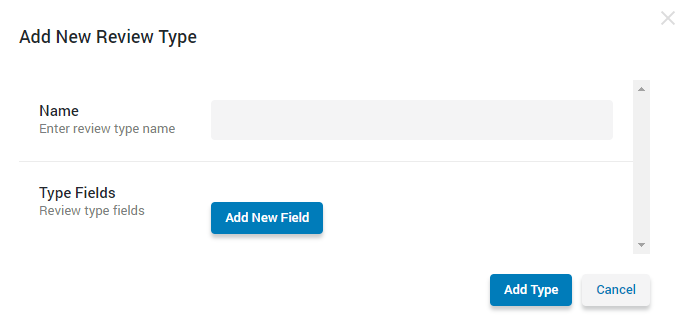
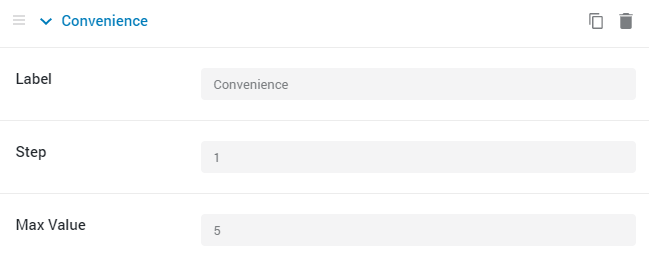
Type in the review type Name and start adding fields. Type Fields are the criteria that you want your clients to rate the post or page for. So, you set the Label for it and then define the Step and Max Value. When the user increases the rating for one step, it will increase by the amount you set in the Step bar. You can add as many fields as you need by clicking the “Add Field” button. When you are done, hit the “Add Type” button.
Comments
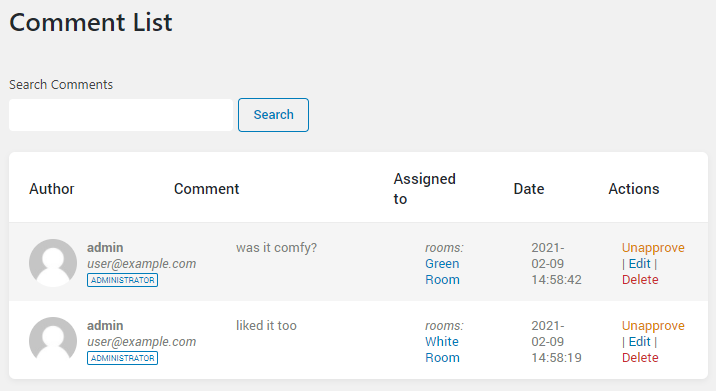
This tab is almost a lookalike of All Reviews but it lists comments instead of reviews. All the comments and replies to them are gathered into a table that displays the text of a comment, the post it is assigned to, the date it was added, and the actions you can do with it. It is possible to “Approve” or “Unapprove” the comment, “Edit” or “Delete”.
Settings
Here you can choose on what pages, posts or custom post types the reviews block will be shown. After turning the Use review for post type toggle on, you will be able to define the other settings.
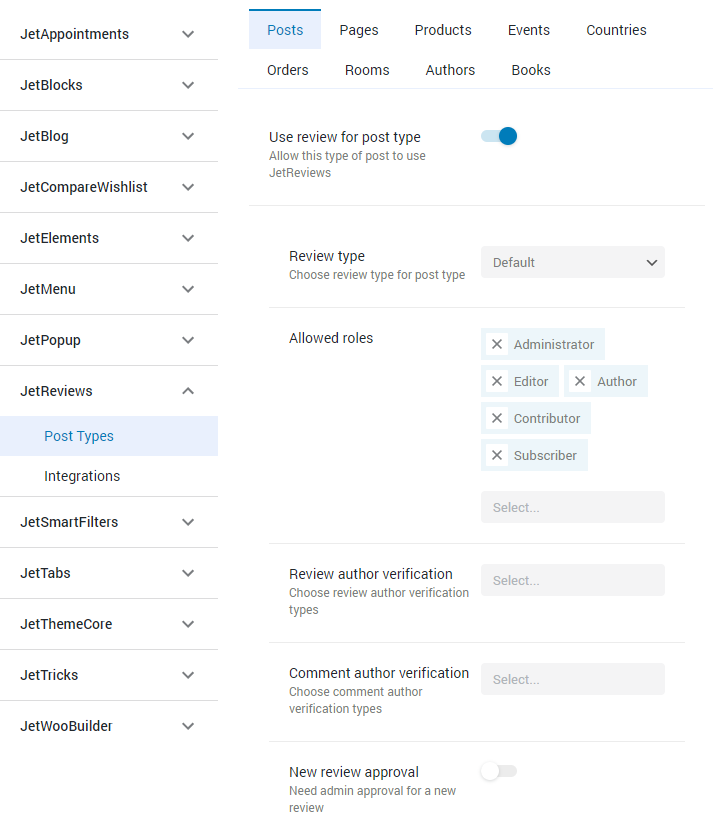
- Review type. Choose the review type you just created from the drop-down list to assign it to this custom post type.
- Allowed roles. Here you can choose who will be allowed to leave reviews on the single pages of this custom post type.
- Review author verification. This option allows you to verify users and add them to one of the added groups – Guest Users, Woo Product Customers, and Shop Managers. Such a verification helps to make the further search of some type of reviews easier;
- Comment author verification. Works the same way as the Review author verification but for the comments;
- New review approval. This toggle allows you to choose whether you want every new review to be approved by you before publishing or not. If you turn it on, it will demand constant attention from you but prevent spam and unappropriated content from appearing on the site.
- Allow comments. By turning this toggle on, you allow the users to comment on the added reviews.
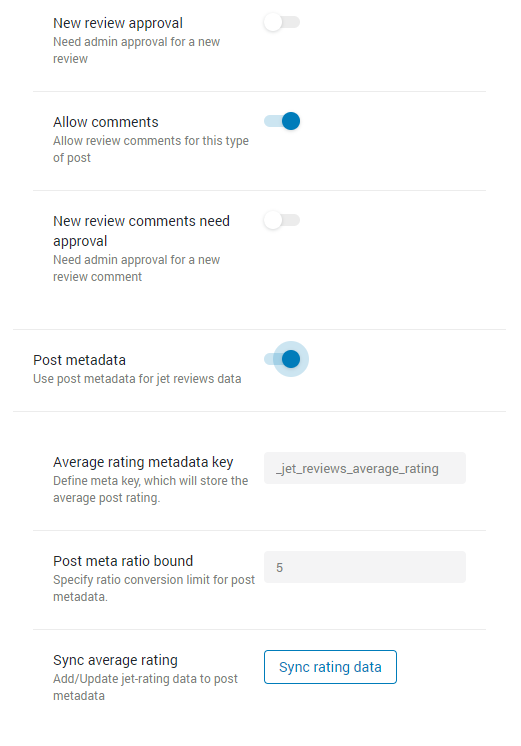
- New review comments need approval. The same situation as with the new reviews’ approval. If you turn this toggle on, every comment will need your approval to be published.
- Post metadata. Enable this toggle if you want to store the average rating of the item in a separate meta field. This will allow you to use that value for different purposes, such as filtering the items;
- Average rating metadata key. Here you have to paste the ID of the meta field where you would like to store the average rating;
- Post meta ratio bound. Here you set the maximum of the scale that will be used to show the average rating;
- Sync average rating. Press this button every time you change the settings to synchronize the rating users leave with the average rating calculating feature.
That’s all about the JetReviews dashboard. You now know all its features, so enjoy using them for the best possible review block creation.