How to Add Pagination to the Table in Gutenberg
In this overview, you will learn how to add Pagination to the Table with the help of the JetEngine plugin.
Pagination will be a good accent to the table’s customization. If you want to systemize all the needed information, it will sufficiently improve table maintenance.
Create Table
Firstly, make sure that you have created a table using JetEngine Tables Builder. But if you have not done it yet, we have a table-building guide for you.
If this step is already taken, do not hesitate to apply some adjustments. One of these is Query Pagination Limit.
Additional query customizations
To make some changes to the number of the items that will be shown in your table, proceed to JetEngine > Query Builder.

There you can create a new Query or modify an existing one.
For instance, we have selected WC Product Query. It will represent all the data about our Products.
There are some additional settings that you can adapt to your desires. However, we are now fully interested in Pagination Settings.
First things first, make sure that you have toggled Enable Pagination on. That way, Table Query and Pagination will work more efficiently.
Changing the pagination limit
To work with this option, proceed to the Limit field. Let us start with “4” items.
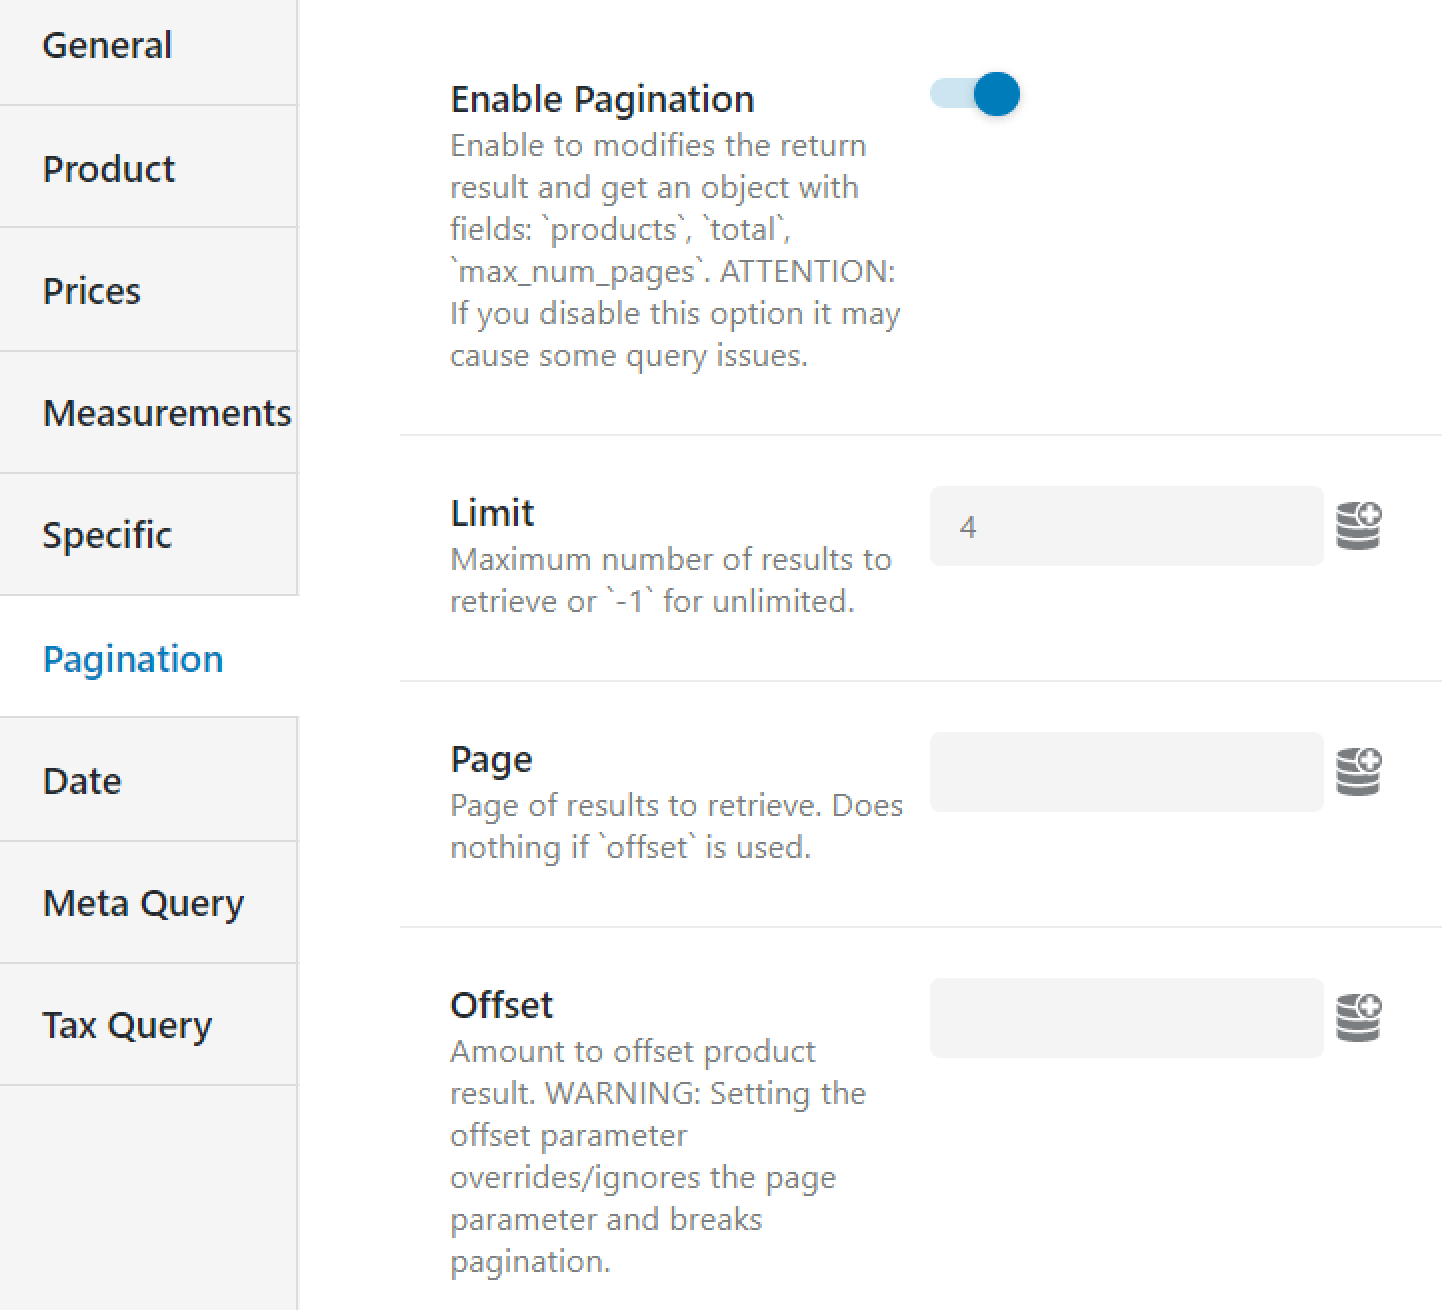
Do not forget to save changes by clicking on the “Update Query” button. To check the results, open a page where your table is displayed.

Suppose we want to show fewer products in our table, for example, only 2 of them. In that case, we have to get back to JetEngine > Query Builder, choose the already created query limited to four products, and change the Limit to “2” in the Pagination Settings.

Now we need to save our query again.
One more time, we will look if our adjustments are applied on the front end. To do so, proceed to the page where the table is presented.
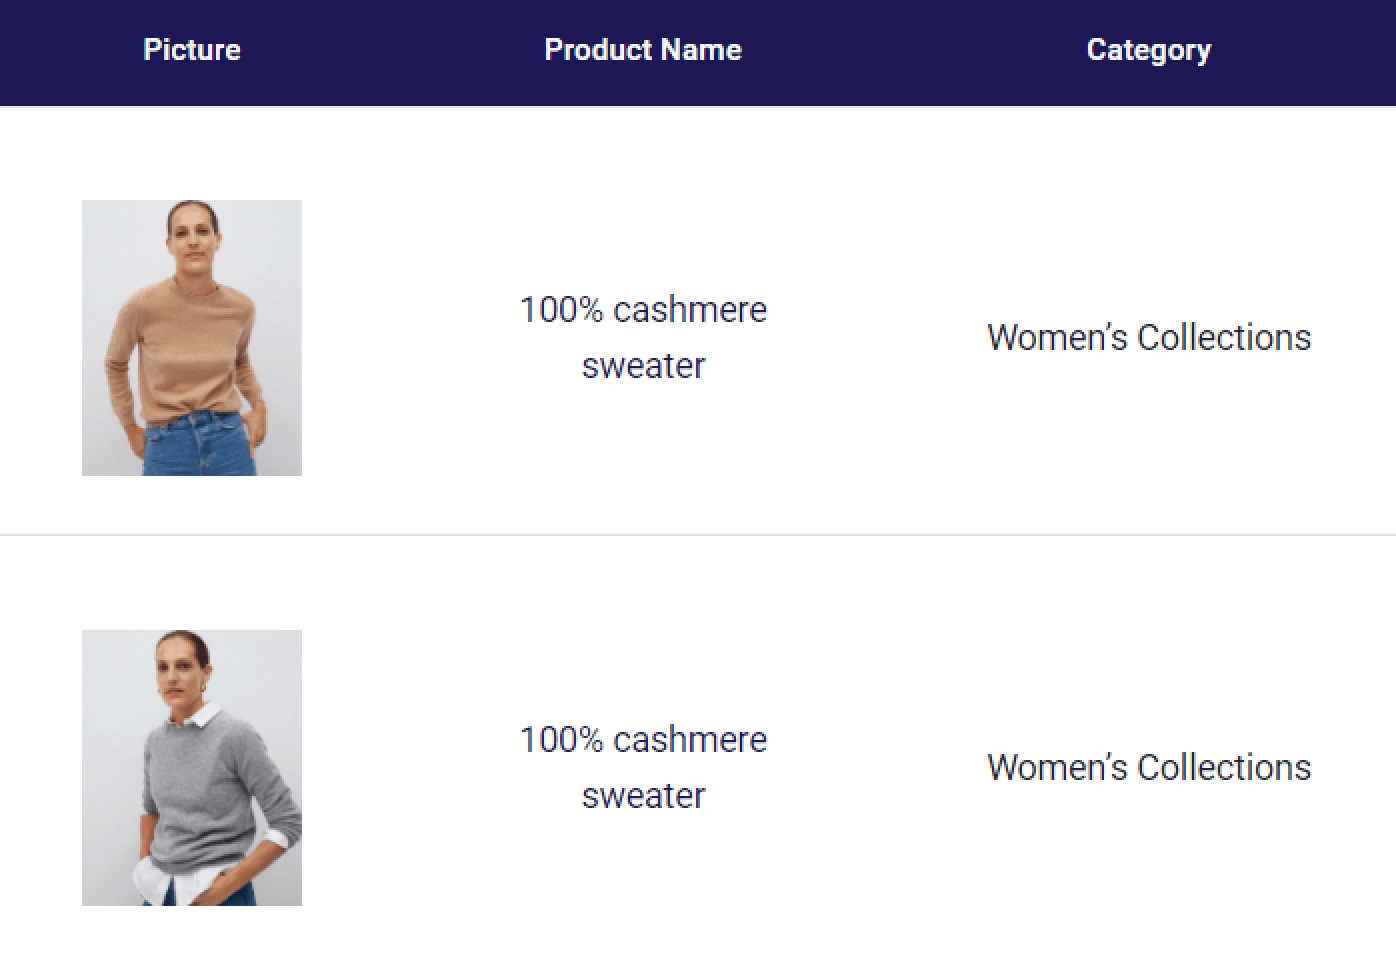
In this way, you already know how to change the number of the Products displayed in the table.
But if you want to display more Products by using the Pagination block, there is a solution. Let’s find out how to implement it with the help of Gutenberg.
Pagination Block in Gutenberg
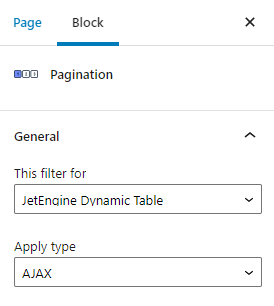
To add Pagination to the table, open the Gutenberg Editor and proceed to the Add New Section by clicking on the Plus icon. Type in Pagination, and drag and drop the block to the area below the table.
Choose the correct provider for the Dynamic Table block – “JetEngine Dynamic Table” – to assign this pagination to the table and pick either “AJAX” or “Page Reload” in the Apply type drop-down on the General tab.
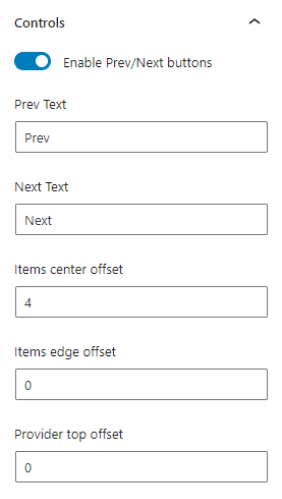
On the Controls tab, you can enable Prev/Next buttons, change the displayed text, and set Offset values.
Once you are done with all the General settings, you can style the Pagination block with the JetStyleManager plugin. Once you install this plugin, the Brush icon appears in the top right corner of the screen.

All the work is done. You can check the final result on the front end.

You now know how to add a Pagination block from the JetSmartFilters plugin to the JetEngine table using Gutenberg.
In addition, you can check how Pagination works for the Dynamic Product Table on its live demo page.
We hope this tutorial will make it easier for you to work with our plugins.