How to Set Indexer Option for Filters
From this tutorial, you will learn about indexing products or posts using JetSmartFilters functionality.
If you run an online shop or blog where you would like to add filters to sort products or posts, you can use the JetSmartFilters plugin. Let us introduce you to the Indexer, which is available in JetSmartFilters.
With this feature, you get the opportunity to save the filtering data in the database with further retrieval. In other words, only the results relevant to the selected filter will be displayed on the front end. The non-relevant results can be hidden or disabled.
We present an example based on filtering WooCommerce products using JetSmartFilters.
Indexer Settings Overview
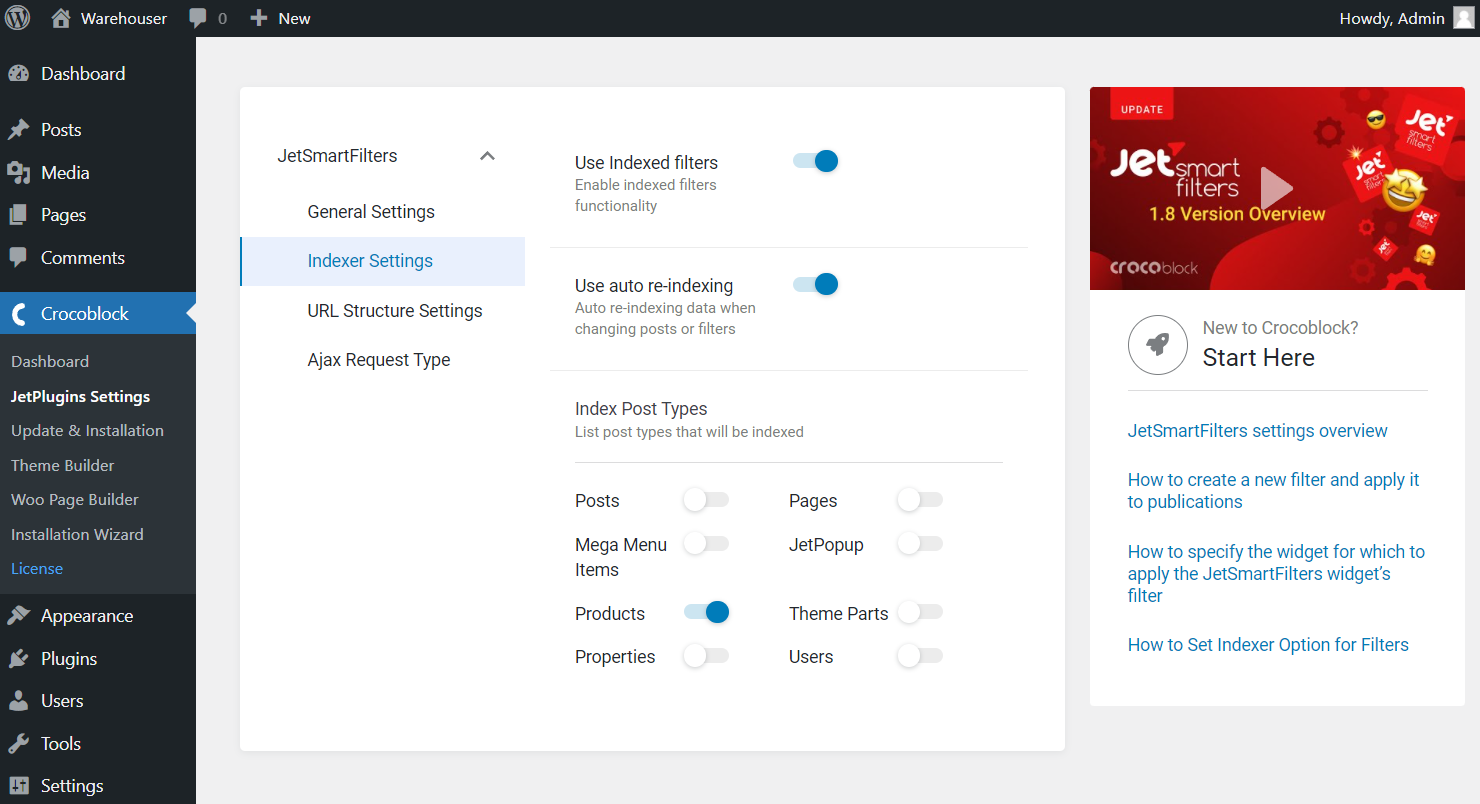
The first thing you should do is head to the Crocoblock > JetPlugins Settings directory. Go to the JetSmartFilters tab and open the Indexer Settings.
Here you need to activate the toggle next to the Use Indexed filters option.
Another helpful option is to enable auto-indexing by toggling the Use auto re-indexing switcher. This feature will do the indexing itself without any further actions on your part.
Also, there is an Index Post Types list, where you can specify the post types, which will be indexed.
After activating all the needed toggles, the changes will be saved automatically.

Managing JetSmartFilters Block in WordPress Dashboard
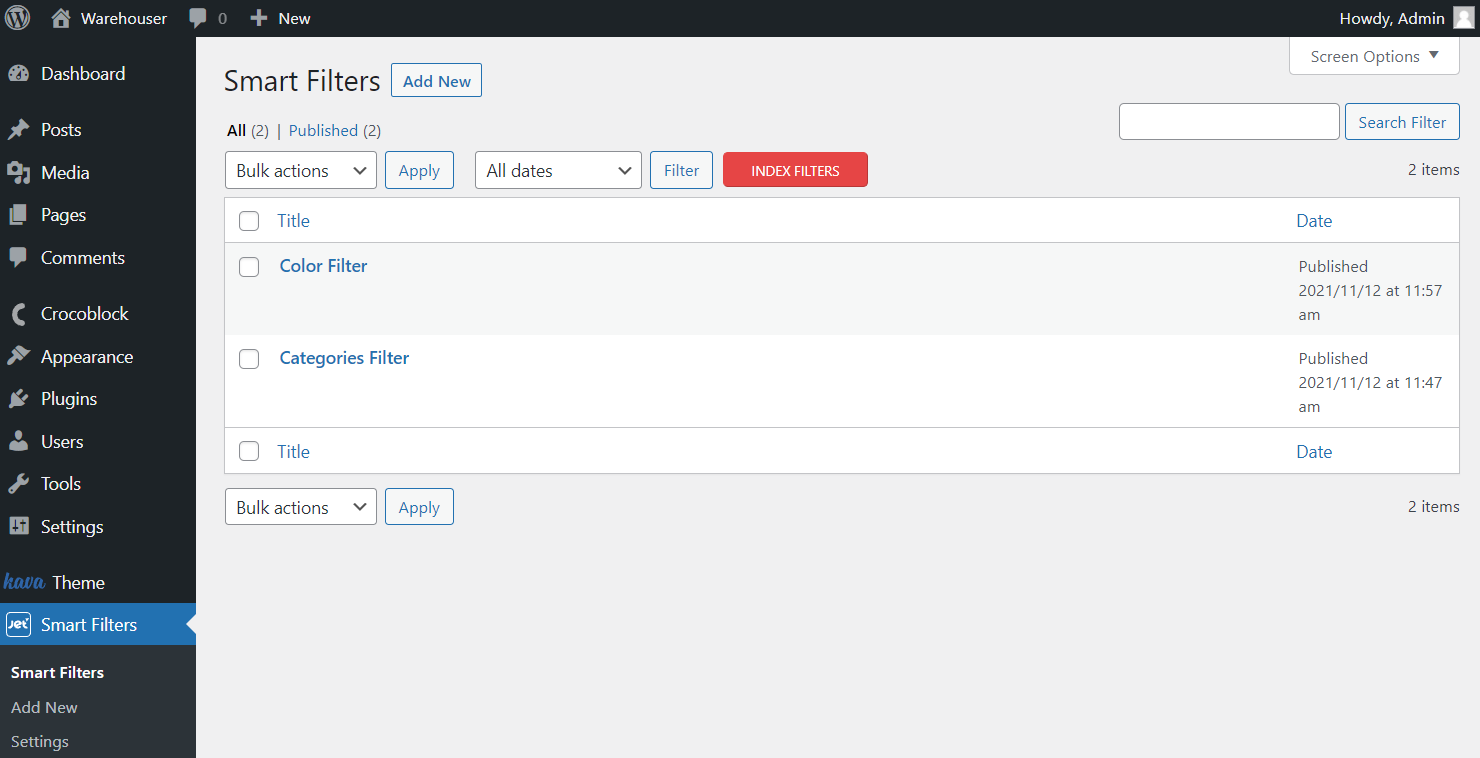
Proceed to the Smart Filters tab in WordPress Dashboard. Here you create the needed filters.
Also, you can see the red Index Filters button, which you should click to apply Indexer functionality to filters right after activating the JetSmartFilters plugin. Do it whenever you customize the products or filters.
Or, if you have toggled the Use auto-reindexing switcher in the Indexer Settings, you don’t need to do it every time. The auto-indexer will update the data itself.

Setting Filter Widget
It is time to open the Shop page, where you have filters.
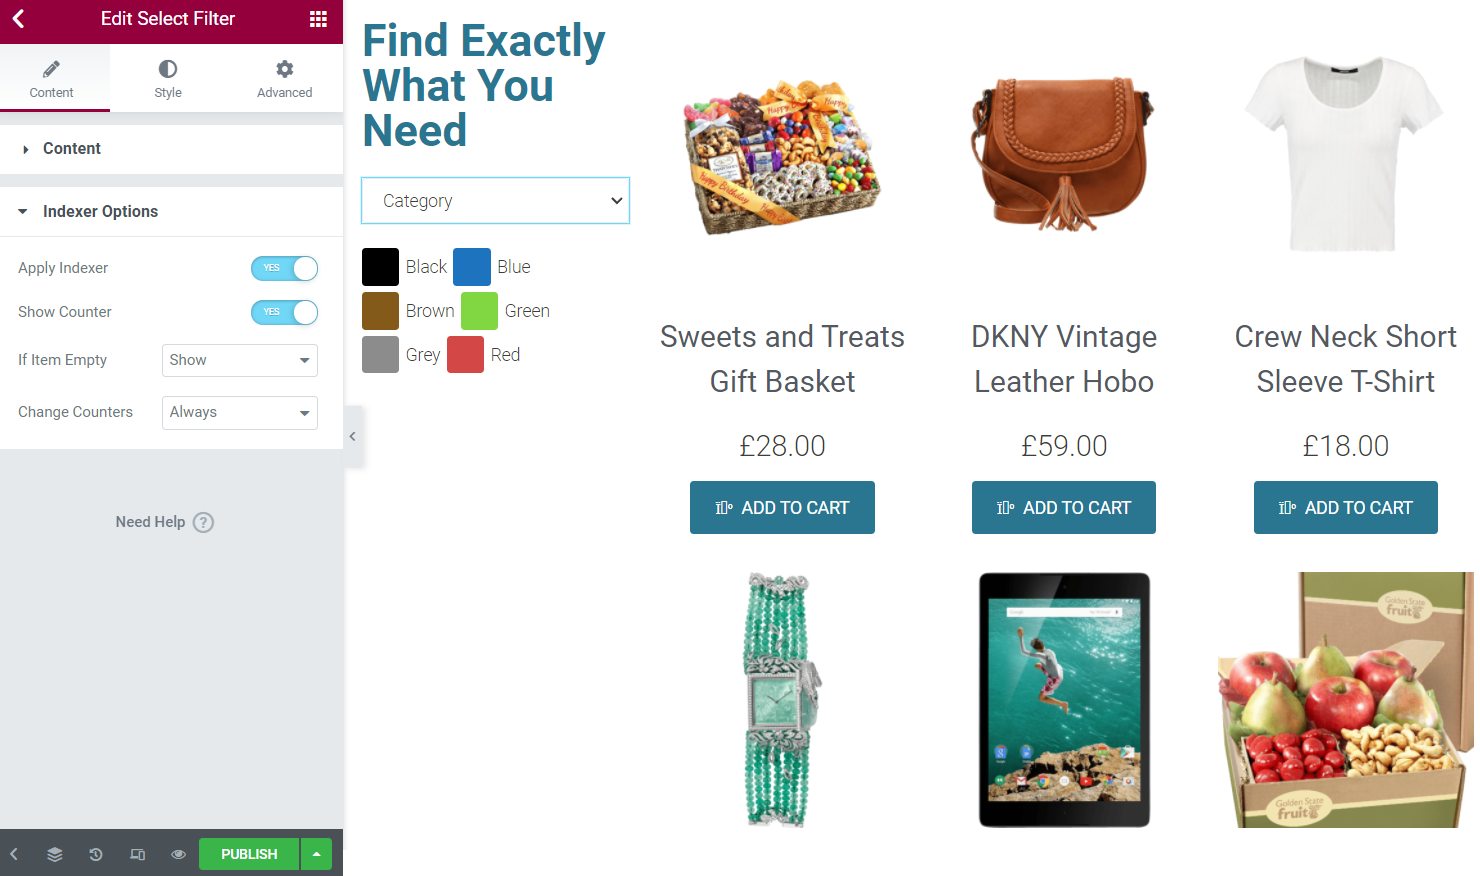
We will take a Select Filter as an example. In the JetSmartFilters widget’s settings, you find the Indexer Options tab, where you need to enable the Apply Indexer option.
The Show Counter option allows showing the number of items of each product. Also, you can show, hide, or disable an item in the filter if it is empty.
In addition, select whether counters should be changed when filters are applied in the Change Counters drop-down list.

Viewing Result on Front End
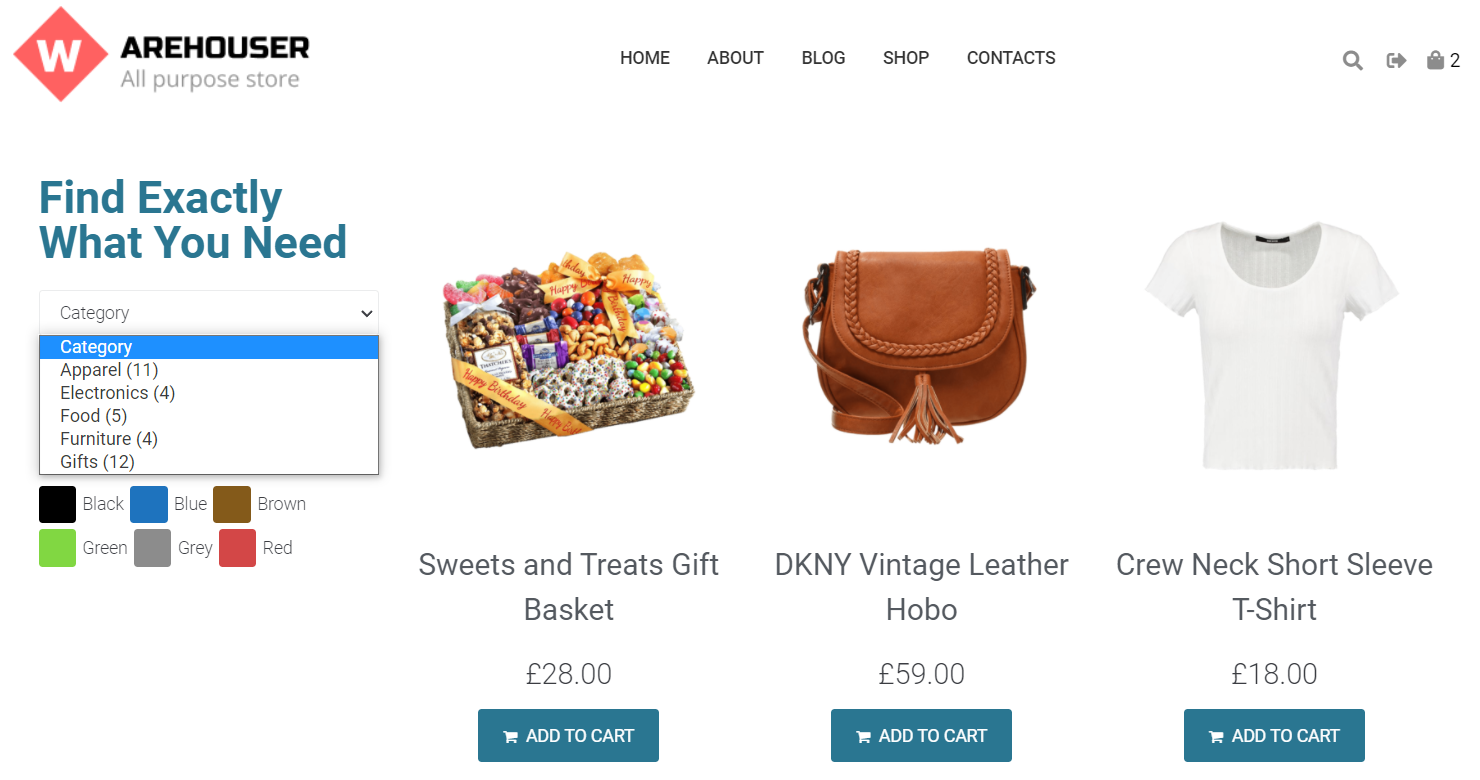
When you set all needed adjustments, click the “Update” button and view how the indexer option looks on the front end.

Now you know how to show the number of items for each product using JetSmartFilter Indexer functionality.