How to Add the Unfold Widget to the Content
This tutorial features the Unfold widget from the JetTricks plugin. You will have an opportunity to hide the content and style it according to the design of your page.
The Unfold widget for Elementor from the JetTricks plugin is one of the space-saving widgets that can help you to organize the appearance of the page and hide extra content. Unlike the Read More widget, it can’t hide one or multiple sections. However, the Unfold widget can be opened and then closed again. Also, it includes a lot of customization options that can help you to get the most out of it. For example, you can style it differently in the fold and unfold modes.
By the way, if you would like to know more about Read More widget – follow the link and check out this tutorial.
So, let’s take a look at how the Unfold widget works.
Add the Unfold Widget
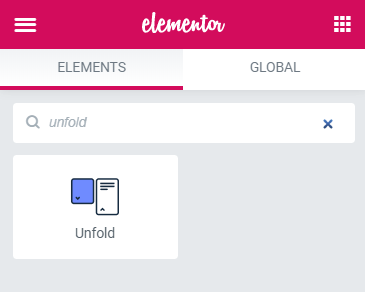
Navigate to the Page or Post to which you need to add an Unfold widget and click the “Edit with Elementor” button to proceed. Find the Unfold widget in the Elements panel and drag it to the section where you want to locate it.

Define Settings
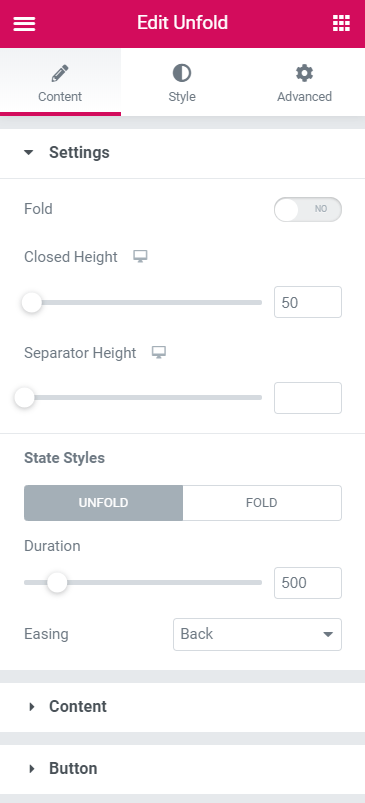
On the left sidebar, you will see the Settings block. Here you can define the folding and unfolding settings.

- Fold – if you don’t turn this toggle on, by default the content block will be shown open. Otherwise, it will be shown closed;
- Closed Height – this option allows you to define the height of the content block when it is closed. You can do it by moving the slider or just typing the needed value to the bar;
- Separator Height – it defines the height of the colored separator stripe that starts from the bottom of the unfolded block and goes to the top. You can set its color in the Style tab. It is possible to even make it a gradient;
- Duration – here you can choose how quickly will the content block fold and unfold. The bigger the value – the slower will be the movement;
- Easing – here are 9 types of folding and unfolding animation you can choose from.
Choose the Content
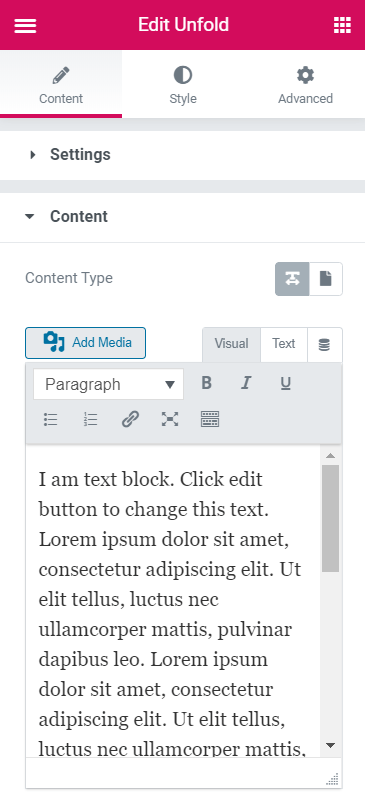
In the Content block, you can add some static content (like text, pictures, video, or other media) or pull it out dynamically from the meta field. Besides that, you can add any of the available templates into the hidden content block.

To add the ready-made template to the hidden block you need to hit the “Template” button in the Content Type row (it is the button with the sheet-shaped icon). Choose the template from the drop-down menu and it will be automatically added to the hidden content block.
If you would like to add the content dynamically, click the “Dynamic Tags” button in the right corner over the text area. You will see the drop-down menu and can choose to pull the data out from any source.
Customize the Button
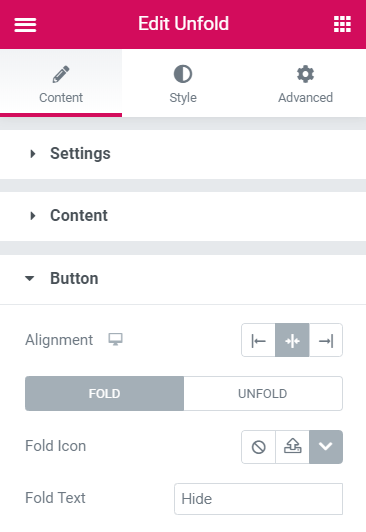
You can customize the button that folds and unfolds the hidden content block in the Button settings section.
- Alignment – allows you to chose where the button will be placed;
- Fold Icon – you can choose the icon for both fold and unfold buttons in the icon library or upload your own SVG file;
- Fold Text – type it the titles of the fold and unfold buttons here.

Do the Styling
There are plenty of design settings for each element in the Style tab. You can customize it according to the design of your page or post.
When you complete all the settings, click the “Publish” button.
So, these easy steps are all you have to do to get a breathtaking unfold block on the page of your website. Well done!