
Displaying Only Users with Posts in a Listing
Learn how to add listings with the active users who published posts on your WordPress website and display users' metadata with the Listing Grid widget/block/element of the JetEngine WordPress plugin.
Create a SQL Query
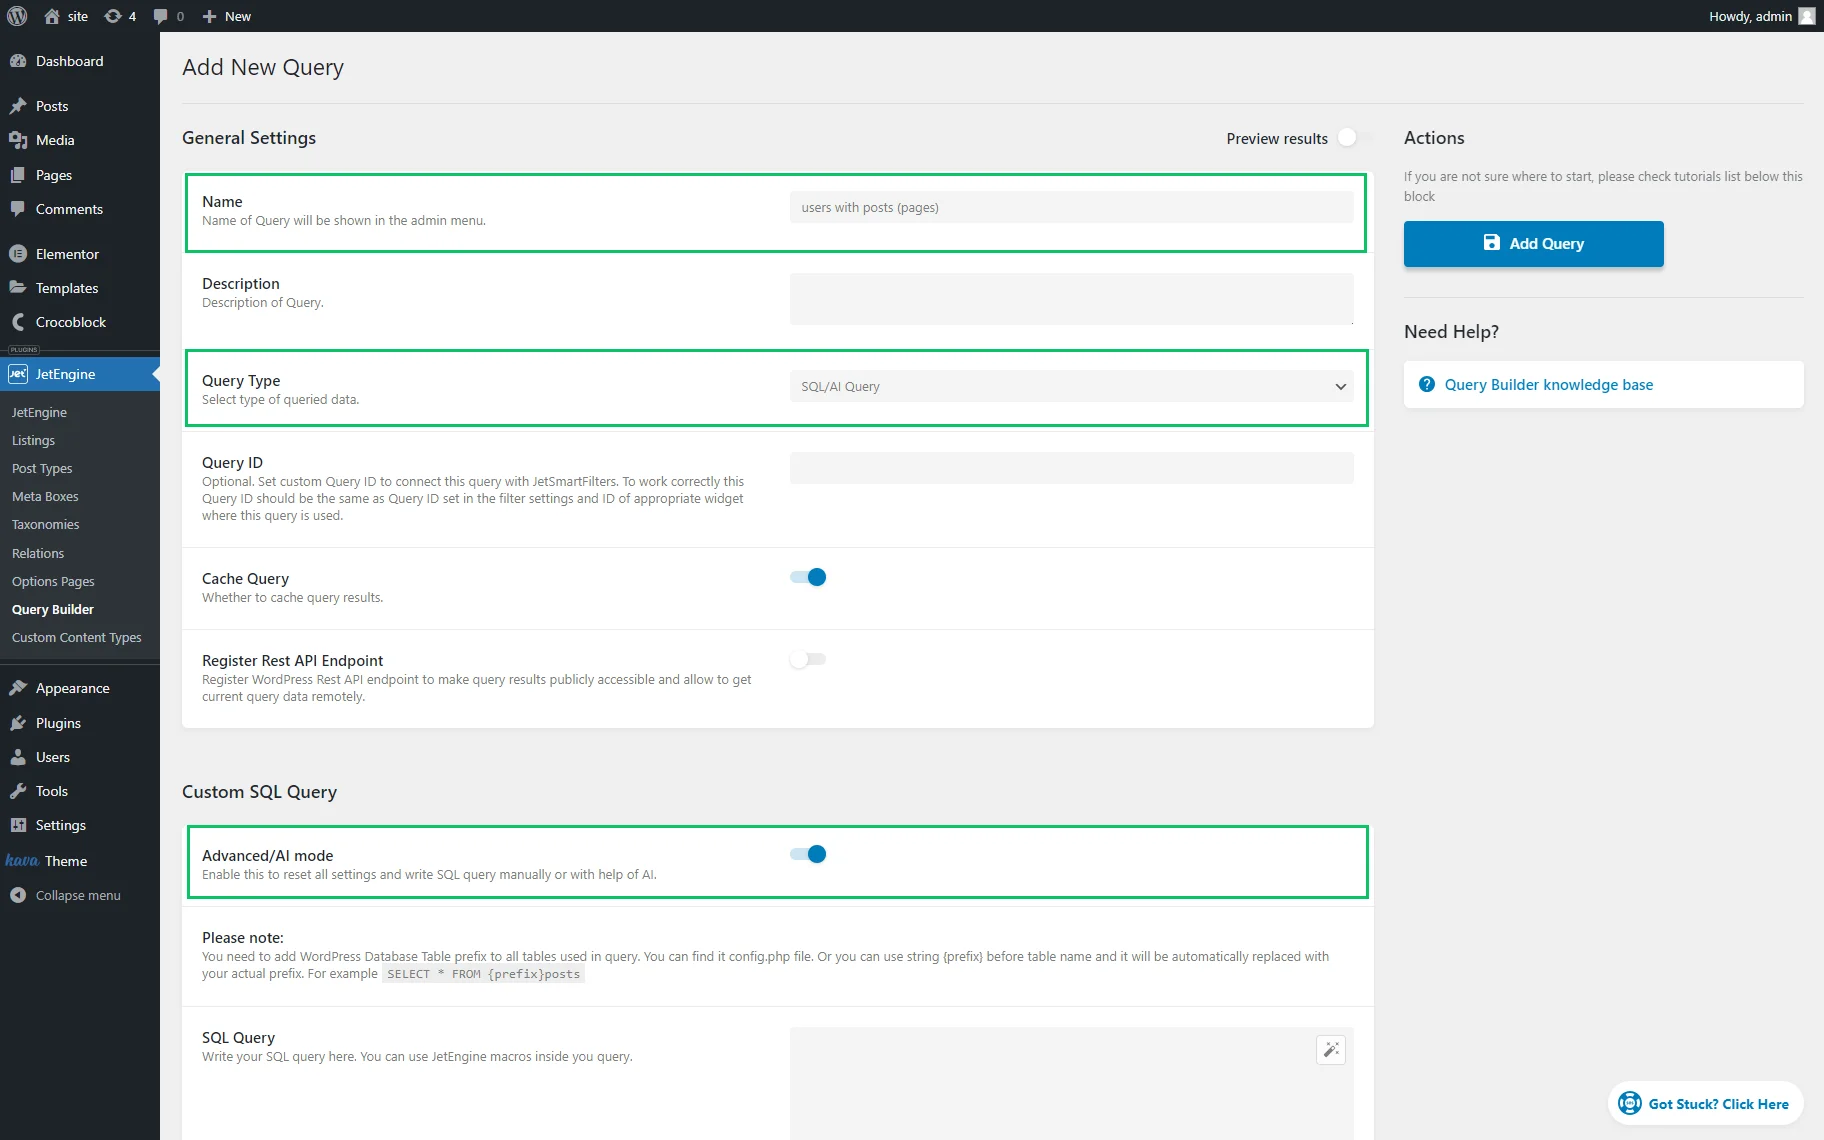
Navigate to WordPress Dashboard > JetEngine > Query Builder and press the “Add New” button.
Type the query Name (“users with posts (pages)” for this tutorial) and choose the “SQL/AI Query” option from the Query Type drop-down list.
Proceed to the Custom SQL Query section and enable the Advanced/AI mode toggle.
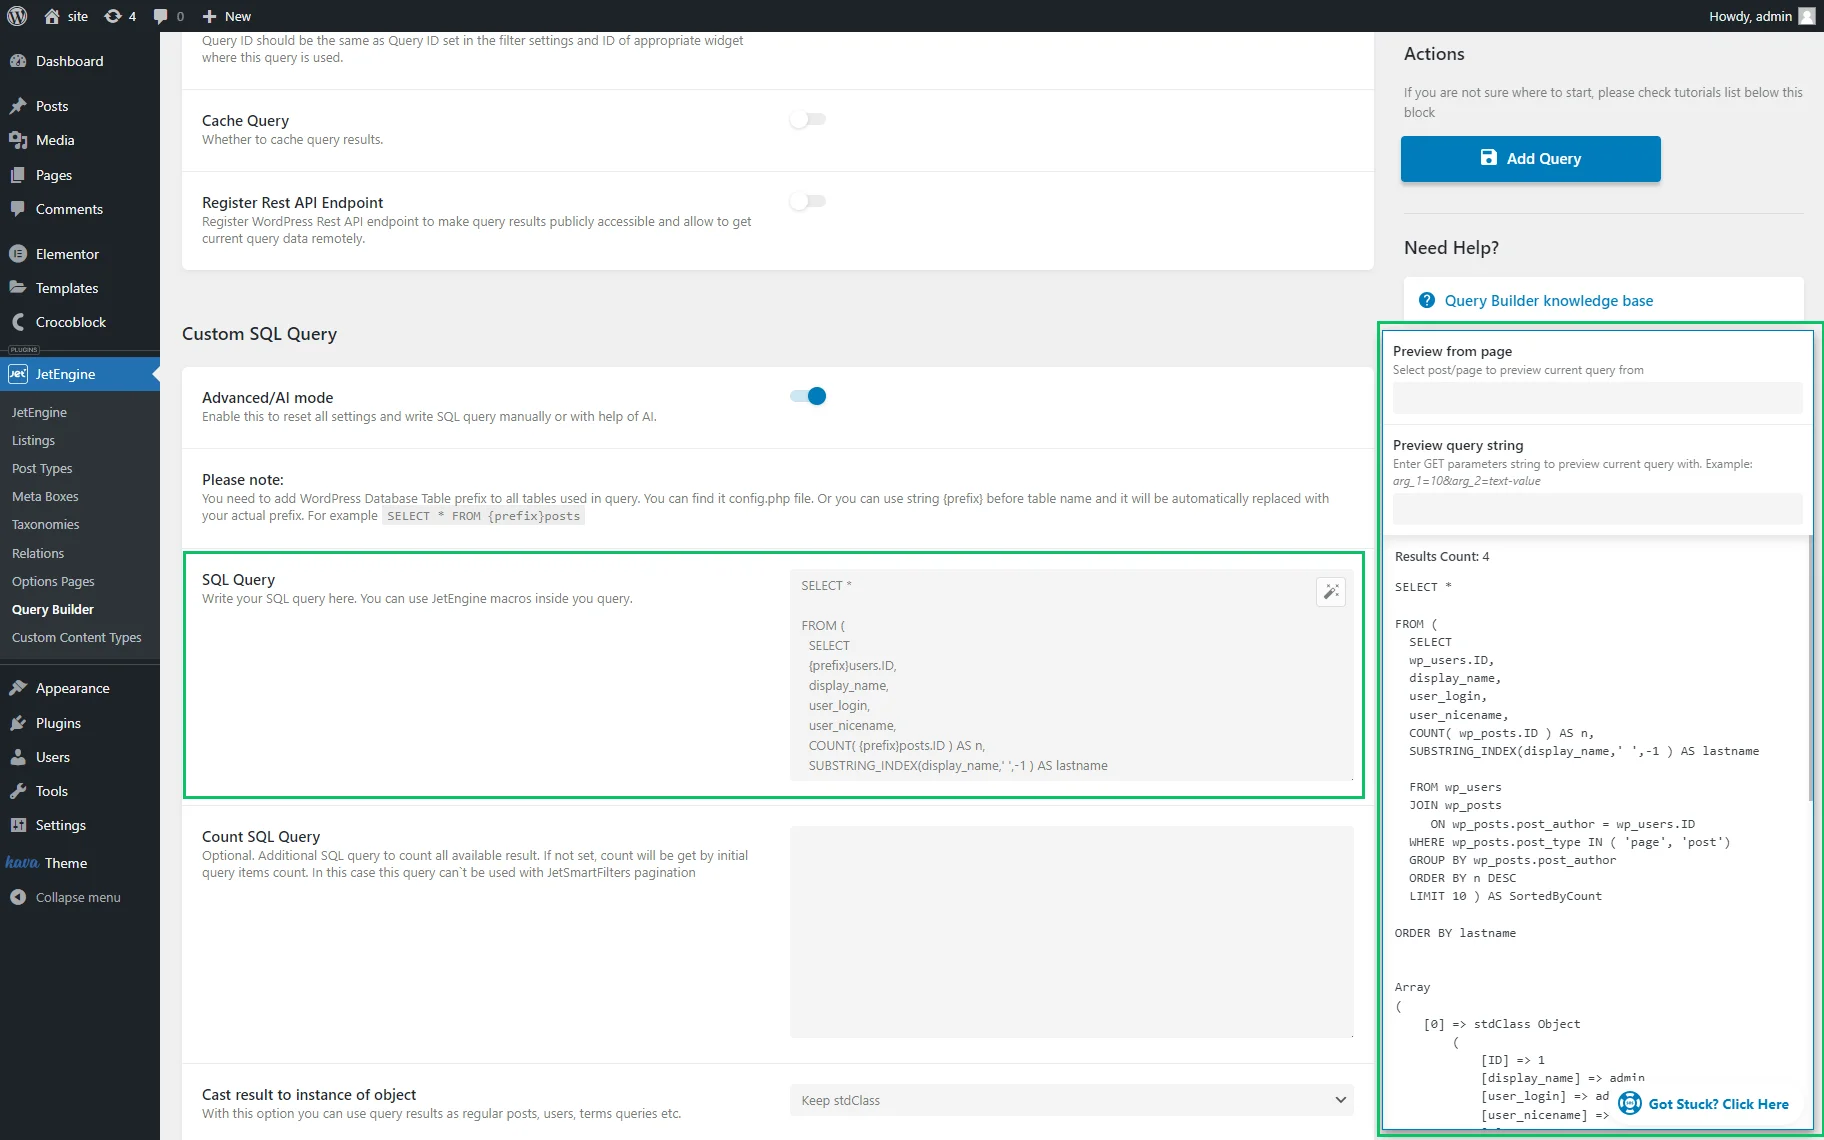
Enter the following query into the SQL Query field:
SELECT *
FROM (
   SELECT
   {prefix}users.ID,
   display_name,
   user_login,
   user_nicename,
   COUNT( {prefix}posts.ID ) AS n,
   SUBSTRING_INDEX(display_name,' ',-1 ) AS lastname

   FROM {prefix}users
   JOIN {prefix}posts
     ON {prefix}posts.post_author = {prefix}users.ID
   WHERE {prefix}posts.post_type IN ( 'page', 'post' )
   GROUP BY {prefix}posts.post_author
   ORDER BY n DESC
   LIMIT 10 ) AS SortedByCount
ORDER BY lastname
If needed, enable the Preview Results toggle on the top of the Add New Query tab to check the query results.
Press the “Add Query” button to save the query or the “Update Query” button to update it.
Create a Users Query
Navigate to WordPress Dashboard > JetEngine > Query Builder and press the “Add New” button.
Type the query Name (“users with posts (pages) 2” in this case), and choose the “Users Query” Query Type.
If selected, the “Users Query” option activates the User Query section of the Query Builder tab.
Open the Include/Exclude tab and hit the macros trigger (“coin stack” button) next to the Include field. Select the “Query Results” macro from the drop-down list.
Then, choose the previously built query (the “users with posts (pages)” query for this tutorial) in the Query drop-down list, the “List of selected fields from item object” option in the Return drop-down list, and the “ID” option from the Comma separated fields list field.
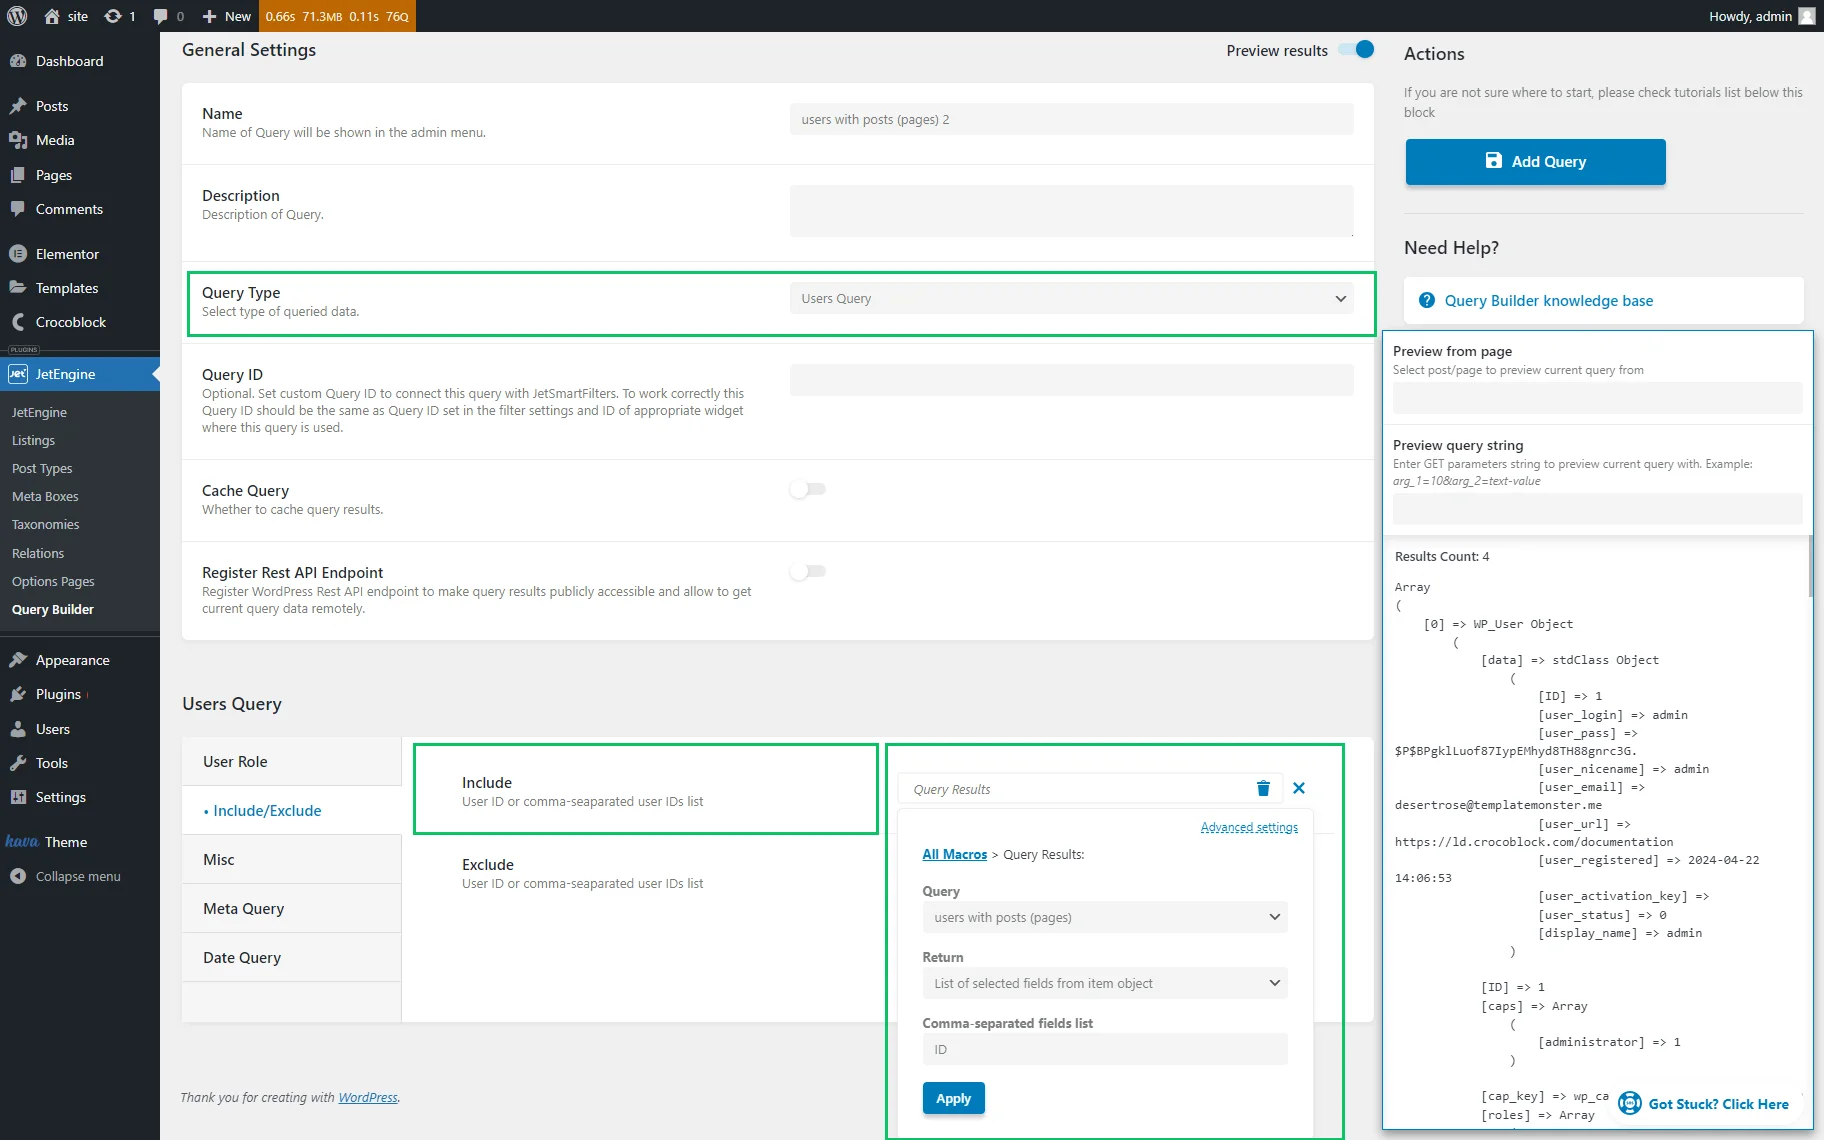
Finally, click the “Apply” and “Add/Update Query” buttons.
Create Users Listing Template
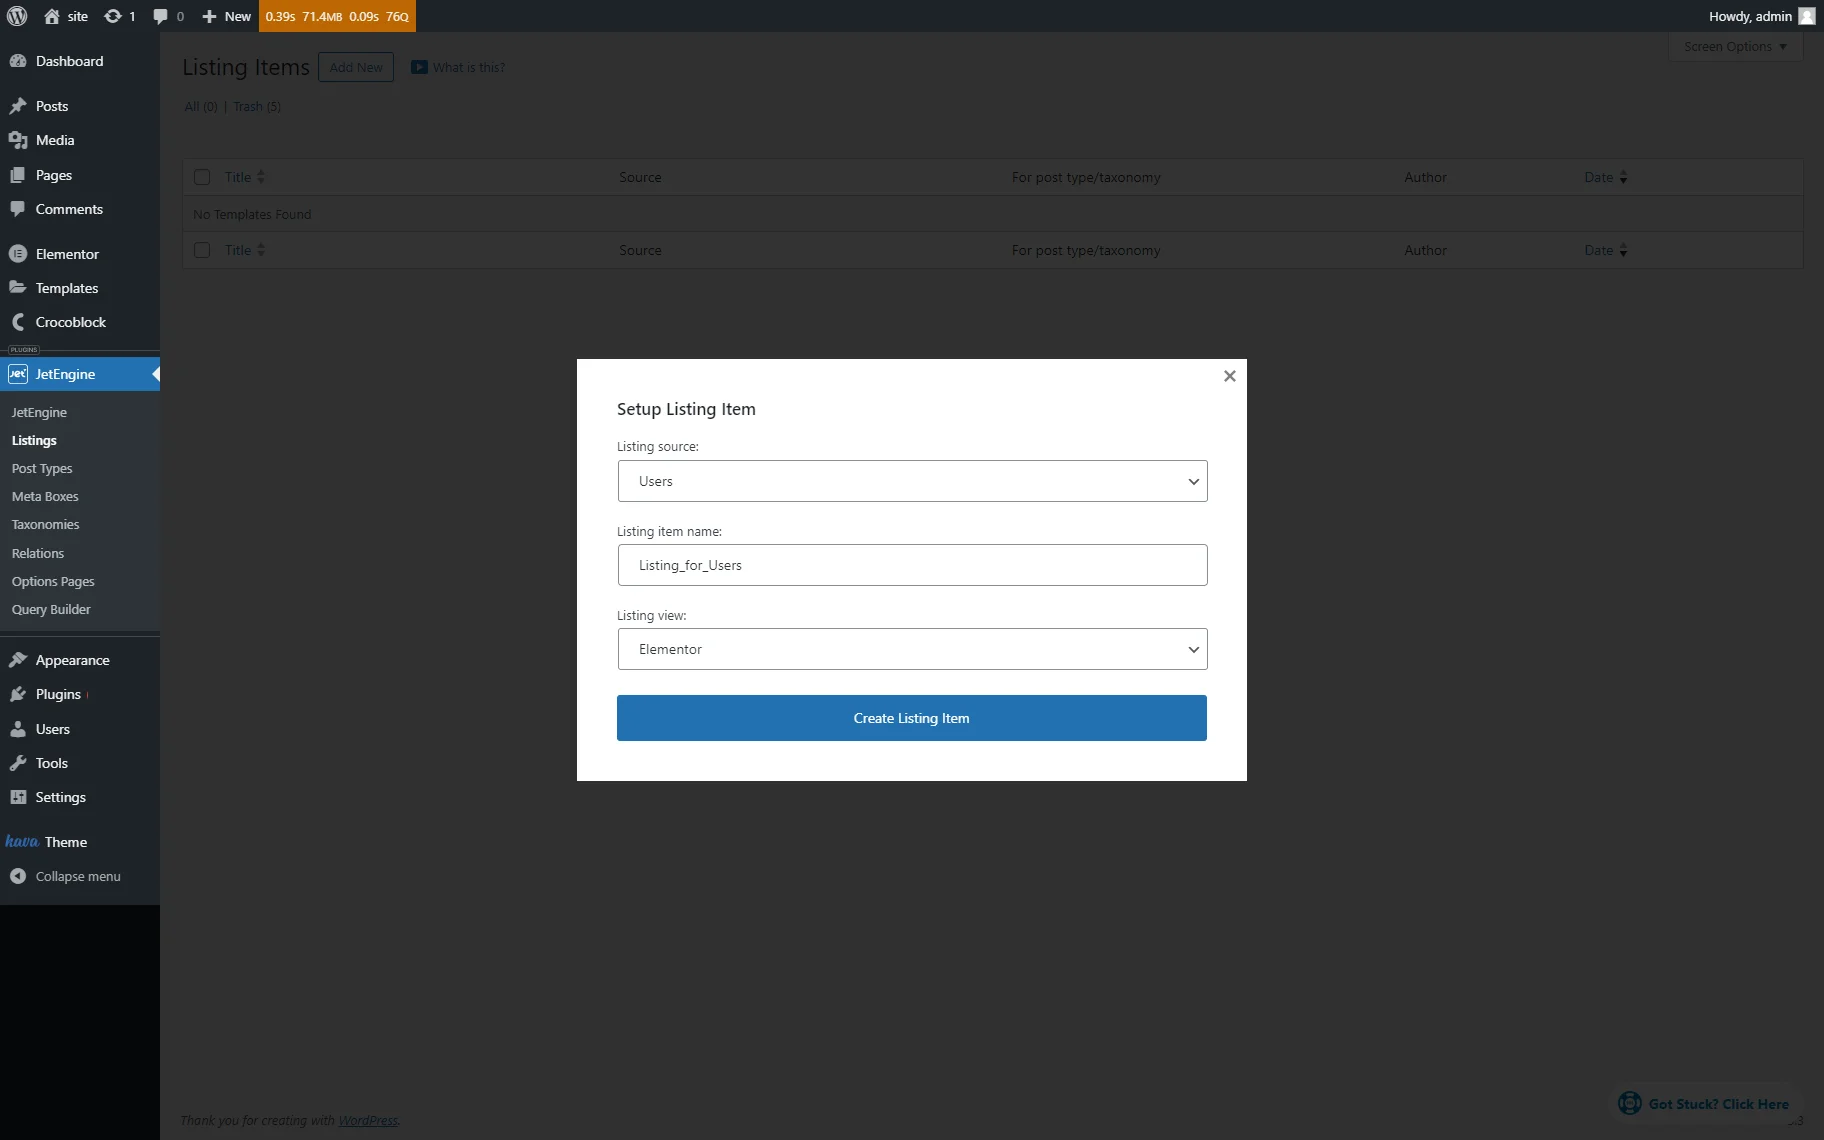
Go to WordPress Dashboard > JetEngine > Listings and hit the “Add New” button.
In the Setup Listing Item pop-up, select the “Users” Listing source, type the listing’s name in the Listing item name field (in this tutorial, the “Listing_for_Users” listing), and choose the editor in the Listing view drop-down list.
In this case, we display users in Elementor, but the appropriate blocks and elements are available in Block Editor and the Bricks theme as well.
The tutorial How to Create a Listing Template for Users details the main features of creating listings for users.
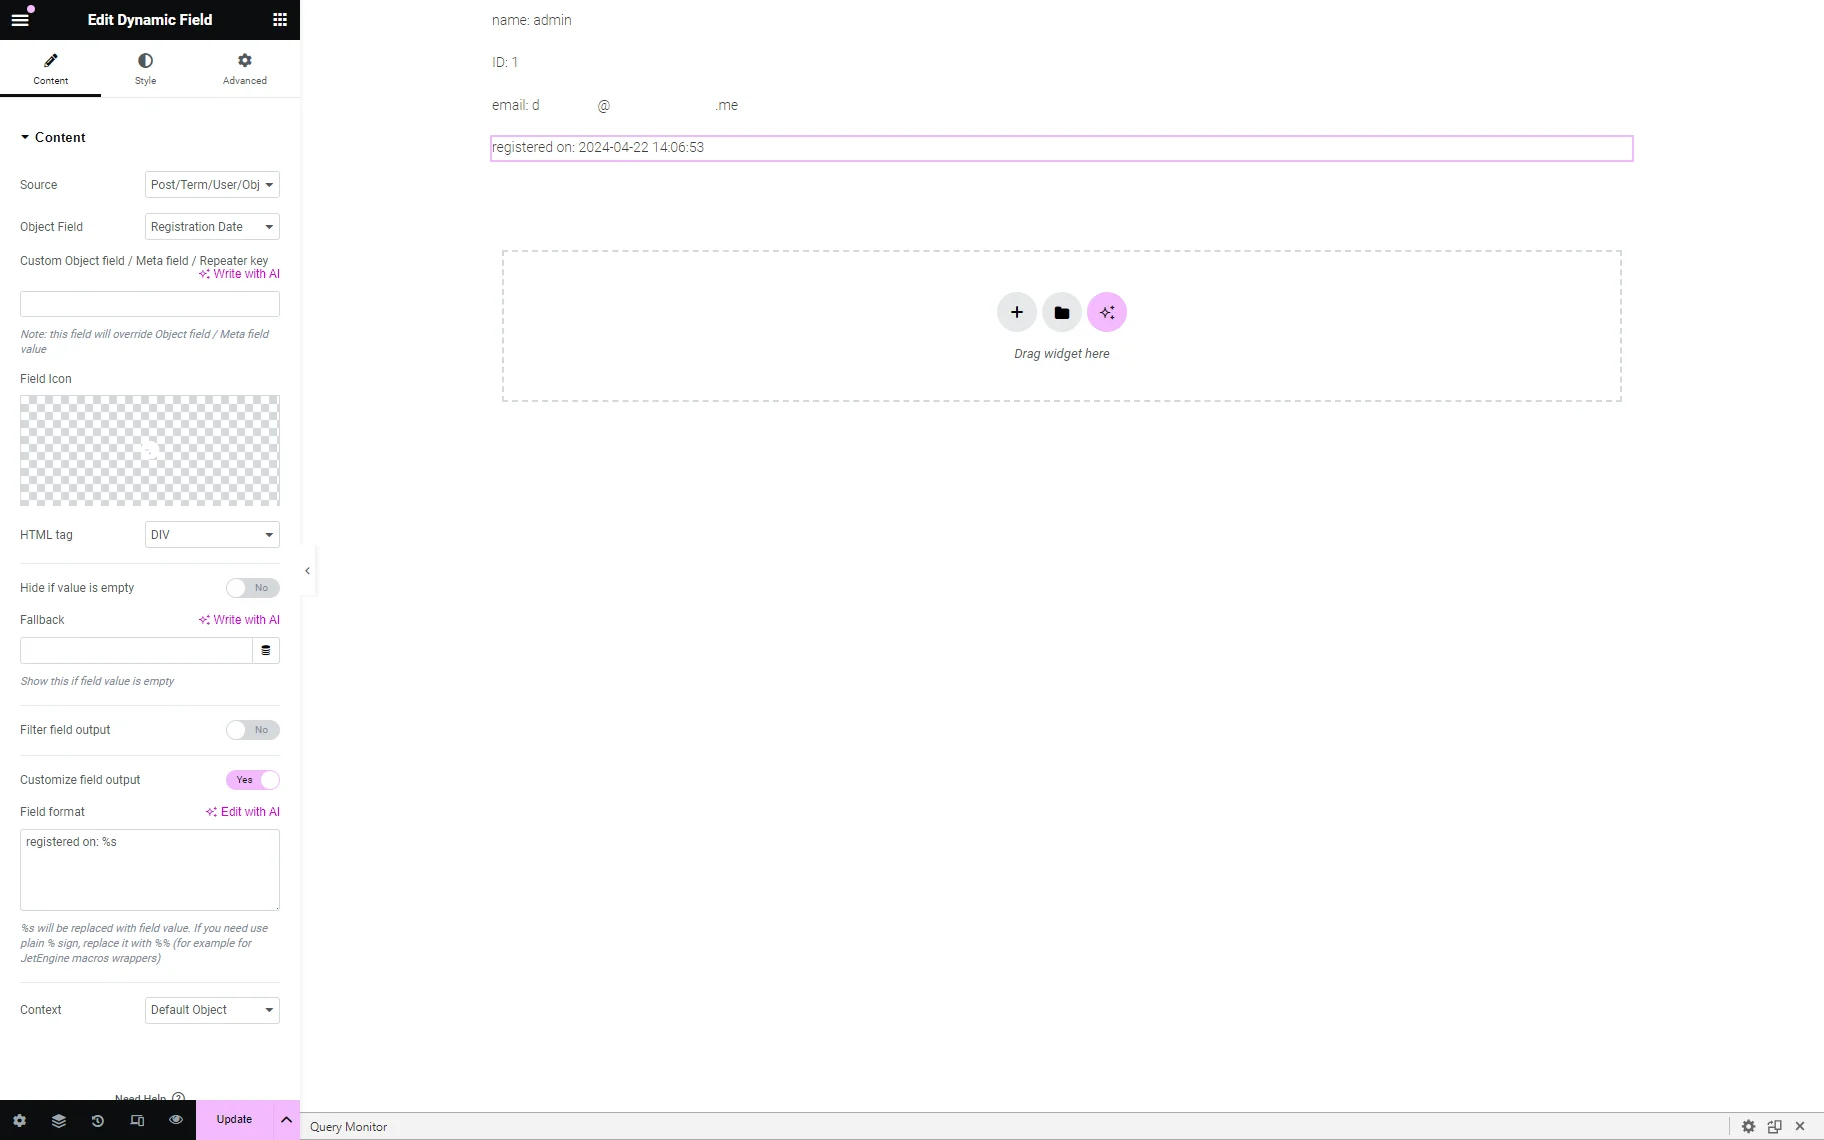
Find and drop the Dynamic Field widget to show the users’ data. Here, we selected the “Post/Term/User/Object Data” from the Source drop-down list. Then, we chose the needed option from the Object Field drop-down list (we picked the “Display Names,” “ID,” “E-mail,” and “Registration Date” options to display the appropriate user’s data).
Additionally, you can apply other widgets to display data associated with users.
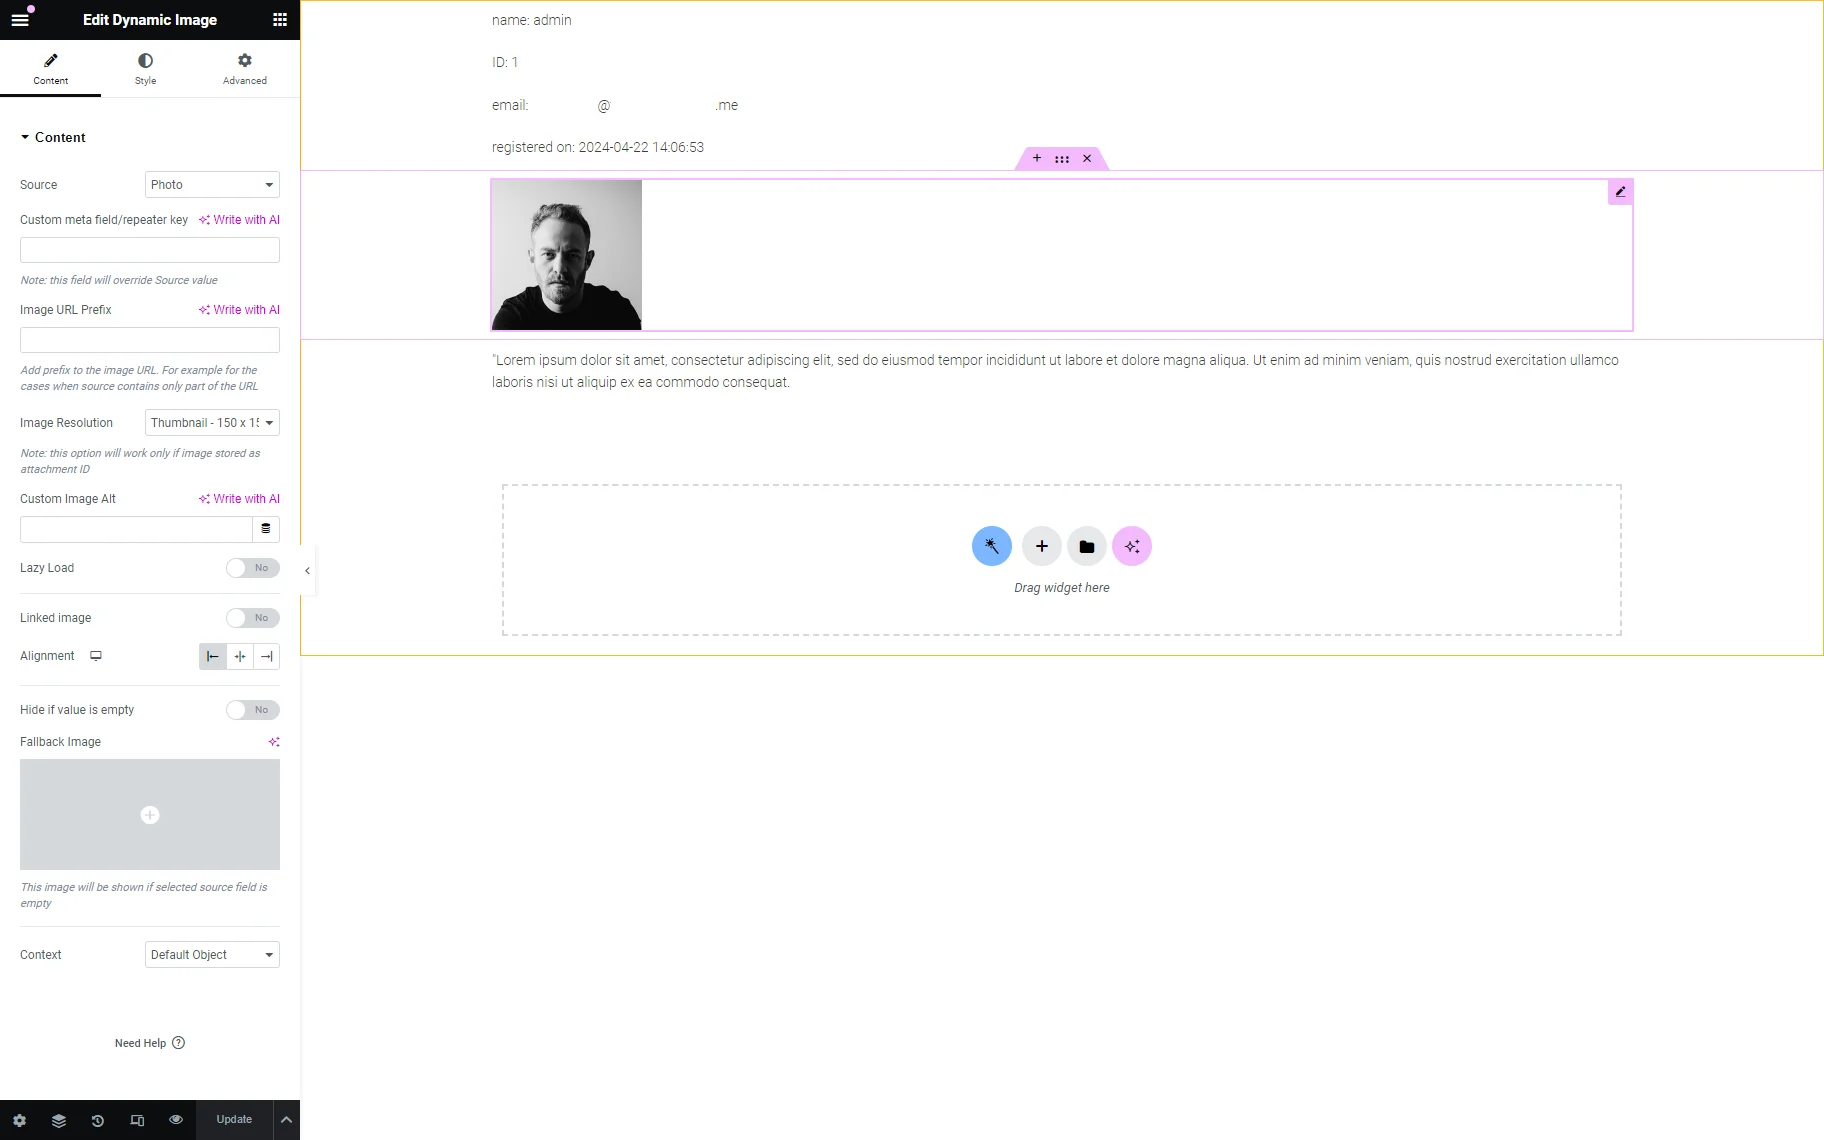
In this case, we added the Dynamic Field and Dynamic Image widgets to show the user’s data from the meta fields of the meta boxes added to the users.
Learn more about Applying Meta Boxes to User Profiles from the tutorial.
When you finish customizing the listing item, push the “Update” button.
Add the Listing to a Page
Move on to the page where you want to display users with posts. In this tutorial, we display users with posts in Elementor.
Drag and drop the Listing Grid widget and select the needed listing (in this case, the created previously “Listing_for_Users” listing item) from the Listing drop-down list of the General tab.
Read the tutorial Listing Grid Widget Overview to know how to manage the Listing Grid widget’s settings.
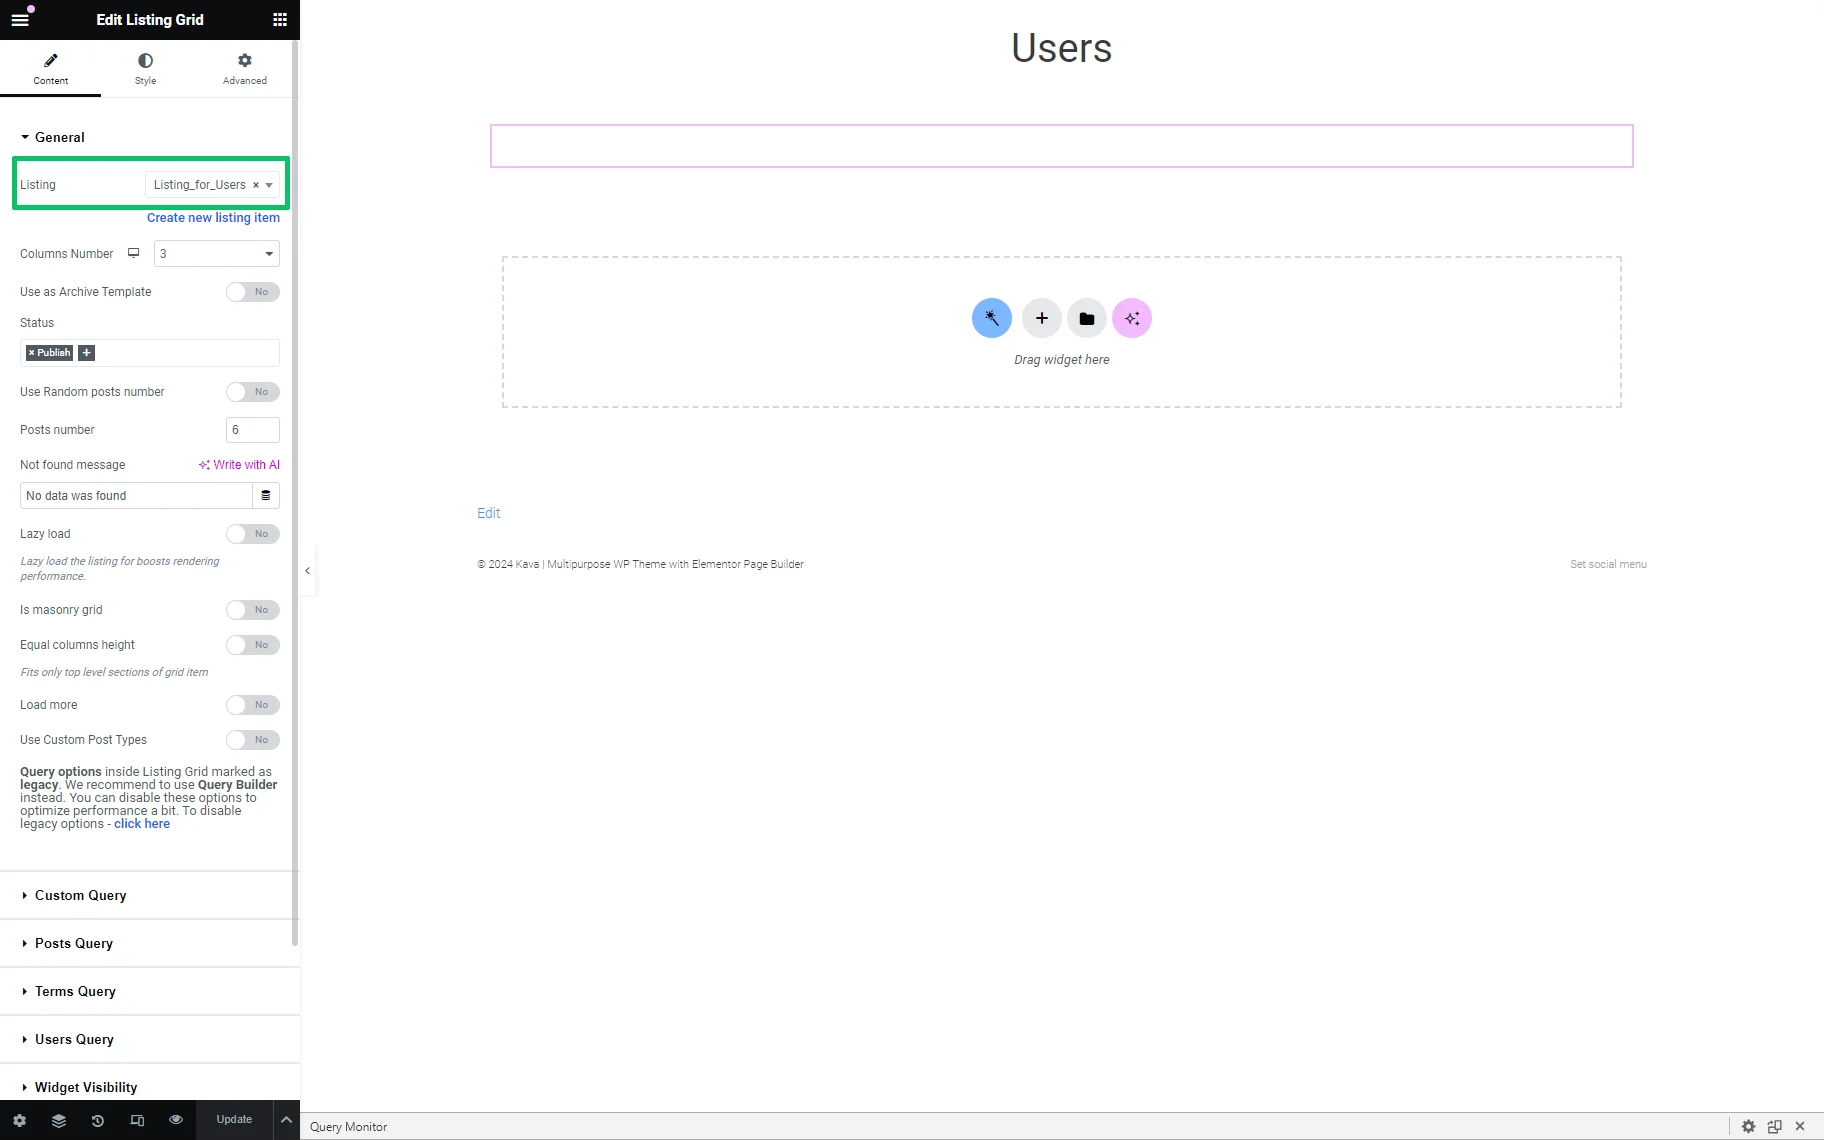
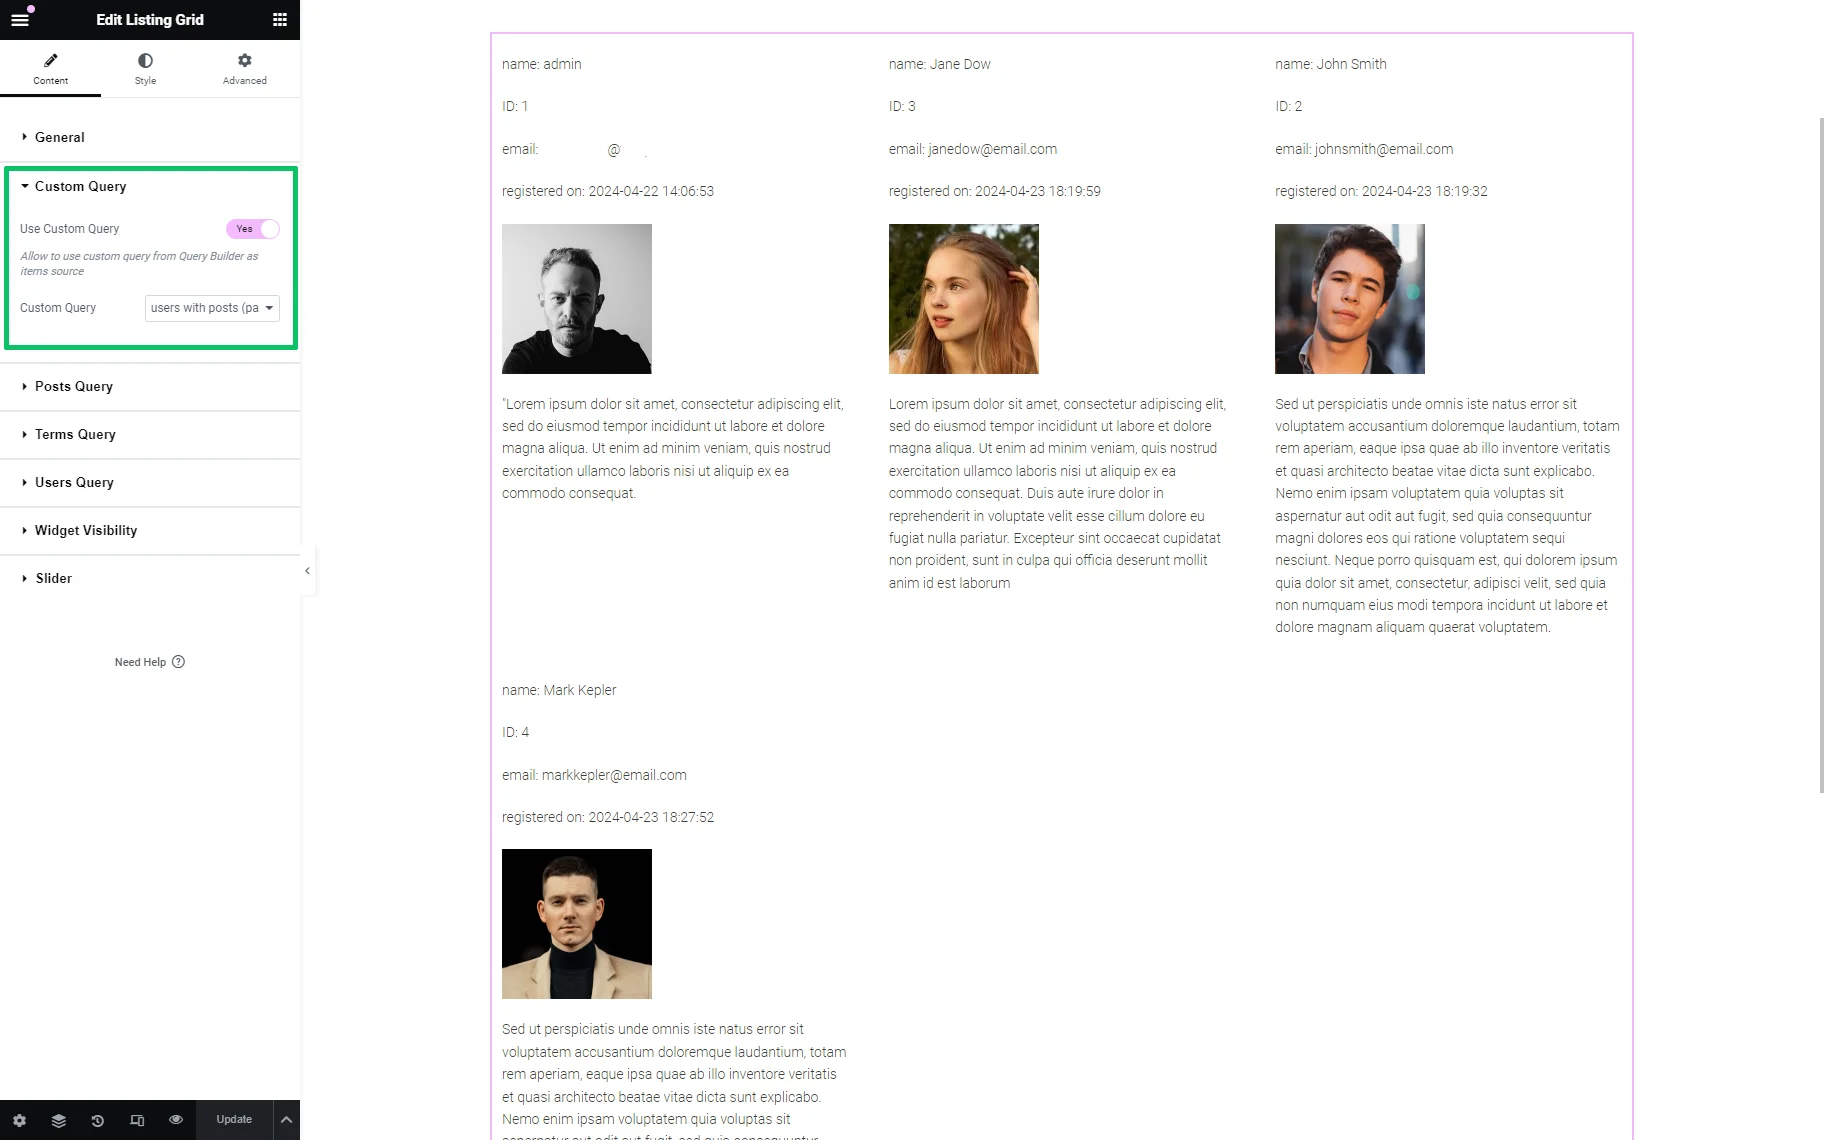
Then, unroll the Custom Query tab and enable the Use Custom Query toggle.
In the Custom Query field, select the needed option (“users with posts (pages) 2” in this case).
Once completed, press the “Publish/Update” button.
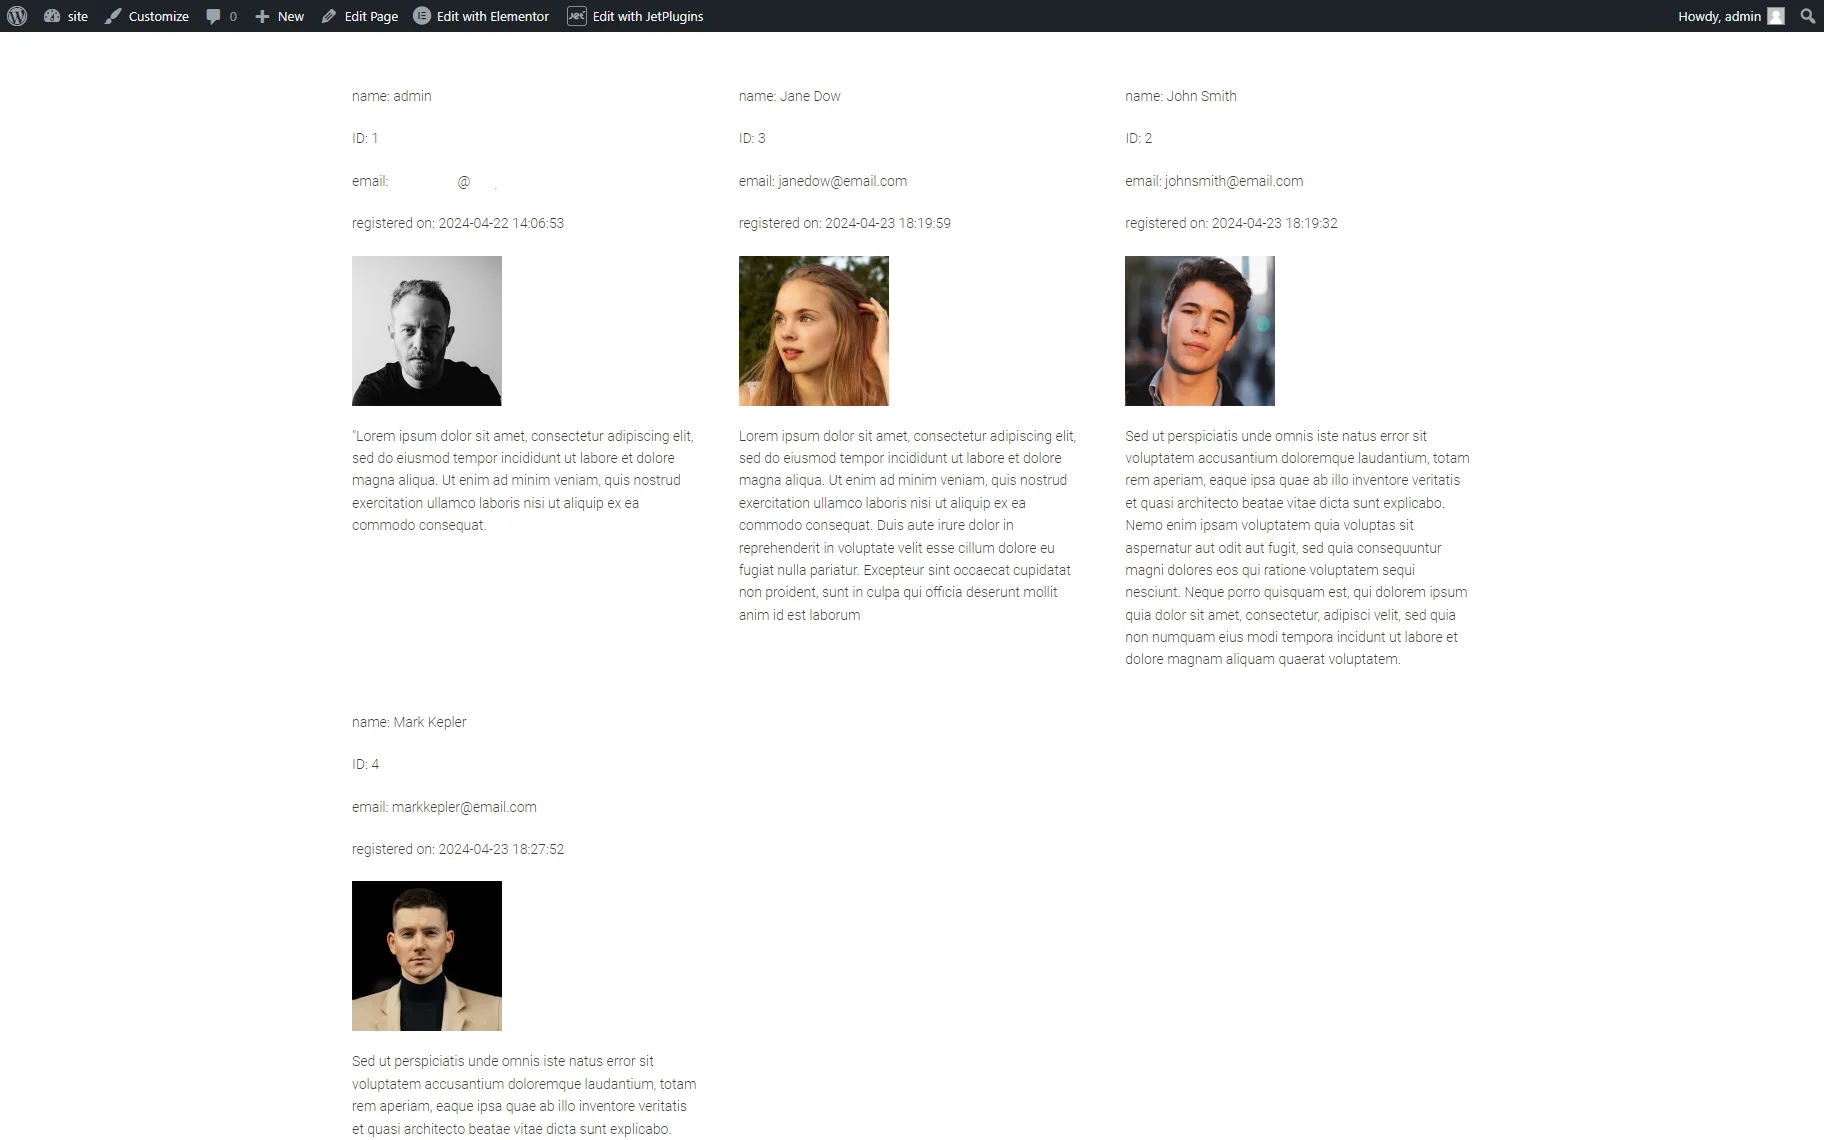
Check Results
Navigate to the front end to check if the query works correctly.
That’s all. Now you know how to add listings with the active users who published posts on your WordPress website and display users’ metadata via the Listing Grid widget/block/element of the JetEngine WordPress plugin.