Redirecting to the Prefiltered Results via the Select Filter
Discover how to create a page with the prefiltered results of the Select filter available with the JetSmartFilters subscription on your WordPress website.
Before you start, check the tutorial requirements:
- Elementor (Free version)
- JetSmartFilters plugin installed and activated
- Products created with the help of WooCommerce
Create Filter
Go to WordPress Dashboard > JetSmartFilters > Add new filter.
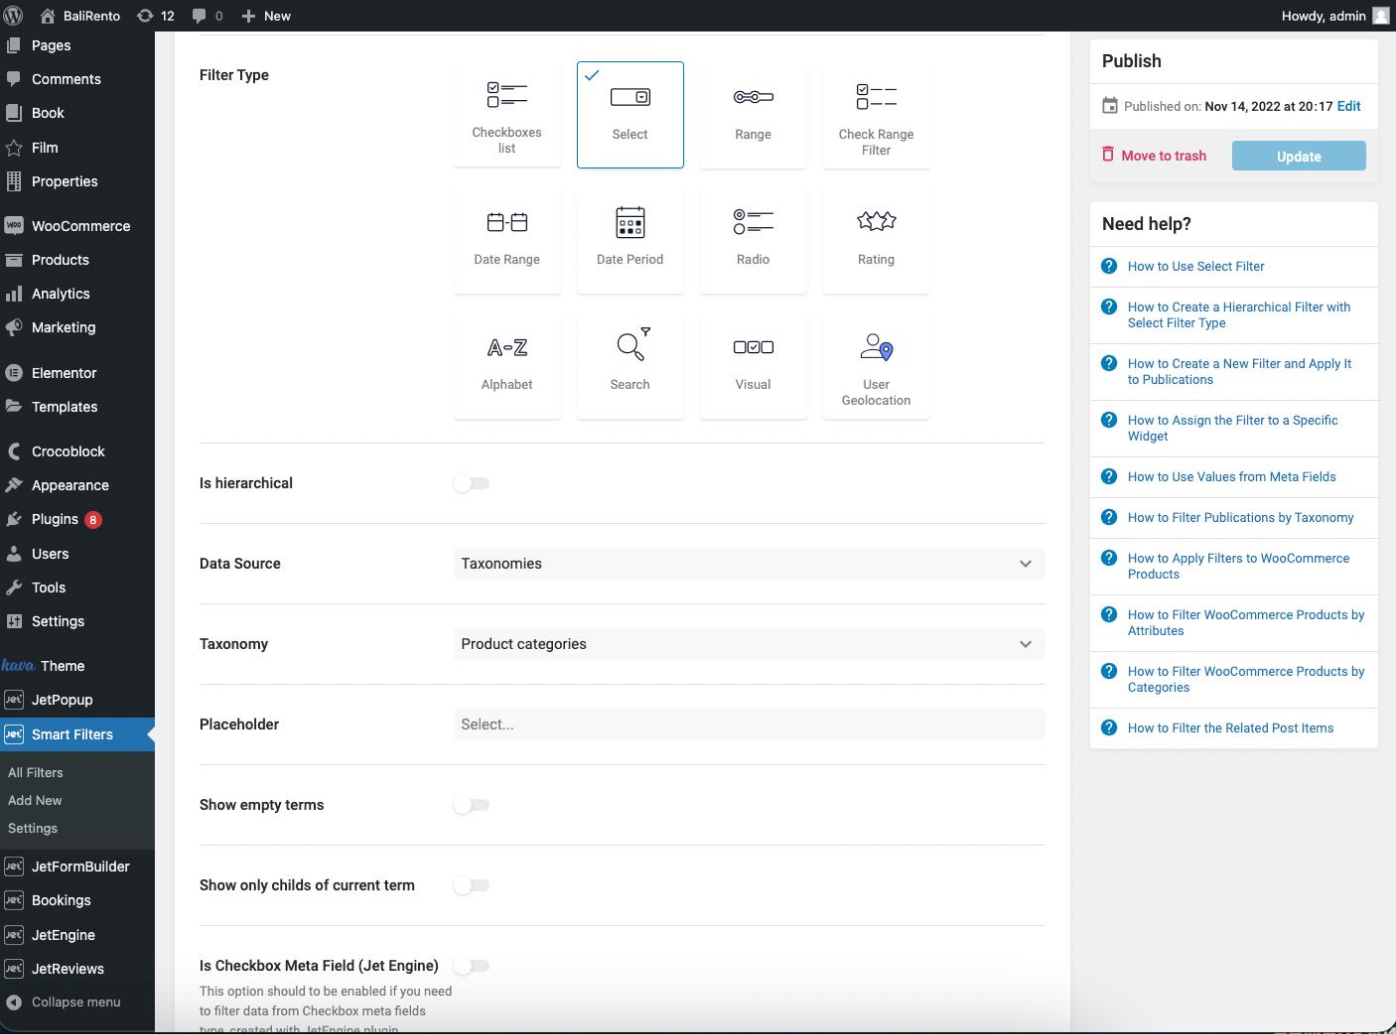
Create a Select Filter, select “Taxonomies” as the Data Source, and choose “Product categories” at the Taxonomy dropdown menu.
Create Page with Product Listing and Filter
Firstly, you need to create two pages. The first one will be a result page where you’ll add filters.
The second page will be a search page. This page should contain the same filters.
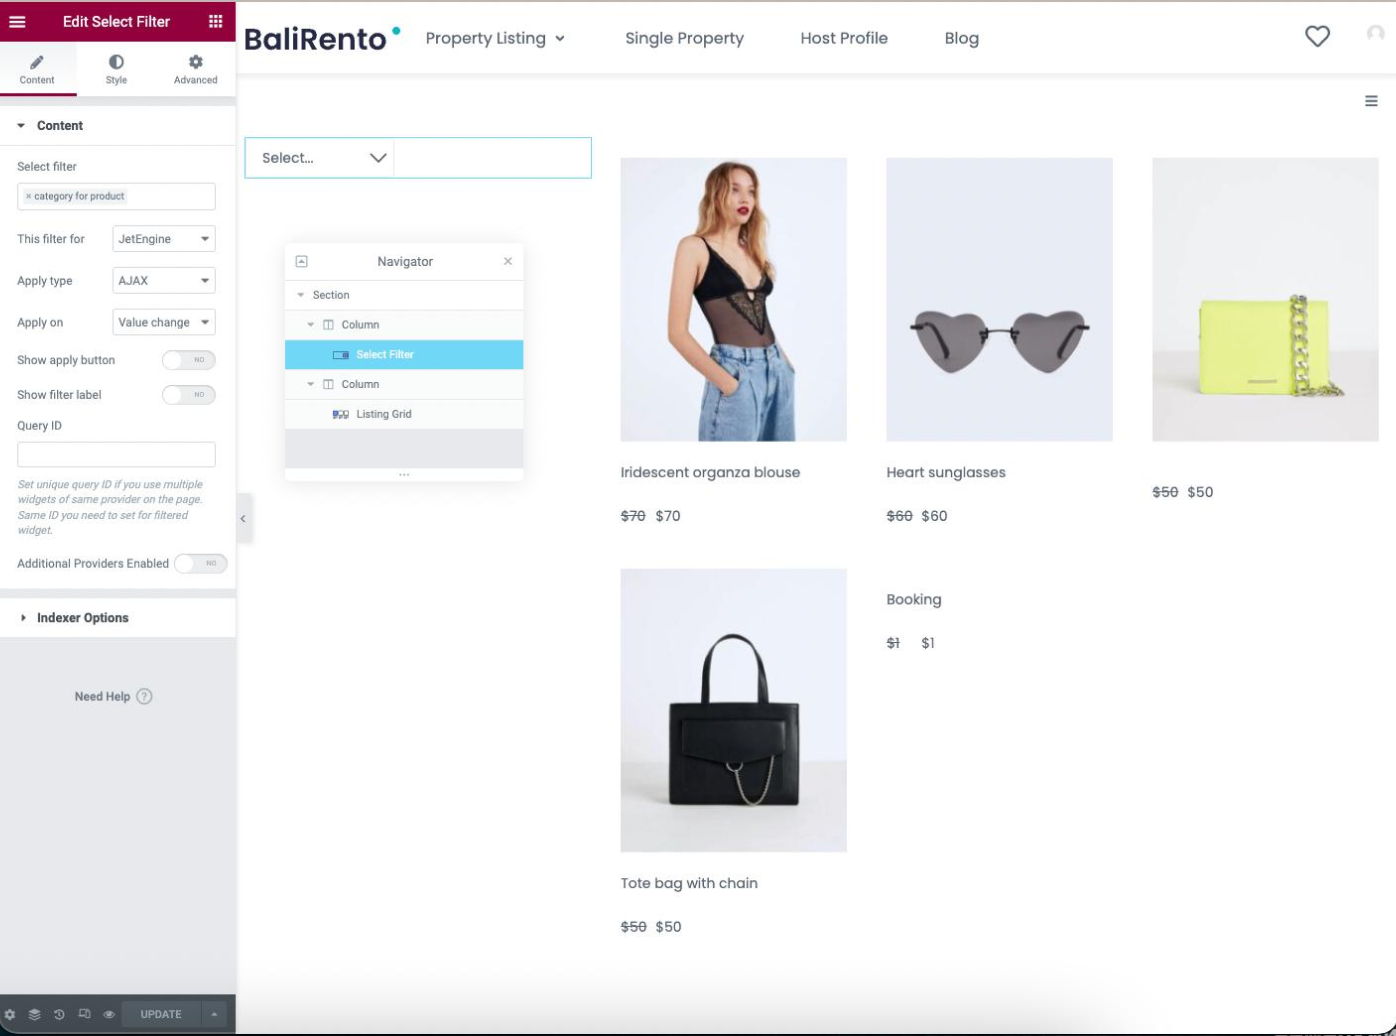
Create a new page or open the needed page in the Elementor Page Builder. Add two columns in Elementor and drag and drop the following widgets into the following columns: first column — filter, second сolumn — Listing Grid:
Add Filter to Needed Page
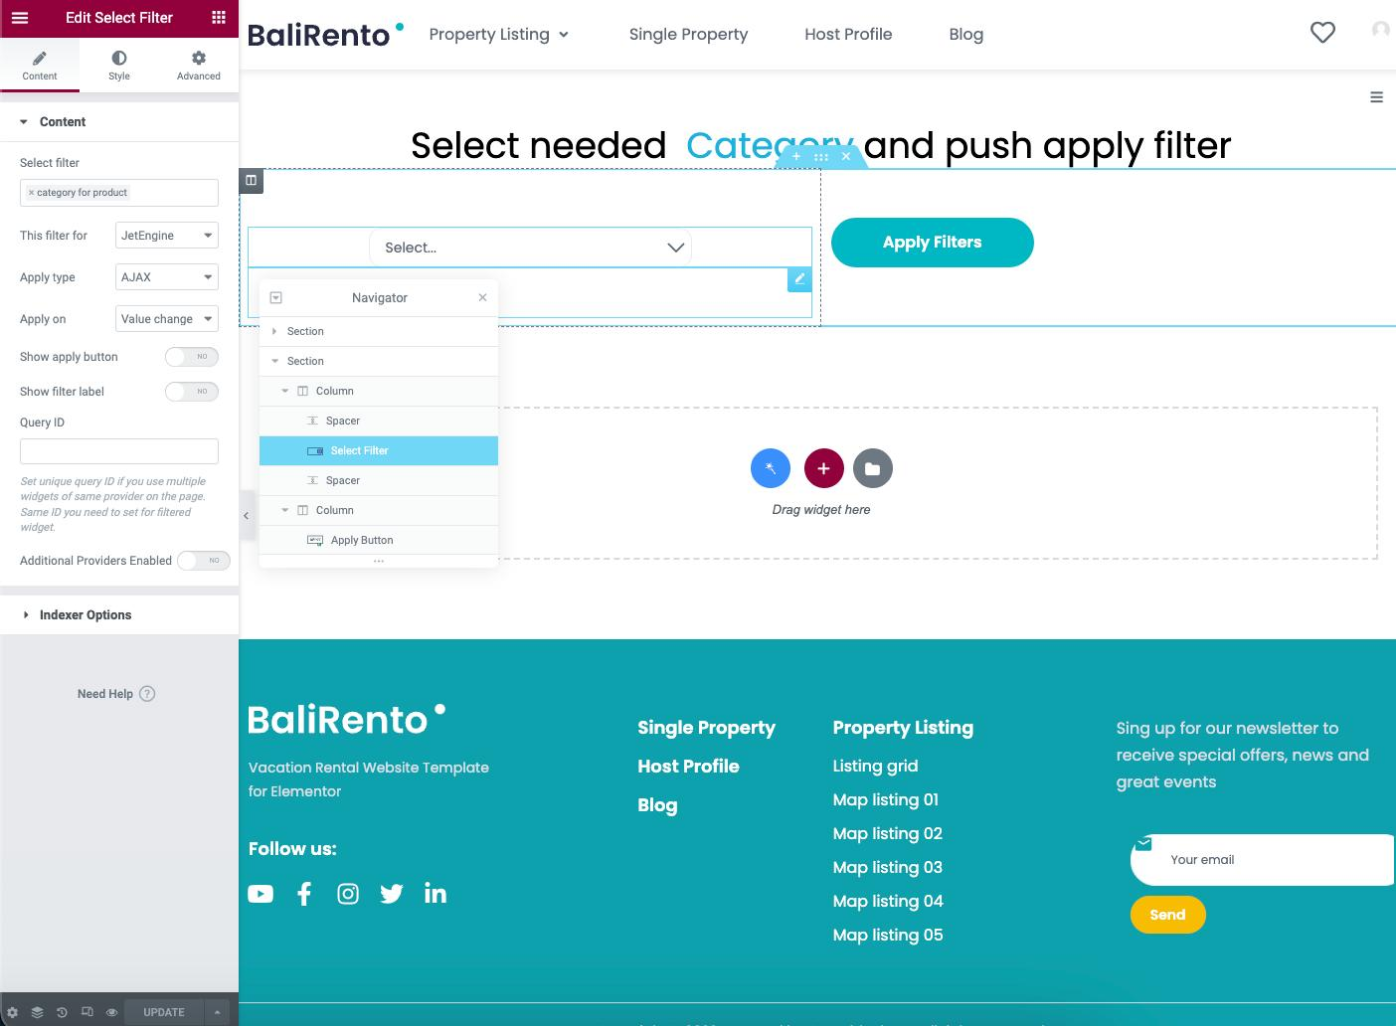
Open the needed page in the Elementor Page Builder. In the described case, we create a new page. Add two columns in Elementor and drag and drop the following widgets into the following columns: first column — filter, second сolumn — Apply Button widget:
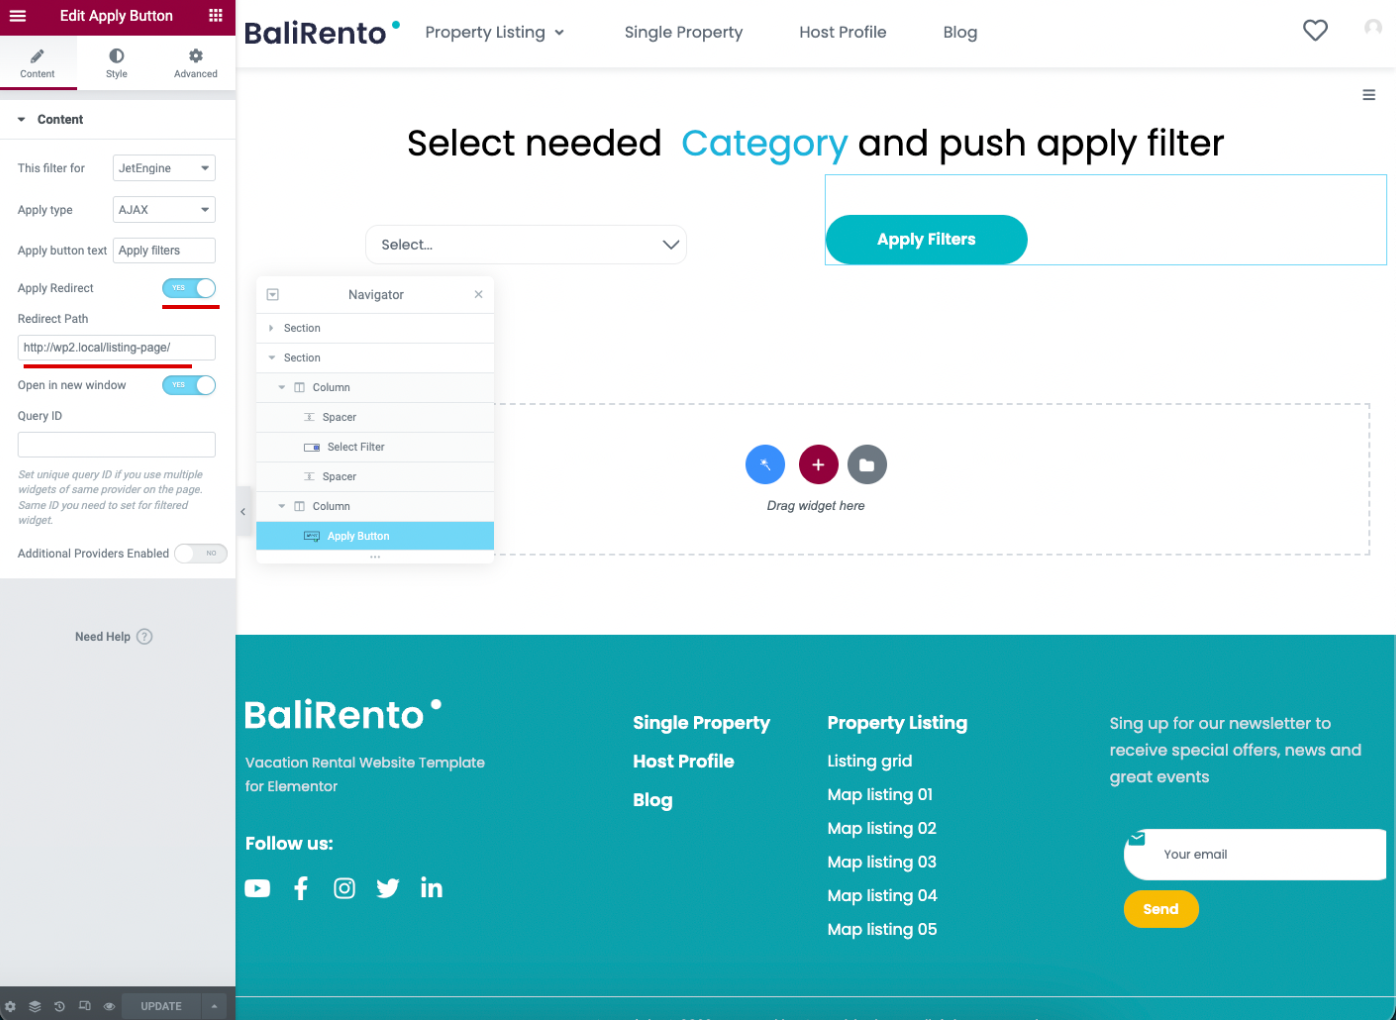
Add the Apply Button widget in the second column and enable the Apply Redirect option. In the Redirect path section, add the URL from the page where the user will be directed after applying the filter.
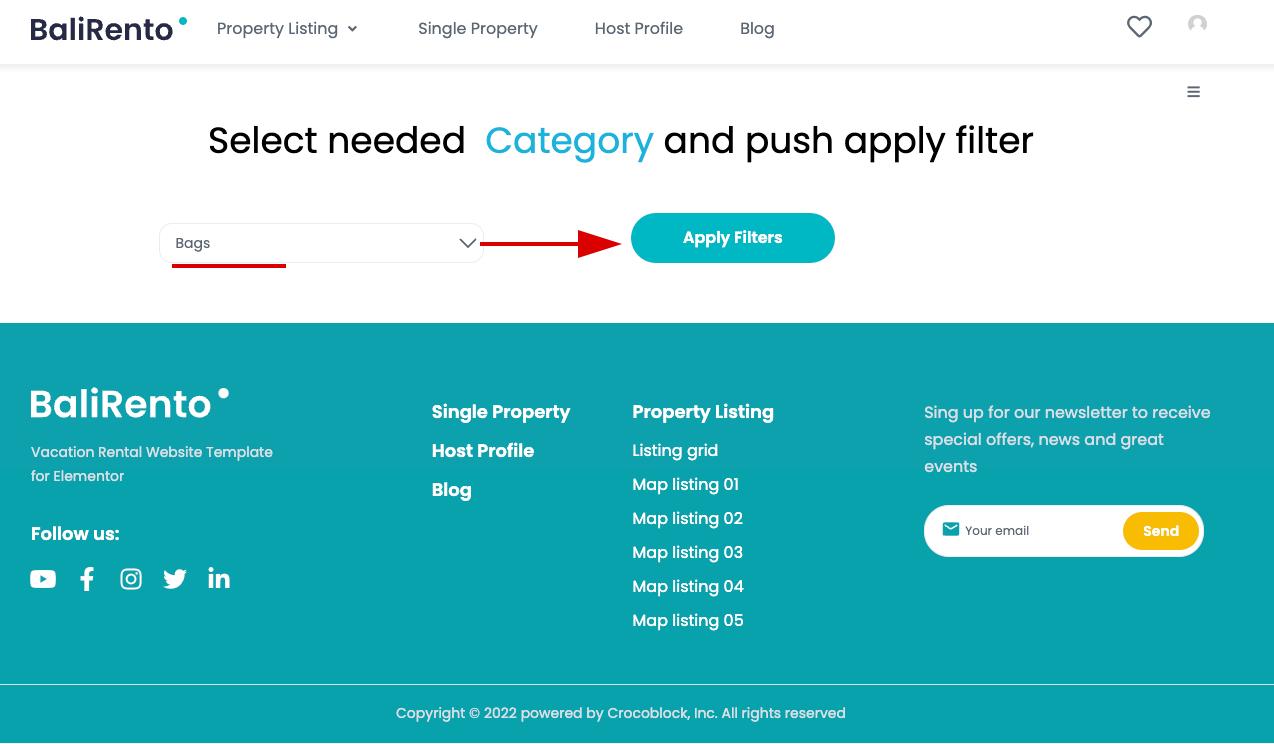
Go to the front end to check the result.
Select any filter and click the “Apply Filter” button.
You will be redirected to the page with the Listing Grid sorted by the category you specified earlier.
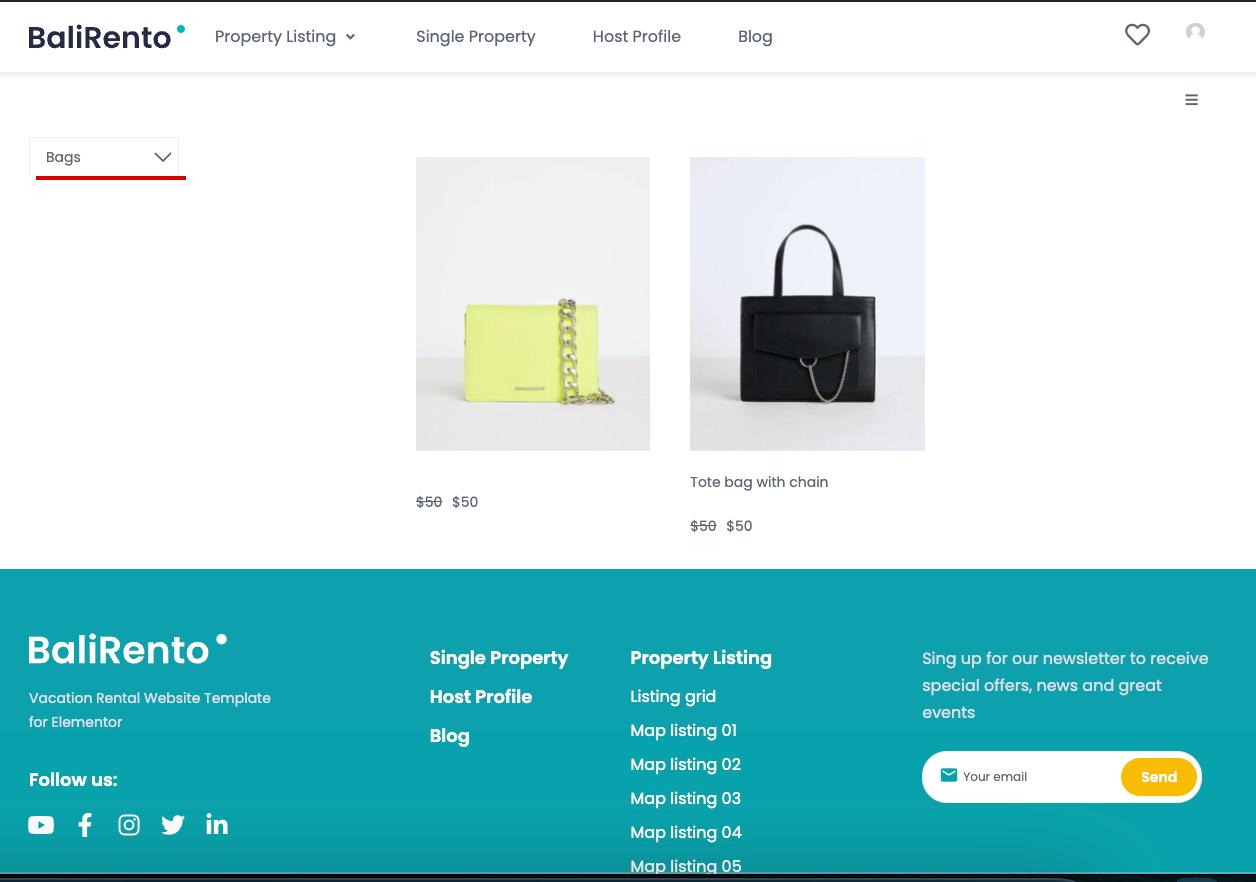
That’s it; now you know how to redirect to the predefined results page via the Select filter available with the JetSmartFilters plugin.