Setting Prices for Variations in WooCommerce
Set the prices for WooCommerce product variations and display the WooCommerce attribute price for each product variation and the whole price range using the JetWooBuilder widgets for WordPress.
Before you start, check the tutorial requirements:
- Elementor (Free version)
- WooCommerce plugin installed and activated with product variations created.
If you have not done it yet, read the tutorial.
- JetWooBuilder plugin installed and activated with Single Add to Cart and Single Price widgets enabled and Single template for products created.
If you have not done it yet, read the tutorial.
Setting Prices for Variations
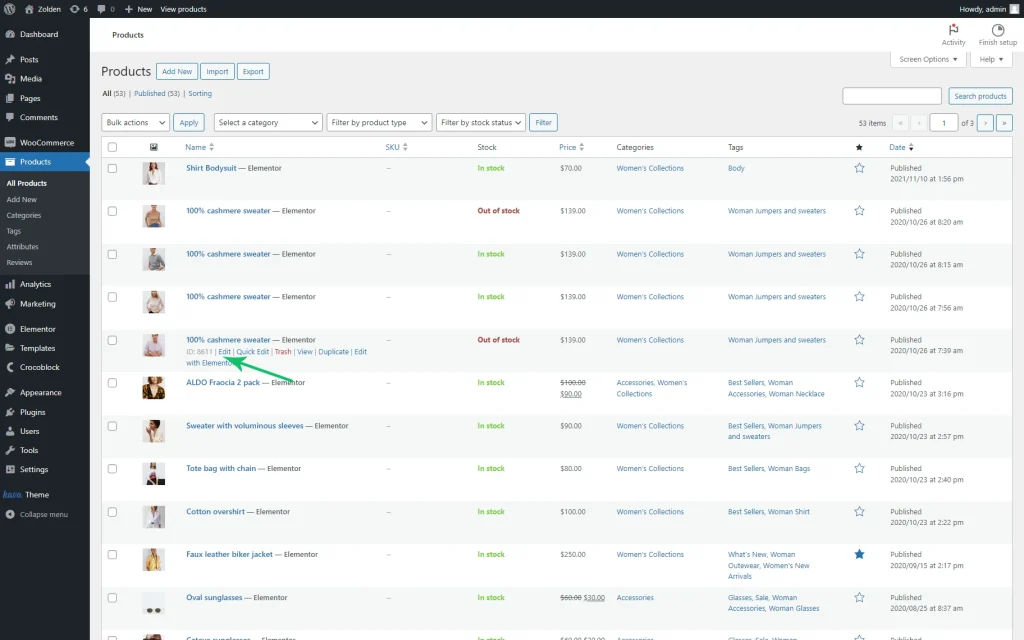
Move to the WordPress Dashboard > Products > All Products tab. Here, hover your cursor over the needed product, click the “Edit” link under the product title, and unroll the product.
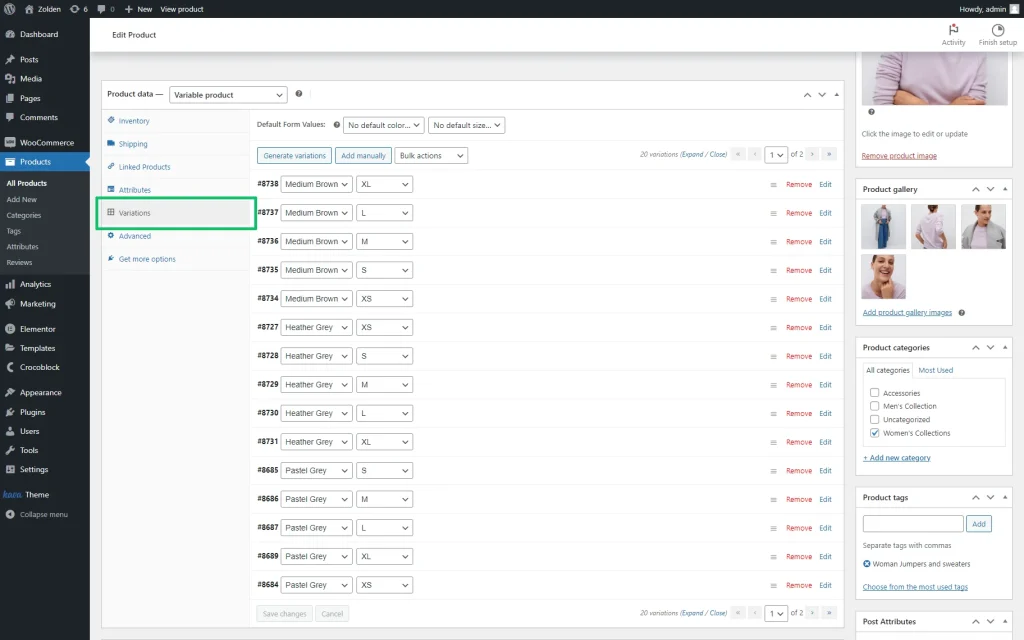
Navigate to the Variations section and unfold it. Here, select the needed variation and press the “Edit” link near the appropriate product variation.
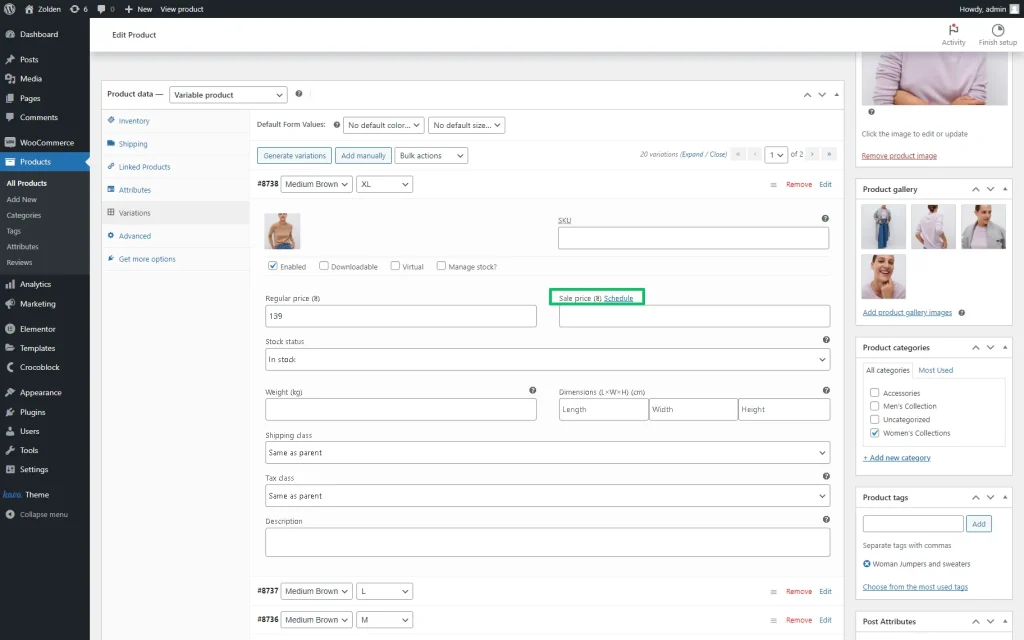
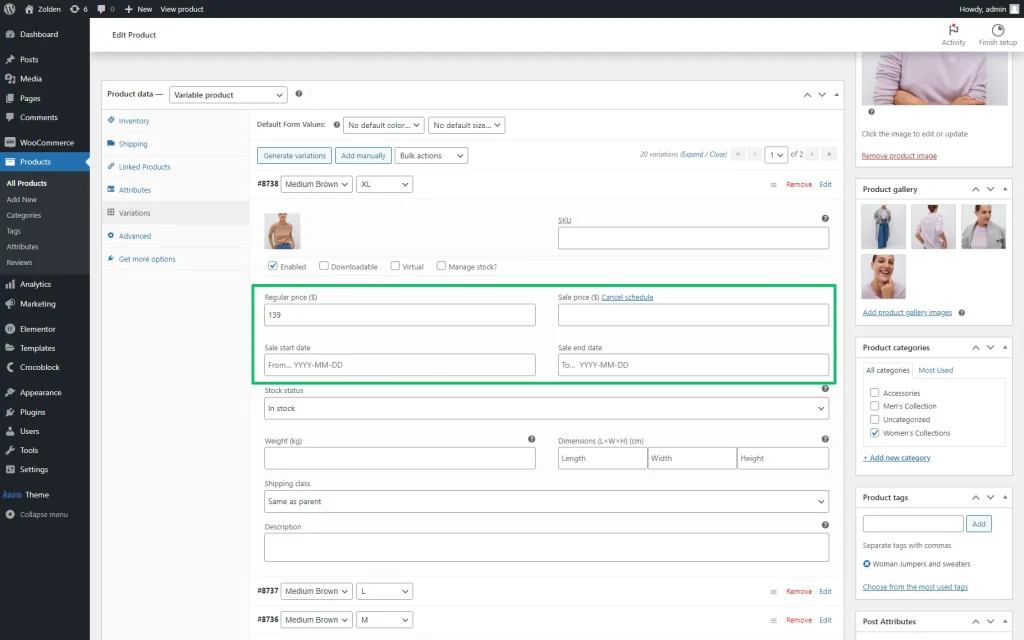
To add prices to the attribute, fill out the Regular price ($) field. If needed, complete the Sale price ($) field and press the “Schedule” link.
Then, the Sale start date and Sale end date fields will appear; these fields allow for selecting the corresponding dates.
Once completed, scroll the tab down and click the “Save changes” button.
Read the How to Create Product Attributes in WooCommerce tutorial to learn how to create different types of WooСommerce product attributes and manage the needed settings.
Adding the JetWooBuilder’s Widgets to Display Prices
Open the previously created Single page. Customize it as needed.
Watch the How to Create a Single Product Page Template in WordPress video to learn in more detail how to use the JetThemeCore, JetWooBuilder, and JetProductGallery plugins to display products and variations.
Displaying the price range of Product Variations
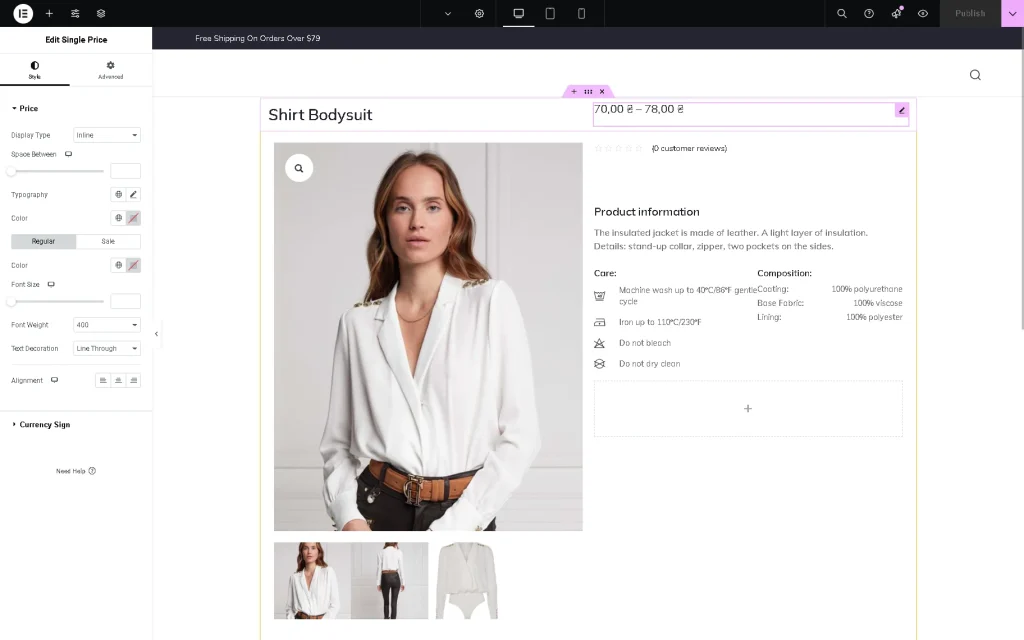
Find the Single Price widget and drag-n-drop it to the template. This widget will show the minimal and maximal prices for product variations. In this case, it is a “70.00” ー “78.00” price range.
Displaying the price for Product Variations
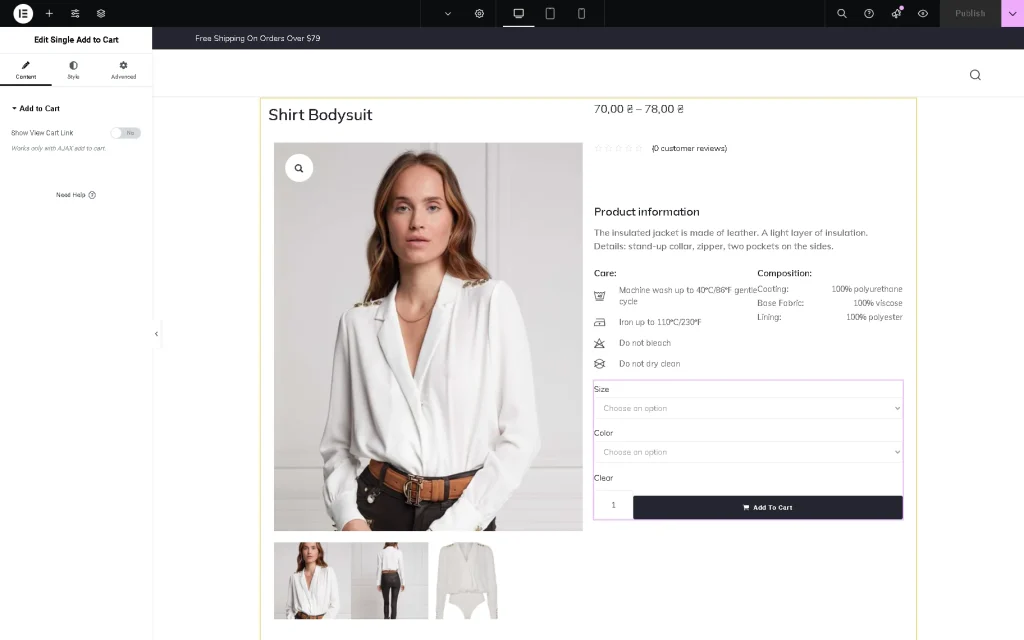
Find the Single Add to Cart widget and drag-n-drop it to the template. After adding this widget, the block that allows selecting the needed options will be displayed on the template.
Once completed, press the “Publish” button and move to the front end to observe how this widget works: after choosing the needed product variation, the widget will show its price.
That’s it. Now you know how to set the prices for WooCommerce product variations and display the WooCommerce attribute price for each product variation and the whole price range using the JetWooBuilder widgets for WordPress.
