
Adding Custom Loader to the Listing Grid When Filtering on AJAX
Make the Listing Grid even more attractive by setting the custom loading icon to display once the filter is applied to the grid. Follow the steps described in the tutorial to recreate the user-friendly feature.
As you already have a Listing Grid block/widget and a JetSmartFilters filter (or several of them) with AJAX Apply Type on the page, you could notice that by default, Listing Grid becomes translucent during loading.
In this tutorial, you will discover how to change the default view into the custom loader icon. For instance, we will present to you the following icon (see the picture below), but you are free to change it to your liking.
Mind that to reproduce the depicted result on your WordPress website, you’ll need to use CSS and JS codes.
To implement the needed functionality, we will use the free Simple Custom CSS and JS plugin, but you can repeat the described steps with another desired plugin.
Place Icon on Page and Make It Animated
Initially, create a section above the Listing Grid widget. Find and place the default Elementor Icon and Heading widgets there.
Customize the content to your liking. You can see the example in the picture below.
In the Advanced settings tab, paste the unique CSS ID code to the corresponding field of the Listing Grid widget.
Find the filter you have used on the page, and paste the same ID in the Query ID field.
Then, complete the CSS ID field of the column where Icon and Heading are placed with a new unique ID.
After you’ve set the loader template, proceed to the following steps to make it movable.
To create an animation, open the WordPress Dashboard > Custom CSS & JS > Add Custom CSS directory and paste the following CSS code:
#loading_icon i {
    -webkit-animation: fa-spin 2s infinite linear;
    animation: fa-spin 2s infinite linear;
You can check the page; the icon will be loading. Let’s make the template hidden once the page is just loaded.
Add one more code the same way you did in the previous step:
#loading_icon {
    display:none;
}
#loading_icon i {
    -webkit-animation: fa-spin 2s infinite linear;
    animation: fa-spin 2s infinite linear;
}Set Condition for Icon Appearance
For the proper work of the function and animation, add the following JS code:
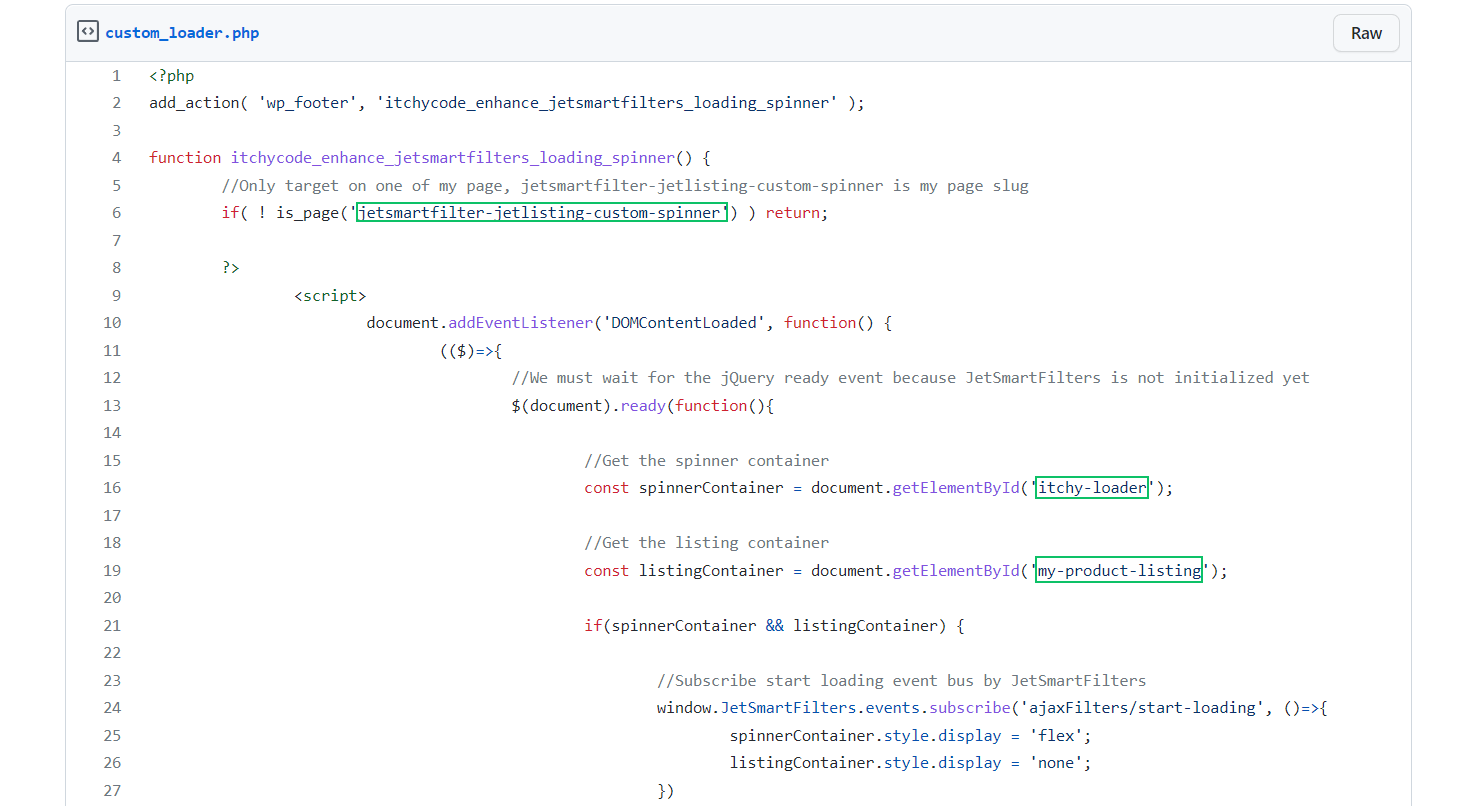
You can check the result on the live page. That’s it; now you know how to create the custom loader animation of the Listing Grid widget/block after filtering it.