There’s no doubt that WooCommerce pages, including the Cart page, need modification in most cases. Let’s see how to do it using two different methods: Elementor and JetWooBuilder plugins or code.
Table of Contents
- Default WooCommerce Cart Page Templates
- Customizing Cart Page in WooCommerce Using JetWooBuilder
- WooCommerce Cart Page Customization Using Code
- FAQ
- Wrapping Up
Default WooCommerce Cart Page Templates
As with all of the templates on your website, the WooCommerce Cart page template follows the design system of your theme so that it can look quite different, depending on the theme. WooCommerce-optimized themes have these layouts that are normally more well-thought-out than the themes that don’t have this feature in their description.
But the idea is quite simple, and, for instance, the H1 title of the Cart page will inherit the style (font family, size, and color) of all the H1 titles on the website, as well as links, buttons, and so on. In many cases, it’s better if the Cart page has a more polished look and a more specific design, or you want to add some specific elements there and implement more interesting layout ideas.
Let’s look at this example: this is what my demo WooCommerce Cart page looks like by default, and it definitely needs some improvements.
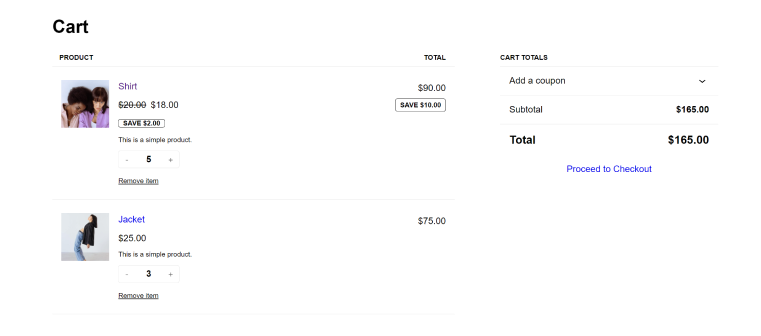
To be more precise, I want to achieve this:
- make it more compact;
- make the price per item and the total price look more prominent;
- style the “Proceed to Checkout” button;
- make the discount notes look not like buttons.
I will use two methods. The first one is editing a cart template with the JetWooBuilder plugin for Elementor, which will be styled fully visually.
The second method will rely upon using custom code if you don’t use Elementor.
WooCommerce Gutenberg blocks
Before I start, I have to mention that since the end of 2023, WooCommerce Block Editor blocks have become a part of the main plugin, and by default, the Cart page is constructed of them (instead of the classic [woocommerce_cart] shortcode). It’s quite convenient that the WooCommerce pages are finally editable by default.
However, it’s still a good old Block Editor with limitations when it comes to styling, and, in the case of Woo blocks for the Cart page, there are no styling options at all, so if you want to change something, you will have to use CSS.
Also, blocks are quite big – for example, the Product block for Cart consists of many elements that you might need, and you can’t remove them in the block settings. Let’s say I don’t want to display the product description in the Cart but can’t just remove it; the custom code will be required.
And here comes one more drawback – not all the hooks are supported if you use WooCommerce blocks to create templates. That’s why I still prefer the classic template ([woocommerce_cart]), as working with it feels less confusing.
Customizing Cart Page in WooCommerce Using JetWooBuilder
This method uses the JetWooBuilder plugin for Elementor, and it’s truly straightforward and fast.
So, there are a bunch of widgets available, in particular for the Cart page:
- Cart Product Table;
- Cart Totals – to show subtotal, total, and the “Proceed to Checkout” button;
- Return to Shop – also can be replaced with any button widget;
- Empty Cart Message that you can customize;
- Cross-Sells Widget to add related products.
Note that specific JetWooBuilder widgets for other page types will not be available on the Cart page.
Also, you can use any other Elementor widgets, including those for Elementor Pro or any third-party add-ons.
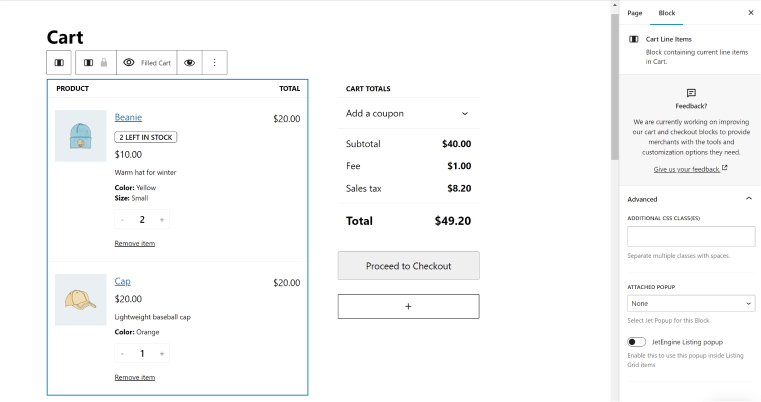
Here is what I’ve achieved after a few minutes of customization of the WooCommerce Cart page. It looks much better than before, doesn’t it?
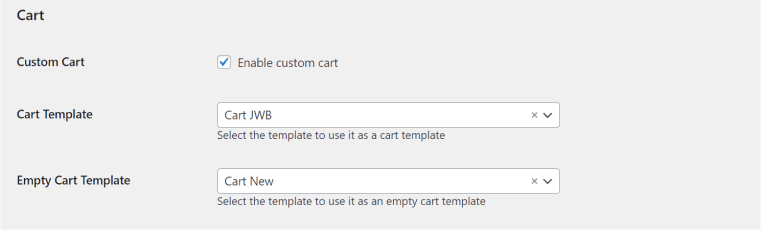
To modify the Cart Page, install JetWooBuilder, then go to Crocoblock > Woo Page Builder on the WordPress dashboard and select the Cart tab. There, hit “Create New Template,” name your template, and edit just like any other page with Elementor.
When you are done and happy with the result, return to the Dashboard, go to WooCommerce > Settings > JetWooBuilder tab, and assign the newly created template for the Cart page:
It should work just after the Cart page refresh. However, if it doesn’t and still shows the old template, click “Edit page” (we are talking about the Cart page), and make sure there’s a [woocommerce_cart] shortcode there, not something else because this is the template that JetWooBuilder overrides.
The reason why we might need to do this is that recent versions of WooCommerce have their templates made of Gutenberg blocks, and it overrides the classic layout that PHP template files are responsible for.
Also, don’t forget to create a template for the empty card case using the corresponding widget by JetWooBuilder.
Watch this video about WooCommerce Cart page customization to have an even better idea of how fast it is.
Combining Cart and Checkout pages in JetWooBuilder
In many cases, it looks better and more convenient when both Cart and Checkout pages are combined. However, you can’t use Checkout widgets on the Cart page and vice versa just to add this functionality there.
But you can do a little trick. Go to Crocoblock > Woo Page Builder and create the custom template for the Checkout part of the page, then go to WooCommerce > Settings > JetWooBuilder tab and assign the newly created template for the Checkout page, just like you did for the Cart one.
Now, open your Cart page on the website, click “Edit page” on the top bar, and to the shortcode of the Cart page – [woocommerce_cart], add the shortcode that will display the checkout page – [woocommerce_checkout].
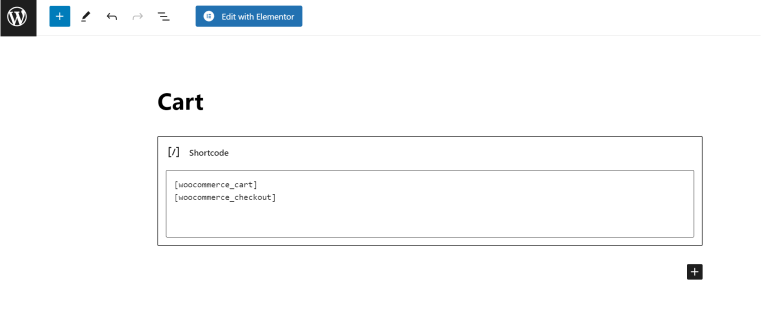
That’s it, and the logic is quite simple here – JetWooBuilder replaces templates for which particular WooCommerce shortcodes are responsible.
Make sure that in your new combined page, you have a nice and concise layout – for example, it shouldn’t include buttons like “Proceed to checkout” or other confusing or duplicating elements that you don’t need anymore if everything is on one page.
WooCommerce Cart Page Customization Using Code
If you want to customize a Cart page using code, you should start by copying WooCommerce template files to your child theme so as not to lose changes on plugin updates. Using your favorite FTP client, copy the “template” folder of the WooCommerce plugin, then create a folder called “woocommerce” in the root of your child theme and paste the template folder there. Thus, this version of templates will override those in the plugin folder.
You can edit the code of these templates and create new layouts. However, there’s a way to change layouts without modifying these files by using hooks and some CSS – it all totally depends on your goal.
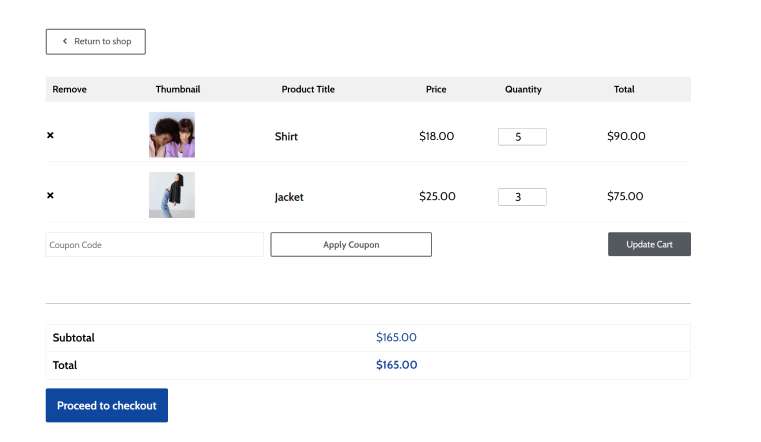
But first, you need to switch to the classic cart so all the hooks will work, and the changes to the PHP templates will appear on the front end. To do so, open the Cart page in the editor and delete Gutenberg blocks for the cart; instead, insert the [woocommerce_cart] shortcode.
By default, you will get a classic product table layout:
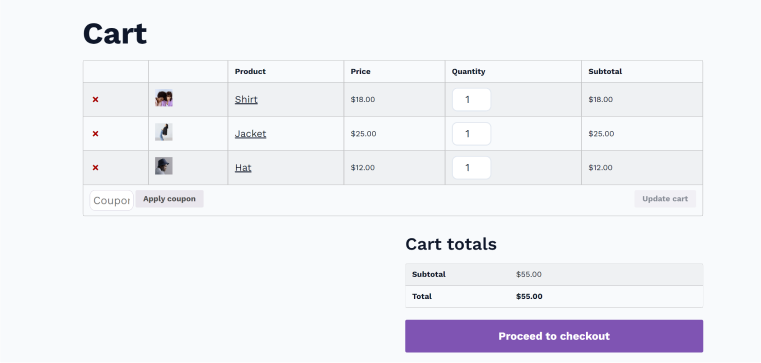
It already made it look better and more compact.
Now, using some CSS, I will change font sizes and colors. To find the element’s class names, open the element in the browser Inspector. Then, add some CSS rules and enjoy the result.
This is my CSS to make the Product name, Subtotal font, and thumbnail size bigger. Note that I use the .woocommerce-cart table.cart class, so the changes will apply only to the Cart page.
.woocommerce-cart table.cart  .product-name a {

font-weight: 600;

font-size: 1.6em;

}

.woocommerce-cart table.cart .product-thumbnail img {

min-width: 100px;

}

.woocommerce-cart table.cart .woocommerce-Price-amount  {

font-size: 1.2em;

}
If I want to change the structure of the table, CSS might not be enough, so you can open the Cart template file that you copied there earlier and change the HTML or PHP.
Useful hooks for the WooCommerce Cart page
Hooks are a very convenient way to modify WooCommerce pages without editing templates. Thus, you can always remove one of them and not worry that the whole structure will be affected.
Hooks are functions that let you add or remove content at specific points in WooCommerce pages. There are two types of hooks:
- Action hooks: Allow you to add or remove functionality (e.g., adding a new button).
- Filter hooks: Allow you to modify existing content (e.g., changing a label or price format).
You can find the full hook reference here, but I will mention some of the most useful ones in this article. Also, it’s very convenient to see which hooks you have on your page and what their priority is, and plugins like WP Hook Finder will help you. Also, you can just have a look at the Cart template file and see all the hooks within the HTML structure.
If you use the plugin, you will see something like this:
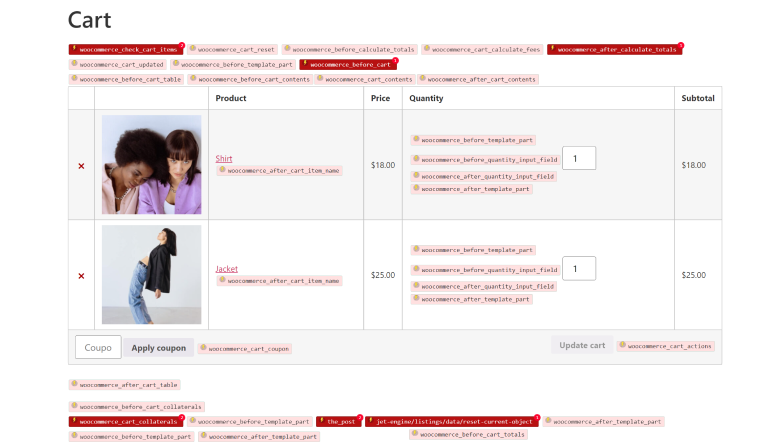
It might look a bit overwhelming, but it’s easy to use: let’s say I want to add a button or word after the Product table, so I just inspect what hooks are located there. It’s “woocommerce_after_cart_table.” So, I write a simple function and “hang” it on that hook:
add_action('woocommerce_after_cart_table', 'add_phrase');

function add_phrase() {

echo '<p class="my-phrase">The phrase</p>';

}
Here are some of the most frequently used hooks for the Cart page:
| The hook | Where it fires |
|---|---|
| woocommerce_before_cart | before the cart table starts |
| woocommerce_before_cart_table | before the cart table, inside the form |
| woocommerce_cart_contents | during the cart table loop, before the items |
| woocommerce_cart_collaterals | below the cart table and above the cart totals |
| woocommerce_cart_totals_before_shipping | after the shipping row in totals |
| woocommerce_cart_totals_before_order_total | before the total price row |
| woocommerce_cart_totals_after_order_total | after the total price row |
| woocommerce_proceed_to_checkout | where the “Proceed to Checkout” button is |
| woocommerce_after_cart | after the cart table ends |
Using these hooks, we can insert elements within the template, move blocks, or remove them. Add the code to your functions.php file and enjoy the result.
In the paragraphs below, I have collected some examples for you.
Moving totals above the Product table
Moving any block is actually removing it from the location of one hook first and then adding it to the location of another one.
add_action('wp', 'remove_default_cart_totals_subtotal');

function remove_default_cart_totals_subtotal() {

    if (is_cart()) {

        remove_action('woocommerce_cart_collaterals', 'woocommerce_cart_totals', 10);

    }

}

add_action('woocommerce_before_cart', 'add_subtotal_above_cart_table');

function add_subtotal_above_cart_table() {

    if (is_cart()) {

        // Output the subtotal block

        echo '<div class="cart-subtotal">';

        echo '<h2>' . __('Cart Totals', 'woocommerce') . '</h2>';

        echo '<table class="shop_table shop_table_responsive">';

        echo '<tr class="cart-subtotal">';

        echo '<th>' . __('Subtotal', 'woocommerce') . '</th>';

        echo '<td>' . WC()->cart->get_cart_subtotal() . '</td>';

        echo '</tr>';

        echo '</table>';

        echo '</div>';

    }

}
Adding a message before the Product table
add_action('woocommerce_before_cart', 'add_custom_message_on_cart');

function add_custom_message_on_cart() {

    echo '<p class="custom-message">Thank you for shopping with us! </p>';

}
Changing “Cart total” to “You will pay”
To do it without the template direct modification, we should hide the existing title using CSS:
.cart_totals h2 { display: none; }And then add the new one:
add_action('woocommerce_cart_totals_before_order_total', 'custom_cart_totals_title', 5);

function custom_cart_totals_title() {

    if (is_cart()) {

        echo '<h2>' . __('You will pay', 'woocommerce') . '</h2>';

    }

}
Adding a phrase after the product quantity input
add_action('woocommerce_after_quantity_input_field', 'add_maybe_more_phrase');

function add_maybe_more_phrase() {

    echo '<p class="maybe-more-phrase">Maybe more?</p>';

}
FAQ
It’s a page where the customer sees all the items they added to the cart and are about to purchase.
By default, the URL of the cart page is yoursite.com/cart.
You can either use plugins, such as JetWooBuilder, or custom code.
Wrapping Up
WooCommerce is a very powerful plugin with huge functionality, but in many cases, extra plugins or skills are required to get a good result.
In this article, I went through the anatomy of the WooCommerce Cart page template and the ways to modify it. This page is crucial for the successful user journey, and if designed and works properly, users will not get lost or confused and will happily make a purchase – and this is what any shop owner really wants.

