In this article, let’s figure out Google Analytics functionality and how you can add Google Analytics to your WordPress website.
Are you keen to improve your WordPress website’s performance? Why don’t you use Google Analytics?
It is crucial to be aware of how your audience interacts with your website. And the best way to do this is by knowing your traffic statistics through Google Analytics.
Table of Contents:
- A Quick Introduction to Google Analytics
- Why is Google Analytics important for your WordPress site?
- How to Sign up for Google Analytics?
- How to Install Google Analytics on WordPress?
- To Conclude
A Quick Introduction to Google Analytics
Before you start using Google Analytics on your WordPress website, it’s essential to understand it and how it works. Google Analytics monitors the website’s activity while providing you with crucial information to improve its performance.
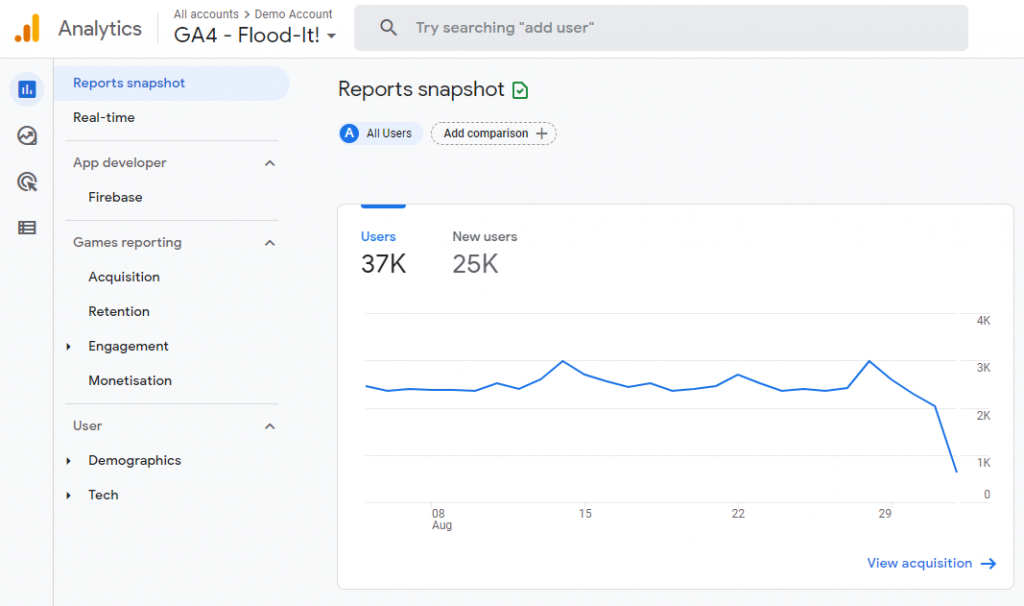
Google Analytics is the most popular and widely used web analytics tool available in the market. Google Analytics collects a wide range of information through a code snippet at the header of each website page.
👉Check out our collection of best SEO plugins for WordPress
This data or information provided by Google Analytics helps you make data-driven decisions for the growth of your website.
Google Analytics data can be divided into five categories:
- Audience – It refers to the visitors on the site and the demographics
- Realtime – Show’s all that is happening on your website at the particular time you’re checking the report
- Acquisition – It describes how your website acquires visitors
- Conversions – An advanced report to monitor activities like email list subscriptions
- Behaviour – It shows what your audience do on your website, such as button clicks, along with the most popular pages
Here are a few examples of what you may find through Google Analytics:
- The number of people visiting your site over time
- How many active users are there on your website at a given time?
- The age, gender, and location of each of the visitors
- Where is your audience coming from? (e.g., social media, organic search, etc.)
- Which page do your visitors view, and what is the time duration?
- Click-through, Bounce, and Conversion rates
Why is Google Analytics Important for your WordPress site?
If you know how to make proper use of Google Analytics, it can be precious to the various aspects. Four important areas that are relevant to any website are:
Content Marketing Strategy
You will know what your audience likes the most about your website through your most popular products, posts, pages, and other content. Boosting traffic and pageviews is directly related to creating more content that resonates well with your audience.
Inbound Marketing
Once you know where your traffic is coming from, you can tell which marketing strategies work and which aren’t. You can then put your efforts and money into the strategies that produce the best results.
User Experience (UX) Auditing
Your user behavior can expose any problems with your website design or navigation. Taking a note of the content and the pages performing poorly with high bounce rates will help rectify any issues.
Audience Segmentation
Understanding your audience is the key to effective communication with them for boosting conversions. Google Analytics allows you to create subgroups for marketing among the target audience.
Therefore, you must understand that it’s not the important numbers, but how you use the knowledge that you receive from Google Analytics carries the value.
How to Sign Up for Google Analytics?
Before adding Google Analytics to your WordPress site, you need to first sign up on it. It’s a simple process, and all you need is a Google account.
Following are the steps to sign up for Google Analytics:
Create your Google account.
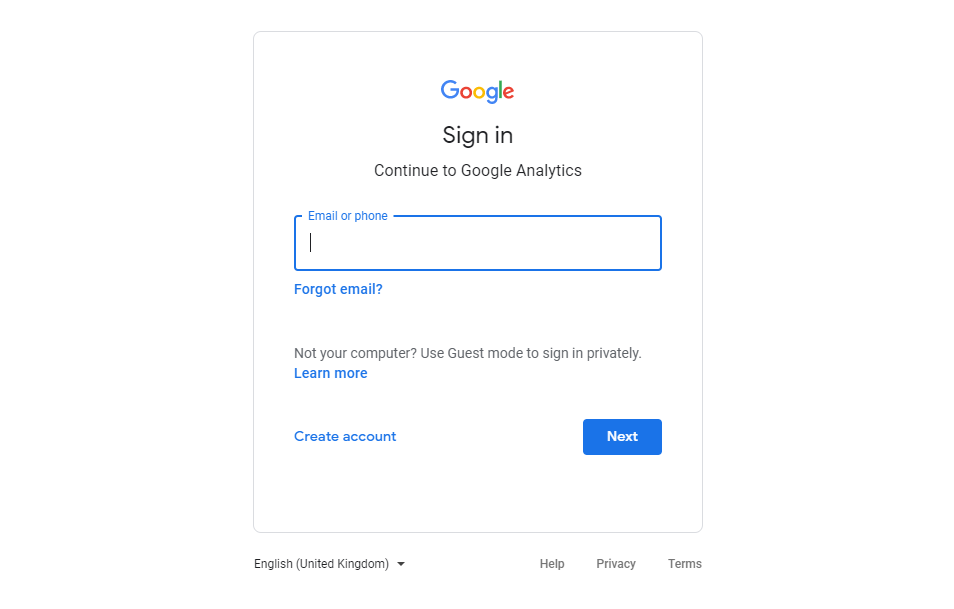
Go to Google Analytics and click on the “Set up for free” button, to begin with.
Go to the Create Account page
Enter your account name, and then set the Account Data Sharing Settings. Now click on Next.
Select how you wish to measure your WordPress site.
Click on “Web” and then move to the next page
Add details
Enter your site name, URL, time zone, industry type, etc., in the third section. Once it’s done, click on “Create”.
Confirm the Terms of Service
Now, you will see the “Terms of Service” of Google Analytics. Tick mark on all the necessary fields, and then click on the “I Accept” button. And you’re all set with your Google Analytics account.
How to Install Google Analytics on WordPress?
You can install Google Analytics on your WordPress site either by using a plugin or manually.
Installing with the Official WordPress Plugin
If you don’t want to change your theme, you can use the third-party plugin as it’s easier and doesn’t interfere with the code.
There are numerous Google Analytics plugins that you can opt from. However, we are here to guide you by using one of the best plugins, i.e., MonsterInsights.
MonsterInsights is used by over 3 million users worldwide. It is a powerful Google Analytics dashboard plugin that is apt for various marketing needs. It is used by some of the biggest brands such as PlayStation, Bloomberg, WPBeginner, Zillow, and many more.
The biggest advantage of this plugin is that it creates customized reports depending on your selection of parameters.
If you require only the basic features of a web analytics tool, you can avail of the free Lite version of MonsterInsights. However, if you need more advanced features, it offers the Plus version, which starts at $99.50 per annum and is an excellent option for small businesses. Besides, other options are available if you want them.
How to add Google Analytics with MonsterInsights:
Step 1: On your WordPress dashboard, go to Plugins > Add New
Step 2: Search and download the Google Analytics Dashboard Plugin for WordPress by MonsterInsights plugin. Now, activate it.
Step 3: Now, go back to your WordPress dashboard. A new Insights option will appear.
Step 4: Once you scroll down, click on the “Launch the Wizard” option. Now complete the set-up by following the instructions given. Here, you will be connecting MonsterInsights to your Google Analytics account.
Step 5: Follow the instructions and fill in the necessary details. Once you are done with it, the Finish Setup & Exit Wizard option will appear.
Step 6: Now you’re done with the integration process. Now, you can visit Insights and then Reports to see how your site is performing.
Adding Google Analytics to your WordPress Site Manually
Once you have created a Google Analytics account, you must get a tracking code and place it on the website.
You are required to install a child theme for adding the Google Analytics code to the functions.php file. Besides being easier to change, a child theme saves all the changes that have been made even after updating the parent theme.
How to get Google Analytics Tracking Code?
Once you are done with the sign-up process, you will be redirected to the place to get the Google Analytics tracking code. Here’s how to do it manually:
Step 1: Sign in to your Google Analytics account, then go to the Admin section on the left bottom.
Step 2: Now, select the Tracking Info and then the Tracking Code submenu.
Step 3: You will now see your Tracking ID as well as Global Site Tag. Save both these codes for later use.
Once you receive the tracking code, you can go to WordPress to start with the configuration process.
There are a variety of ways to add Google Analytics to WordPress sites with a code snippet.
Via functions.php
functions.php file is the first option to add the Google Analytics code. A new function is created containing the code snippet.
NOTE:
For precautionary measures, it’s recommended to create a backup copy of the file before changing it.
Step 1: Go to the Theme Editor under the Appearance menu on your WordPress dashboard.
Step 2: Now open the Theme Functions (functions.php) file.
Step 3: Add the below-mentioned code snippet to the file. Make sure you replace the Tracking ID with the one that is yours.
add_action('wp_head','my_analytics', 20);
function my_analytics() {
?>
<!-- Global site tag (gtag.js) - Google Analytics -->
<script async src="https://www.googletagmanager.com/gtag/js?id=UA-26575989-48"></script>
<script>
  window.dataLayer = window.dataLayer || [];
  function gtag(){dataLayer.push(arguments);}
  gtag('js', new Date());
  gtag('config', 'UA-26575989-48');
</script>
<?php
}
Step 4: Once this is done, click on the Update File, which saves the changes.
Via header.php
The Google Analytics tracking code can also be added to the Theme Header (header.php) file.
Step 1: Go to the Theme Editor again.
Step2: Click on the Theme Header (header.php) file now.
Step 3: Now paste the code snippet in the header, or more precisely over the </head> tag.
add_action('wp_head','my_analytics', 20);
function my_analytics() {
?>
<!-- Global site tag (gtag.js) - Google Analytics -->
<script async src="https://www.googletagmanager.com/gtag/js?id=UA-26575989-48"></script>
<script>
  window.dataLayer = window.dataLayer || [];
  function gtag(){dataLayer.push(arguments);}
  gtag('js', new Date());
  gtag('config', 'UA-26575989-48');
</script>
<?php
}
Step 4: Finally, save the changes by clicking on the Update File option.
Adding Google Analytics Through Google Tag Manager
Another way to add Google Analytics to your WordPress site is through Google Tag Manager.
This is useful in boosting the agility of your website. This means it lets you update your tags for conversion tracking, etc.
You can easily change or add new tags per your requirements or even add third-party tags for web and mobile applications.
The most important benefit of Google Tag Manager is that it allows you to update or add scripts.
Step 1: Create a Google Tag Manager account.
Step 2: Download the Tag Manager WordPress plugin.
Step 3: Add a new plugin to your WordPress site.
Step 4: Activate the Tag Manager WordPress plugin.
Step 5: Enter your Google Tag ID in the plugin. Just go to Tag Manager site, select Admin and copy ID with the “GTM” beginning.
Step 6: Go to WordPress Site, click Settings -> Google Tag Manager -> paste the ID into the Google Tag Manager ID box.
To Conclude
Google Analytics is a powerful tool with a wide range of excellent features. Some are easy to use, while others need some additional setup.
Google Analytics works exceptionally well with the Google Search Console. It lets you see how your website is performing in search results.
I hope this article was helpful enough to guide you on installing Google Analytics to your WordPress site. Tracking your website’s user activity, data, referral sources, etc., is essential for building your brand and getting more engagement with your audience.


