In this article, I’ll cover these issues and guide you through creating a custom user registration form using Crocoblock.
If you want not only your colleagues but also external users to register on your WordPress website, you’ll need a custom user registration form. The default registration form appears utilitarian and outdated, with only two fields. The rest of the form is supposed to be filled out later in the default WordPress user interface, which looks very technical and may deter customers. So, it becomes obvious that for membership websites, a custom registration form should be created.
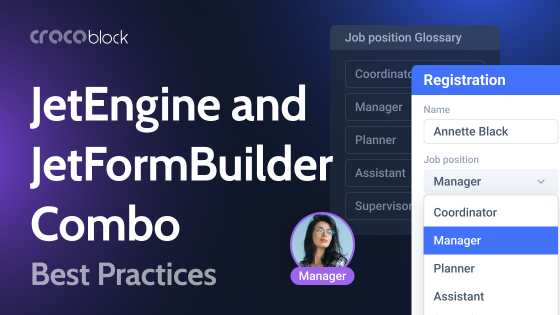
Building an Event Registration Form With JetFormBuilder and JetEngine
Let’s imagine we are building a website for an annual business summit. We need a registration form that collects attendee details, their chosen ticket type, and their preferences for breakout sessions.
But WordPress’ default user dashboard doesn’t have fields for such details. That’s why I should first add custom fields to the User object so they will be stored in the database.
Adding custom fields to Users using JetEngine’s Meta Box feature
With JetEngine, you can add custom fields to different post types, particularly custom post types, while creating them. But there is another way to add custom fields not only to different post types but also to users and terms, it’s called Meta Boxes.
Meta Boxes is a feature that allows you to create a group of custom Fields and assign them to specific post types, terms, or users. You can obviously reuse these groups as many times as you need.
In our particular case, I will need it for adding extra fields to users. Go to JetEngine > JetEngine > Meta Boxes, add a new group of Fields, and name it. Then, add all the necessary fields. I recommend adding all the necessary fields this way, except for the required registration fields – Login and Email – so you will have them all in one place.
I’ve created fields for name, company, ticket type, dietary preferences, hotel preferences, etc.
After adding the fields and saving the meta box, you will be able to see them at the bottom of the user profile page. And, of course, you can edit those values right from the dashboard.
Later on, these fields will be populated using the custom registration form I will create in the next step.
Custom post type for Breakout Sessions and AI Website Structure Builder
Because it’s a business conference, I will also have a list of breakout sessions. I want to have them as a custom post type, so I go to JetEngine > Post Types and add a new post type called sessions with all the custom fields I need, such as a field called Start for the time and date when this session starts.
Another convenient way to create a website structure is by using JetEngine’s visual and intuitive AI Website Structure Builder. It automatically creates the post types you need, their custom fields, a query for them using the Query Builder tool, and a listing template for these queries to display your custom post types dynamically. What is also cool is that it creates filters for JetSmartFilters.
You can add, delete, or correct these filters, custom post types, and fields from the single dashboard if you use this website builder. Even if your task isn’t complex and you don’t need AI to create a structure that saves you time, you can still use this tool for a centralized dashboard that’s convenient for you.
Creating a custom registration form with JetFormBuilder
Now, when all the preparations are done, I can actually create a form. Go to JetFormBuilder > Add New Form, and you will see the Registration form among the suggested templates, so click it. The simple registration form will be created for you, with just two fields, but with an after-submit action.
Now, add all the fields you want to have. Ensure the fields are the same and have the same type (Select and Checkbox can be interchangeable), as you have added them using Meta Boxes. If something is missing, add it first to Meta Boxes, save, and then add it to your form.
Here is my list of fields for our event registration form:
- Full Name (Text);
- Email Address (Text – email);
- Company Name (Text);
- Password (Text – password);
- Confirm Password (Text – password);
- Ticket Type (Radio);
- Dietary Restrictions (Checkbox);
- Breakout Sessions (Select, populated dynamically);
- Do you require a hotel room? (Radio);
- Hotel Room Preferences (Textarea, conditional field).
Mark at least the field you use for Login (Name in my case), Email, and Password fields as required.
To validate the Confirm Password field, navigate to the Validation section in the field’s settings, open the Advanced tab, and add a rule to match the Password field.
Additionally, you can opt to use the Form Verification functionality for confirming user registration, either by the admin or by the user via a confirmation link.
Configuring the post-submit actions
The real power of JetFormBuilder lies in its post-submit actions, which define what happens once the form is submitted. In the JetForm tab, under the Post-Submit Actions, you will configure the following:
- Register User: This action is the core of the form. It maps the submitted form data (Name, Email, Password, etc.) to the user account being created in WordPress. The rest of the JetEngine’s Meta Box tool is used to first create these custom fields for the User entity. Then, you can easily map the form fields to these new custom user fields. This ensures all the collected data is stored directly in the user’s profile.
- Send Email: Add this action to send a confirmation email to the new registrant with their account details and a summary of their registration. You can also send a notification email to the event organizer.
- Payment Processing: If your event is paid, you can add a payment gateway action (e.g., Stripe or PayPal). This action will redirect the user to a payment page or process the payment in the background before completing the registration.
💡Read here how to connect a payment gateway.
But how do you calculate the amount to pay?
Every JetFormBuilder field has a hidden section called Calculate. For text fields, this input is located on the right panel, while Select/Checkbox/Radio fields have it under the field where you fill out the manual options. Thus, you can add this value. For example, if the Ticket Type field has two values – Silver and Golden, add, let’s say, 100 for Silver, and 200 for Golden. Also, I have a Room Type field – let’s say, Standard will cost $25 and Deluxe will cost $50.
Next, create a Calculated field, select “Hidden” in the settings, and add the macros (by clicking the wrench icon) of the fields you wish to calculate. In the payment gateway’s settings, select the value of this hidden Calculated field as the amount the user will pay.
By the way, a recurring payment option is also available in JetFormBuilder if you deal with subscriptions. - Connect Related Items: For our event site, this action is a game-changer. Using JetEngine’s relationships, you can automatically link the newly registered user to the specific breakout session they chose. This creates a powerful connection that can later be used to display a list of all attendees for a given session.
You should create a relation between the User ID and the chosen session in the Breakout Sessions field. But first, click the “Add User ID” toggle in the Register User action settings.
Registration, Login, and Restore Password forms in one
Of course, you can create Registration and Login forms on different pages and crosslink them. However, the most advanced method for creating registration forms involves the all-in-one approach, which can be achieved using JetFormBuilder’s Render State feature and the User Login premium add-on.
💡 This guide will tell you how to do it. In short, you create a Login form first using the User Login add-on, but also add a Switcher field at the bottom with the “I don’t have an account and want to register” label. Then, add a conditional block with the Registration form.
Also, this video about the Login and Restore Password forms will be helpful.
Building an Attendee Dashboard
A registration form is just the first step. Attendees will need a dedicated area to view their registration details and potentially update them. With JetFormBuilder and JetEngine’s Profile Builder module, you can create a custom, front-end user dashboard.
This dashboard can display the user’s information, including their selected ticket type and session choices. You can also embed a pre-populated form that allows them to edit their details, such as their company name or dietary restrictions, without ever needing to access the WordPress backend.
💡 This article has all the details about building a custom user dashboard.
FAQ
A custom registration form goes beyond the basic default form to collect more detailed user information. It provides a better user experience with a modern, branded look and allows you to gather data essential for your membership site or business.
You can add custom fields to a user’s profile by using a plugin like JetEngine’s Meta Box feature. This allows you to create a group of fields to store data like company name, ticket type, and dietary preferences directly in the user’s profile in the WordPress dashboard.
Post-submit actions define what happens after a user submits the form. In JetFormBuilder, these actions can include registering the user, sending a confirmation email, processing a payment, or connecting the user to a related item, such as a breakout session.
Yes, you can create an all-in-one form for registration, login, and password recovery by using JetFormBuilder’s Render State feature and the User Login premium add-on. This simplifies the user experience by keeping all account-related actions in one place.
Conclusion
Relying on the default WordPress registration form is a significant roadblock for any website that requires collecting specific user information. Using a dedicated form builder like JetFormBuilder provides a solution that is both flexible and powerful.
By combining it with JetEngine, you can go beyond basic forms to create a fully integrated system that registers users, builds data relationships, and provides a custom, professional-looking user profile, all essential for a successful event-based website.